Brian’s been in touch. He’s been busy adding a model train sawmill to his layout:
“Hi Al, I have finished the sawmill at last and placed it on the layout. It just needs to be “bedded” into the surrounds.
This is a continuation of my previous post of building and modifying a Fine Scale Miniatures Sawmill.
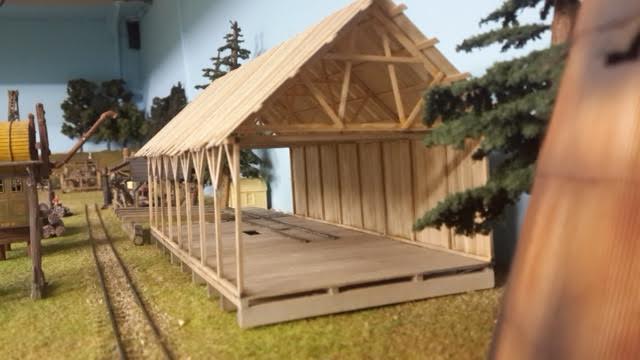
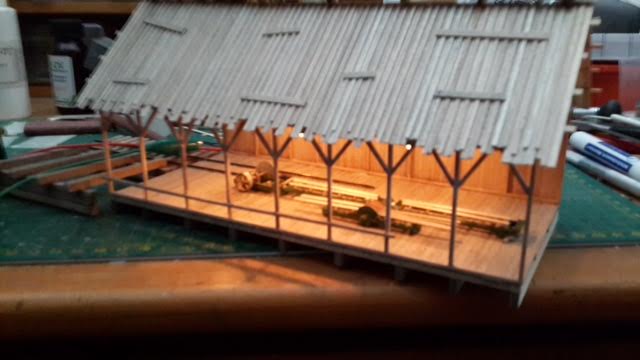
Photo below, roof done except for the roof walk and fire barrels

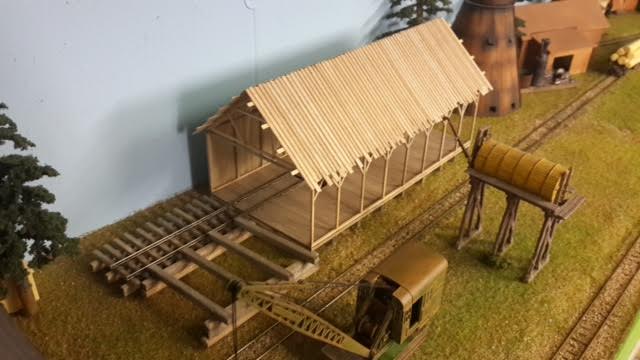
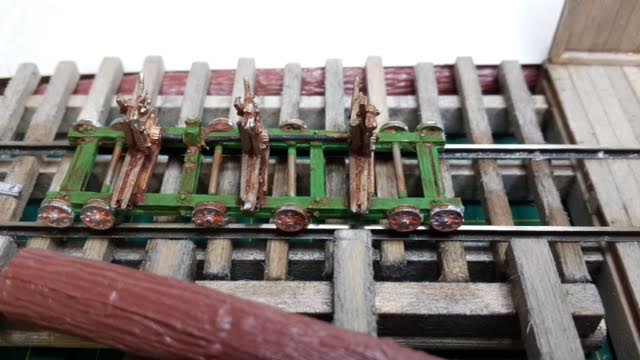
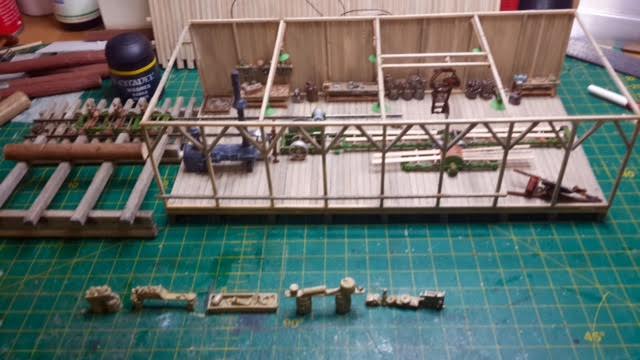
Below, test fit on the layout to make sure all is in the correct place. The crane will be used to offload logs from the log cars as well as the incoming logs by road on trucks.
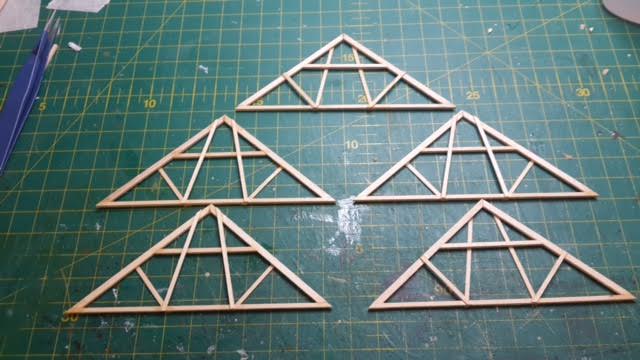
Below, the mitre box used for cutting the roof truss pieces at the correct angle and length.

The five roof trusses assembled.
Final test before carrying on with the building at the workbench.
This is where a lot of time is needed in painting all the details. After the main color, I use a wash to age it and add the used look to the parts. (I use Warhammer washes)
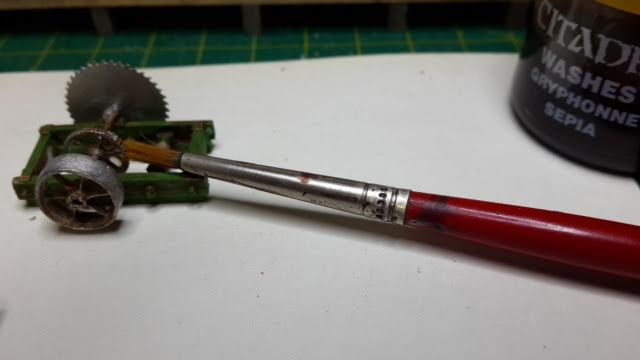
Same procedure used here as above.
Model train sawmill:
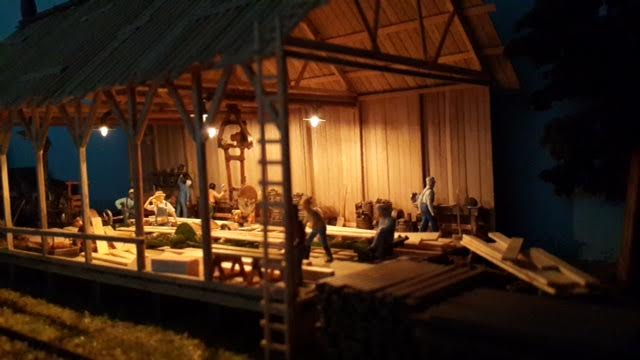
I have used 12 volt grain of wheat bulbs in Campbell Scale lamp shades for the interior lighting and run them at 6 volts from a power source under the layout to ensure long lasting lights.
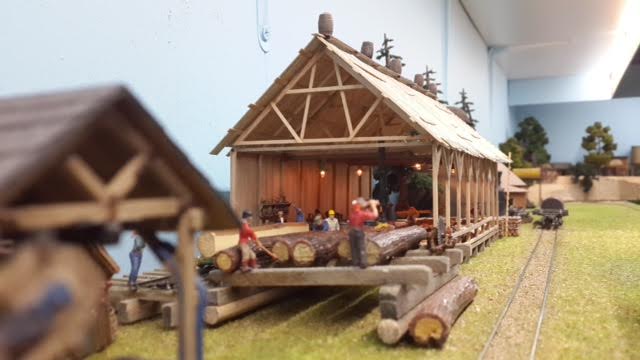
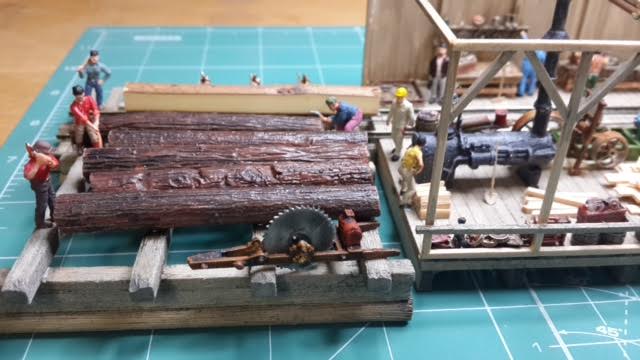
The fun part of the hobby is placing all the bits and pieces in the model.
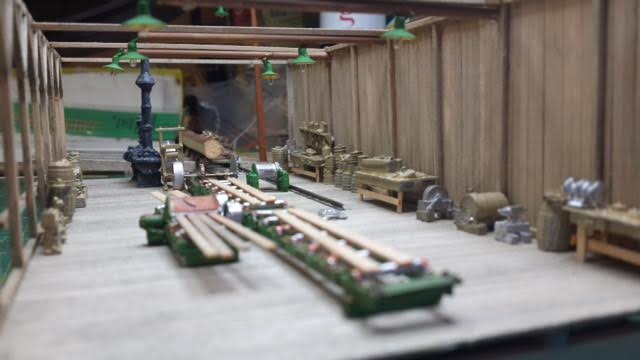
I spray paint all the metal castings with a light sand color and when dry, I start picking out all the detail and color on them. When this is complete, I then do a black wash over all the parts and do a final dry brush using white acrylic paint from a tube.
Figures in (as close as you can get) positions are placed around the model to bring it to life. I have placed 15 figures around this model.
Two night shots of the sawmill in action.
Final photos of the sawmill on the layout ready to receive the first load of logs.
Total number of hours to build this model is 91. It is an HO Scale model used on my 3 foot narrow gauge layout named the Cascade Creek Railroad.
My next model to build is also a Fine Scale Miniatures kit of a logging repair shed which will be placed to the right of the sawmill above.
Till next time – keep having FUN.
Brian”
A huge thanks to Brian for sharing his model train sawmill. I’ve lost count of the wonderful ‘step by steps’ he’s done for us.
That’s all for today folks.
Please do keep ’em coming.
And if today is the day you get busy on your own layout, the Beginner’s Guide is here.
Best
Al
PS Latest ebay cheat sheet is here.
PPS More HO scale train layouts here if that’s your thing.


That’s great, I recently did something similar from coffee stirrers although not so technical. Keep it up.
Looking great Brian. Looking forward to continuing installments and a complete overview of the entire setup of yours. Thanks for the good work. Frank G.
The sawmill is very cool. That took a lot of time.
Beautiful job! What will you do with the loaded log cars? Lift the load off when nobody’s looking, or shunt them back to the loader after a running session?
Rod
Great job!
Super job and great thoughtfulness with all the details.
Jim AZ
Really great job. Congrats.
Great detail Brian, the lighting really makes it pop!
Thanks for sharing, Cary in KY
Superlative to say the least. I can find the time no problemo, but where the hell do you find the patience.
I have always said that “with time comes patience” BUT I did put a a few “new” words into the ‘blue’ dictionary. I am still trying to find all my patience. Brian