“Hi Al
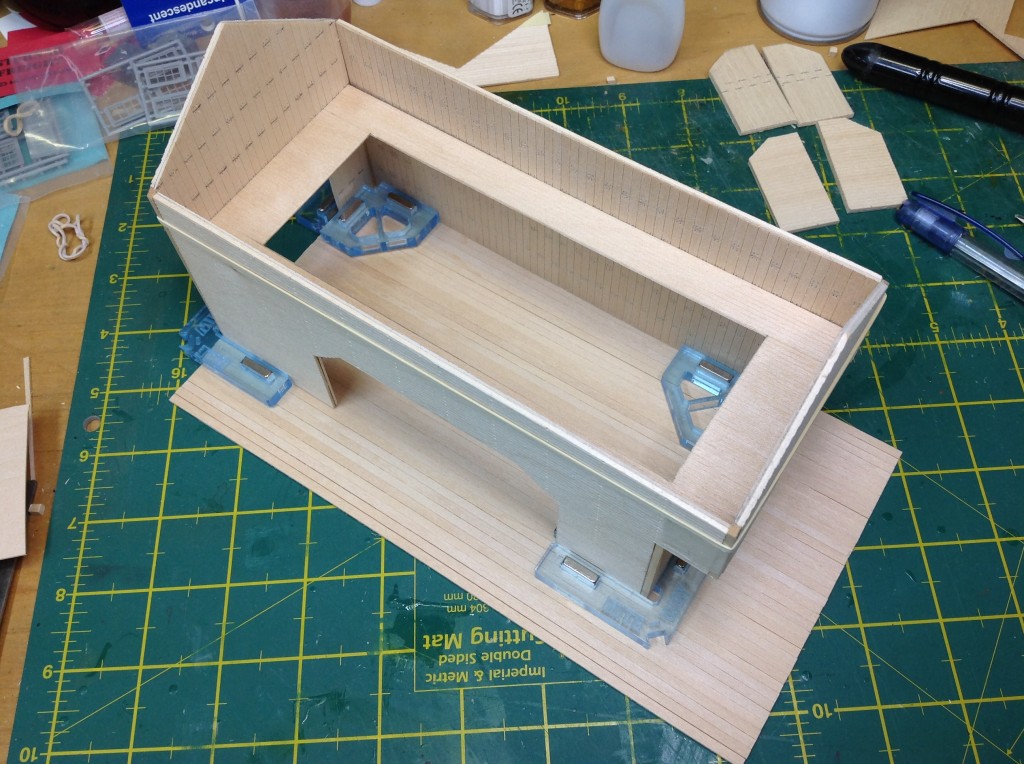
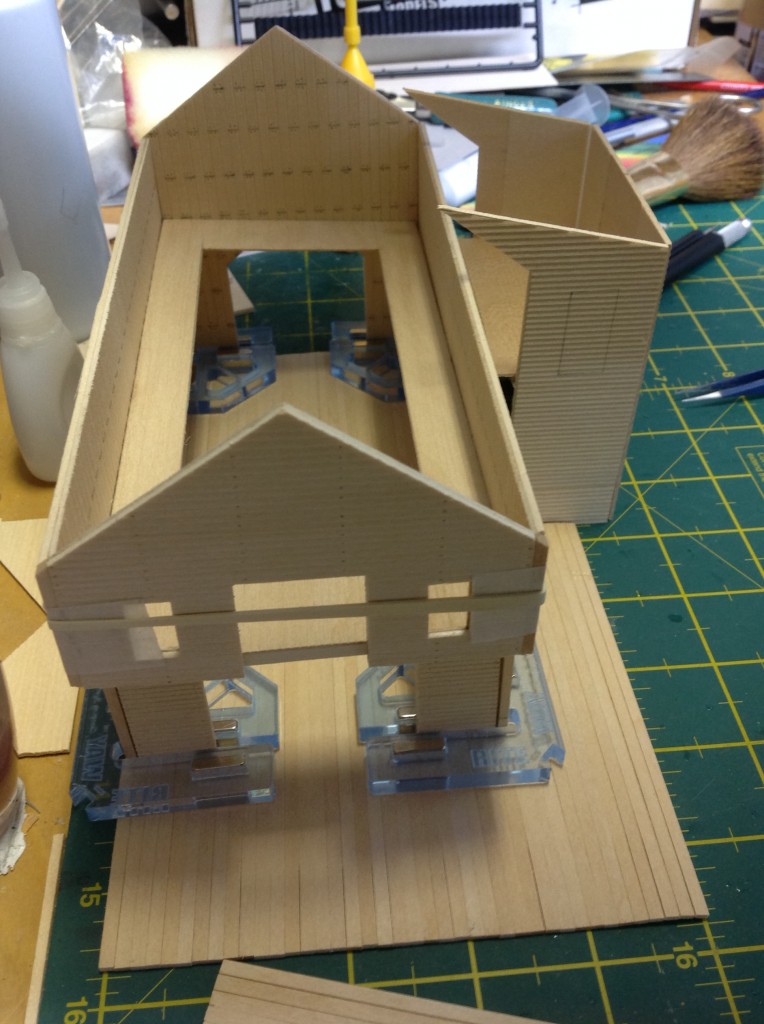
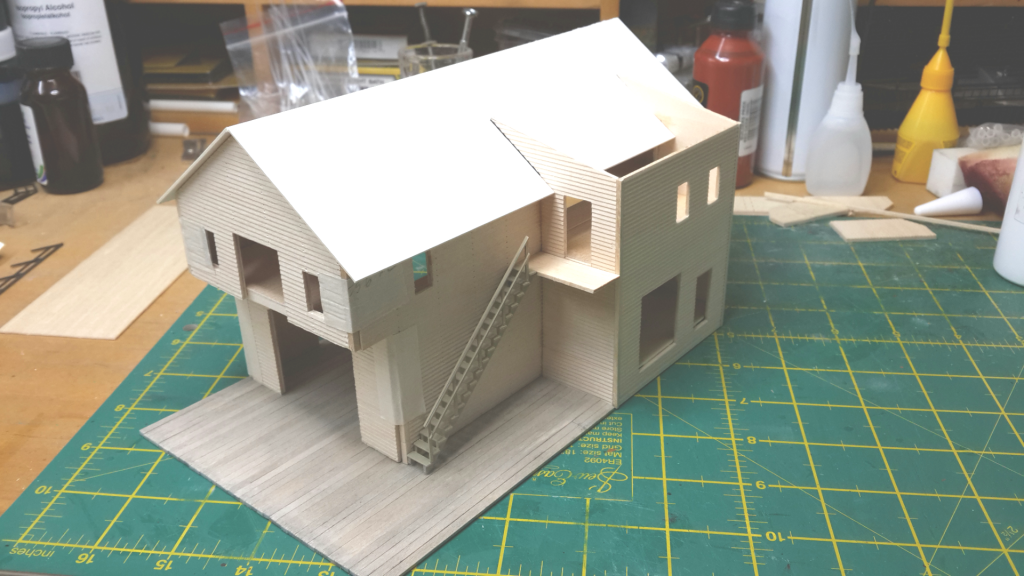
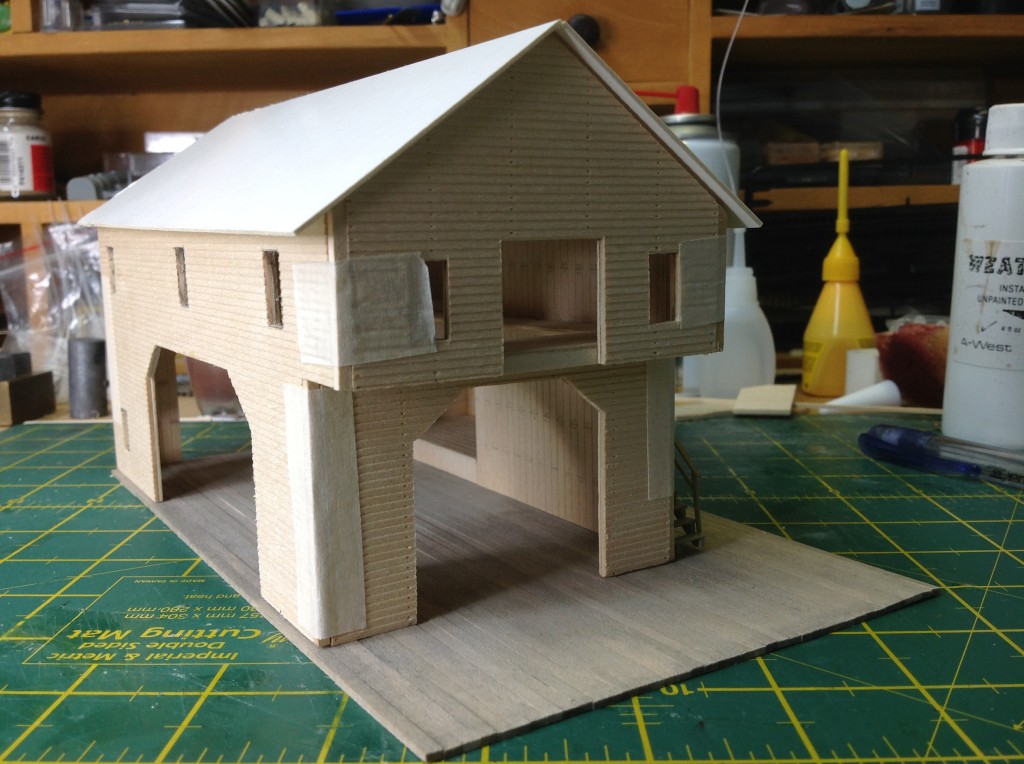
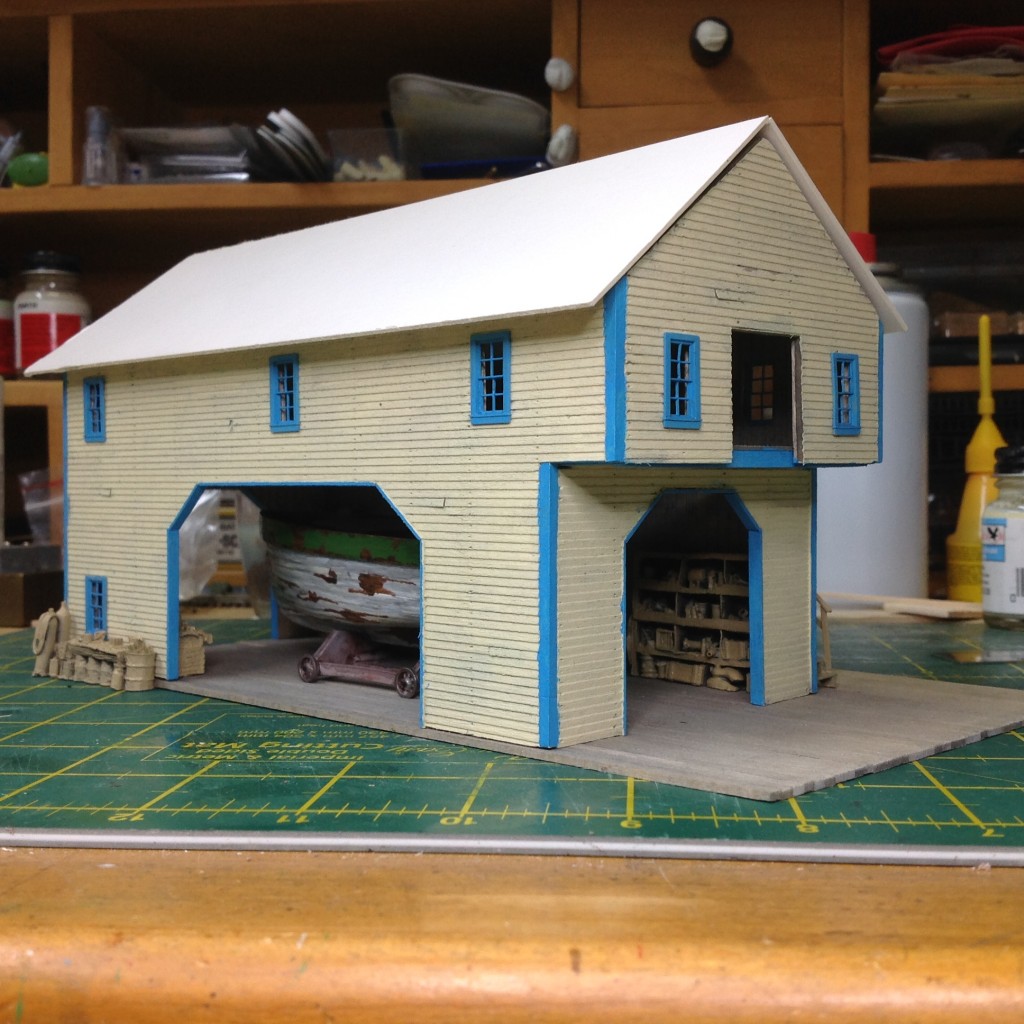
I have been busy with a new scratch built boat repair yard and will send a link to all the build so far. It is called Jacks Marine – boat builder and repairs.
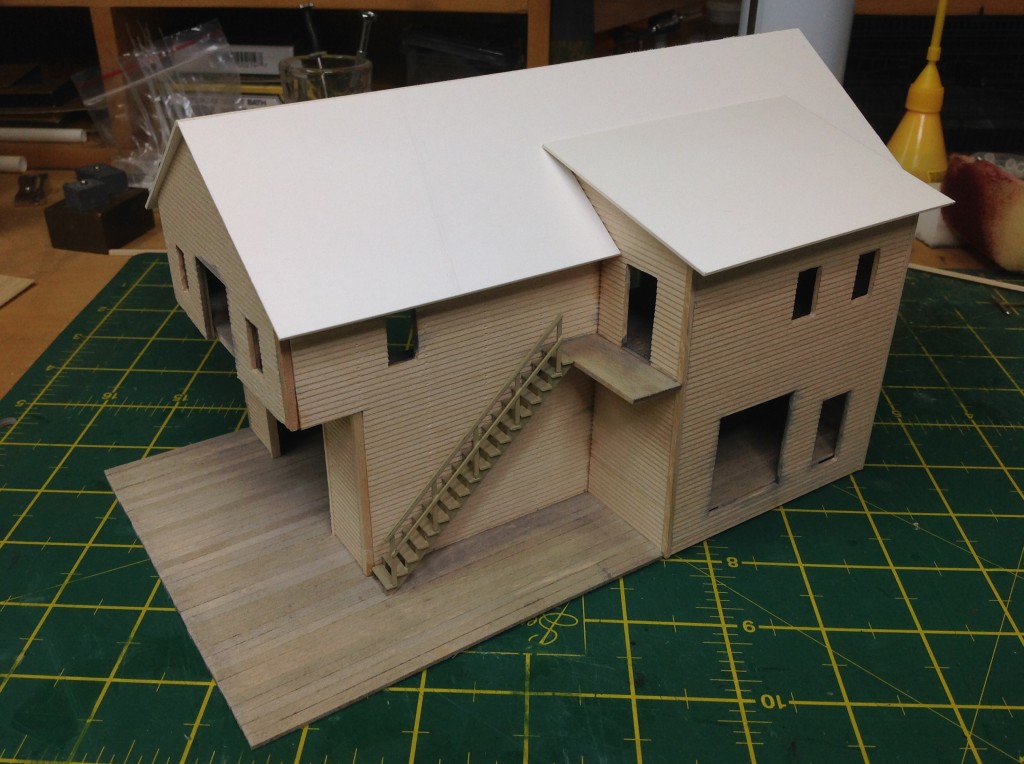
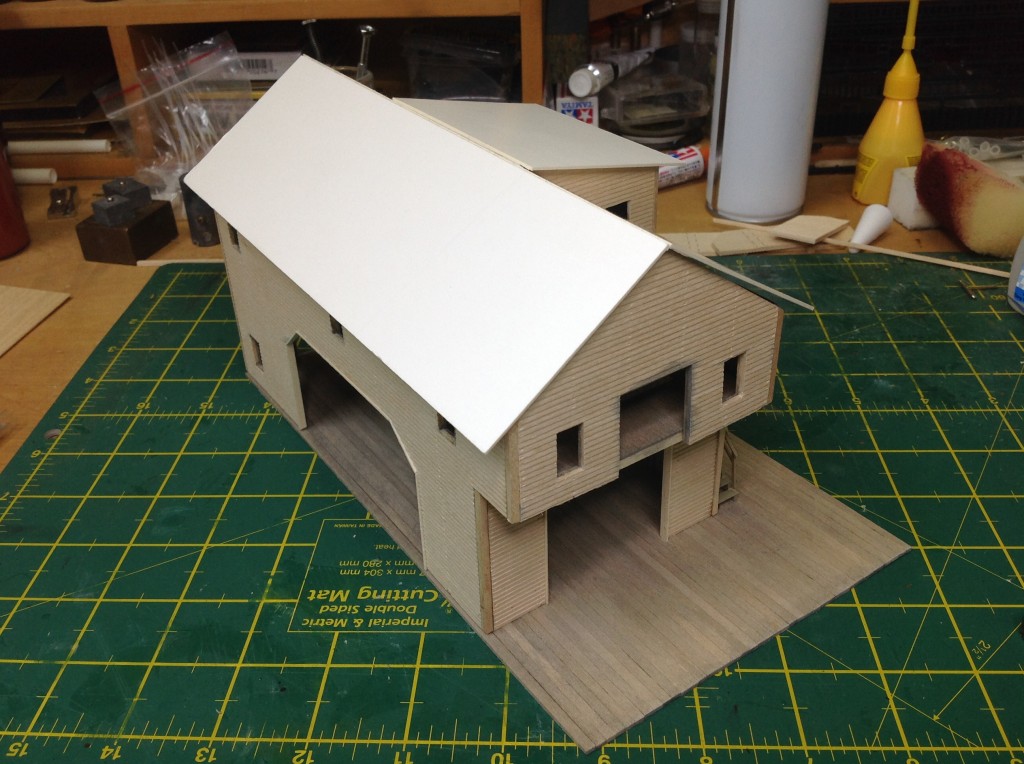
The build is a a scratch built mirror image of Shelby’s Marine (Sierra West Model Kit) The reason for the mirror image build Is to fit the area on my layout with some modifications and extra detail.
The card roof will be covered in either tar paper or shingles. Still have to make that decision as I am still busy with the interior finishes. Don’t want to rush the roof and spoil a good model.
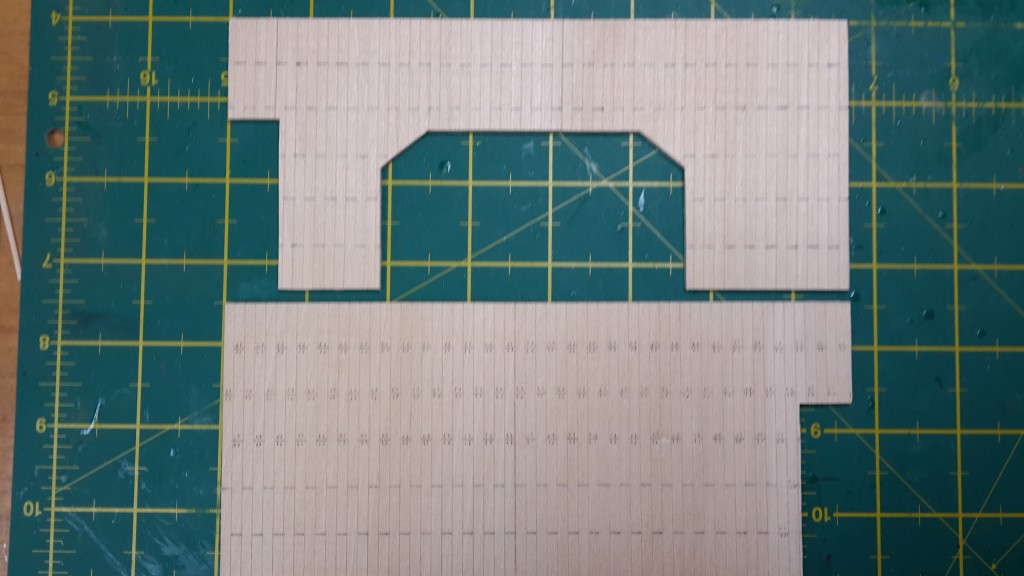
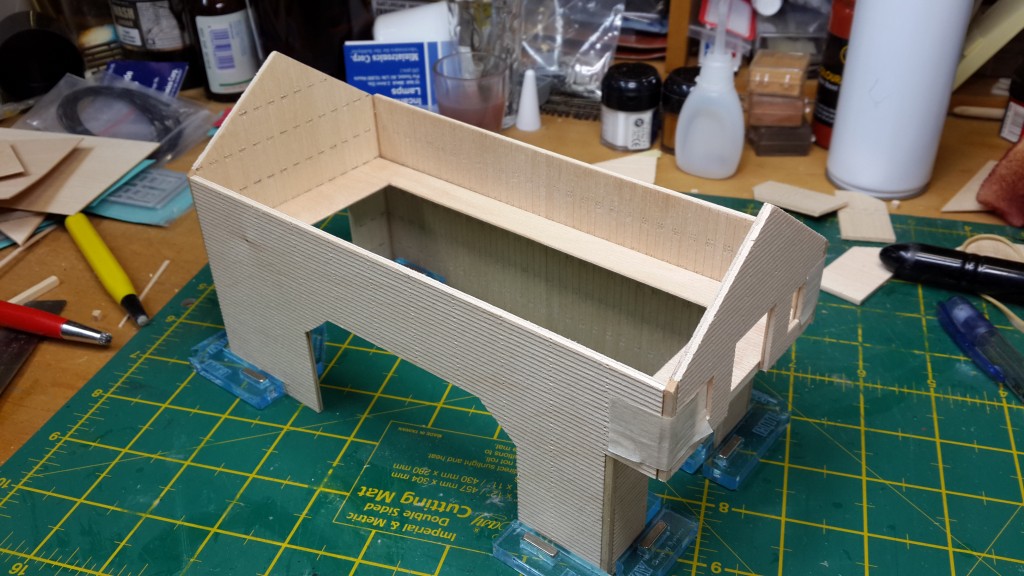
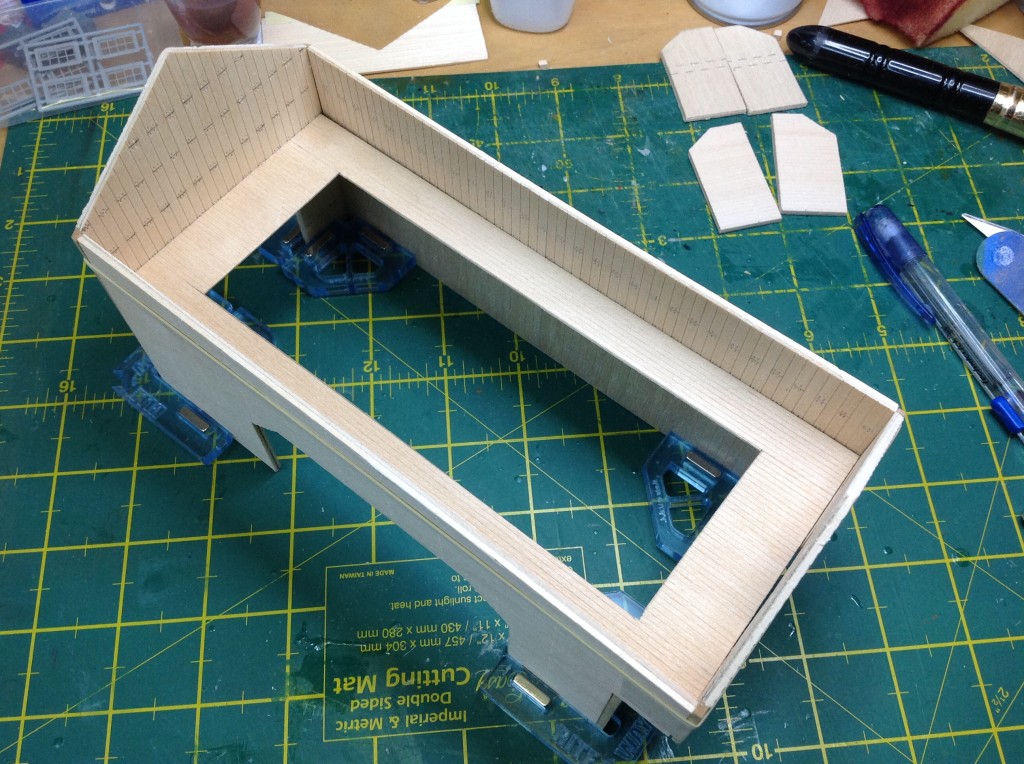
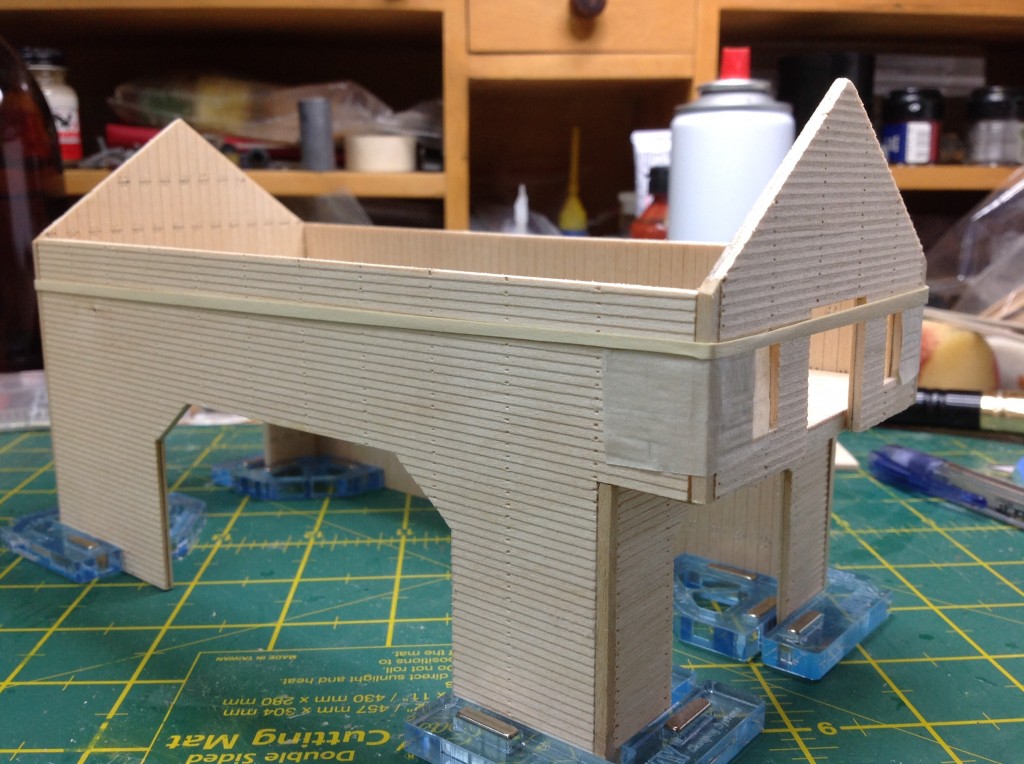
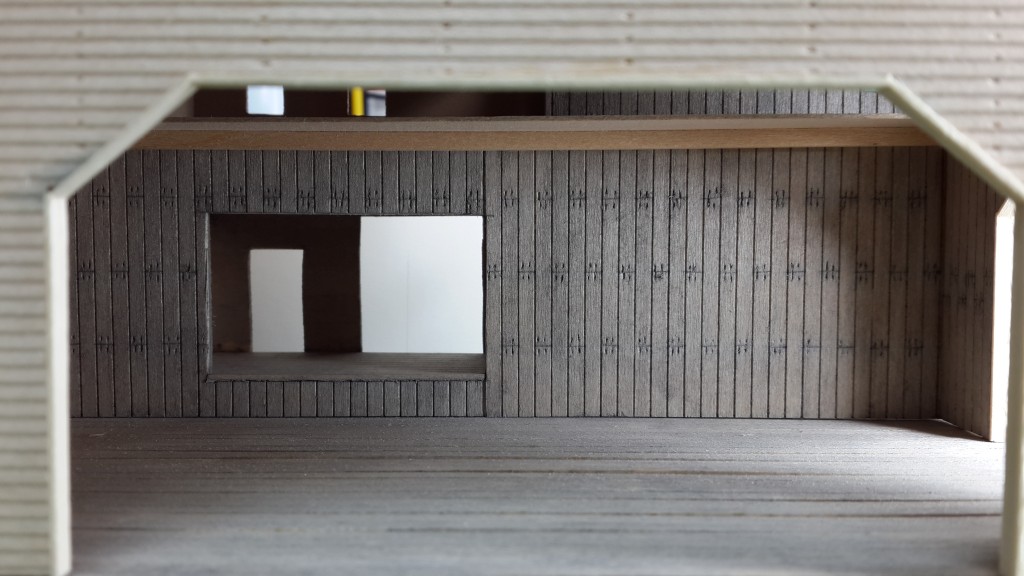
Btw, the siding on the walls is a sandwich of vertical siding on the inside and horizontal clapboard on the outside. The sandwich is stuck together with my favorite – double sided tape as this prevents warping when painting and staining and makes a very sturdy wall.
Keep ’em’ coming.
Cheers.
Brian”
I enjoyed seeing how Brian creates his buildings. It’s a stunning layout in the making (his last post is here). Can’t wait for his next installment.
That’s all this time, peeps.
Please do keep them coming – just hit reply to any of my mails to get in touch.
And if today is the day you get started on your layout, the Beginner’s Guide is here.
Best
Al
PS Latest ebay cheat sheet is here.



Dear Al, l luck with your model Good loved Brians scratch build. That’s what I call a beautiful finished model. When I do mine I get more glue on me than on the model, and my fingers stick to the model and leave pieces of the model on my fingers. Well done Brian. Lets have some more with plenty of instructions. Being 84 years old the old brain wont keep up with me. Good luck with your layout.;
Hello Al,
What can anyone say that can do more justice to Brian’s scratch built buildings other than STUNNING, And Beautifully done and SUPERB!!, They are brilliant and actually look the part!.
The love and patients it took to make them is tremendous and lik many reading your site, very much look forward to seeing more from chaps like Brian, John and all the other superb modellers……
Sid from UK
Beautiful work!
Who makes those nice little corner clamps I see in your pics?
Brian, great detail and realism!
I do have one request to all those who send in those great pictures of their creations, please as a matter of course remind us of what scale you are working in.
that is a work of art Brian , well done
Brian,
A building well done … the great detail gives it personality!
looking forward to the next installment.
regards,
tom
The clamps are called right clamps and are available from Micro Mark on their website in the USA . They come 2 in a set. Extremely helpful. Brian
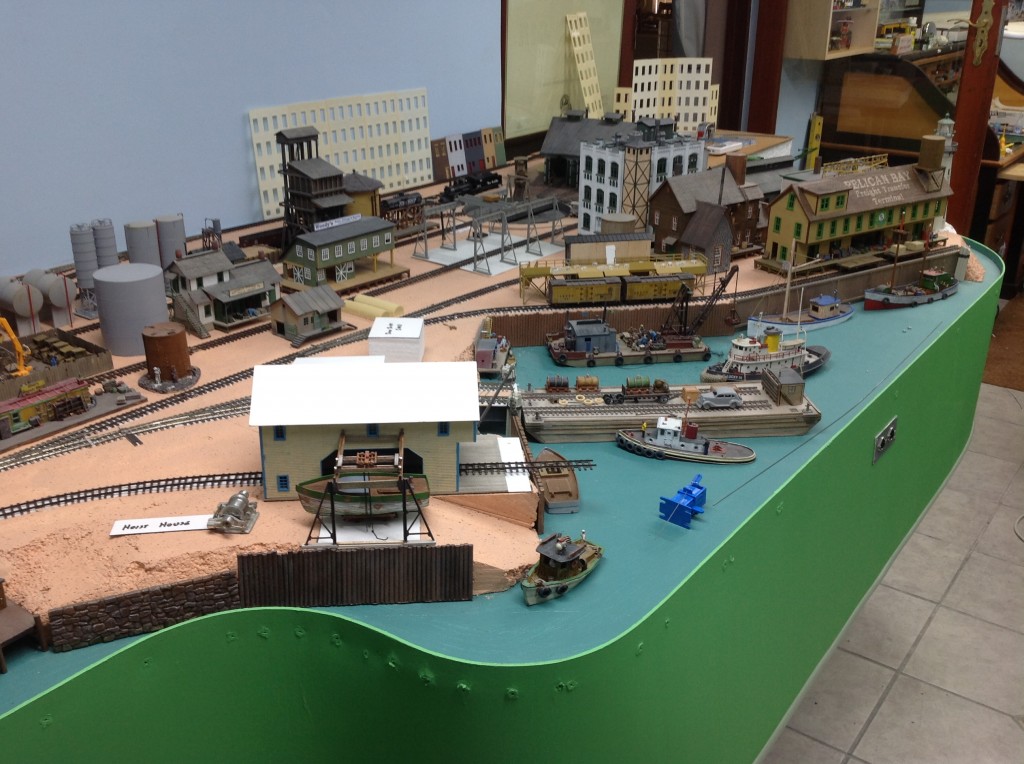
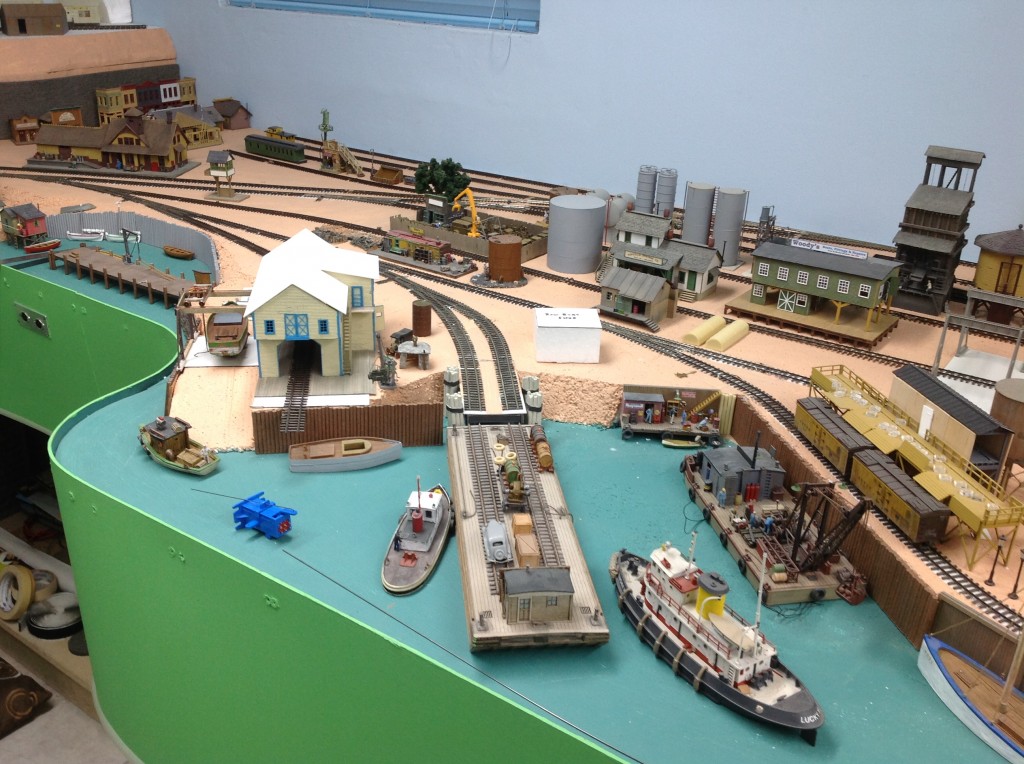
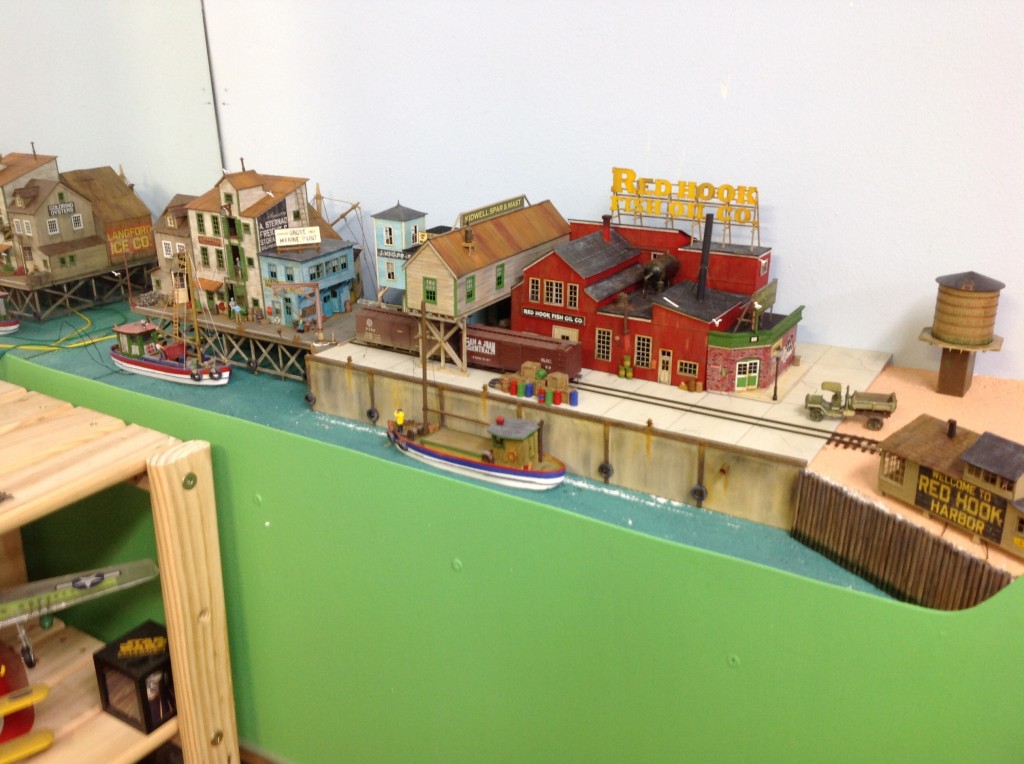
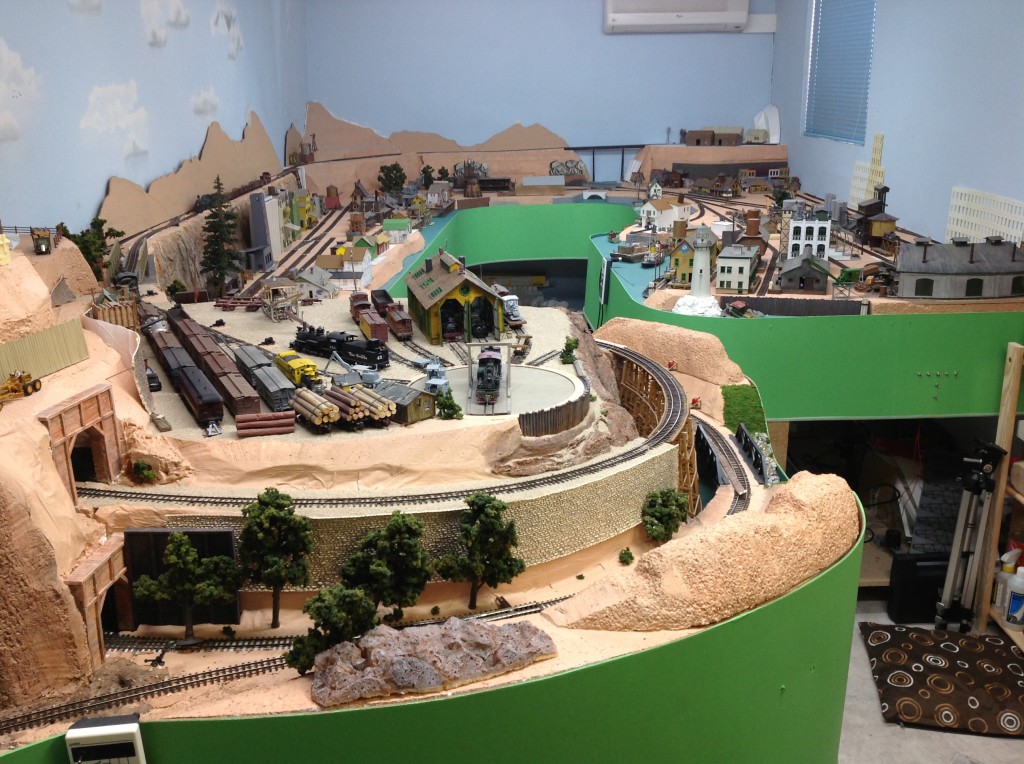
What a fine looking building you have created! I am very very impressed with the harbor you have created! Superb! I would like to see more pictures of your layhout.
Really impressive, Brian. But again, what scale are you modeling? If you’re in N scale, I’m even more impressed!!
Hi Colin Pryce, the scale that I am working in is HO (3.5mm = 1ft, 1:87) and the track gauge is 3 scale feet – 10.5mm – ie: HOn3 – Brian
The scale that I am working in is HO (3.5mm = 1ft, 1:87) and the track gauge is 3 scale feet – 10.5mm – ie: HOn3 – Brian
Guess I need to get to work! Beautiful building!!! I built on a smaller scale some 30 years ago, but I would agree that a handcrafted building is very much better than any plastic kit you can buy
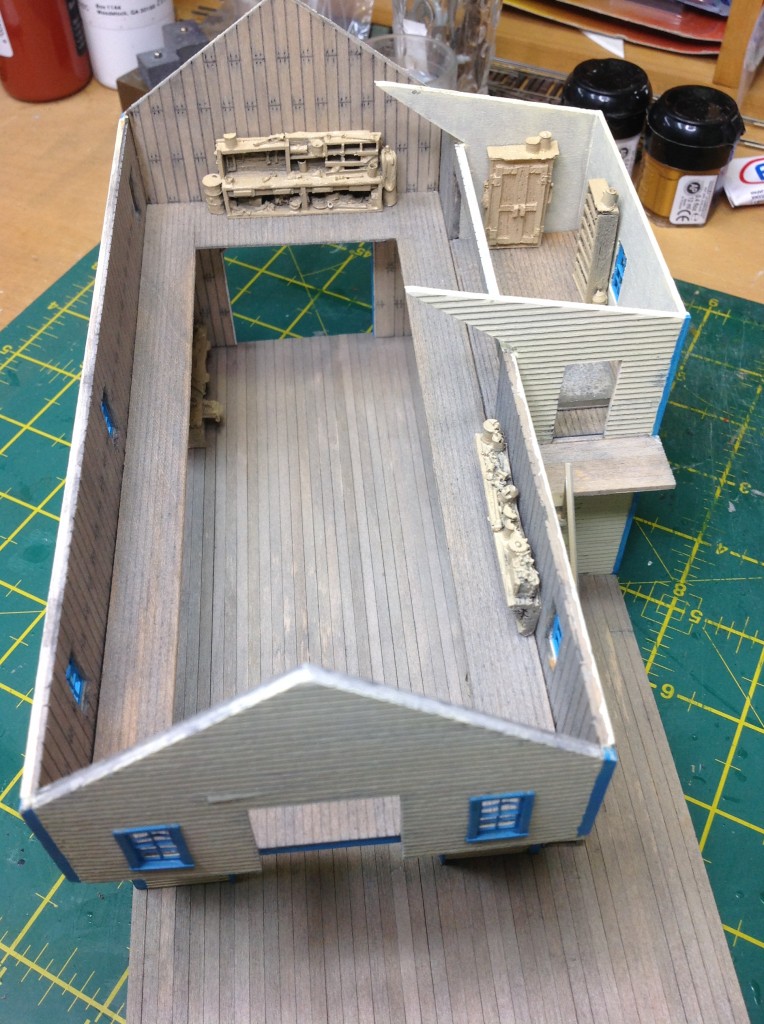
great detail work. wish I had the time and patience to do this. Looks like you even finished off small details in the hidden upper areas! Most impressive
For your roof, I would recommend shingles on the steep 12-12 pitch roof and tar paper on the flatter shed roof. That would meet prototype standards, (while allowing you to use two types of roofing on one model).
Your steep roof suggests the potential for snow. Shingles on the steeper roof would provide excellent weather protection against rain and snow.
Shingles on the flatter roof would allow wind-driven rain to get under the shingles leading to wood rot and thus leakage inside. In winter, snow melt on the flat roof would run down and freeze along the exposed edge beyond the wall, creating an ice dam, forcing water to run up under the shingles.
Just my opinion on finishing a beautiful model.
Great. That encourages me to move forward on my two layouts that have been just there. Love the idea of something that I can do. Thanks.
Congrats. Brian. A masterwork, and fits perfectly
on the layout. I love the combination of rail, auto,
and water.
jack (former “Marine”)
What a great job Brian! A really detailed account of how you constructed the building. Your layour looks great and I hope you send in more photos and even a track plan. Thanks for sharing.
stunning work, very impresssive
Well done,where did you find the great boats
10 out of 11. Excellent use of Space.
Great scratch built model. I love all the internal detail – well modeled.
THOSE ARE SOME NICE LOOKING BUILDINGS.
looks great, the detail will get everybody building one.the step by step is nice and easy, keep the progress coming.
“horizontal clapboard” on the out side??? What is that? What do you use to make it look like real horizontal siding?
I think that Brian is very clever at doing this construction. Good on yer Mate.
Hi everyone, thanks for all the wonderful comments as well as the opinions from some of you. They are all greatly appreciated and inspires me to continue with what I am doing. Every building that I build is a learning curve, by this I mean that I learn new techniques all the time. I will always remember what one person told me a long time ago – “with time, comes patience” I have never lost sight of that.
I use a wire distresser to weather and rough up the clapboard siding as well as other wood like the verticle siding inside the building – photo 9. The second photo from the top shows a yellow, and below it, a red pencil type of tool. The yellow one is a fibre-glass eraser (excellent for removing existing decals without removing paint or if you have touched a paint brush with paint against your model, use this to remove it) and the red one is the wire distresser. They are available from (here in Cape Town) a watchmaker supply company. This one here has some fantastic tools for the modeler. These are a few tips on how I achieve the look on my models. The boats come from a company called Rusty Rail in the USA.
Brian, since good harbor scenes are uncommon, how about sharing more about yours? Not only how you built a structure, but why, for those of us that don’t know much about the topic.
Marvelous layout! I love harbours and waterfront layouts, and when completed this is going to become a top notch layout in that category. What scale is this?
Just beautiful. With weathering, one could not tell these from actual buildings. 1st class work. Congratulations!
Brian, you have a gift.
Thank you for your pictures.
Roland
Excellent combination thanks for sharing.
steve
Great job Brian! I loved the water front. But one question, are you going to keep the water levels that low???? Is there not a way to bring up the water levels closer to the top of the dock???
Your layout is truly a work of art. You are the “Michelangelo” of the model railroad world.
Jim AZ
Surgical gloves can keep the glue off your fingers.
👌build …
Regards Fred from the Castle
Brian : You obviously have great skill , patience and knowledge in constructing all those buildings not to mention the layout in general. Can’t wait to see the water added with a little debris added for the realness.
Robert
Brian shows exceptional scratch building talents, great to see his step by step methods, thank you Brian
Brian
You are an exceptional artist and creator that us ordinary folk learn from but only wish to reach your level. Something like squaring a roof as well as you did requires exact, precise measurement. It will only plop on if it is perfect.
” With time comes patience.” Brilliant!!
Many thanks for your tips. Please be patient with comments from us mortals and keep up the excellent narratives
George from NY
Great imagination and superb scratch building skills, lovely looking layout Brian
Mike S
Thx for sharing your hobby
Brian’s building skills are in top. So enjoyable to see and be inspired by the masters.
Soren
Brian,
Beautiful work! You mentioned Sierra West Models — is that where you got some of the interior detail pieces for your building interior or did you make your own castings? I’m very jealous of your modeling skills. Keep us posted with your layout progress — it looks like it will be a real showpiece. And thank you Al for making all this iinfo available to all of us.
Will
The low water level maybe its low tide 🙂 ?? that’s a wonderful waterfront so much detail I as a teen worked in a boat yard in Miami FL
How high re the tides there Brian, that is quite a drop from the rail end to the water.
Amazing creativity!
Please tell us where you did get the interior castings.
EXCELLENT
Can u send me the link
Brian; Did you build your boats from scratch or use jits? If kits would you please let me know your source of kites available.
Thank You Un Advance;
Walt
Brian by all means put the right type of roofing on the roofs of that beautiful building! My career roofer father would be spinning like a top in his grave if I didn’t keep harping on this. For the gable roof (the one that comes to a peak) Shingles is the only roofing to use on a steep pitch roof like that. Given your era either asphalt 3 tab shingles which each measure 36″ x 12″ , have two 6″ notches dividing the shingle into 3 “tabs”and are laid with each row above overlapping the one below by 6” The tabs should stagger like bricks, but remain in a straight vertical line in alternating rows. This is called the “bond line” and if not straight from bottom to toptells everyone an amateur put on the roof. The shed roof (shed roofs do not have a peak) over the bump out could have shingles or roll roofing on it. NOTE: roll roofing is NOT tar paper! it has stone granules on it the same as shingles, so course grit wet or dry sandpaper could be used to represent roll roofing. Roll roofing is 36″ wide and 33′ long per roll. It is applied horizontally starting at the bottom and working up overlapping 6″ along the top and at any ends of a roll. the bottom edge and the roll end overlaps are cemented down with roofing cement, avoiding getting any on the exposed portion. No nails are ever visible. At a seaside prior to WW2 and till today in the north-east shore buildings near the sea are often roofed in cedar shake shingles. A roof that requires a lot of expertise to put on correctly. Do your research as to how a shake shingle roof is applied before modeling one. The final type of roofing you might find on commercial gabled roofs near the sea is standing seam metal roofing, These are metal sheets that have interlocking edges bent in the panels. These panels are installed “north-south” vertically and have a characteristic raised rib between the smooth metal sheets. This roofing comes in a rainbow of colors, with medium green being the most common.
Very nice looking building and the layout is great too. Consider me properly stunned.