Dennis has been in touch with a wonderful post on Cheap N scale train sets.
It just goes to show you don’t need to spend a fortune or have lots of space:
“Dear Al,
I have a good friend, JT, who is a snowbird, spending summers in Colorado and winters in Arizona.
His home in Colorado has a basement, but the Arizona home is smaller, a double wide trailer.
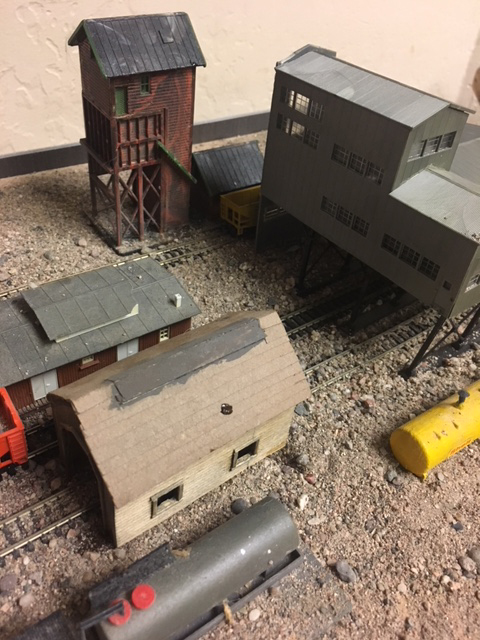
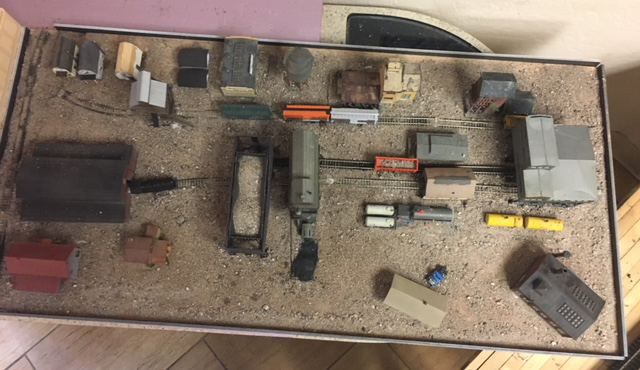
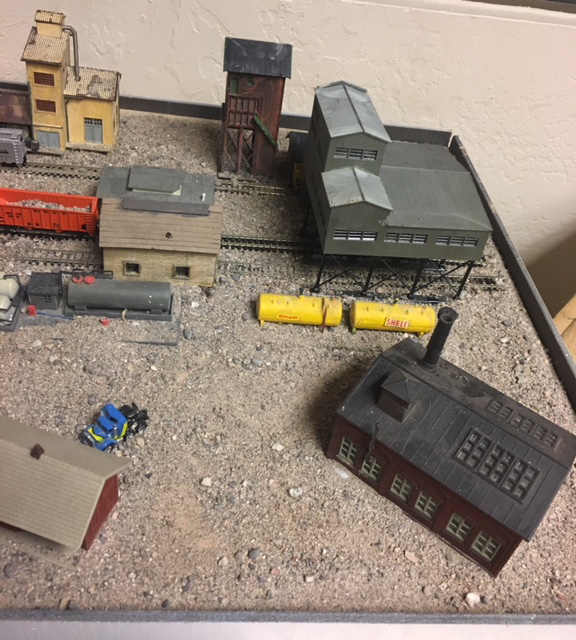
I decided to make a small N-scale diorama for his trailer and set out to illustrate that even a small space can have a railroad and that you don’t have to rob a bank to do it!
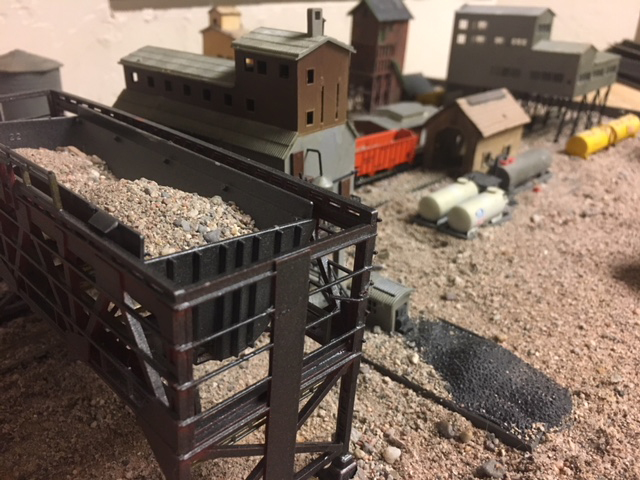
I found a scrap piece of plywood approximately 20 x 40 inches. Since I was creating a static diorama, I eliminated every potential electrical problem. I decided to use clear Gorilla glue and not a single nail or fastener. The theme would be a dusty Western US small town.
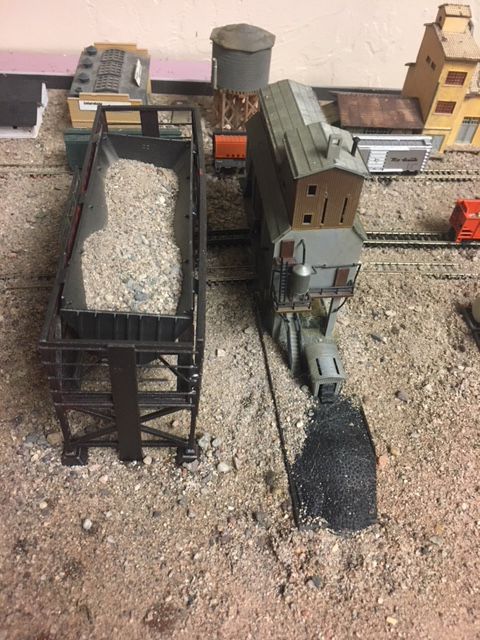
My real fun was scavenging railroad swap meets for cast off “junk” parts that I could transform. I bought discarded buildings, locomotives, cars, and track, never spending more than $5 for any one item, and most were only a dollar or two.
Like all of us I bought some structures that wouldn’t fit in, but at these prices I had no regrets. I moved things around a bit, covered my errors and sins with lots of glue and sand, dulled down some of the colored plastic, and added painted strips around the perimeter to contain any loose sand.
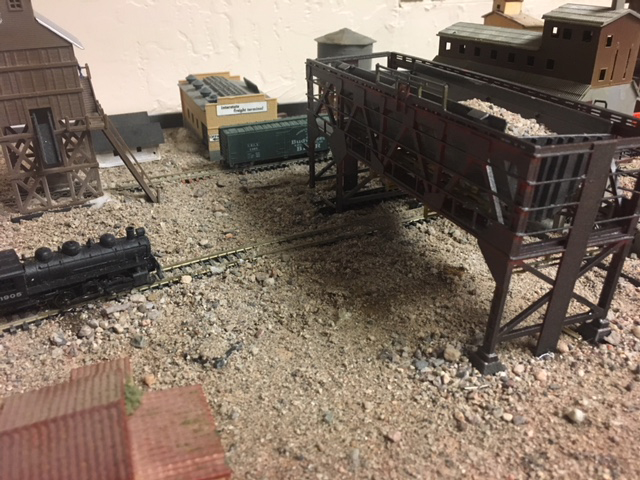
I deliberately left a gap in the fence in case JT wanted to strip out the end piece of track and connect to a larger layout in the future.
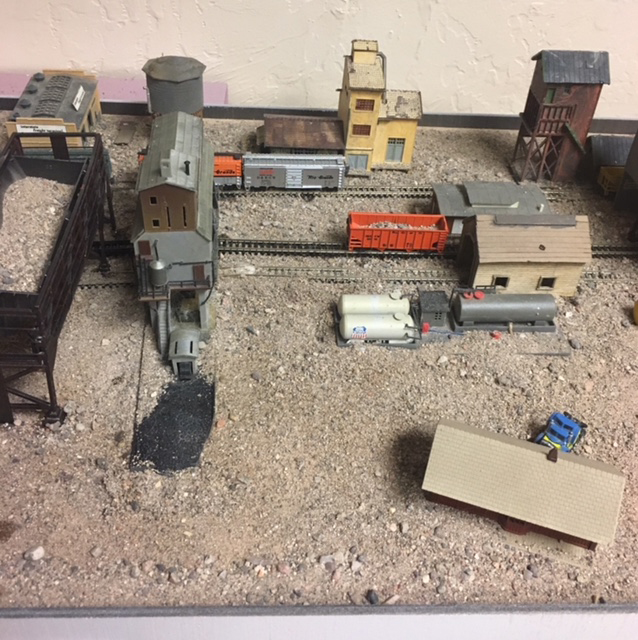
Voila! Total expense less than $75 US!
Hope it inspires you to go to swap meets, too. I met some new friends there and bumped into lots of old ones.
Dennis M.D., Scottsdale Arizona”

 .
.

And John has decided you don’t need much space to build a layout too:
“If you have never built any kind of layout, if you think you do not have any room, do not let those things be excuses…
Build a diorama to develop some modeling skills. A “micro layout” can be fun. Just get started.
One thing I hear too much of is the complaint that someone does not have enough room for a layout. Well, since building my little shed on my camping trip in September I have been lost in the doldrums. Or what we here call a modeling funk.
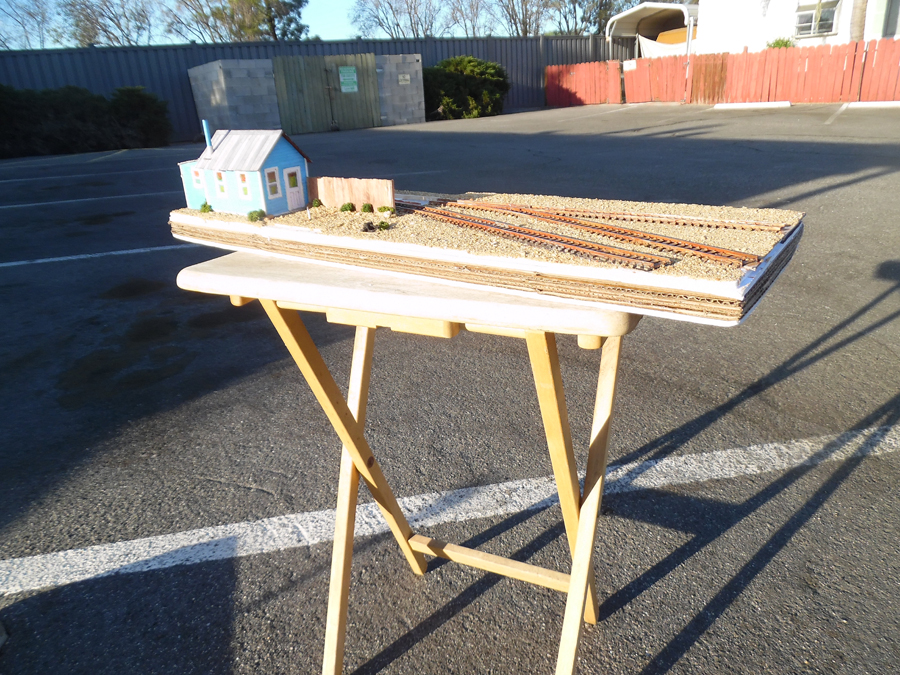
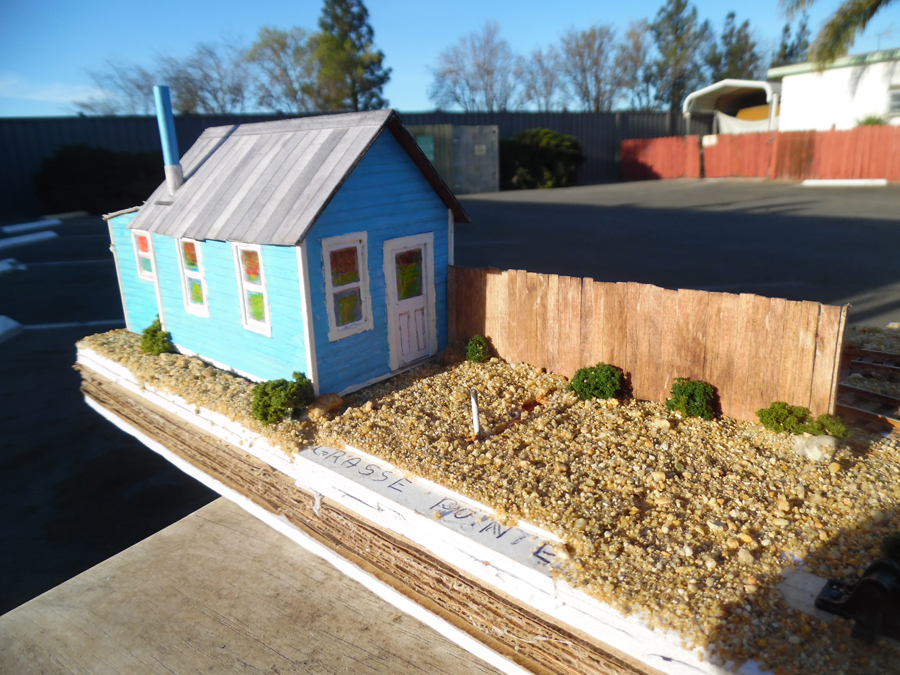
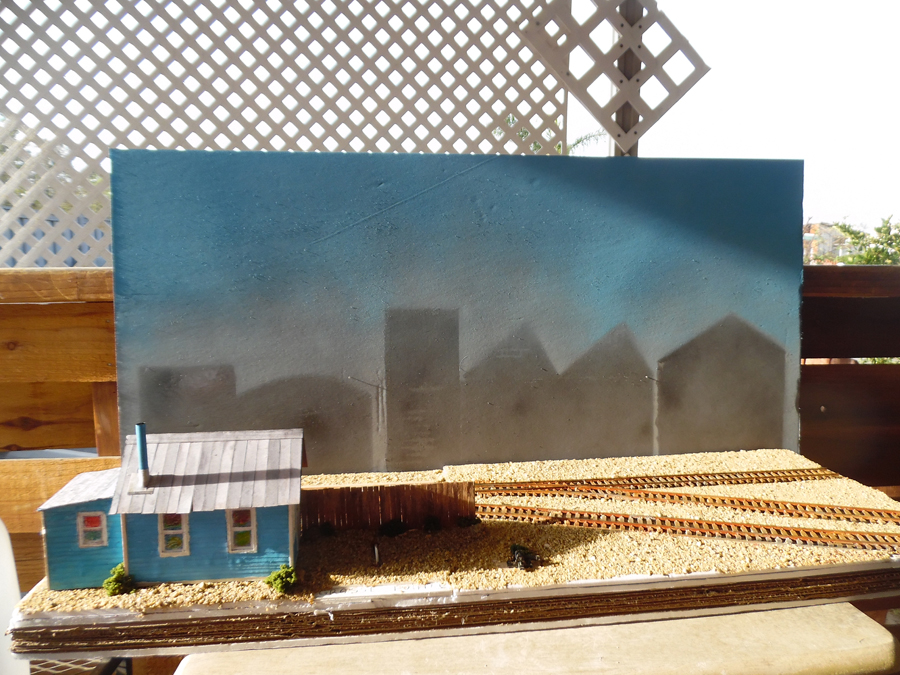
Then in early December I saw a video of a little 1 foot by 3 foot inglenook. I started looking through some of my old “idea files”… “Grasse Pointe” is the result!
This is my first attempt at using a sector plate and I am learning some new things too…
Grasse Pointe is roughly 10 inches deep and 28 inches long. It fits in a standard bookshelf. It really is becoming a scenic diorama that I can run trains on.
Here are three pictures. You might recognize the paper house. More photos will appear soon.
John
aka “John from Cali”
And lastly, another installment from Dangerous Dave.
I haven’t been too quick off the mark in posting this one, so apols if you’ve already seen it:
“Hi Alistair
Happy New Year to you and all the members
New vid shows adding there side mounted points motors…
Dave”
A huge thanks to Dave.
Thanks also to John and to Dennis for showing us how cheap N scale train sets can be just as fun as the expensive ones.
Just goes to show you don’t have to have a lot of room if you want to scratch that layout itch.
That’s all for today folks.
Don’t forget the Beginner’s Guide if you’re tired of sitting on the side lines.
Best
Al
PPS More N scale layouts here if that’s your thing.


Al, All great post’s. Model railroading is a great hobby. Like Dave said, keep the site going as your site has a little of everything for everyone.
Cary B
I really enjoyed Dennis layout. Start small and do a good job. There is so much to learn and with a manageable size the learning curve is smaller. Also I love the budget aspect of his layout. We are not all millionaires, like Dangerous Dave, and yet we can enjoy the hobby and appreciate railroading just the same.
To Aliatair, Dangerous Dave, John & all the fine folks at modelrailwaylayoutsplans…
Hey Dennis….Very neat….Mike
Excellent videos from Dave. Thankyou. I called my wife to share the “walk to Grosmont and train return”. Brings back happy memories for us, too. Maybe we could do another trip to North Yorks, the trouble is that we love north Norfolk [home] and we have the Poppy Line and many fine walks… and I have a model railway under construction.
Macbear
And no aging required!
Al,
Just wanted to let you know how appreciative l am of the website and all the work and effort you put into it. And to all the model railroaders, the amazing ideas just keep coming. I’ve got the beginners guide and have downloaded the engine sheds and tunnel opening. It’s like I’ve seen written by so many on the website, a layout is truly never finished. It’s in constant flux, constant change. Speaking of which, I do believe it’s about time to head on down to the basement and see what else we can try or just sit back and run the trains. “O gauge Frank”
After Dave’s last video on Peco points I have now installed seven on a new layout however I found that power from my DCC Guagemaster Prodigy Express did not have the power to throw the points. After discussing with my supplier of the points they suggested a Gaugemaster cased transformer 2 x 16v AC. This has been installed and throws the points perfectly. Thanks once again to Dave for highlighting these points. Regards Ian
yep pretty cool little ‘shelf’ diorama…
I’m designing a 40 in by 60 in layout in my little studio apt…..
3 layers tall…if ya cant go OUT …you can go UP …..
so yeh….. ‘space’ is not an excuse folks…..
stop whinin’ and get to buildin’ on yer layout….
RE: side mounted points motors….
I scored a small BOX of them on ebay for like a coupla bucks
probably 10 or more….pretty good deal…
keep em runnin fellas
stjohn in Long Beach calif
Dave, nice video as always. I do have one suggestion for you regarding the roadway tunnel arch in the middle of your retaining wall. Could you find a similar arched tunnel in your area to photograph? You could then size it to fit and paste the picture into the arch to add depth to the scene. Tim
Hello Dennis. You and I are a lot alike. I just love making things out of junk! For an example, I used an old battery from my grandson’s smart phone for a flat car load. At work, I will find discarded computer parts. I take them apart and find a treasure trove of small screws, small wires and electrical parts that can be used for car loads or whatever you can think of. So before you throw something out, take it to the work bench and see what’s inside that could be used for your layout. It is a lot of fun.
Conductor Dave. Dayton, Ohio
Thanks Dave. Your videos are always informative and entertaining. You truly have a great layout.
Nothing like N scale to do so much with limited space. Nice job.
Jim AZ
Glad to see I’m not the only one who loves shopping the 2nd hand stores, you never know what gems you might find. great work guys and thanks for sharing!
Cary in KY
its quite incredible what can be done with n scale good job
I am getting ready to lay out new track (HO SCALE) question Is a 22 inch radais inside ,outside or middle of track My 4-8-8-4 would like to know.I have plenty of room.
Excellent, I wish I had his talent!
Thanks Tim for that suggestion , I shall take my camera down the road later to day and see if I can capture a road Bridge not far from here which may be suitable ….as for the suggestion that Dangerous Dave is a millionaire !!! I certainly are not ..its taken 10 years to build up my stock on the layout , and if that adds up to £10.000 or $11000..its aprox
…Thanks all for your comments £20 per week ..ie £1000 per year ..as a non smoker and only partake in the odd drink at weekend …I find that I get more enjoyment spending this on my layout ..and if you need to be a millionaire do that , its not saying a lot for the way you spend your money …I retied 10 years ago as a truck driver …and saved most of my life ..unlike a lot to day who blow it all as they earn it
great little layouts like all the outbuildings, always learning off Daves videos thanks for sharing.
Dave, have you ever had trouble getting the Peco side mount points motors to align properly with the Peco points? Most of my track is Atlas but I have one Peco switch/points because I need one where both branches curve to the right (one more sharply than the other). This is a Peco ST244 with a Peco PL-11 turnout motor. Unfortunately when the mounting tabs on the motor are inserted between the ties/sleepers, the moving bar on the motor is about 1/16 inch off (lengthwise) from the one on the switch/points. I can force it to fit, sort of, but when the motor is activated it often jumps loose. Any pointers? Does Peco make a different side mount motor to fit this odd shaped turnout? Should I try your method of gluing the motor in place instead of just using tacks? Or what?
Larry in Maine
Hi Al,
Love this community of model rail enthusiasts, which you are instrumental in keeping together. Well one mate!
I note a lot of folks are using sand and fine gravel on their layouts. A little word of warning is needed here. Mineral particles are death to small gear trains and moving parts on locomotives. They can wear out your favourite loco in a very short time, if picked up in the gear train. There are a couple of ways to avoid this. The best is to use softer materials for scatter and ballast (eg sawdust or small wood chips, coloured or natural, or other softer materials) If you must use mineral particles, make sure they are sealed down with adhesive or cover coating, so that there are no loose particles to escape and lodge in your gear trains. This is particularly critical with newer models which tend to have plastic gears.
Plunko in Australia
For Dangerous Dave AND Al:
Being Across the Pond in New England… I have wondered who operates the Gate at Railroad Crossings in England? Your Layout Dave, shows these “white fence
type gates” blocking all your roads that cross the Tracks…. WHO opens and closes those gates when the trains come thru? I noticed the Flashing Round Globe Light Posts that go off when Trains are coming along. But didn’t see any “Gate Keeper” roadside shanty or shack close by? Can you let us Yanks know, since some of us are not understanding of British or European Railroad Operations or “Culture”. Thanks.. from Mike in N.H.,(New England) U.S.A.
Just proved to my wife that there is no such thing as junk, pack rats or hoarders.
To Timothy Barr,
A 22-inch radius is measured to the centerline of the track. It’s the bare minimum for a 4-8-8-4 locomotive, which would look much better on a 36- or 48-inch radius.
Dangerous Dave,
Nice explanation of the Peco switch motors. Your videos are always a great inspiration to other model railroaders. I guess that guy thought you were a millionaire because your layout looks like a million bucks! 🙂
Wow that is great keep up the workmanship.