Here’s the free printable scenery that comes with the Beginner’s Guide.
Scroll down and have a look, but just so you know, the wooden bridge and the tunnel are both in the store for $9.97 each.
That’s just under $20 worth of scenery absolutely free.
And don’t forget, the Beginner’s Guide at just $9, gives you an $18 dollar saving on its own.
So right now, that’s a $38 saving up for grabs. But not for long.
Click here to go back to the order page.
Here’s some pics of this fantastic bridge too:
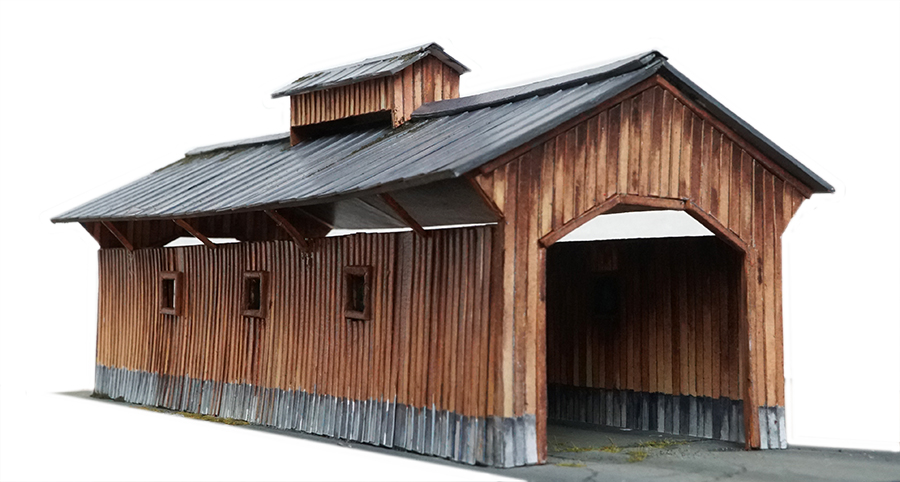
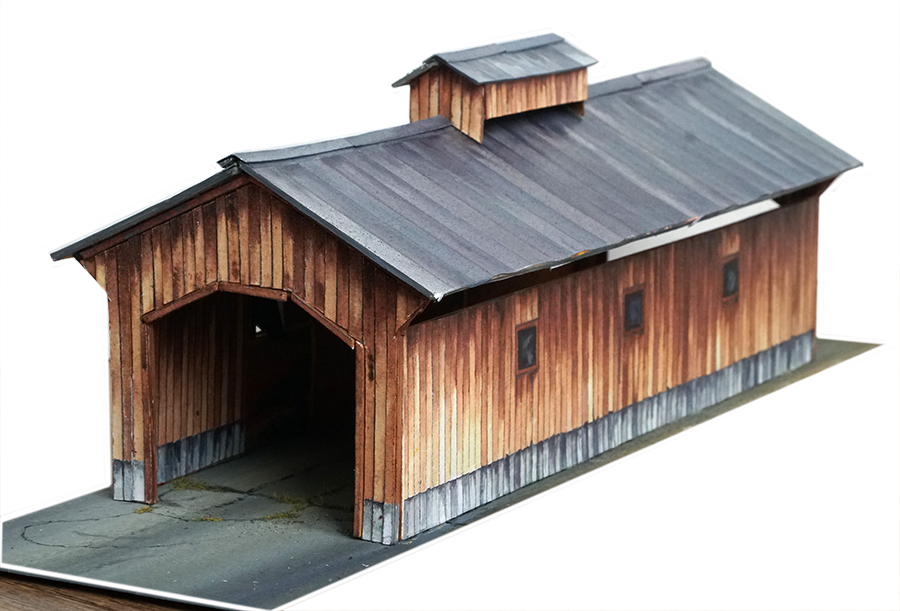
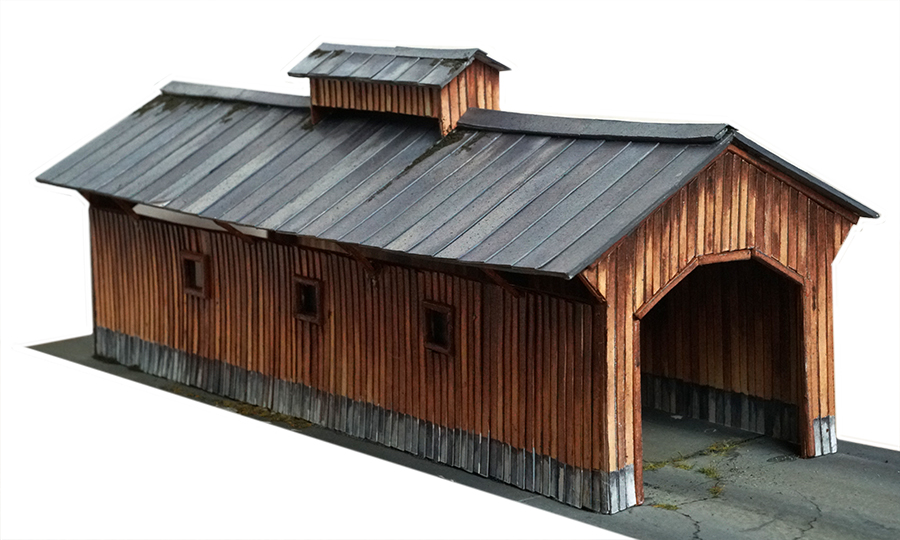
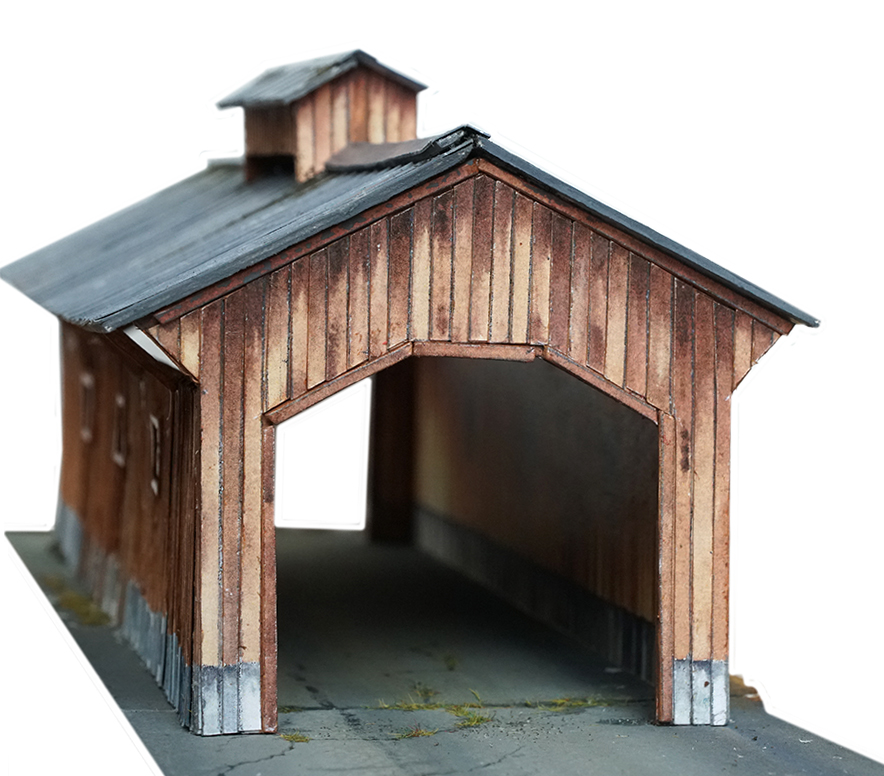
It’s now in the store for $9.97 – so if you like the look of it, grab it now.
For HO scale, you don’t need to do anything, just print it out.
For N scale, reduce the print size by 50%.
For O scale, increase the print by 143%.
“Hi Al,
It’s been a decade or two since I had my own layout, but I’ve been enjoying your blog for a number of years now.
It was “Martin’s tunnel” post that first made me want to get back in to it.
Ever since Ive been toying with the idea of making one just for fun. Your offer of trying out the the new tunnel print was just the excuse I needed.
I’m pleased with the way it’s turned out, but saying that, I’d do things slightly differently on the next one, as you’ll read.
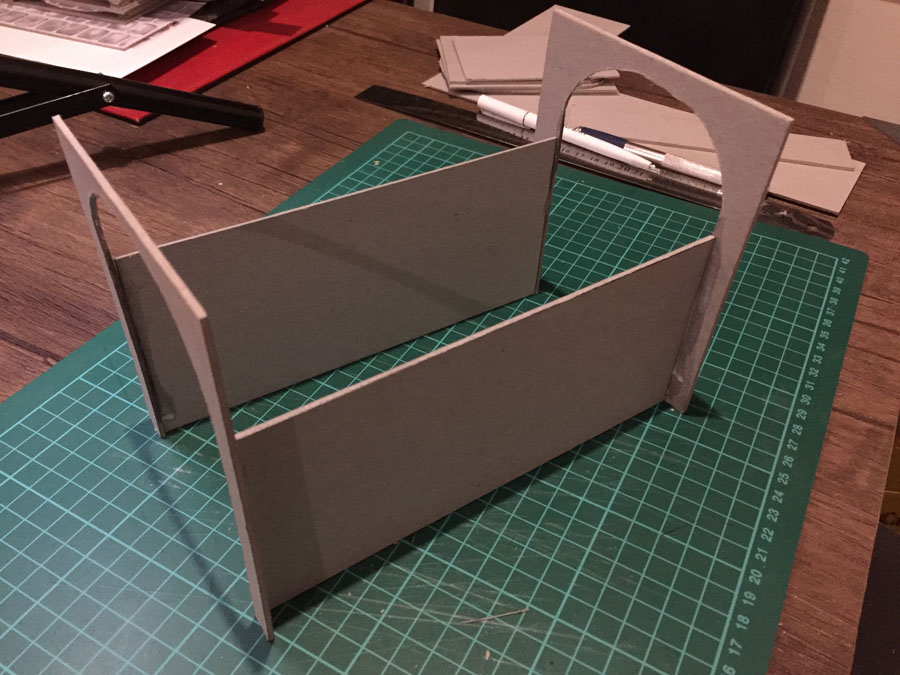
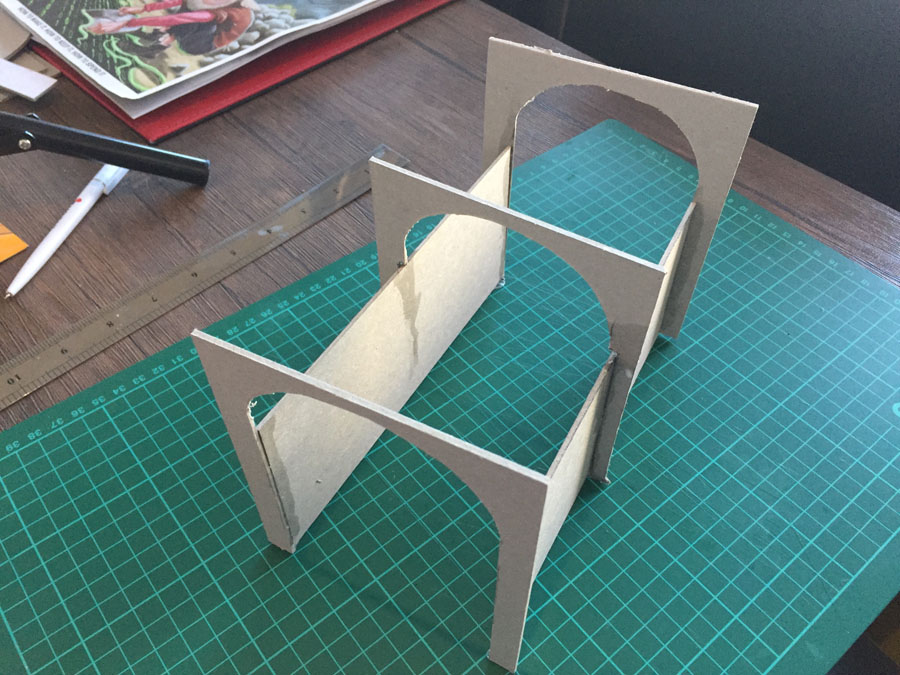
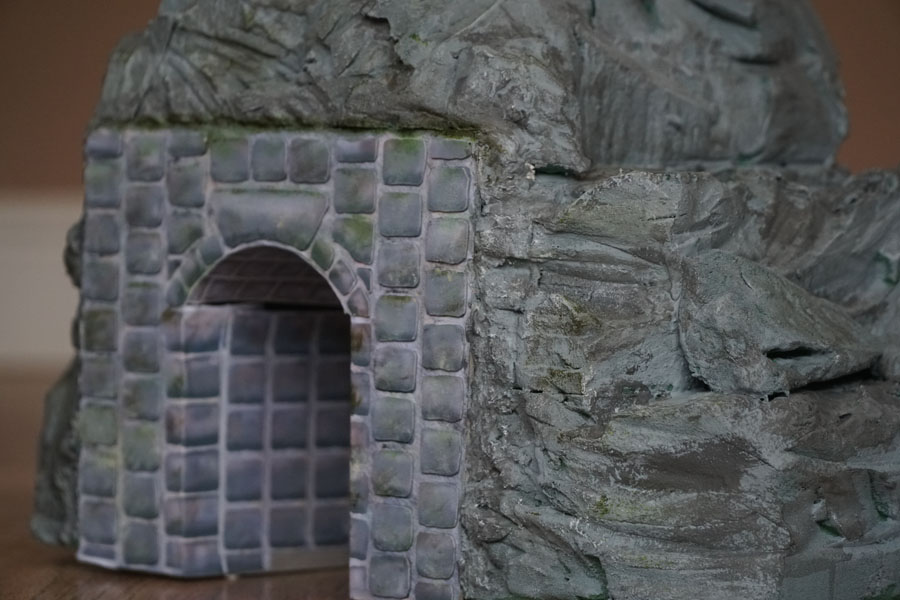
First, I made a card frame for the tunnel entrance because I wanted the tunnel it to fit snuggly in the foam. Also, I wanted the inside of the tunnels to fix to the outside without any gaps.
(All images are clickable.)
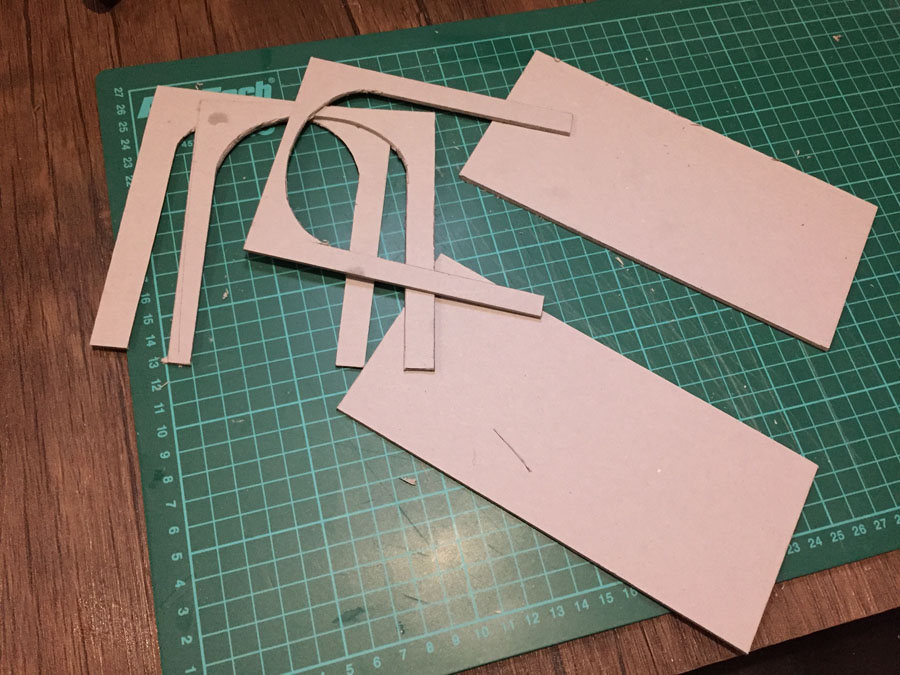
The print comes with a tunnel outline, so making the frame was easy enough.
Here I’ve printed out the tunnel and stuck it to card.
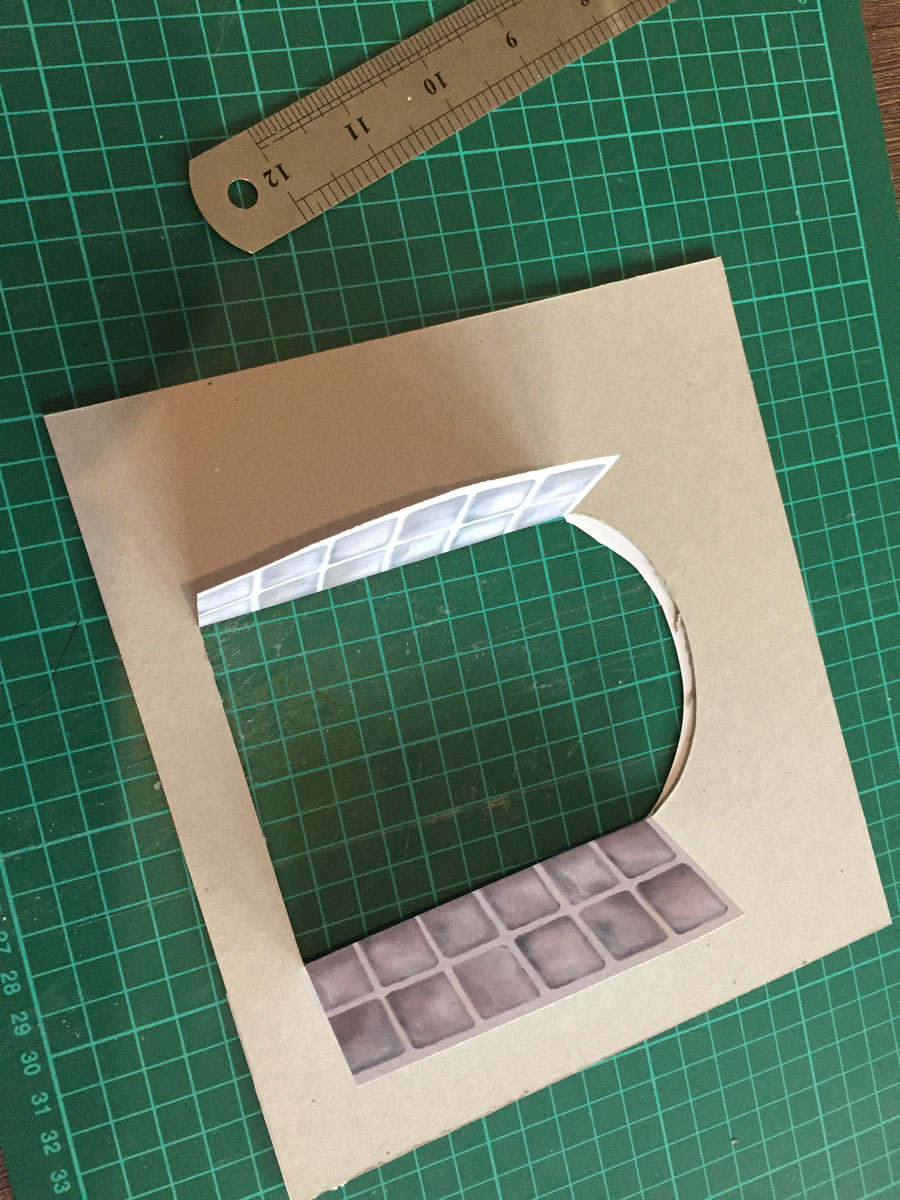
You can see the flaps that line the inside of the tunnel.
Here the flaps are folded completely behind the tunnel wall.
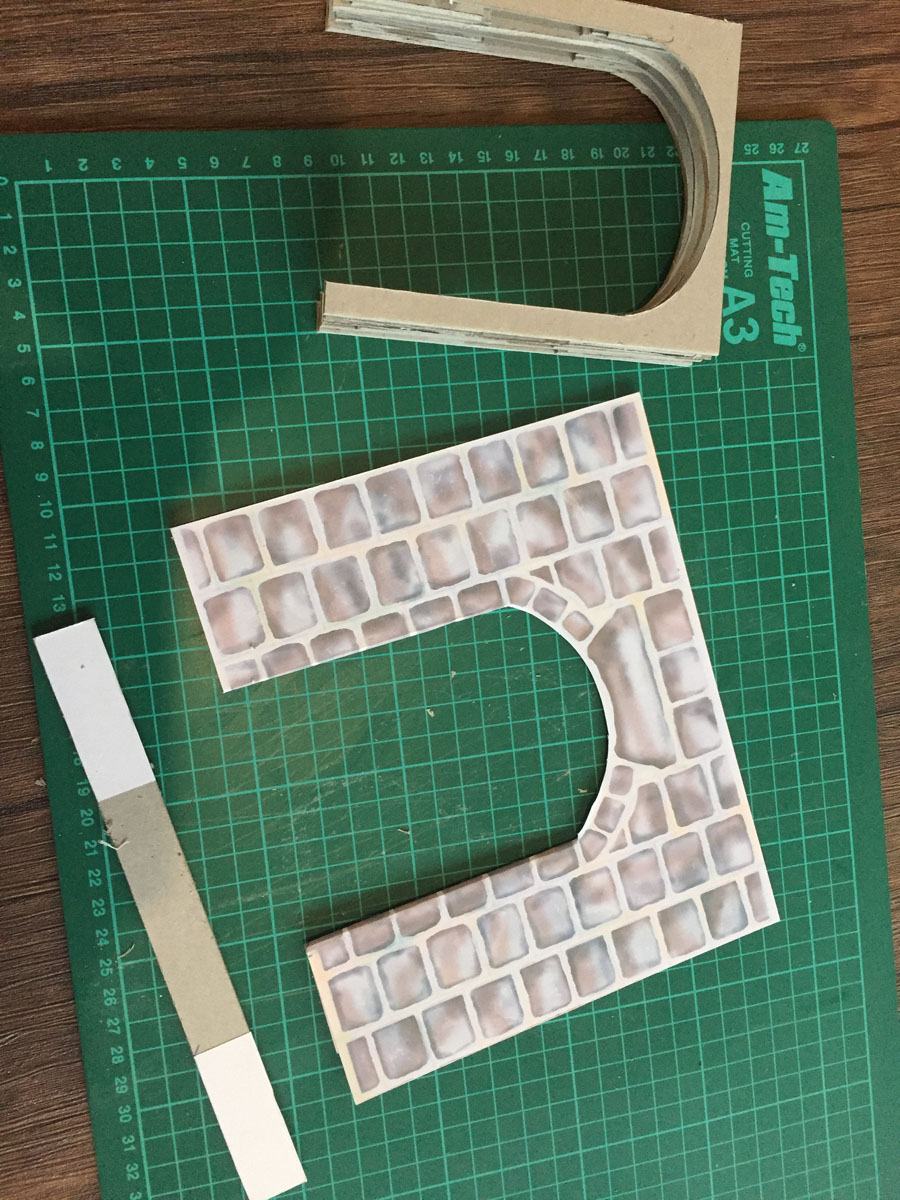
Think of the print as a base coat only – it needs to be built up, so it has what John calls ‘relief’, and it also needs to be weathered.
Doing this is easy and fun.
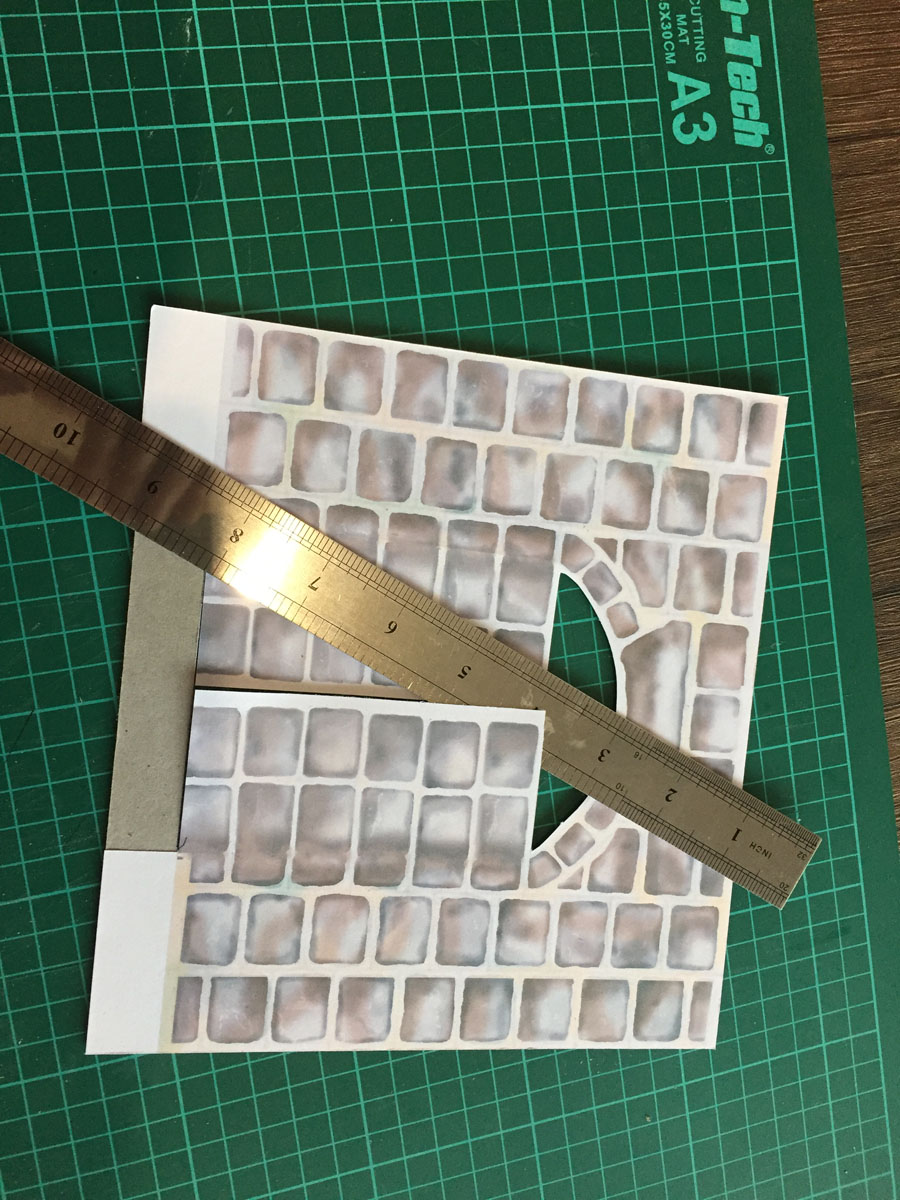
Just print out another tunnel wall. Here, I’ve stuck it to three sheets of blackish card to give me the right thickness I was looking for.
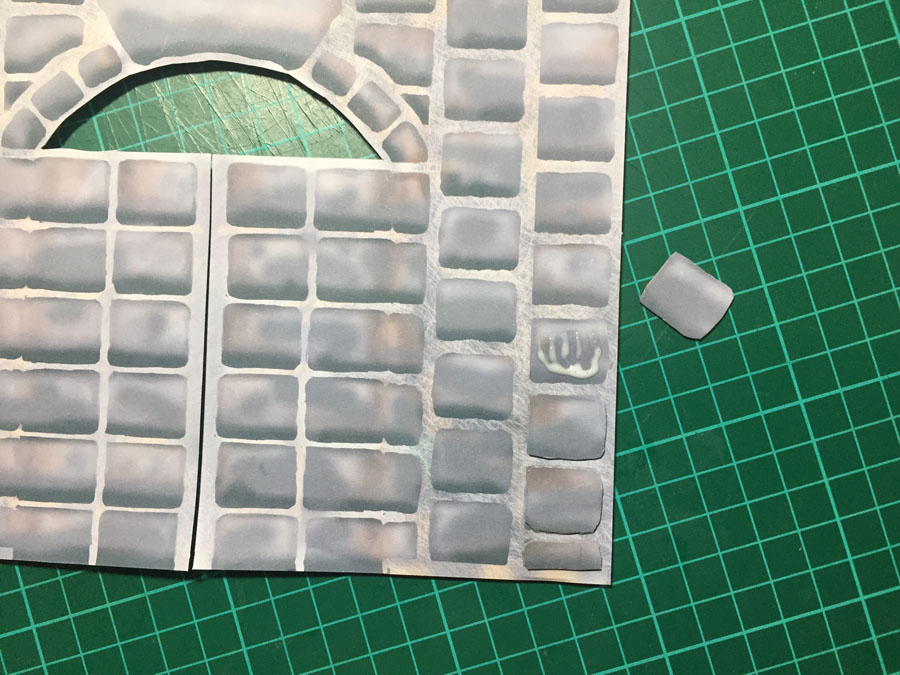
Then, just cut out the stones and stick to the original tunnel print.
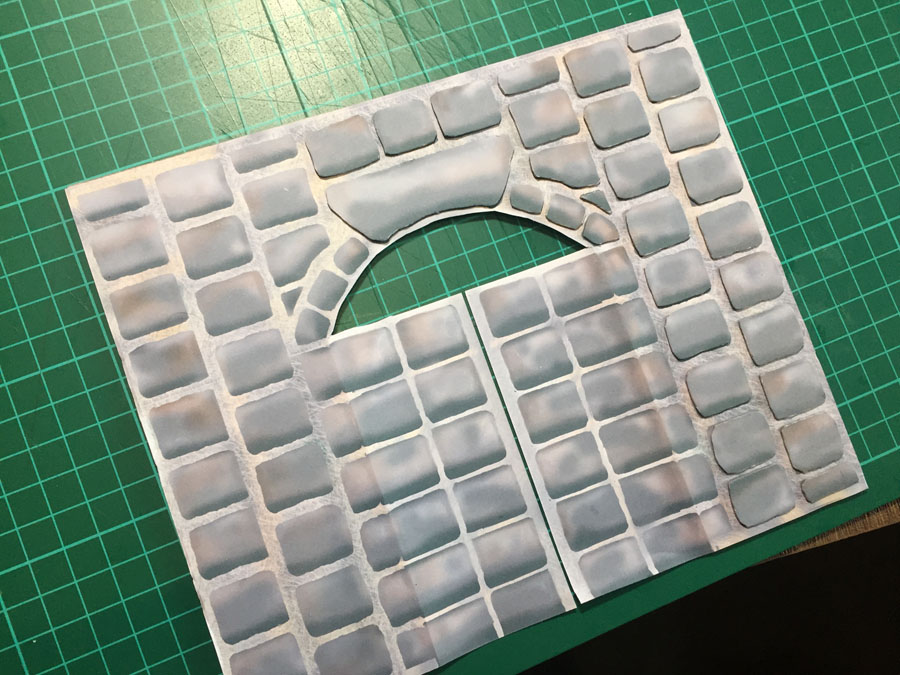
Here you can see how much of a difference it makes – I’ve done the right hand side of the tunnel only.
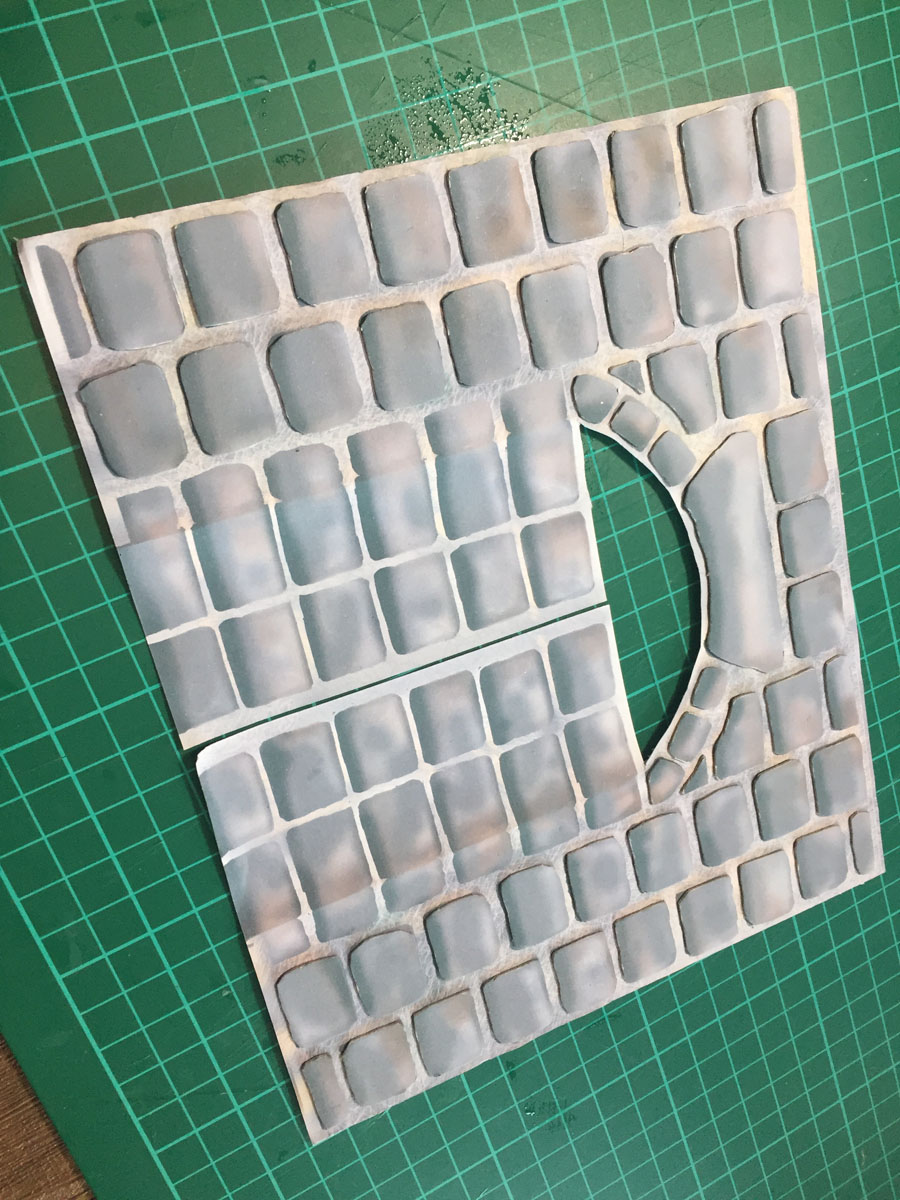
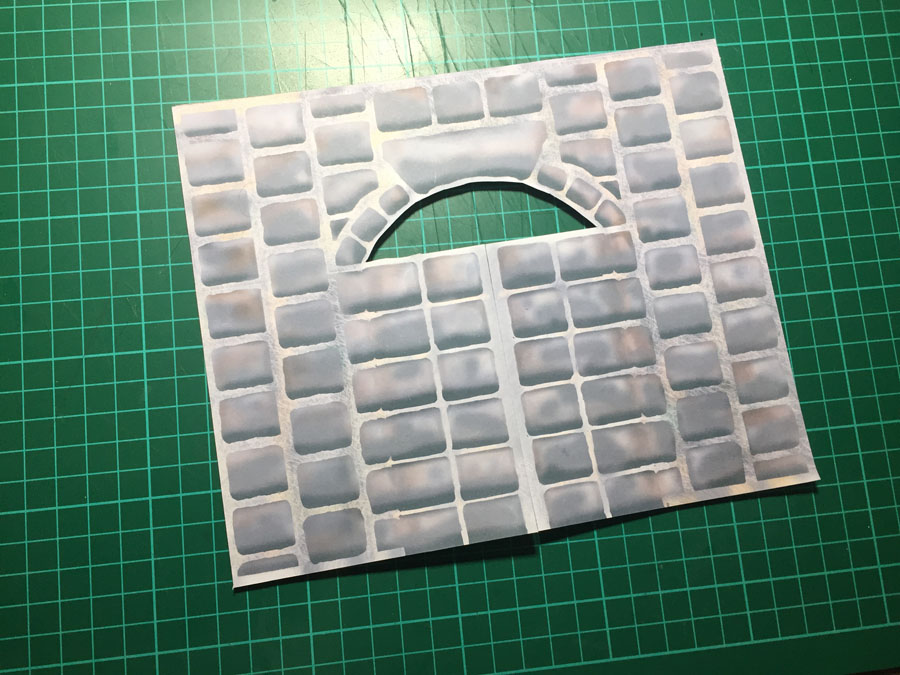
Here’s it with all the stones glued on.
It looks better, but it still has a long way to go – that’s when the weathering comes in.
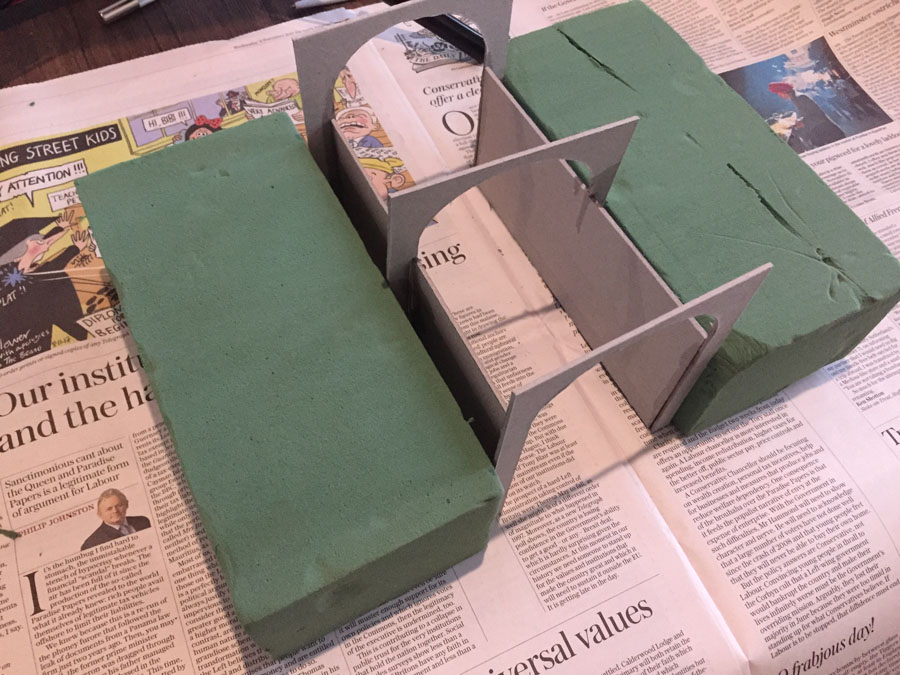
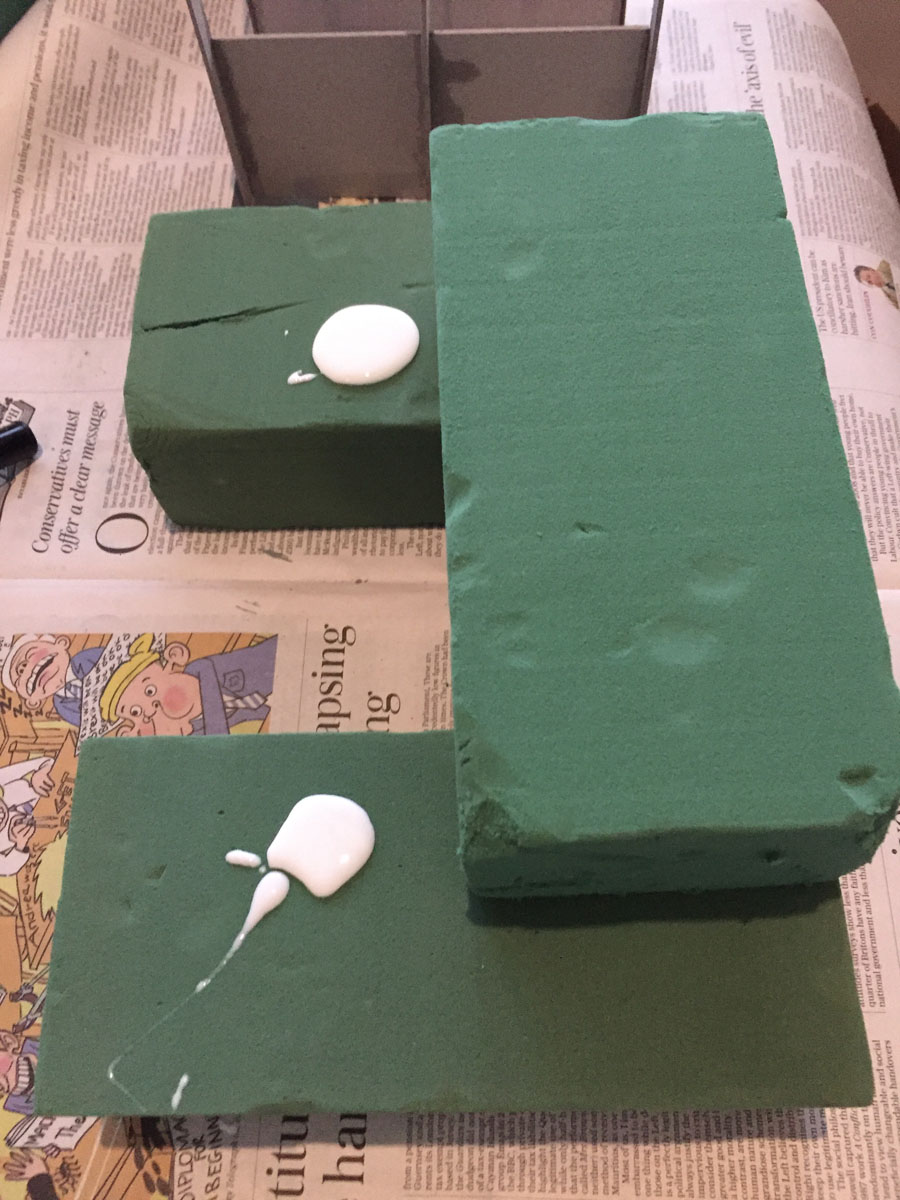
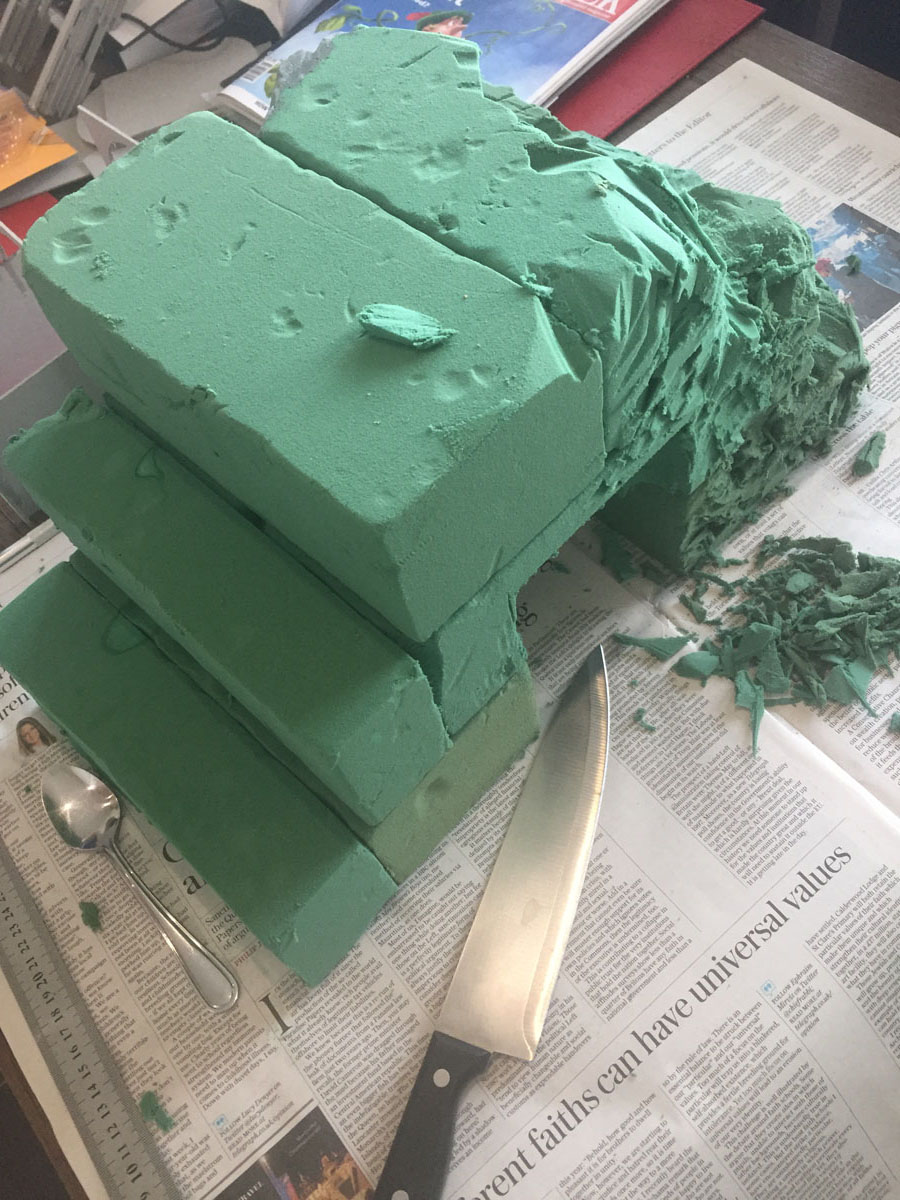
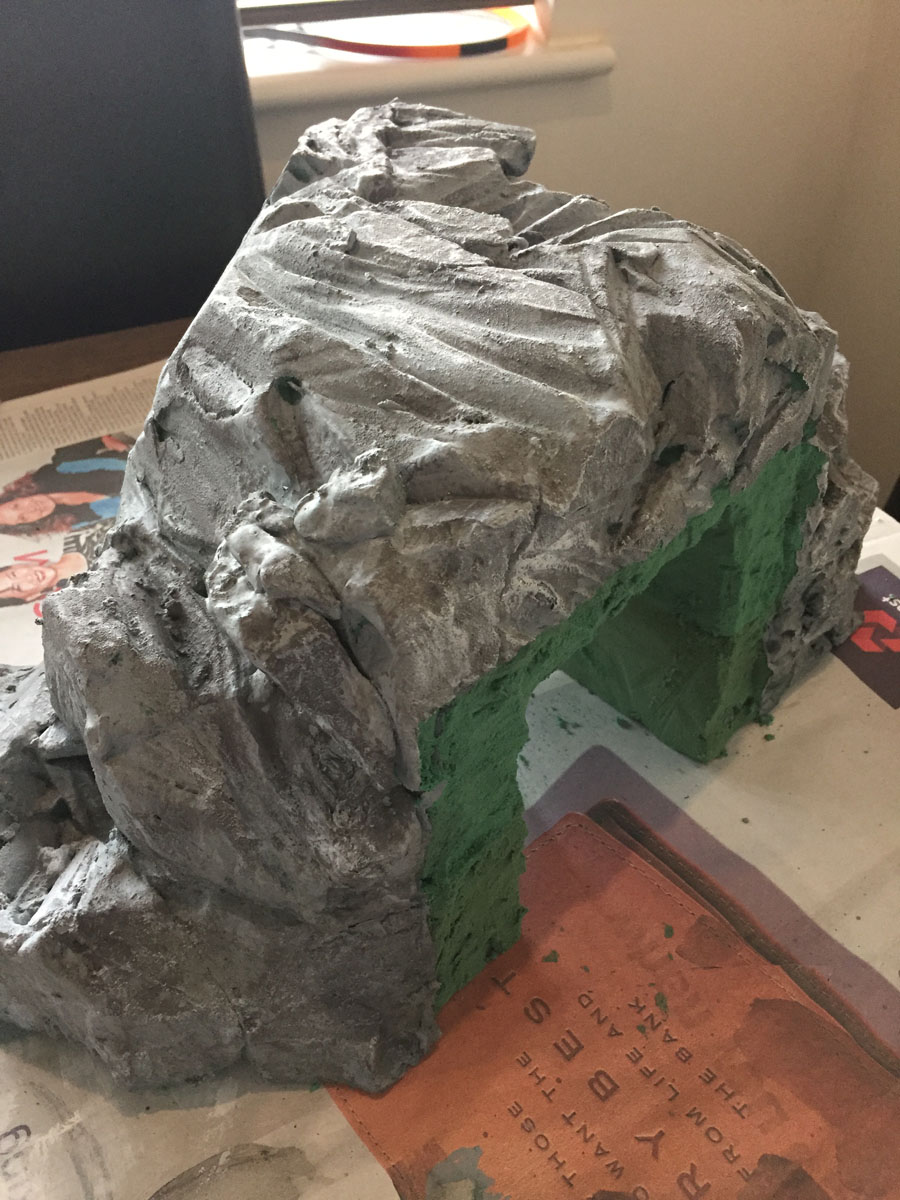
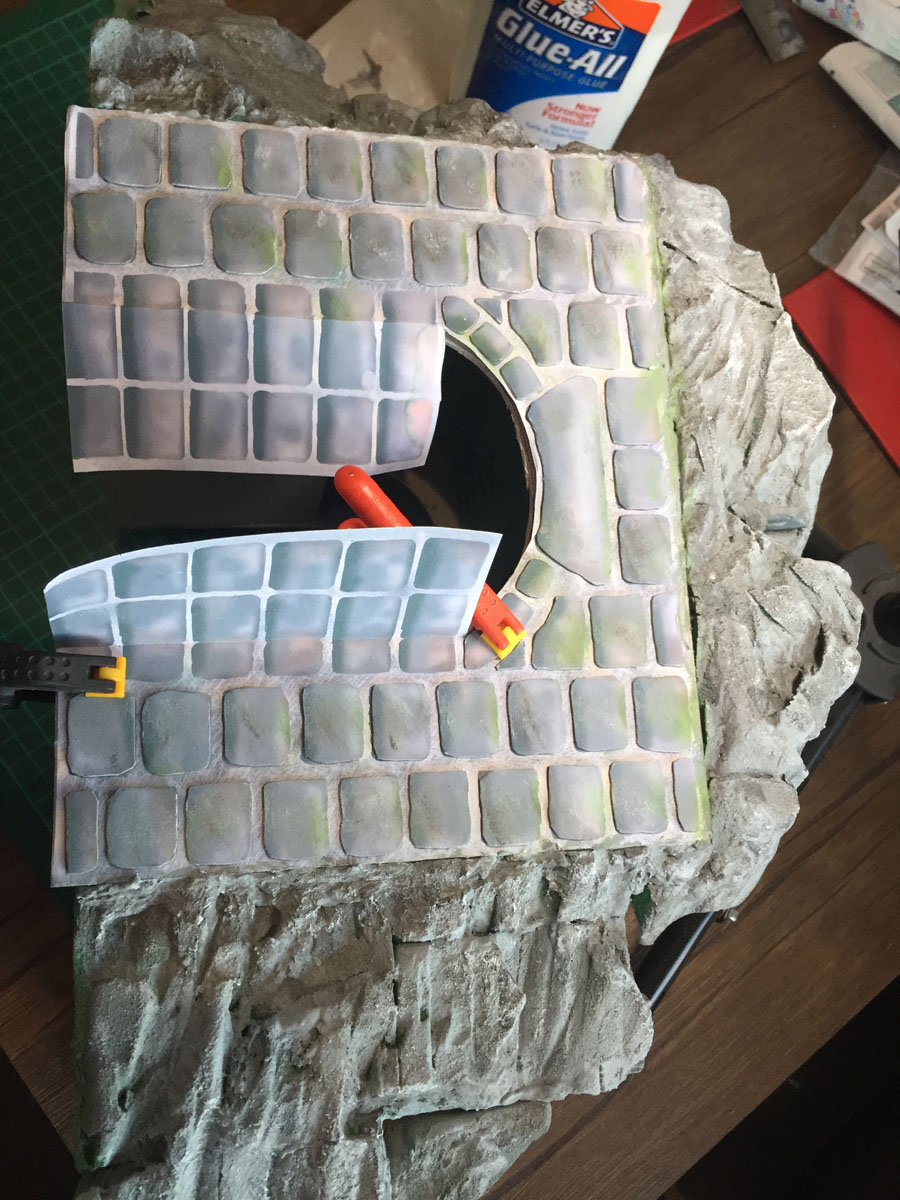
Here I’m using the tunnel frame to measure the foam / dry plant bricks, to save me carving it all out.
In “Martin’s how to” he uses insulation foam. But I didn’t have any lying about. But I remembered seeing a post where they used the dry plant bricks – so used them instead.
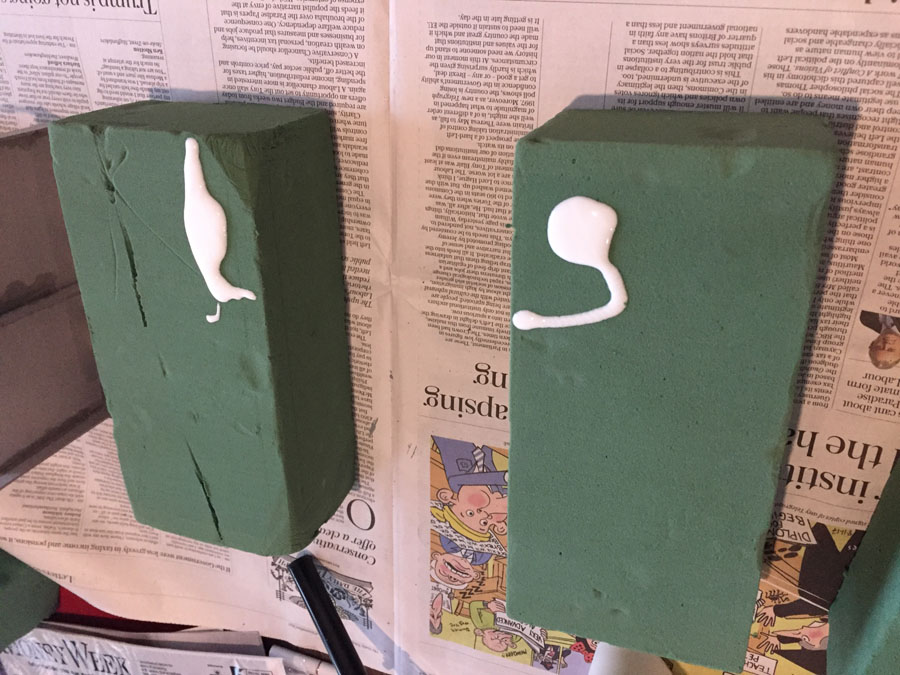
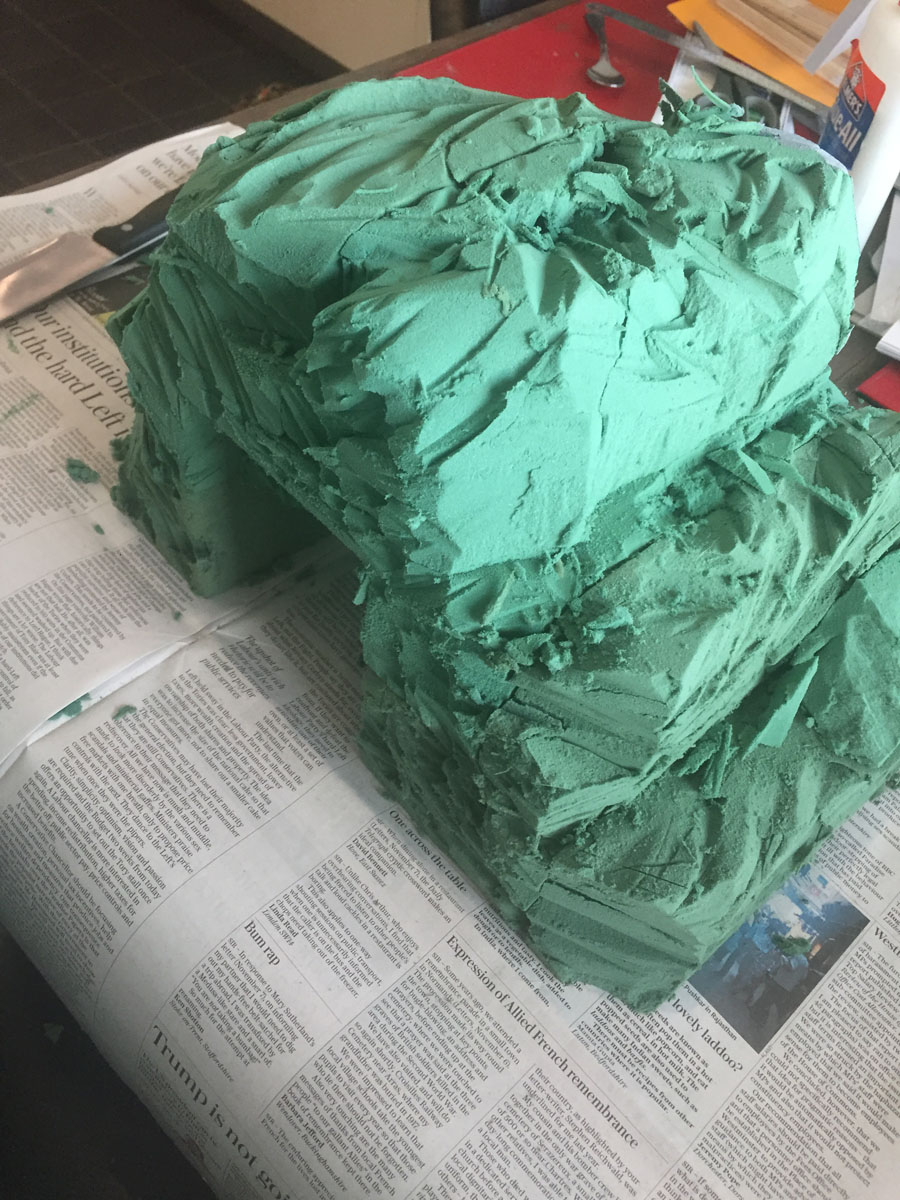
Then glue your mountain together.
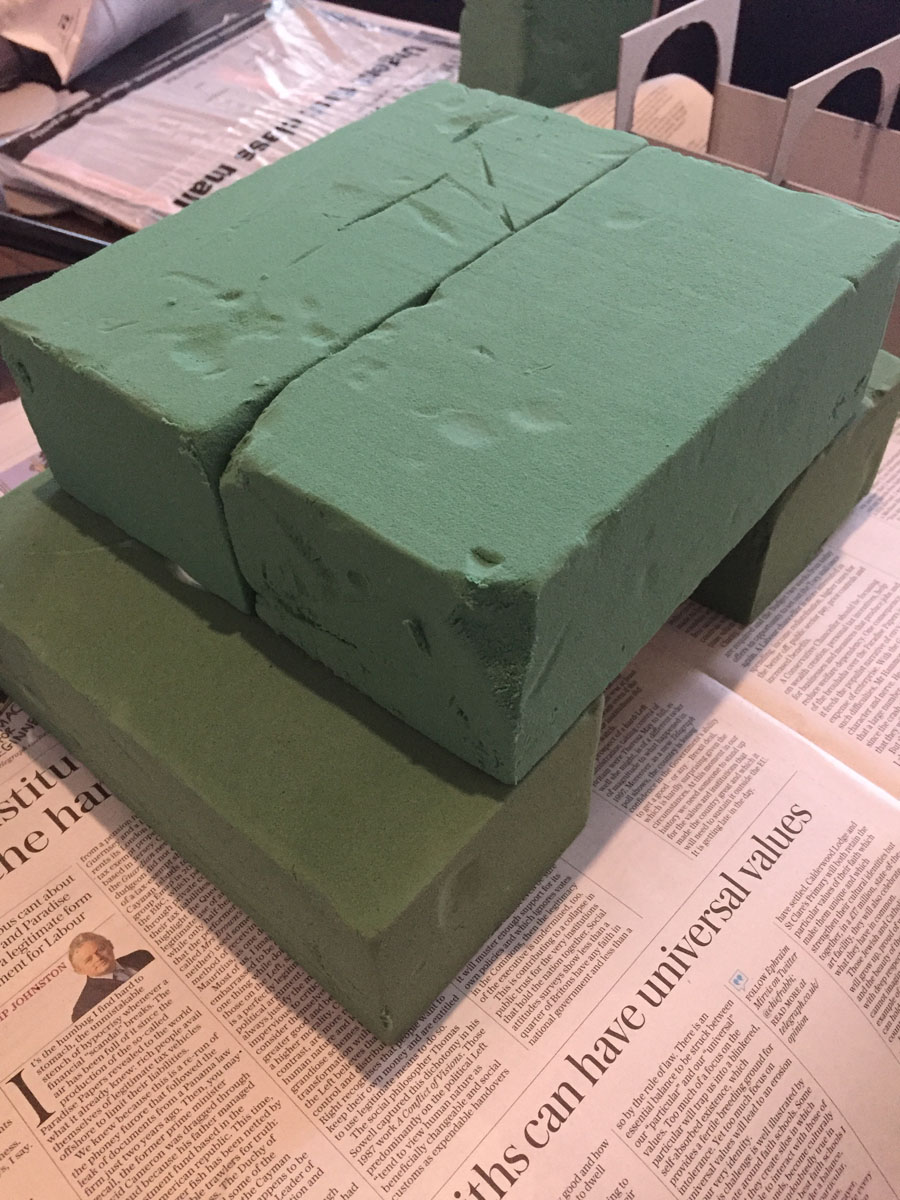
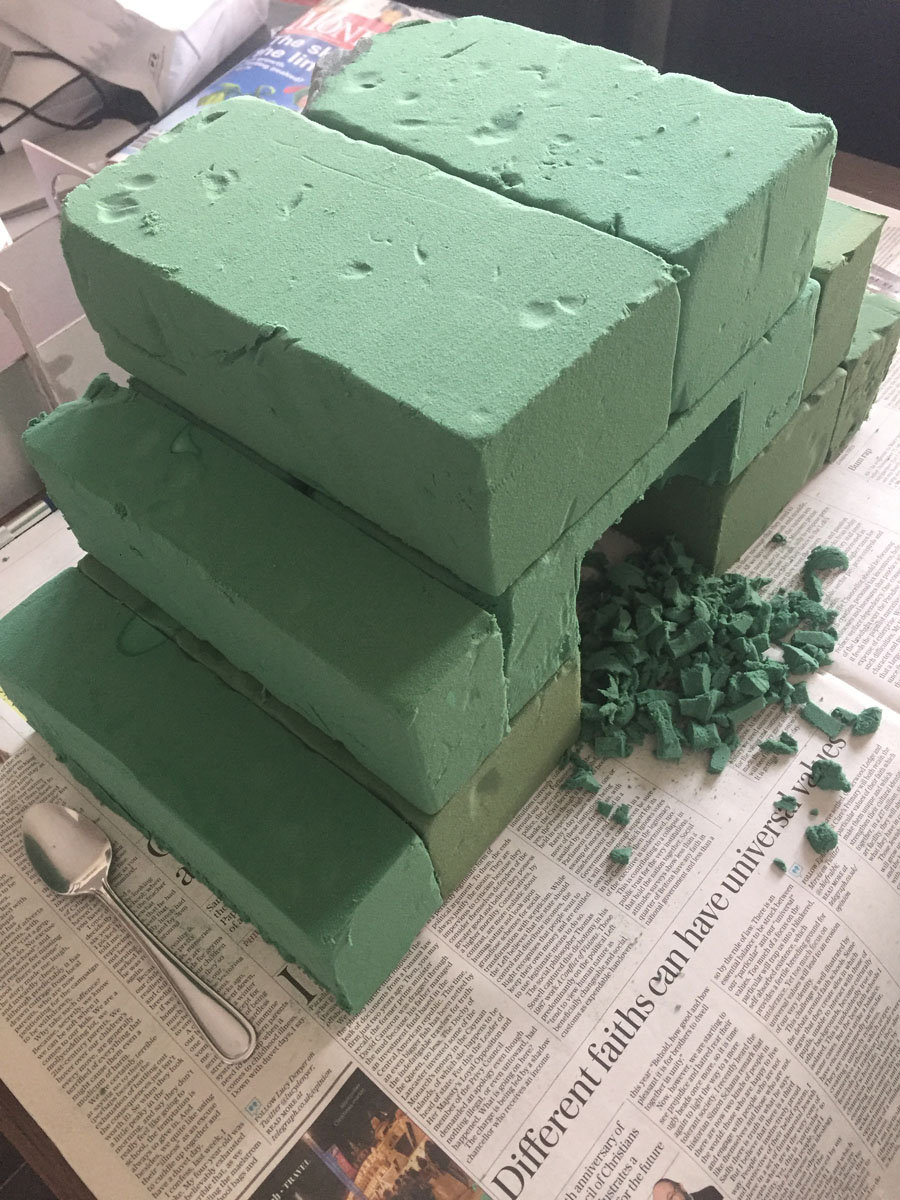
Here I’m carving out the top half of the tunnel. I have to say, I was really surprised how easy it was to work with the flower foam bricks – I just used a spoon. It was like working with ice cream that doesn’t melt.
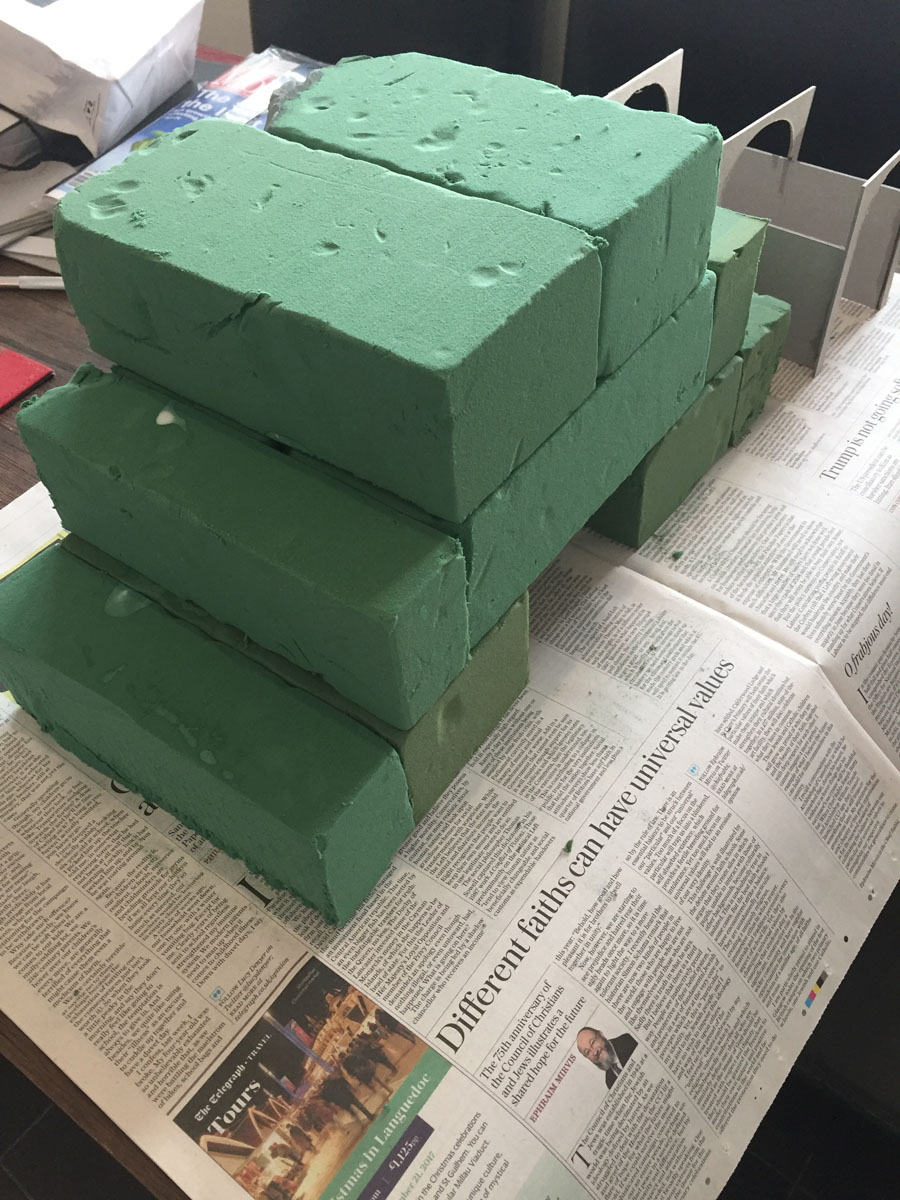
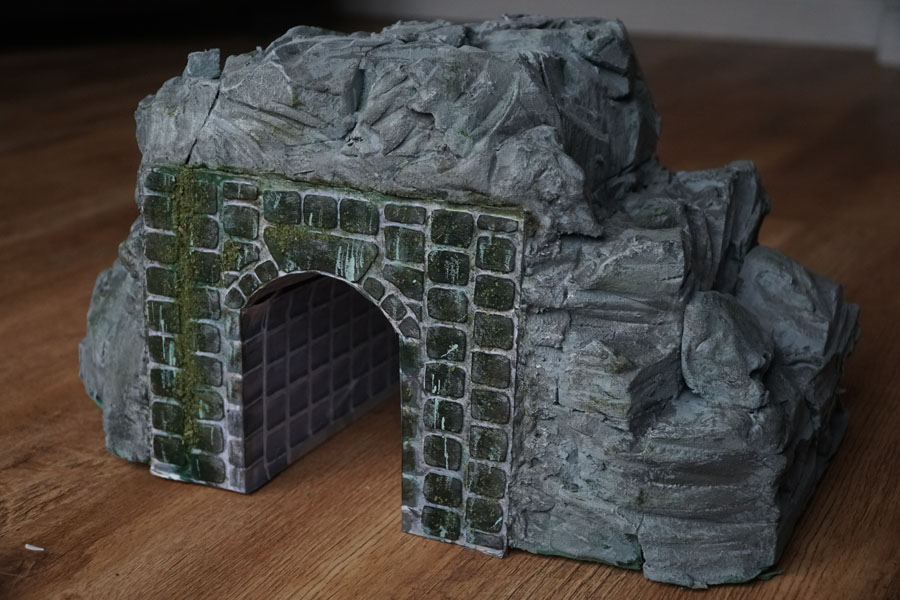
Now for a really fun part – carving the mountain. Loved doing this.
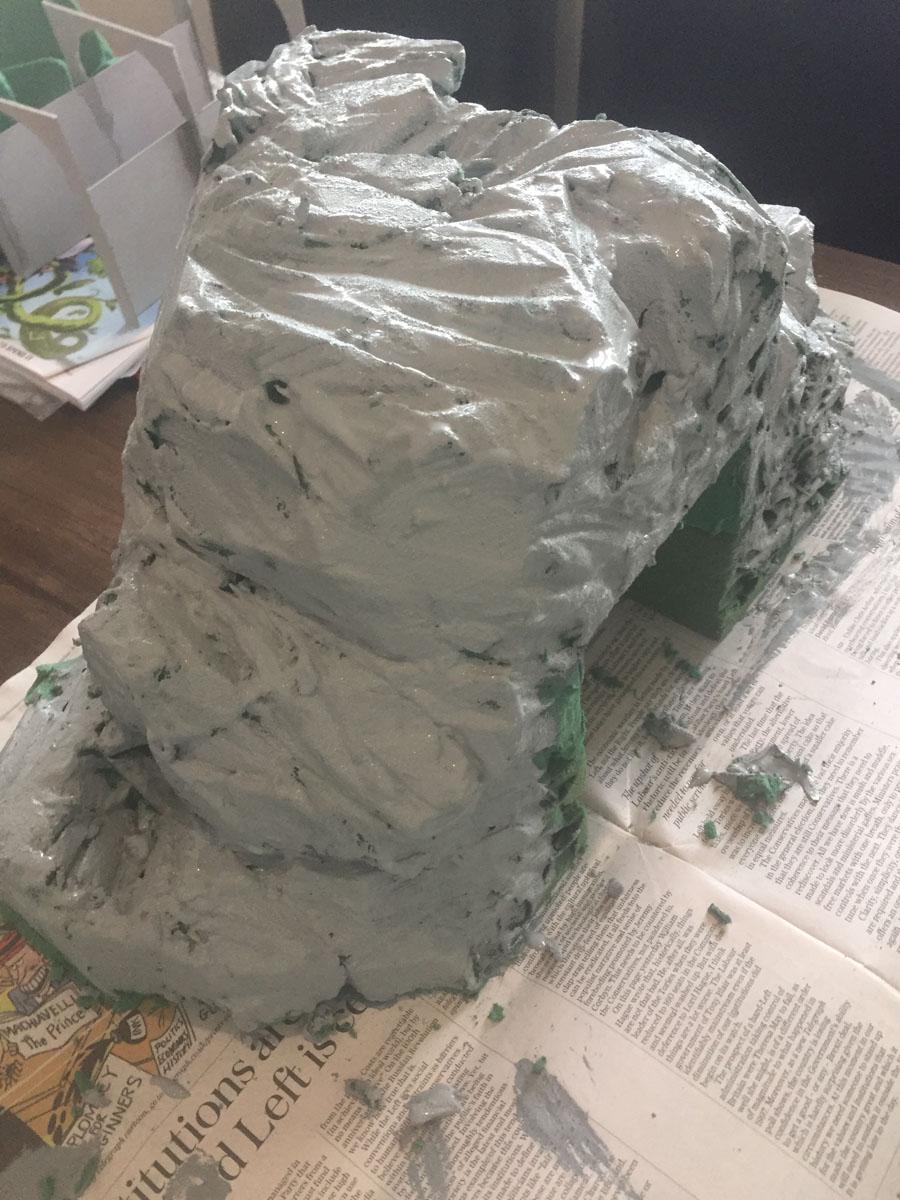
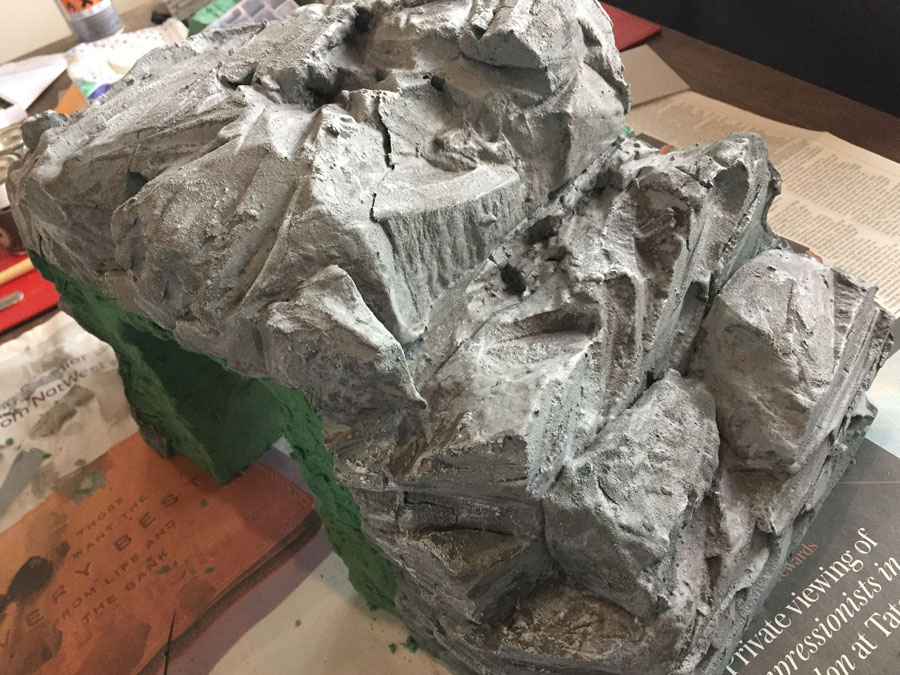
Once you’ve carved it, give it a base layer of grey. Or gray if you’re the otherside of the atlantic.
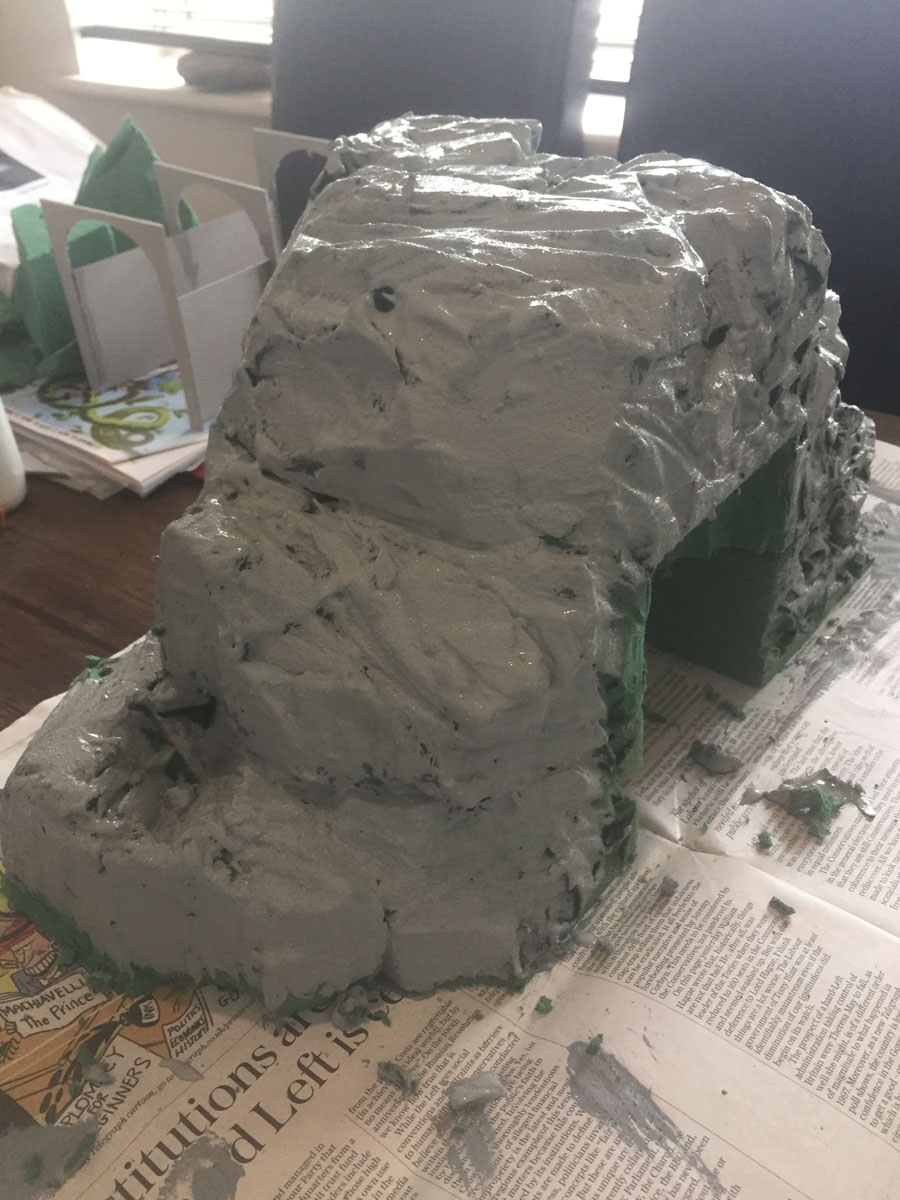
At this stage, I started to get a little worried. The tunnel print still looks very toy like, and so does the mountain.
But I kept on going – I know from the blog all projects hit this stage. Didn’t stop me worrying though.
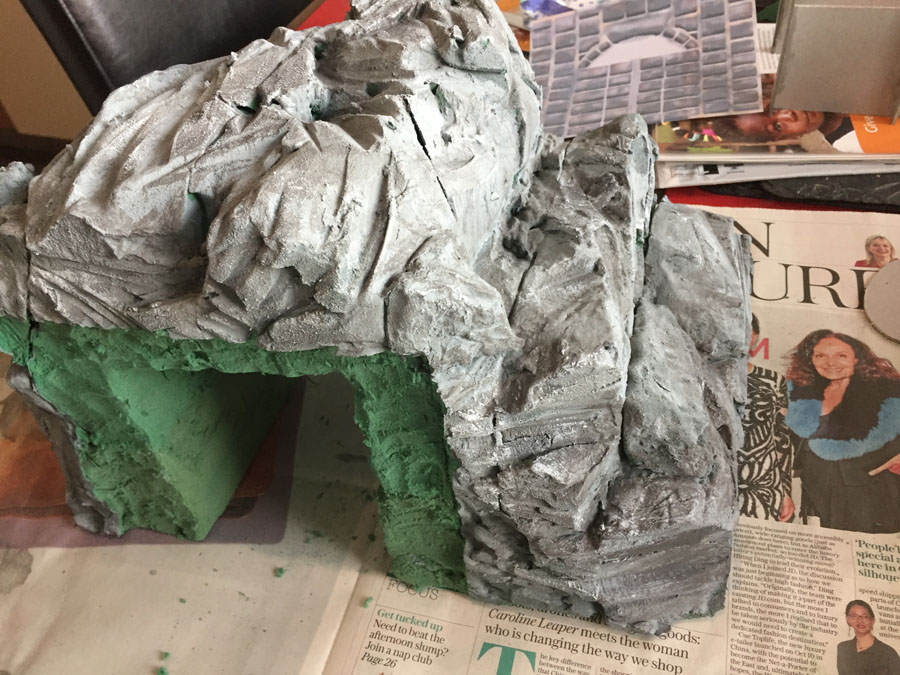
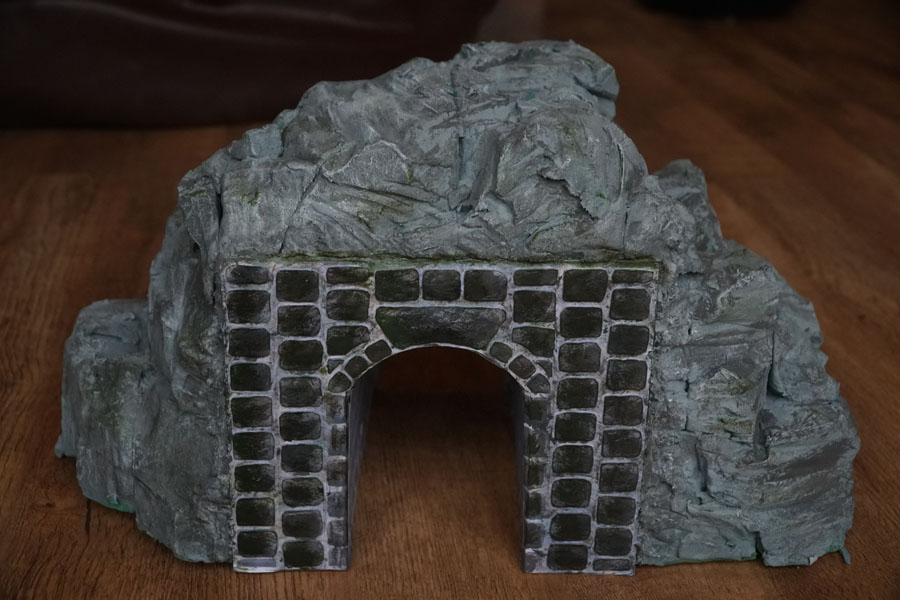
Here’s the exact point where it all starts to come together. I used a very, very dry brush with black on it (well, very, very dark brown) and just took my time dabbing it over the bits of rock that were ‘sunk’ (the opposite to sticking out bits).
I was surprised at just doing this how much better it made the rocks look.
And then when I did exactly the same with a dry white brush (on the bits sticking out) it transformed it.
In fact, I was really pleased with it.
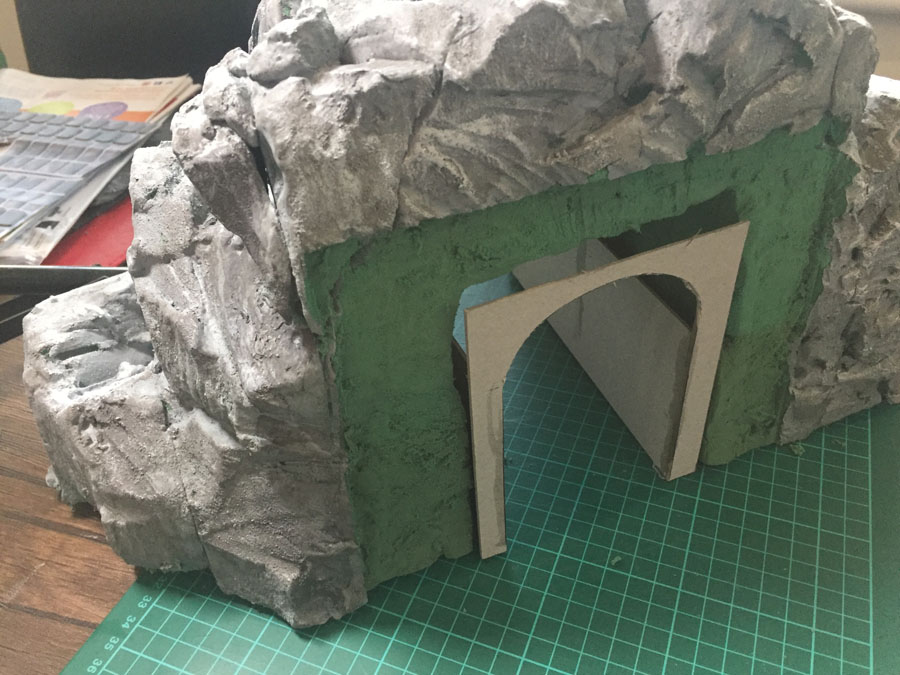
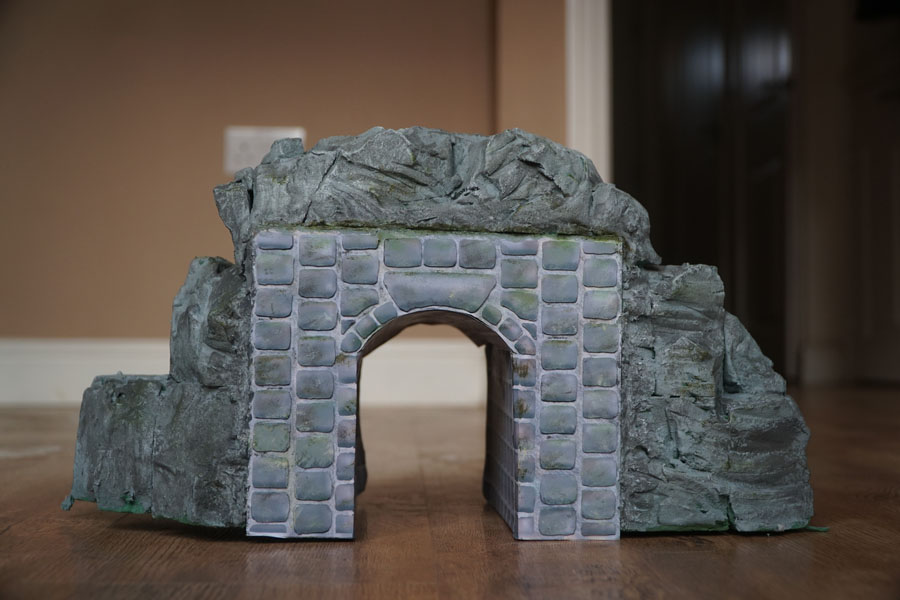
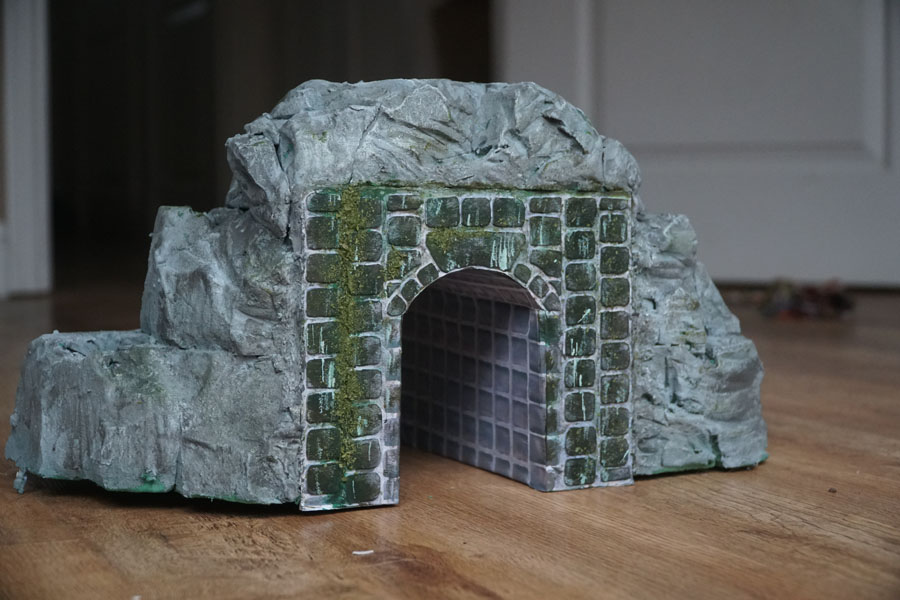
Now to get the tunnel print in place.
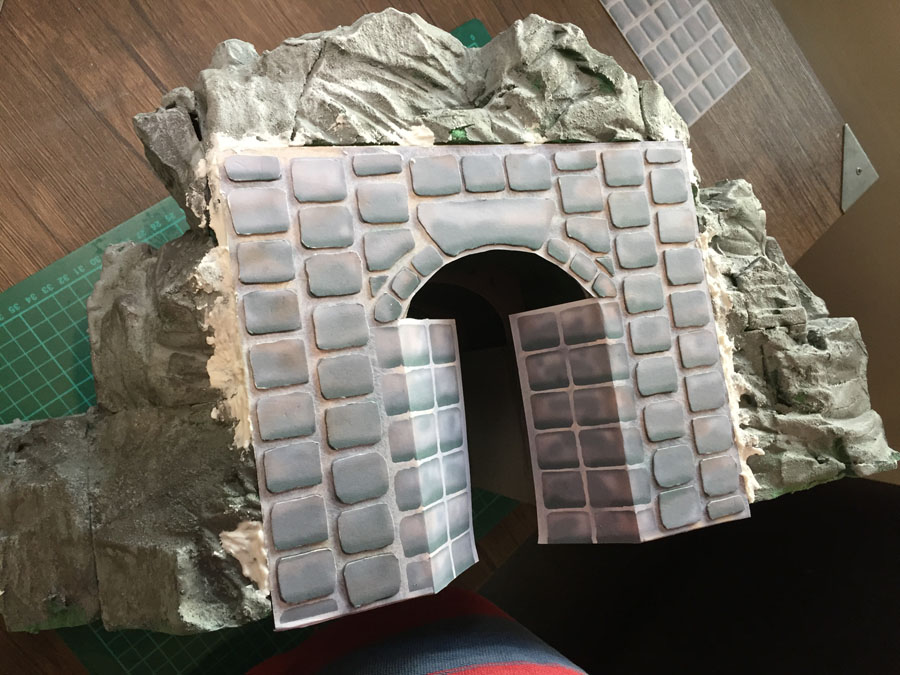
I stuck the print to the card frame and used a DIY filler for the gaps at the side
Here I’ve painted the filler.
I used exactly the same technique with the black and white paint.
I also added more glue to secure the tunnel print – I really didn’t want any ‘wobble’.
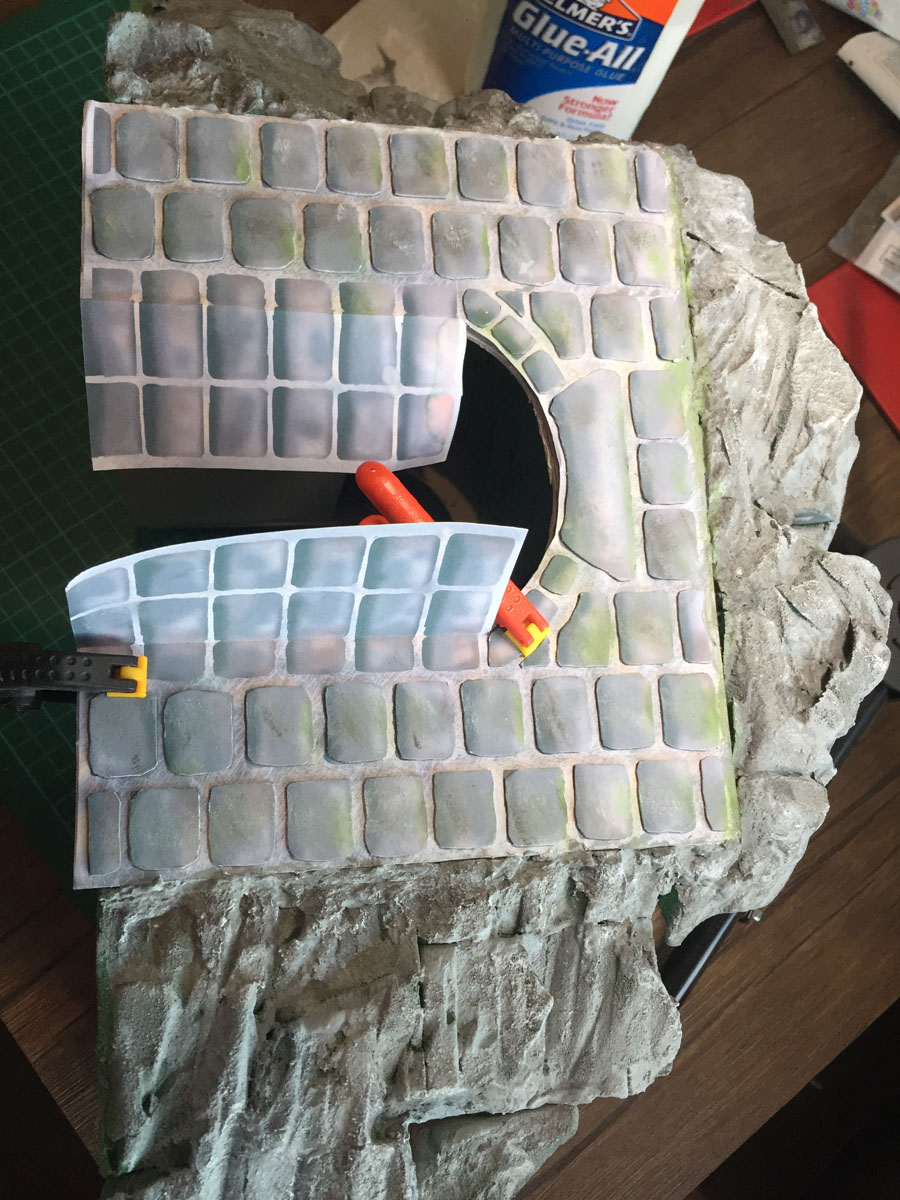
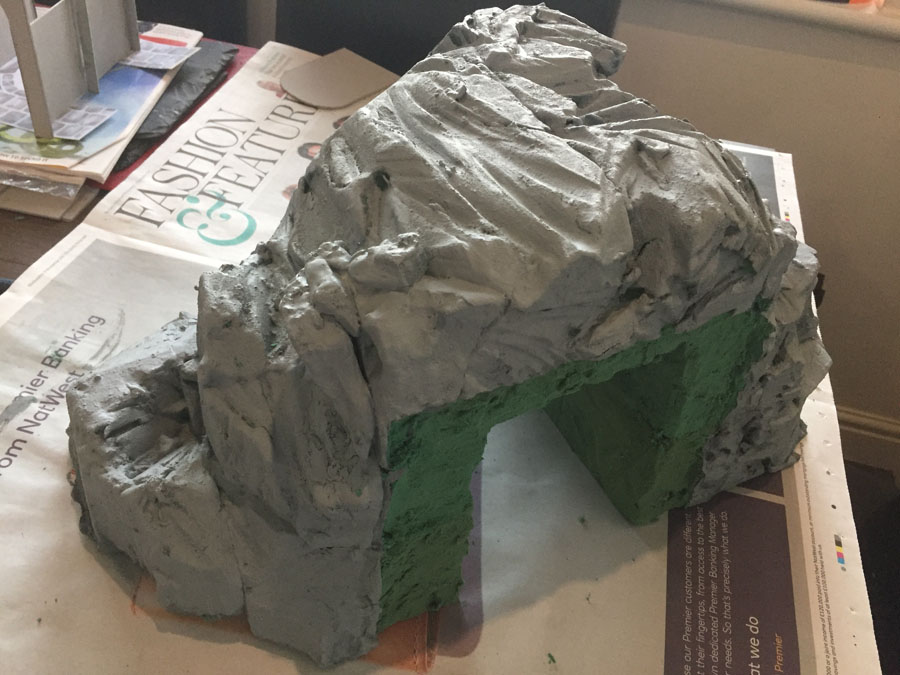
Now for the part I like most – the weathering. Again, using a very dry brush, I began to add green.
I also used a dark grey to pad out the stones.
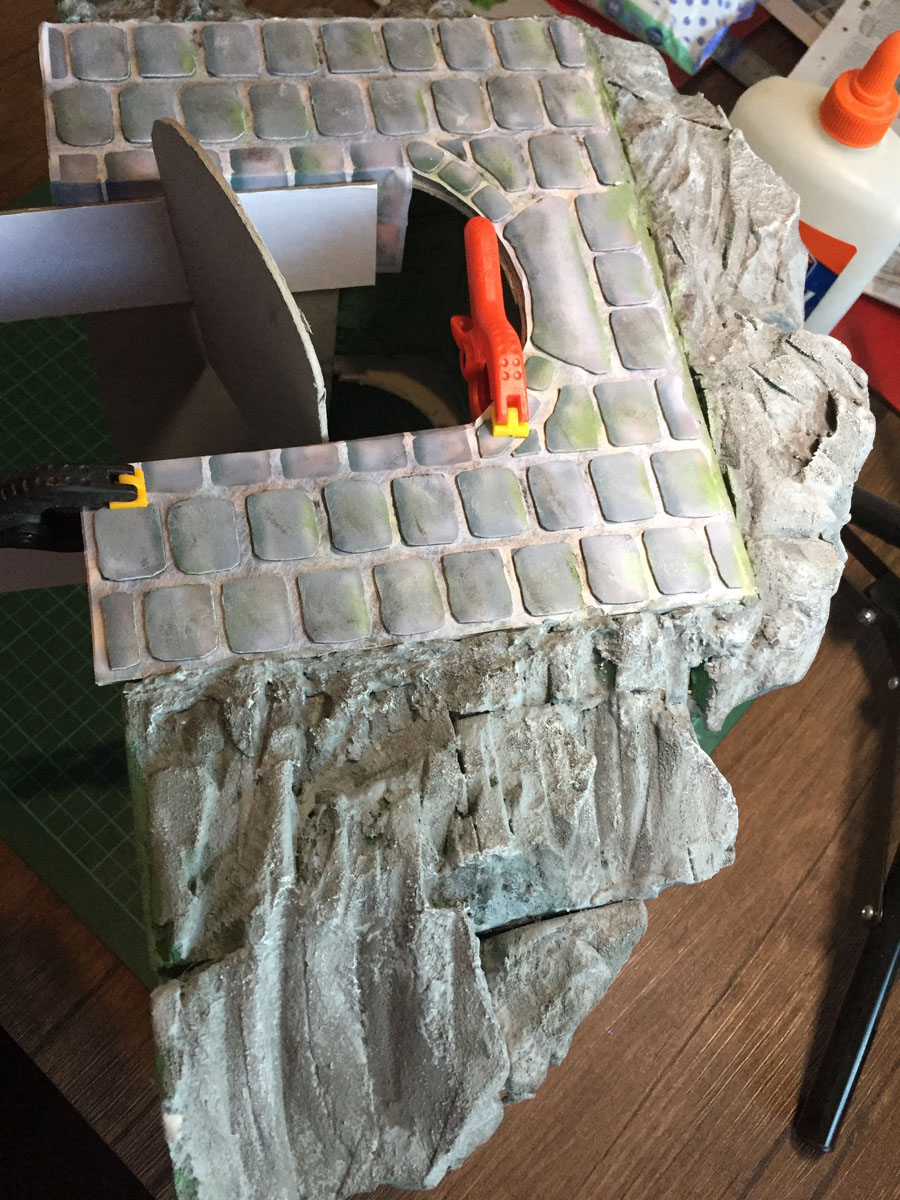
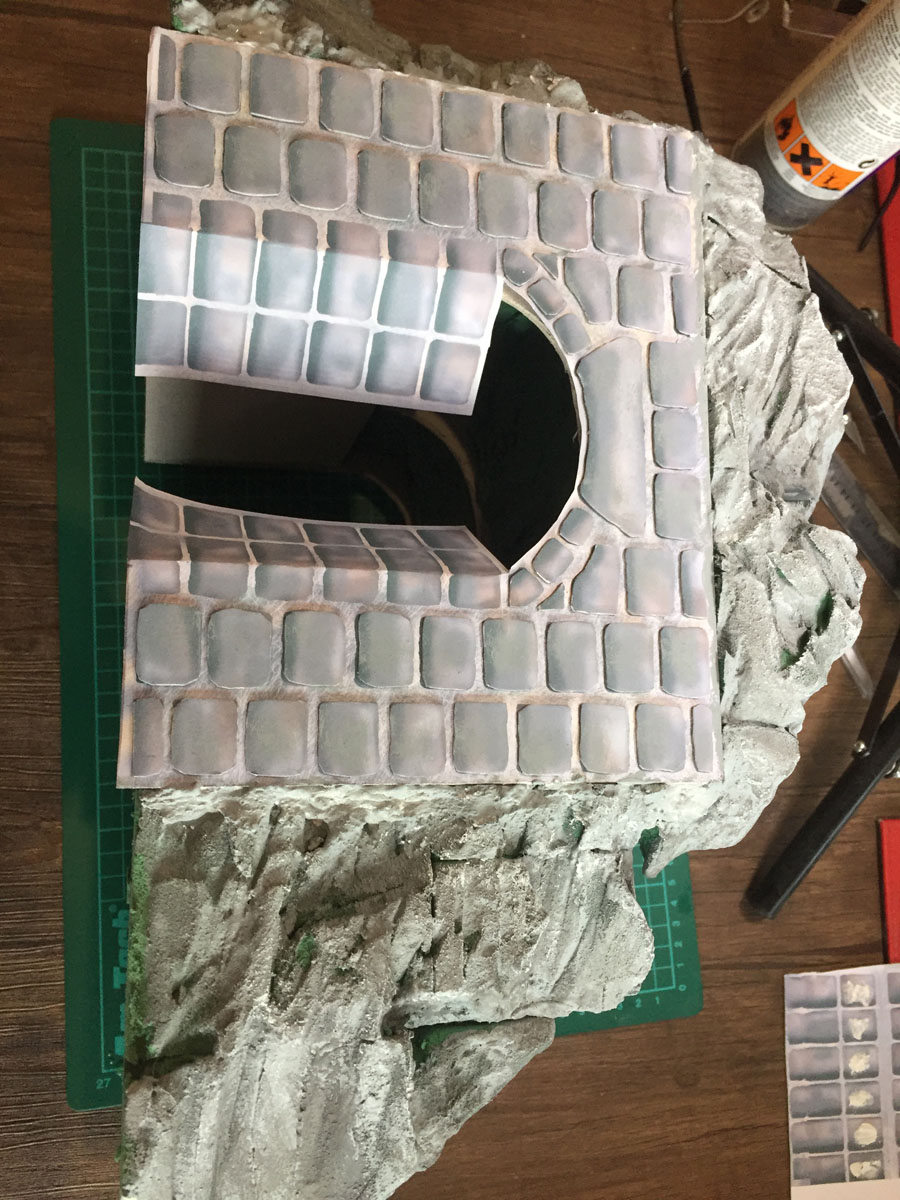
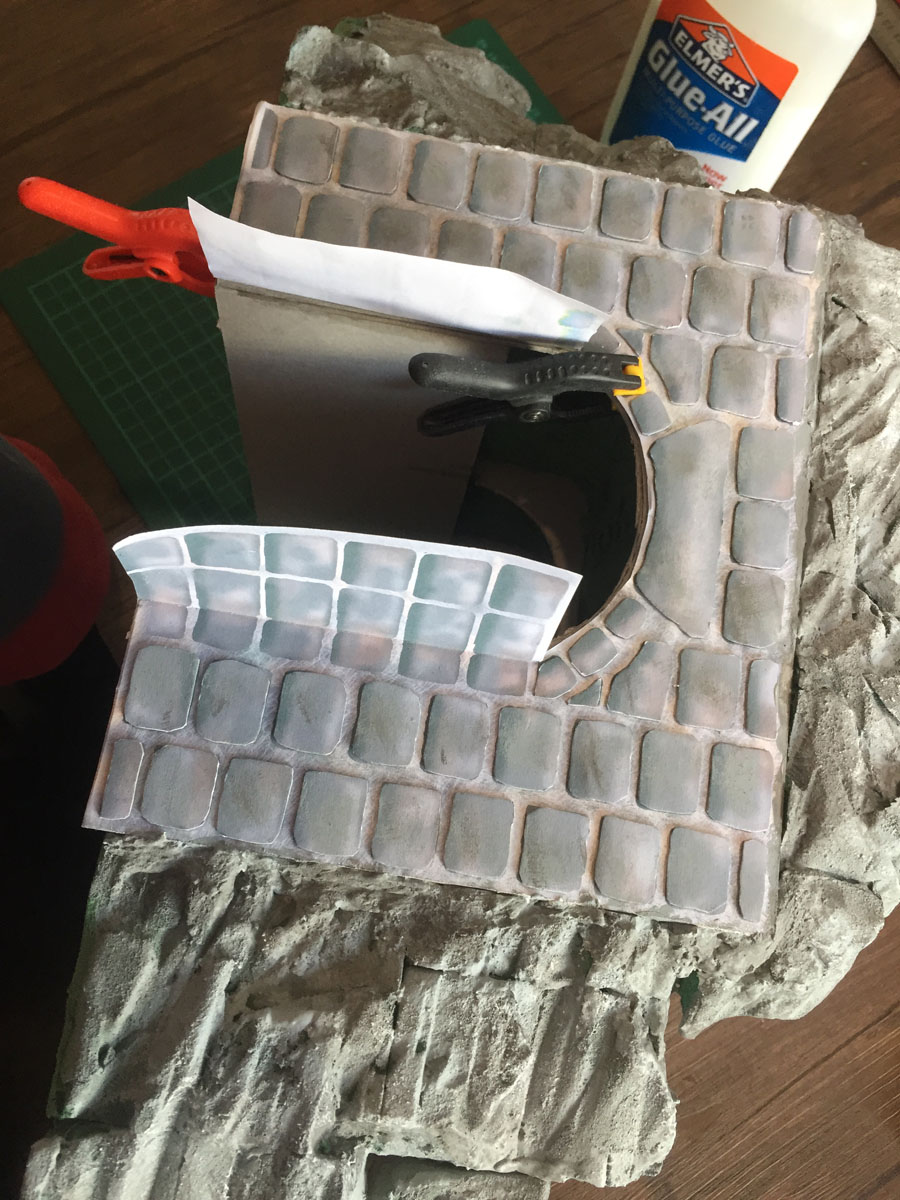
Here I’m gluing the tunnel flap to the tunnel wall. Using cardboard wedges to make sure it’s flat.
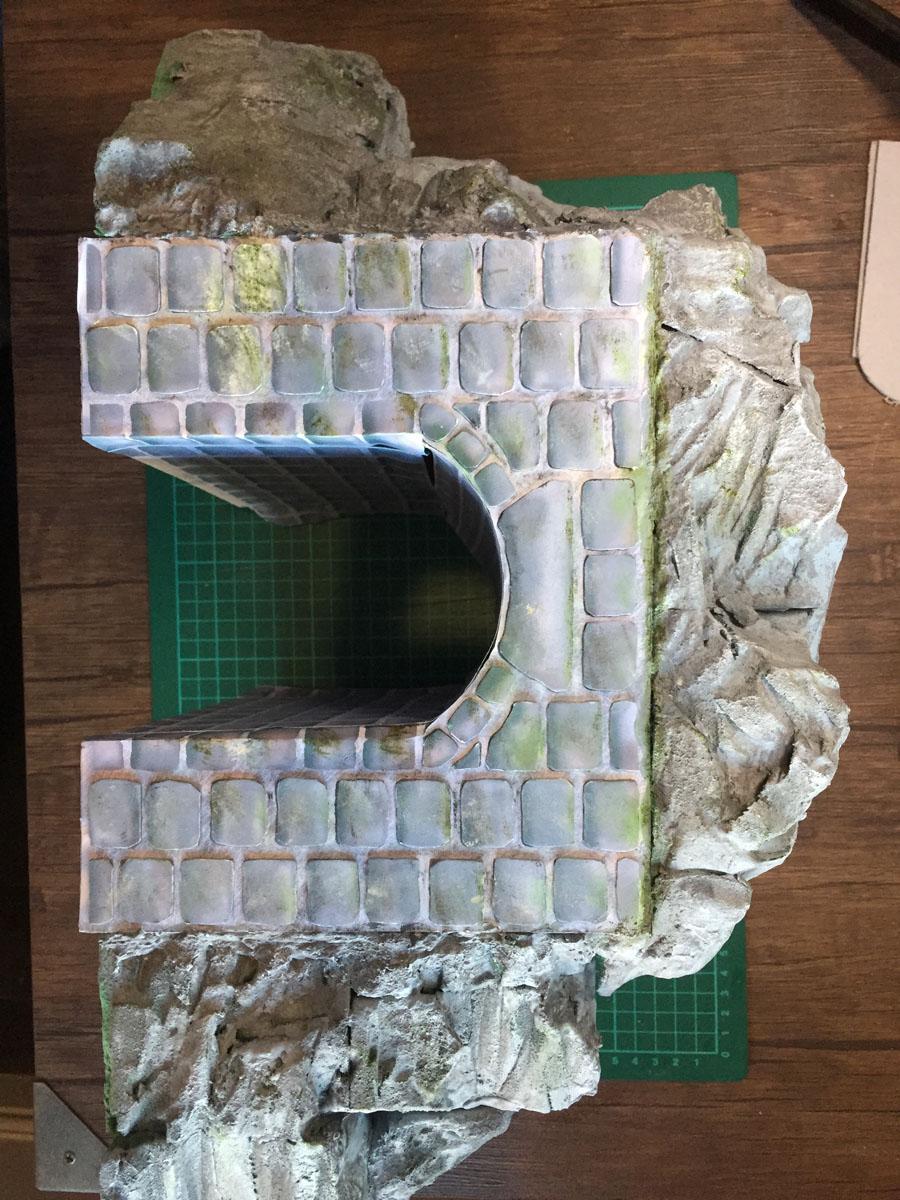
More weathering with the green.
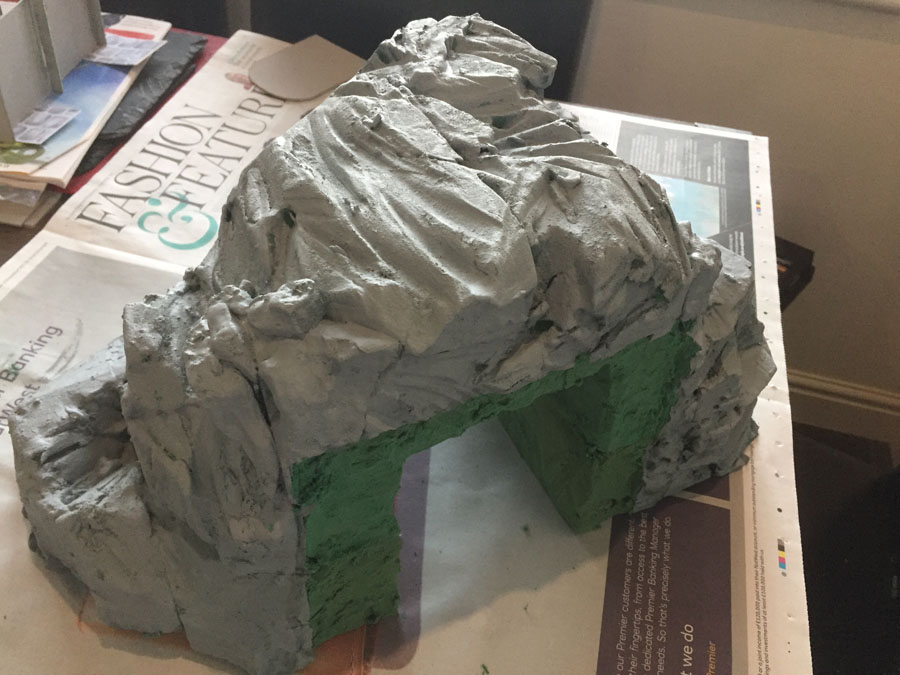
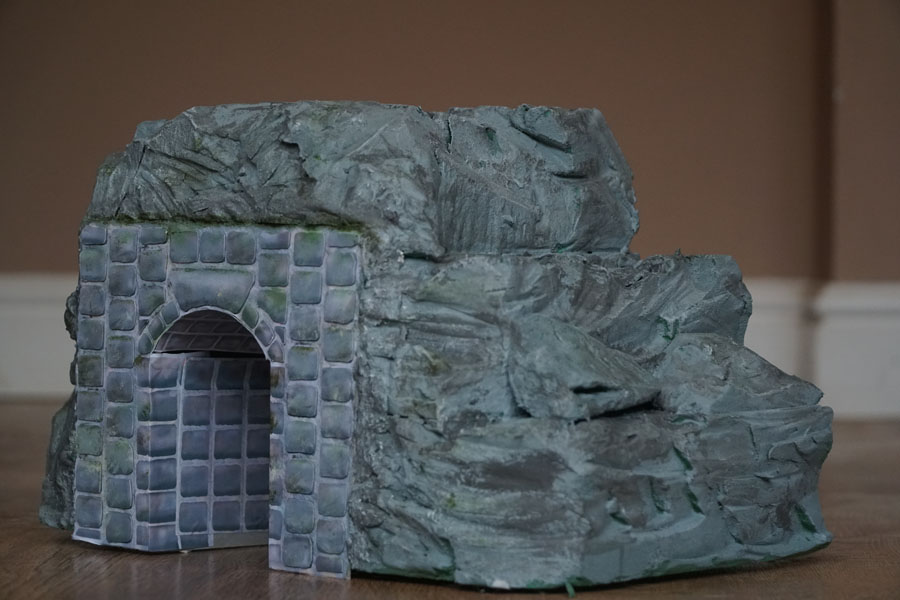
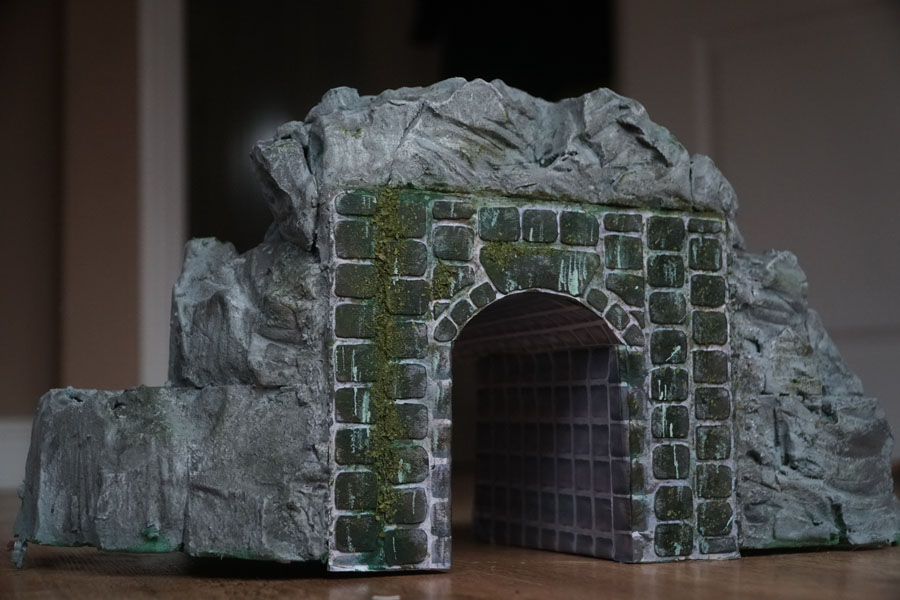
At this point, it looks pretty much done, so I thought I’d photo it.
This was me just being cautious though, I wanted to weather it a lot more. But I thought if it all goes wrong, I still have this pic.
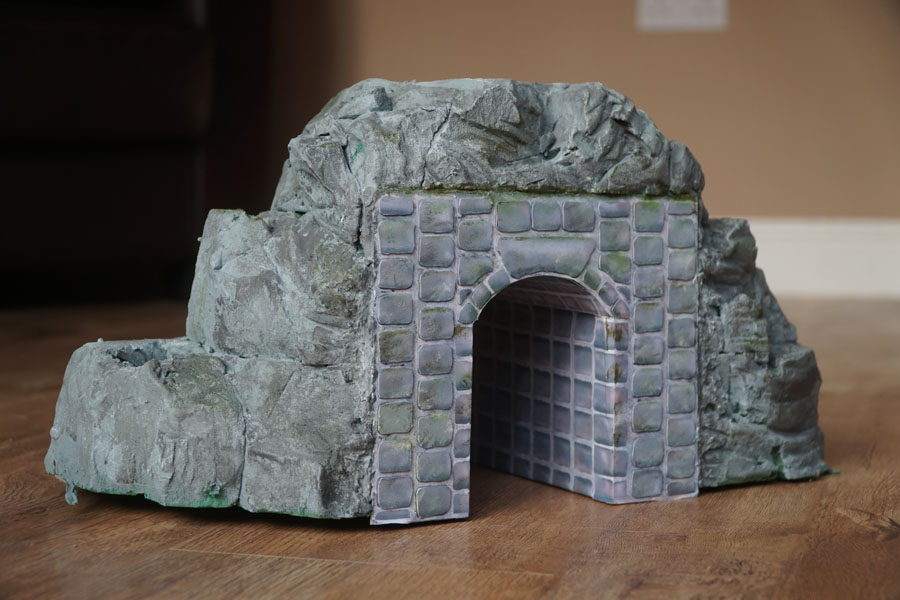
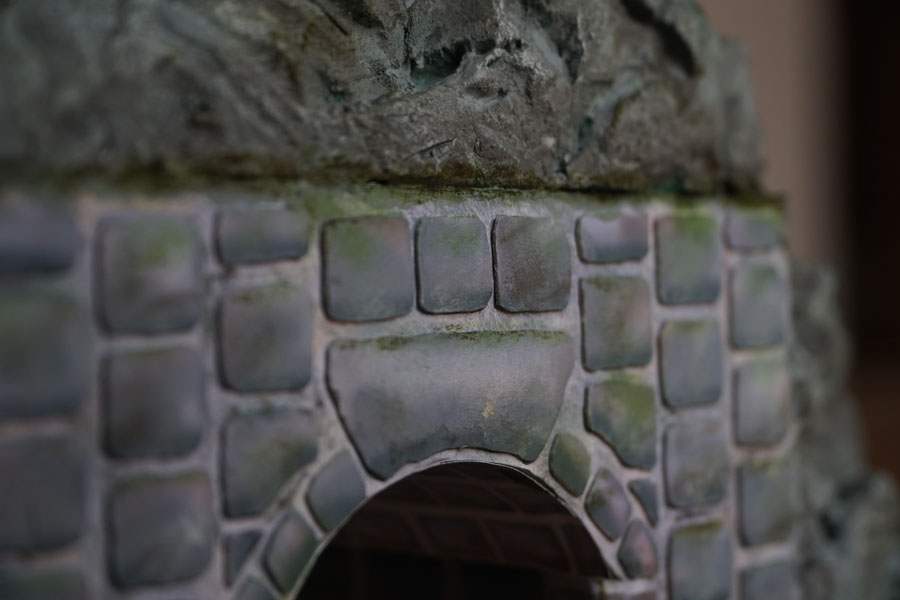
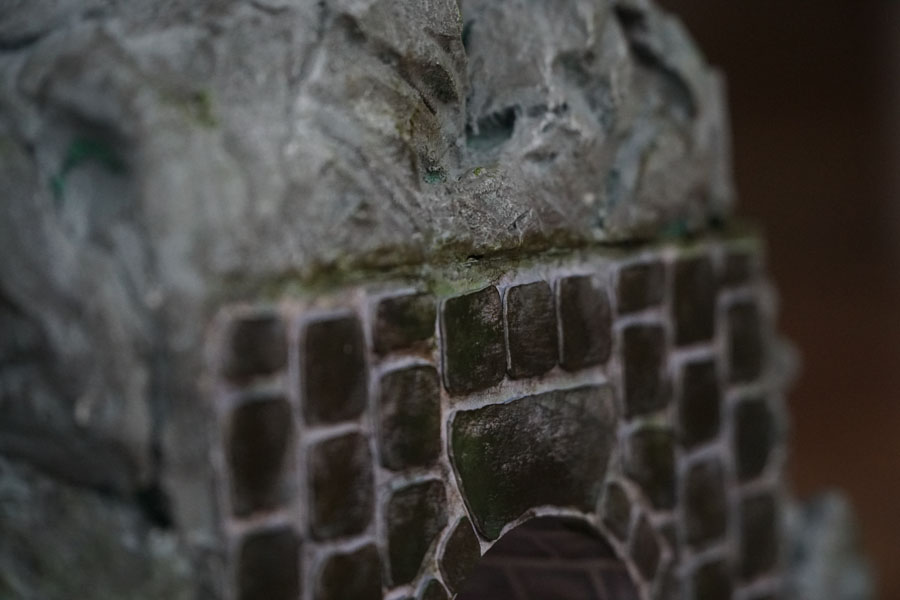
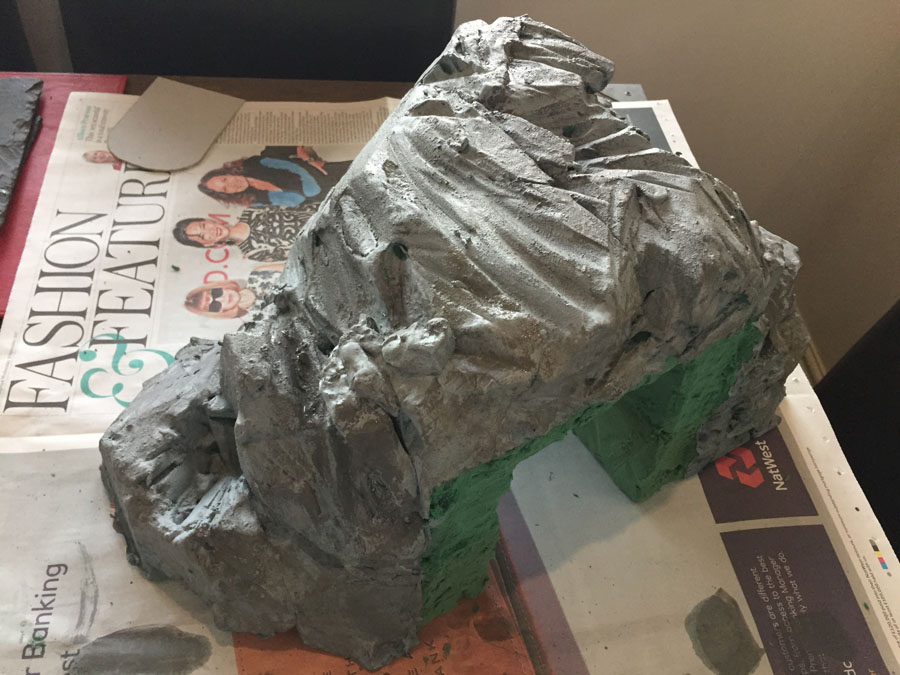
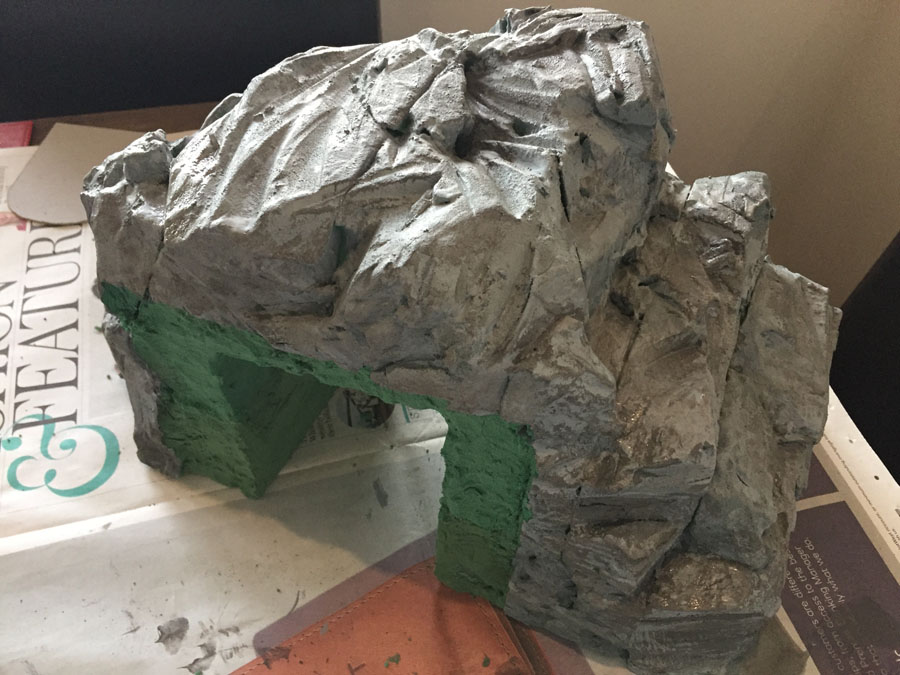
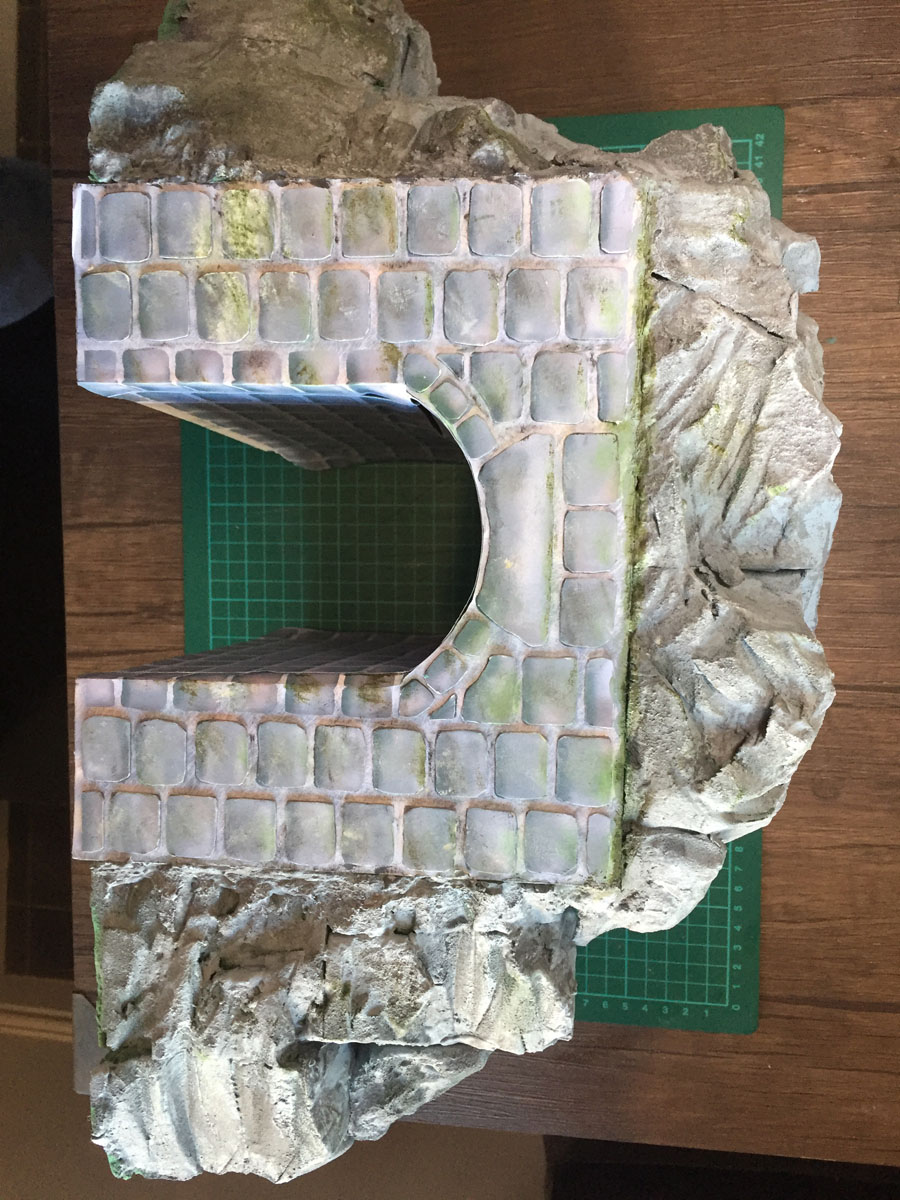
Now I get really busy and make the stones a lot darker.
Again, just different shades of dark grey applied with a very dry brush.

Now a quick word on scale. Al’s made these prints big as it’s easier to scale down than enlarge. Have a look below at just how big.

Here’s an OO loco. So you can see, in a proper scene I’d either chop the bottom 4 stones off when making the tunnel, or print it out smaller (Al say’s he going to do a ‘how to’ on doing that).
I really wanted to make another one that was smaller and a different colour, but Al was in a bit of a hurry, so I hope what I’ve done is helpful to some.
I can’t tell you how much fun it was to make this tunnel.
I think the options are limitless if you treat the tunnel print as a base coat. It would have been just as easy to make a light brown rocky tunnel – just get stuck in with the paints and enjoy yourself. I did.
Thank you Al for letting me try it out.
Mike”


