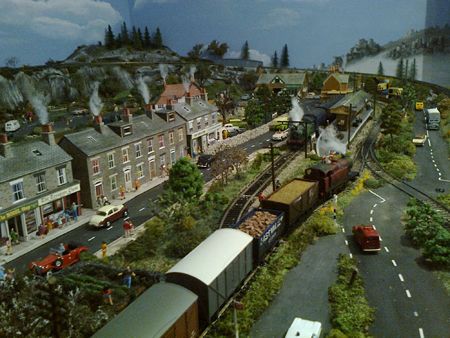
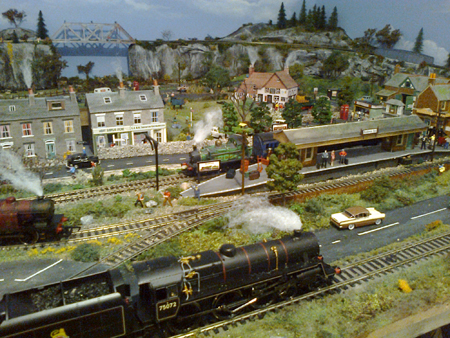
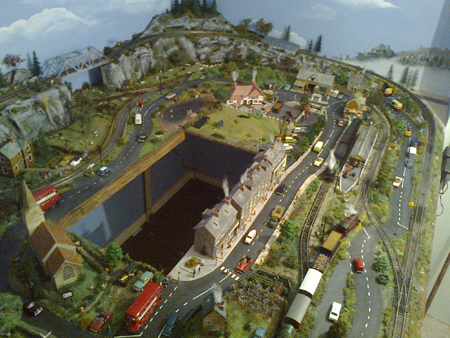
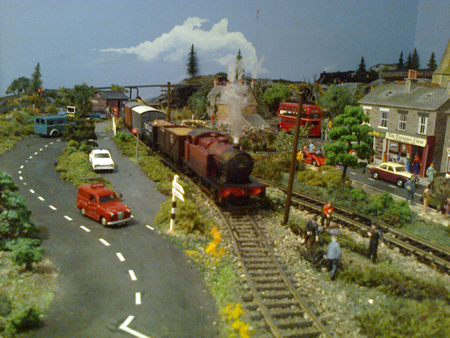
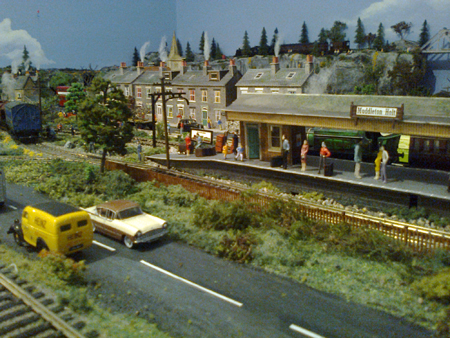
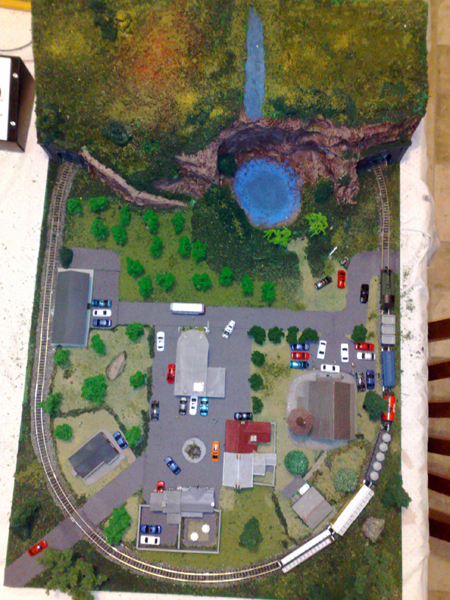
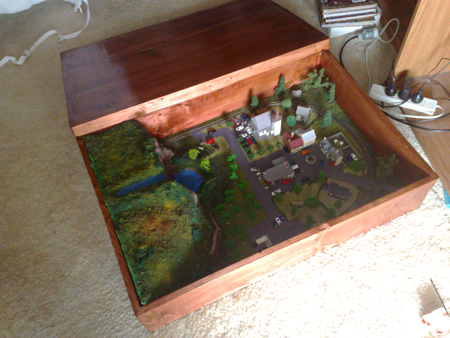
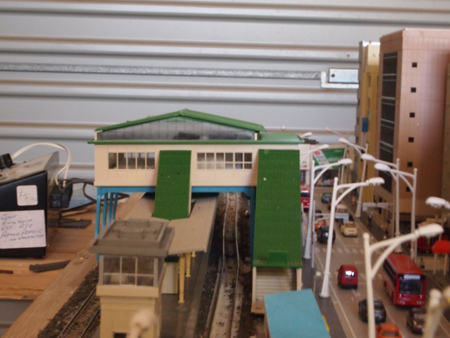
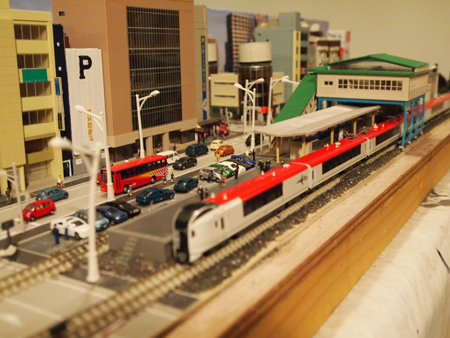
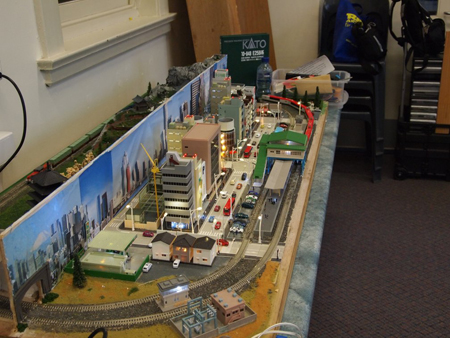
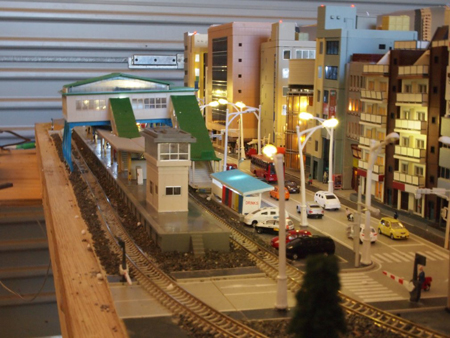
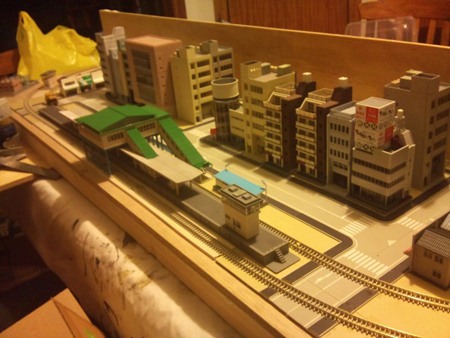
“Hi Alistair. More pics of the station area which is coming on now.
Still a lot of touching up to do, and always something else that needs doing; as you know it’s never really completed.
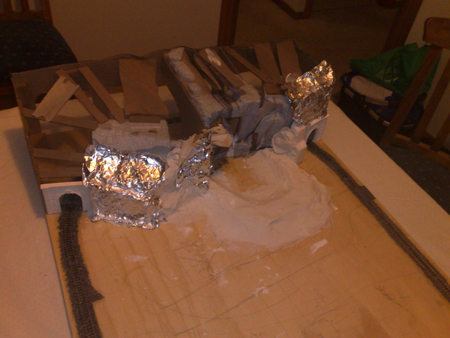
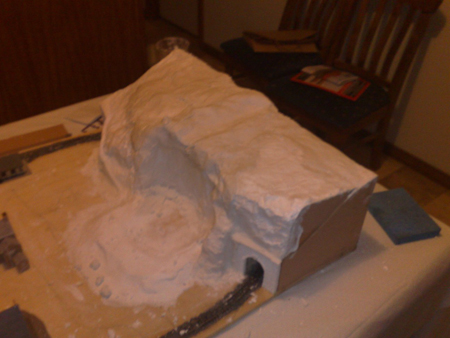
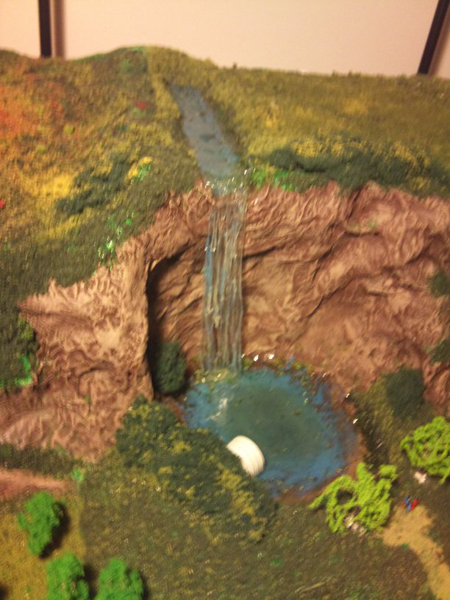
I have decided to make a small lake area in the middle of the model which can be lifted out and replaced whenever I need to get into the centre.
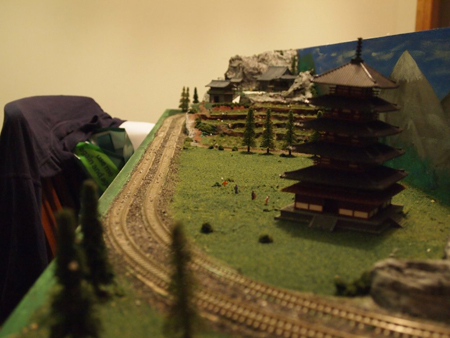
I have made some mistakes on this build, ie the climb for the train on the outside track is too steep for it to run without working the control, I have to speed it up on the incline and slow it down on the descend; however my next one will be bigger and better I hope, cos I have really got the bug now, this has certainly been a fantastic hobby.
A big thank you to everyone for sending in their tips, photo’s, videos and how to’s. There have been some fantastic ideas, will keep sending in new things.
Cheers
Stuart”
“Hi Alastair,
Here is a contribution for you.
I am an N scale modeller from Australia
I have several small layouts that I show at our local rail shows every year. Currently I have completed a Small Coffee Table layout that is modeled vaguely on Germany/Europe.
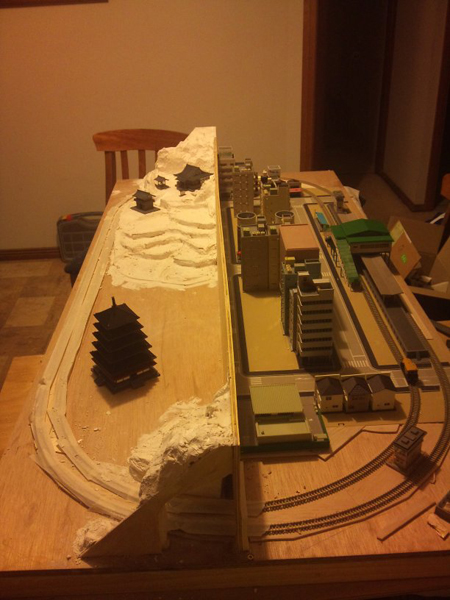
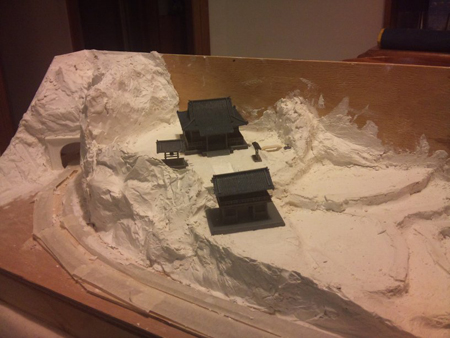
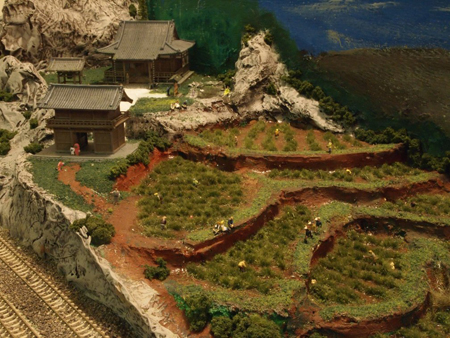
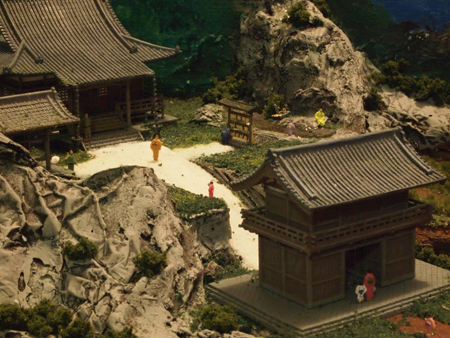
My other completed layout (as much as any layout is ever “completed”) is a two sided Japanese layout, with one side being urban the other rural. I found this a great way to have more detail in a small space.
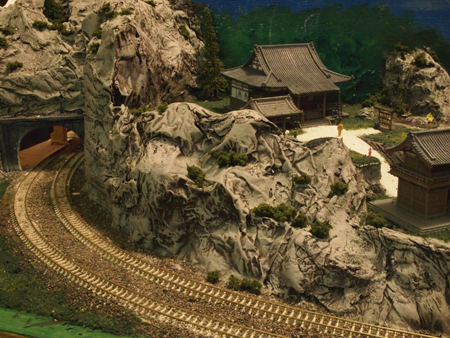
Mountains – I have a tip and trick for your readers. How I do mountains.
When doing mountains I do some things slightly different.
As usual I create my frame work using polystyrene foam, bits of cardboard or whatever is lying around. I then cover this in plastic fly wire (mesh) that I get by the roll from my local hardware store, securing it with tacks or a staple gun. To create my realistic mountain shapes, I use the following tools
• Plaster of Paris
• Cement render Tints
• Tin Foil (usually one foot squares (30cm by 30cm) folded into quarters. (15cm x 15cm)
• Wet Water (water with a couple of drops of dish detergent)
Once I have a good idea of the sorts of formations I want, I create as much as possible with the under frame to avoid unnecessary weight. (my layouts travel a lot)
I then mix up my plaster in small batches, usually three or four large tablespoons of plaster and one large teaspoon of Tint. These tints are available from your local hardware store and are used to shade the cement renders used in housing and concreting.
I use a chocolate brown for earth tones, and a terracotta for my Australian red desert scenes. I used a grey tint on the Japanese layout.
These tints make undercoats more effective, but also, if the layout is chipped and damaged, then in stead of a white showing through, I get an earth tone, which looks less obvious and more realistic.
Also, varying the amount of tint you use changes the shade of your plaster, which can create an effect all its own.
Once I have the Plaster/Tint mix at the right consistency I then spray the tin foil with the Wet Water.
I then place the plaster on the foil and place that, foil up plaster down on my framework. I then shape the foil to the contours I want, or leave the natural crinkle in the foil to generate a random pattern. (usually a little of both).
A batch of that size will allow for 2 or three patches at a time, so have that much foil ready.
It is important to note to do these patches away from each other, so as to not foul the foil. I usually work from each end and in the middle.
I then wait about 5 minutes for the plaster to set (once it is warm) and then gently peel the foil off, revealing a contoured area.
I then repeat with another batch in more small patches next to the ones I have created.
The foil can be pushed to follow the shape of the last patch, so each section is seemed with the last.
Also, Start at the bottom and work up.
Painting – To paint my mountains. I use a dark base coat, much darker than I want to end up with. I also have three shades of the colour I want, including two lighter than I want.
For example on my Japanese layout I used:
• Burnt umber undercoat (almost black grey)
• Grey (rock colour)
• Nimbus Grey (highlights)
• White. (highlights)
I start with a dark undercoat, usually watering it down so it soaks in all the little cracks, holes and crevasses the foil has created.
Once that is dry i use a technique called Dry Brushing to add the primary rock colour.
Dry brushing is a technique by which you place a little amount of paint on the brush, rubbing the brush on the palate to remove most of the paint leaving you with an almost “Dry Brush” and then gently brushing across the surface in quick strokes.
This causes the paint to adhere to the raised areas, but skip over the lower ones.
For my colour coat I tend to still have a fairly “wet Brush” but I make sure it is not running into the cracks.
Then I switch to my first highlight colour and do that with a very dry brush. You may have to work over areas a few times to get the shading you need.
Then I use my second highlight to just add to the very tips of the areas. This is usually a very subtle highlight.
This technique is worth practicing as it creates real dimension in your mountain work.
From there I would decorate with flocking, trees etc.
I hope your readers enjoy.
Grant”
That’s all for this time, folks.
Please do keep ’em coming.
Don’t forget the Beginner’s Guide is here if you want to join in rather just lurk.
Best
Al
PS Latest ebay cheat sheet is here
PPS And a small indulgence if I may – I thought rather than scour Amazon for a good book I’d ask you kind folk.
Any suggestions for a good novel (or any good read)? Doesn’t have to be train related – but would help…
(Just hit reply to any of my mails and let me know!).




Great looking trees, Shelli. We are always looking for ways to save a few bucks and still have authentic looking scenery. Good job. If you ever get the urge to make a video on this process, it would be very helpful. But, for now, the pix are good. Thanks for sharing.
Now, that is a pretty neat process. I really like the finished product.
I’ve been receiving youe e-mails for perhaps 6 months and find them interesting and stimulating. You end most with printable buildings that when mounted on card board could be used on a layout. The layout I’m planning is O-scale. How do I set my printer to print out facades in O-scale?
Hi Shelli,
Great lookin trees-just another way to make trees that I and a number of my train buddies have been using-we have a flower plant in the states-not sure if all of them,but here in Maryland,western part of the state,a flower called SEEDUM,to start a new plant just cut or break a stem from another planp,punch a hole in the ground and that’s all there is to it,come spring and you will have another plant!!and the best part is to break off the stem after the first frost,let dry and then paint the trunk first-next spray on White Rain hair spray,hand pump type works best,dip in find woodland scenic turf green,spray again with the White Rain and makes a great tree in about 5 minutes or less!
really good pics on tree making, i can never get enough advice
Great effects. Have been using this (these) techniques since 2004 after attending a model railway weekend with Dr Mike Waters in Oxford. Tricky thing is to get scale right for different gauges. I model in OO (HO) and Z.
nice trees Shelli.
Thanks for that fantastic video on making trees, and the music which accompanied it. I was looking at buying trees, but the cost is prohibitive, so this video was timely. Thanks Shelli!
Clive Cussler has a series of books about a detective – Issac Bell set in the early 1900’s. Train travel comes into play In all the books. Try The Chase first
WOW, that is awesome. Wish I had seen this before purchasing all the trees on E-Bay for my very large HO scale. And to think, I have everything in my shop to make them. Great job. Austin.
Al,
 by Christian Wolmer … hard cover copy around $20 paperback $13.
In regard to you request for a good book … click here for
The Great Railroad Revolution … The Hisotry of Trains in America.
Well written book starts from first railroad Baltimore and Ohio in the 1830’s to the expanion through the growth of the nation to about 200,000 miles of railroad interlaised around the USA how the railroads were very vital in the growth of our country up through the late 1970’s when automobiles, truck helped to dcrease the need for major rail … passenger and freight service.
I think you will find it interesting reading … rolled up in historical overtones.
Thanks Al for your site!
Regards,
Tom N
Selli I can see a forest for the trees. I have a couple of brooms I was going to through away. Forget that!
Nice trees, well done. Thanks for the info.
Thanks Al for sharing!
Regards,
Tom N
YOU HAVE SOME GOOD IDEAS.
Nice trees. I find that I can use bunches of cinnamon branches from the dollar store which I then use to follow a similar process. Thanks for reinforcing what I am working on. I don’t feel so alone. Keep up the work and can’t wait to see more.
great pics am just starting to add scernery to my layout this is a great help thank you.
Very nicely done, Shelli. Using cast-off materials to make such unique and interesting trees is a terrific idea. Thanks for sharing it!
you want to read a good book. Try “ALL HANDS DOWN”, it is about the sinking of the USS Scorpion, a nukie boat(sub). The reason I bought it when first out, I was in a round about way involved in this fiasco. I was assigned to the USS ORION AS 18 from September 1967 until March 1969, my active duty days. I was a 2nd. Class Boatswain Mate/Gunners Mate ( I jokingly refer to myself as the only BMGM in the Navy). I was assigned to the Armory aboard the Orion, or as we called her “pier 18 or the USS never sails. She was stationed in Norfolk,Va., my hometown. For another one if you have never seen Kalmbachs’ Building the N Scaled Clinchfield RR, it my be hard to get as there are no copies and Kalmbach no longer has the “dies” to make any more.
For a mass of good reading I recommend the novels of Lee Childs. About 20 of them featuring the same character “Jack Reacher” . Reacher is an ex US military police Major who spends his time just wandering around America. He has a talent for finding trouble and of fixing it. Fast moving stuff and difficult to put down.. once you get hooked, you will want to read them all
Nice job on the trees. Great tunes to go with it. Thanks AL and Shelli!
Forgot all about Cussler’s Isaac Brown series…and i read a great one about some ruthless folks building a railroad !
This series is interesting, fast-paced, and difficult to put down once you’ve started.
I think you will enjoy!
Dave, in NY
Shelling, very nicely done. I liked the greenege to go along with your lay out. Like the music to go along with it. Who is the artist music by? I was digging it. You have to have some good music when you are building. Al, thanks for everything that you are putting into this, without you I don’t know how far I would be. All the comments that everyone and the little details mean a lot to me and other folks out there here in the U.S.A and across the big fish pond where yall are at.
Thank you, S.D.G.
I’ve watched a lot of these videos never left a message but watching creativity of making those trees from scratch was pretty amazing
You can’t go wrong with anything Lee Child writes. David BaldaccI would be a close second. Also, John Grisham writes great legal-themed stories.
Grisham is a great choice, as is any Ken Follett. If you have any interest in flying, “Fate is the Hunter” by Ernest Gann is a real classic. Great job on the trees!
Very nice choice in music. Brought back memories. I’m going to give these trees a try!
Railway Book? How about “The Signalman” by Charles Dickens. Was also made into a (very good) short film. I wonder if you can get it on YouTube?
Great job Shelli on the trees video! Looks like an easy way to get some great looking foliage for your layout. I think I would have used more than one shade of green grass to dust the trees into slightly different shades of green for more variety. Other than that, I like the results.
Oh, and the song “What Condition My Condition Was In” by Kenny Rogers and the First Edition from the 1970’s was a perfect accompaniment for the video.
How do I send photos to this address? I haven’t played with an electric train for over 60 years I started a small railroad with my 3 year old great grandson he is totally fascinated with my old steam engine ( HO gauge) so we decided to build a lumber camp with sawmill, cabin’s made from logs,crane etc. looks pretty good for an old man and a young child, no matter what he loves his train and houses as he calls everything. I thought it might give some of your readers ideas it’s all pretty much home made from stuff around my house dried lieves, broom straw cardboard and writing paper, the only things I bought was a few .89 cents wood dowels, some paint, and green paper for the grass all told including what I paid for the train and a few accessories years ago at present I have about $40 in the whole train set buildings and train.
I watched the video and I would agree it’s totally worth the few minutes to watch.
There is no real shortcut to making nice trees. Anything using sticks requires drilling holes or wrapping wires. Using wire requires twisting and wrapping, forming branches and then the application or glues, paints and materials such as furnace filter medium or ground foam to create your foliage.
Each tree needs to be crafted and shaped or sculpted and then made to look “fluffy” and life-like.
And the last way that comes to mind is to use clay and wire (“Ho Railroad That Grows” By Linn Westcott) and sculpt your tree and then add something as leaves. But since that time we have newer products and new ideas, so any of these methods can be combined.
I also like the last tree making tutorial with the gnarly looking wire. We need different methods as modelers to find that which works for our skills and budgets, not to mention variety of techniques and materials allows us to create different types of trees, bushes and grass for a more interesting and realistic looking layout.
Frank in Orlando
I am posting a separate comment for Grant.
The split or two-sided layout is new to me. I have never seen that done or even suggested before. I also liked you explanation of how you create your mountains and hills. You choose to use simple methods. I like the tinting idea and how the foil “pads” you make allow seamless integration of the areas you work on.
I do feel inspired by your small layouts. I have seen small layouts with more track, but when you stated you have several layouts, it made me think that’s a great option for those of us with little room and multiple scales or sets and would at least like to show them off and see them rolling rather than sitting in boxes or containers.
Frank in Orlando
Personally, I prefer using static grass with applicator for pine needles rather than turf, never seen a pine tree with fluffy foliage. Use short grass for short needle pines or small scales, long grass for long needle pines or larger scales. Be sure to mix a couple colors of grass together. Mix in more lighter colored, yellows and browns with green towards bottom and inside where shaded from sun, darker, brighter greens toward ends of branches and top section. On pines the lower branches also droop down towards the ground and start losing needles until the branch is shed. Lower trunk is pretty bare on older pines. Google tree identification pictures for reference as to the overall shapes of various trees types that grow in the area you are modeling.
A job very well done …
Grant, I like your 2-sided idea where different lands or eras can be experienced as you follow the tracks. I think that I might try it in my (painfully slowly) developing garden railroad, where as a completely different theme will await as The train turns past the next corner of the house.
I need to keep thinking about it, because all of my current ideas involve disaster scenes.
Stuart: you have an awesome-looking model train layout. Keep up the great work!!!
nicely done.
looks great will try doing the water fall in the winter time