Martin sent in this wonderful model train tunnels ‘how-to’. It’s so easy to follow – and look absolutely stunning.
“
“Here’s “My way” of making scenic items to place on model railway layouts. I produce many different models usually which have some form or rock face, but not all are landscaped the same although I do tend to put plenty of grasses & many bushes on my models.:
This project is a single track tunnel entrance designed to fit in the corner of a layout with the track running behind the back scène to a ‘fiddle yard’.:
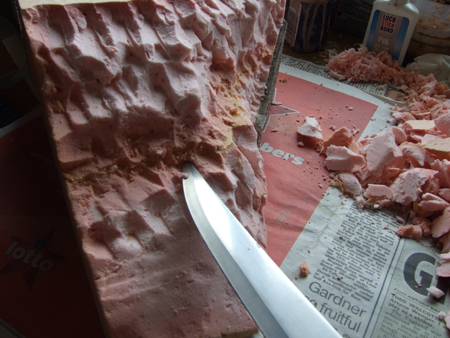
First I use a type of insulation foam which is used to insulate houses, the off cut’s are ideal to make models. (Please excuse my untidy workspace).
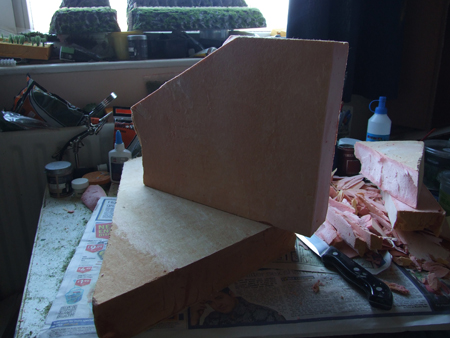
Model train tunnels:
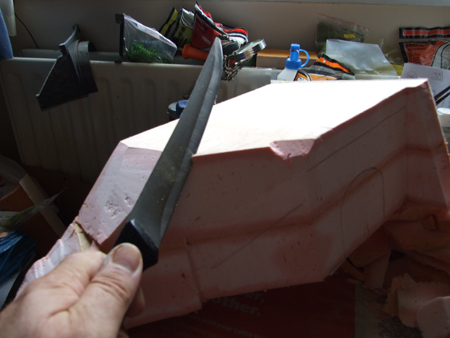
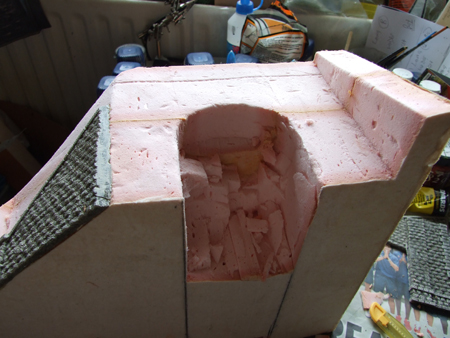
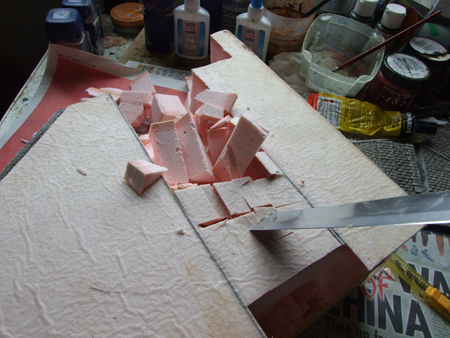
Having obtained a readymade resin portal for the model train tunnels used on this project, I marked out on the foam the tunnel and carefully began to carve the foam.
On many occasions I do not use a portal but carve my own into the foam, this model I decided to paint a resin postal to use.

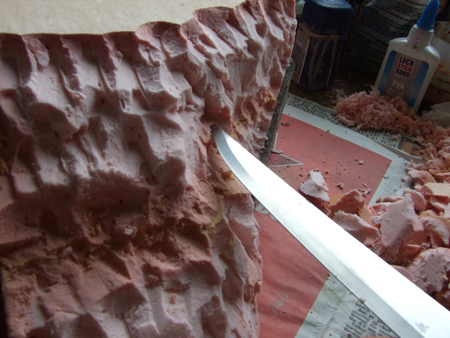
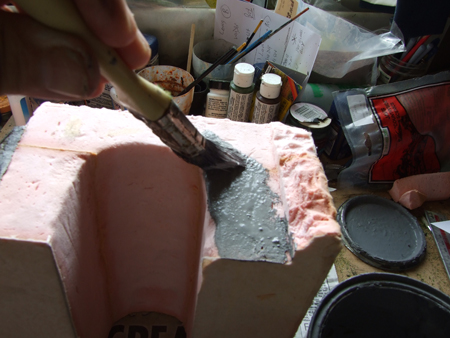
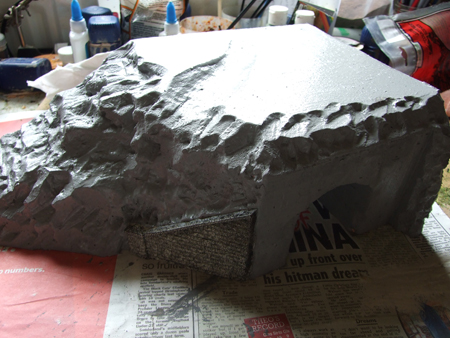
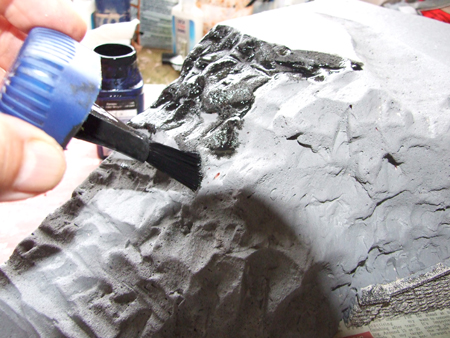
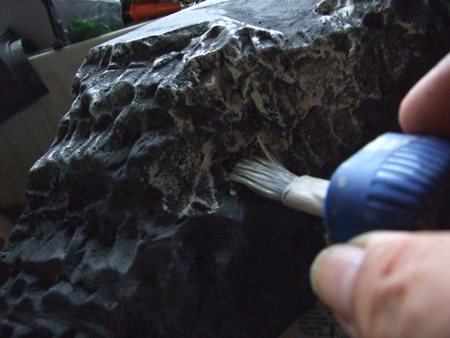

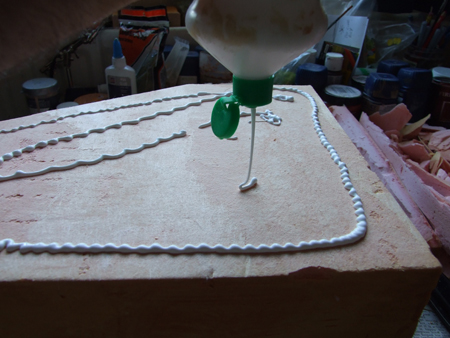
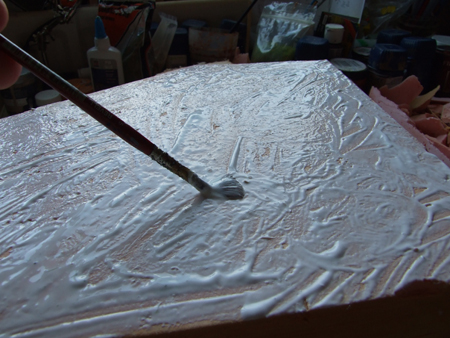
Then I use a light emulsion on an almost dry brush to bring out the highlights on the model train tunnels. The portal can be then glued onto the foam by using a strong contact adhesive bought from the Poundland shop in the town centre. The model is now ready to Start applying the landscaping. This is a matter of taste and I vary my models by the use of a variety of types of grasses & bushes.
Most of my materials are Woodland Scenics, Although I do sometimes use other makes. On this model I have chosen to first apply an olive coloured grass onto the rock embankment.
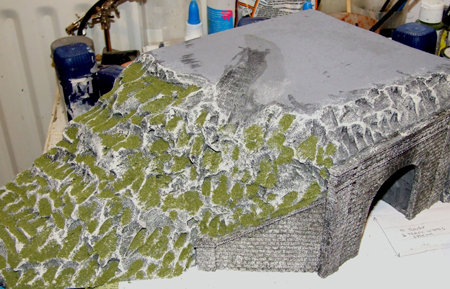
Then I applied a summer ‘Static grass’ by the use of an electric applicator.
With short static grass, the static effect of making the grass stand up is not very effective. But when I use 4.5mm & 6mm grass the effect is very lifelike.

The next job is to apply a variety of bushes onto the odel train tunnels, again by PVA glue.
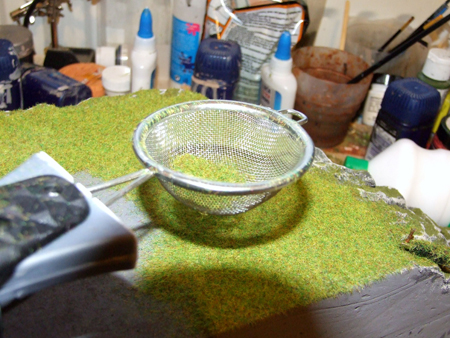
All that is left to do then is to give the model a spray of watered down PVA glue (always remember to run some clear water through the spray when you have finished).
It can set in the nozzle & ruin the spray for future use). I then sprinkled some Woodland scenics coarse turf onto the summer static grass and a little on the rocks.
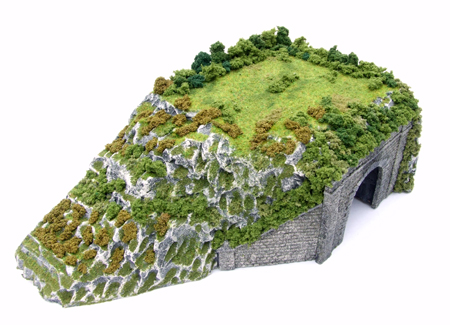
I usually add a row of various bushes along the back edge of the model train tunnels.
That is how I make my models, I hope that it gives you some ideas? Whilst this is drying – Here’s one I made earlier where I carved the portal myself.
Martin”

Incredible work and stunning detail – thanks so much for Martin for sharing his model train tunnels ‘how to’.
There are lots of tunnel step-by-steps on the site, here are some more:
Building model railroad tunnels.
Model railroad tunnel building.
Model railroad tunnel entrance
That’s all for today folks.
Please do keep ’em coming.
And if today is the day you get started on your model trains tunnels on your very own layout, the Beginner’s Guide is here.
Best
Al
PS Latest ebay cheat sheet is here.
PPS More HO scale train layouts here if that’s your thing.


Great job. If it is possible could you email me your photos and steps and what is the name of the glue. Thank you very much
I am Impressed. I Will borrow this Idea. Next time…..
Looks great Martin. What kind of foam did you use? Looks a lot less messy than the insulation boards I’ve been using from Wickes.
Excellent job!
Celotex foam seems to now have a layer of fine mesh inside. Didn’t have that the last time I used it.
The pink foam looks a lot easier to work with so interested to know what and where sourced
Great job Martin, very realistic.
Awesome piece of workmanship son.A tree or two and a kangaroo,would suit any aussie railway layout.
John the aussie bloke
great easy how to i just need to find that type of foam thanks it looks so good.
Really impressive. Brilliant, thanks Martin. I will enthusiastically crib your method.
i wish i had the tim
i wish i had the time to show some technecs to all your followers, im starting a new layout on my loft and i am now at the stage were this type of idea is very welcome. i will however in the near future pass on some of my ideas and hopefully help others. i do thank you for the great tunnel and i will make it a must in my layout when the time comes.
george
thanks to Martin I am just starting on a layout which well be my first and you have showing me what to do great and thanks again Mick
Do you have, or can you suggest, other pictures and detailed building instructions for other parts of the layout? One thing I am really desperate to find out is how to “weather” rail cars and buildings (remove the “plastic manufacturer shine” from them. If you know of a source for this, or you can show it yourself, I would really appreciate it. Your tunnel face pictures are great and your instructions are even better. Tnx Much. M
There are hundreds of posts on the site on weathering, Mike. I’ll dig some out for you.
I work in the cold storage construction business and will offer this information concerning insulation. Insulation for scenery is available at Home Depot, Lowe’s and almost any home improvement store. Use the blue (Dow Corning), pink or green foam (extruded polystyrene) – try to stay away from the “coffee-cup” foam (expanded polystyrene) if at all possible. The extruded foam has the right consistency for modeling use and is easily cut, rasped, filed and sanded into finish shapes. If you err, new pieces do not “break the bank” on a redo. Some pieces may be available as drops from construction sites – always ask permission before helping yourself. If you are purchasing – check what you are buying as the insulation with the mesh is usually designated for a specific purpose and is not needed for modeling use. Good luck!
OK, I should know, but what is a “fiddle yard”? Thank you. Great deal. DR
Beautifully simple to follow tutorial. Clear, concise, and a very good finished item. I’ll be keeping hold of this “how to”. Al’s right, one of the best.
DR – a fiddle yard is a collection of sidings, all connected directly to the main line and usually out of sight. Train A leaves the layout and stops in the fiddle yard, train B leaves the fiddle yard and magically appears at the other end of the layout. You now have the illusion that train A actually “went” somewhere.
if u would have used a HOT KNIFE IT WOULD HAVE COME OUT NICER BUT ALL IN ALL IT LOOKS GREAT!!!!!!!!!!!!!!!!!!!!!!!!!!!!!!! TKS FOR SHARING.
That’s a very creative way to approach tunnel construction. We have a long tunnel (O scale) which needs to be covered and I think we’ll use a variant on that technique to provide scenic cover (great for camera cars) while remaining accessible.
Martin/Al:
Love your work as depicted above. Your “How To” is one of the best I’ve seen posted and it has sufficient detail for one to follow with whatever materials they wish to use. Keep sharing your wonderful works. Harold Jr. GP,Tx, USA
Nice job. Very instructive. Thank you.
Tank you for the detailed descriptions. Nice work.
Great item. I am new to this hobby but I hope I can make such amazing scenary. Was there a particular brand name for the insulation material?
I have no need for a tunnel, but your foam rockwork is VERY neat! I’m glad this was brought to my attention!
Great job. Wondering how much the block of foam runs. Sometimes I find this more expensive than simply purchasing something that is already manufactured. Even though it takes the fun out of the creation it does save some time. I have a corner that I am going to be looking at here in the not to distant future and may try to apply your approach if I can find the right block of foam at a reasonable cost. Thanks for the info.
a very nice looking tunnel.
I remember this one. Good stuff.
looks real neat, wish I had a tunnel like that.
Paul Otway
Hi,doing your “pocked” ground with a nice is good but very time consuming.I use a very light and brief application of aerosol auto paint,it leaves same effect in less time and the color is there. I am at moment building a totally new layout 8800 cm X 152 cm (2 Shipping pallets joined together). Once I have attached legs and stood table upright,will sending pics of progress. Comments and suggestions will be welcome.By the way “N” scale
Excellent ! I’m on my very first layout, and excited about yours.
Thanks to all.
-Scotched.
great job. john
Fantastic creation.
Lots of work but so rewarding thank you so much for sharing.
I am so borrowing this concepet for my next layout.
Hope you don’t mind.
ED
Thank you for the tip on making the tunnel.
is the tunnel you made for HO and also what was the thickness of the foam I would love to do one Thank you for sharing Mick