“Hi Al.
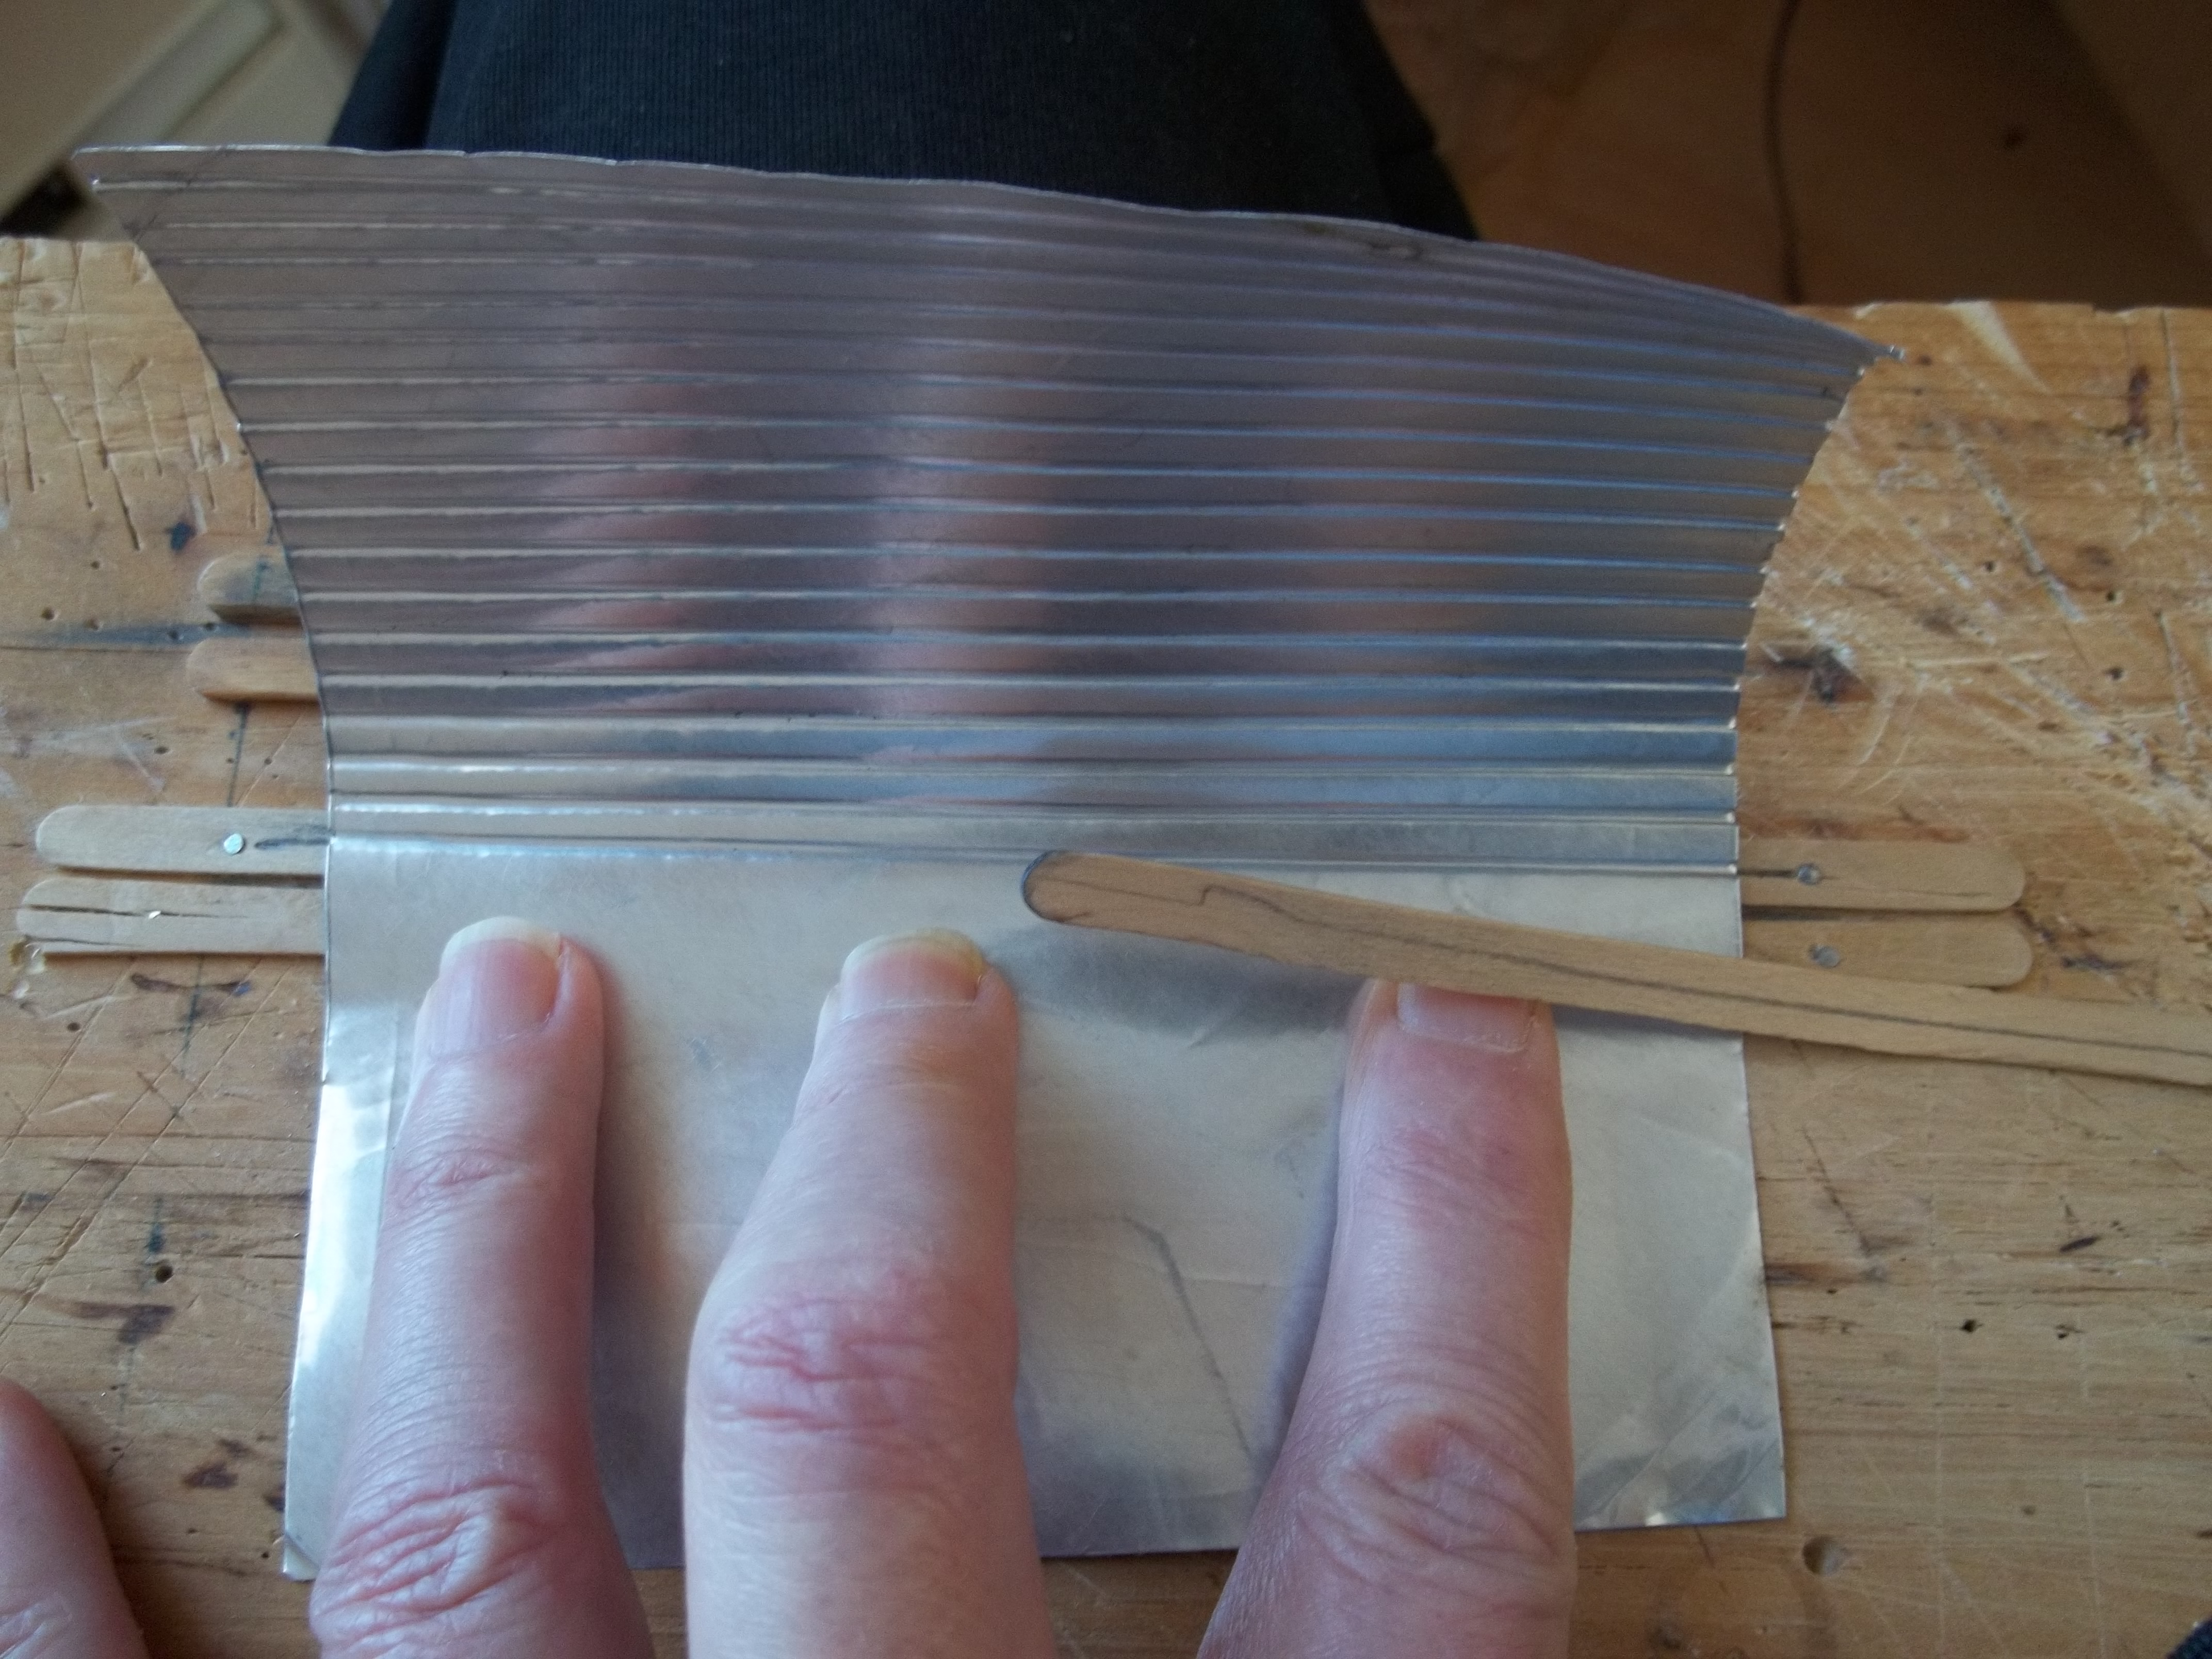
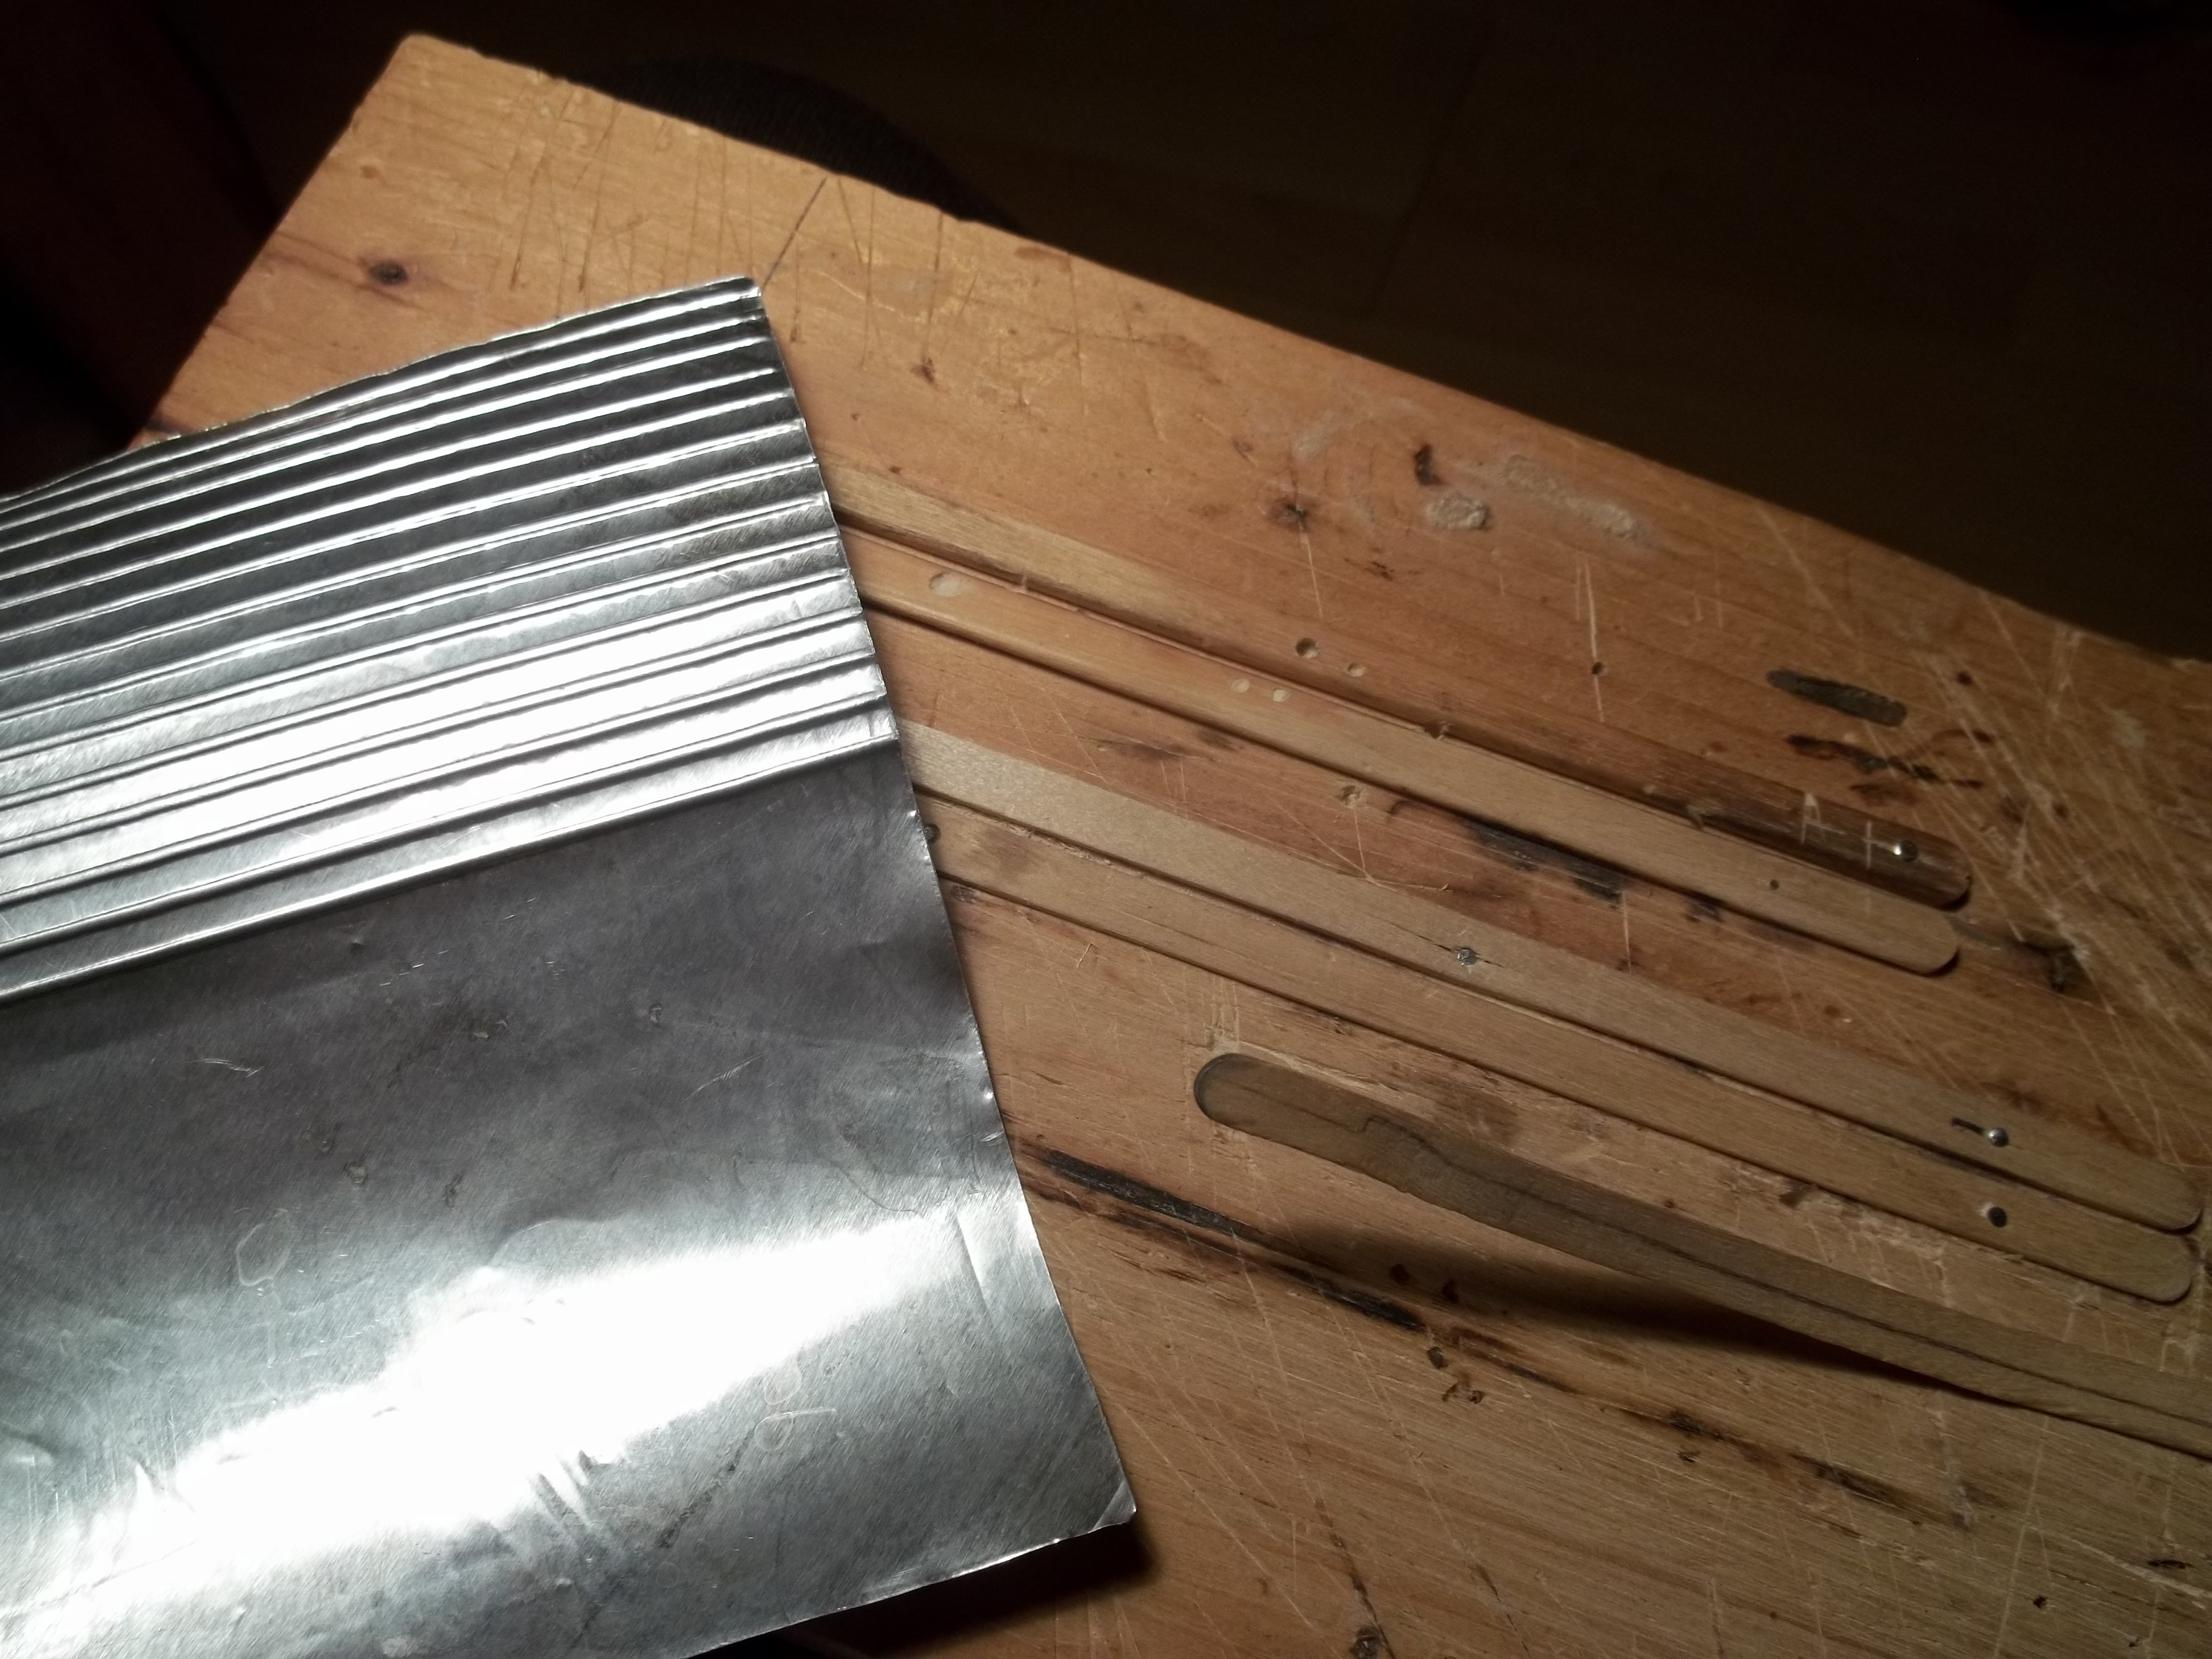
I took a piece of wood like you see. I then nailed down two lolly or popsicle stick’s to the board. Take another stick and slip it between the two your tacking down to keep it evenly spaced or gapped. I used large sewing pin’s with head’s as nails. then lightly sanded the top of the sticks to take any bur’s imperfections so it doent show up on the tin.
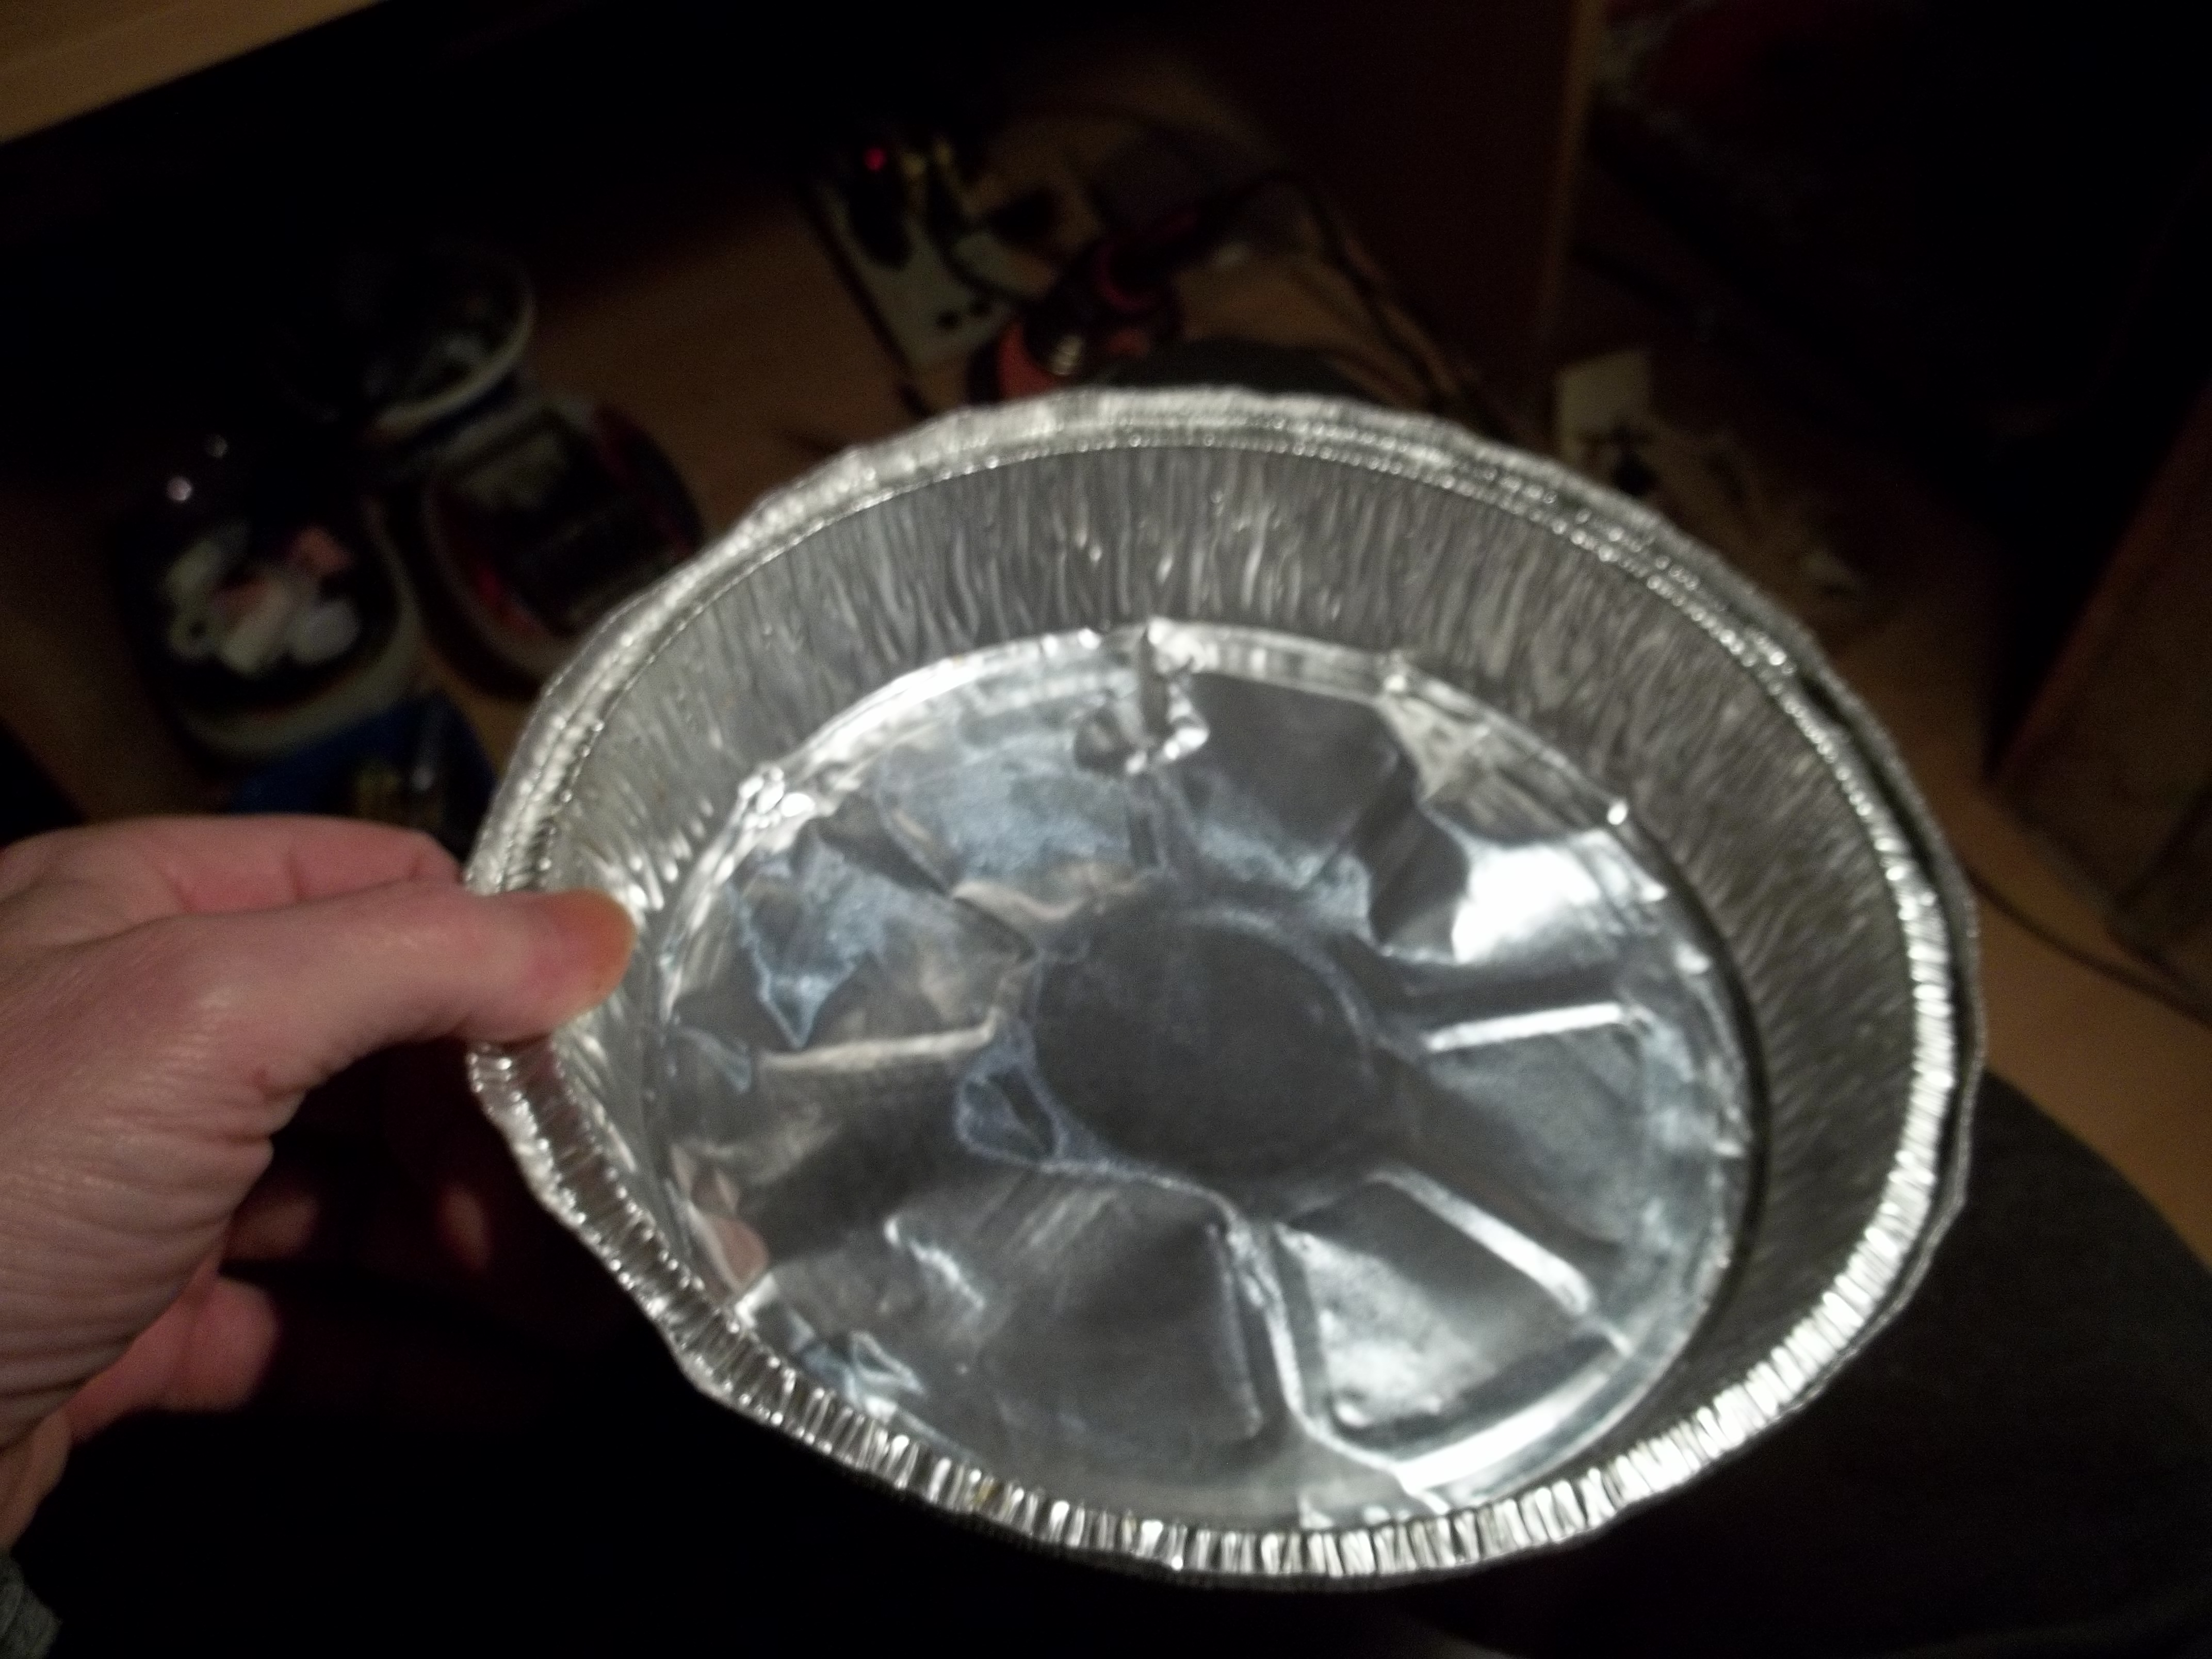
Draw a even line on one of the tacked down sticks as a guild line.Now take your tin, mine is from aluminum food container’s. First photo line your finger’s up against the tin. Take your stick and run it up and down a few time’s. Dont add a lot of pressure or you will rip through. Move the impression you just did, line it with the pencil line you did on the tacked down stick. Do another then another. After a few you will see the tin start to roll. That’s a pain. So after a few and without moving the tin. Pass your finger along gently over the impression’s and you will see the tin relax and go back down.
I have used the same sort of jig to make green houses,picnic tables, you name it if it is wood. Need window frame’s. Cut a stick up the middle in two. slip one into that lolly stick gap.Take a small wood block and wrap sand paper around it and sand way. Go’s very fast.
Kim”
“I am John McHugh, a lawyer in New York City and a resident of New Jersey.
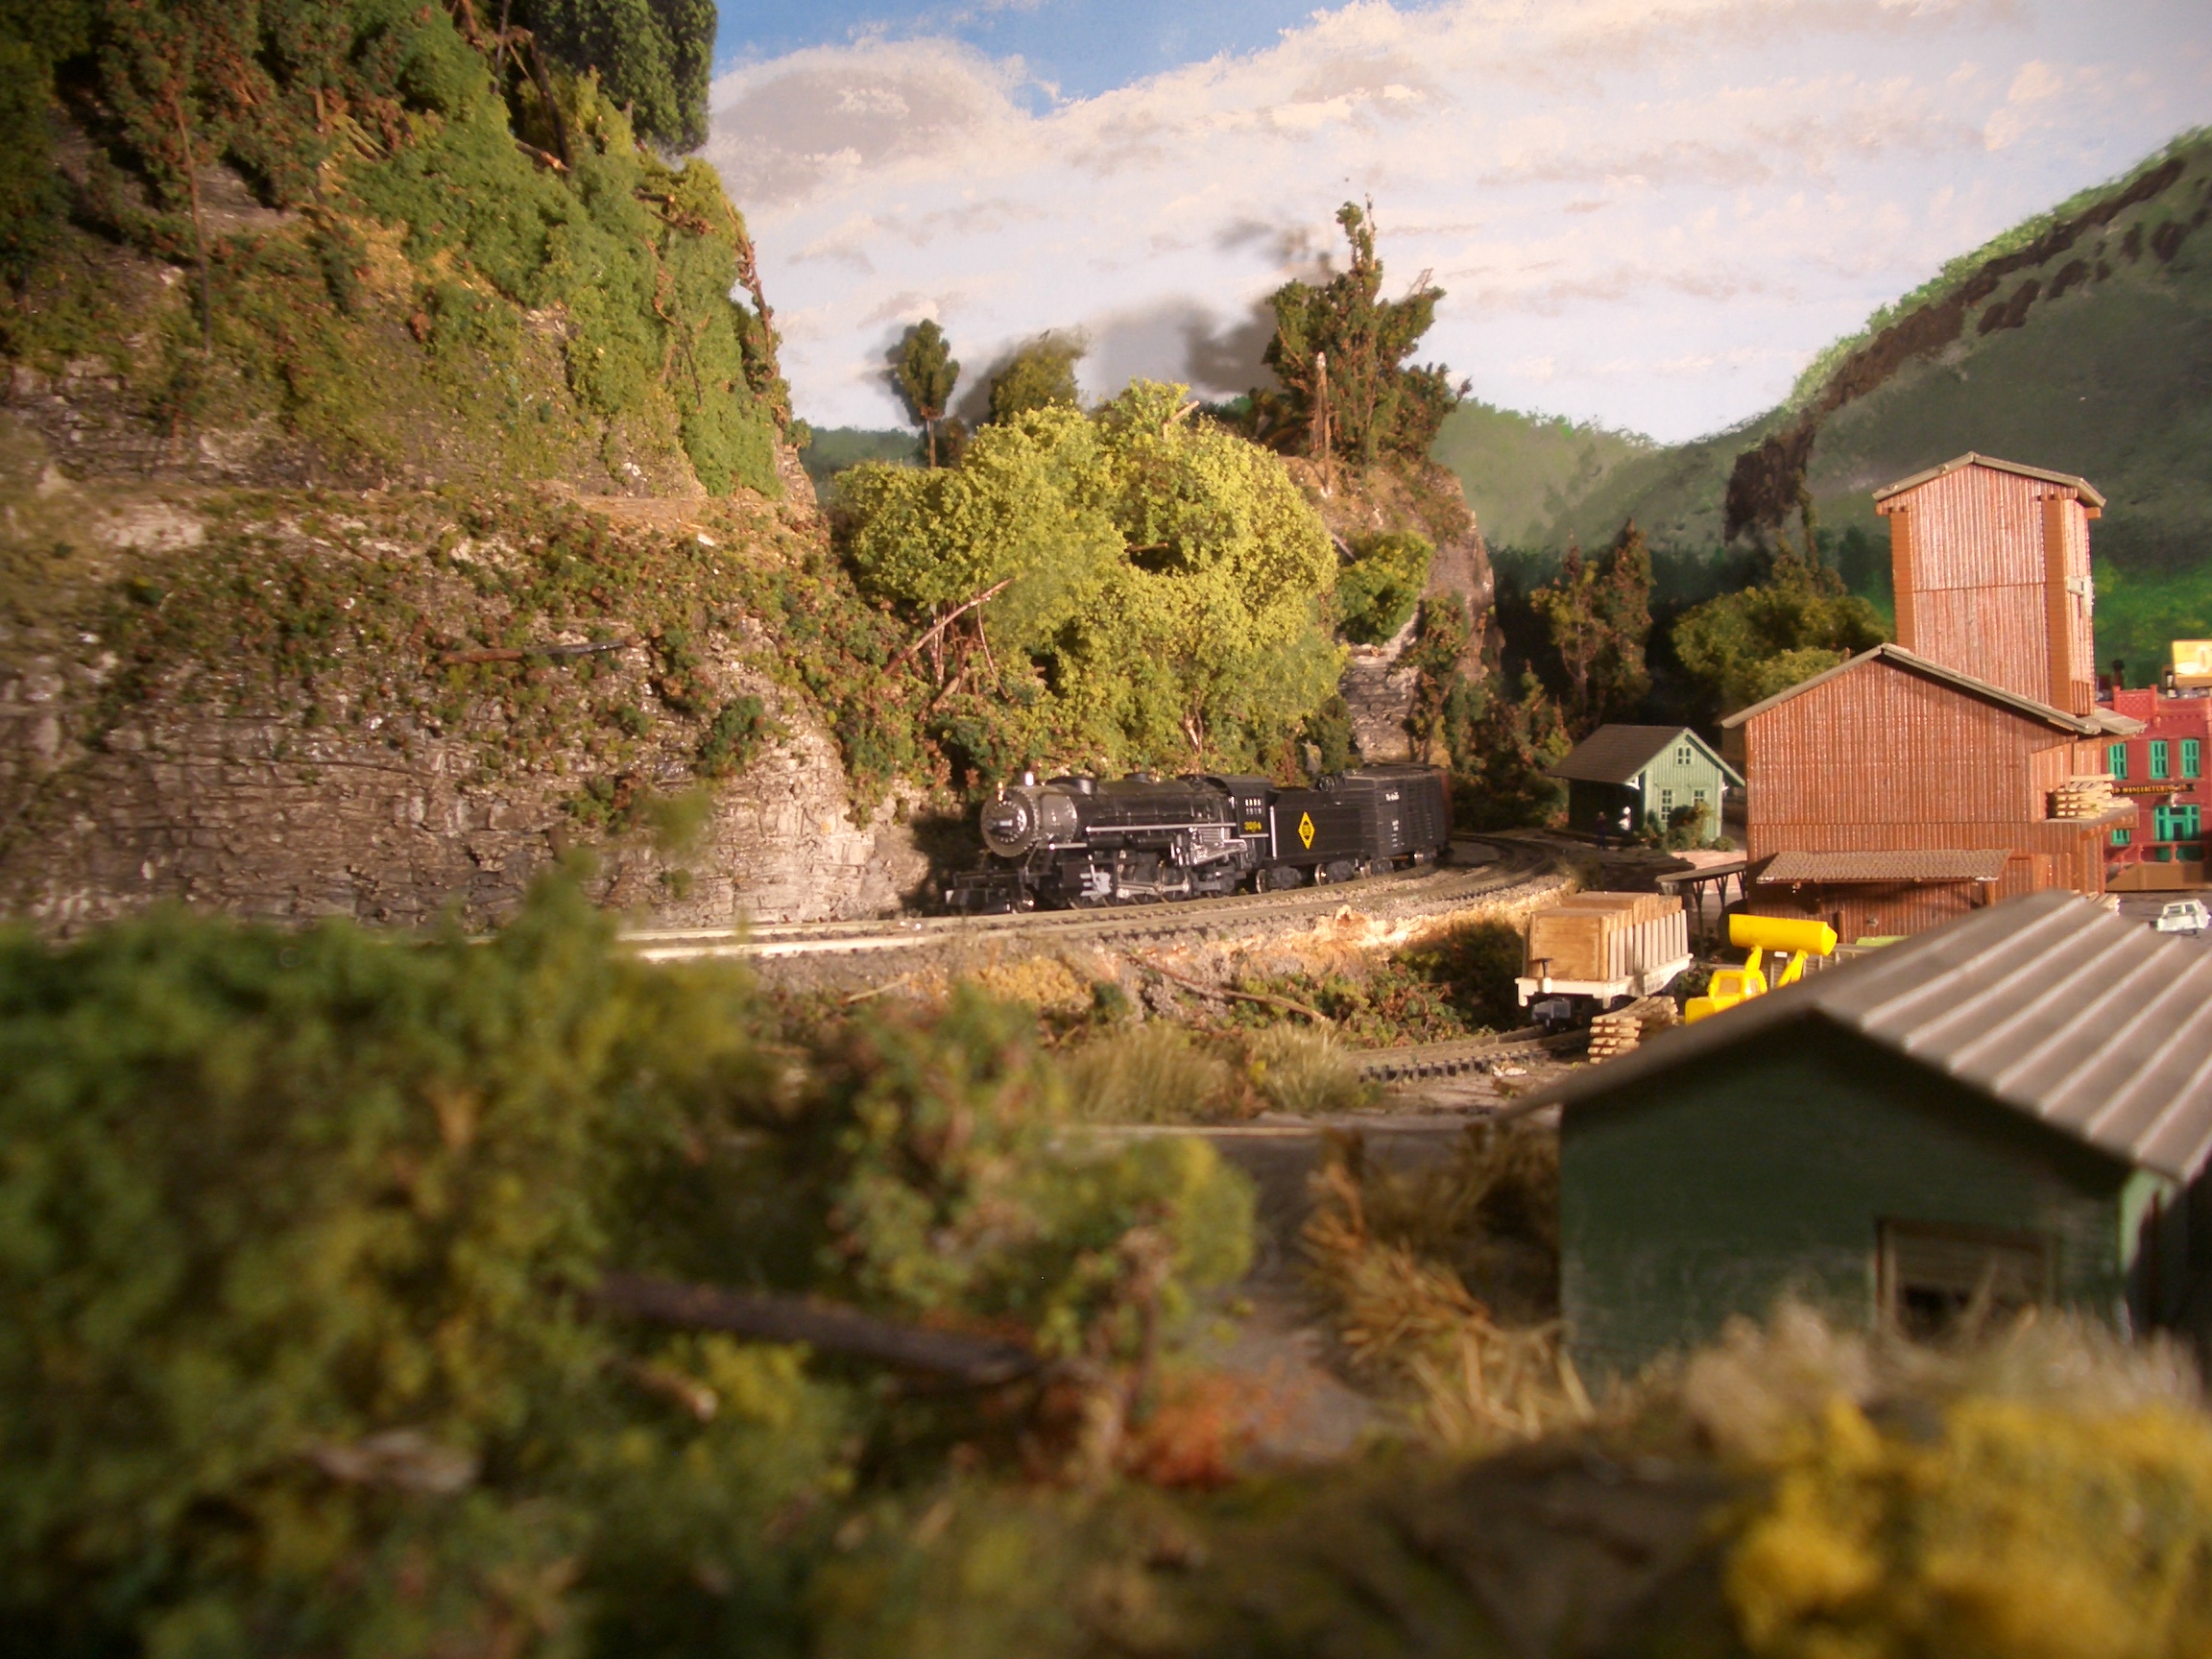
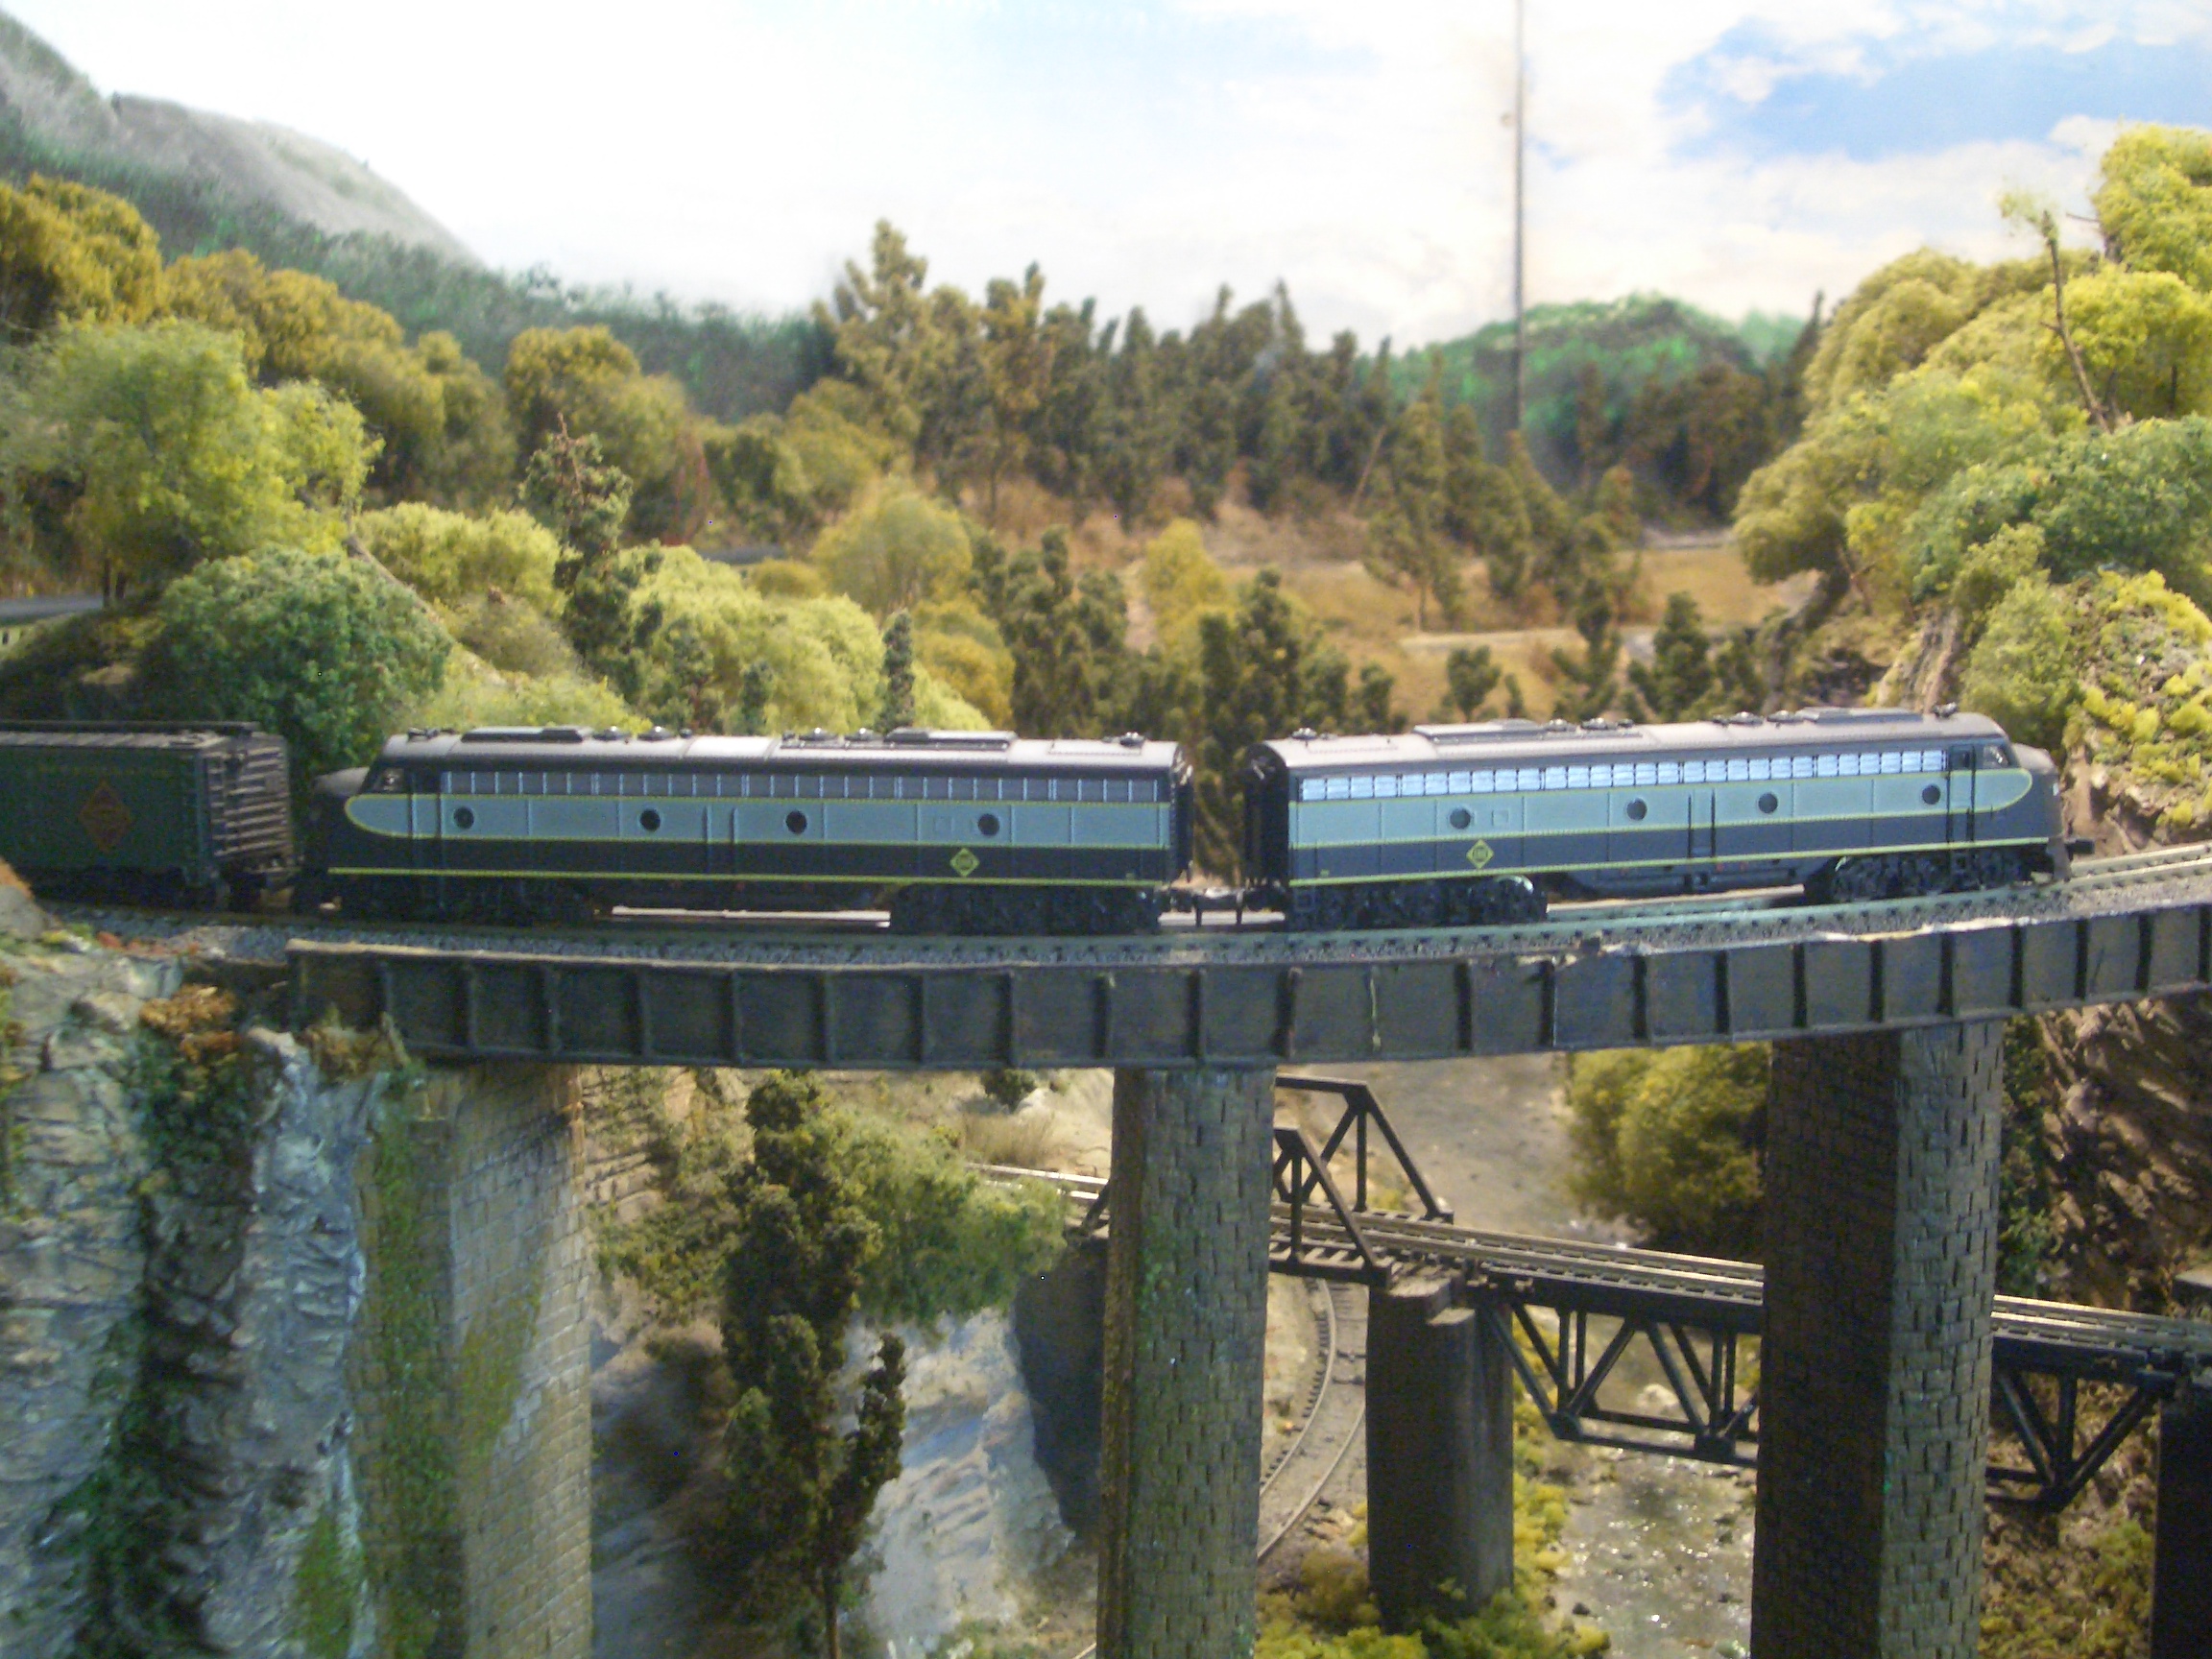
I have been building train displays for about 55 years, in the last 40, several a year until a few years ago and now it is just one. My more recent effort have been in O and Standard gauge. While these are toy trains, largely, I do like to see them climbing hills through realistic scenery. I build fast as the halls these displays are in are available for only a few weeks before a show.
I use the scrap wool left over from cutting the road bed along with cheap furring strips, to build a frame, some several feet tall. The remains of curve cuts are particularly useful to give your hills or mountains some shape. They can be the entire strut or they can be attached to struts to add the shape you want. The same applies to other scraps.
Once the frame is done, with due attention to points which must bear weight, I then staple or screw on black aluminum window screen pulling it taught to minimizing sagging. This material is not that cheap but it is easily cut with a utility knife or a scissor and if pulled tight across the frame it needs less support than other materials, such as cardboard strips.
However, in smaller scales, such as N, cardboard and masking tape can do most of the entire job. Window screen is for O and Standard work generally where the size of the hill or cliff is significant. The cut edges of the window screen prick, so if possible fold them over as you staple to put that rough edge facing away from areas you expect to touch.
Once satisfied that the frame and screening is ok, I mix patching plaster in a large paint bucket. Now this is not plaster of Paris, this is patching plaster. Plaster of Paris sets much too fast to use for scenery. Lately I have only found it as a DAP product called Plaster Wall Patch. I understand that Sheet Rock still has it as patching plaster but I have not been able to find that product. It is hard to find but paint stores can order it. Plaster Wall Patch comes in 20 lb bags.
First put on latex gloves, this stuff will wreck your hands for a week or more. Put about a quart of water in the bucket and then add plaster slowly mixing with a stick until it is the consistency of latex paint. I then take good quality paper towels, ones with some fiber in them so that they do not shred when wet. Dip the towels in the plaster, get both sides. Place over the wire. With a large cheap wet paint brush smooth the plaster gently to cover up the seems, the sheets should overlap for full coverage, you do not want holes. You need not get it perfect yet. Always work the brush form the center of a sheet of towel toward the edges to avoid rolling it up with the brush. Keep the brush in a bucket of clean, to start, water.
For steep cliffs or overhangs you need to paint some plaster directly onto the screen, it should stick as long as the plaster has some viscosity. Press dry paper towel onto the screen without any plaster on the towel. Once the plaster holding the towel to the wire sets, paint the towels with several coats of plaster one at a time twenty minutes apart at least, starting with the latex paint consistency and getting heavier each round. Remember, too thick and it will fall off.
Plaster does not dry, it sets, a chemical reaction, thus, it does not wash off once set. Patching plaster takes about 40 minutes to set on a first coat. This first coat gives you an egg shell coating of the frame against which you can work gently. You need to add another coat or so this by again mixing the plaster but this time a bit thicker but not so thick that you can not continue to use a brush to apply it. Paint on one or two more coats. These coats will set in about ten minutes or less. As you put on the last coat, work behind yourself with a putty knife or any similar implement to carve the rock shapes, stroke in one direction and attempt to keep the rock shapes parallel, then do occasional strokes at right angles to produce cracks in the rock face. It is a good idea to study rocks in the field and try to copy what you see.
Where you are going to plant trees, make the plaster thick enough to give the tree trunk some support.
When you have gone over and have a hard and strong enough shell, mix plaster much thicker and apply that for major rock formations. It is also good for filling holes and fixing places were you need to bang the plaster in to clear your trains. I also use wallboard compound for patches. But the best material for roads is wallboard compound. Apply it, shape it and when it drys, (it drys in about 24 hours and unlike plaster, and it washes off) sand it to shape. Unlike plaster it does not absorb pigment so it must be painted. You can work this material, carving rocks, after it has hardened, but it makes a mess.
After each pot of plaster clean the pot and all your tools completely as if you leave any set plaster in your pot or on a tool it will cause the next batch to start setting quickly in the pot and once this stuff sets on a tool you will find it very difficult to get it off. For the same reason cover your track with masking tape or something else to make sure you do not get plaster on it or anything else. If you do, wash it off immediately.
Coloring plaster is slightly different. I try not to use paint, I use tints in water or water paint. On a small lay out, the contents of a child’s water coloring set may do alot of the work as to rock formations. Semi fresh plaster sucks in water. Thus, if you put pigment in water, it is absorbed by the surface of the plaster. Pigments can be purchased at paint stores, they are in tubes of tint. I use lamp black for grey, just do not use much of it on white plaster, you can mix it with other colors to get dark red of sand stone. Again study rocks for the proper color, and they come in almost all colors.
Try your technique on scrap plaster until you are satisfied. Remember that water runs, so start at the bottom and work up to limit the destructive effect of a run and control them as you see them. A paper towel works as does just brushing a run back up or just spreading it around so it no longer looks like a run. The same applies to earth colors, they also vary. Just do not flood your brush and all should work. If you intend to use a ground cover, you can kill many birds by mixing glue with your earth colored water, paint it on the surface and then sprinkle on your ground foam.
I do not use a drill to make holes in plaster for trees, I take the top off a nail and use that, point down, in my drill. I use a good glue to hold the tree trunk in place, but if the plaster is thick enough the tree should stand in the hole without help. But the best glue you can get is plaster. When you are ready to plant, mix up a very small amount and dip the tree trunk in it just enough then stick it in the hole. It will set as part of the plaster of your hill and will not move. Do not use trees made of wood (sticks) where you must reach over the scene as they will break. In such locations trees made of twisted wire work better as they bend and bend back. Remember, however, you have about a half hour to work before the plaster will be setting. So make just enough.
Finally, do not wash any large amount of plaster out of anything in your sink. Scrape it out into the garbage. You do not want this stuff setting in your pipes. After a few hours of washing out pots and brushes, pour a quart of white vinegar down your drain, it will soften plaster which has not yet completely set. White vinegar is relatively cheap and comes in gallon jugs.
I did not develop any of these techniques, but just picked this stuff up over the years and I do not know from who or when.
As a boy I used paper and flower to make my first mountain. Don’t unless you live in a desert. It grew mold as it was in a northeastern basement. You can use fungicide in the mix, but then there is a problem if there are children around.
John”
Thanks to John for taking the time to share his techniques. I’ve lost count on the number of tutorials on rocks – but that’s what makes this site, there’s always more than one way to do anything in this hobby.
Keep ’em coming, folks.
And if today is the day when you join in on the fun, the Beginner’s Guide is here.
Best
Al
PS Latest ebay cheat sheet is here.


Hi: This man is a master…The workmanship and the effect is awesome…..
John…You are one accomplished modeler! I am building a small layout after some 35 years of collecting European N scale. Your tips are well received and will certainly help me in my endeavor.. Thankyou for taking the time to write and photograph your work.
John has to be recommended for his tips on “how to” especialy with roofs and of course the rock face. So a big thank you from me ,you are never too late to learn a new technique., I am well into my dotage now and have been making my layouts for some time now .so all the very best John .
Best regards Bernatrd
I can now see how Hollywood can make such eye decieving backgrounds etc. in their movies, what has been shown here is just top notch and what I always wanted to achieve. Thank you for the info.
Aloha, Richard
GREAT work on the Rocks and the Land scraping. A work of ART.
Great rocks, very realistic.
Richard:
Everything is real. Congratulations for good job you have done.
fabulus
I have a question that has nothing to do with the wonderful info on this page. My question is.I run a ez command controller . What run’s 28 volt’s. Now The UK model loco’s say a Hornby class or lima dcc. Can I run those model’s on my ez command controller or are those sort of engine’s only run 12 volt’s
great how tos put them in my library so i can look them up when i need to .
This all looks very well done ,and a lot of work also ,something to be proud of.
Very creative and amazing craft work.
Congratulations
Kim, you are the master of corrugated metal. Truly well done. I always grab a couple of extra stirrers when I hit the coffee shop. The round edge are nice, but I like the square cut ones as well, as they are good for getting into tight spaces, and resemble dimensional lumber.
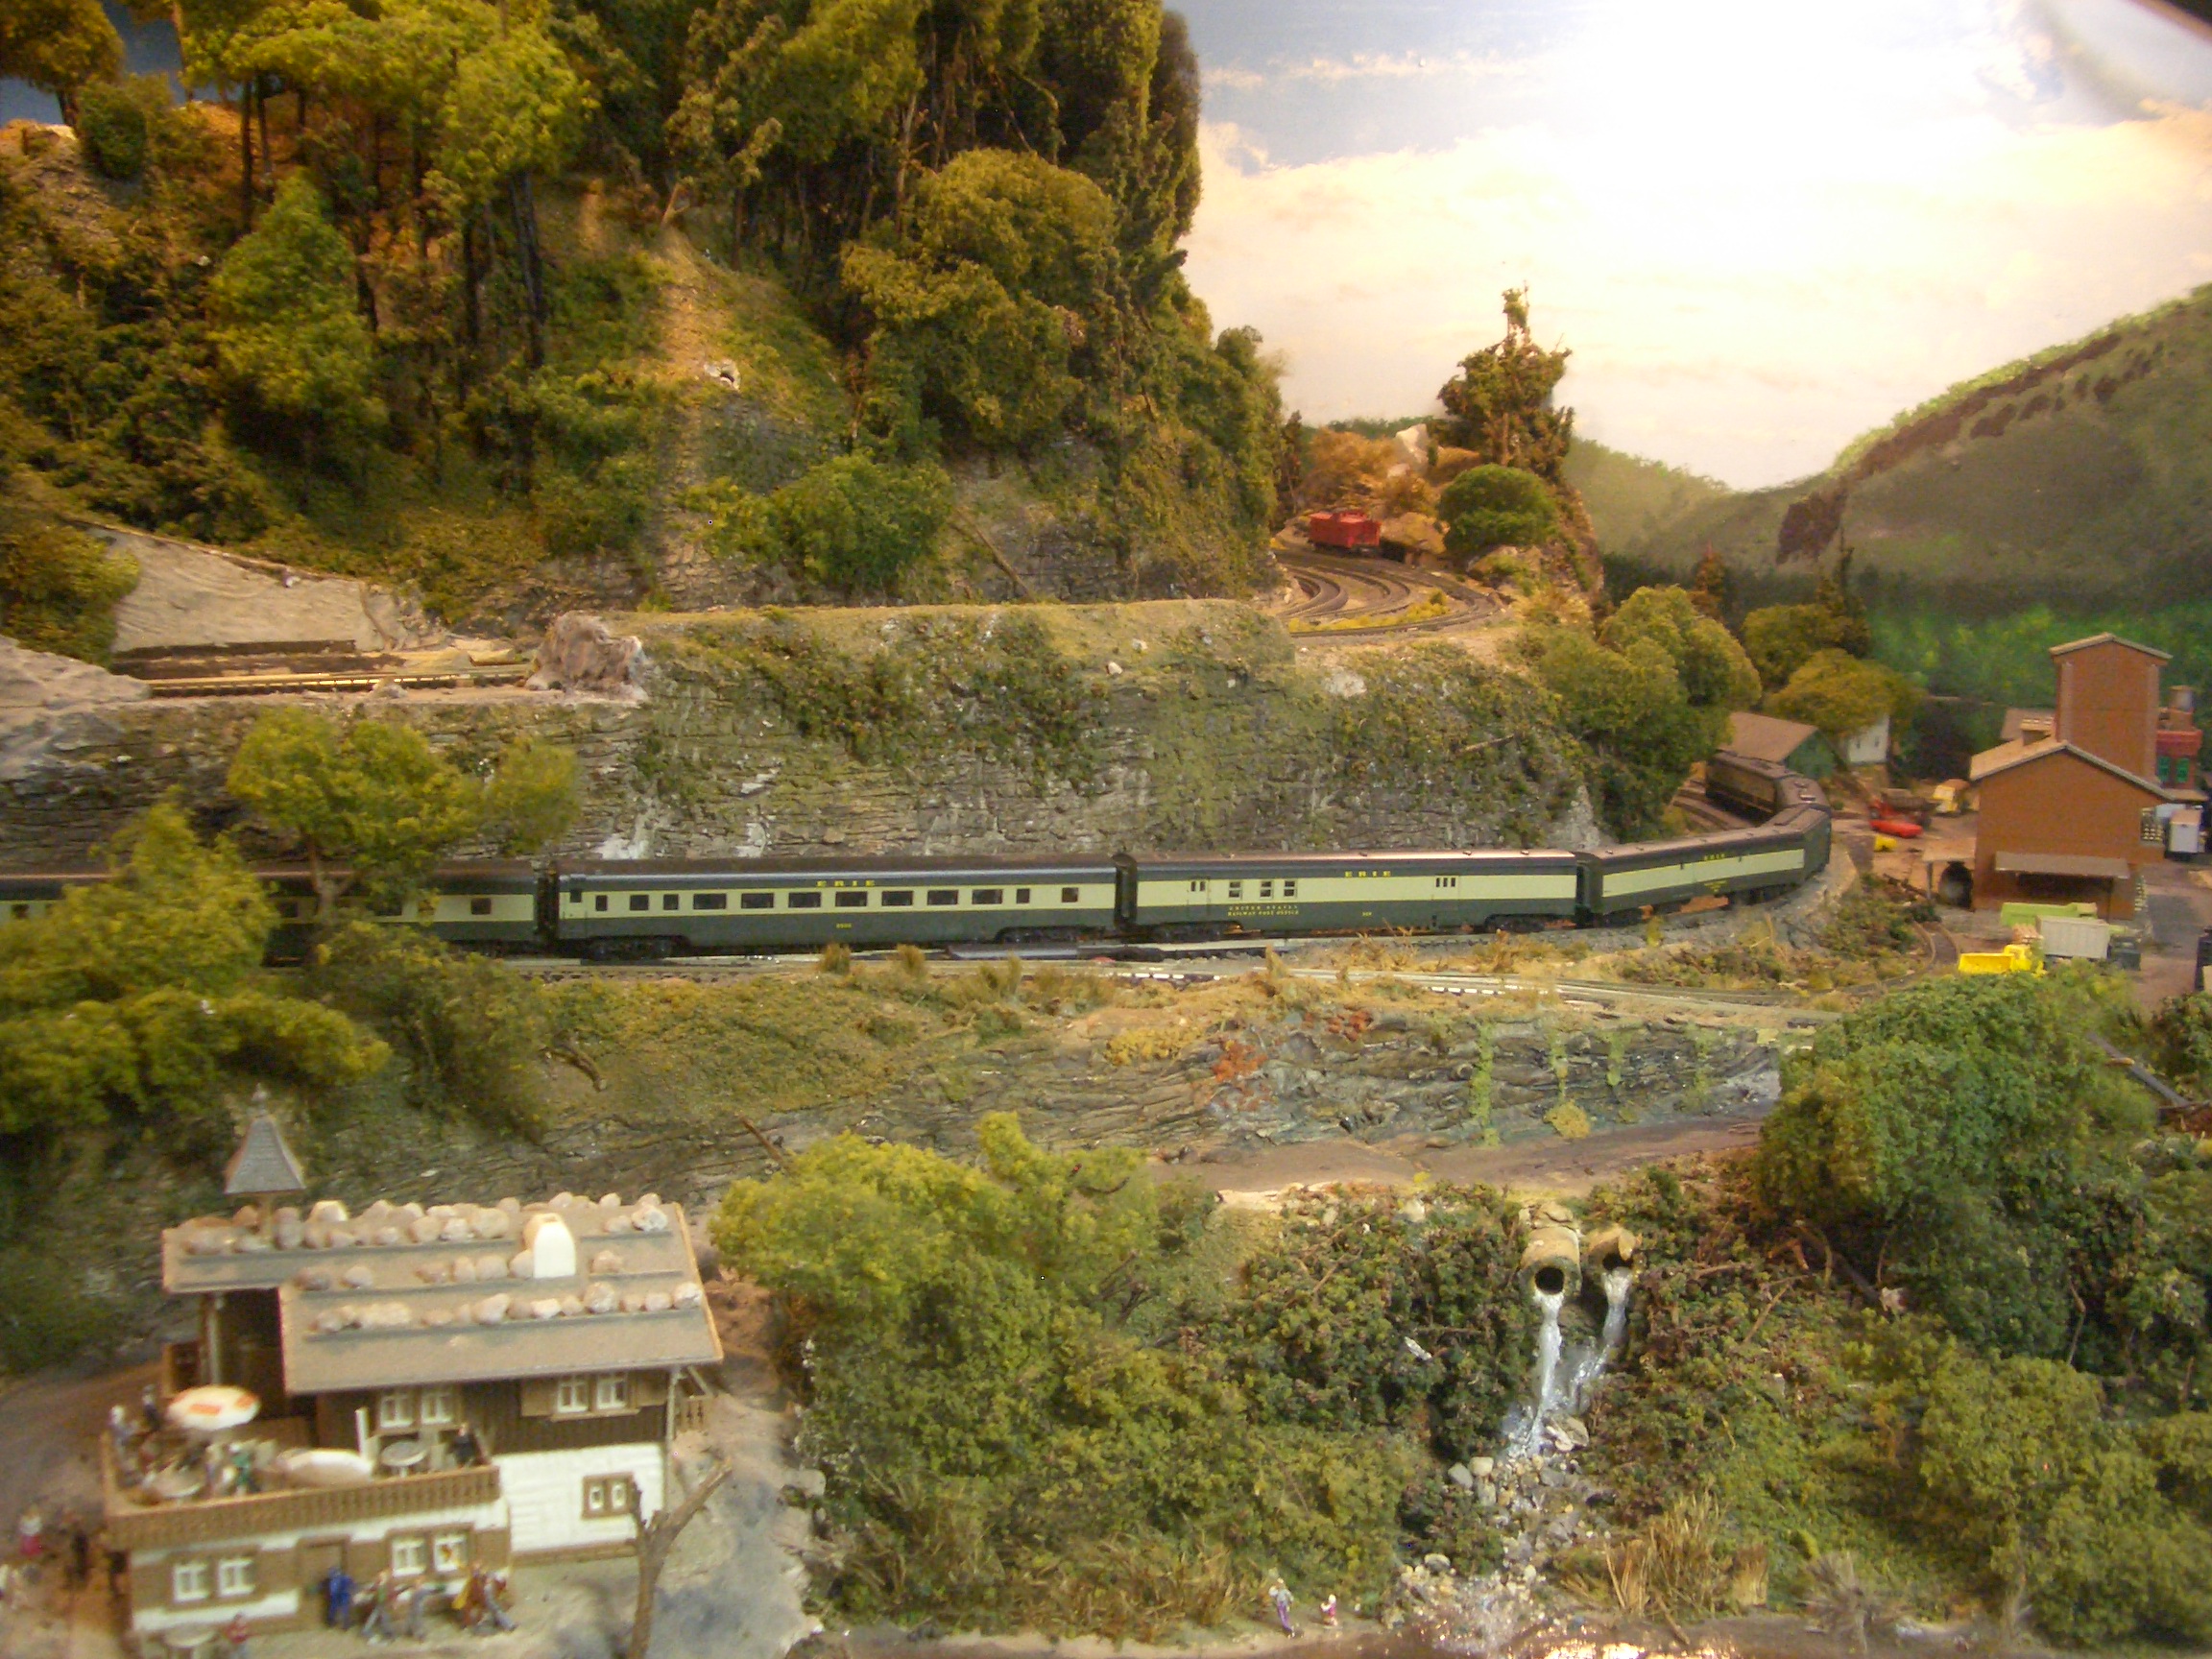
As to the Jersey guy, this former south Jersey guy is reminded of the line “is it live or Memorex” Wonderful scenes. What was the inspiration for the chalet with all the boulders on the roof?
Great tips, folks.
Must be Sunday like back in the day ,No people out and about. Great scenery!
Replying to Builder Kim, why do you think your Bachmann EZ Command is 28v ?
I don’t think they go that high 16-18v possibly. This is the DCC CONTROLLER you are talking about isn’t it?
Mike Street
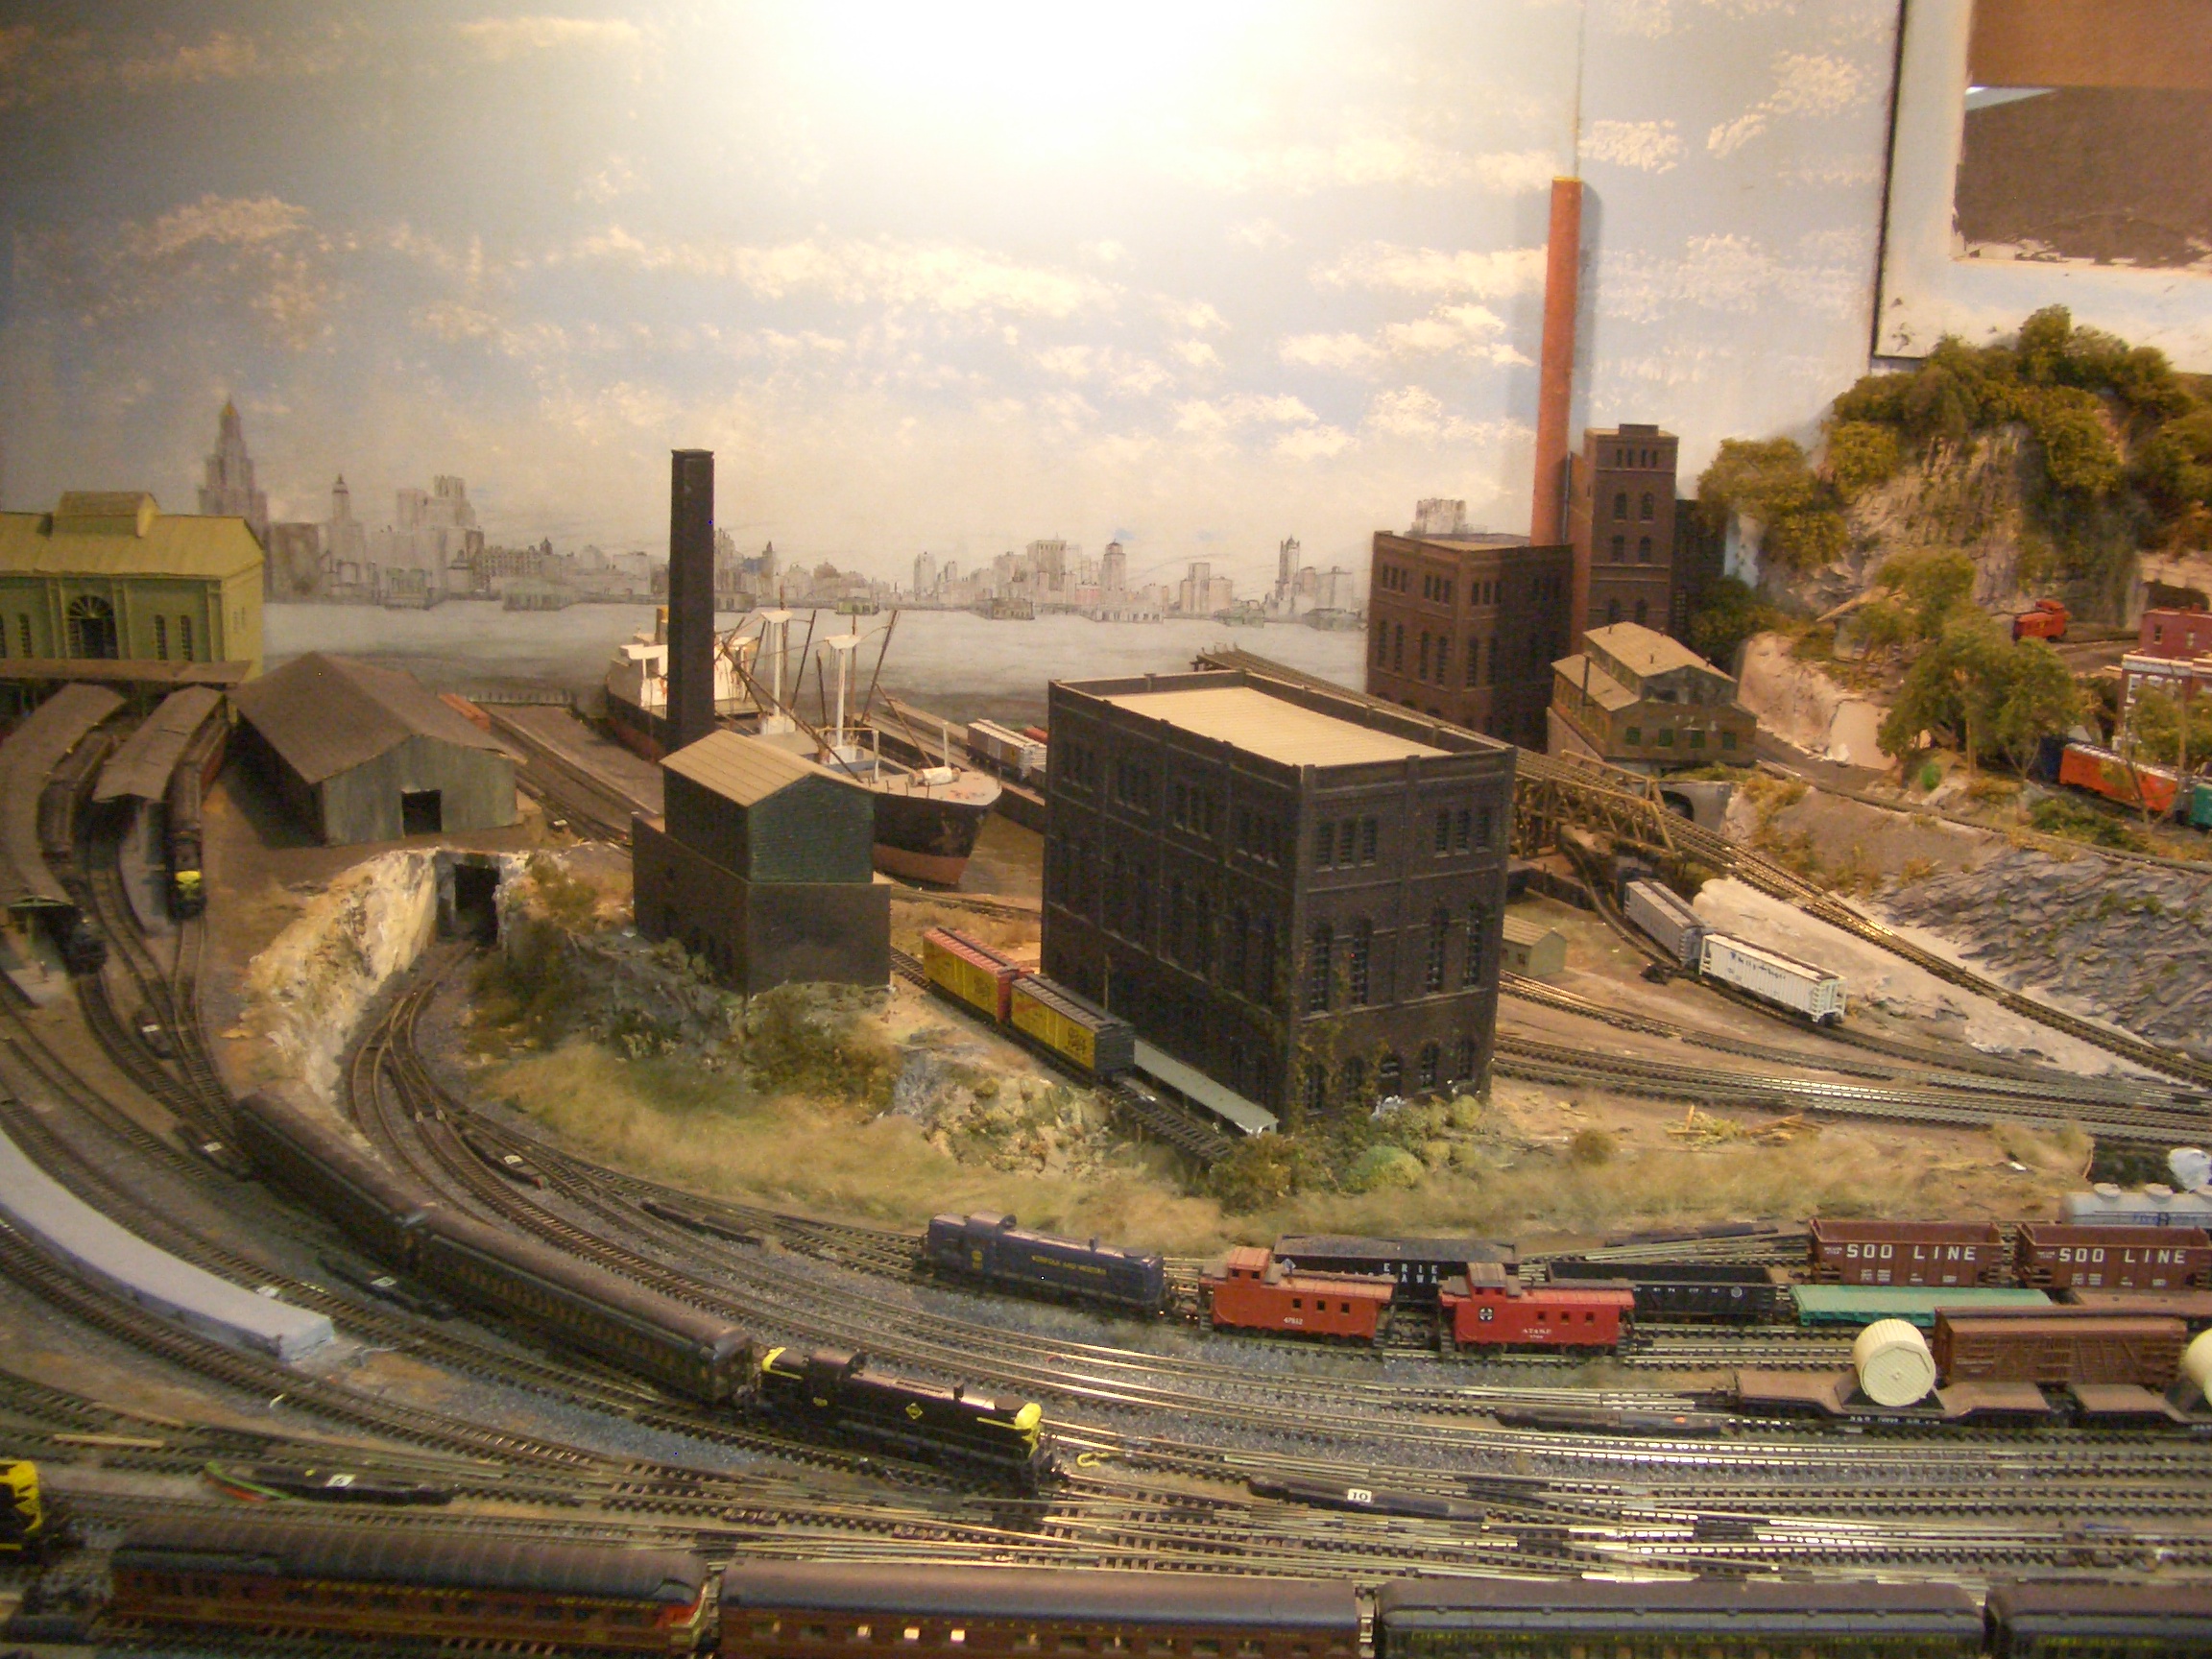
The Scenery is Fantastic. It is Like being there in real life. Question: What Scale is this Display Layout? AND Since I really like the Harbor Scene. Where did you get the Merchant Ship that is on the Pier? Who makes the Kit and would that work with HO Scale? Anyone have an Idea?
The vinegar to help keep the drain clean is a great tip.
The scenery is just gorgeous.
Nice tip from builder Kim on the making of metal roofs.
Kim, Very clever use of wooden stirrer sticks and aluminum foil. It looks like the size of the creases may be more appropriate for O scale or larger metal roofing, but a similar technique could be used for HO and N scale roofs..
John, That’s a great explanation of your scenery construction method and your photos are beautiful examples of what you’ve achieved. I didn’t notice the boulders on the roof of the chalet until Daniel Hulitt mentioned them, In New Mexico, we often see old tires on the metal mobile home roofs to keep them from blowing off in the wind. Do they have similar problems in the mountains?