Lawrence has been in touch again with some model train tunnel building:
“Al
With my overhead train layout I do not have the space for the tunnels I see being made on the table tops. To separate the alternate world areas that the train travels through I needed to build tunnels.
After looking at what has been displayed by your emails and what I could find online I started my tunnels.
Started with paper as found on the web. I was not successful in getting what I wanted so used the idea and did my own. Did not like the look of it. Back to the web.
Found a way using 3/4 inch foam. That appeared to work at least on the web.
Figured out what the inside dimensions of the tunnel was that allows the train to pass. Got the foam and foam glue from Lowe’s.
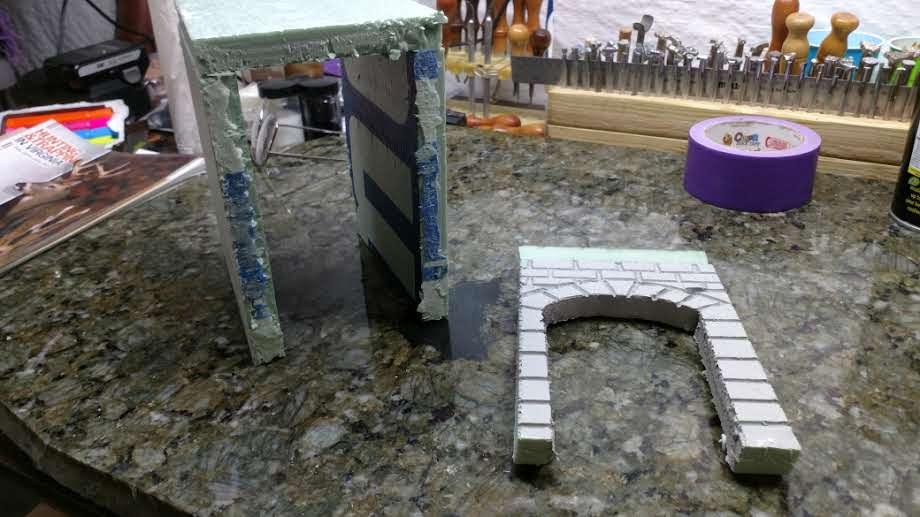
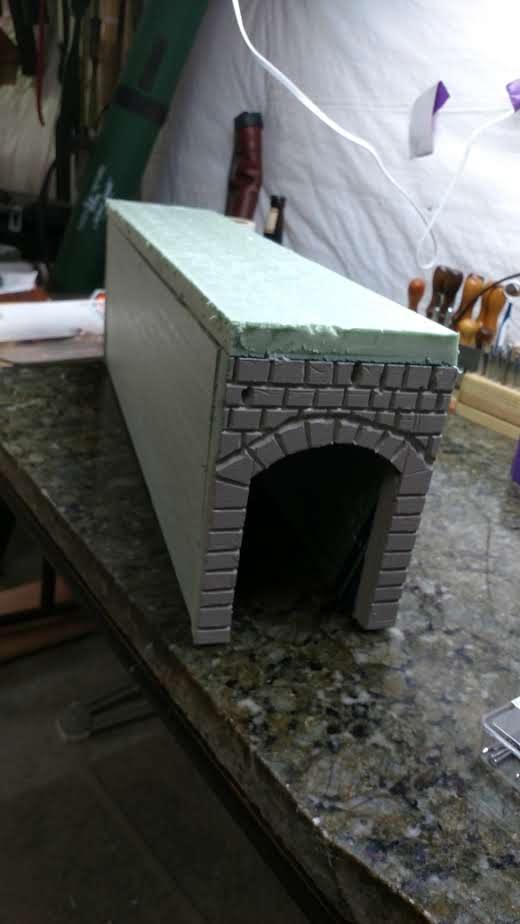
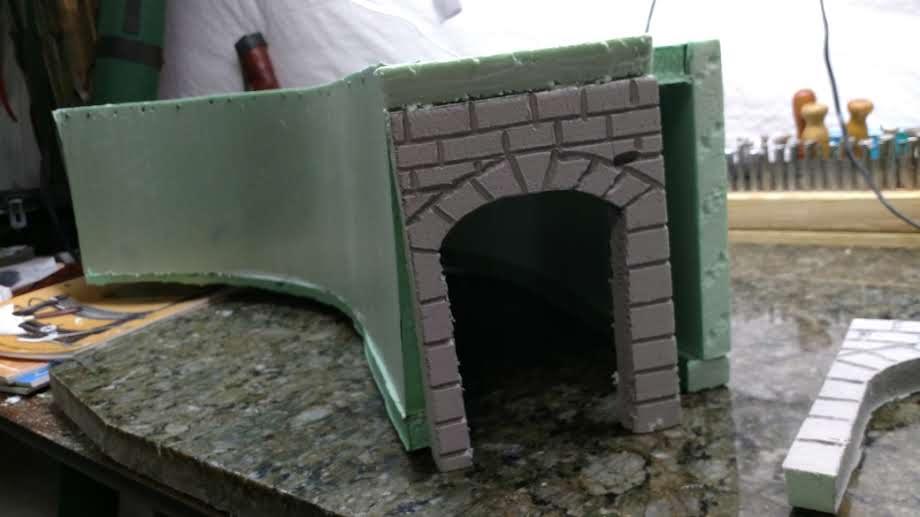
Built a number of straight tunnels by cutting the shapes with a soldering iron and using the iron for the facing design.
With the glue put them all together and worked just like it did on the web.
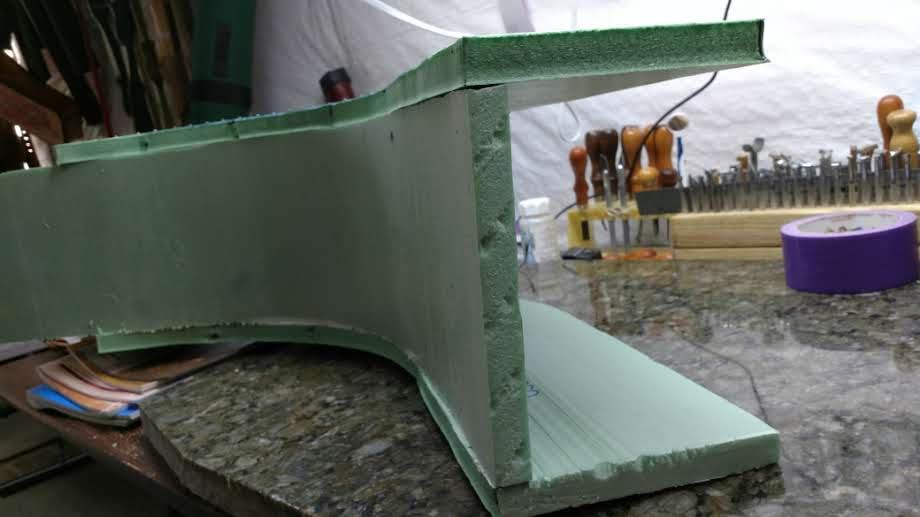
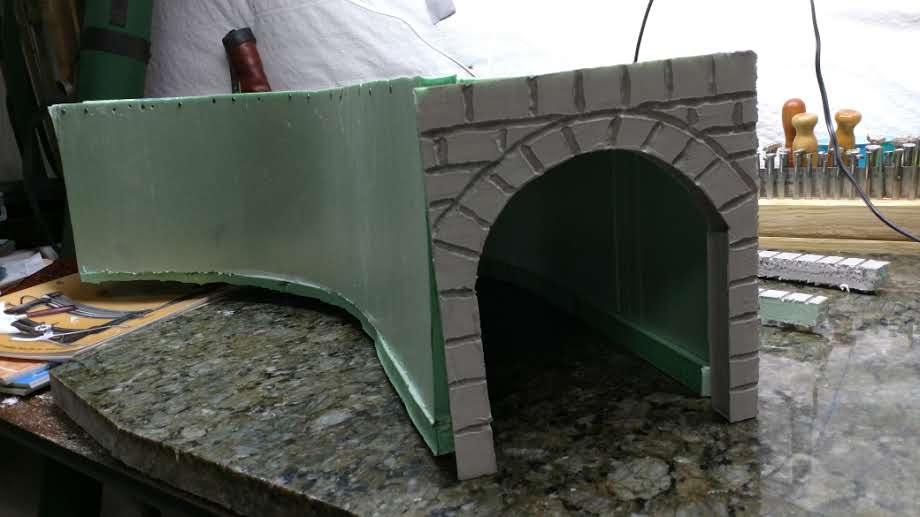
Now wanted to put a tunnel around the curve. And found out that the foam will just take the bend of the curve without breaking, just like it showed on the web.
Made a top and bottom piece that matched the curve. But need to pin the side piece in place, either top or bottom. Then glued the side piece to the other curve section.
Continued the process for all four corners. Cut out the middle of the bottom curved section, was needed for stability for building. Obvious that the width of straight tunnel facing is not wide enough for curved tunnel. So made new tunnel facings.
All tunnels built and train runs through them with no problem. The straight tunnels are from six inches to two feet. The curved tunnel is thirty six inches and eighty eight inches. The final step is to use sealing foam to give the appearance of rocks/mountains and paint with grey and green for vines. After doing the first one the foam might need a bit of forming yet.
Lawrence”
(All images are clickable, and that’s the same for every post too).

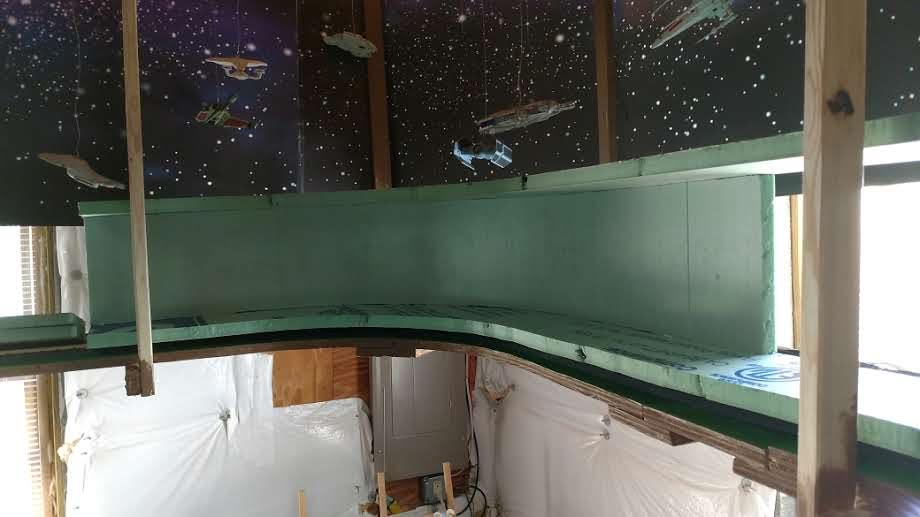
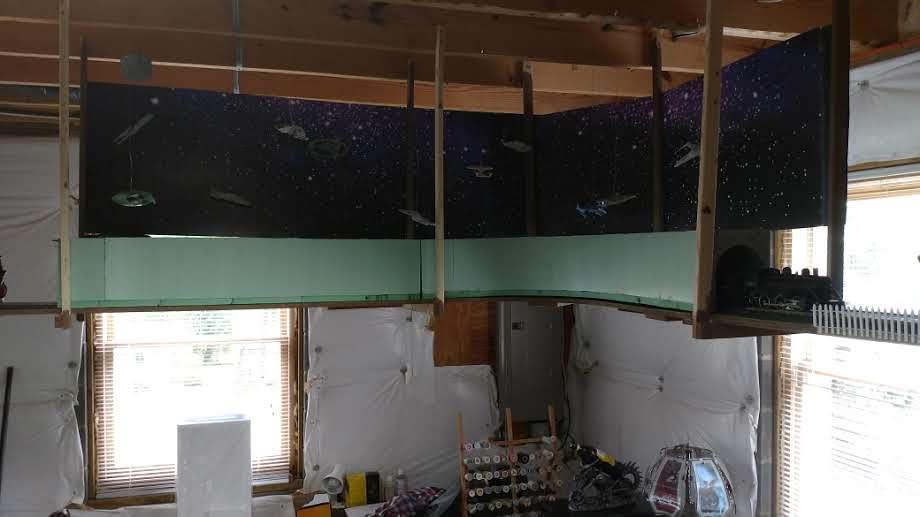

A huge thanks to Lawrence. You can tell Lawrence is having fun with his Model train tunnel building, and the whole of his layout too – loved the Star Wars back drop.
That’s all for today folks.
Please do keep ’em coming.
And if today is the day you make a tunnel from scratch just like Lawrence, the Beginner’s Guide is here.
Best
Al
PS Latest ebay cheat sheet is here.
PPS More HO scale train layouts here if that’s your thing.


I will begin my new layout soon and planned for an overhead over the layout. Had not considered tunnels, only some backdrop stations, buildings, etc. now you have inspired me with your tunnels.
Appears your track radius is 36 or so inches. What is the radius?
Where is your home and is layout in basement?
Thanks for your posts
Bruce in SC USA
thanks for the tip. I have many G gauge running in the ceiling of my second floor layour
I would have left the top open some way , in case you have some sort of derailment, You never know
Great tunnel, appreciate you sharing this us.
I am modeling in HO, building a mountainous layout with tunnels, reveines, gullies, etc., upper and lower levels and ,vertially, everything is made from wallboard and wall board paste (mud). Mountains and hills are made from newspaper soaked in dilute solution of mud; taller mountains use chicken wire as a framework and backgrounds are the wetted out newspaper to give some texture to represent far away mountains. I even use wallboard as roadbed and I am toying with the idea of using the dust or residue from cutting the wall board as ballast. I plan to colored the ballast with dilute paint, whichever color I choose, perhaps brown/black. I am scratch building, as you can see, and a newbie at that so if anyone has experience with this kind of build I would be anxious to hear your comments …….Gene
Hi Lawrence, you did a fine job; but I agree with another contributor, your tunnels need some access in case of problems within the tunnel.
Regards, Tom (USA).
Not good at building & have bar arthrits- Can someone build me a curved O guage tunnel in a polar type like the Lionel Polar Express #6-37837?
Please contact me if interested…Would be gretly appreciated
I like the Star Ships in the background of the 6th photo
Very nice, I did a tunnel but I used black plastic guttering. It worked quite well for Hornby 00 gauge. England
I had been planing on building tunnels; but by gluing several layers of horizontal extruded styrofoam. You’ve given me the better idea of curving vertical thinner styrofoam, and then facing it with bottled spray foam. Thanks for the new insight.
– Bullfrogeh in Ontario
If U make the top removable with scenery on top (which is what I personally do) OR make a whole removable tunnel as in “toy train” layouts and accessories. I am also doing this on another part of my layout.
Also using the foam in a can is awkward to accomplish really good looking scenery at least in my opinion. U can do much better and faster with the pink foam, later covering it with plaster or powdered drywall mixed up and applied with plaster rock castings. finally with ground foam.
THANK YOU LAWRENCE!!!!
I’ve made a lot of tunnels out of a lot of stuff and have been dreading to making more, however after I read and saw your article I realized that there was an easier way than pouring plaster into molds or cutting wood. I didn’t use foam but I had some 3/16 foam BOARD that I got at Walmart and because it has a paper-like cover, doesn’t need special glue to paste parts together. It’s also easy to cut with an x-acto knife. I think the thing that your article brought home to me was that the tunnel and portals DON’T HAVE TO SUPPORT A LOT OF WEIGHT so this thin stuff work’s well. Thanks again!!
Terry/ Idaho USA
Not Star Wars my friends that is Star Trek ships……Live long and prosper