Hemi’s been in touch with his HO scale single hopper coal gondola:
“Loading Coal Cars?
I had mentioned once I’d do this so here I am…
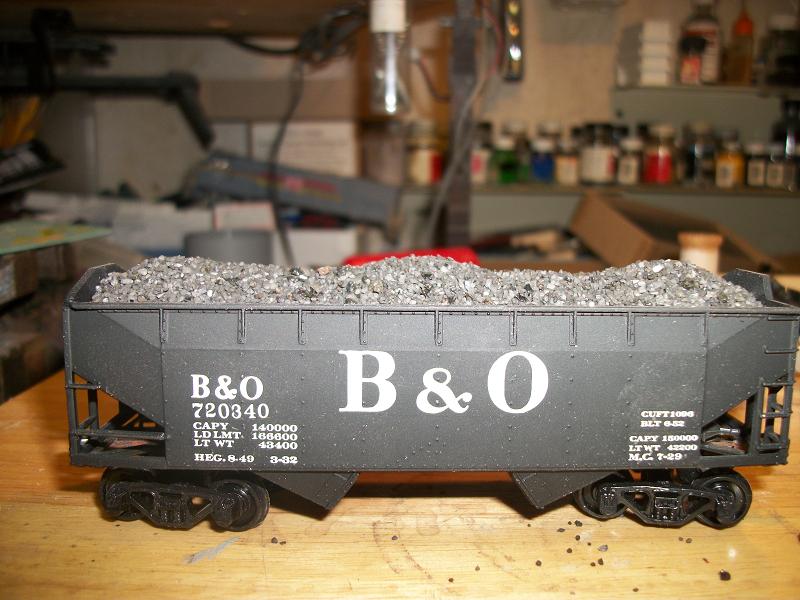
I took a Athearn 55 ton 2 bay hopper car, undecorated, and custom painted it to be a B&O hopper to match those I already have in the number series.
Then I said, I’d do a “loading” post…..
So here goes!
This is what the inside of the hopper looks like:
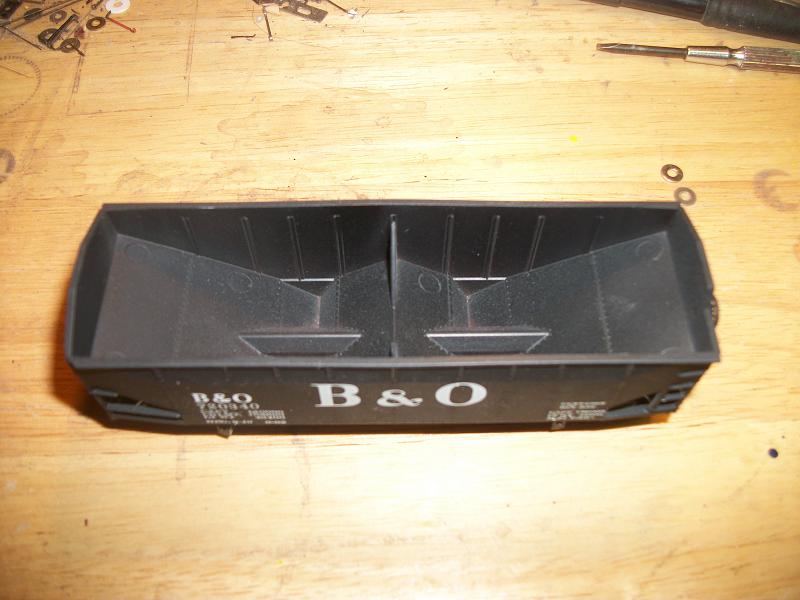
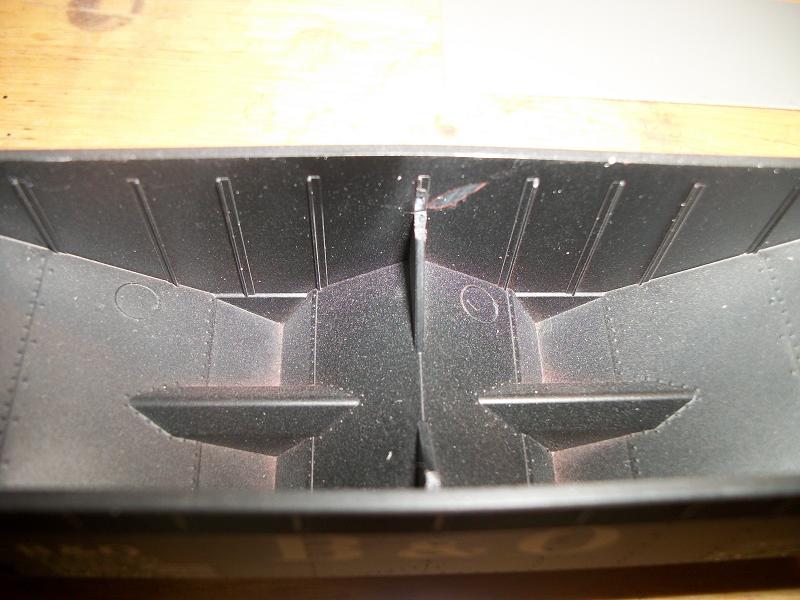
In order to follow through with what I did, you will need to cut ANY and ALL of the inner bracing thats molded into the cars body, seen here:
This makes it possible to add this section into the car:
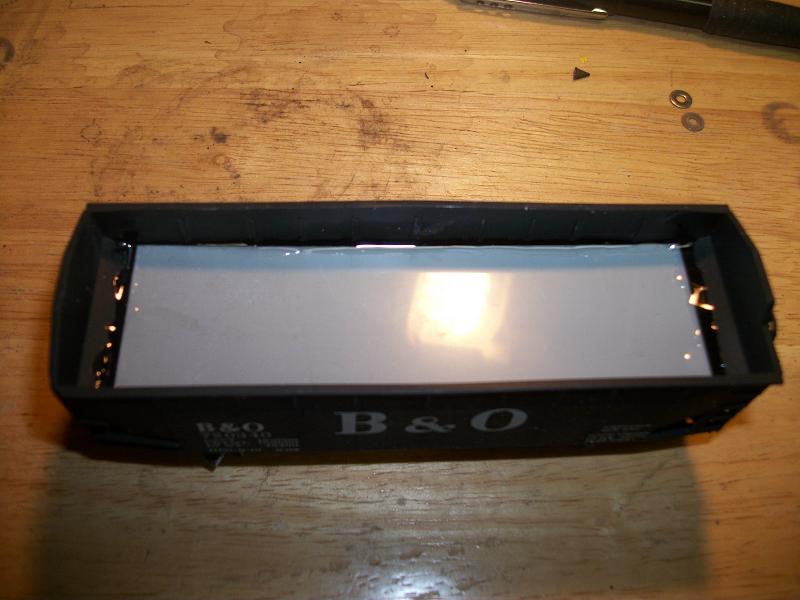
The above section MUST BE water proof around the edges of the gray plastic, so that when the “coal” is added not so much but when the “wet water” is added to keep it from going under this plastic as it will take forever and a day to dry, even with the 50% alcohol.
Then you will need to add the coal to the gray plastic, piled as it would look being loaded by a coal tipple. That depends on each persons taste of “looks” of the load going into the car, mine looks like this:
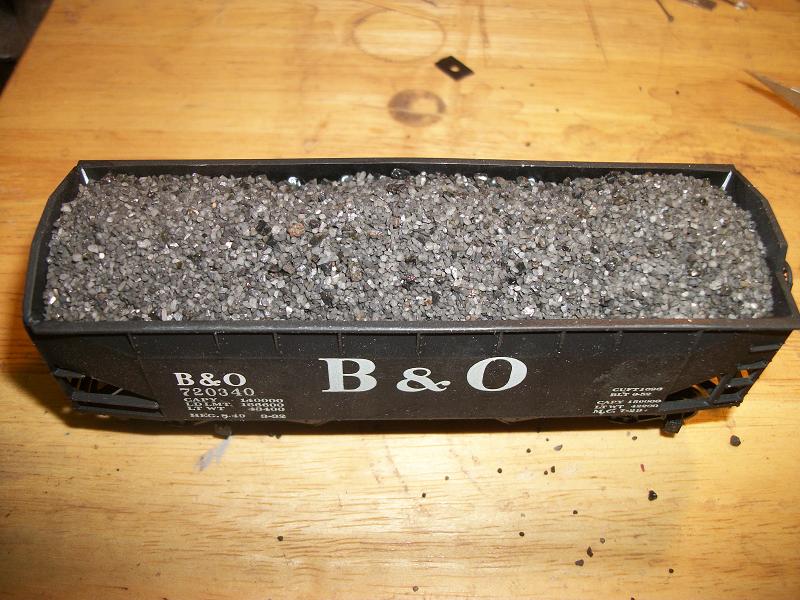
A “profile” view of the load:
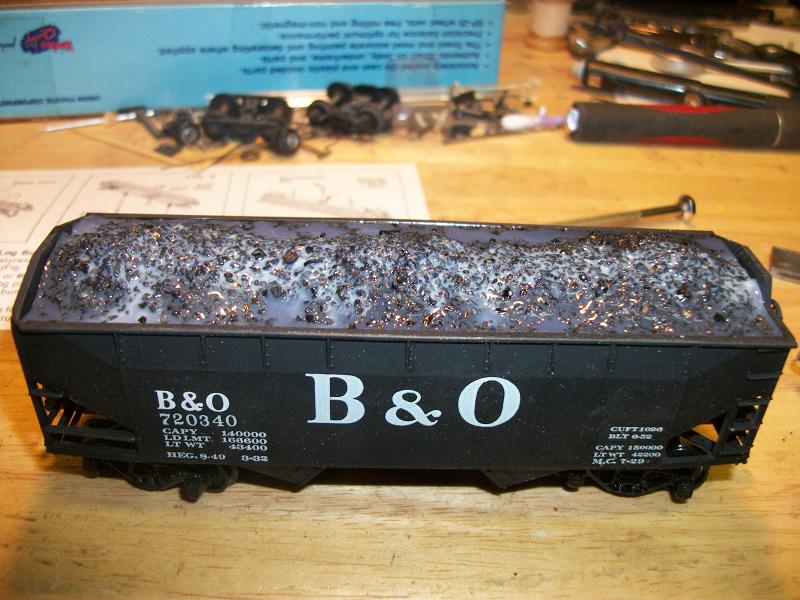
Now being “happy” with the profile of the coal load, you need to soak the “coal” load with wet water solution, 50% alcohol, 50% water. NOT to allow it to puddle, but to be seen “wet”.
Once it is wet, add in your “ballast” glue solution, mine is 1/3 glue, to 2/3’s water. I use this also on ballast work on track!
This would look like this:

This is the first “coat” of glue…..
Allow to settle or “evaporate” the alcohol, and water to leave the glue to dry a while, then BEFORE its dry completely, add another “coat” of glue…. As that first application is/has settled in the lowest part of the load. BUT, is not dry completely, thats when the next, (second) application of glue will adhere to the first…..
This second application would look like this:
Then just like the first application of glue, you will need to do this again! I have done 3 applications in the past and it seems to have been all that was needed to not be able to see the glue when dry! You want the coal to look as real as possible!
This project, is not done, I’m waiting for the second application of glue to dry some to add another before I hit the bed for work tomorrow This will be the last application….
Once that application is dry, I’ll get pictures of the final product!
And YES, this is the SAME “coal” that was bought from Jo-Anne Fabric, OR Micheals Craft Store, for 32 ounces, for around $3.00! Decorative Black Sand…..
I have done ALL my HO scale single hopper coal gondola loads like this! (Except of course the empty ones!)
Enjoy!
Hemi”
Now on to Art who has a small problem:
“Here are some of the pics of my layout and the one at Hobby town.

I feel the polarity is the problem at the crossing. I feel I need to insulate part of one of the legs on the crossing. Thanks for your advice.

Art”
A big thanks to Hemi for sharing his HO scale single hopper coal gondola. And who can help Art?
Or would it be quicker just to take the plunge with the Beginner’s Guide?
That’s all for today folks.
Please do keep ’em coming.
And if today is the day you get started on your layout, the Beginner’s Guide is here.
Best
Al
PS Latest ebay cheat sheet is here.
PPS More HO scale train layouts here if that’s your thing.


Quite a lot of work to make coal. Besides this method puts all the weight up high thus effecting the center of gravity. My coal is just kitty litter dyed black and mixed with some PVA to bind it. It also sits down in the hopper keeping the CG low.
Than center of gravity thing could be a problem, but adding lead to the inside bottom of the hopper would help. It’s a real miss to spill loose “coal” on the tracks I use the fine residue from bags of charcoal briquettes for my :coal”. I will have to try this method soon.
Real train coal cars are filled to the bottom so why not fill the model cars too it be exact? Center of Gravity will be compromised
Actually, there is so little “coal” used the cars with this isn’t at all top heavy. I thought it would be as well till I tried it once, BUT the way the car(s) is loaded that gray plastic sheet seems to put the weight on the slope sheet of the hopper, YEAH I know I got lucky, but to give an idea that gray sheet of plastic doesn’t get but 5/16th of an inch thick/deep, so its not much weight added to the car. I also weighted the car with the steel plate weights in one car with the coal, and the total weight is just 1 ounce more then the car with weights in-place. So its not as heavy as you might think….. Thats a 55 foot hopper, granted, a longer car, would have a bit more weight as you add the coal to a longer…..
I’ll have to weigh one of my longer cars to see what the difference is on say a 40 foot 3 bay hopper or a 50 foot hopper loaded much the same way!
Far simpler method I use is to insert a polystyrene foam block to just over half way, paint it black then add coal and glue in covering the block completely. Cars are not top heavy and very light
My method is to take a block of dense foam insulation, and cut it about 1/4″ thick, randomly shaped to look like loaded coal, and sized to just fit in a hopper, laying on the slope sheets. I then apply latex contact cement to the top side of the foam, dip the top side in fine “coal” and add some scenic cement as needed to keep straggler coal from dropping off later. I paint it all with black water based poster paint, which flattens the load and also helps glue down the coal. I stick a 1″ washer to the bottom of the foam with caulk so a magnet can help remove the coal load if needed. I do this assembly-line style, 20 at a time, and now have a fleet of 110 coal hoppers, about 1/4 empties, the rest “loaded.”
I think you could make the plastic inserts that simulate a coal load for the hopper cars more realistic by doing what you listed above. Put tape around the insert to prevent the load from escaping and then gluing. Weigh the inserts to make sure they are within tolerances. I have the same reservations about shifting center of gravity as an earlier post.
Hi, There are a lot of,good comments here. I intend to try a few and see what’s BEST for me.
Coal. I thought I was done with coal. That dirty , BITUMINOUS TYPE
As a child in the Pittsburgh area having shoveled many tons of the stuff, to use for heating our home, but here I am playing with IT again. I cannot believe.
THIS TIME , It’s fun. Bill N.
I like this website, it is dynamite.
This is element of surprise. I like it.
I agree with use polystyrene or dense foam, This what I use even for the coal dump near the steam loco shed.Far easier and simpler. Also when you have a lot of these coal freight cars to be hauled, it will not be a problem for the loco to haul (no weight issues).
Hemi, thanks for your photos and info. Who produced the B&O decals you used.
yep …good build
but I agree with the guy who said “why not just fill the entire car with ‘coal'”
…that’s the way the REAL railroads do it….and it would work here too…
keep em runnin fellas
stjohn in long beach calif
I also use foam with coal glued on top, that way rather then cut the bracing from the car, I just cut slots in the foam so the bracing has room to fit in coal load.
Yes Art, you need to insulate the crossings from your mainline. I would just ask Hobby Town how they did theirs. You could also do a search on the Internet on how to wire crossovers.
Bob
Hi Art, in your track laying picture it looks like the diamond frogs are all plastic. This should isolate the rails and prevent a short circuit. With the power to the tracks turned off, you can test for this using the resistance setting on a multi-meter or a simple battery and low voltage light bulb circuit connected between the 90* rails of the crossing. If the meter shows max resistance or the bulb does not light, you do not have a short. You will need to have a power connection for each rail on the section of track between the crossings of the parallel tracks. I hope this helps; Tim
[quote]Hemi, thanks for your photos and info. Who produced the B&O decals you used.[/quote]
The decals were made by Champion Decal….. MANY years ago those decals were bought…… (They say decals have a shelf life), Yes, sure, other-than Champion decals! I have Champ decals I bought NEW 20 plus years ago and they STILL work like the day I got them in the mail over 20 years ago!
I’ve recently used Walthers Decals on another custom painted item, that the decals were NEWLY printed in 1957, BUT, I had to use the Microscale Liquid Decal Film on them, Champs decals I HAVE YET to NEED that liquid decal film on to use them! God, how I miss Champ Decals!
ART, I can not tell what brand Hobby Town is using, however the ones you have look like Atlas. If they are Atlas they are insulated. Of course I have no idea what your plan on the rest of the track is and you may have got a bad crossing.
NVBob
a great how to Hemi thanks for sharing. pictures look great,
Thanks guys for the input. to those who mentioned about “Prototypical Loading” of Coal cars, WELL I might add here MOST if not ALL my “Coal drags” are truly a “drag”……. 35-40 plus cars PER train! I’ve currently got around 150 coal cars from the 55 ton ones seen here all the way up to 100 ton HO scale cars. Sadly, I don’t have the prototypical grade on my layout (its all flat) and I still run doubled headed Articulated steam……….. Early diesels, require at least 3 powered Proto-2000 (NOT Walthers Proto) SD-7’s or SD-9’s….. IF not SD type (6 axle powered trucks) and go with a GP type I go at least 3, depending length of train, even up to 4 powered loco’s…. AS-is the train is already heavy, prototypical loading of them, I’d have to quadruple head articulated steam to pull one train!v IN some cases, single articulated on the point, and double headed helpers of the B&O 2-10-2 steamers pushing to keep up slack…..
Even tho my Black Sand Coal load material from the “Dollar tree” is $1.00, it would require 4 times the amount needed per car so…… Not to mention amount of glue I’d need required to glue that much inside the car!
I had a number of coal hopper cars filed by a variety of methods but thought they all were too heavy to assemble into a long train. Then I found some black styrofoam used for packing furniture legs. I bought a.small coffee grinder from the Goodwill Store, and ground enough of the black styrofoam to fill a dozen hoppers. Sprayed the top lightly with hairspray, and I now have a string of lightweight coal cars with realistic looking coal. I’ll attach a photo in a separate email.
Thanks everyone and your replies! Since I have done this, I’ve taken a few “weight tests”…. The way I’m doing this, has actually stabilized the cars I load, IF loaded correctly, its centered, and to that I have also taken a car of the same, placed a “cast” coal load in the car, and put it on my digital scale, and took this very car and weighed it on the scale…. MY CAR is 2 ounces lighter then those cast (molded) coal loads you buy…. -Also these I do, how I do them, in runs of say 50 cars or more…. I use 2 articulated Steam locomotives, pulling on the point, and ten one maybe 2 helpers of the 2-8-2 or 2-10-2 wheel arrangements. Or one of each!
I also have placed metal wheels under my cars as well and only some of these cars have metal truck frames as well and those are “sprung” as I wanted and am will go to do them all this way as those sprung trucks looks so good so… Which this, they roll nicely, and the metal wheels and trucks bring a little of the weight lower on the car for a lowered center of gravity….
Been running them like this for decades…. Have yet to have a problem!
Keep Modeling guys!!!! ~Hemi
I’ll have to send over the coal loader and cars
That I got on e bay a while ago
The loader actually loads coal into the car
And the cars just like your two bay were custom
Made to dump out the bottom
I agree with the above, but I will say it looks nice good luck with your project.
The system I use to load wagons I got from this website, thanks Al.
First line the wagon with Cling Film, then insert a suitably shaped polystyrene filler of the right depth with black painted top and using water and PVA glue stick the coal to the top of the filler. Then when this is well glued and dry gently pull the Cling Film up to remove the “load”. Peel the Cling Film off and put the load back into the wagon. You now have an undamaged clean wagon with a removable load.
Looks Fantastic? I hope mine comes out that good.
I used the same idea for my coal loads except I use foam core followed by house caulking first to build the general shape, painted it black after that dried I used the glue and scenic coal over the form. Works well, much lighter.