“Al–
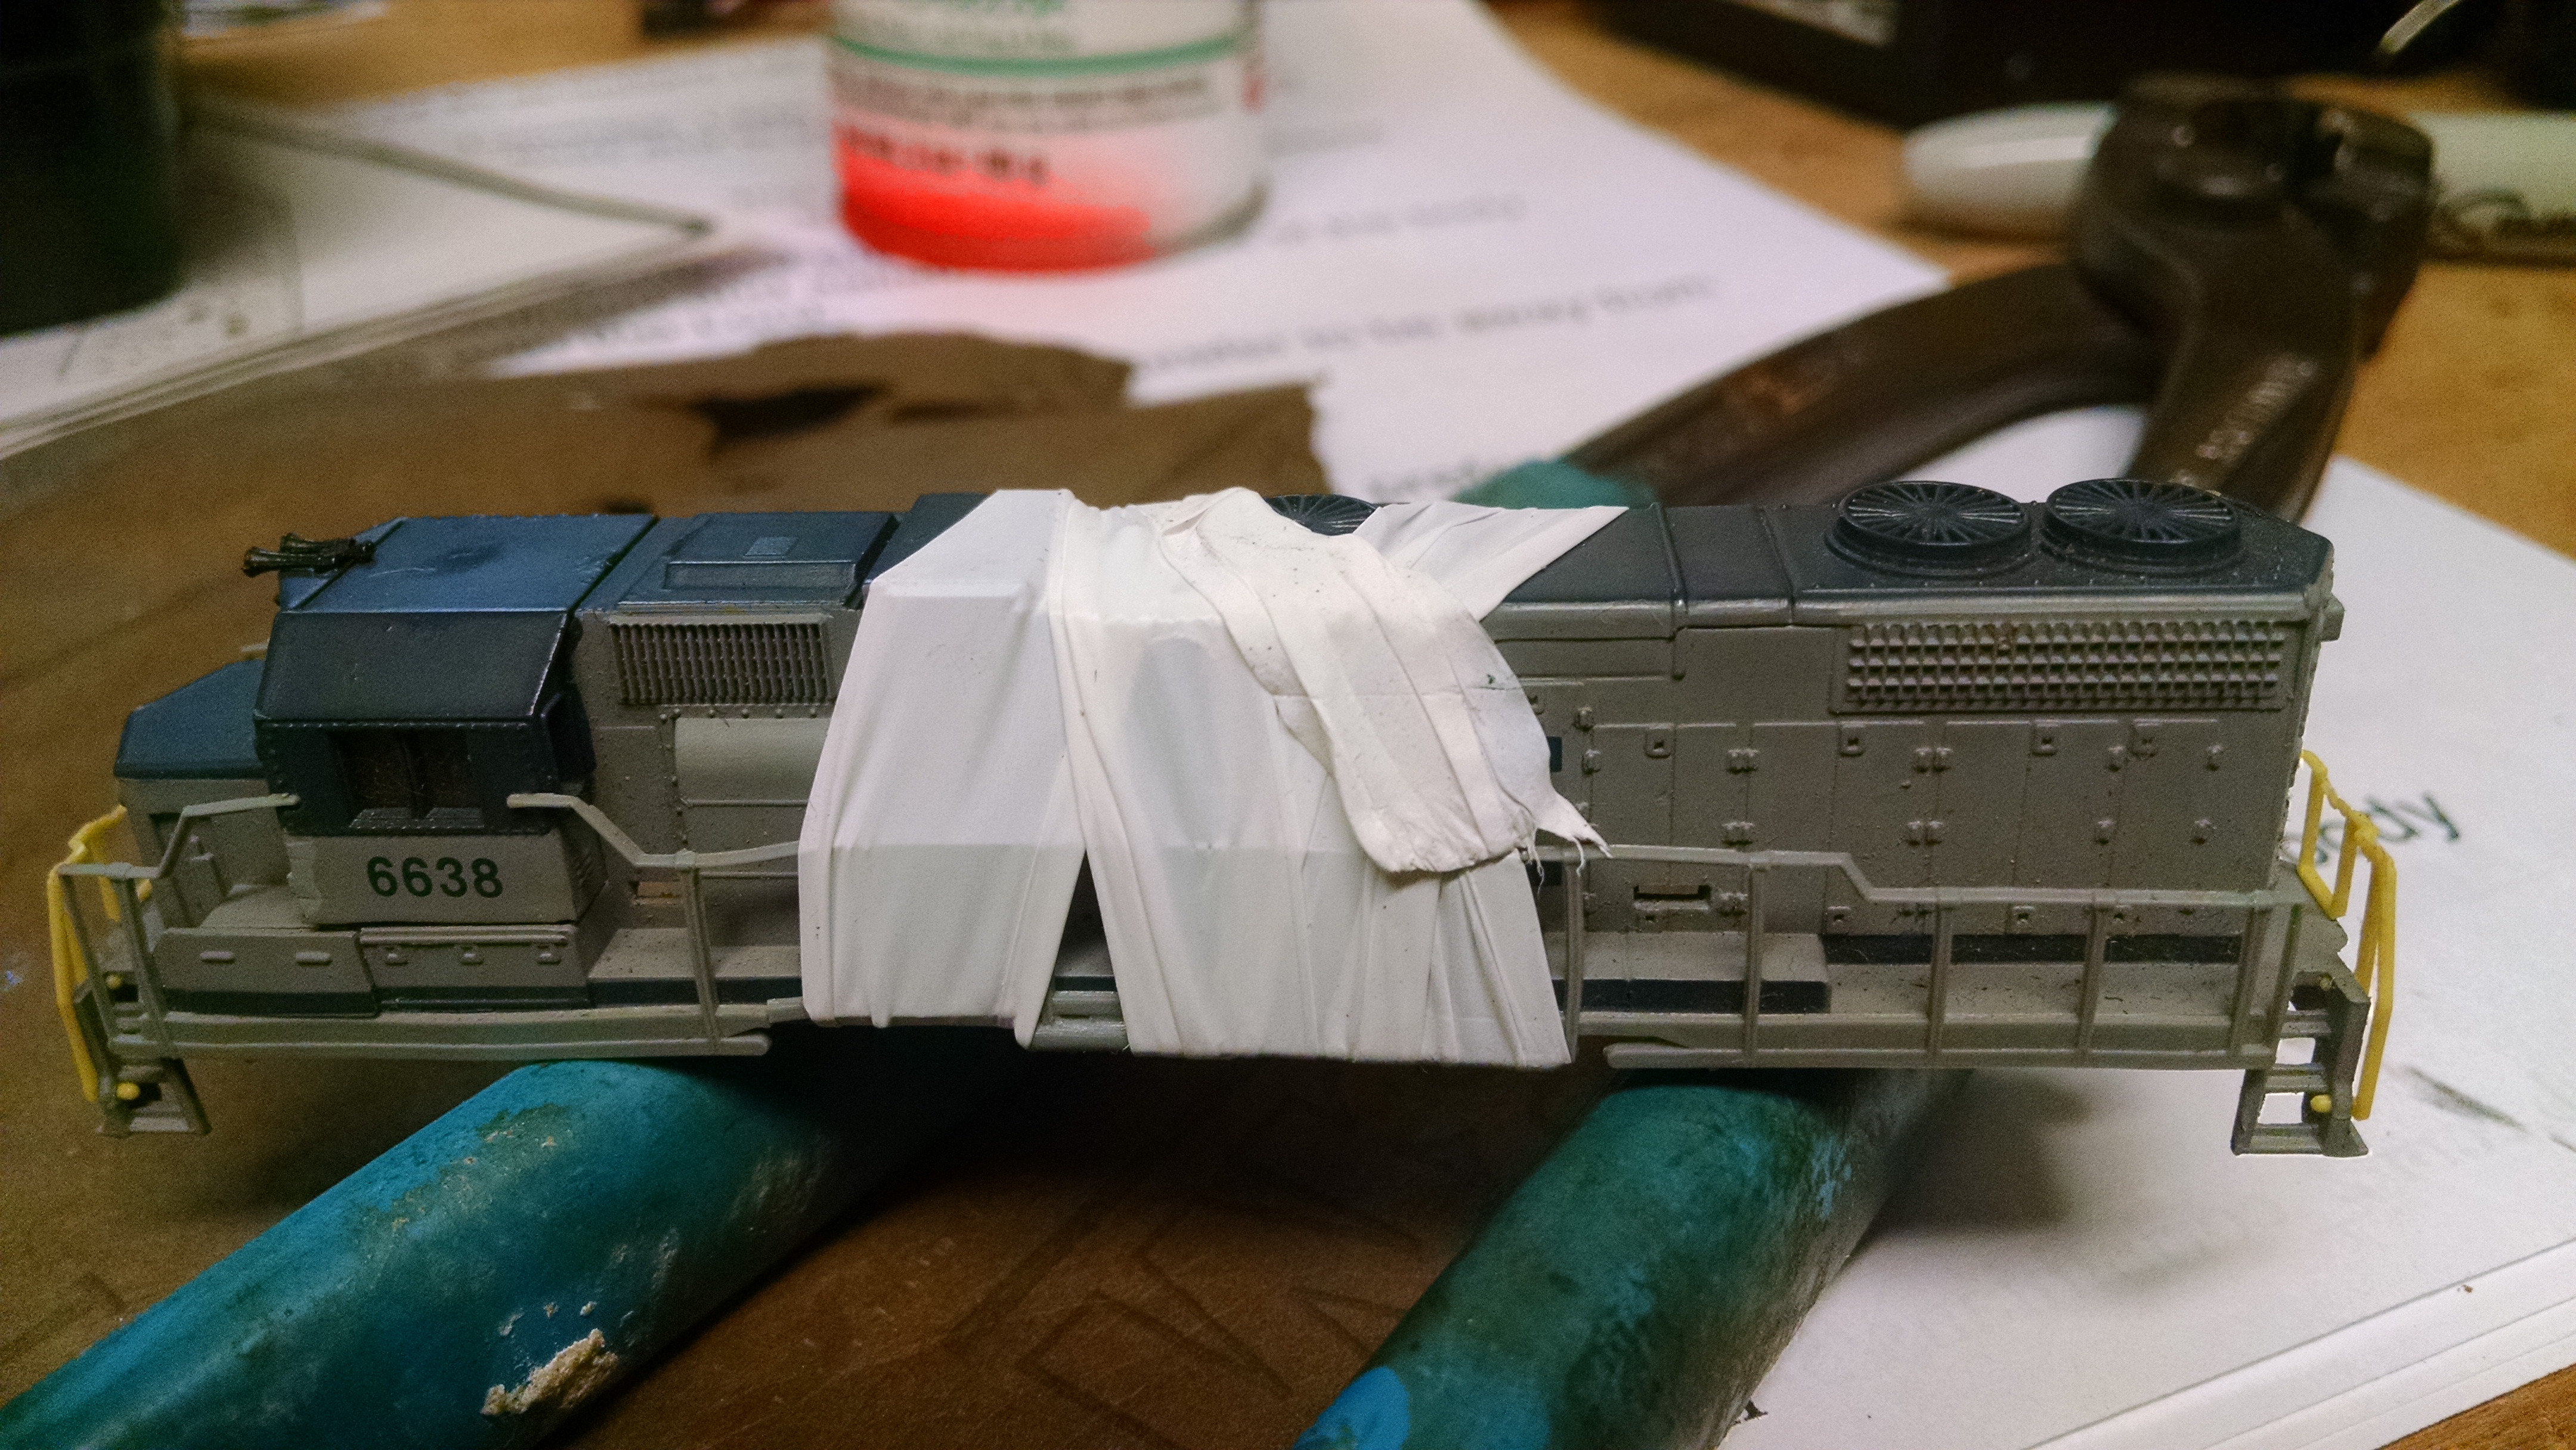
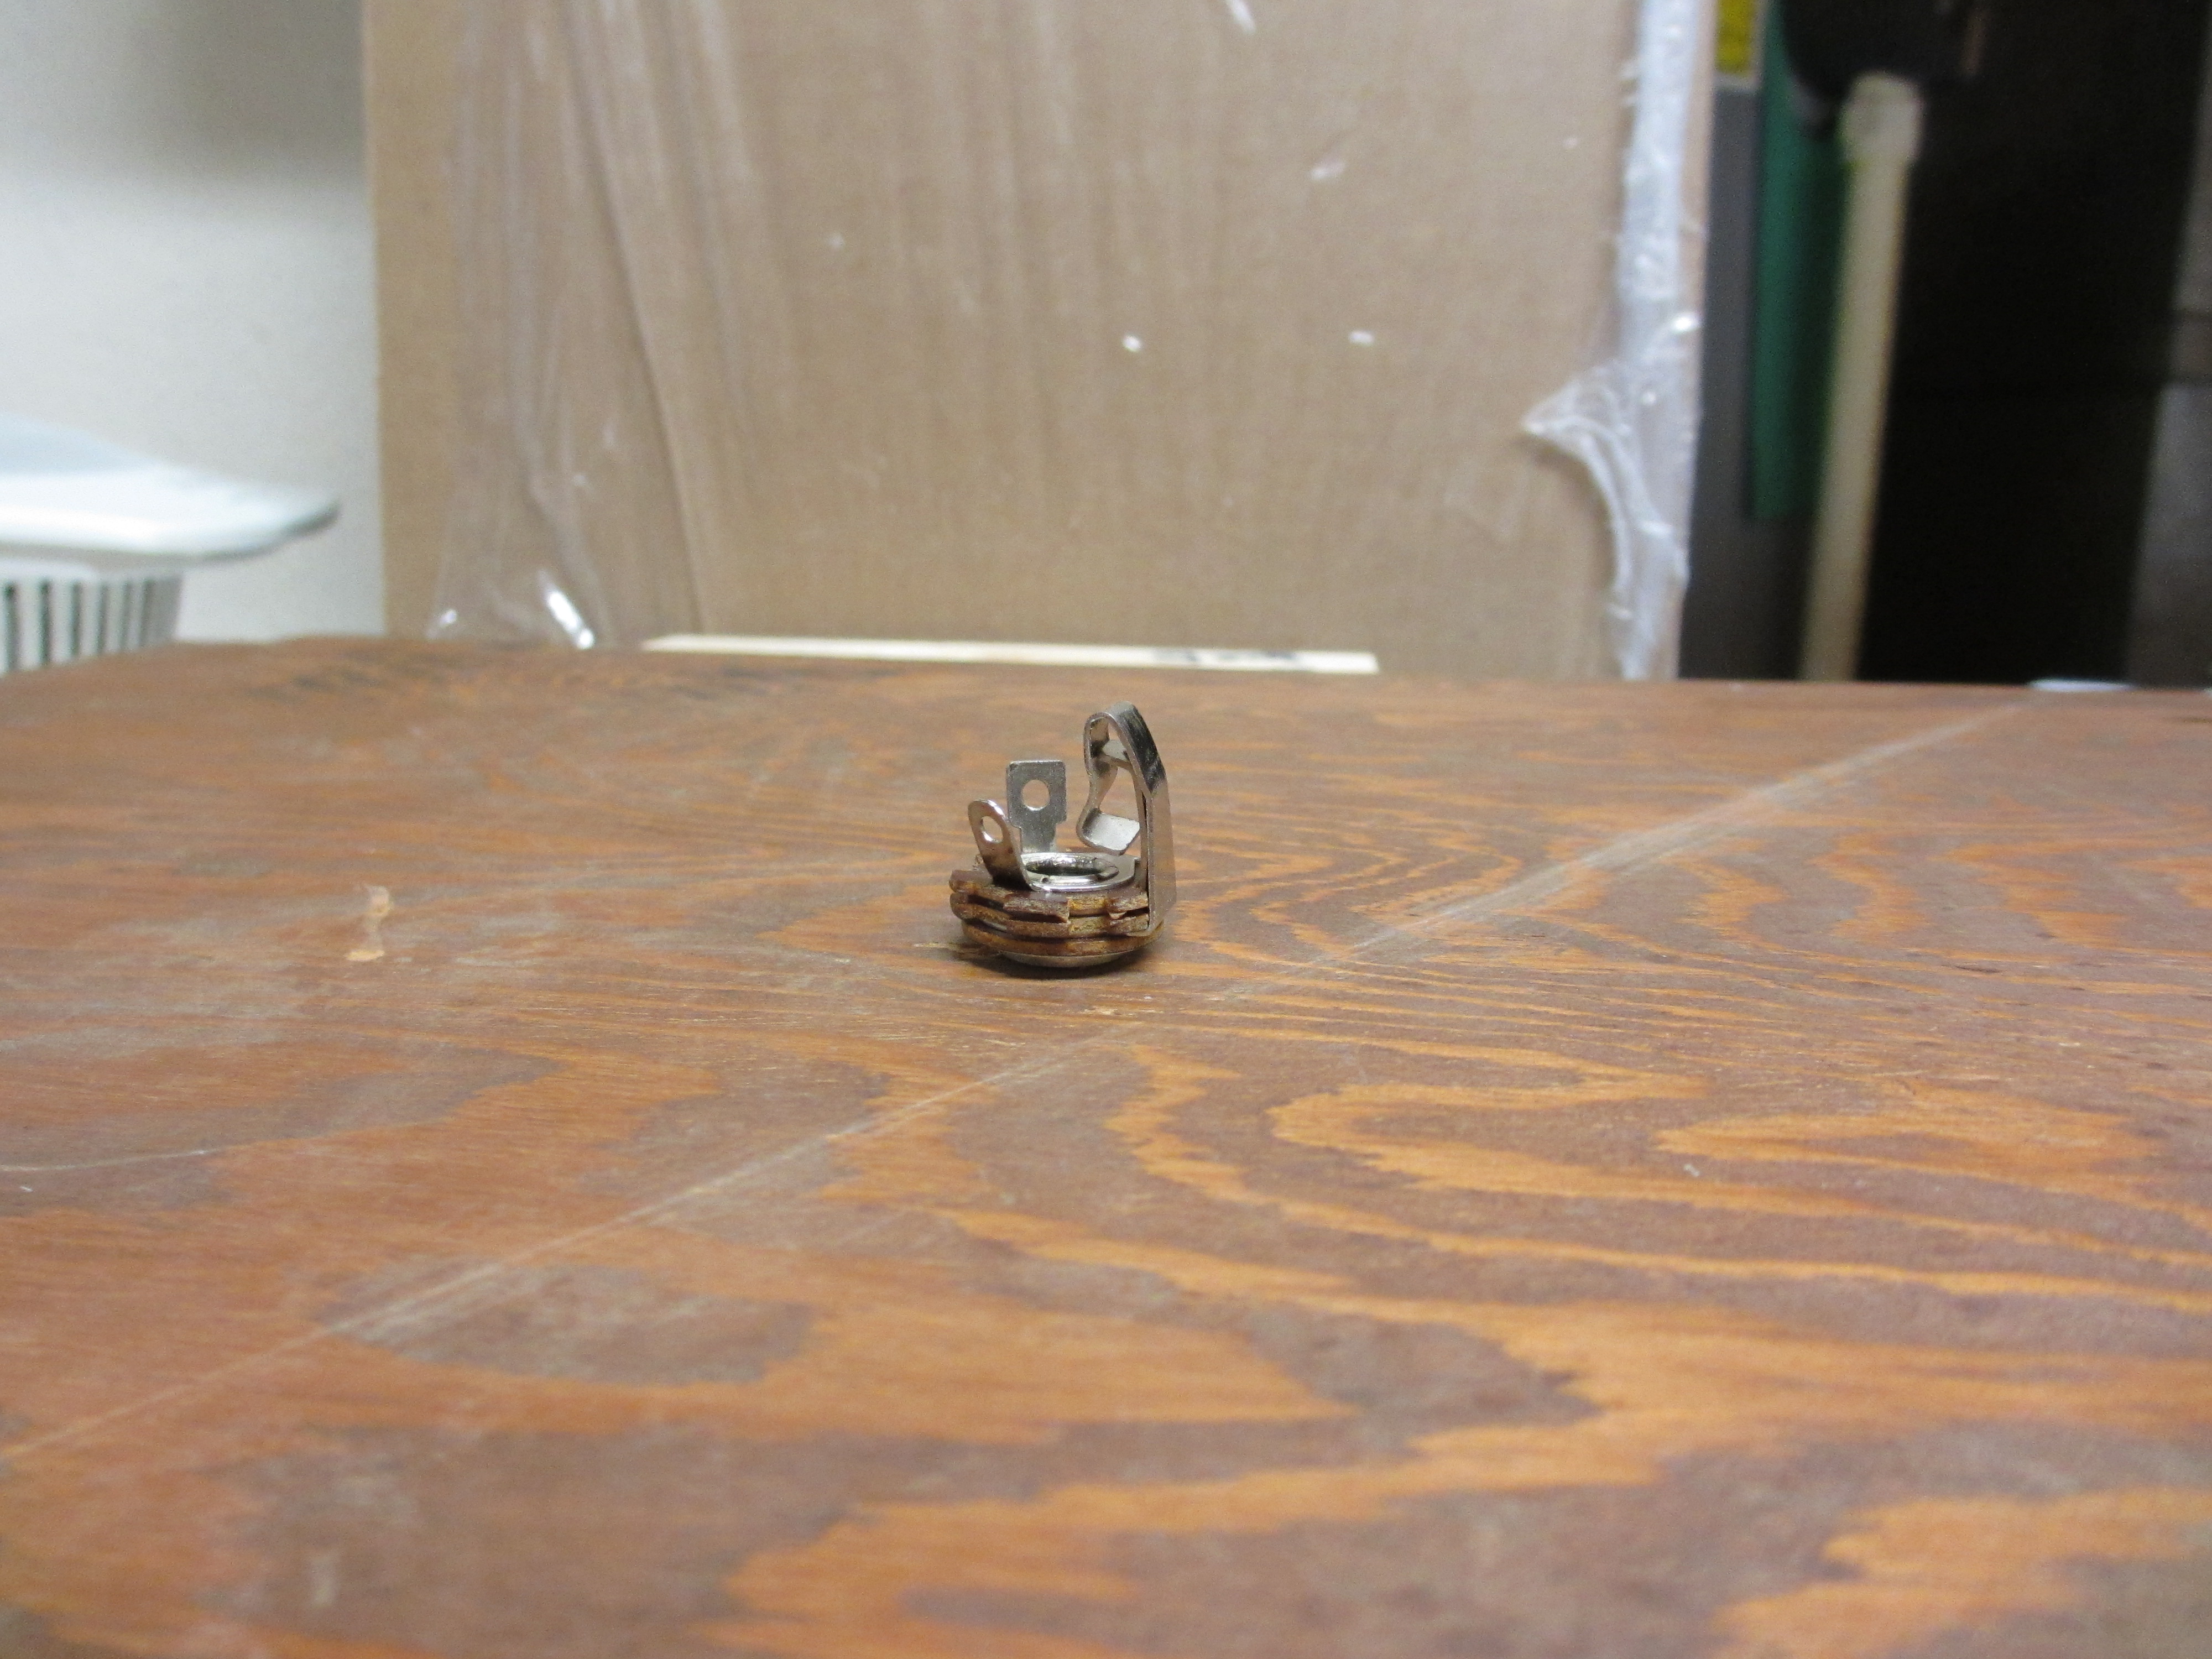
I have one for you; I was trying figure out how to hold one of those little bitty tiny N scale handrails in place while I glued it back in place with a bit of epoxy.
My hands are not stable, tape will pull the handrail right back off of its intended location, tape reversed with the shiny side toward the handrail will not let me position it correctly, etc., etc.
I looked around for a new trick and came up with using pipe tape (the stuff you use to prevent leaks on pipe thread) to wrap the locomotive.
It holds nicely, even stretching a bit like, but not too much like, a rubber band.
I have included a picture for you, and I really like all the tips!
This little guy is running around the tracks now, happy as can be!
Jerret”
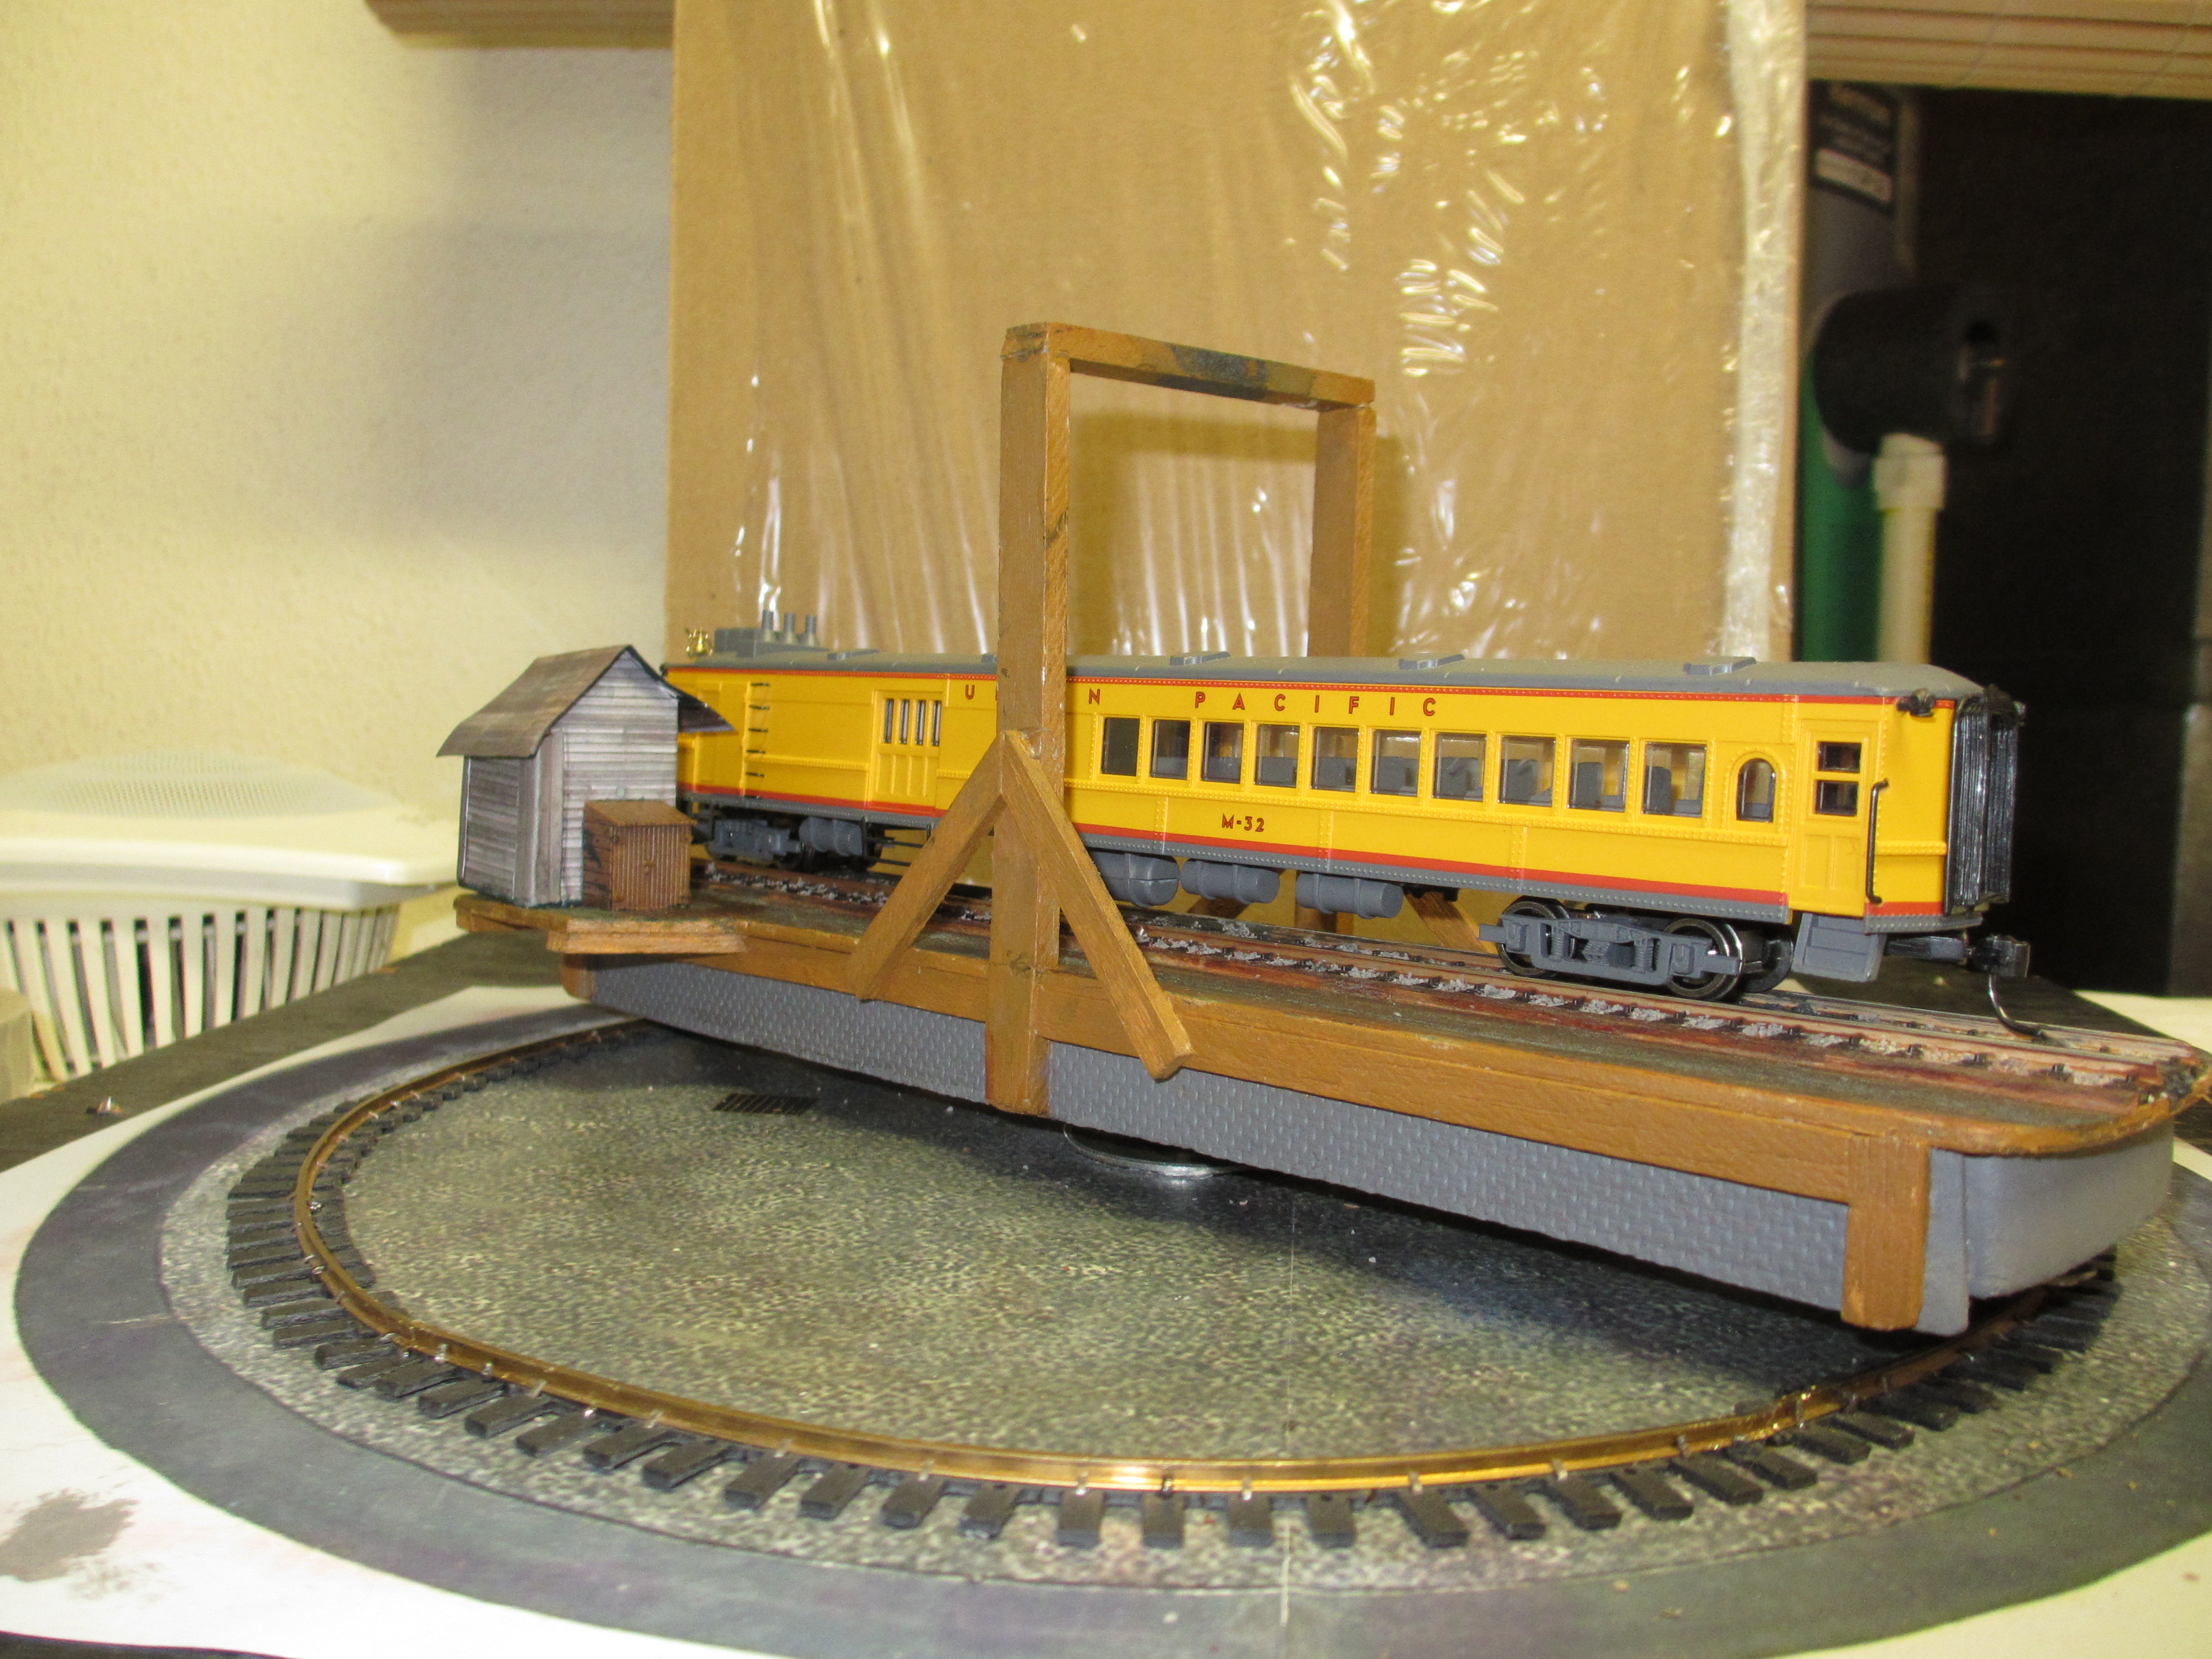
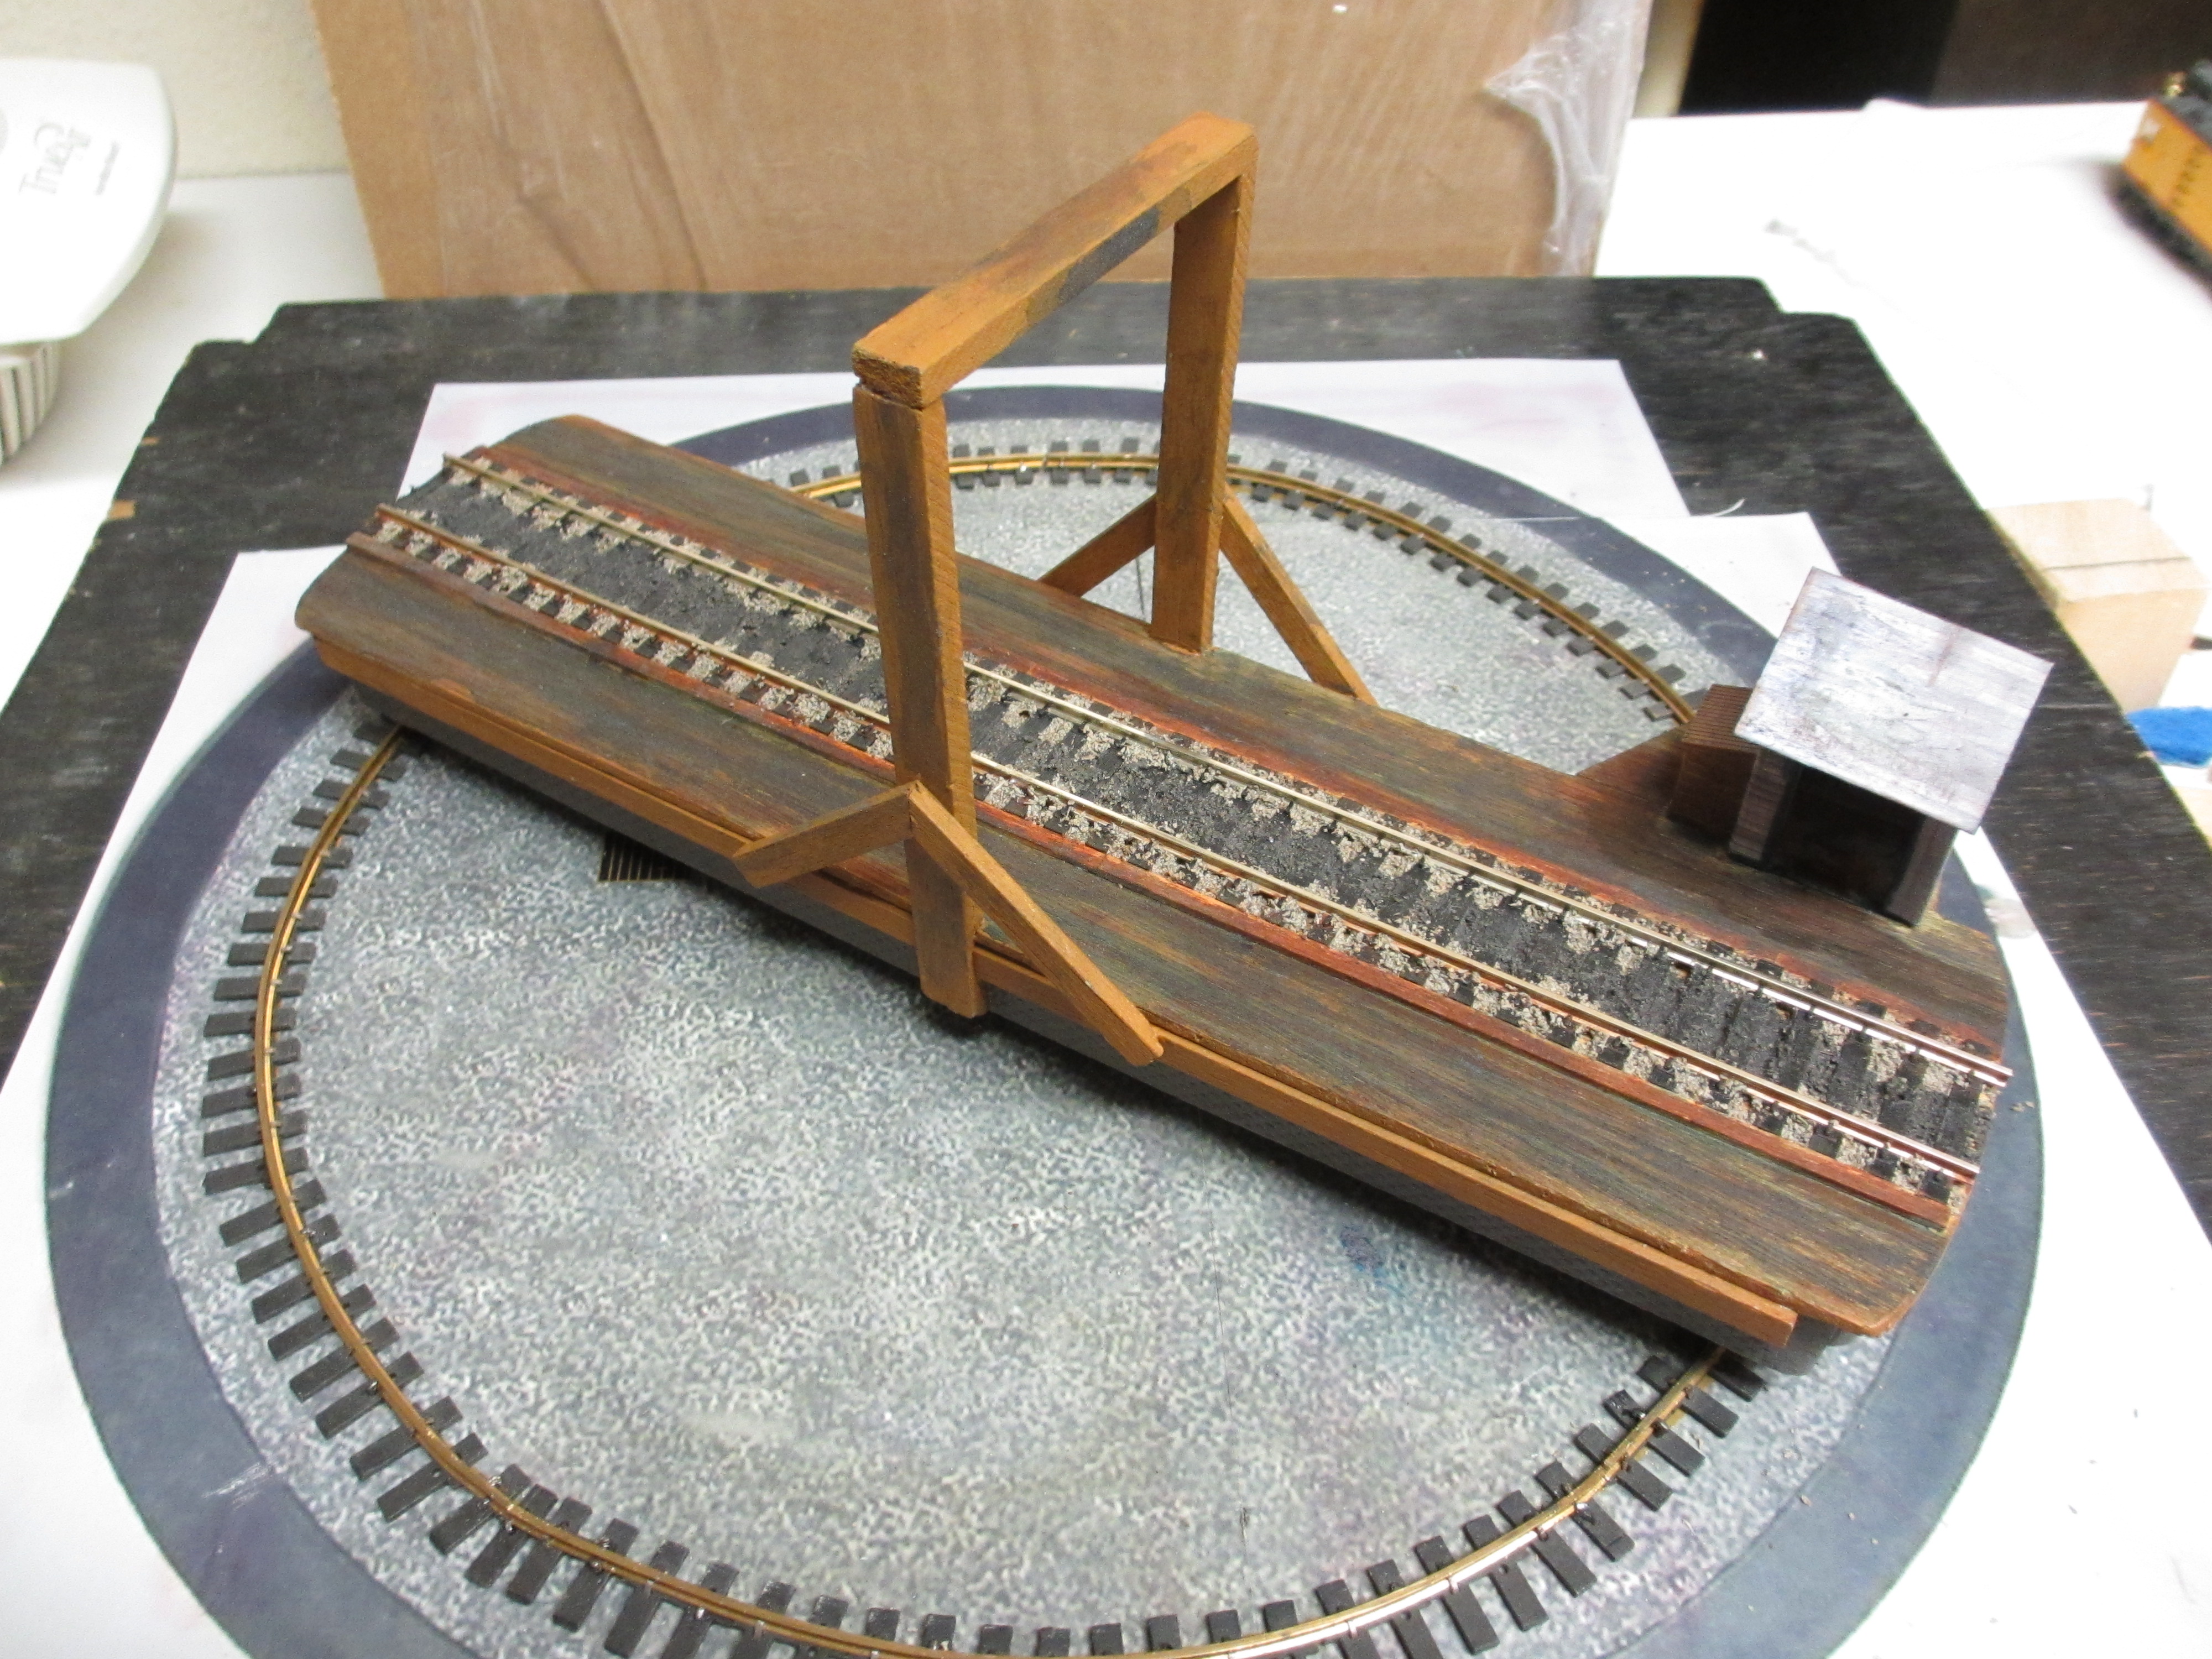
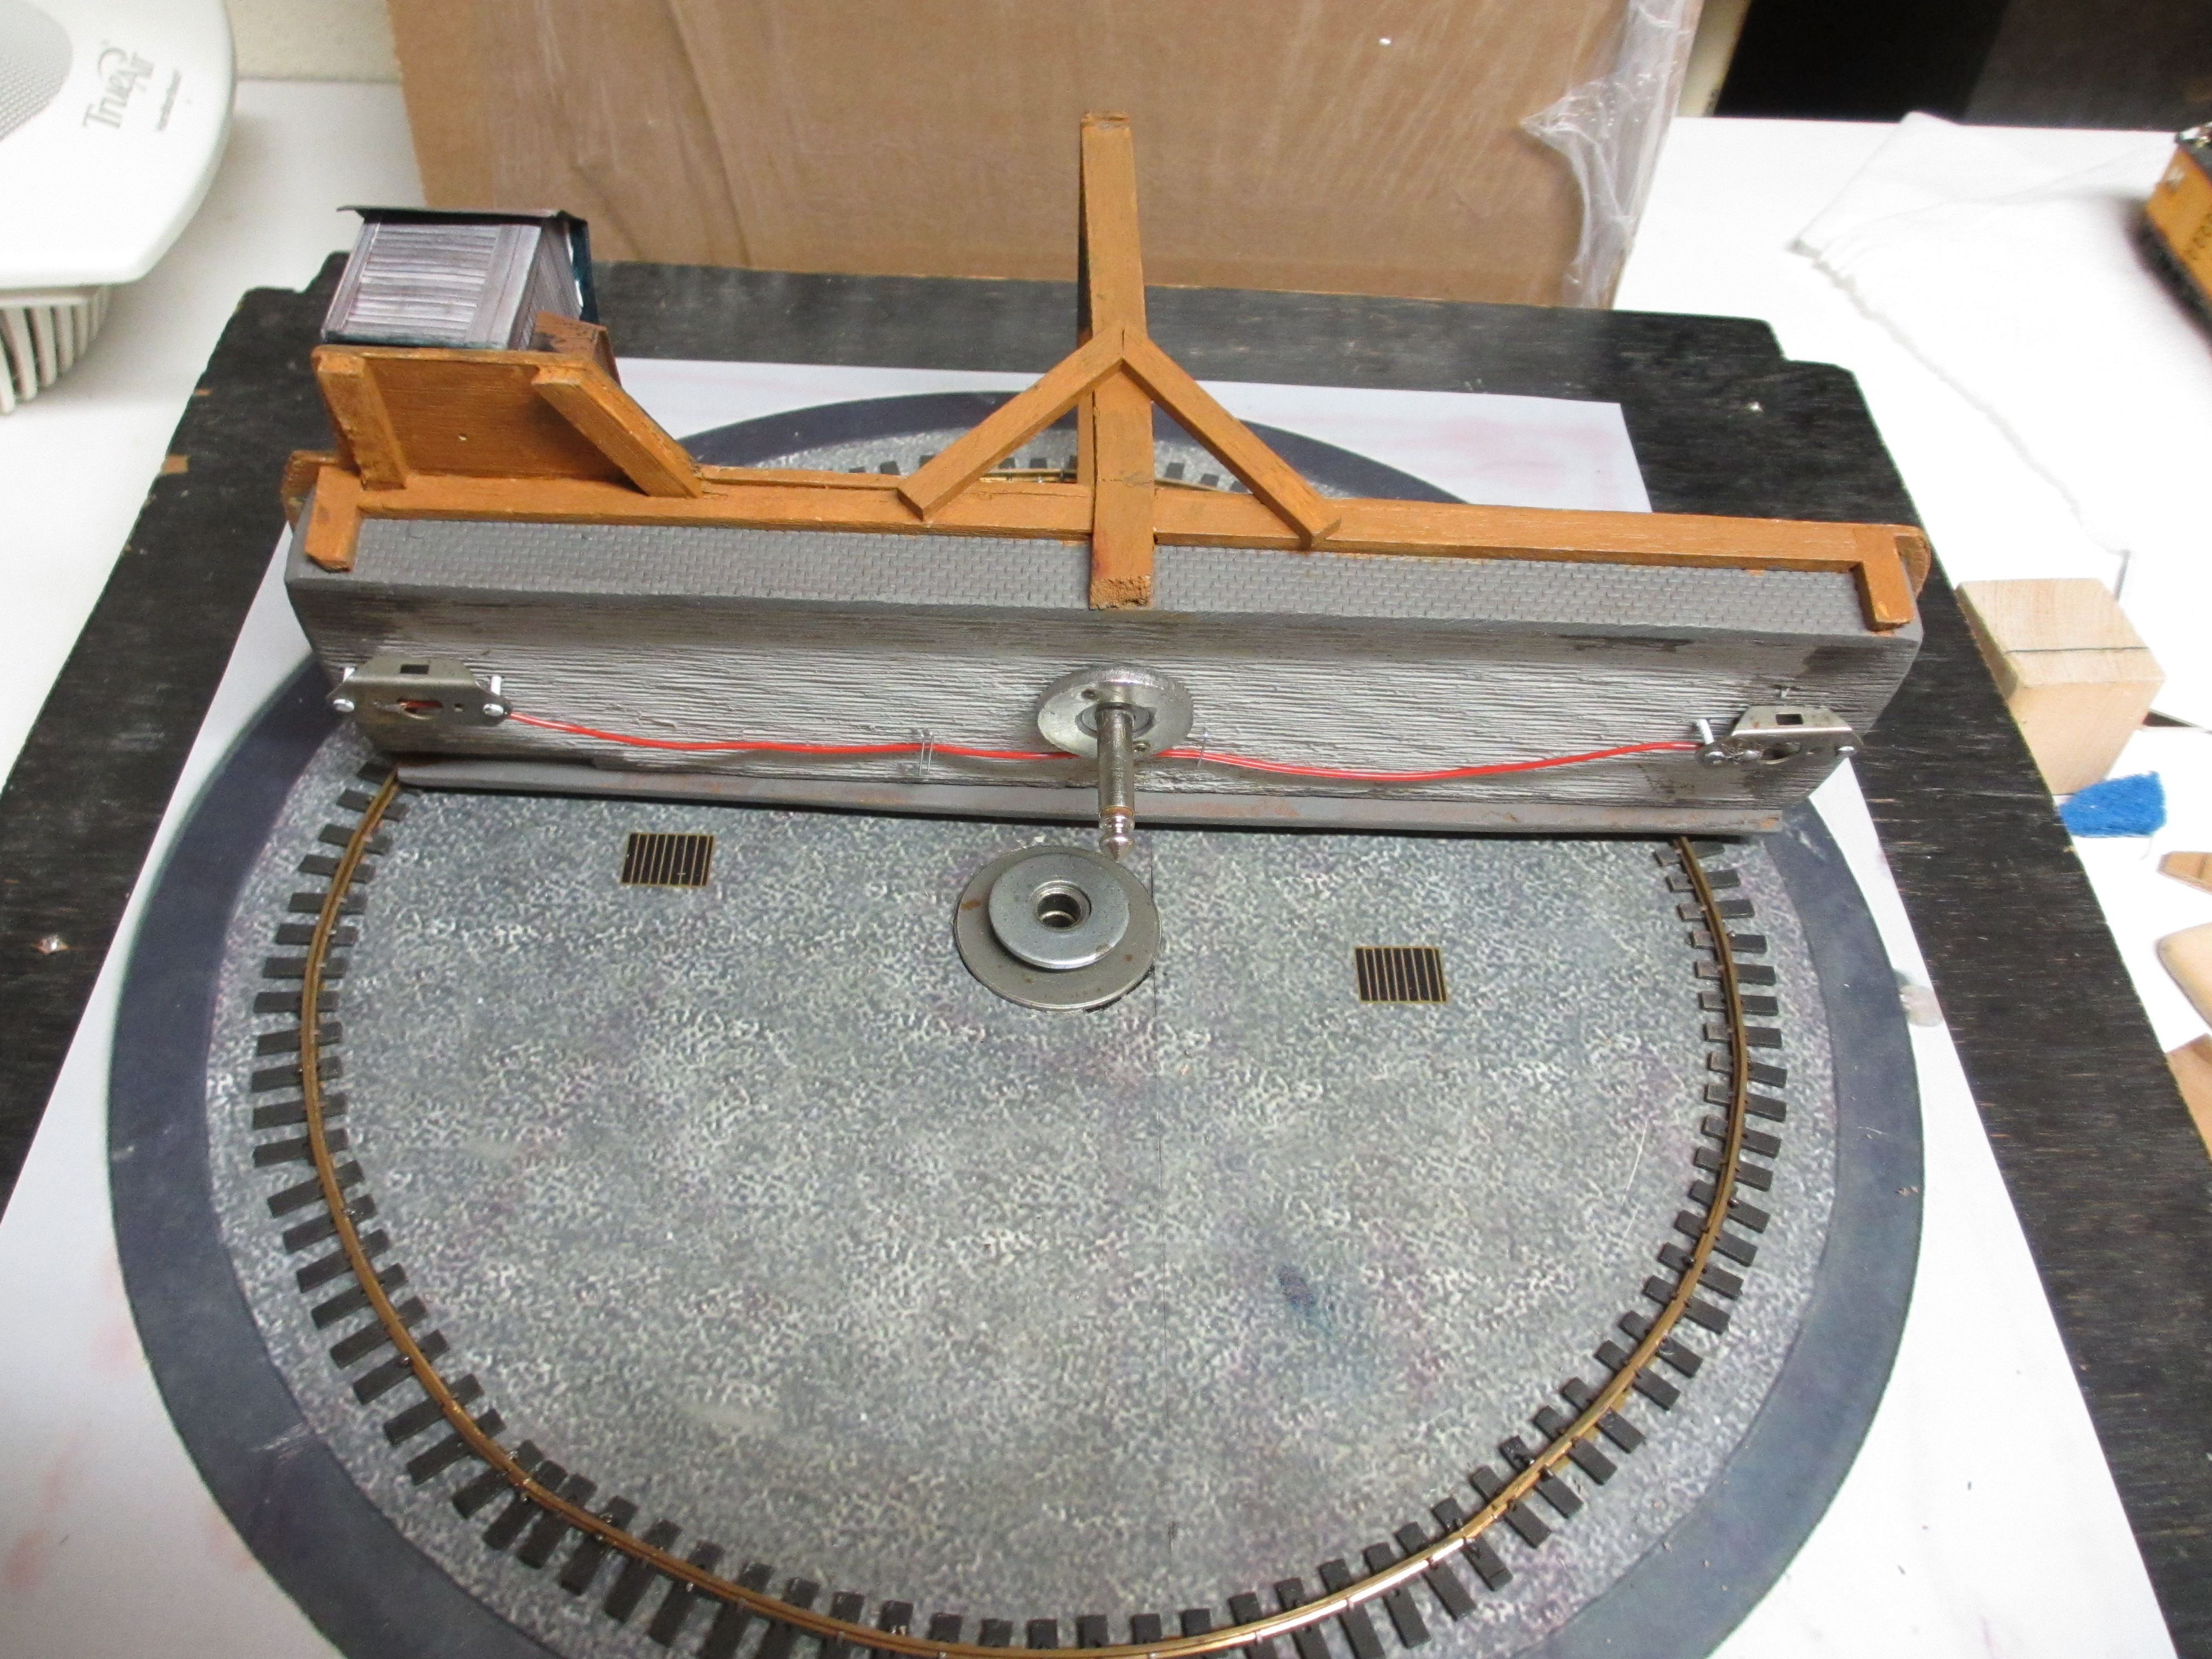
“Alastair here is a tip for Ken or anyone planning to scratch build a turntable:
If you decide to make a scratch built turntable, you can use an old style large dual contact audio plug and jack as the spindle and pivot hole. This makes powering the track on the table very easy.
Wire the plug leads through the table to the rails and wire the jack from your track transformer.
When operating regular DC and completely turning your engine, the section(s) of inbound/outbound track(s) to the turntable must be isolated so that their polarity can be switched independent to that of the transformer.
This will allow the track to match the polarity of the rotated turntable, since this way of wiring keeps the polarity of the table constant.
Once the engine is off the turntable, the transformer direction can be changed to the new direction and then the isolated section must also be reversed again, to match the transformers direction.
The turntable will also need to be rotated back again to match the polarity of the next inbound engine.
The hard part is making sure that the plug is perfectly centered and perpendicular when screwed into the bottom of the turntable.
I got this tip from a video clip on scratch building a turntable, when I needed to build one to turn a doodlebug at the end of its branch run.
I am still working on how best to operate the table.
Since these pictures were taken, I have added wooden railings with a pit access ladder and a fine toothed gear around spindle and glued it to the bottom of the table.
I also found a roller bearing donut in my spare parts stash that reduces friction and stabilizes any wobble of the table due to the tightness or lack there of between the plug and jack.
The wire in the pic that runs the length of the table bottom is for an alignment indicating circuit.
When the tracks are properly aligned the table will complete a simple dc circuit to a light and battery (one light and battery with leads to each contact pairings) thru contacts in the pit walls at the center of each track and the opposite wall.
The bottom of the pit is just a picture from a computer paint program’s gravel texture with drawings of drains added.
The rail is old brass flex track cut in half and formed into a circle. Make sure that the alignment contacts on the table do not touch this rail or you will get a short in your circuit.
Alignment circuit:
wire to contacts on left side of pit }—@—+[batteries]~—{ wire to contacts on right side of pit
Best of luck,
Tim”
A big thanks to Jerret and Tim. After all these years, I’m still constantly amazed at what comes in.
And if today is the day you get going on your layout, the Beginner’s Guide is here.
Best
Al
PS Latest ebay cheat sheet is here.


now that is very clever, brilliant idea and well executed
well done I like this idea so much it gives you ideas for other things
Great turn table with some extra neat advice about the jack plug. It is great to get another email. I start my school morning off with these emails and last week was hard without them. Thanks Al.
Hi Jerret”. Don’t leve that on to long or the plastic will form and stick bent. Next time this happen’s. Use instant glue and hold the piece. It dries very fast. but a good tip.
That turntable is great.Cool idea on how to build it. Look’s like it work’s very well. Thanks for the tip and the pictures. good idea’s
What a brilliant idea. Yes I agree with Al…keep ’em coming!!!
hmmm…pretty interesting scratch engineering
on the turntable…
and like the previous comment
gives a whole new light to some other ideas
keep it runnin fellas…
What a great idea and it would peel off without leaving marks.
I LIKE THE TURNTABLE !
PAUL OTWAY
When I saw your turn table, I thought about a record player turn table? It can be slowed down so the train will not fall off. I’m not sur3e the electronics as how to make a way to slow down the turn table slower than the 33 1/3 speed. This is a great site for anything I need help on. Please keep up this great site.
With my mechanical abilities, i’ll Just purchase a turntable, thank you.
What a good idea
Low tack modelers tape is a pretty good tool as well. I paint a lot of acrylics lately and found regular painters tape would pull up most of the paint. Got Tamiya modeler tape and viola no more. So i imagine it would work well holding things in place without sticking too hard when you remove it.
1/4” Jack plug is a brilliant suggestion for a pivot point on the turntable.
As you have a complete circle of brass rail round the turntable. Two small cuts at 180 degrees to each other, and then wire the track feed power, one to each half. Take the track pickup for the table from the circular rails then each time it swaps end it will reverse the polarity on the table rails. No complicated switching of the feed in feed out track.
Mal
North Wales
Pretty neat idea; I am going to have try that .
The tape is known as anti-seize tape. It is actually used on threaded fittings to prevent them from rusting together. It has no adhesive properties It available in plumbing departments. Glenn
How did you get the track so perfect? your idea is fantastic. Ralph
Many year ago. and I mean many years ago my Dad and I built a O-27 layout and he used as old furnace damper drive to operate the turntable. The tricky part was to stop the turntable at the correct rack as the motor had some over travel, but still the movement ws slow and to scale.