Bill’s been in touch with his HO scale figure 8 layout:
“Al,
I started my HO layout back in the ‘90s when my now 37-years-old son was a teenager and we were building it together.
Complexity of dealing with reversing polarity segments in DC, general lack of knowledge, and shifting interests caused the layout to languish for decades.
When we moved residences in 2019 as part of downsizing in advance of my planned retirement, I decided to move the layout to an unused loft area in the new home (In retrospect clearly a mistake.)
There I began to work again on the layout. Free time following retirement contributed to my ability to focus on the layout.
Once the track was laid and DCC wiring was installed, I could run some trains — or at least locos to test my track.
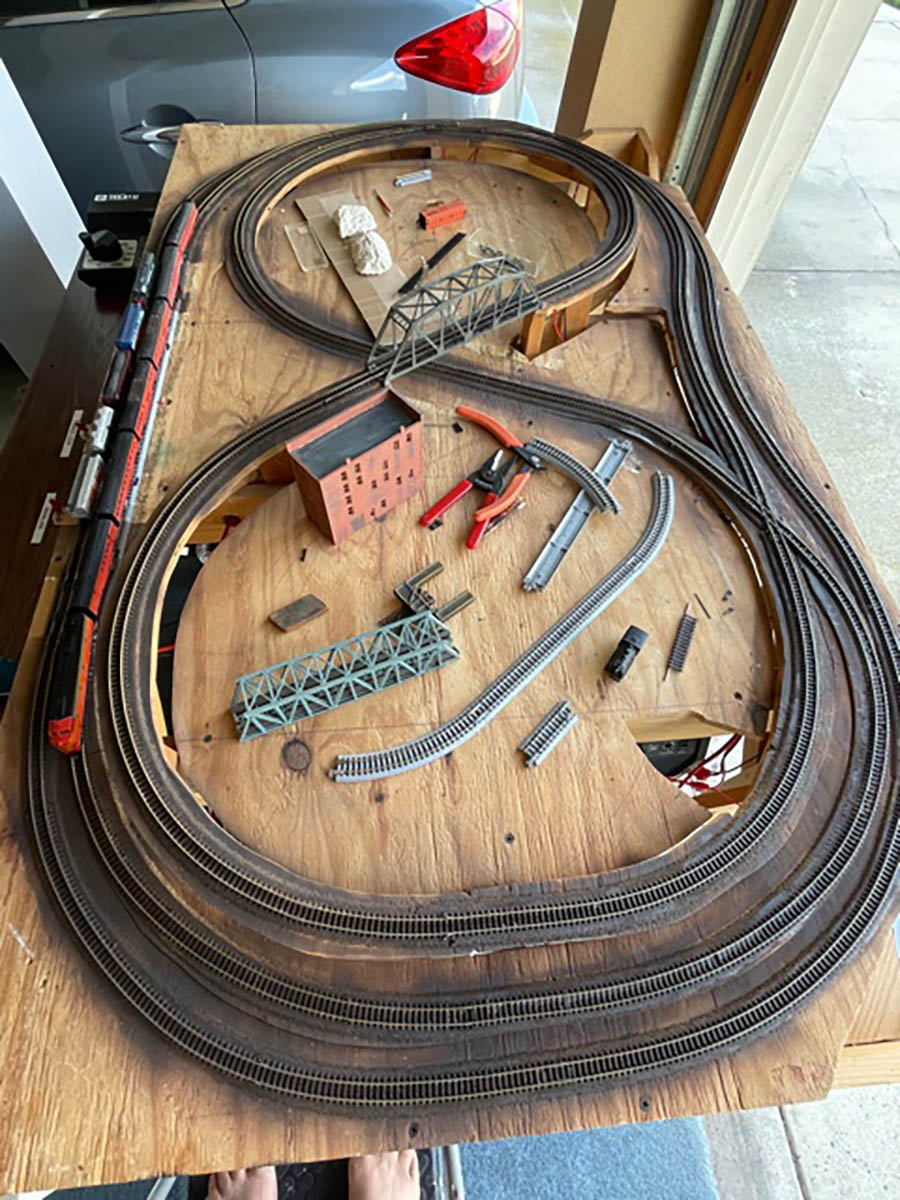
The track plan is a basic HO scale figure 8, with elevated cross-over and two reversing segments.
The design was modified from a book of track plans published by Atlas. The construction method (admittedly dated and I would never recommend today) involved making parallel cuts in the layout top surface with a sabre saw, and then inserting a series of increasingly larger strips of wood “wedged” from side to side beneath the cut strip to pry it upwards, forming an inclined ramp (and reversing the process on the downward slope).
I used a popular brand of what I would call introductory quality track and turnouts. No soldered joints. Some flex-track, but mostly set-track as specified in the plan. Mostly 22” radius curves.
It was a potentially fun layout, but I could not get my locos to run without constant derailments. And in some cases, I couldn’t even get them to run! The problems were multiple and different.
For example, slight variation in the rate of incline created at least one “dip” and transitions were poor, causing locos to derail or stop running, either for lack of electrical continuity or physical contact.
My N&W “A“ (2-6-6-4) loco especially disliked the dip in the incline, it’s front truck wheels and rear truck wheels would be on opposite “high” sides of the dip, suspending the tractionless drive wheels spinning between the loco above the dip. The loco may be “articulated,” but not that way!
Turn-out issues, problems with joiners and flex-track all revealed the dire consequences of my novice errors years before in inadequate attention to sound roadbed preparation practice and proper track laying technique. These issues were undoubtedly compounded by flaws unintentionally introduced by the inevitable twisting of the approximately 5’ X 9’ layout during the move.
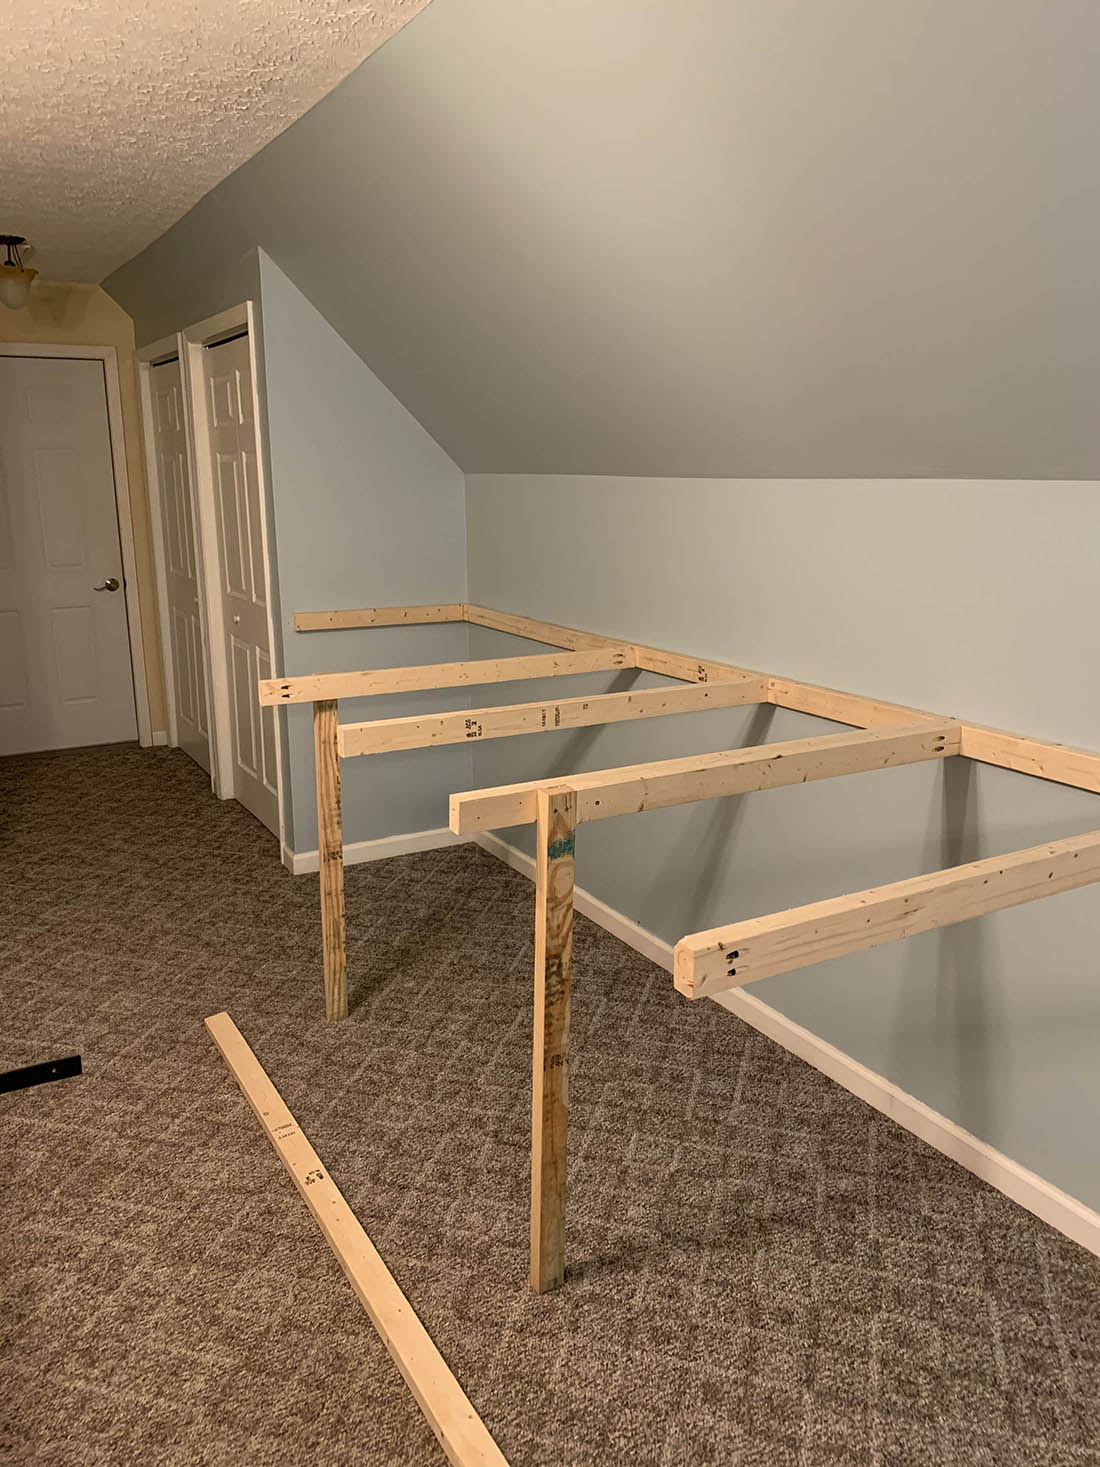
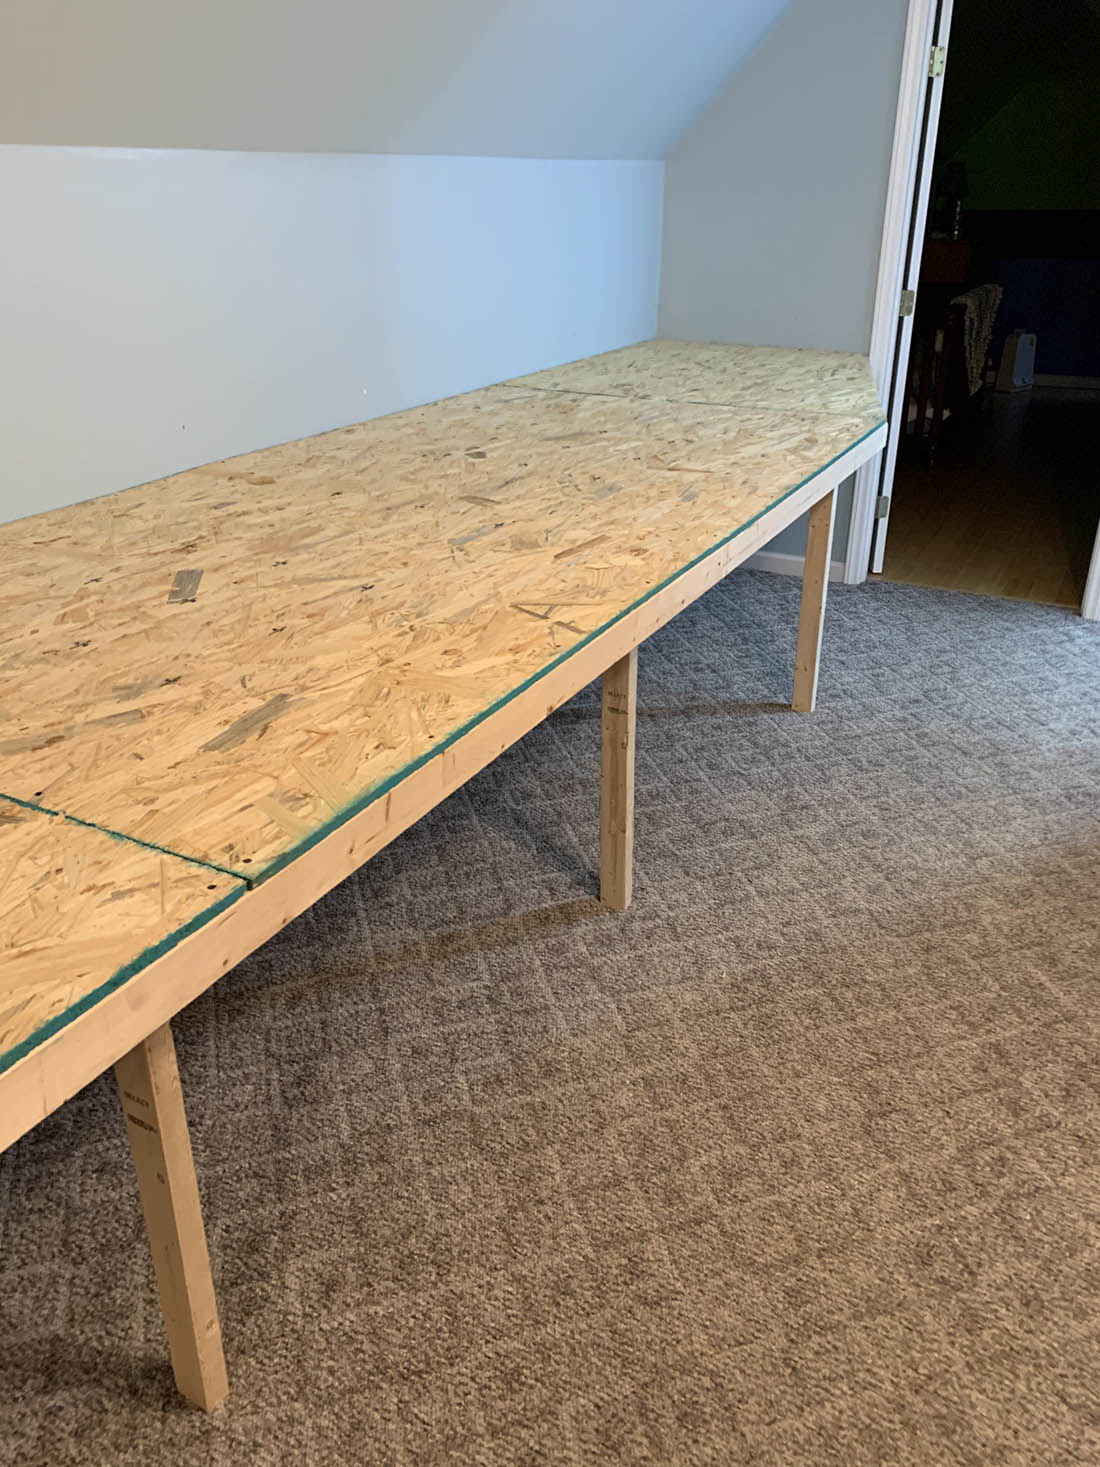
Ultimately I determined that I could chase derailments for years, and never get the layout to run reliably, or START OVER. The latter is what I did: I tore off the entire top of the platform and installed new plywood and 1” foam as a base.
I also took this as an opportunity, using some model train layout-planning software available on the internet, to redesign the layout with larger 24” min. radius curves to better accommodate my larger locos and 80’ passenger cars. That process revealed that I would need to expand the layout, both in length and width.
That expansion is why I’m writing you. I am not a gorilla and the width of the layout — 5’6” — means that any detail in the middle of the layout is unreachable from the sides.
This presented a particular challenge as a critical set of turnouts, on opposite sides of a bridge crossing the stream that bifurcates the track, is located right in the middle of the layout — with the crossover of the figure 8 mainline crossing almost directly overhead — a busy place for track laying and scenery.
Climbing up on the top of the layout was no longer an option given the modern use of foam board overlaying the plywood top surface.
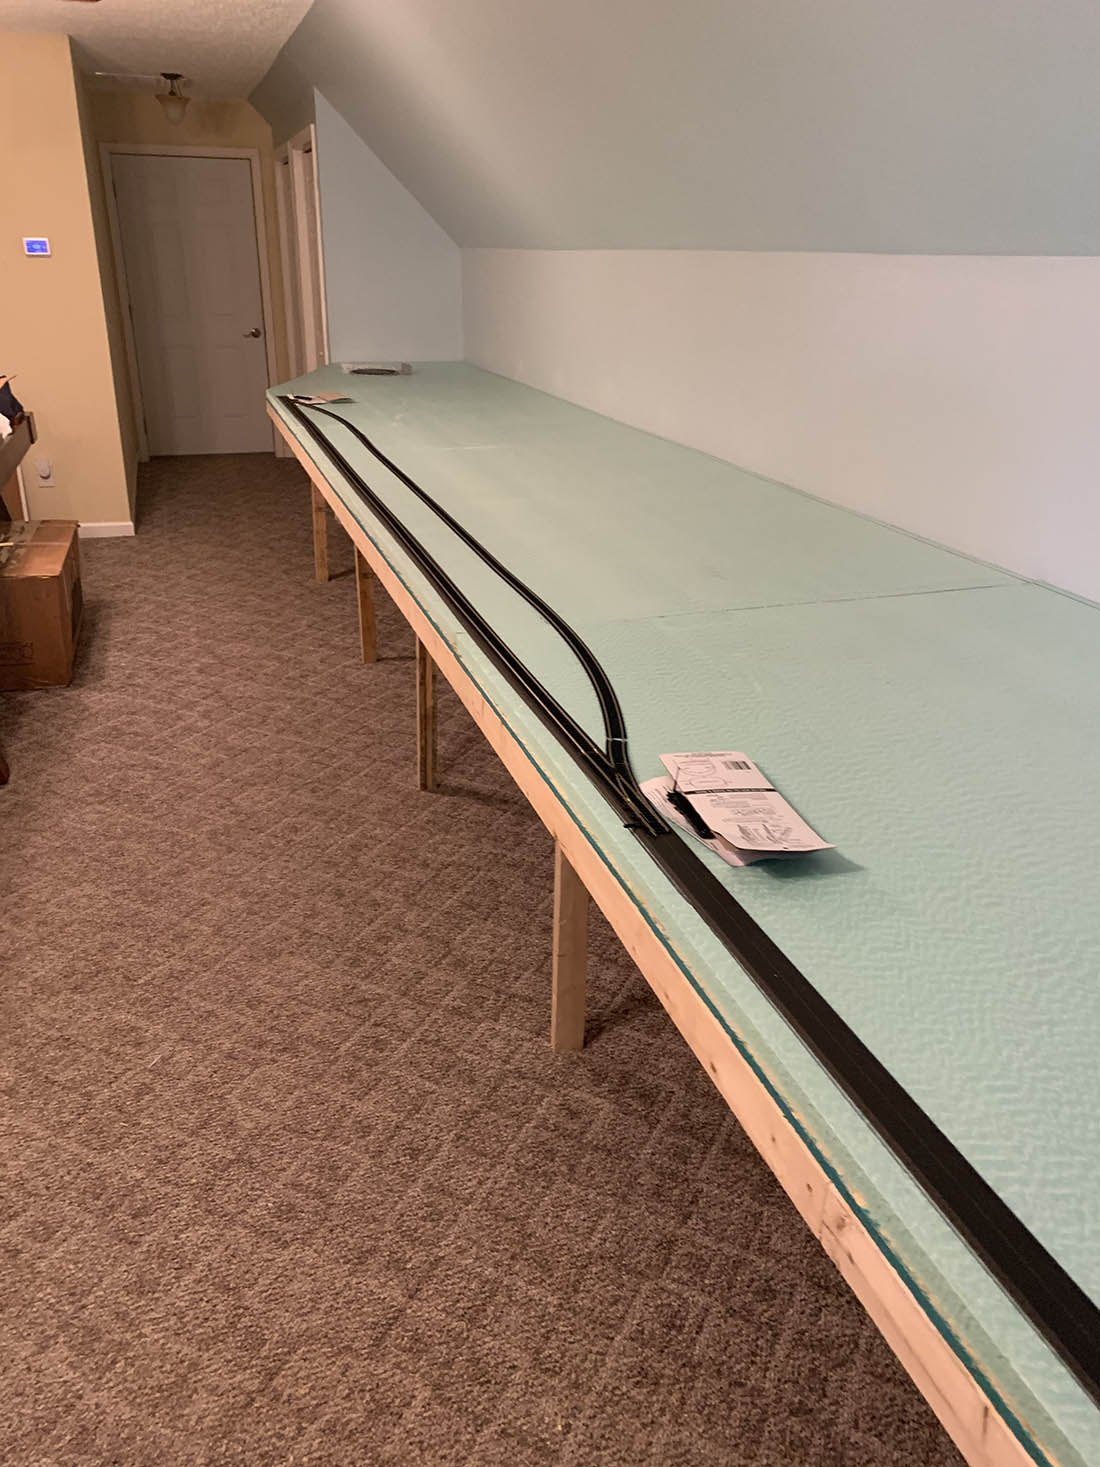
Scenic Woodlands inclines and risers solved both the “transition” and smoothness issues associated with elevation change. A switch to better quality PECO track, turnouts, connectors, and use of tracksetta guides promised far better basic track-laying practice, hopefully with concomitant improvement in performance and reduction in derailments.
But how to do all that in the middle of the layout?
What I discovered is called a “tall creeper.” Mechanics on this side of the pond use it to access the engine compartment on pick-up trucks, the height of which can make it difficult, if not impossible, to perform routine service or repair the motor with ones‘ feed solidly planted on the ground while trying to bend over the fenders to access the engine compartment.
Here’s some photos.
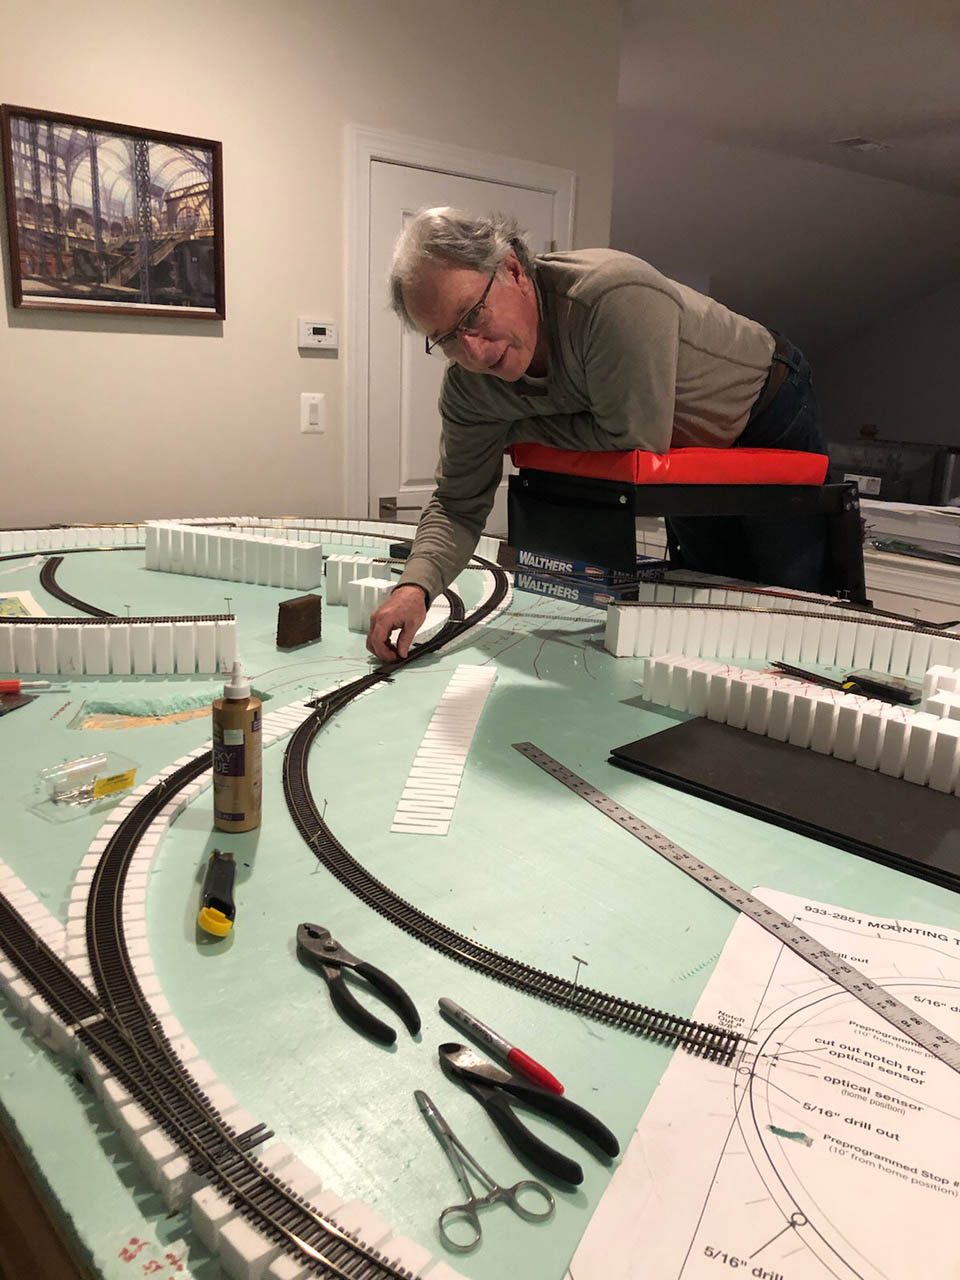
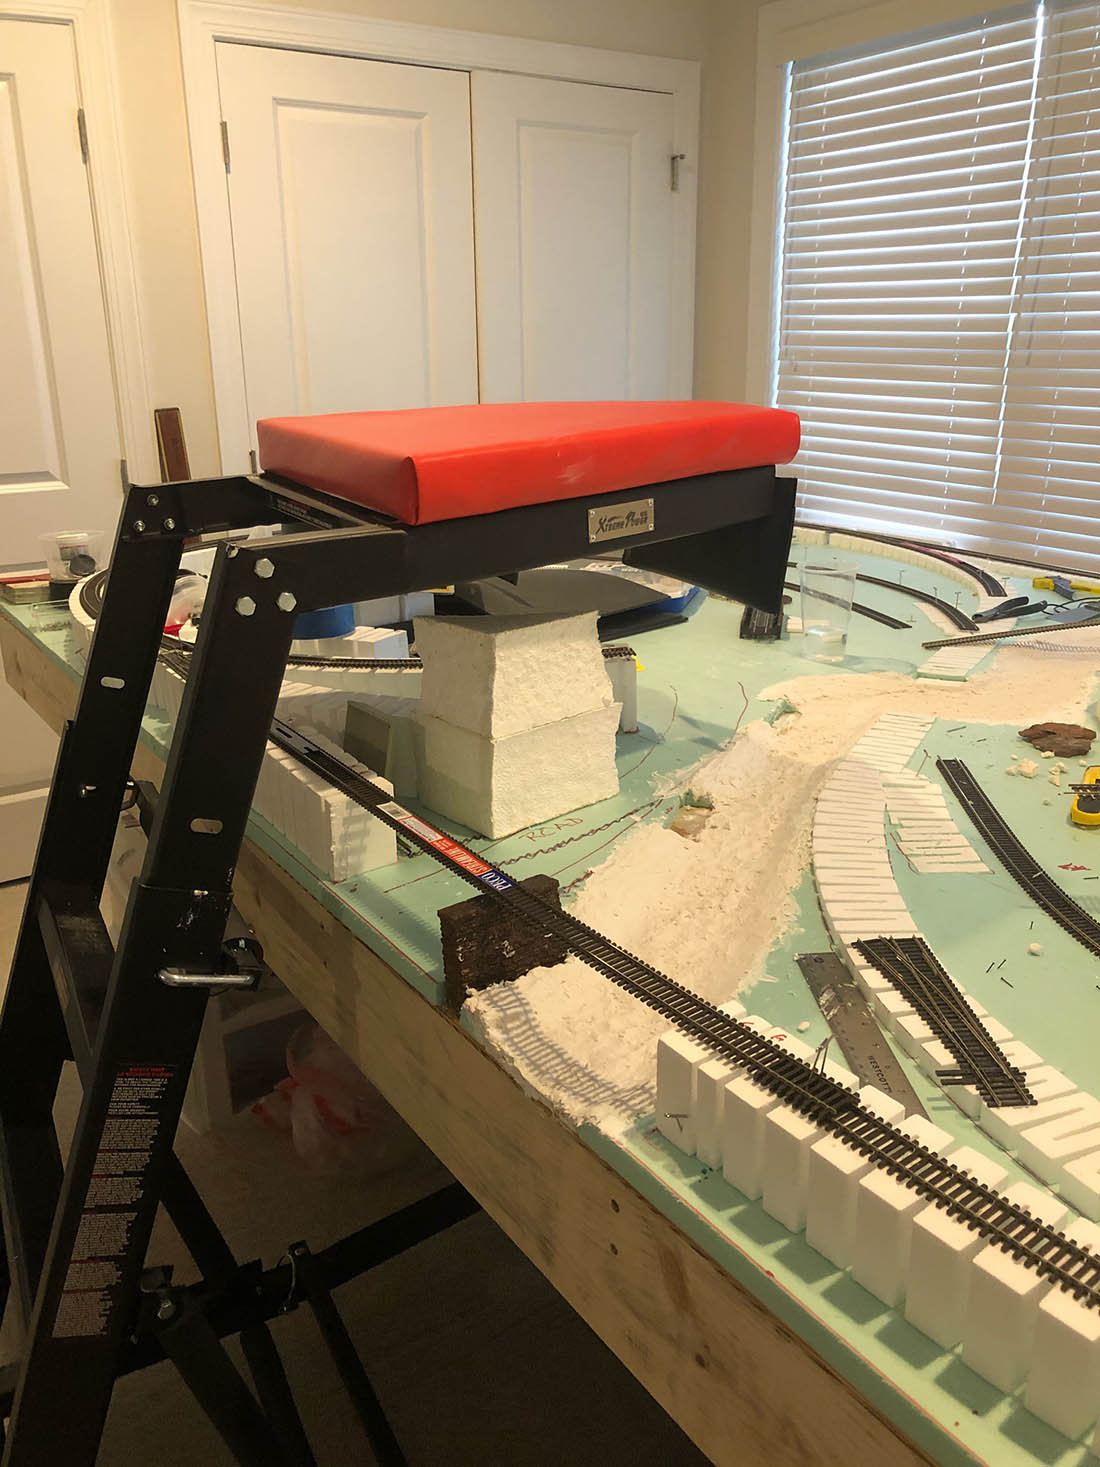
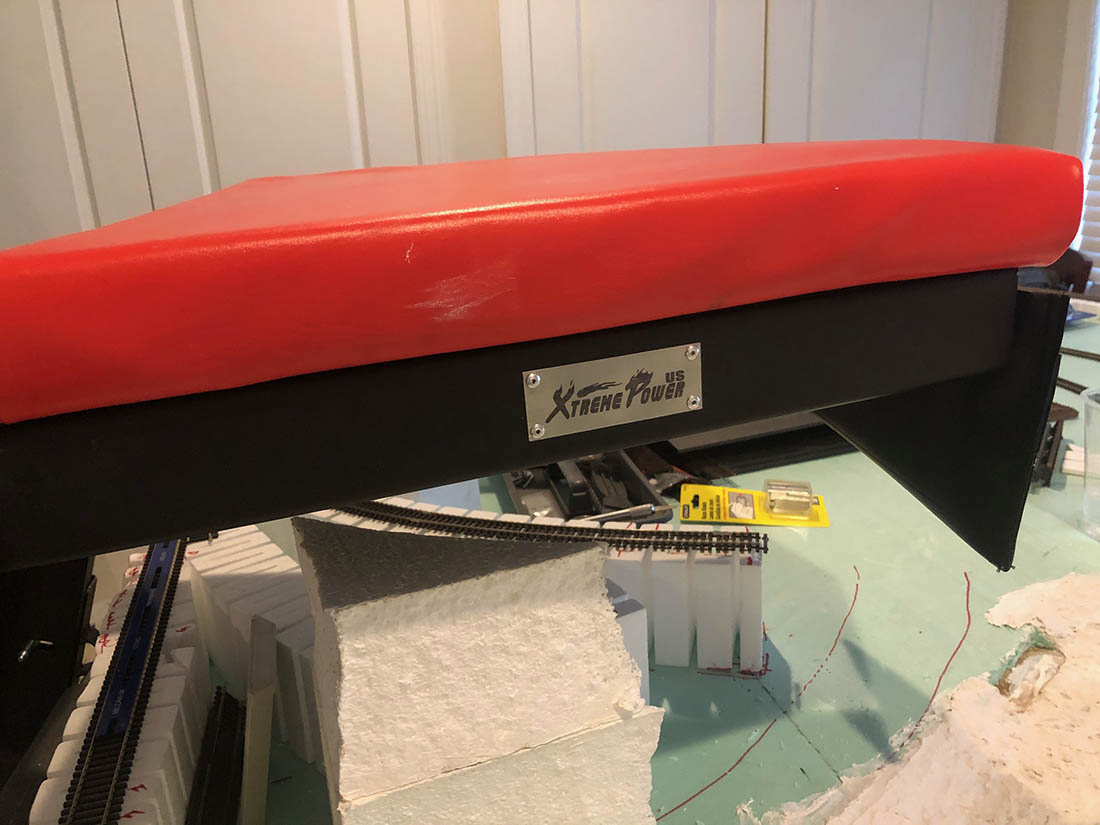
Works wonderfully and collapses to store under the layout when not in use. Height is adjustable too. Found it available States-side at Home Depot for under $200 with free home shipping! This thing opens a world of modeling possibilities.
As my new layout progresses, I’ll send some updates. But this discovery couldn’t wait.
Bill”
Now on to Walt, who has done something I’m always banging on about: making a start.
“Hey Alastair,
I am returning to the wonderful world of HO trains after a 50+ year hiatus!
And I am incorporating the wife’s Dept 56 North Pole Series collection!
So my theme is going to be winter and snowy!
I am taking photos of my progress and was wondering if you were interested in showing others?
Sincerely,
Walt”
And it’s not just Walt, who has made a start, Clarke has too:
“Finally becoming a reality! Just retired and am starting my first layout, pic attached.
Rail laid & painted, two train operation going smoothly, all track and wiring for rails complete. Ballasting & scenery next.
Also putting lighting in place (Blue LED plus track lighting, for general illumination) now.
N Scale, figure 8, plus double around inner loop, single mainline outer loop, with double crossover for interchange.
Two train operation, or single train completes entire route in about a minute. Probably adding a reversing trolley as well.
Clarke”
Next, Cassio has been back in touch again – it’s always good to hear from him – it’s wonderful to see the layouts from different corners of the world:
“Hi Alastair.
I send another movie in my Bragança Layout, with two Union Pacific type 4400 locomotives.
If you like it, share it with your followers.
The last film sent had 2500 views.
Hugs.
Cassio”
I do like to publish the pics of the folk just making a start. Sometimes there’s not much to see, but that’s not the point. Making a start is all that matters.
Sadly, it’s the start that stops too many of us.
That’s all for today folks.
Please do keep ’em coming.
And if you’d like to make your start on your layout, just like Clark and Walt, the Beginner’s Guide is here.
Best
Al


I like the plastic guard on the edge of the layout. Keeps the train from making that final trip to the floor! I plan to do the same. Not the trip, but the plastic guard. :}
Hi, first time commenting been looking at this for a while now and when I seen the man with the overhead creeper I had to laugh. My buddy has one that he uses to work on his lifted four-wheel drive and I’ve tried it out before and had the same exact thought thank you for posting that yeah my wife knows I’m not crazy
Walt great start and it is looking great and hope all goes well with this layout. On your upright supports I would fasten them to the floor to stop them moving, you could add bracing but that may hamper access underneath. I use small brackets on mine at the back of the leg they are hardly noticeable. Regards Peter…
Pretty Neat.!!!
Thanks for this great idea with the tall creeper! If and when I move and have to start on my seventh layout this will be a lifesaver (for real-no pun intended). I hit 79 next month and the ole body feels it.!
It’s the Granite Gorge an Northern! I had that same Atlas book and always wanted to build it. That is a real nice layout Bill, it you ever get the track laid smoothly. The track is designed so you can run a train in either direction around the layout without the need for reverse loops. Not much for switching but a 2-6-6-4 needs room to run. When that book was written, (a loooong time ago) the layout was a miracle of modern engineering. Hope you get it running well.
Hey Bill, thanks for sharing you high-top creeper. This might just be the solution for the layout I’m planning. I’ve been vexed by not being able to access the back regions because the back up to three walls. Cheers! Jerry
Many thanks to all for sharing their starts and redos. I must say that it is Al that makes this all possible for all of us to come together and share. Al, you definitely deserve a large thank you for you unwavering efforts and even more the restyled of this great site and now the forum! You are a great man amongst the best trainmen ever! Thanks from all of us!
Greg Schaefer,
You are so correct: Granite Gorge on Great Northern! But I’m modeling as N&W late steam era in W.Va.
Expanded layout surface dimension to accommodate 24” min. radius curves and using max 2% grade Woodland Scenics inclines. Both should help to improve running reliability. I also added a second reversing loop so I can reverse in both directions.
Looks interesting interesting, what’s the dimensions ? 👍
A nice layout Casio, I am not a diesel fan BUT love the sound coming from them. Well done.
Brian – the HOn3 guy in Knysna RSA
Bill, seeing you on the overhead creeper just made up my mind. I have been wondering if I would be better able to work from one of those at our age. My N scale layout is designed with lift out panels to access the deeper areas, but contorting my stiff body up through them is not easy! Also, I can use it on my lifted Jeep, so two arguments to give the wife.
Glad you’ve revisited and have taken up the sport again , looks like a fun layout and plenty to look forward to. Great start .
Cassio … what a wonderful snd lifelike display , really enjoy your video and scenery . Thank you .
Bill
Old guys like me have to go over-not under. Have to get me one of those. Send us progress.
Walt
Keep us posted on progress and send a layout plan if you can.
Clarke
Nice
Cassio
Awesome layout. Thanks for the video.
Big Al
Mucho gracias Amigo.
Cassio…….great layout…… good speed on your trains…..many of us run our trains to fast in relation to the scale of the layout.
Bill, Walt & Clark…..great starts……stick with it and patience…..
I just built my own tall creeper from a ladder..But i saw one on ebay for $126 including shipping….
I like your layout … most of all I liked watching your train run … Thank You !
Bill, as the old saying goes: Don’t feel like the Lone Ranger. I model in N scale and for my big build a couple of years ago, I also made the mistake of using the name brand track and switches. I knew I was in trouble when I opened one switch blister pack, and one of the rails fell to the floor. After constant derailments over the switches, I decided to start over for the same reason you did and am now doing a complete rebuild with Peco.
Watching Cassio’s layout, I began to wonder about train marking language. Cassio’s layout appears to be a USA system. Are trains in other countries composted of USA labeled cars or are the cars labeled in the language of the country or continent they operate in?
Just wondering.
Looks great!
Need to get mine going again. An hour inspiration.
I also have a motor access rolling ladder. Works great!
If anyone wants to buy one go to the auto parts and tools online for the best prices. Not sure of prices now but I checked the prices with micro mark and it was around half of micro mark. Four years latter years I am Still getting e-mails about socket wrenches and other automotive tools. Need a spare alternator. No worries they have them.
Great set up.
Are those Atlas’s bare feet at the bottom of the photo of Clarke’s Figure-8 layout? 😉