Norm’s been in touch with a very unusual take on a HO scale modular layout.
The great thing about a modular layout is you can move it should you need to – most people never give any thought to this.
But what about taking apart a layout – even a modular one?
Norm shares some advice.
“Alastair..
I read the blog every day. I’m sure there are thousands of readers that get a lot out of it like me.
One theme you see most modelers focusing on is the BUILDING of a layout. Well I’ve got a different sort of job ahead of me for the next few weeks. I have to take the layout apart.
Thankfully, it was never fully operational after I started doing the scenery, (or else I’d be heartbroken) but it did run at one point.
Very few of those articles are written about the process of taking the modules apart in the event of a move.
I started building my layout more than two years ago. I was inspired by some of the history of railroads in the area.
I, with the help of several of my Berkshire Model Railroad Club friends, had made quite a bit of progress over the many months of building my first layout.
Then my wife and I decided to “downsize” and move. This is where we will put to test the concept of “modular benchwork.” Luckily, I had not completed the scenery or any of the turnout control systems, but this report will still be useful in demonstrating the modular concepts.
Before we get too far into the dismantling. I want you to envision the PLAN as described onto an ANYRAIL multilayer plan almost two years ago. At the top is Greenfield HELIX and Holyoke. The middle is the Deerfield River and the bottom is the Hoosac Mountain.
The plan we came up with considered making the fewest cuts into the scenery while still maintaining the structural integrity of the modules. If they were put together properly, they should come apart with minimal damage. As you can see, the layout had a long way to go before it could be called completed, but the move is less than two months away and it was taking a while to plan and pack.
The rolling stock and all of the engines have been wrapped in bubble wrap and carefully boxed up. The problem now was to safely put away the structures and bridges so that they wouldn’t get damaged in the move.
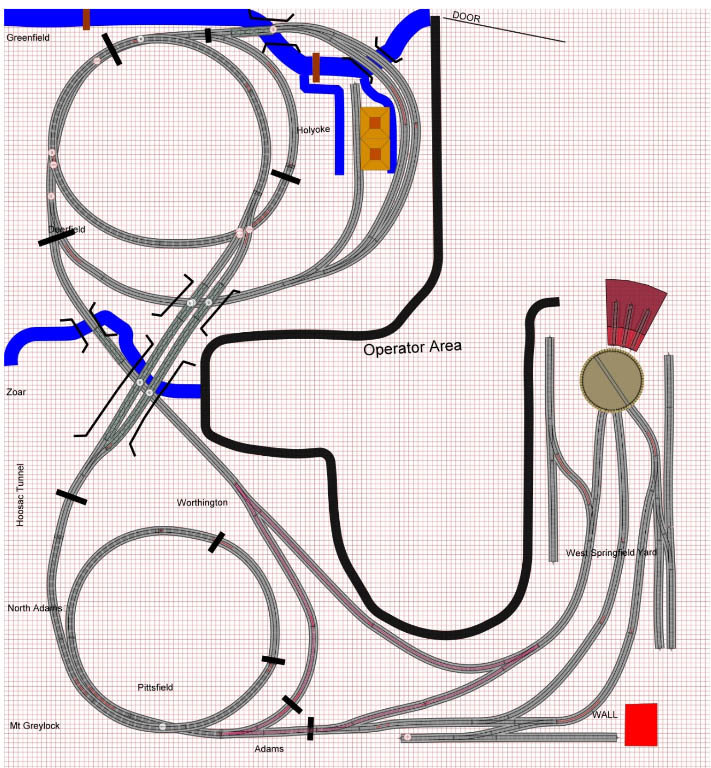
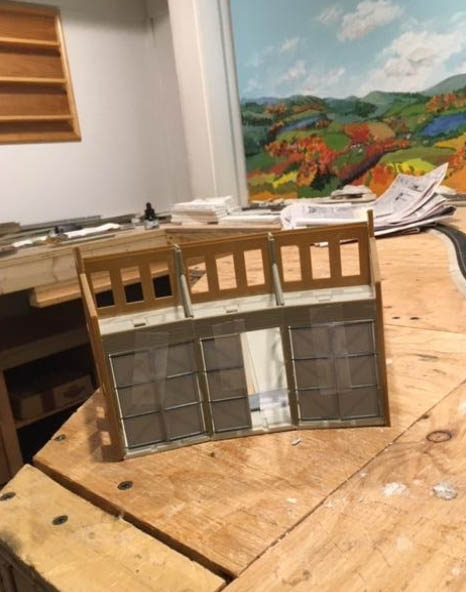
The structure featured here is a four-story factory building representing Hampden Papers in the canal city of Holyoke, Massachusetts.
The factory sits between two canals and the water flows through the basement of the building to turn the shafts that power all of the equipment in the factory. The dam between to two canals is on the Connecticut River.
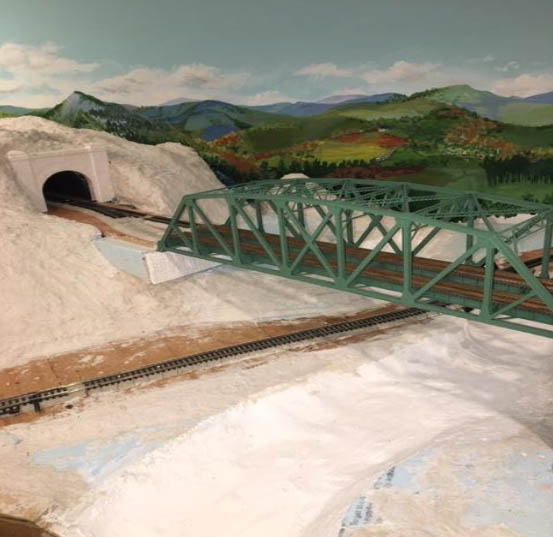
Not only the factory building in Holyoke, but the dual track Truss Bridge that spans my Deerfield River needed to be carefully packed.
That bridge took hours to build after being able to finally find one at the Amherst Model Railway show in West Springfield last January.
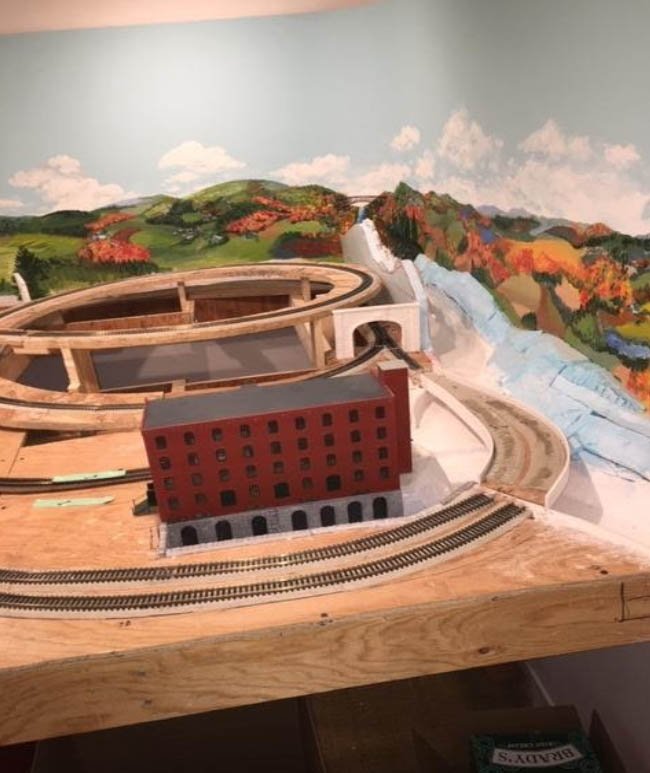
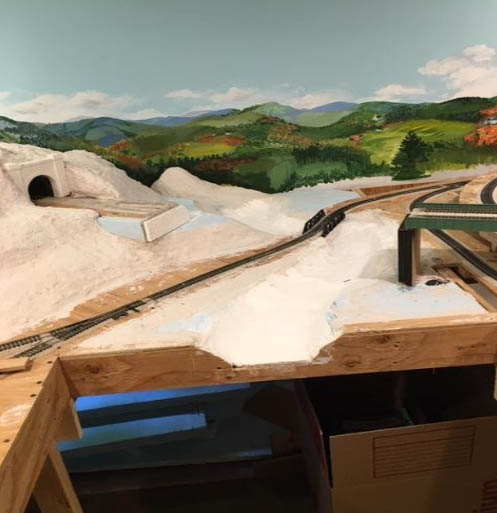
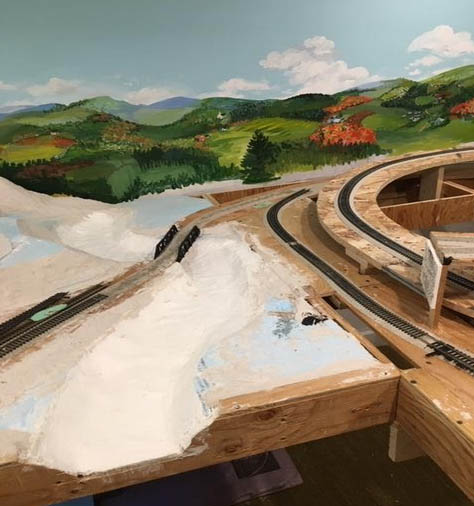
The backdrops in this area of the scenery represent the hills of Western Mass and the tunnel portal you see Is the East Portal of the Hoosac Tunnel with “1877” cast into the plaster.
The Deerfield River flows from Vermont into the gorge next to the tunnel and then down into the Connecticut River. My hope was to be able to model one of the Zoar Outdoors white-water rafts on the Deerfield. I did a rafting trip a few years ago and it was a super exciting event for an old man.
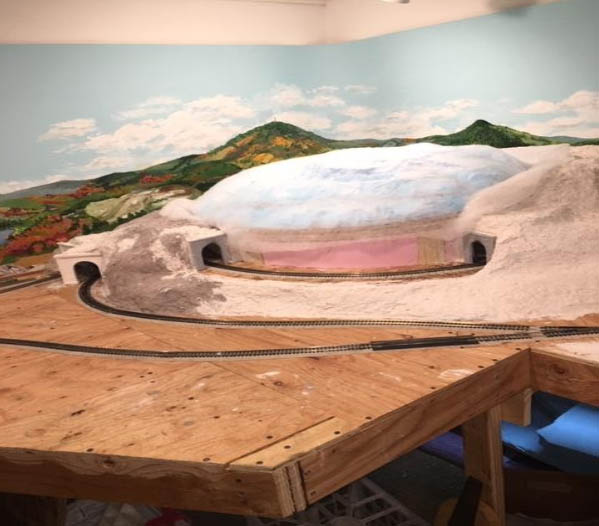
The area above the Hoosac Tunnel portal was to become a pasture/pond dairy farm so we had the Hoosac liftout set up as a lightweight foam sub-module to lift out and allow maintenance and scenery work to be done in and around the Hoosac Helix.
A helix was used in order to climb the six inches needed in a span of only nine feet across the west wall. The helix on the other wall, above Holyoke was used to bring the level back down. The mountain in the background is Mount Greylock and the iconic war memorial tower.
The other fragile models, in my HO scale modular layout, that we had begun to build were the Three Bay Roundhouse and the 90 ft Turntable. The packing of these was done to insure their safety while in storage and during transportation acreoss the state.
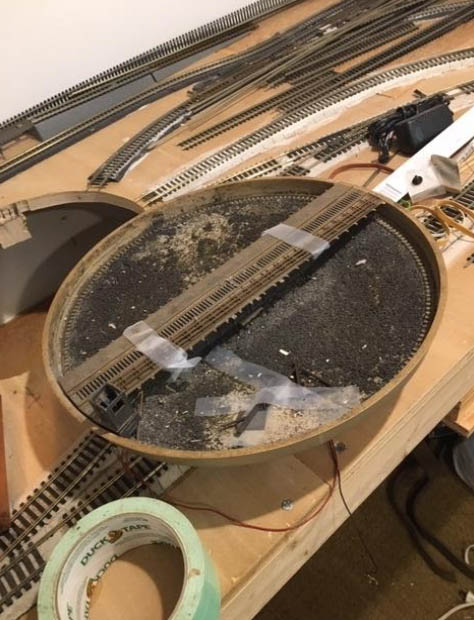
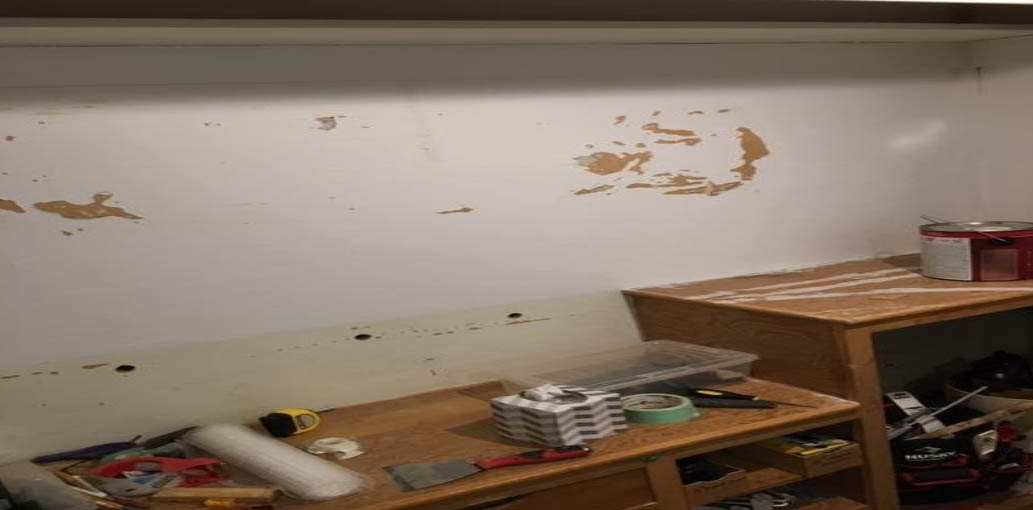
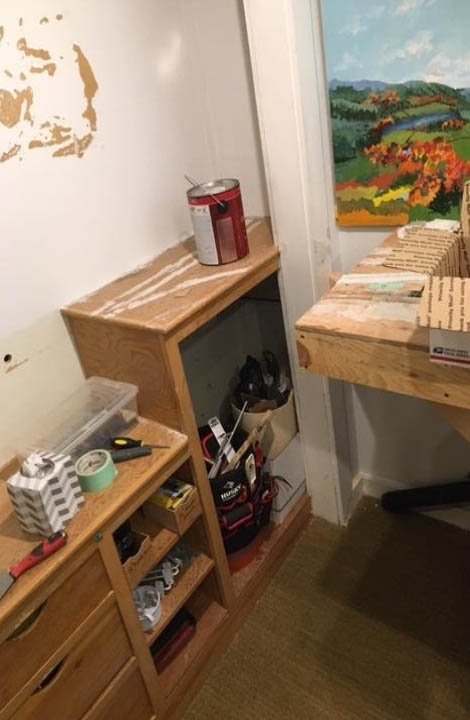
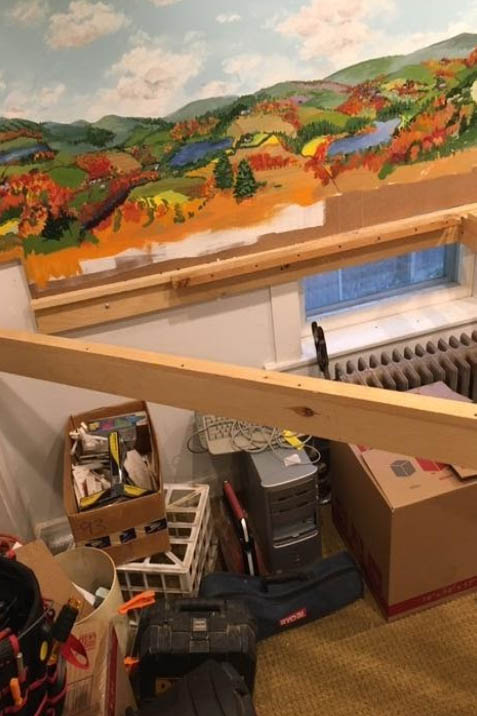
Once the Turntable was removed from the Yard, it was time to return the Yard space back into a closet. As is evidenced by the holes in the wall, there was quite a bit of damage to repair.
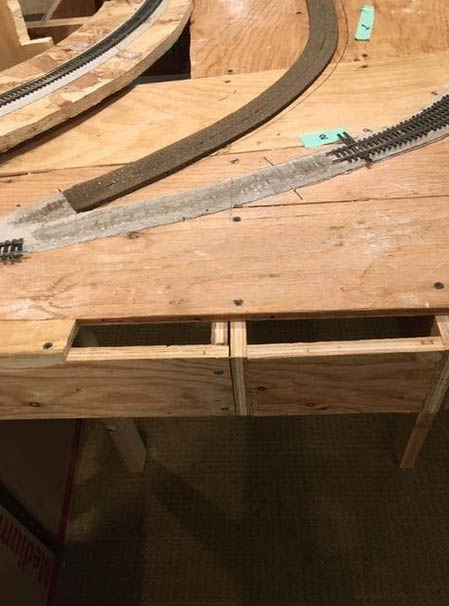
Since we were taking the HO scale modular layout apart module by module, it was critical that we find out where the seams were below the sub-roadbed.
The track on the connectors to the Yard and the Yard itself was all on Sub-roadbed that wasn’t part of the modular system. Therefore, all of that track had to come up.
Another discovery became apparent when going through this process. Since most of the work in the Yard area was my earliest layout work, I could see what a difference some of my later techniques made. The later use of Elmer’s Clear glue and pushpins to set the sections of track into the roadbed was much easier to dis-assemble that any of the track I set with nails.
The Reversing Wye module is removed. It was as simple as finding the seam between the Wye module and the Hoosac Helix.
After removing a couple of bolts, making a few careful jigsaw cuts through the sub-roadbed along the seam line and presto, the Wye is free. We’ll get to the backdrop in a later step.
In order to make it easier to get some of the larger modules out of the room and into storage prior to the trip, We decided to go back to the Holyoke end and take out the Canal Module.
Luckily, when we were creating the canals, one of the stone walls fell right on a module seam so we didn’t have to cut apart any of the stone walls of the canal.
Once it was unbolted, and the seam spreader inserted into the end of the seam, the jigsaw was able to able to find its way along the seam without too much trouble.
Once we got to the Connecticut River section of the module, we switched over to a carpenter’s crosscut saw to carefully cut through the foam and plaster.
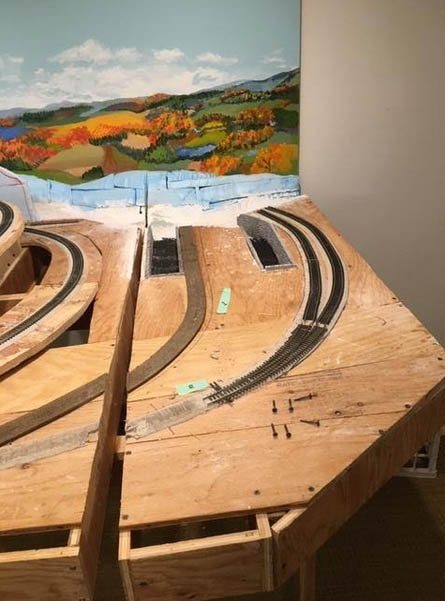
You might note the numbered tabs of green tape on the subroadbed. These number match a corresponding piece of tape on the section of track that had to be removed. The thought of cutting through the track seemed too daunting and potentially damaging. With the use of the Elmer’s Clear and push-pins, the track came up easily and because the glue is water soluble, it is easy to wash off the plywood.
Once the canal model was separated from the helix and removed to storage, it was time to take out the Deerfield River section that sits between the two helixes. One side was easy, just unbolt and run the jigsaw down the seam.
The hot glue of the support for the approach bridge had to be undone but the seam was pretty straightforward. However, the cut along the Hoosac Helix had to cut through a lot of celluclay and foam. Stiill though, not as bad as it could have been.
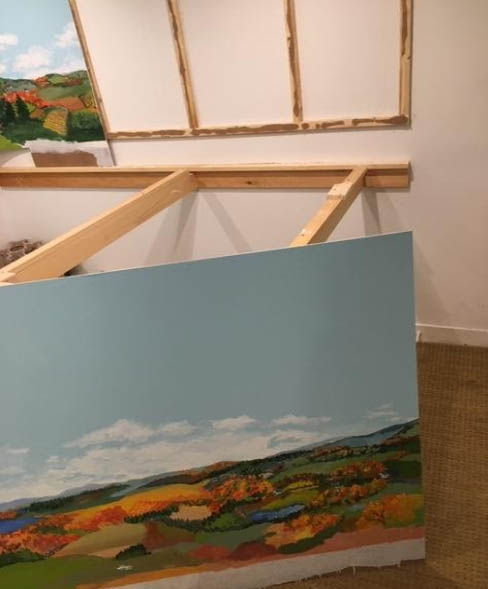
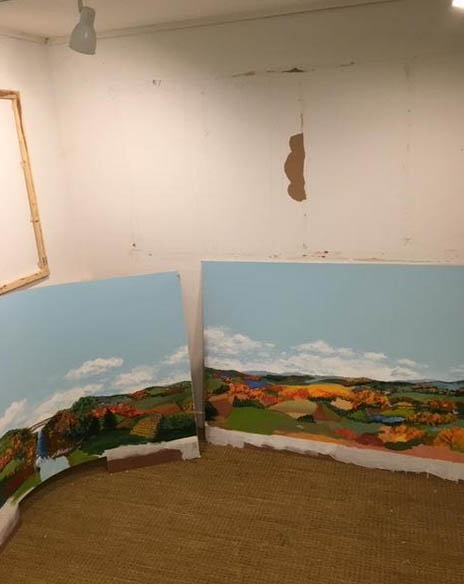
Now that all of the modules have been removed from the L-Girder frames and the support legs, it is time to get the Backdrops removed and safely stored.
Thinking back to how the panels were installed, I had to cut through fabric tape and joint compound at the seams, but the panels themselves were easy to remove from the furring strips that had held them with a light application of construction cement. My wife would not have been happy if I broke any of the panels, but really, that was about the least stressful portion of the dis-assembly.
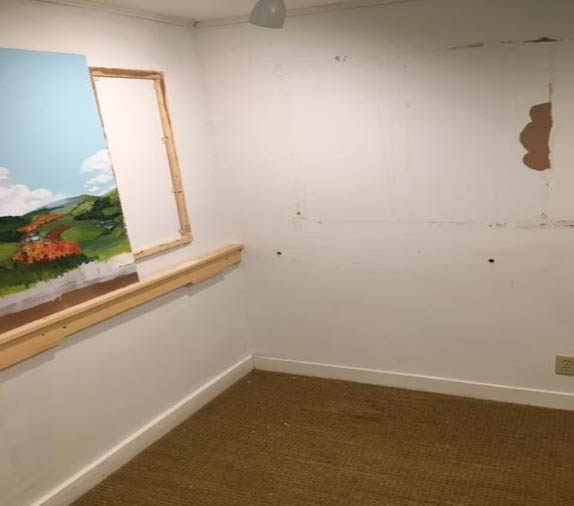
It’s been about three weeks since the last of the panels were removed. The house has been sold; the layout room has been returned to use as a bedroom for the new family. We’re excited about being able to have all the components safely stored and ready to be picked up by the movers in a week or so.
I wanted to get this document off the table because we still have a lot to do before we’re done. I hope it has been helpful to any readers that are getting ready to start a new layout. Do it with the eventual dis-assembly factored in.
Norm.”
A big thanks to Norm for sharing some advice on a HO scale modular layout – hope his reassemble goes well!
That’s all for today folks, please do keep ’em coming.
And don’t forget, the Beginner’s Guide is here if you want to take your first step towards your own layout.
Best
Al
PS Latest ebay cheat sheet is here.


Norm
For those of us not in the USA , what is Elmer’s Clear glue the trade name for White PVA wood glue?
When reassembling and wiring use chocolate block connectors between sections just in-case you have to move your dream again. It has such promise.
If so and especially for beginners and for indoor use only, if you know a primary school staffer try buying some of the PVA glue formulated for younger children, a feature of which is that it is washable and therefore avoids irate parents. So if / when you need to relay your track because you have a better idea it is easily done.
When laying track work out the width of the ballast shoulder and with a hard pencil say 4H or above, draw it out on the board. Have to hand a 6 inch mirror tile. Coat between your marked lines with a thin coat of glue and place track down the middle, using the mirror at the end of the line and look back along the track, you may be amazed at how many wiggles need straightening. Before the glue begins to set coat it in fine ballast and carefully press down, when dry brush off surplus and you will have finished track ready for weathering.
Norm, A very useful run through of a dismantle together with some of the aspects that may not have been thought of in initial construction. Thanks.
Here’s your chance to recirculate and reconstruct a different layout. Take advantage of the new surroundings and go forward with new ideas
The Critic
Norm, you’ve shown us that you should think about an eventual dismantle to any future layout(s) either underconstruction or being planned.
John
Nice layout!!!
A very helpful topic aspect to consider! Thank you for the detailed layout takedown. I’m a month or so from my first build in over thirty years and I will definitely consider “a potential move” as I construct.
Thank you.
I have a free standing10 by 5 table in bsmt that tilts up out of way. Have considered how to enable a new table owner to get it upstairs and out . No simple way in future unless I make it possible now somehow. Either that, or always know that it will be simply torn apart and cut up as firewood. That gives me pause when deciding if to do more detailed modeling.
With much fore thought it could have been constructed to enable deconstruction and not destruction! Sigh.
Really good deep dive into your process and highlighting things all should be mindful of if we think our layouts will be moved in the future
What a task! Best of luck. One thing …. you mentioned wrapping the trains in bubble wrap. Careful! Long term storage especially if in a warm location, can damage the finish on some of the rolling stock. I had a flood in the man cave a couple years ago and had to pack up all my old Lionel and Marx trains. I used bubble wrap on some then switched to brown paper covered bubble wrap after hearing about the problems with bubble wrap. I’m in the process of unpacking and one of my old Marx commodore Vanderbilt locos was bubble wrap marks all over it! Darn!! It was wrapped for two years and part of that time was in a storage pod. Not a great idea!
Beware the movers, NONE of them give a hoot about your stuff. They will loose stuff, break stuff, and generally only focus on getting the job done and not HOW it gets done. My advice to anyone moving (in the US) is to use U-Pack. They are about 1/3 the price of a moving company and also have helpers available to hire and storage for your stuff if you need it The containers or truck are packed and locked by you. At least if things get broken it is on you because you pack the truck or containers and not someone else
I agree with Tim. I could never trust movers unless they specialized in moving fragile items, and even then…
I would rent a trailer and do it myself. Maybe even buy a trailer so I would have plenty of time. (Then sell it after the move.)
Thanks for contributing. This is an aspect thar I never gave too much thought to. Maybe I should apply this to my Howard Street railroad. All out to be publishing part 2 soon.
I know exactly what Norm has gone through. I have done the same thing three week ago, but unlike Norm I have to wait until February/March until my 6 x 6 meter train shed is expanded to 9 x 6 meters and then lined, a necessity here in Queensland. So while I have a number of months to wait to start rebuilding, I’m envious of Norm that he has commenced tackling the job; good luck Norm.
Cheers
John
Having grown up in Adams, I am considering something similar for the west side of the Hoosiers Tunnel! But before I’ve done anything, I’m wondering about eventual dismantling. You have done very well indeed! I’m in southern NH. Hope the rest of your move goes well!
I have the solution to the problem of dismantling the railroad.
IM NEVER MOVEING! My wife will have to find a rail fan to buy the house with the railroad….. Hope that works for her …. 😪
We do quite a few exhibitions over here in the UK so it helps to plan in transportability, our old club layout was 21′ by 10′ with two levels about five inches apart, with two double track main lines served by twin 10-road staging yards one above the other in the rear. Once, we had all day to put it all together and sure enough it took most of the day, but once we had just one hour, and it took an hour and the first trains ran as they let the public in through the doors, and rarely had it all run better. Packing it away when tired usually took an hour and a half from last train to driving away in the van.
As mentioned above bubble wrap is not a good idea at all. Use tissue paper or paper towels or old white sheets or towels. Bubble wrap will wreak havoc in a short time.
I have started build my layout, and one of the primary objectives has been. How do I move it, in the future? As I know that in 7-10 years I will be selling my current home. This each module joint will be able to be taken apart with minimal effort. All the wiring will have terminal strips at the module joints, all the roadbed is cut at the joints.
Al, I will send photos once the I am to the point where the roadbed is complete.
Brother, I feel your pain! I’ve been moving my layout from the basement train room up 3 floors to an attic room. Destruction of the layout to make it into movable blocks was harder than I anticipated, and some of my modules wouldn’t make the turn to go to the attic access. On top of that, nothing fits the same as the dimensions are different, so a basic re-design is needed.
Anyway, I think the new layout will be better, and operational problems that popped up can be designed out. It’s all part of this hobby we love! Hope to have pictures and trains running by Christmas!
Hello All, the dilemma of semi portability has been and will be one of the many reasons I have, for snails pace layout progress. Designing for the eventuality of moving adds another layer of complexity that if contemplated to long prevents progress. I’m a tad jealous of those who, go for it, with little or no regard for tomorrow- – – . We put so much of ourselves into building that in my case, I’d be heartbroken to see that dream destroyed kicking myself for not thinking of and planning for those possibilities. That said, the least we can ever expect is change and contemplating for every eventuality takes the fun out of the hobby so that old cliché comes to mind: Its not the destination that’s important, it’s the journey! Have fun fellow railroaders.
Norm – you say you are moving across the state. May I ask to which town? I am in New Bedford on the South Coast and would welcome another HO modeler. Good luck with the move.
Norm, great ideas when building any model railroad! I started my dream layout in 1974, a version of Gizmo Gulch, from a Model Trains issue from 1951. I was in a condo and knowing we would be moving as our family grew, made it modular through and including the top of the table. The mountains were even separated at module edge so only the plaster needed to be cut. The track was mostly sectional so each module just slid apart. Table was 1×4’s, legs were 2×4’s, all bolted together, with corresponding numbers. This layout lasted from 1974 until 2011, having been moved five times. In 2011 it met its demise since we were moving to a condo once again, but this time there is no basement. Time to downsize to N scale in the garage! Sorry, I have no photos handy to show due to the era of the times!
I’ve found that the paper sheets sold to wrap dishes are just right for wrapping HO rolling stock. Also, don’t used duck tape for packing…use painter’s tape instead. It comes off without leaving any residue on your layout.
As an electronic technician I am very familiar with multipin connectors and use them to connect segments. I have used as large as 50-pin connectors to split a large rail yard without having to rewire a bunch of switches. The old 25-pin DB series connectors are my favorite. Easy to use, cheap, and just about the right size. You can often find them with a length of cable already connected so you can just hook them to a terminal block or splice the wires.
I recommend that every railroader learn to solder. It isn’t hard, just takes some practise to get good at it. A properly soldered joint won’t come apart or work itself loose forcing you to troublshoot intermittent connections.
I used to teach soldering and my favorite lesson was this:
There are three important things to remember.
1. Keep your soldering iron clean.
2. Make sure the connections are clean before soldering.
3. Clean your work after you finish.
Oh yes, I almost forgot! Keep everything clean!
Dirt can ruin a connection faster than a kid can grab a railcar.
Charlie
I would place terminal strips at every module junction and connect them with jumper wires. A multi wire connector can also be used, a bit expensive and high tech, but provides positive connections, not a bundle of wires to sort through to re-connect. If you look at very large layouts, they bundle their wiring and run them harness style. I saw a very efficient wiring system that used only white wires, but each wire was run through a machine that printed a number on the wire spaced about 6″ apart. Hundreds of wires were bundled into harnesses and terminated into a plug on one end and a receptacle on the other. Very high tech, but so easy to troubleshoot. This is done on military equipment such as aircraft. It may seem overkill, but it is easy to implement on a layout. The system may not be easy for some to understand, but if you have been exposed to wiring design as a draftsperson or designer, it is very easy. A well detailed schematic, not a scribbled diagram on pieces of paper done on a computer and printed out can make any wiring an easy operation.
Norm & Alastair
I have moved 7 times, due to corporate relocation. Each time, I had to dismantle my train layout. Each time I was dismantling an 027 layout. I also had to dismantle it, when I sold the collection 2 years ago. I learned quickly that all bench work should be bolted together and not nailed. I also marked all the boards and table components to facilitate reassembly. I kept all the boxes for my buildings and rolling stock; however most buildings could not be disassembled, so I had to carefully wrap them to avoid breakage. I have quite a few plastic tubs for transport of my collection. I also saved wiring, when possible, since it can be expensive.
The irony of dismantling a layout is that tit takes a fraction of the time it takes to disassemble versus assemble. There must be a metaphor for this? I wish Norm luck; it can be a tedious process, however, the good news is that you get to recreate your layout avoiding any mistakes you originally made.
I now have an HO collection and layout. I hope I don’t have to disassemble it, because the wiring is so fragile and has a tendency to break or split. This is why planning is so crucial to enjoying this hobby.
Best Wishes to all and thanks Al for your wonderful blog.
Great ideas. However Bubblewrap can destroy trains.
mr,C. H. Specht is absolutely correct. I learned to solder as a junior high school course. Knowing how to solder led me to working in a hobby shop doing conversions on brass locomotives. I later added silver soldering. I also used various temperature solders so that I could start with a high melting temperature solder, then move to lower temperature solders.This allowed assemblies to be joined easily without unsolderig a previous assembly. Soldering is not hard. It just takes practice.