Ray’s been in touch with a simpel way to keep your model railroading wire tidy.
Like all ideas, the simple ones are the best.
“Hi Al.
Today I was mulling over changing my layout for the same reason as D Dave, ease of access.
Well I decided I would have to do something about the hundreds of wires under my boards to make them neater and tidier. Working in DC means I do have 100s of wires under there going in all directions an electrical spaghetti junction, it’s horrifying really.
So what could I do? I decided I would start from scratch this time and rip out all the old wiring, some dating to earlier layouts that aren’t needed for my present layout.
You know when you have one of those rare Eureka moments.
In my layout I use Sundeala boards so have a lot of offcuts kicking around. So I cut up a 2.5 nch strip 4 inches long as below…
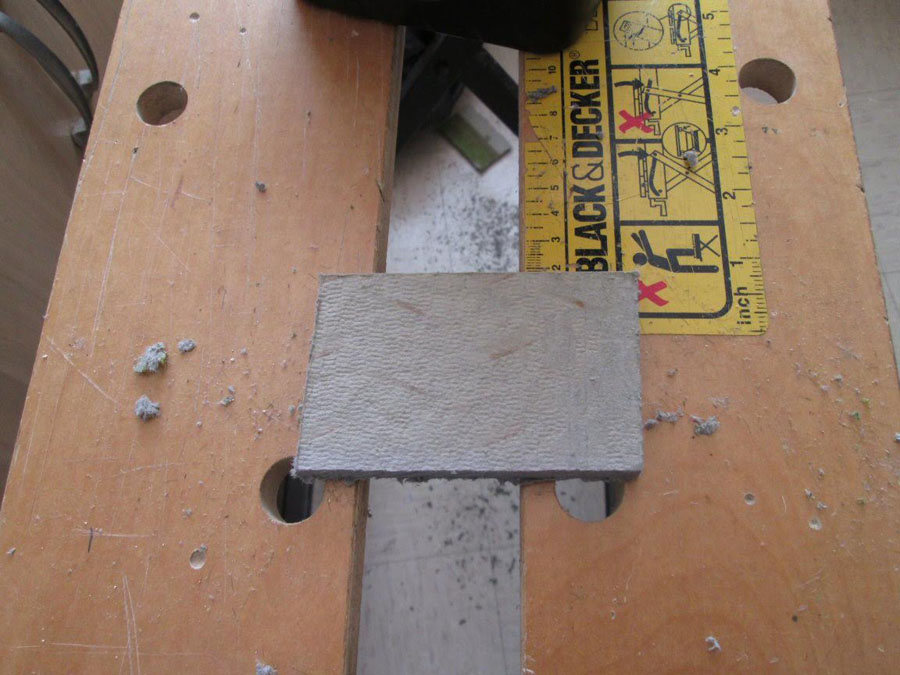
Next a 1/4 inch drill and drilled 6 holes in it leaving room at the top to screw to the battens. I made quite a few out of the long strip I had so I now have numerous drilled blocks that I will screw to the battens.
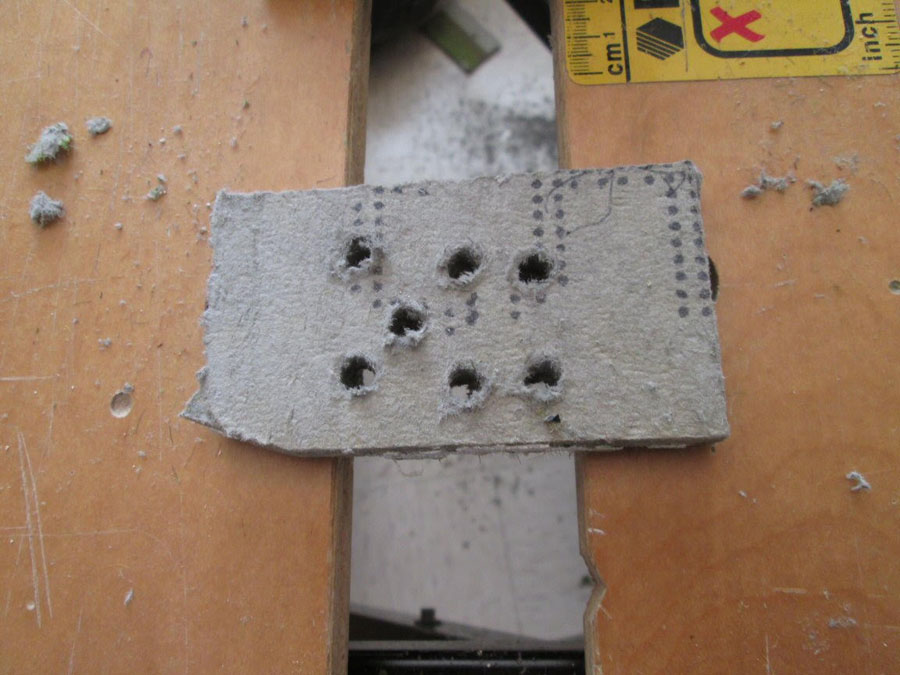
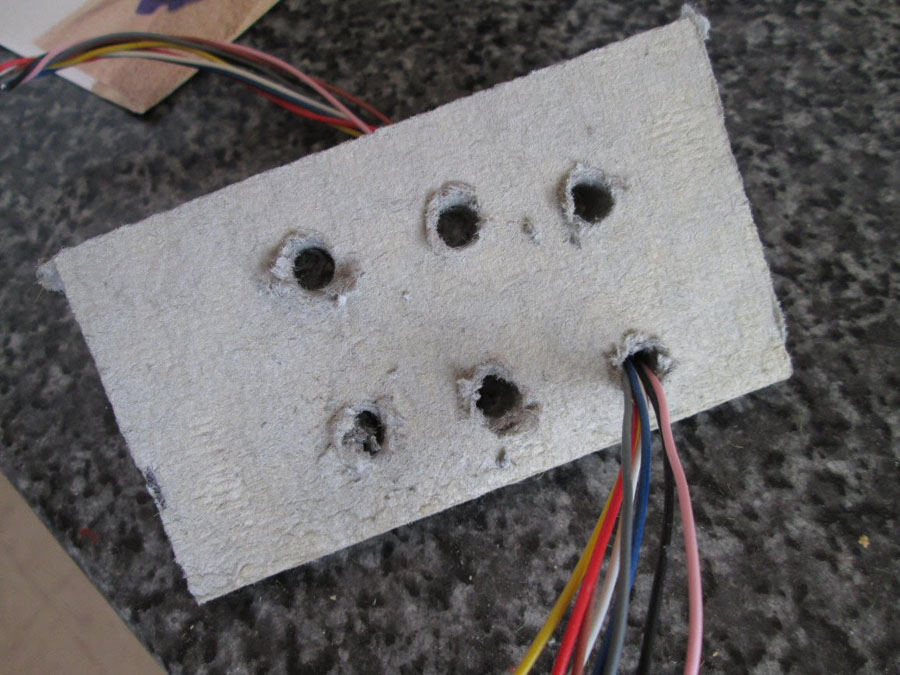
In the picture below you will see I threaded 8 wires through one of the holes but it would take quite a few more this will bring a lot more order under the board at no cost. A simple and rewarding ten minutes. For anyone starting up in DC then it would be a really handy tip.
Hope this is useful to others.
Happy Modelling
Eric (Leeds) UK”
Next on to Dave and his eternal quest to making entry to his layout easier. I think he’s on to something (his last post is here).
“I have also added a comment to try and reply to some of the comments… re heights and suggestions members have sent in.
The next one is showing me at the end going in via the old office chair and using a Gimbal should go well … and should make a few smile.
Regards
Dave”
Latest ebay cheat sheet is here.
A big thanks to Dave and to Eric for sharing his model railroading wire tidy. Some great tips and a few smiles too.
That’s all for today folks.
Please do keep ’em coming.
And if today is the day you get started on your layout, the Beginner’s Guide is here.
Best
Al
PS Latest ebay cheat sheet is here.
PPS More HO scale train layouts here if that’s your thing.


A couple of good ideas from D Dave on how to get in and out. I thought your first idea – just slide your hands along the rails to support your upper body as you ‘walk’ through – was pretty good. It looked easy, but how high is the ‘ceiling’ above the floor? The old office chair idea is good as well, providing you have a good smooth and clear floor… Looks as though you have T&G chipboard flooring – this might not be known all over the world, but here in the UK it is commonly used for flooring. The sheets are 8 feet by two with a tongue along two edges and a matching groove on the other two. They are so well made that you do end up with quite a smooth floor. I am not sure I could keep mine as clean and clear as yours though…
Hi Dave! Excellent solution to your access problem… I’m curious about your “Gimbal” though… sounds like what we call a “steadicam” mount here in the states… any chance you could show us a photo or two of it & how it works? All the best… -Bob W, NH, USA
Rather than drill hole and have to thread the wire through a hole in each board, I would cut slots at 45 degree angle. This would accomplish the goal but wires can be lifted in and out of the slots rather than pulled through.
Very good Dave and gave a smile too. I had a laugh when I realised I showed a piece with 7 holes instead of 6 let’s call it poetic licence, but the ideas are good especially the gimble show us more, I need it with my hands.
Eric (Leeds) UK
Eric made me think more about my wireing. This was my first layout in 40 years so when I started l was all in and I thought I know it all. I didn’t do bad but know a couple of years later and many of Al’s posts I think I have learned a lot and would love to start over. I would love to rewire my layout but one thing I did in the beginning I would definitely do again. The board is built with 1×4 outside framing and 1×3 joists 12 inches on center. Before I assembled it I precut the 1x3s they were all the same length. Then I drilled 3/4″ holes every 10″ along them. Now when t run wire I don’t have them hanging and don’t need ties to hold them up. One of the things I did right. Hope this helps outhrs.
Steve from Toms River NJ
I am just starting to wire my layout and decided to go with cable management clips w/ screw hole. You can open and close them and they are adjustable. Also come in different sizes. Purchased them on ebay and not expensive at all.
Looks Great Dave thanks for the tips.
Dave,
The new video was great as always. Its such a pleasure watching your vids especially on early Saturday mornings. You can be sure I’ll “watch this space”.
Keep them coming.
Cary B
Oh Boy!!!! What a collection…
Dave’s video was “Entertaining” and useful… Very many good ideas there…
The chair in the “duckunder” is a brilliant addition to what was already a brilliant idea with the handrails…
Loved the tune at the end… A Scot Joplin classic… Brought a real smile…
The wiring idea is good… Especially for those using DC (I do but on my very small layouts “spaghetti junction” is not an issue…
After reading the above comment on “wire clips”… A very old solution (and dirt cheap also) used to be what are called “Guarded Cup Hooks”. These little hooks have a snap “catch” so that the wires cannot “jump” out of the hook on their own…
John from California….
Great pictures with the gimbal, Dave. Almost made me “car sick”. 😊
A cheap alternative for restraining wires is plastic pipe clips.
They can be unclipped to release the wires or add more, so do not require pulling through of many lengths of wire, and can easily be screwed to the battens.
A pack of 100 costs 7GBP, and screws another 2. (Screwfix call them talon 15mm hinge clips)
For places where the wires need gathering, the nylon twist wrap works well. Always shown as providing wrap for great lengths (which does look very pretty) you only need a few inches to get two wraps around a bundle, (which can then easily be reversed) and so the pack of 10m lasts ages. (Maplin call it 8mm Spiral Cable Wrap)
OK, Kinda lost here. The top side is what people see, the underside is what you see when you need to fix something, well maybe a friend that you trust to help you. In the States they sell staple guns that will stable low voltage wires 5/32 (4 MM) 1/4 (6.35 MM) I think They work very well to hold wires in place, as if you use the correct staple you can always remove a wire or add one. With that being said my lay out is on 1/2 ” plywood with 1X3 Oak supports and I just drill little holes through the supports when needed. No it is not the neatest looking wiring I have ever seen, However it does ( Old School DC ) run 32 tracks and 21 switches, ( points) as they are called across the pond. NV Bob
Hello I upgraded my computer and lost my link to the paper houses I was wondering if it is possible to retrieve my link
`Hi Al ..just for those who do not know what a Gimbal is ..it is a 3 axis Hand Herld Steady Gadget for your Camera ..this is one for the Go Pro Camera I have used …as said it will be like a Steadicam …the one I use is battery operated made by Feiyutech …very good for keeping your video fairly smooth when walking along ….My floor is covered with carpet squares but provide a reasonably smooth surface for the chair to ride over ….my clearance from floor to layout height is 3ft. 7″ …so not a problem , just have to bend my head a little …Dangerous Dave
great watching the video I think the chair is a great idea be careful you might make the chair move by electrics next. nice idea on the wiring.thanks for sharing