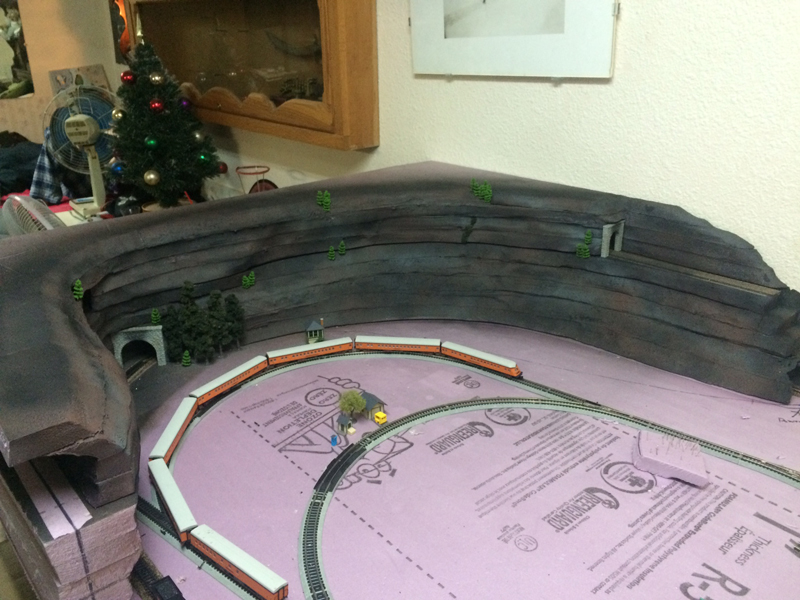
Ed’s been in touch with a Styrofoam train tunnel ‘how to’:
“Hi Al,
Sorry this email took so long to send, life got in the way, lol. I see a lot of discussion about paint and styrofoam, and what works with what.
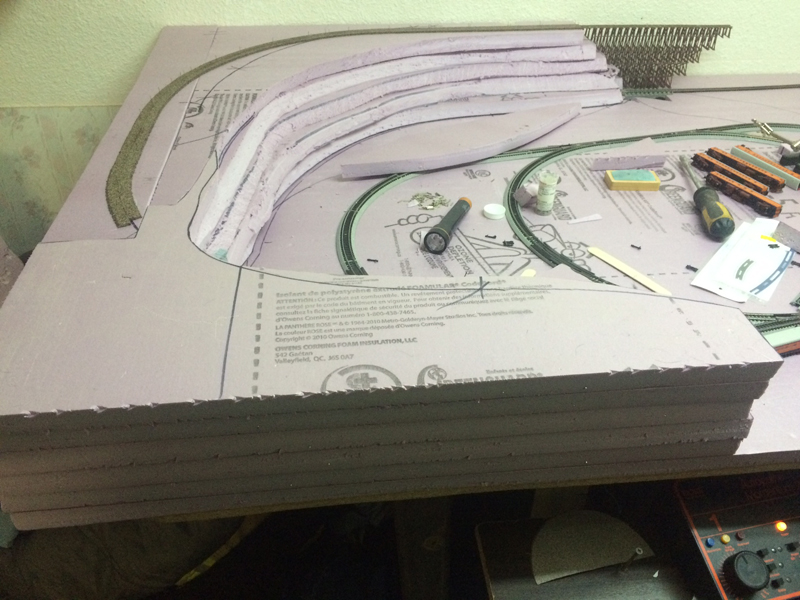
I have been making mountains with a insulation board that come in blue and/or pink. It can be glued together in layers with white glue, sanded, and even accepts any spray paint. I use Tremclad and Rustoleum.
I use an Exacto knife to rough it to shape, finish with sand paper, then spray my colour.
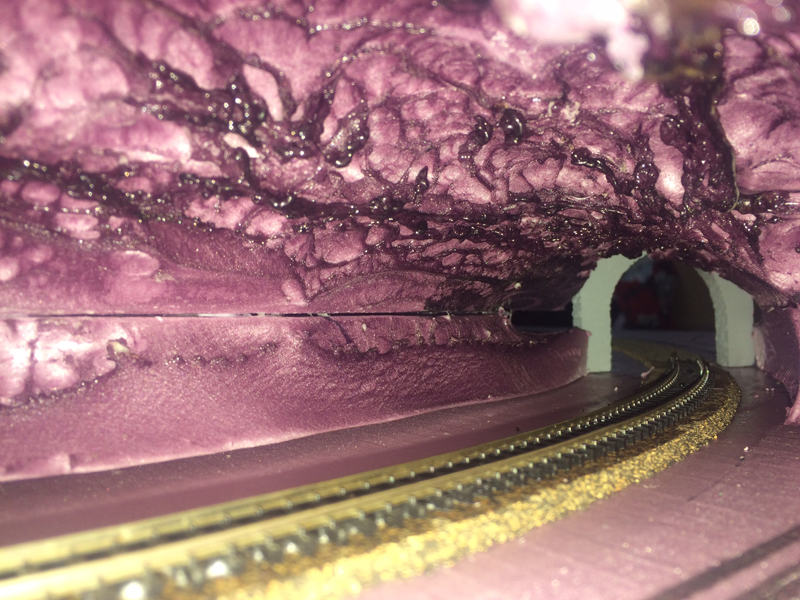
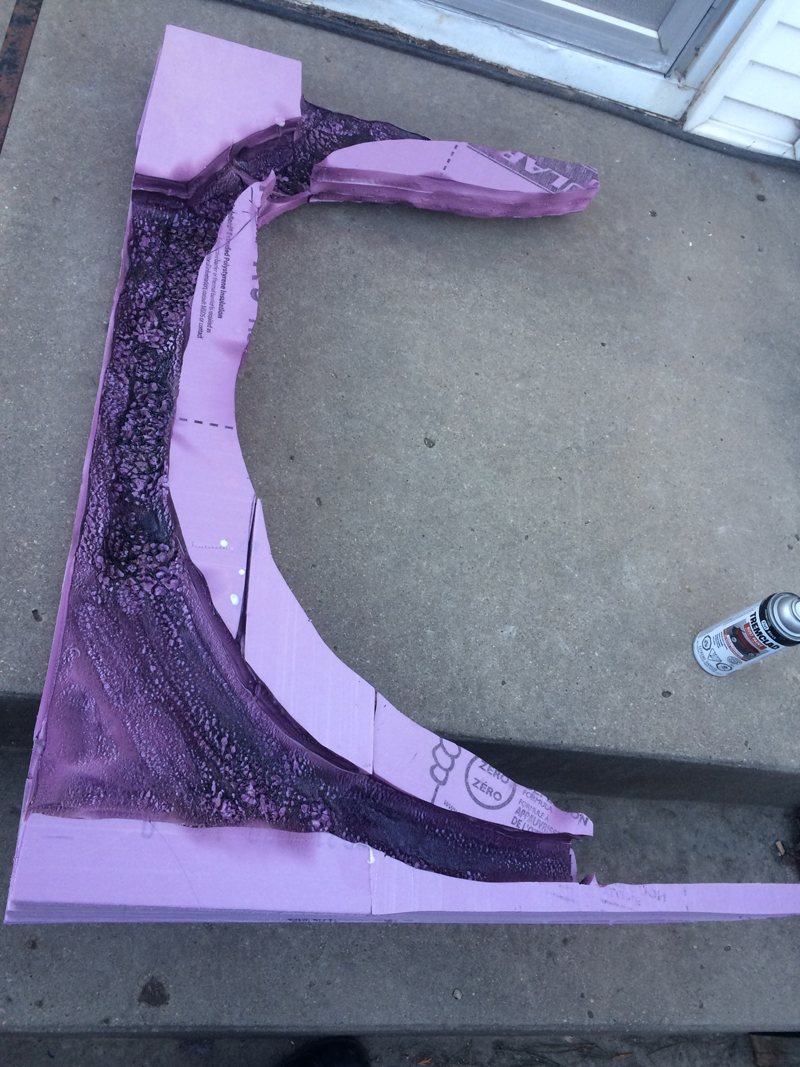
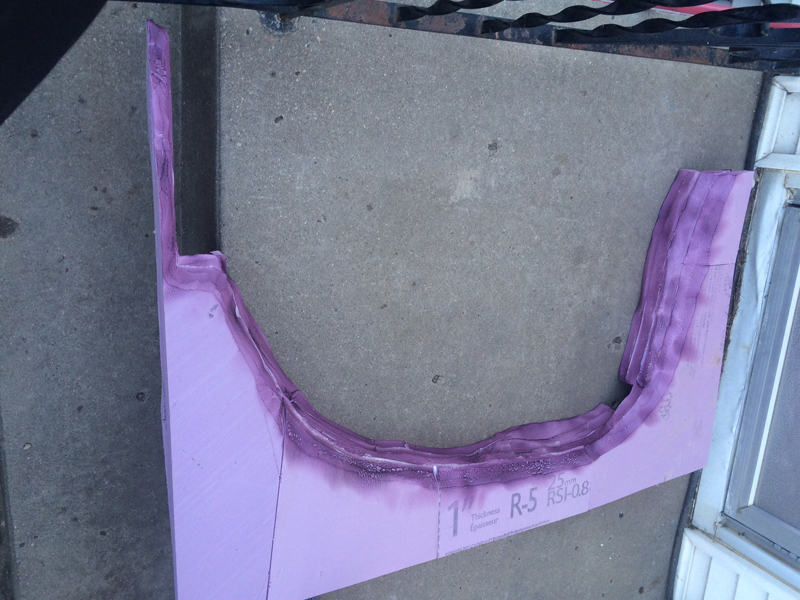
I have been experimenting with different techniques to form tunnels and find a plumbers torch or heat gun work well for forming them. Outdoors, with a mask, of course. The wife isn’t fond of the smell it produces.
I wait for it to cool, then spay colour into them. I have include some photos of them for you.
Sincerely,
Ed”
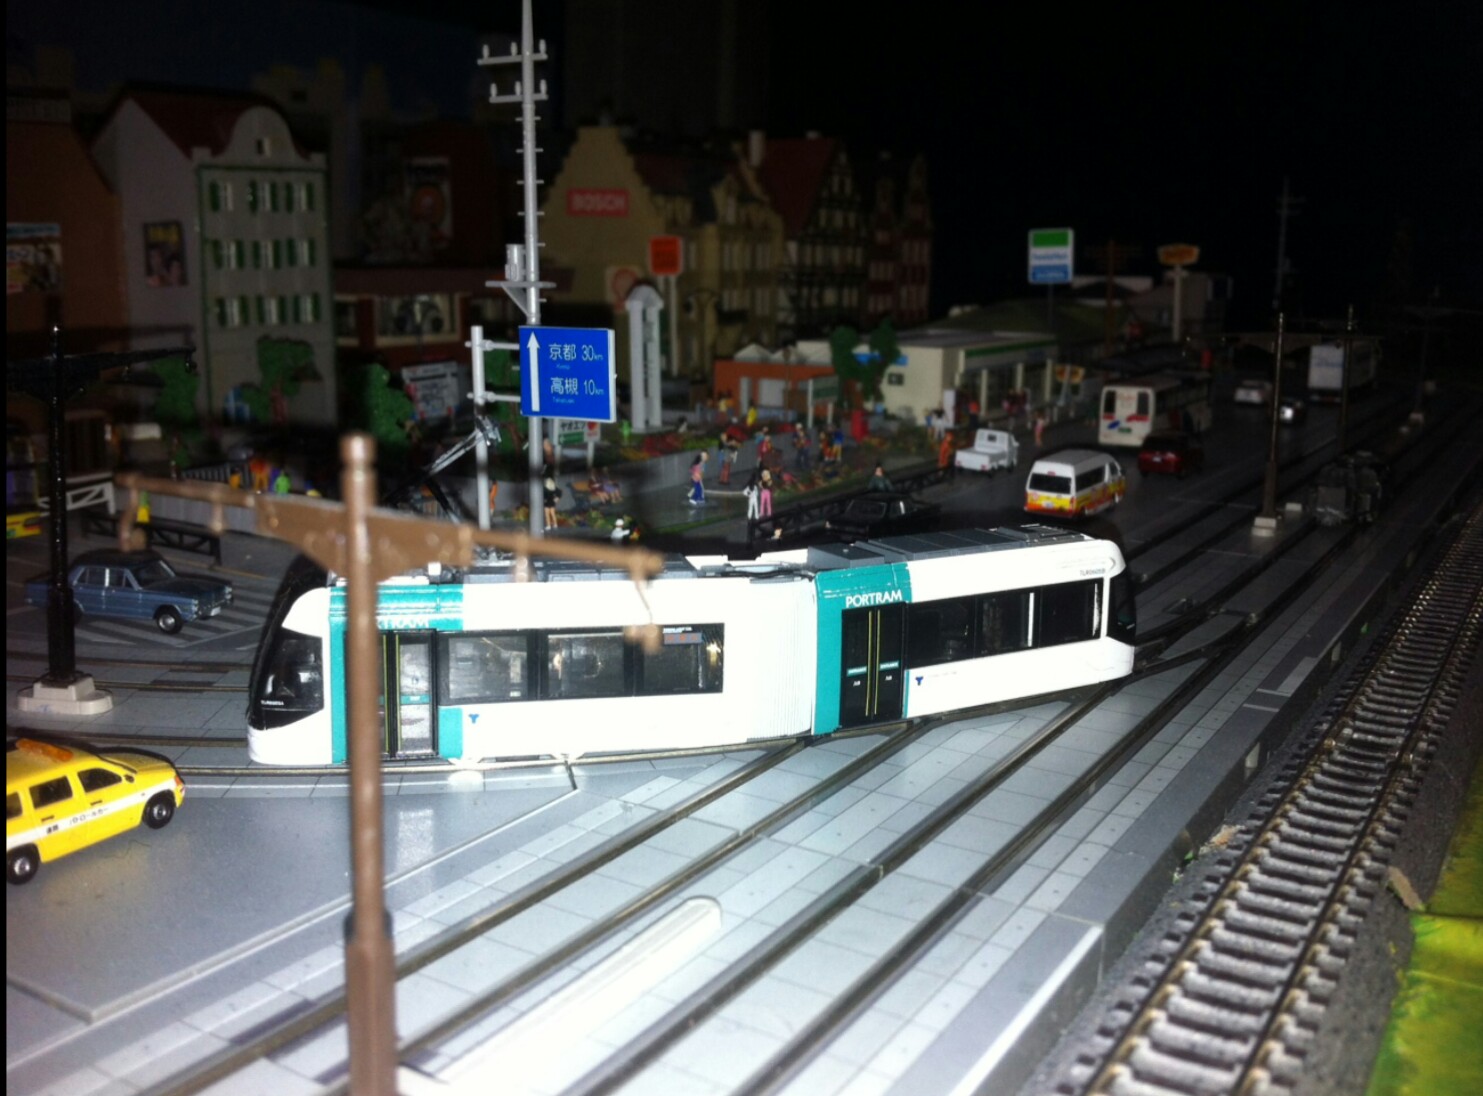
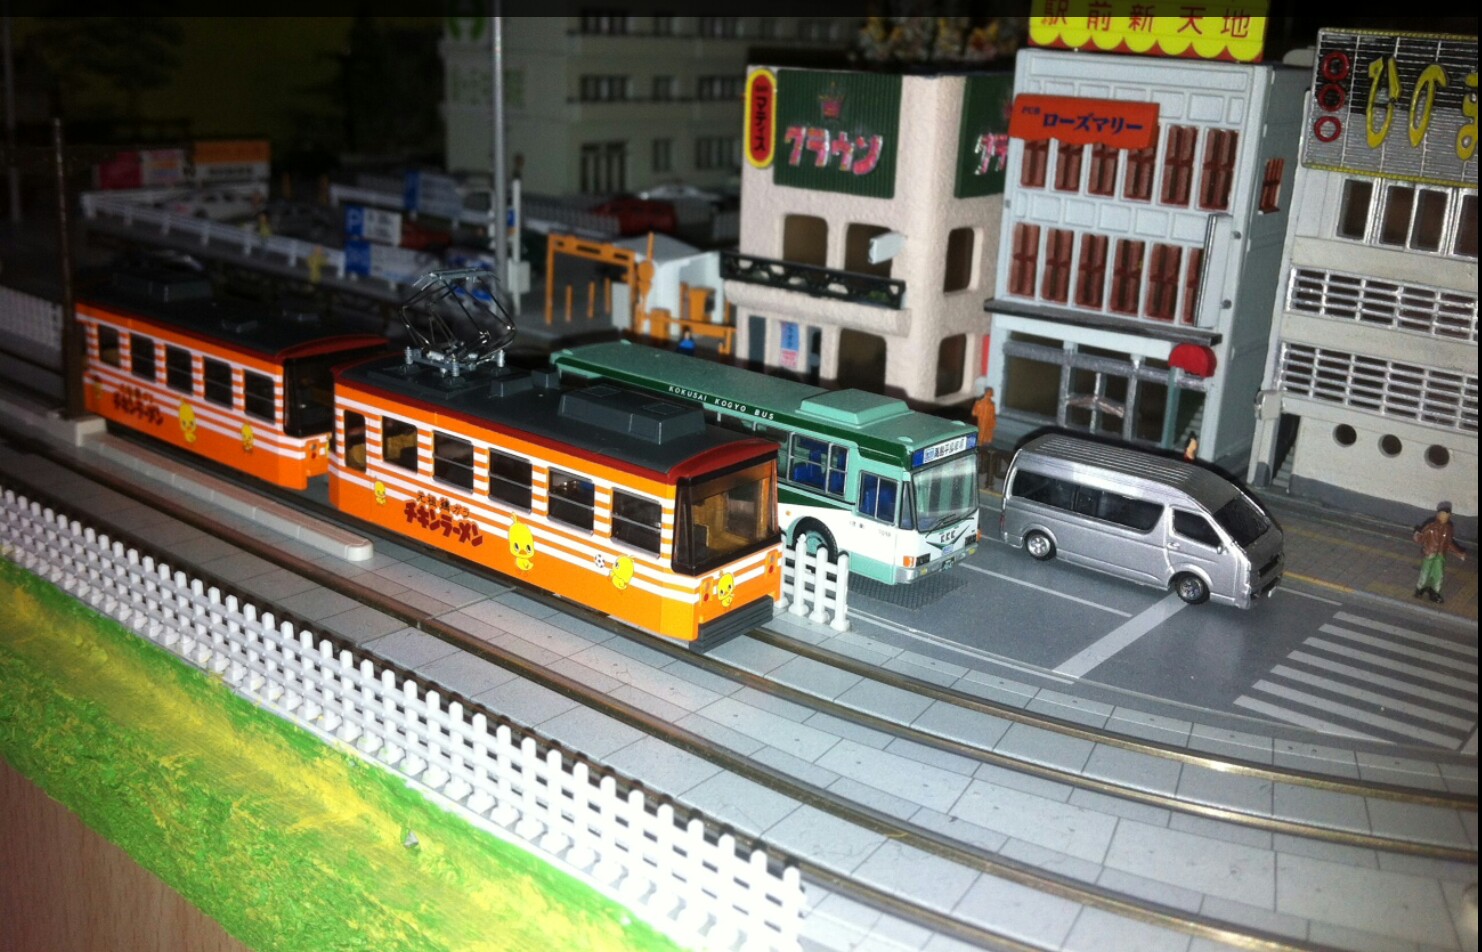
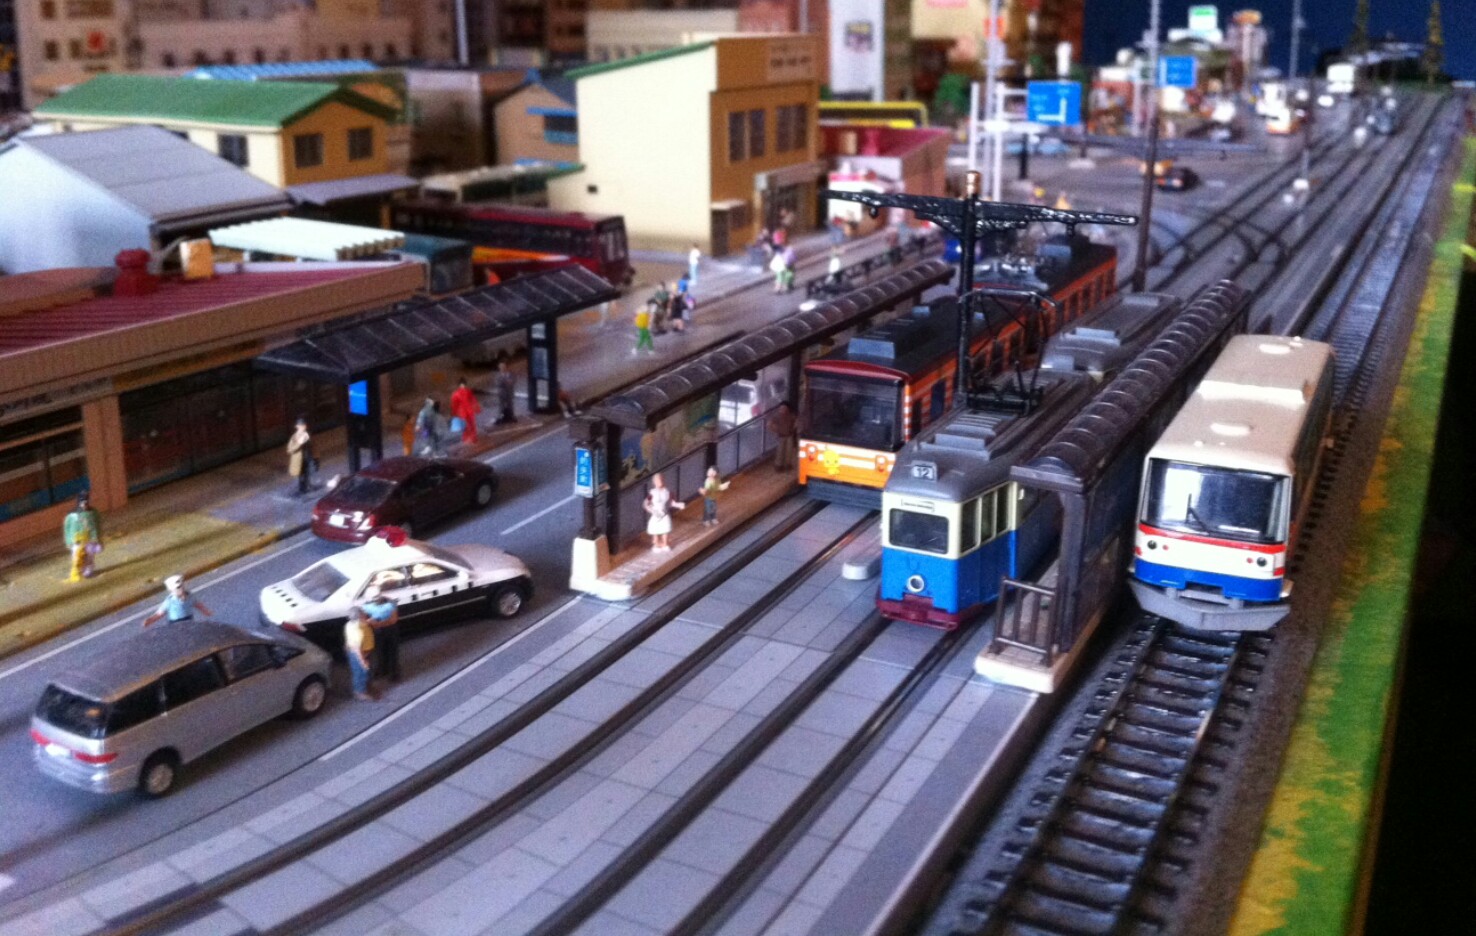
Next, on to Kevin:
“Hi.
I attach 3 images from my Japanese N scale tram layout.
I have various shots along my tramway which I’ll attach soon.
Kevin”
“Hi Alastair,
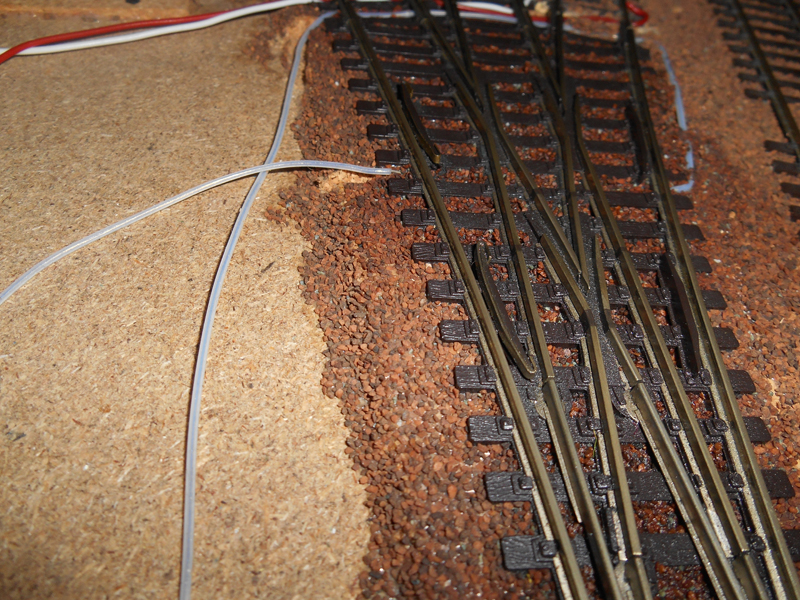
Some while ago I promised a photo of the shim I found I had to put round the checkrail on a code 100 Peco three-way point, to get the finer-flanged wheels on continental rolling stock to follow the curve, instead of pushing out through the gap in the crossing towards the middle route.
I think you can just see it in the photo, incidentally the sheathed wires carry current to the crossings (or “frogs”) of the points from the switches attached to the point motors.
This section of the layout is not sceniced as yet since its part of the fiddle yard, but I ballasted the track anyway as it may have a cameo scene built round it later
Rod”
Loved Kevin’s trams – I don’t think I’ve posted any tram pics before.
Styrofoam train tunnel tutorials always go down well too. Just goes to show there’s a million and one ways to do one thing.
And great to hear from Rod again.
Please do keep ’em coming folks. Thanks for all your comments on this too.
Best
Al
PS Ebay cheat sheet still charging along.


Please drill a hole in the table top to bury the sheathed wires.
It would look a lot better. Try it.
very nice work guys
help guys what is the best material to form a concrete base in a diesel depot? to make it look like a soiled concrete foor,, thanks john from hull uk
I love the many useful contributions from all the readers and am always pleased when I open my emails and there’s another one from Alastair. I do get annoyed though from time to time when responses pick up on silly things and not on the tip (like hiding the wires, above). The very useful tip about the shims is what it’s all about.
Love your tram system and I would enjoy seeing details on how you built it! It’s a great alternative if you have a smaller area but still affording great detail. I often have thought about doing one based on either the San Francisco Muni system or the old LA Red Car line. There is a very huge and detailed layout not far from me here in Southern Cal. Out in the town of Perris, CA . Theirs I would be very challenging to do as they use overhead wires to provide the power!
I must throw in my thanks for you posting these photos.Sir,to me this is good wholesome entertainment at its best.In our present day insanity is for the most part the normal word for us.Any way your photos provide a retired engineer peace and fortitude and to look at an example of life of yesteryear has a calming effect.It also continues to add to my list or mental files of my own railroad layout.Again Alastair,many thanks for sharing these.
Make “concrete” by putting egg boxes, not the Styrofoam type, into a blender with some watered down PVA.
Best let it soak for a while first.
Then blend.
Make sure it looks and feels like a kind of plaster, i.e. not to wet, mold into shape.
Looks awesome after it dries out.
interesting posts today
and well done to each layout
keep em runnin fellas
So one anonymous reader gets sufficiently annoyed when someone uses one tip to prompt an equally useful tip (such as hiding the wires below the track bed level) that he has to moans about it on this forum. Tough, Why not just ignore this particular tip.
I am pleased, and I am sure the rest of us are just as pleased to get the additional tip which easily tidy-up a non scenic area of a layout.
Trevor, Upper Michigan,USA
Impressive and inspirational!
Are any of the print-and-cut buildings available in G-scale?
Love the tramway. Looking forward to more pics.
Like that tramway Kevin ..well done …Dave
Amen to the off-the-subject nitpickers.
Like the N Scale trams, also like and love the Tunnel.
The P.E. layout in Perris, Ca. is at a scale of 12″ to the foot.
Bob
Just a wee word on landscaping polystyrene –
1. Don’t glue layers – pin them
2.Cut basic outline, and then scratch it with your fingernails to rough it up a bit
3.Use Solvent based spray paint – this will etch and glue the layers together
without showing any lines. Do this in a well ventillated space – outside best.
Do this as often as you like to get varying degrees of erosion
4. once evaporation complete, apply a base coat of acrylic to seal it – khaki is
a good base coat for ground cover materials. It also allows you to set bushes
on the ledges that would naturally have growth
I Will repost some photos of my layout a little later. I am coming to grips with windows 8.1 from the old XP where all my photos are located
Wayne
Downunder kiwi
This process gives the actual weathered appearance of natural cliffs and banks
I would not use the torch on the Styrofoam. When it burns it will produceTOXIC gasses!!!
Great I love all products look like kato unitram systems V50 I have to get a set verysoon wow.
First time I came across pictures of tramway/streetcars layouts. Beautiful pictures of the completed layouts and work-in-progress! Anyone ever considered doing a 1964 Worlds Fair layout with the AMF Monorail traveling around the ENTIRE fair grounds, instead of remaining inside the lakeside area. Would mean constructing all the fair pavilions. Perfect guide would be pictures of some of the Queens Museum’s domed tabletop model. Just a thought. Great pictures!
I actually enjoy reading ALL the comments; the ideas, the tips, the magnificent layouts; AND, the off-topic items. The latter proves we are all just ‘regular’ folks, and not just ‘experts’. Remember that some ‘experts’ are simply ‘drips’ that have already left the the main ‘flow’…. (ex-spurts) – Dave in Ontario
Alastair, Love your posts. I’m just getting started in N gauge and found them vicariously! Les Irwin, PA
Love that tramway, very neat, convincing paving job, well done. I did a model tramway as part of a club layout we used to have some years ago, it’s much more fun than you’d imagine.
Sorry to be so late responding, been on holiday.
Rod
a couple years back I setup a 4×8 platform at work (in our lab area) it was open to all to use. for a short time it had a monorail loop, unfortunately I did not get a photo of it; I do have photos of the basic platform, it had two loops and two sidings, the loops had cross-overs. I painted it white to simulate a winter scene and used bare tree armatures to complete the winter scene. When I get my butt in gear I will submit the photos, it was very basic but it was fun while it lasted. I was NOTIIED the owner was going to make his yearly visit, so it was an indirect message to remove the platform, I made it disappeared that night.
Rich F. Warminster Pa.
Regarding layouts at work, one of my sons, an engineer, reports that his lab has a small model train layout running above a suspended ceiling, with a couple of simple periscopes that can be set up so that people can view the train. Few people outside the lab know that it’s there, and it only usually runs during the holiday party.
Nice job of “naturalizing” your rocks, Ed
Like the way the wiring was buried in the three-way switch!
Has anyone thought about incorporating those pesky wires into a scene in the layout? What I’m trying to say is use the wires as ‘pipes’ to some sort of refueling station or other type of industry! With a little imagination you could make it a maintenance scene of replacing an underground pipe with figures, backhoe and trucks. Maybe for that little spot on your layout that needs something. Just an idea!
By the way, there is a reason I left the point wiring on the surface rather than drilling it through the baseboard, that baseboard section is 5′ long and 2′ wide and rests between two others so has no legs or other apparatus to go within it, and is the first section of the layout to be removed when dismantling, so my original plan was to line the underside with foam and use it as a box for the coaching stock, to save room in the van going to and from exhibitions, but that would’ve meant making proper, fitted top (to protect the track, point motors etc.) and ‘lid’ to contain the rolling stock, so in the end I decided separate stockboxes and a bigger van was the way to go. I had originally thought to get the whole kit and caboodle to fit in a Ford Transit Connect, but that would have been a proper shoe-horn job.
Al I am getting ready to start my first lay out and am seeking advice on the best way to do the video on the layout. I would like to video it from start to finish if possible. Any advice from you or your readers.
Look very neat.!!!!!
In order to print Al’s downloaded buildings in G-Gauge, simply print them at 400%. Print only one page to test they are the correct size. Most US entry doors are 36″ wide by 80″ tall. In G-Gauge, which is 1:24, or 1/2″ to the foot, the printed doorway should measure close to 1-1/2″ wide by about 3-3/8″ tall. Adjust your 400% up or down until you are satisfied with the size of the printout, then print the entire building at this percent.