Got this in from Ken – and I’m always a sucker for the ‘step by step’ stuff. Hope you like it as much as I did.
“Thank you for all the great tips and advice, I have included pictures and a dialog of my progress since beginning my new layout in September.
I now live 2 hours away from Guadalajara, grew up in L.A. Calif. and after the service moved around a lot and now am retired in Mexico.
My new layout begun in September, it occupies a space of 13 feet by 13 feet.
It has been almost 20 years since I last had a layout, that one was in a basement room that was 30 feet by 30 feet, it never got beyond track laid and operation but was fun.
I am determined this time to get as complete as possible, this however now has some challenges as I now live in Mexico, and some things we take for granted as always being available just aren’t here or are so expensive as to be prohibitive.
With this in mind I started, the bench work is made from ½ inch plywood, the reason for this is simple, solid lumber costs more and is not kiln dried, so prone to warp and shrinkage.
I started by cutting up 2 sheets into 3 inch strips, these for the legs and bench framing, the legs are L shaped, the joints are glued and screwed together.
The bench work is L girder in design, again all joints are glued and screwed together, also in assembling the bench work I planned on 4 sections that could be separated as we are contemplating a move to another city and do not wish to destroy what I have.
The only part that remained from my previous layout is a bridge that I hand built as a removable bridge.
After 20 years three moves and subsequent time in storage it was in sad shape, this became the first project, rehab, that is done except new paint.
Then where to place it, the design of the layout and the length of the bridge made the choice easy.
I needed a way into the center of the layout and so one corner became the bridge central.
The main track concept is a main loop around the entire layout, this required a double track bridge, the bridge, and then up and down ramps to the main level.
Also there is a coal mine incorporated with its own trackage, this would also require another bridge, and then there is a loop on the main level connecting everything that needs a bridge.
The 2 remaining bridge designs have not been decided as yet mainly because as I go I think of different ways to do things, such as a lift out section with trestles.
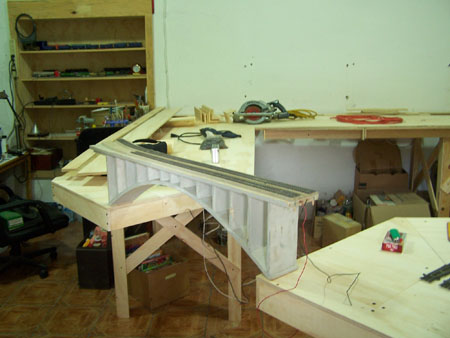
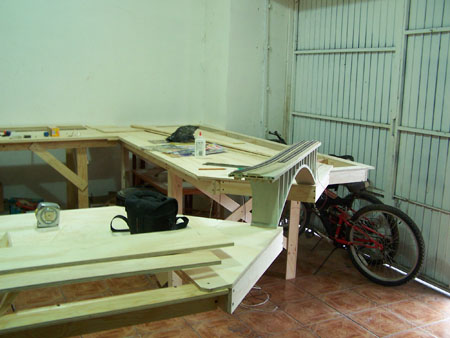
These first pictures show basic benchwork completed.
Here the bridge is seen, this is the location it will be in, the height above the bench is 8 inches.
This section of the bench is 4 feet across all the rest are 30 inches.
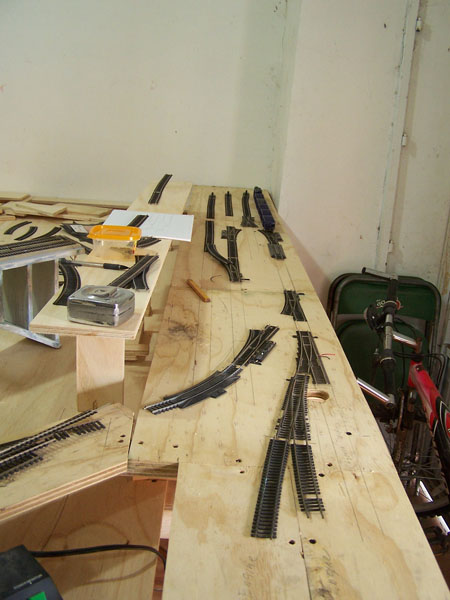
This is the location of the coal mine, here I am working on the track layout. I have numerous switches from before, number 5 and 6, left and right, plus some Atlas that a friend gave me, these plus what track I still have I set to work.
I lost count of the variations I tried till I finally arrived at this one.
The considerations were, being able to pull empties in, un couple, run around, and push into appropriate track, number of tracks, length of tracks thus dictating length of train.
The first of many designs. I find it easier to lay things out full scale.
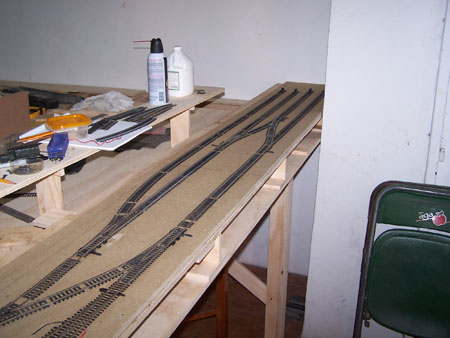
Final design, the sub road bed base is construction fiber board, after putting it down I ‘painted’ it with a mix of white glue and water, firmed it up and stopped the fuzzing.
Then after trying all the regular methods of fasting the track and visiting several hardware stores, and told every time, no, senor, I don’t have that, I resorted to a silicone glue and now all track is glued in place. After all the mine track was laid and I was admiring my work I made a nasty discovery, I had left out the un coupling magnets. Trust me I will not make that mistake again.
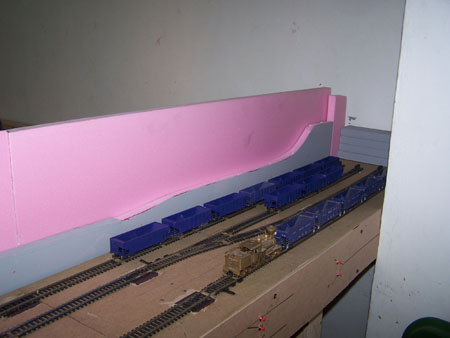
Here are the cars that make up the mine consist. The purple cars are from Tyco, that I have modified to meet my needs, I chose these cars because they have operating bottoms, and my plan is to have an operating mine loading cars and a point of drop off, the wife has suggested a coal fired power station.
The Shay is from NWSL, I bought it in the early 70’s, and plan to use it as the main motive power for the mine. The name on the cars is that of my daughter.
The pink insulation foam board is the base for the scenery.
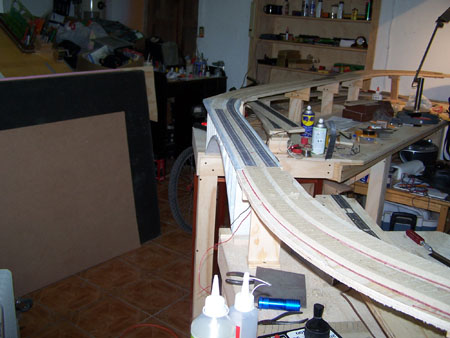
Here I’m beginning work on the upper level, I had to make the road bed, I used the fiber construction board, cut on a table saw, 2 inch width, then beveled 35 degrees.
Then for the curvable pieces I used a band saw to cut diagonal cuts, all done at my local carpenter shop, they are friends of mine, in fact I helped them get and set up the shop. I create quite a cloud of paper fiber dust every time I do this.
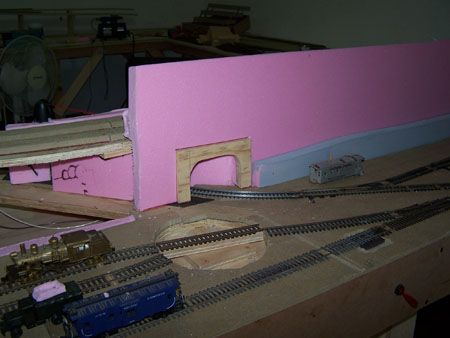
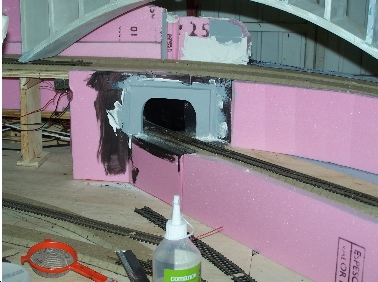
Here you see the tunnel for the mine track under the main upper line, also what will become a turn table.
After I was congratulating myself on such a brilliant job laying out the mine track I realized I had no way of turning the loco’s around, so I came up with a turn table and then an engine shed for the loco’s also needed a track for car repair.
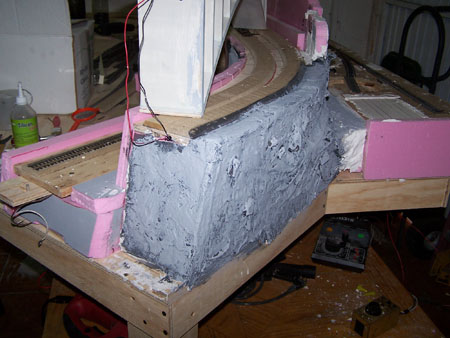
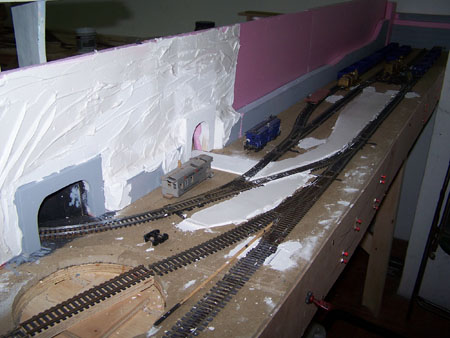
Here is the first attempt at what will be rock walls, I am using drywall compound and clothes dryer sheets over the insulation board. I got the idea for the sheets from an on line blog, works great and there is no cracking. In the background to the right is the ‘concrete pad for the engine house.
My tunnel portals are hand made from ¾ inch plywood, cut with a saber saw, installed using silicone glue, coated with drywall mud, sanded, and painted. May not be the ideal but it is what I came up with.
Did I mention the only hobby shop is a 2 hour drive from where I live, and if he does not have ‘it’ in stock, it takes a month for ‘it’ to get here, plus it is twice the cost of ‘it’ in the US, and it does not matter what ‘it’ is.
Also no liquid items can be shipped in, so alternatives need to be found, be creative, or plan a shopping trip to the US.
The tunnels 1 track, 1 road and the road, why you may ask are all the cars and engine still there when I am working on the messy scenery.
Good question. I don’t really have a good answer, I do know however that all will clean up and work fine.
All the mine track and locomotives are straight DC, there will be an interchange point where the cars will be left and taken over by loco’s in a DCC system.”
Wow! A big thanks to Ken for sharing. Can’t wait to see how it comes along.
That’s all for today folks.
Please do keep ’em coming.
And if today is the day you get started on your layout, the Beginner’s Guide is here.
Best
Al
PS More HO scale train layouts here if that’s your thing.


.With all the trouble of getting the supplies you need.The layout looks VERY INTERESTING.Keep up the good work MIKE
great story so far
Hi, Very informative. I started with wood but switched to foam when I found that I had a hot wire foam cutter. I go into stores looking for damaged sheets which I can get free. I use liquid nails and an old product called instant road bed for track. The base is 2″ foam 12 x 4 N scale.
As if putting down track is not hard enough I keep changing my mind. It is a suburban theme……… PRR GG1s, Doodlebug, etc I even have a PTC trolley. MetroLiners will go thru.
Construction is paused because of landscape and weather issues. And now we have Sandy
I have really enjoyed the these tours/ lessons. They are the best
Del
As always, I am impressed with the amount of ingenuity and talent used in the construction of a layout. These guys are great. I will keep reading and looking forward to the step by step of this layout. You guys are really ingenious.
Thank you for all your suggestions it is hard to make a track from scratch, trying to select which one will work best and enjoy the longest, out of so many excellent choices.
Would greatly appreciate your including a track diagram with pix. Then we can get an idea of thee relationshiops wi of photo in the overall plan. Thanxc. Enjoy yuour [resemtatpms
Hi Ken, will you please oblige us with regular updates? What is the oververall plan and does the railway have a “history”? when I was in parts of Africa I had similar supply problems but I see you are quite inventive in your solutions. Thanks for sharing this, Muy Bien ! D/
Liked the ‘chat’ and pictures. What are ‘clothes dryer sheets’ so that I might try and get something like it in the UK?
And al. keep up the good work of posting all the tips.
This is great! I always love the great tips and things I get from this newsletter. I never thought to have a DC district and a DCC district ! What a great idea. Now I can use my non-DcC loco’s to switch certain industries and just pick up the freight on the main using the DCC ! Simple, nice solution!
I just attended a train show that was a flop. Only G and O scale. Pictures like this helps me tremendously and his letter gives me hope. 6 months and I am still working my layout and not as far along as this one. Love the pics, look forward to the completion of the layout. 75 and time is against me.
The DC and DCC idea strikes a chord with me Ken! I have several steam locos from the 1970’s that would be difficult to fit for DCC so I may have “heritage railway” section when my plans come to fruition – hopefully sooner rather than later!
Thank you for the great comments.
For Keith in the UK, ‘dryer sheets’ are fabric softener sheets you put in the clothes dryer , here and in the US brand name is ‘Bounce’.
As I progress I will certainly keep you all up to date. Immediate plan is to have at least the mine portion and some main in operation for the Christmas season for a display. The town I live in has a total population of 2800 people.
I use wood for all my table tops and then use a dense Black & brown cellulose base 1/2″ insultion board on top before cork road bed is put down I use the cheapest latex caulk that I can find to fix the cork to insulation board. That stops alot of the sound transfer to the wooden part of the table which of coarse makes it noisy. I am from Indiana in the USA so I go to farm stores and get 1’x1’x 18″ foam blocks that they get in from trailer shipments and they are usually free. Those make the greatest mountain bases if you trim them down to 4″ slabs to stack, and I glue with low melt glue sticks. Good luck building your layout it is agreat hobby.
coming along nicely
Thanks for the step by step photos, Ken. I really like that bridge.
VERY VERY NICE.
Keith Hicks .Hi in north american we have diffrent kinds of dryer sheet’s.They are really thin sort of paper cloth that you toss in your dryer to make the cloths smell nice and fresh.then after you fold up ya cloths and find the sheet.you toss away.normaly get a box 100 sheets of diffrent smelling detergent.
Monch Hi.I have both DC and DCC running together on the same layout.best of both worlds.
Im thinking of upgradeing a Ho DC conrail to DCC.And will show this on here how too.
Ken’s layout, step by step…Is very impressive and very helpful. The comments are also a good resource of info too.
Thank You all for taking the time to respond.
God Bless You All.
Jack.
I paint all plywood tops of bench work with cheap latex charcoal colored paint.
That color is good for asphalt streets, parking lots, alleys, ETC. All other areas
are covered with grass, buildings, sidewalks, hills & rail roadbed. Although it
seems backward it saves work!
I noticed you have pink foam boards, why don’t you use that for road bed, that is what I plan on doing.
Can I get the full layout plan?
Hi Ken ,great job on the layout. I too have not built a layout in 20yrs. and find I have forgotten some how to’s from back then. Supply problem here in Las Vegas as well so it is all mail order…+ shipping…..Bob….
very interested in your plan to build the roundhouse.. I am building a layout in S guage (American flyer) and I have never seen a pre-made round house system. Thinking I could build one from other trains, still no answers. Anyone with experience or working plans to build a round house, please contact me.
Hi my set Ken I like your layout as I am now retired I am now into trains and I am starting from scratch my layout will be 6×3 as I live in a small unit but I am having fun sorting out I have a train but that is only for testing when I lay tracks so far its a board and other things but your site has given me a few ideas thank you
Some great ideas, I also have not built a layout since the 70’s -80’s ,and have
DC Locos,never thought of having both. We have three Hobby shops within a
Two mile raddius, now I feel lucky after hearing of your 2 hour trip to your hobby
Shop! My layout is only 4X8 , same bench work I used in the old layout,but now
I may have room to expand. Perhaps I can send photos of our progress,as we
Get along. Keep p the great work.
Hi to all. I am an n gauge railroader. I believe I have the easiest table system. I use 2 inch foam sheets on folding metal and plastic tables. when I am ready to make it all stay in place, I use double stick pieces; as many as needed to make it stay. I even use these little double stick pieces to hold 1 inch foam sheets on the garage wall. I will paint with blue sky and clouds on them before I stick them up. I have built a room in the garage out of 2 inch foam because I live in Las Vegas where we have extreme high temperatures. I have a portable a/c unit that easily keeps them room comfortable. If anyone needs further details, let me know. There must be a way to do that, keeping my email secure.
This looks great. My only question is the vertical rock faces. I think that slanted or angled back would be more realistic since vertical cuts/cliffs are fairly rare.
The pictures show a lot of hard work great job good
Luck,with the rest of it
If anyone hasn’t built a new layout in the last fifteen or so years, you are better off forgetting how you did it before. The technology and materials have changed/improved so much, that trying to build the old way is akin to making phone calls on a rotary dial phone. Take time to research and learn the new ways and materials rather than fighting it, you’ll be glad you did.
Hi all,
I also used dryer sheets as a base for my plaster of paris. Works great, although later I learned that I could have and should have used paint to darken the plaster so that later changes or “accidents” won’t show up so white.
Great job under tough supply conditions
Ken, nice narrative and photos of your layout construction. I wish we had a track plan to put the photos into their proper context. That’s a great bridge for your duck-under into the layout. Regarding the clothes dryer sheets, aren’t they rather small and thin for doing plaster work? It seems like the old method of using paper towels dipped in hard-shell plaster would be quicker and stronger.
BTW: I liked the idea of separate DC and DCC sections with an interchange track. I too have a lot of old brass DC engines that would be hard to convert to DCC but are too nice to just chuck. Some, of course, don’t run so well after 50 years of storage so they may have to become a static display in a railroad historical park. Right now, they sit in display cabinets hung on my train room walls.
Great start to the layout. I really found this one interesting with the ways you have adapted to building a layout in Mexico. Cant wait to see an update in a couple of months. See if you can locate some rock it. Its a plaster repair product but im not sure if its available we’re you are.