Here’s how to make your model train scenery look as realistic as possible.
There are hundreds and hundreds of scenery ‘step by steps’ on the blog – here are just a few of them.
Jump on the newsletter to get ’em all!
1. How to make tunnels for your model railroad
Martin has put together a very easy step-by-step on making tunnels for you layout:
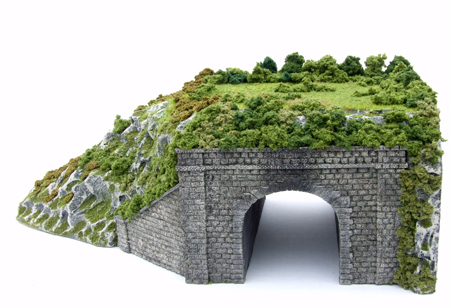
“Here’s ‘My way’ of making scenic items to place on model railroad tunnels.
I produce many different models usually which have some form or rock face, but not all are landscaped the same although I do tend to put plenty of grasses & many bushes on my models.
This project is a single track tunnel entrance designed to fit in the corner of a layout with the track running behind the back scène to a ‘fiddle yard’.
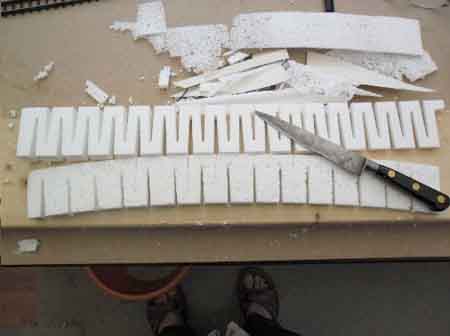
First I use a type of insulation foam which is used to insulate houses, the off cut’s are ideal to make models. (Please excuse my untidy workspace).
Martin”
Martin’s post on how to make tunnels is here
Next on to trees, because no model train scenery would be complete without them.
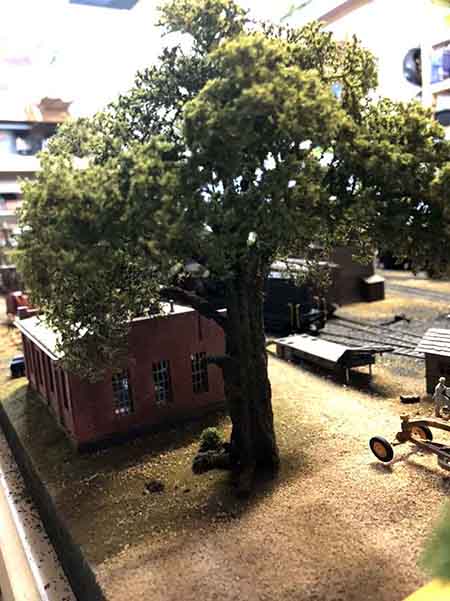
2. How to make trees for your train track
“I experimented using sawdust to simulate bark in the video. I did not think of doing it until I had the first layer of foliage glued to the branches. It could have been a disaster adding the bark after the foliage but it worked out okay.
The tree I built next did get its sawdust/bark first and I also painted it before any foliage went on and it turned out really well. I have included photos of both the video subject tree and the one built subsequent to the video.
Rob”

Rob’s post on how to make trees for your train track is here
One thing you might want to avoid is layout that is completely flat – you don’t want it looking like a pool table.
But when you add inclines, all sorts of problems come along with them.
Here’s how to get it right:
3. How to make inclines for your model railroad
“I used this process to create my layout on a 6’x4’ mdf board.
The layout is basically a figure of 8 with the cross over placed to the rear.
The two loops run side by side at the front at a height of 2”.
The inclines to the crossover have a 1” rise and a 2” drop giving a 3” clearance with a rise gradient of 1:40.
This doubles the length of track on a single controller and enables me to run two locos at a safe distance between them
Chris”
You can read all of Rob’s post on how to make inclines for your train layout here
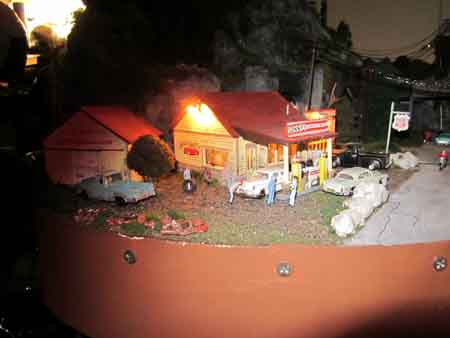
4. How to add lighting to your buildings
“I found an inexpensive way (OK, cheap) to make yard lights. I wanted to share.
Street lights cost upward of $10 each. I did find some that were about $10 for 2 lamps on posts. Still expensive if you need several of them.
I want to share a new way to get street lights with the guys. I ordered 20 of these building lights. Peel and stick type. They were $18+ for 20 of them and they had Grain of Wheat sized LED’s.
I used the light that came in the peel and stick lamps and they were good for yard lights but a bit too big for outside building lights.
Craig”
You can read Craig’s post on how to add scenery lighting here.
5. How to make mountains for your model railroad
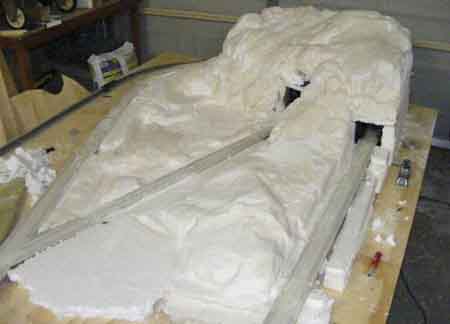
“Hello Alastair, find pics for a 4M x 2M HO layout in figure 8. Still under construction but base board, track risers and track laid and ballast.
The tunnels and mountains are constructed from broken styrene boxes, expanding foam and plaster cloth.
I am in North Queensland Australia so this layout will be a rainforest and bush layout. Have left the “mess” in the pics to show some of the materials.
To make tunnels/mountain, I first made a box section with openings for the tunnels and spray painted inside with flat black waterbase acrylic.
Tony”
You can read all of Tony’s post on how to add mountains to your layout here.
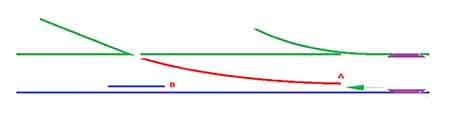
6. How to stop your trains derailing
“Firstly, is it the track?
The track will only work well if it is in gauge. I foolishly assumed that my track (peco 100) would be in gauge at all times, after all it is made in a factory and the rail is inserted into sleeper chairs that are a fixed distance apart. WRONG!
Flexible track on curves has a tendency to slightly tighten up the gauge. Usually not a problem until you create a joint on a curve. These do tend to press inwards on the inside rail. I used a stout pair of pliers to bend the rail back outwards and re-checked with a track gauge. That was problem one solved.
Mal”
You can read all of Mal’s post on how to stop your trains derailing here (post #1).
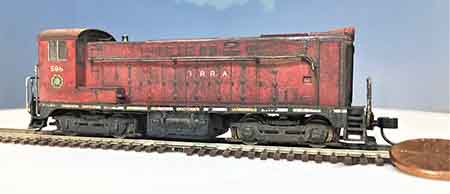
7. How to weather your trains
Model train scenery just doesn’t look right when it’s shiny and new – and that goes for locomotives, freight, track, buildings, vehicles… all of it.
“That’s what I did when I weathered my Atlas VO-1000 – a tiny little N scale locomotive that not only runs well, but boasts a lot of fine details.
I feel it is comparable to my all time favorite N Scale switcher locomotive Kato NW-2, except the blocked cab – if only they could make it a proper, see thorugh cab it could be on the top of my list!
Anyway, I wanted an easy, fast, over the weekend job for my next how-to, but I also wanted to do something uncharacteristic of me – really heavy weathering without relying on rust.
Kaustav”
You can see all of Kaustav’s weathering step by step here.
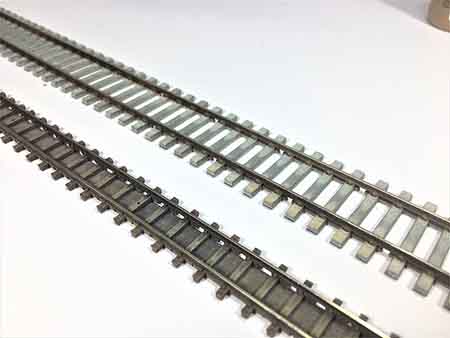
8. How to weather your train tracks
“Believe it or not, I used spray paint to paint the tracks, and it worked really well.
Yes, it is not practical if the track is already laid, but for those who are about to lay the track or want to start a new model railroad, I feel there is merit in completing the whole detailing of track and then lay it. It gives much better control to bring out the details.
Kaustav”
You can read Kaustav’s post on weathering train tracks here.
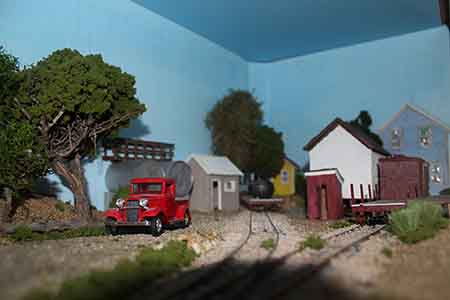
9. How to make a model train diorama
“Through those years I have repeatedly heard three complaints repeated nearly endlessly; these three complaints continually spring up like daisies after a spring rain.
The first of the complaints is “I do not have room for a layout.”
The second is that “Model railroading has gotten too expensive.”
The third is that “I do not have time.”
There is a skin of truth to each of these… But it is only a skin; these excuses are veils that hides the truth of the greatest hobby that anyone can ever be involved in. It can be fun to be a spectator in any game, being a player is generally even more fun.
John”
You can read all of John’s post on making a small model railroad – or diorama – here
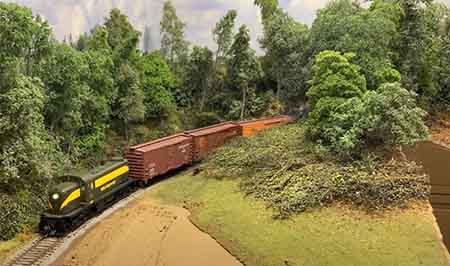
10 More on making trees for your model train scenery
There are so many different way to create trees for your scenery, it really is a case of choosing one best for you, and the one that you have time for.
Here’s Bill’s model train scenery ‘step by step’ on making trees.
11. How to make an overgrown bramble area
John sent in this fabulous scenery ‘how to’ on making a bramble or overgrown area for your layout.
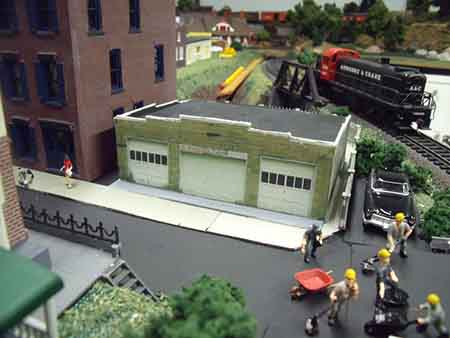
12/ Larry’s scratch built scenery
Larry shares how he adds buildings to his layout scenery.
Mark’s one hour scenery project
Mark sent in this very simple but effective ‘one hour scenery project‘.
Have a look at the before and after pics. Impressive stuff.
There are hundreds and hundreds of step by step, model train scenery tutorials on the blog – but the only way you can see them all is to jump on to the mailing list.
And course, there are the printable buildings too, which look great on any model railroad.
