I know lots of you are after free HO scale paper buildings – so I thought Larry’s post may catch your attention:
My word. What a clever lot you are. Look what Larry has sent in after Rob’ post.
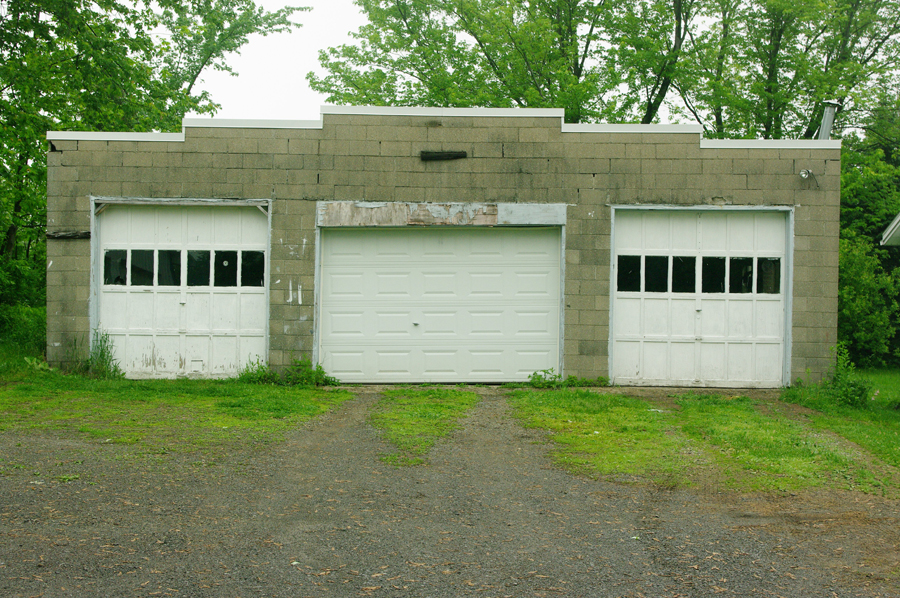
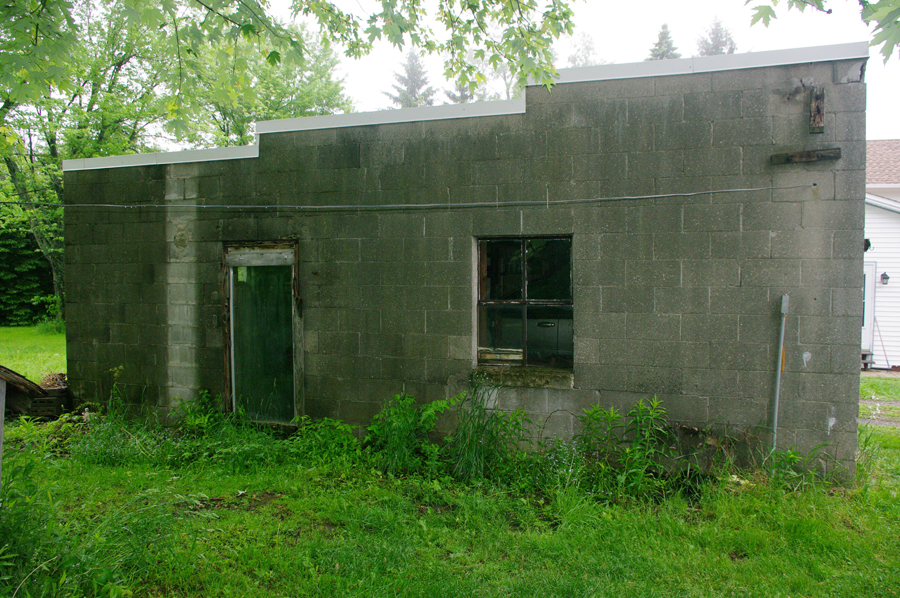
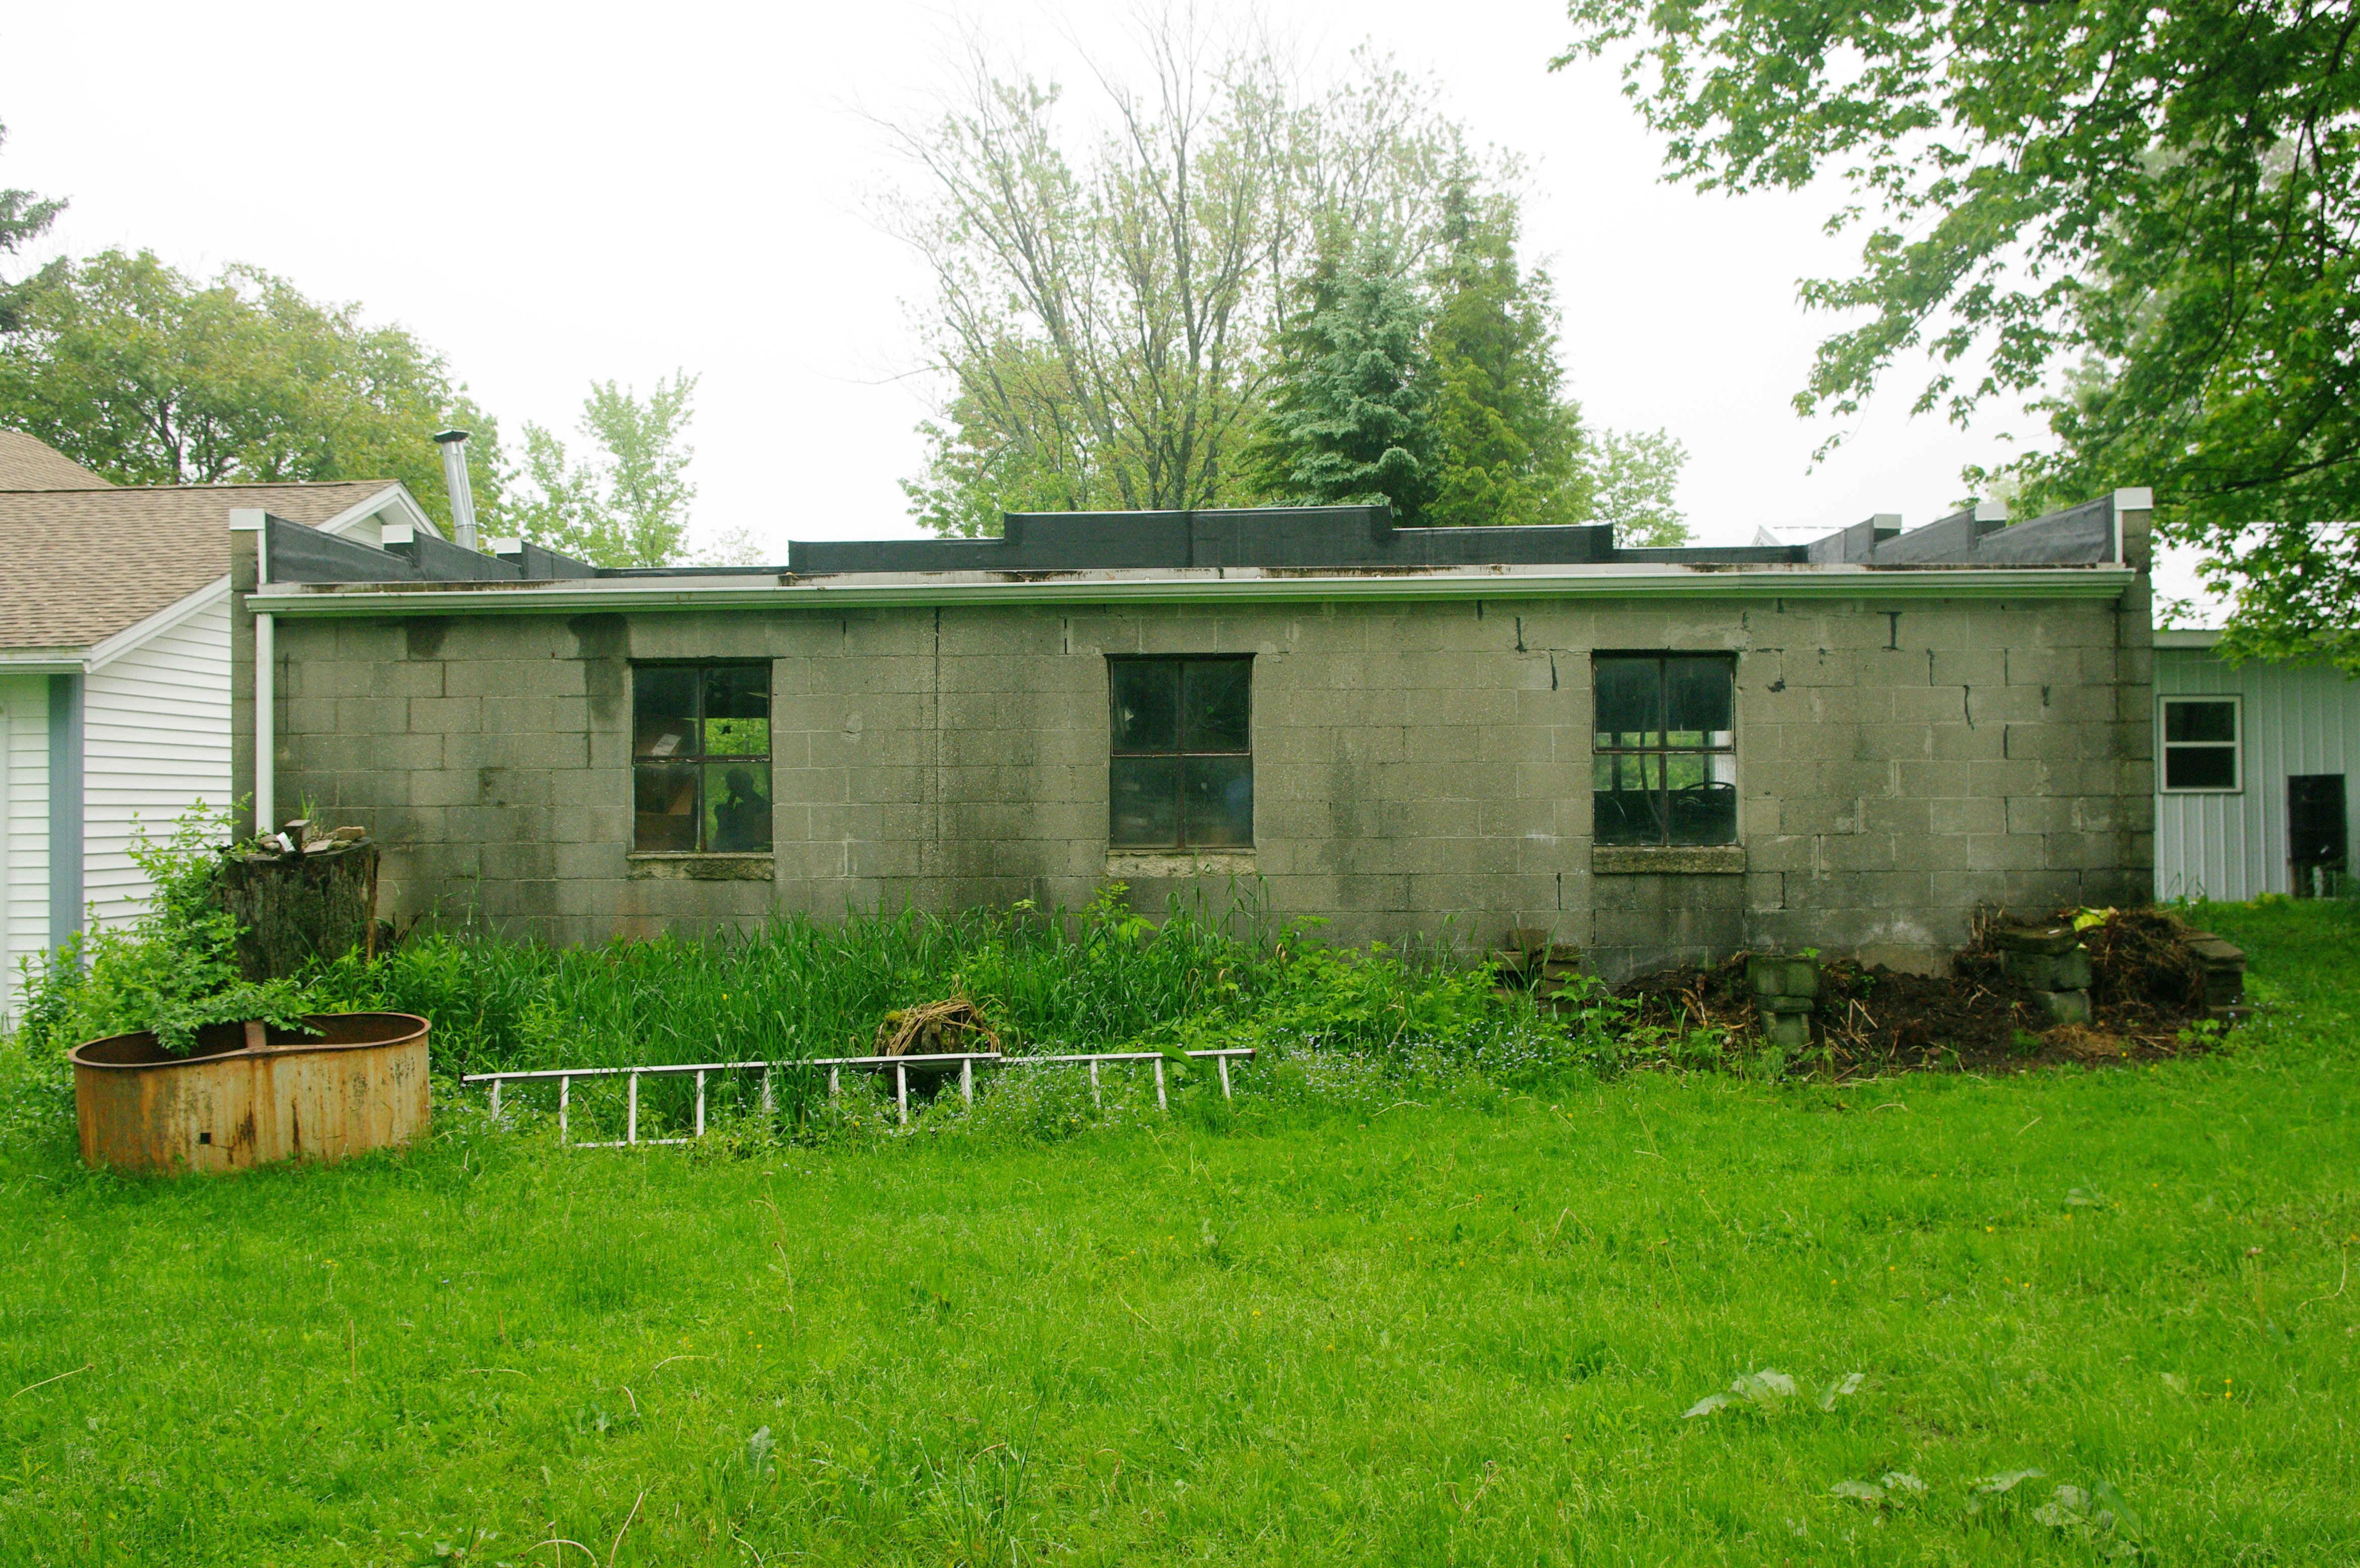
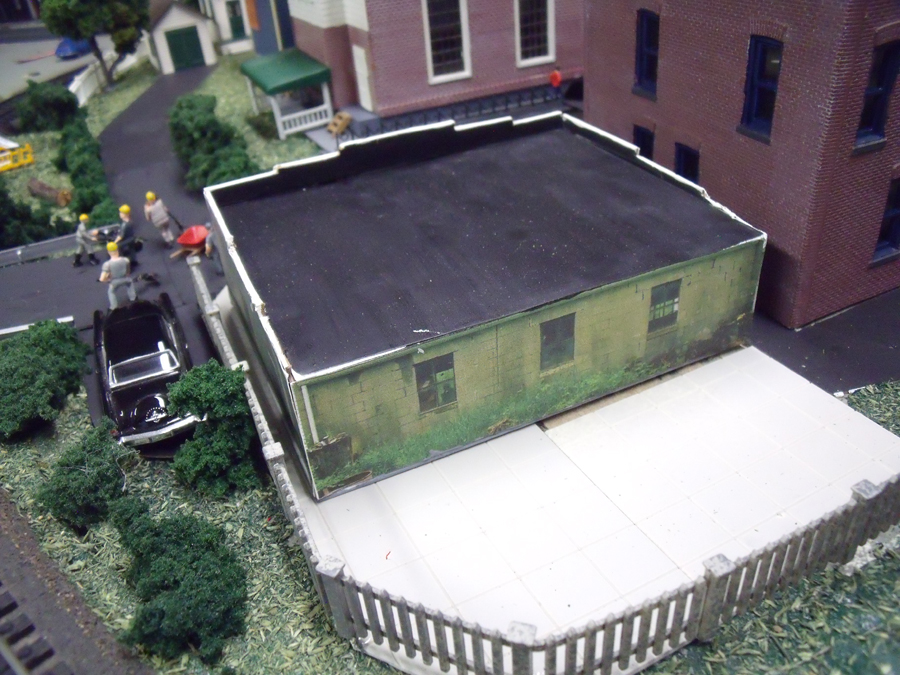
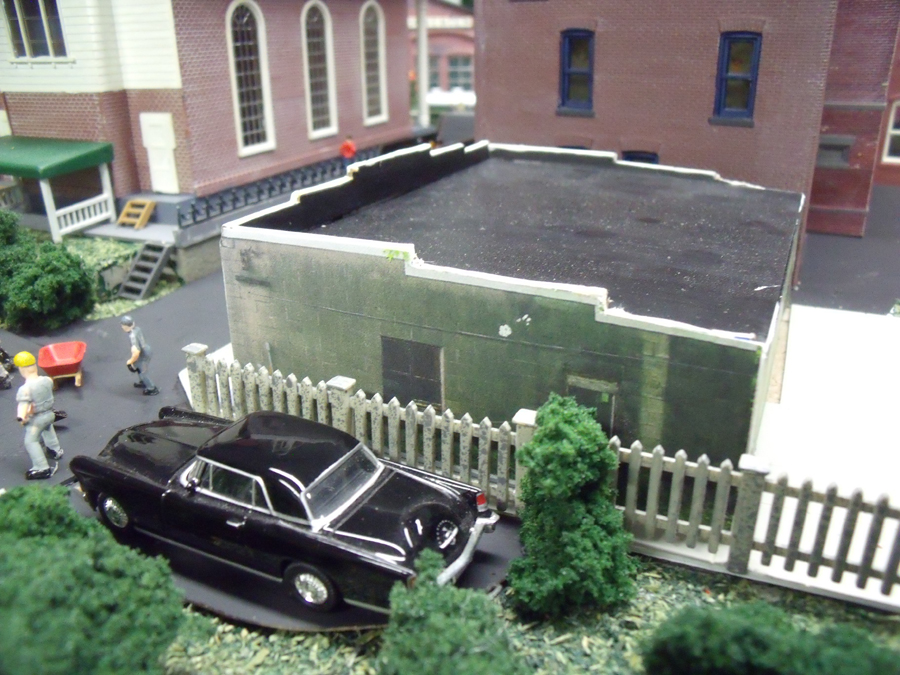
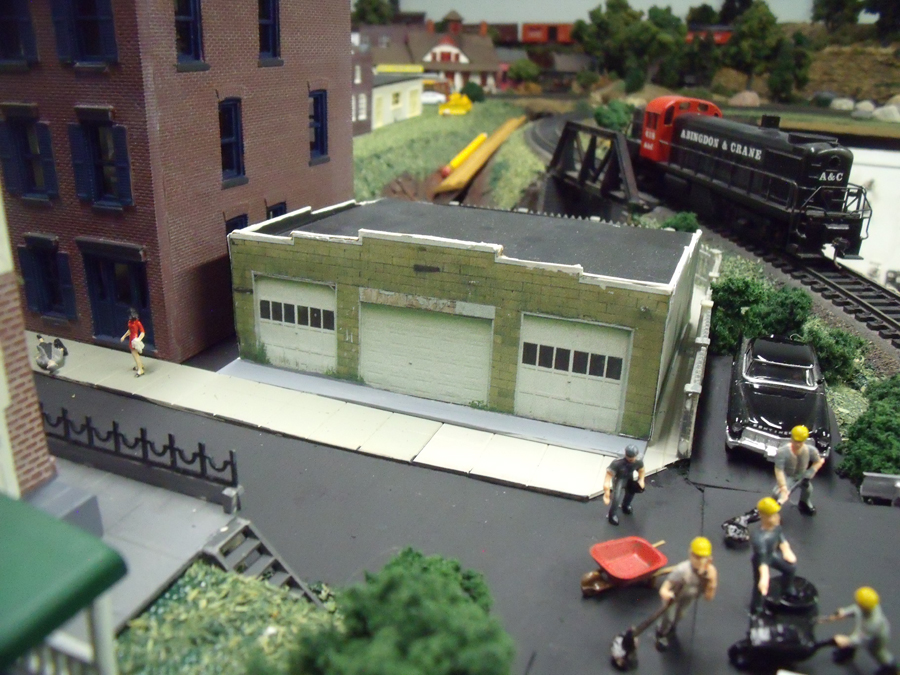
“Here’s an idea I had for a scratch-built building, based on a real one next to by house.
While I have not decided on a permanent location for it on my Abingdon & Crane nor properly landscaped it, here it is.
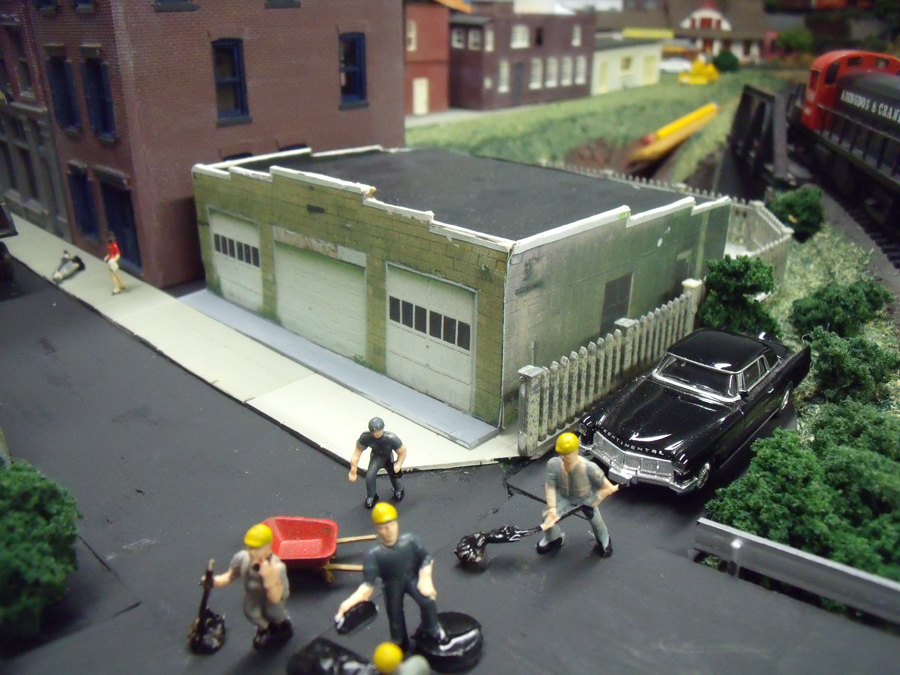
This block garage was built in 1951. I photographed 3 sides of it, one side being too close to the house for an effective picture.
The other side, reversed makes up the missing east side.
A little photo manipulation of perspective and scale, gluing the cardstock to sheet plastic and cementing it together makes a great old garage for the town!
Larry”
A huge thanks to Larry for sharing his take on free HO scale paper buildings.
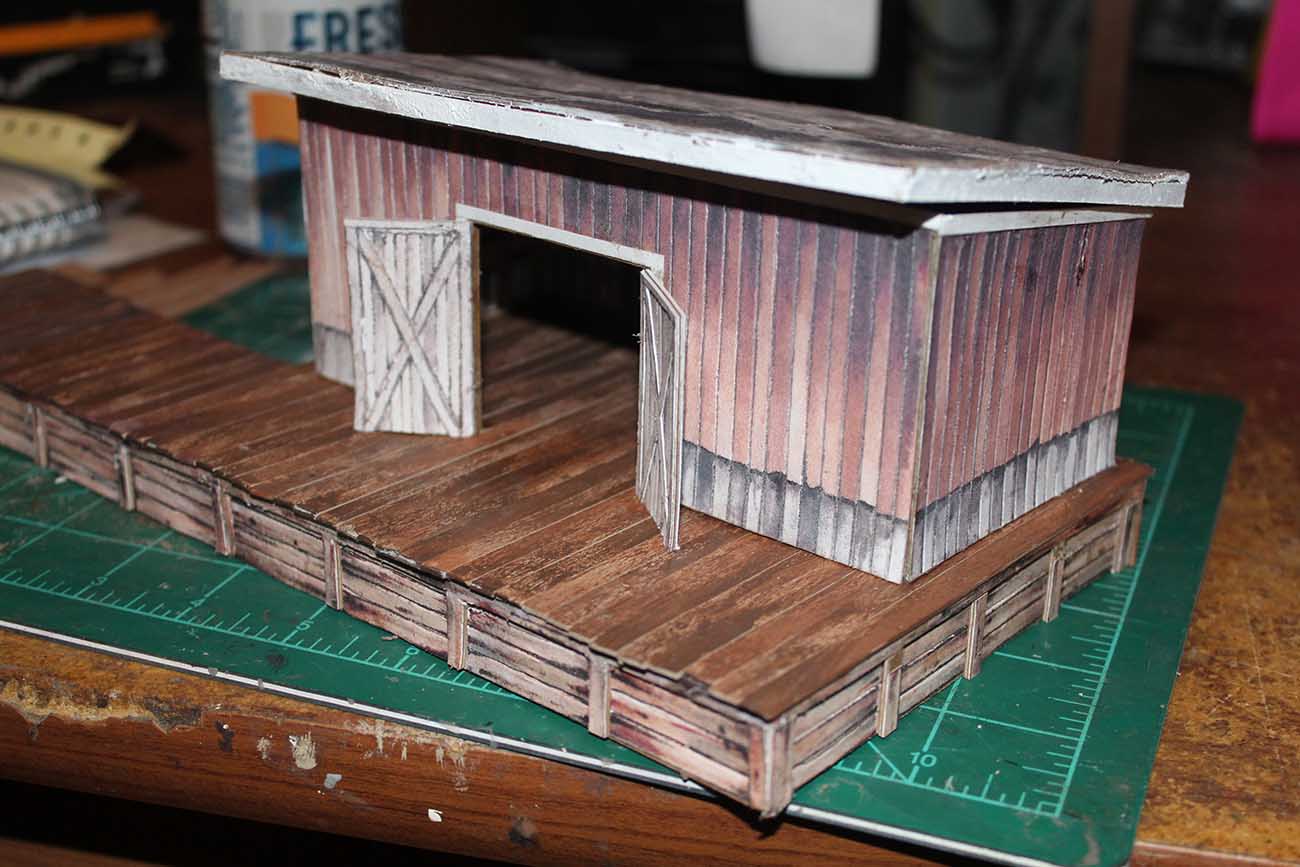
Here’s some free HO scale cardstock buildings of a freight shed which you can download right now:
There are lots of printable buildings here, but they are not free…
I love seeing where you all get your inspiration from – and how to attack the build! Larry’s last post is here.
Now on to Rob:
He’s been in touch again – and he’s very kindly answered from questions from his last post, which is here.
“Hello Al…
Here are some answers to the questions that I received via your posting of my “Solid Core” modeling.
1. Question: What do I do about windows.
Answer: I sheet the balsa blocks with 1/16″ thick scribed sheeting…clap board…board and baten similar material and by using an Xacto knife I cut out the window and door opening.
This leaves a 1/16″ recess in the siding to accept the blackout paper…shades…curtains and glass. Once these are installed I glue my Tichy windows and doors into place for a perfect fit.
2. Question: How do I cut the balsa block clean and square.
Answer: I have a Mikita 8″ sliding chop saw. I only deal with the standard angles to include 15 degrees… 22.5 degrees…30 degrees…45 degrees…60 degrees…and 90 degrees.
I do not frustrate myself with oddball angles that I can’t remember later on. Stick to the basics and you will never have a “no fit” moment.
3. Question: What saw do I use:
Answer: A Mikita 8″ sliding compound chop saw. An absolute gem to work with.
4. Comment: The cost of balsa is a little to expensive to entertain.
Reply: Interestingly enough when you compare the cost of strip wood (specifically 3/16″ or 1/4″) for which I would use nothing less for stability the cost difference isn’t that great.
I will have to admit that I am registered with some 200 different manufacturers and I acquire my supplies at wholesale.
5. Question: How do you add lights.
Answer: Excellent question and very difficult to explain with a drawing showing how I leave a void in the layers of balsa block to create an open room.
This is best illustrated by a drawing that makes it all very simple.
6. Question: Where do I source the cladding and fixtures from Ray in Australia.
Answer: Reference my comment in question number 5 above. I have numerous suppliers that provide a number of items that are not available outside of the United States.
Simply put they do not spend any time to market outside the country. This is sad since there is a “Horn of Plenty” available to me that overseas modelers can’t acquire.
7. Comment: To Tad in Long Beach…Reference comment number 4 above. I reside in Valencia (Magic Mountain) which makes us practically neighbors when you consider that a large majority of Al’s readers are world wide.
Best regards,
Robert”
Please please do keep ’em coming.
Thanks for all your comments on the Beginner’s Guide and ebay cheat sheet too – makes it all worthwhile.
That’s all this time.
Best
Al

The first ones with the grass are amazing. So realistic, much preferred over the town setup. Great work.
What a great idea! Thanks for showing us.
Very nicely done and it ties in nicely with your other scenery.
Well done larry …very realistic …Dave
Great job of constructing a scratcbuilt garage! Is it O scale? Jerry
Looks great…. just like the real deal… fantastic.
Nothing but memories for me, Larry…One almost identical to it where I grew up…Thank’s….Mike
About the first comment : The first three pictures are of the original building. They were use to make the model.
Very nice
What a great ideal for making an easy scratch built garage. One could possibly go a step further, and by using some thick card stock, say 1/8th to 3/16th inch thick, cut out the doors and windows, and have them recessed a little, so there is a bit of depth when looking at an angle. Just a little paint to match the frame.
OOPS, a scale pencil and ruler. very nice model, if you change your mind, I can find a place on my RR, keep up the great work
Good idea for small simple building. Could be about any where or era on a railroad.
I would like some tips on green on the model. Captured the look of the orgibal
that is beyond cool it looks like a garage we had in Brighton Co. USA
Great looking garage, the spit of one in town.
a pretty neat set up
I think there must be one of those garages in every town and city in the world
and I know of one in the town I grew up in too , only difference between them is
the one I remember had a storage area built on the top and it was used for car parts that they used in the car repair on the first floor !
George
WOW! Looks exactly like the real one. Great craftsmanship.
a nice job. it would go on any layout thanks for sharing.
Love the fusion of artistic creativity and technology. Cheers NJ Mark
How come these ideas are so obvious after you see them? I just might do most of my main street here in my home town instead of using my current buildings.
Bob Miller
Are those first few pictures real or are they the model? They great looking models! What did you go by? Like did you use a program or was it all by yourself thinking?
They are great looking models! What did you go by? Like did you use a program or was it all by yourself thinking?
What impresses me is by using a ‘simple’ building Larry has achieved a very effective finish to the model.
You have done a great job of making that real garage fit into your layout. It looks perfect sitting on the street and blends in well with its surroundings.
Way to go.
That is what “kit-bashing” is all about.
Keep us posted to what other creative projects you do.
Where I grew up in South Bend Indiana there were a number of buildings like this. They were used as garages, plumbing shops, machine shops and whatever. Great job on the building and jogging my memory
Wonderful job Larry. But I would put the ’56 Lincoln Continental in the garage. The SRP in ’56 was 10k.
Whimsy aside, a very nice job, indeed.
Thanks for sharing.
Mn Dan
The first 3 pictures are true to life We established that much . The next 4 photos are of your scratch building abilities . EXCELENT JOB, I’ll buy that…
The Critic
I remember a similar one in the town where I was born and raised. Now I think I’ll scratch build one for my layout. How wide and tall are the doors?
Brilliant idea, so much more realistic.This website never fails to produce excellence.
Great job Larry, came out really nice!
That Continental Mark II next to the garage sets off the scene The building is typical of the one’s you see(cinder block construction) in many small towns in the US. Even some of the older parts of big cities when many gas stations and repair shops were street side instead of set back on the lot. There’s still a few left in Milwaukee, Wisconsin. What’s your plan for the lot behind the building? Myself, I would put a few junked cars, old tires, and junk behind it to give it the look of an old repair shop that’s been there for decades.
Great work! I’m anxious to see where you finally decide to put it!
Wow, Larry…you have SKILLS!!!! As one with very little artistic skills, I bow with respect to your craftsmanship!
Very clever Larry. I think Lance Mindheim used a similar method to create his realistic-looking Miami warehouse structures. It’s a great time-saver if you have access to the original structure to take all the photos you need.
Looks amazing. Keep up the good work.
I’m always taking pictures when out and about, so many at the very least finding a place as backdrops on my layout. They look real because they are real.
Looks just like the photos!
It’s the scenery that makes a model railroad come to life. Without it, a railroad would only be an “around the Christmas tree” toy.
What a great idea. I’ll have to try that for myself.