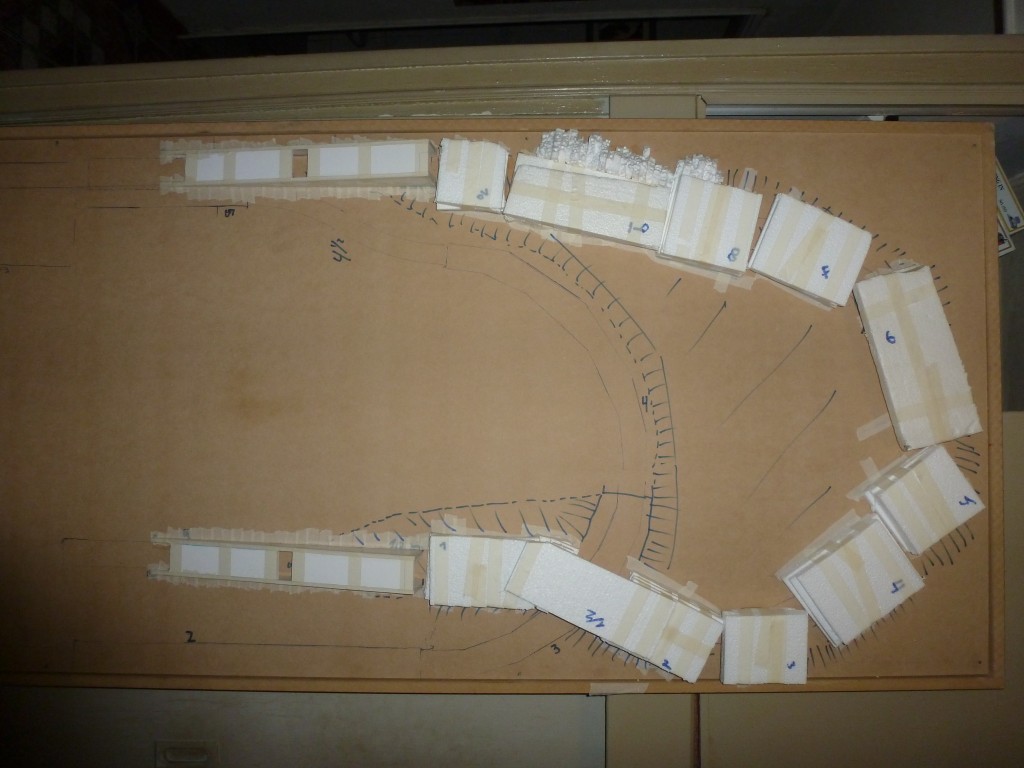
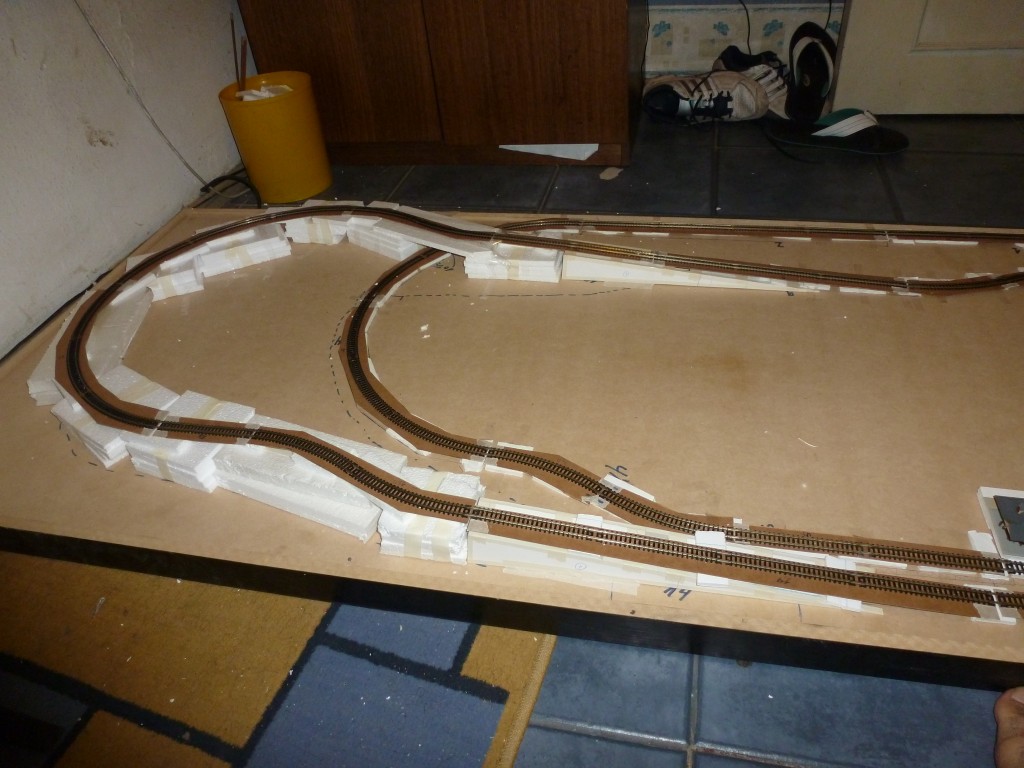
“Hi there again!, i just want to share how to modelling rocks in a really cheap way, and in my opinion, i got a really nice results.
Hope you like it.
I only use styrofoam to model and give steadiness to the railway area (white line), and modelling the cliffs too. I covered all the area with higienic paper and white glue more water mixture. (it took some days to dry)…
After that, with the woodland scenics “how to” videos that tells you how to paint, only use acrylic paint and when it get dry, i used all the stuff from the “environment learning kit” from woodland.
Hope you like the pictures, that’s my layout, i started building it 9 months ago, but i got a lot to things to add to it”
Sebastian”
When it comes to making rocks, I always think of Barry’a post: Model train rocks.
“Hi Al.
This is made from old phone wire. Strip the plastic off the wire and twist it till you cant anymore. Cut into sections same size. After take a piece of very thing wire for to hold the radials and use as a pole. Take clear instant glue and add a very tiny tiny drop and add a radial. Do all the radials and let dry over night. Or for a few hours.Take a very sharp pair of cutters and cut the radials at an angle as in photo.
Paint silver. Cost nothing to make. If you are having problems.Could switch from phone wire. Take black thick thread. Stretch out a foot and hang it. Take a tube of clear instant glue and wet the thread.Dont add a lot just anough to wet it.Let dry. Cut into sections and follow the same way as you did or would do with the phone wire. I cant believe how expensive it is to buy small things like this.
Kim”
And lastly, here’s this weeks update from the talented Dave:
Thanks to everyone. Don’t forget the latest ‘ebay cheat sheet is here.
That’s it for today.
Please do keep ’em coming though. I enjoy them as much as you do.
And if today is the day you make that life changing start, the Beginner’s Guide is here.
Best
Al


Hi Dave looks like a beginning of another brill layout are you going to put a diagram of the circuit out also the track beneath the control box is there a slight dip in the track as the trains look like they undulate a bit looking forward to the next session
Hi Dave…
Great Job…
I always enjoy Dave’s updates and other videos from the past. I see that you are making great progress, interesting changes and additions like the expansion bridges. I really like that addition. I am curious about your train room, what is the dimensions approximately. Secondly, is this room above your house or garage? The reason I am asking that because you made mention about drying time for some of the plastering of railway embankments. How are you heating this room is my question, if you do not mind answering them? I am very interested in your layout and follow it along. Regards, Ray A Philadelphia, Pa USA
I used the the same scenic technique with the cloth and paper and does work well.
newspaper that is wet makes formin rocks and mountains easy and a lot less messy than carving foam pieces.
Wow. A TV antenna, I had forgotten about those things. The will be perfect for my layout based in the 1960’s. Great tip and I can use it.
Looks like a good layout in the making Sebastien , and Kims ariel is great idea ..
You have answered wonderfully so many questions that I have been wanting to ask… Outstanding video. Please keep it going…Thanks again for being so helpful.
try using modelling clay, it is cheap and it even has a brown colour.
So if it chips no unsightly white plaster colour.
Good evening Dave, BRLLIANT i’ve learnt more watching your videos than a multitude of so called project books. I’m an old chap just trying to get an initial layout running, and would like to know your thoughts about control systems.I’ve bought a set with the hornby select, but to have walkabout wireless does’nt seem an option. What dynamis is yours as it is wireless. I trust i shall get the good advice from you. We all await your next update. Regards William.
AL your site is GREAT.
great tips i reall y can use these. the layout pictures please keep us posted on updates. and good update Dave like the bridges.
Rob M I know Rob.Thing of the past but many still use them.add’s alittle more detail to your layout.Fills in empty spaces to.Was very easy to make.I been working on my next build.I did my first attempt already.2 kids and an adult flying a kite.It’s crude but gives an idea on how.And is cheap to make.
thanks david howarth was easy.adds to it.could always add rust and damage to look like its been up there along time.
GREAT STUFF THANKS FOR THE INFO .
WHAT YOU ARE DOING IS A LOT OF WORK.KEEP DOING GOOD WORK.
great idea!
Great stuff Dave. Thanks for the explanation of rock building & DCC wiring.
You mention not completing the power/signal bus loop. Why do you not like this?
I’m thinking that the track completes the bus loop for us anyway & all our ring mains in houses running AC current are complete loops/rings to allow the current to pass on both sides of the loop thereby providing 2 parallel paths so reducing the resistance as well as allowing more current to flow to the ring main sockets & household devices.
Steve..
A1 Dave
Nice work with the rock work Sebastian. Not sure of the scale but I was wondering about the grade/slope. Just guessing but it looks to be about 5%. When I built my layout, I didn’t realize my grade run was 4% and later had to reset it to 2.5%. Just say’n.
As always, Dave great video. And that bridge is always impressive to see.
TV antenna. A great idea.
Jim AZ
Nice rock work Sebastian. Loved the video Dave.
Cary B
Love Dave’s videos, but one issue in watching these for several months is that they are out of sequence and in some cases by a year or two. (reruns?). It would be helpful to date the submission as to when it was done to form a chronology. Which updates are the most current? Kinda get lost in old videos being reposted that I think predate the current version of his layout. Be nice to have a chronological library of them. Asking a bit much, I know.
Hi Steve , yes the power BUS , I have always read that on a BUS you should never haver the two end meet , not sure why , but thats the way I read it and thats the way I did it …one end going right one going left , but not joined at the end s ….as for being out of sync …yes Al does show some of these older videos from time to time , think it is due to the information on them which can be useful …dangerous Dave
Love the antennae idea
Hi Dave, Love your videos. May I be so bold as to point out a better way to monitor your wiring and track voltage? You meter is a high impedance device meaning that it doesn’t draw any current when you measure the voltage. If you have a bad connection, it won’t show it. What you need to do is put a resister across the rail prior to measuring the voltage. A 300 ohm, 1/4 watt will draw 50 ma and should show if you have a bad connection.
If I were to do it, I would get a 6 watt 30 ohm resistor and add alligator clips to the leads. Be careful because this will get warm during the test but will mimic the draw of a single engine (about 1/2 amp).
I hope this is helpful to you. All the best. Geoff Kerr
At the risk of sounding patronising, I love the sound of Dave’s voice, his accent and style of speech reminds me of my grandfather, born and bred in Blackburn, Lancashire … is that in fact an East Lancs accent , Dave?
Sebastian, Great set of photos on how you built your mountain. I like that you were able to build it with scrap bits of foam, My only suggeston would be to not put the track and roadbed joints directly over the joints in the foam substrate as seen in your second photo. The final results of your efforts looks very good.
Builder Kim, Nice work on the TV antenna. It looks just like the one outside my house. Thanks for sharing that idea.
Thats one great job , keep up the wonderful work .
Sebastian: I used “just the Styrofoam” as well, and was amazed at how well it came out, so I know! It’s amazing, huh! Nice job. After carving it, I just used 2 coats of Modge Podge to seal it, then acrylic paint with some weathering, and it looks great.
Sebastian…… a lot of work but it came out great. Nice job.
Kim…..nice work with old time tv antenna. I have to remember this tip.
Dave…..I have always wondered how you built that……amazing