Steve’s been in touch, with a fab post on using mirrors to create depth in model railroads:
“Hi Al
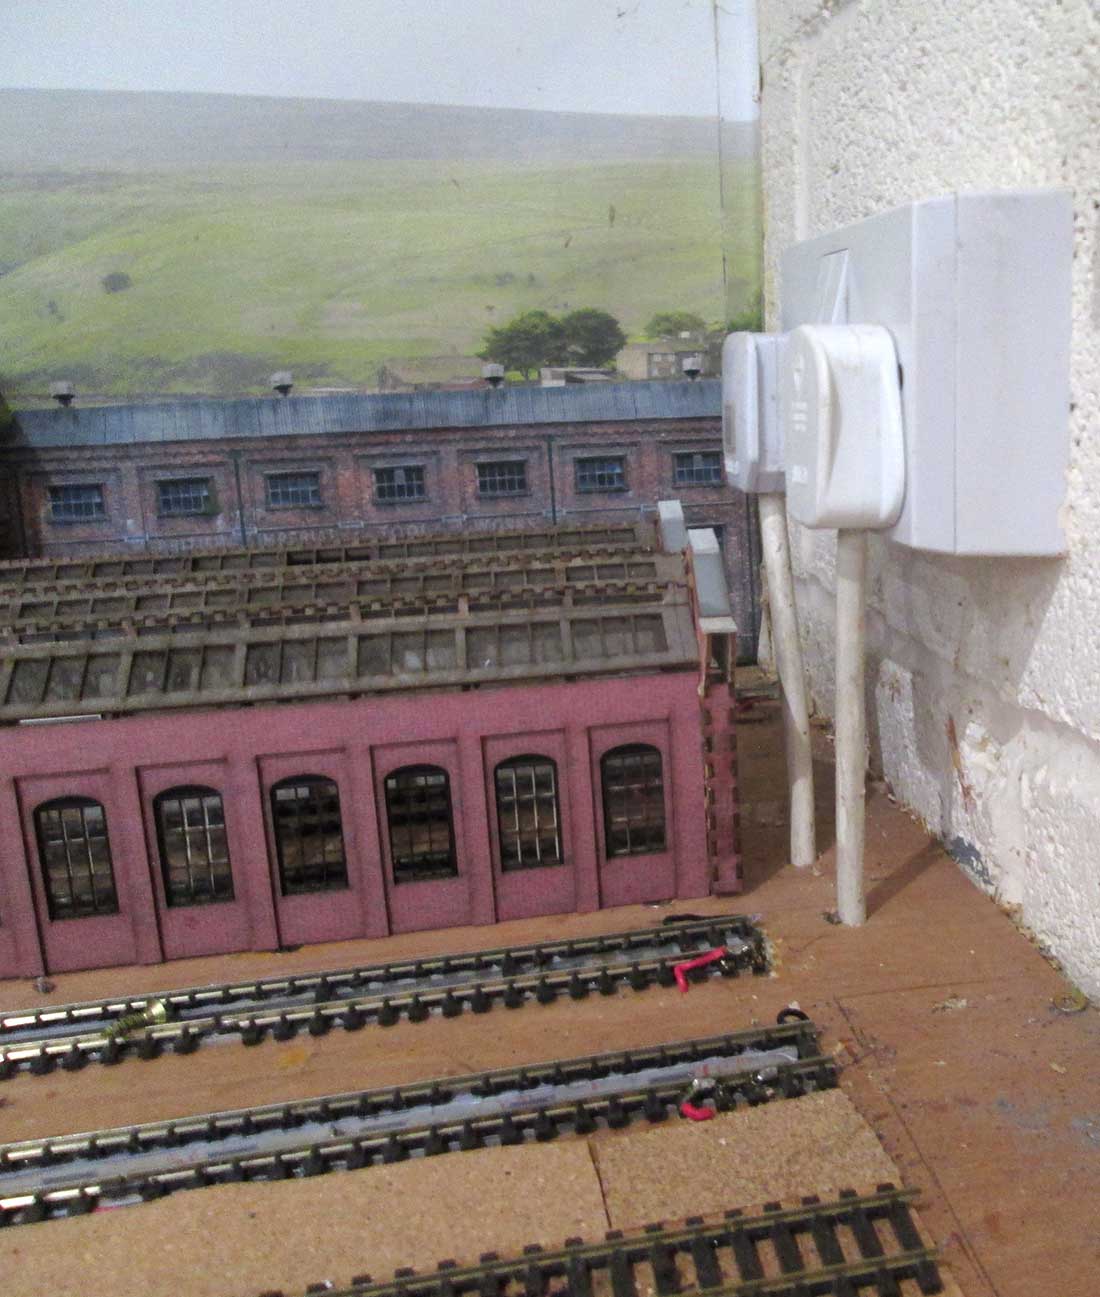
I have been working on my MPD for my “Whenton” heritage railway. At one end of the baseboard there was a problem in that I needed my loco shed to be quite near to the wall, but there was a double wall socket protruding at just the wrong height.
Having had quotes for relocating the socket, I decided that a different (for which read cheaper) approach was needed. I decided to mask the socket using a mirror (which would also make the loco shed look twice the size).
The solution had to allow access to the sockets if the plugs needed to be removed (which would be a rare occurrence) although I did want to be able to turn the sockets off at the end of an operating session.
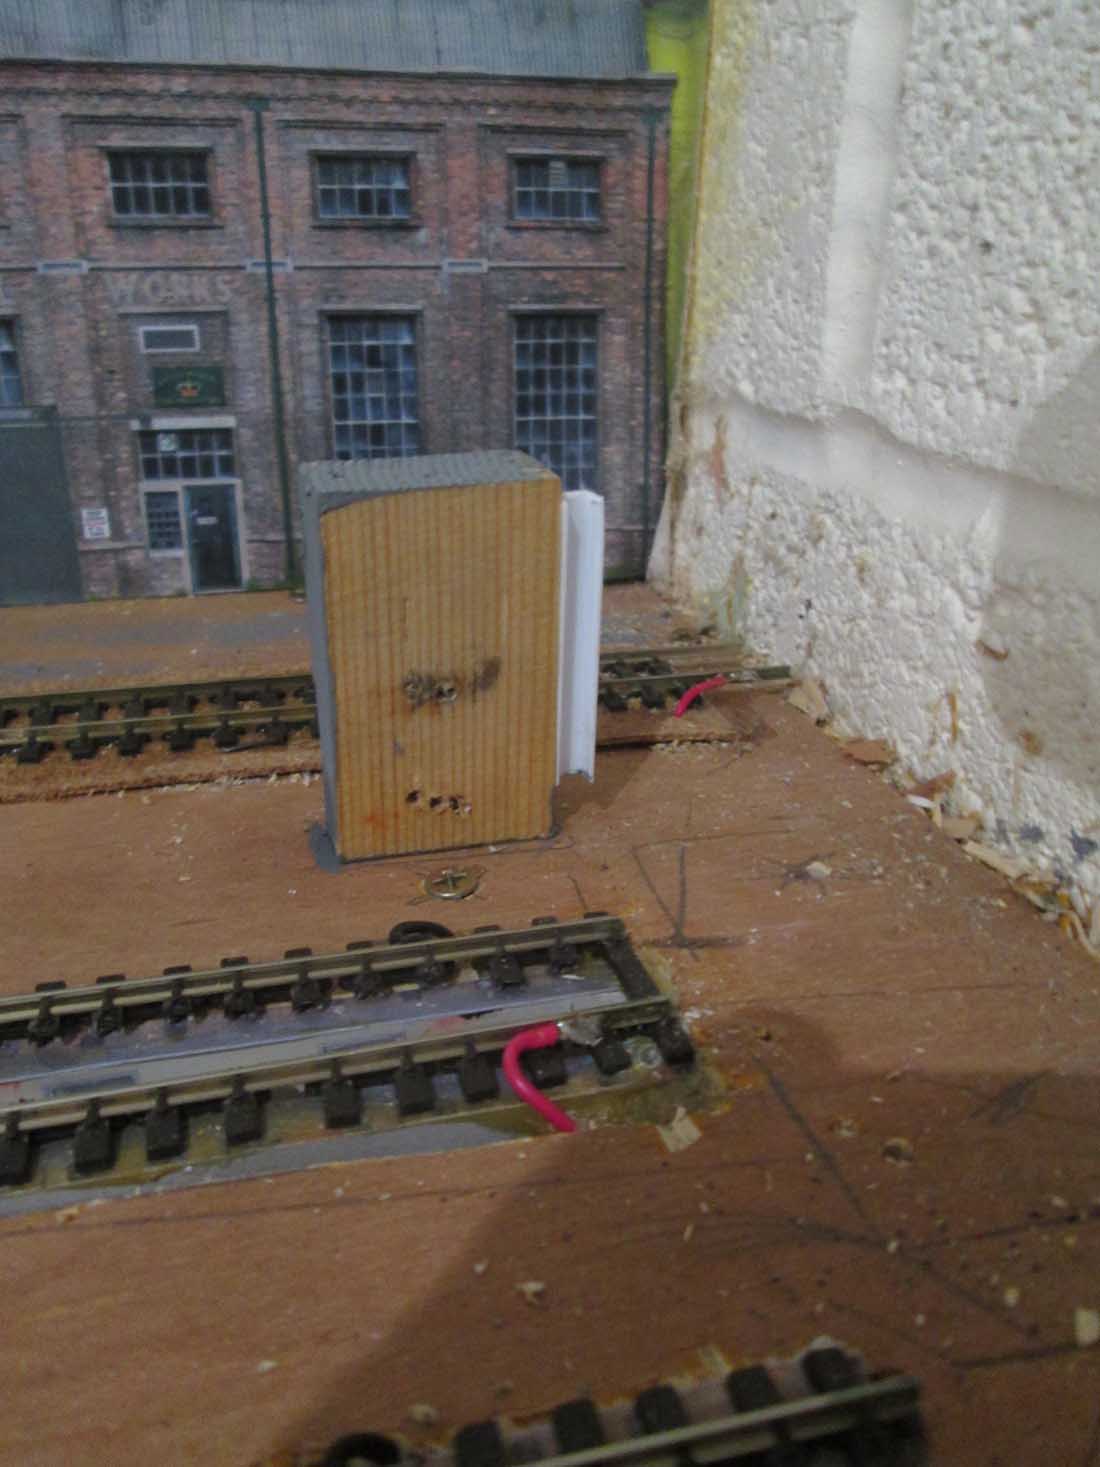
I obtained a suitably sized mirror with plain edges and considered how to mount it so as to be removable yet securely fixed. I made up a small end support from a wood block screwed to the baseboard with a piece of plastic channel epoxied to it (photo 2). This would hold the far end of the mirror at 90 degrees which was vital if the reflection of the shed was to look correct.
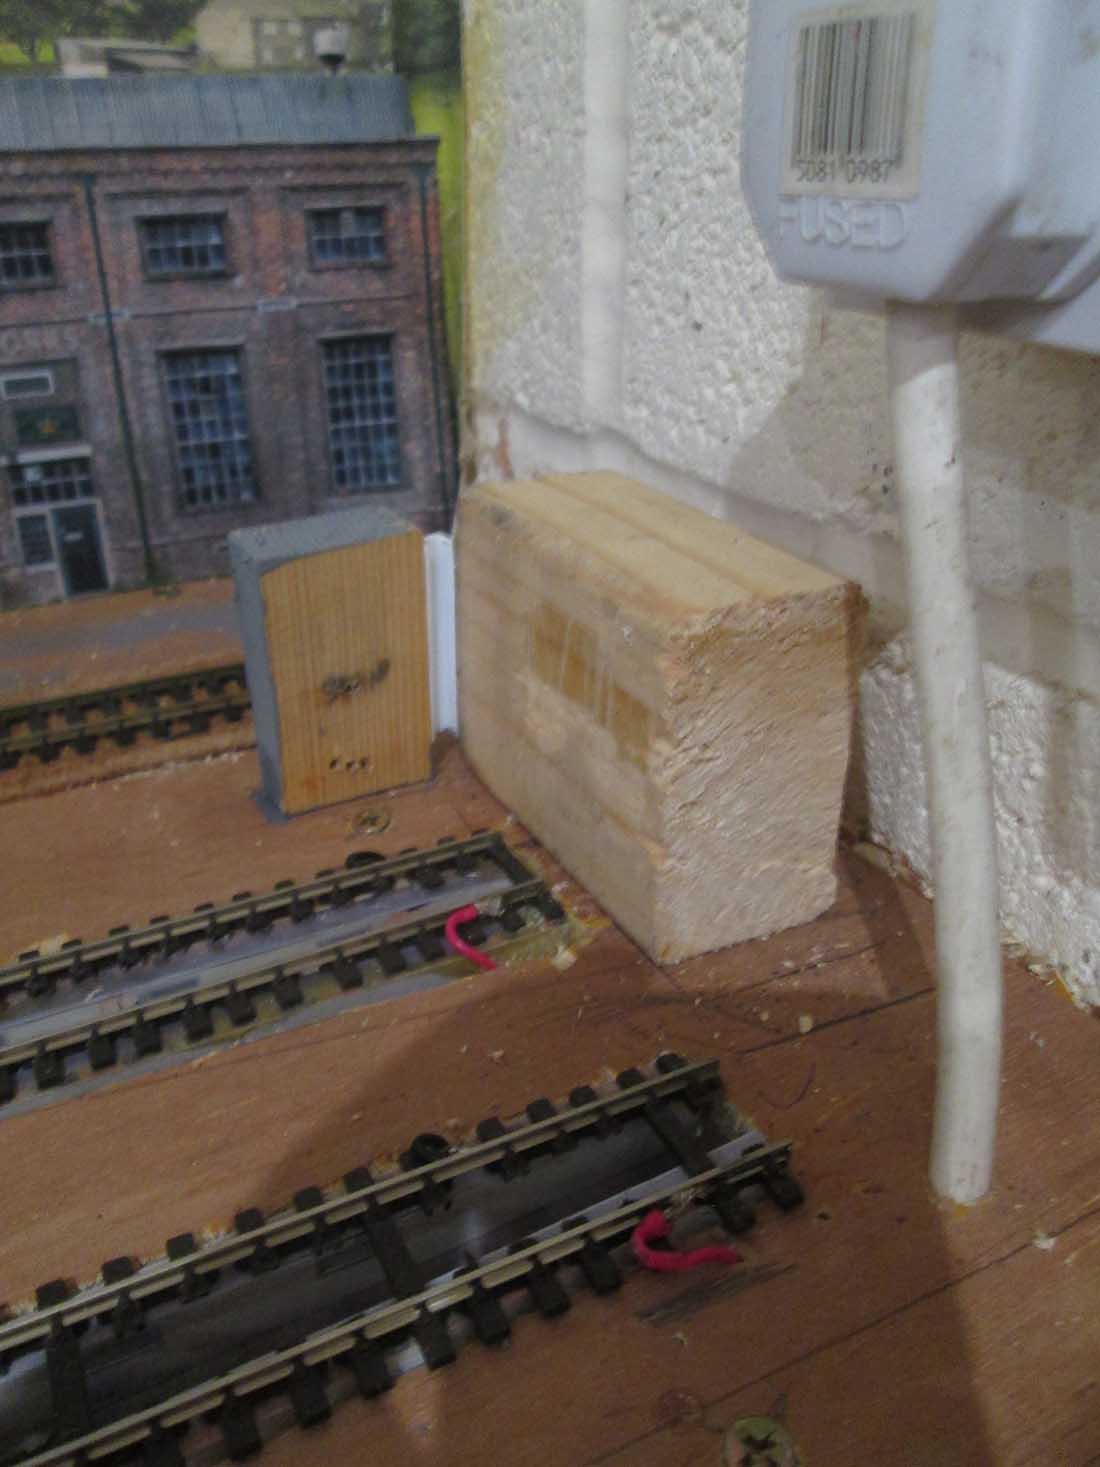
A more substantial block was screwed to the baseboard at right-angles to the first one (photo 3). This forms a stop-block for the rear of the mirror, and the mirror has another piece of wood epoxied to the back which is screwed to the top of the stop-block and is the small one to the bottom right in photo 4.
A third wooden block was epoxied to the nearer end of the mirror’s back. This was then screwed to the baseboard to steady that end of the mirror, (With hindsight, it would have made mirror removal a bit easier had I done this one in a similar way to the far stop block!) This block is the large one seen in photo 4 bottom left.
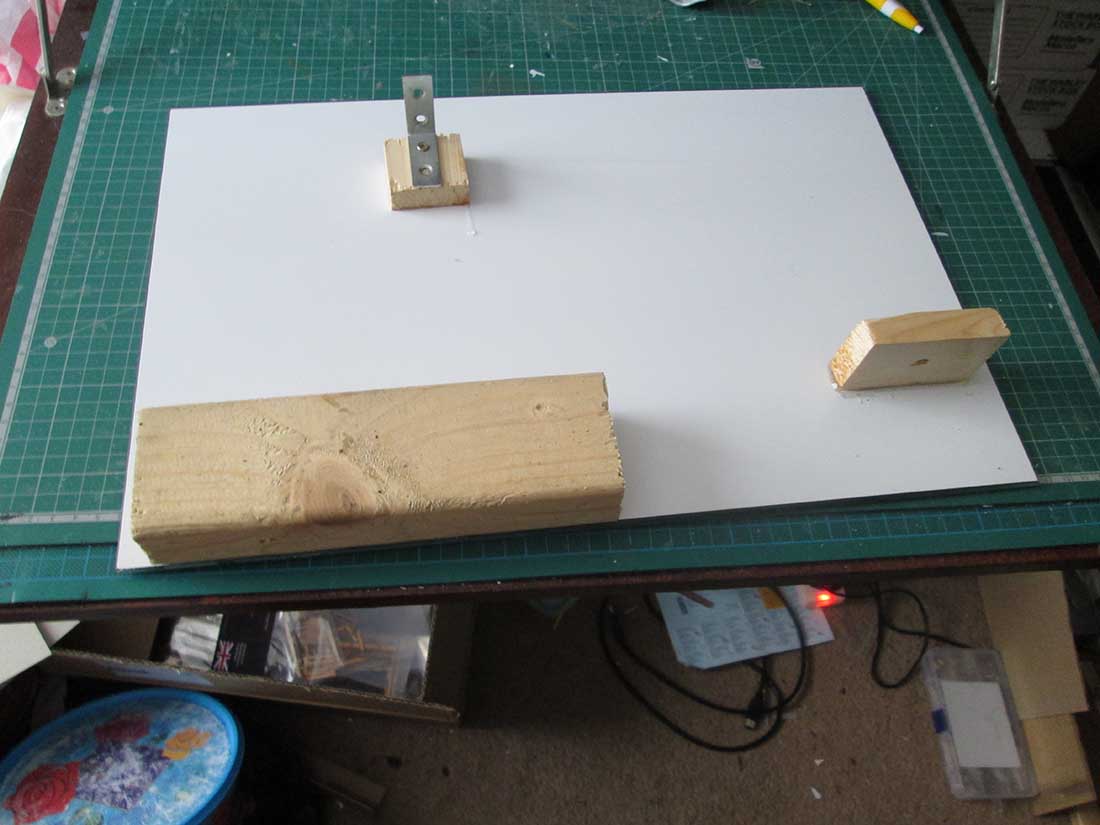
Finally, a small block was epoxied nearer the top edge of the mirror back, with a right-angled metal bracket screwed to it. The other end of the bracket is screwed to a small batten in the wall. This bracket is seen at the top of photo 4.
During all this I was cracking on with building a 4-road shed to go alongside the 2-road shed shown in photo 1.
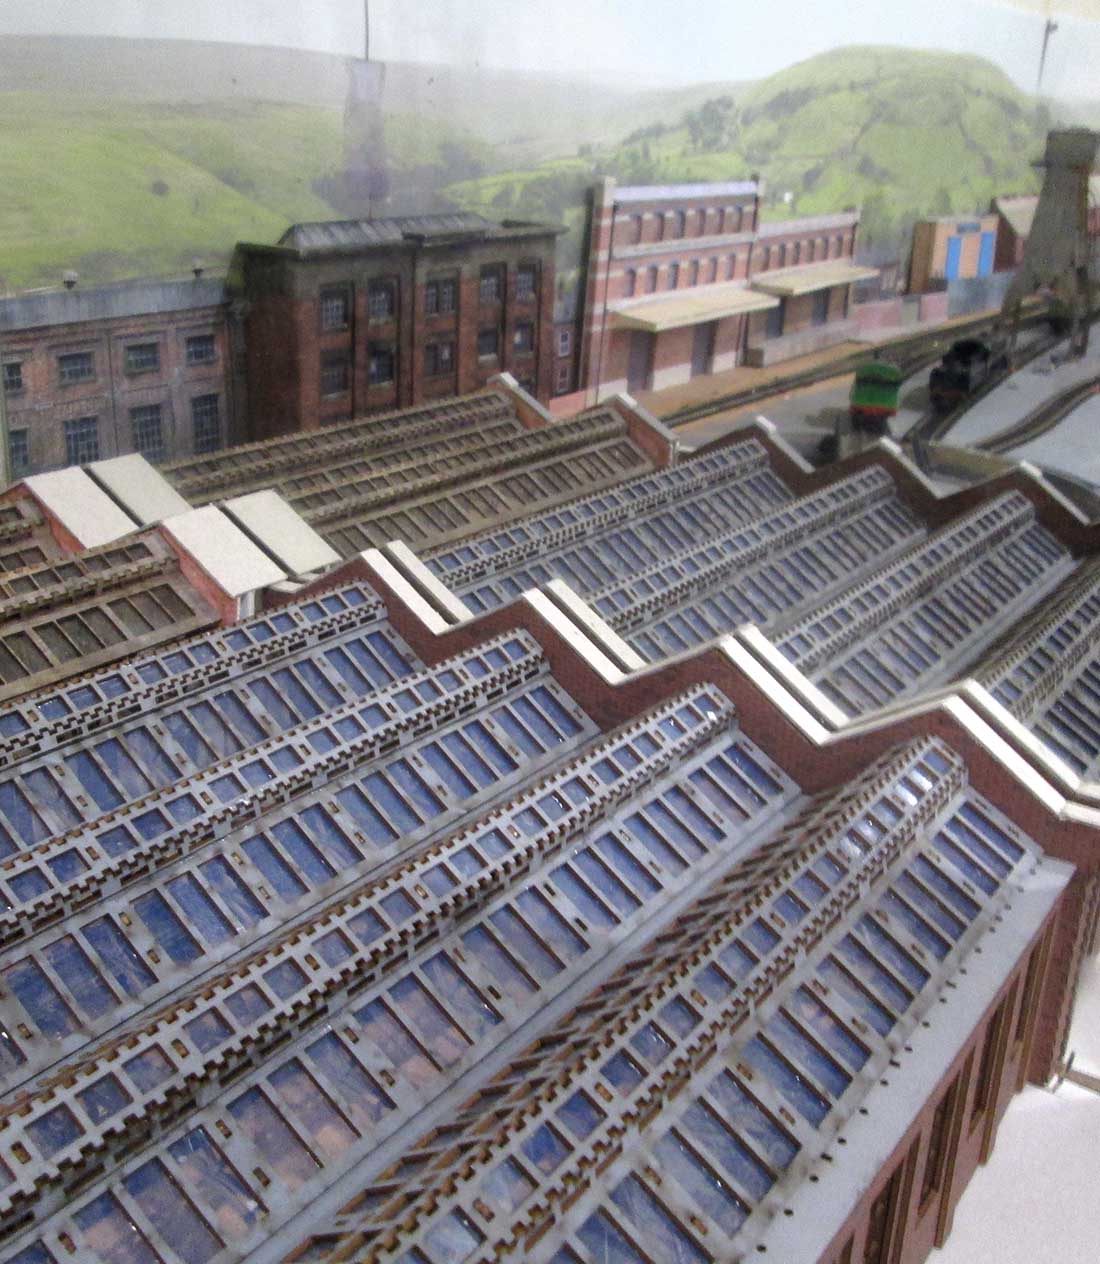
The effect given by the mirror is shown in photo 5. There is a lot of scenic work still to be done, but I am quite pleased with the result so far. I can reach the socket switches without disturbing the mirror and should I need to get at the plugs it’s a case of undoing a few screws.
Regards,
Steve”
A big thanks to Steve for his way og using mirrors to create depth in model railroads. I do love seeing your solutions to the problems your layouts throw at you.
It rememinded me of the bottom of this post, where a mirror has been used to ‘enlarge’ the layout: N scale coal mine.
Now on to Fuad – can anyone help?
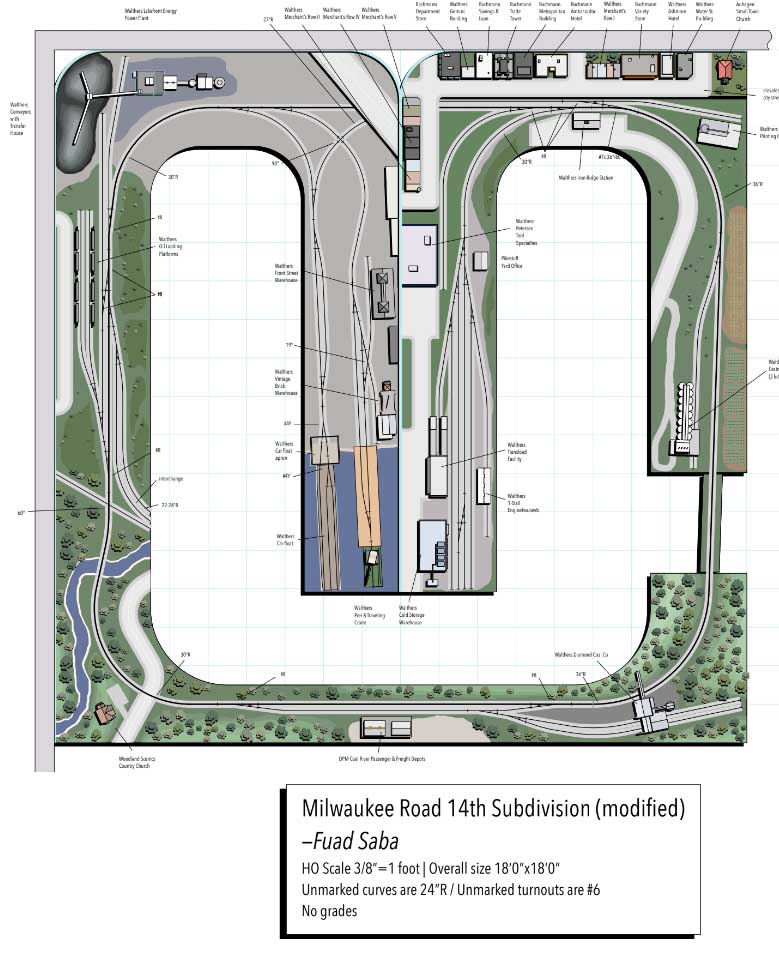
“Hello Al, I hope this finds you well. I’m embarking on a new HO layout. Essentially an open square with a duck-under and a central peninsula with a dividing backdrop, 18×18.
I’m looking for lightweight construction ideas. The surface of the layout will be 2” pink foam board so I don’t need heavy duty framing to hold it up. In addition, two sides of the square will be attached to basement walls as shown in the image.
Is there something lighter and easier to use than lumber to hold up the foam board, and make the legs on the sides that are not attached to the walls (as well as the peninsula?) Would aluminum or steel beams work – assuming I could cut them to size handily – or some other material?
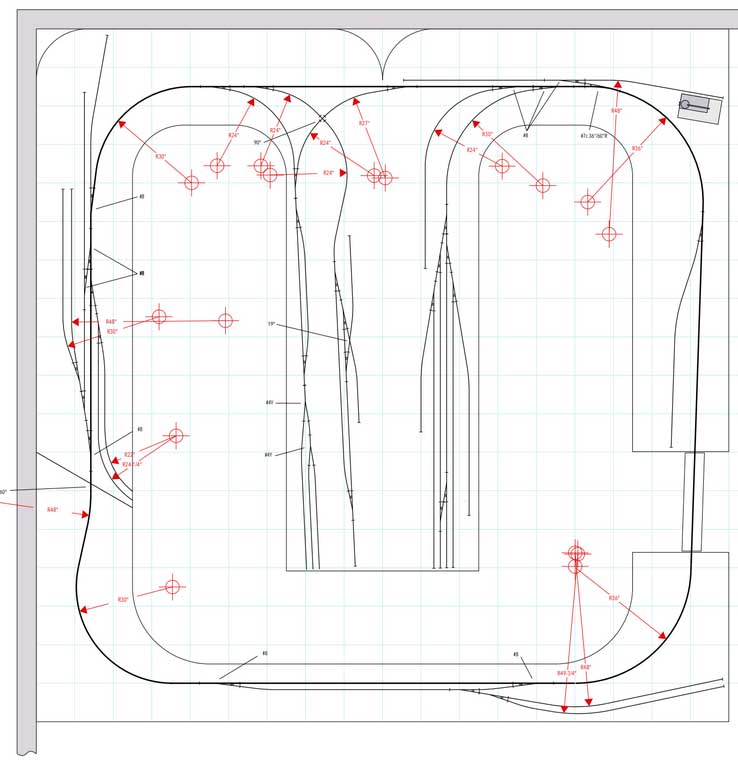
Here’s the track plan. I hope folks on this site can contribute ideas. Thanks.
Fuad”
If you can help Fuad please leave a comment below!
And lastly on to Jim, who has shared his stunning update:
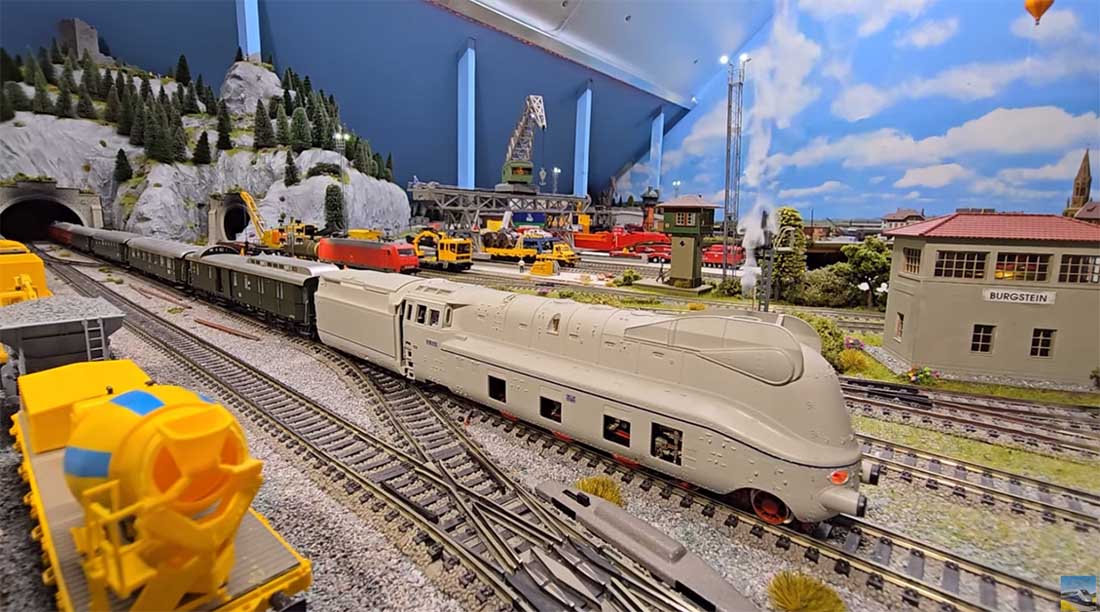
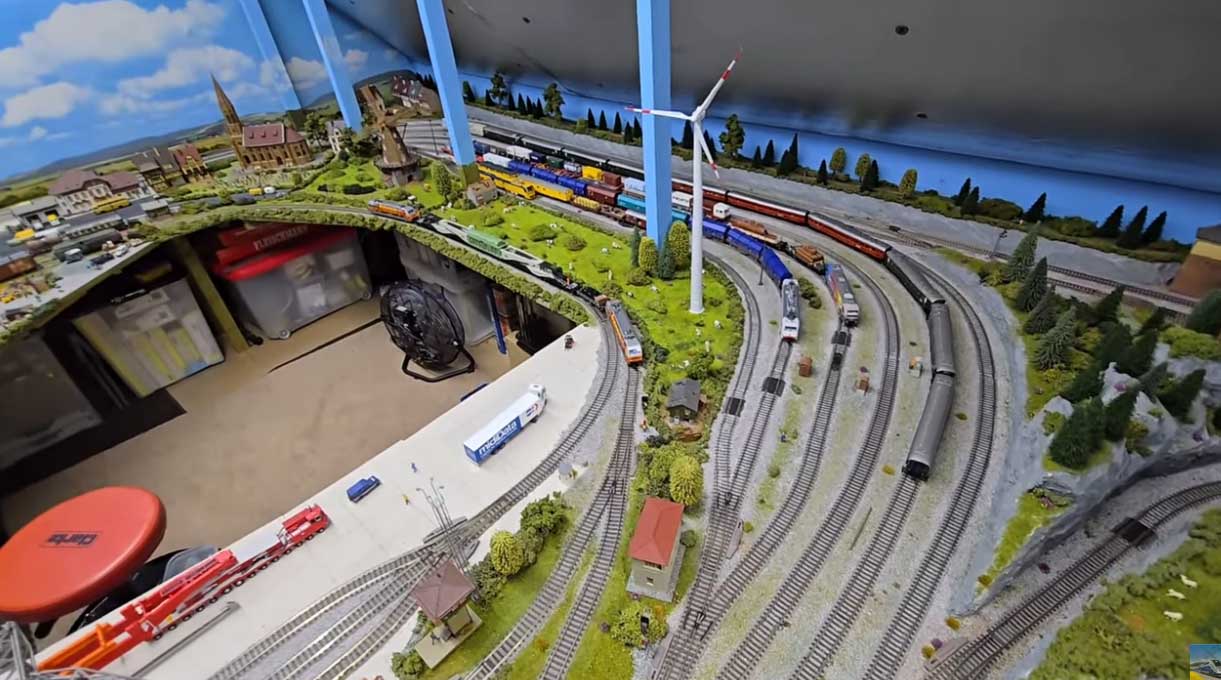
“The loco is an analog to dcc converted Fleischmann br 03 streamlined loco in photo livery and is about 40 years old pulling Fleischmann express coaches.
Model railway attic layout is H0 1/87 scale based in Germany black forest area , size is 4.4m x 0.8 for the station run off and the main layout is 3.8m x 3.3m.
The system is digital controlled & most locos have sound.The layout is shaped like a big number nine with the terminus branching off the oval, it has three main lines & two stations with many storage areas including a 26 exit Fleischmann turntable.
Jim”
You can see Jim’s first post here.
That’s all for this time folks.
Please do keep ’em coming.
And if today is the day you get started on your layout, the Beginner’s Guide is here.
Best
Al
PS More HO scale train layouts here if that’s your thing.
Need buildings for your layout? Have a look at the Silly Discount bundle.

I notice Steve is using a Modelux engine shed, you can improve the look of these with very little cost by adding downpipes to the holes in the gutter section, I have used 1.50mm tubing from Hobbies used a felt tip to make it black and two small dabs of adhesive one on the top where it fits through the hole in the gutter and one near the bottom to hold it to the wall.
I think the idea of using a mirror is excellent.
Why not use 2 inch foam standing vertically in either a T shape or an L shape. Even a square if neaded? A few pillars should do fine.
Unique idea with mirror , may be other applications ax will gorges concept … good idea.
The submission with the video is awesome … what a cool locomotive and train. I am curious however , how gid you make the cement truck rotate ?
Faud,
You could use 25mm T-slot aluminum to support. Creality makes 3-D printer frames from this material, and it has good strength with light weight. The T-slot design allows easy construction of shapes and attachment.
For maximum strength, I would recommend making box type supports, as they will have the most strength.
Hollow-core doors. Strong, flat, light weight.
Steve, Excellent integration of the mirror into a tight corner of your layout. You would make the late John Allen proud of your accomplishment.
Fuad, First of all I love your layout plan. Nice point to point with a continuous loop running option. The division of the center peninsula with the view block creates a lot of interest. I can’t wait to see it under construction. As to your desire for light weight framing, I’d recommend aluminum L angle stock or I beam depending upon what’s easiest for you to work with. Aluminum can be cut to length easily with both hand saws and simple power tools, whereas steel is much harder to cut without a diamond blade chop saw.
Jim, I really liked your streamlined locomotive with DCC and smoke. Very nice video that gives us a sense of your whole layout room. Thanks for sharing that.
In reply to Christopher, good point – the 4-road shed kit did include down-pipes and wall fixtures for them, but I haven’t got round to fitting them yet. They were not included in the original 2-road version though. In fact, although the designs are almost the same, the 4-road shed is longer than the 2-road one by about 6mm/0.25″ – hence the broader coping I have had to add to the “mirror end” gable of the 2-road shed to make both ends of the sheds flush.
Steve – very nice work. I’d have been tempted to disguise the outlets as water towers.
Steve,
If you remove the end wall of the shed and butt the mirror to the shed it would give the appearance of a continuous shed in the mirror.
Fuad,
Aluminum may be the way to go, but PVC pipe might be worth considering. It’ll flex over long spans and will need support, but it does come in 16’ lengths
Though sometimes difficult to find, and slightly more expensive, a front face mirror will effectively eliminate the double image a “normal” back faced mirror creates. Still, your mirror illusion is very effective. Congratulations on a challenging space saving yet effective solution.
Nice looking plan Fuad. Seems like you could incorporate a loop at the end of the island to add a lot of running length to your layout. Maybe even underground as a staging area for thru trains to stop for a time and then re-emerge to continue their route. Probably have to have slightly narrower aisles and a wider island but IMHO a tremendous addition to the project. Jus’ Sayin’
Thanks for the suggestions, Matt and Thomas. I was wondering about the gap in the relection myself… I hadn’t heard of front face mirrors but will “look into” them (pardon the pun!).
And thanks for all the nice things folk have said too.
Thanks Jim for showing us your great layout. Lots of detail. Cheers Rossco, Australia
No actual picture of the mirror in place ! and resulting view ! Something gone wrong with this message.
Mike S
Hi Michael – well, that’s either a great compliment, thanks, or there’s a problem with your browser/email/download software 😀
Thomas – I’ve looked up front-face mirrors, and one the size I need would be about a hundred quid (ouch)…mind you, there are apparently ways you can convert a normal mirror to front-face, using paint stripper to remove the backing from a normal mirror. Might give that a go and if it improves the reflection I will do a “before and after” post.