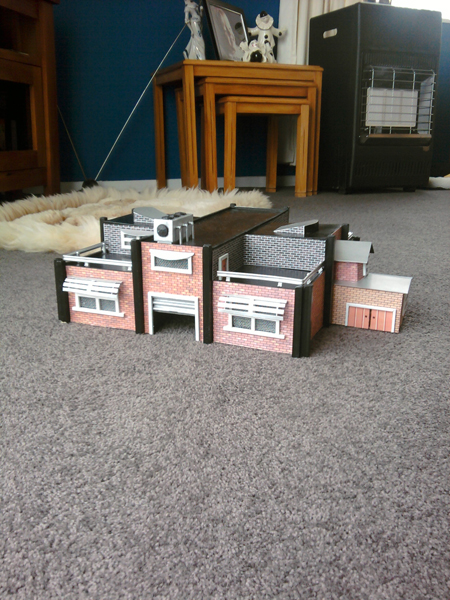
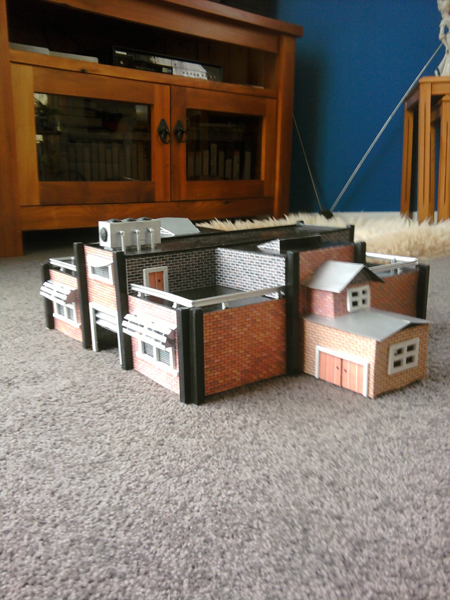
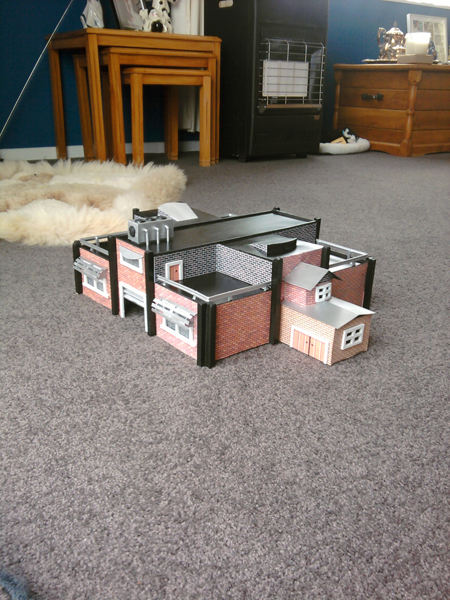
Alan mailed in with this excellent scratch built terminal:
“Hi here is a terminal I built from scratch, I use AFX scale crash barriers for the roof barriers and they are also in my opinion perfect for road barriers.
The air conditioning unit on the roof I used loco fans to simulate the fan units, cheap easy solutions.”
There some great printable buildings here too.
Richard also mailed in with these:
“I use gypsum for scenery, which I buy direct from the maker. It works out real good, and can be mixed with dry colors for various shades of rock and dirt.
I also use in/out door carpeting, green in color, which I cover with colored gypsum, to simulate yards and fields. This saves time and money, and doesn’t look half bad.
For tunnels, I have molds which cover the outside with plaster, let set and harden, and then remove the tunnels and place them where they will fit on the scenery, before I build in the mountains.
This gives me the ‘rock-cut’ interior, which most tunnels have, although for me, you can only seee into the tunnels maybe 6 to 7 inches.
For bridges, I use scaled plans and structural plastic shapes, which I heat weld when building the bridge.
A current project bridge is being built using steel, for under-framing, with the plastic parts, (beams, columns, etc), heat welded together, so the steel will be hidden.
This is because I plan a bridge which will be built in a canti-lever style, and will measure around 12′ long (real time measurements).
This bridge is needed to span a walk-under part of the layout.”
A big thanks to Alan and Richard.
That’s all for today folks.
Please do keep ’em coming.
And if you want to start your model train layout, the Beginner’s Guide is here.
Best
Al
PS Latest ebay cheat sheet is here.


Alan has made a nice job there, well done
I have just finished my scratch built Tressel. I will be getting the pictures to you on this site as soon as I get them in order. lol. I hope you all like it, it’s not perfect, but then again my HO set-up is set in the 1920s-1930s. I love the warehouse, I will keep it in mind when scratching my buildings.
Keep on Trackin!
Those are some great ideas
Good ideas;very useful.
That is awesome work. I have taken a break ferom trains for a bit. Now, getting back into it. I model with “N” scale due to lack of room. My Father however, models with “S” gauge.
Can you give me the web site for the bricks
Regards
Nice job, Al. Just wondering if you have heard of a layout done with plexiglas, or similar transparent material? I want to be a minimalist and possibly stack layout, but be able to see throug 34 layers. It would have to be a longer layout for the grades. Any help is much appreciated…thanx, Lynn
I think that this will have taken a long time to build,but well worth it,well done, bril.
looks great nice design help me out when i get on with my layout thanks Ian Australia
verry nice alan,just wondering if you have a nice track lay out i could do with a difrent lay out and i know you have some idea,s,please try and help me also i have plenty of room in my loft ,i have more than 80 foot of track and lots of building,s 40 of and some point motors.see if you can help me i have pics in face book on my photoes,thanks john.
The terminal looks great. I have my eyes open for tips and ideas for a scratch built wooden trestle bridge. It will be about 48″ long and 12″ high. I want to cut the parts on my table saw, so I am looking for tips on that too.
Great job,
Brian
Very imaginative and a nice looking, clean building…
I enjoyed seeing the terminal design and the methods of construction. I am looking for a train platform design (under cover) for multiple tracks that would be next to a terminal.
I am working on a N Gauge layout. What should be the spacing distance between parked trains vs. trains rolling in opposite directions.
Thanks,
Bill
very nice, can you try to do a video next project?
WEll done. I assume it is HO.
I do like the terminal, and a have read all your emails, I was advised to buy a Toshiba EZ 40 programable controller with Programer hand set which i did. This is to control other things like signals and so on, My question is, do you or any of your readers know anything about this system who can advise me on how to use it more efficiently ….
Regards
S, Oakes
good job i like it i have a hornby dublo 3rail set
I would think he would have given it some character, like putting it onto a diorama or something, the overall build is great, but please, not on the living room floor!
Wonderful job, Alan.
What is the best method for applying weights to roll stock? I have some very expensive cars and do not want to ruin them. Please I need some ideas on this……am quite new to this. I am also planning on running a railroad track around my ceiling of my living room and dining room but am terrified of my expensive steam locomotive falling because I did not do something right……please advise. Thank you!
Great job! Like the aunings and AC unit.
Nice building but I think that the guardrails look to out of scale.
In answer to running a train around the ceiling, I have seen overhead trains and they are often running on what looks like a continuous truss girder bridge, or with a railing along the outside edge. No way the train can fall onto the floor unless the structure breaks.
Keep opn Training,
Carl in Kansas
Nice build Alan
Cary B
WOW!! WHAT a great job! We sure are a smart breed! Cant say American beginning but smart,very smart. Craig
Sweet.
Great job. Nice detail
since I am on a limited income I’m have been building a lot of my buildings. I build scale model ships also so buildings are easy. My layout is the old Missouri & Northern Arkansas. it runs from Harrison Ark. to Berryville Ark. It was started in the early 1900s and ran until the early 1960s. so it is hard to buy stuff for that time period. I even make my own rerailers and crossings
Being a mechanic all my life, I’ve fou great joy in using cut down, stick on wheel weights for auto wheels, very handy indeed. They also work wonderul in weighting down the rolling stock. Keep as much of the weigh around the bolster area. Then in a straight line if possible between the bolsters. Many different cars won’t always let you do this(hopper cars or,skeleton flats for example), just remember… keep your weights as low as possible so the cars won’t wobble, or flop on their sides getting pulled through any curves. 3 – 3 1/2 ounces is optimum weight for your cars. Example, I had an Athearn DD40AX that I was able to weight out to 19 ounces…yes HO scale loco at 3 ounces OVER a full pound. After doing a pull test at 3% grade, WITH curves included(which probably added another 1/2% to the equation, I was able to pull 92 cars up that grade(once I found out to moisten the traction wheel rubber tires with wintergreen oil, then burnish the oil in on a test track, those wheels got soooper sticky). Oh yeah, couldn’t pull more than 92 cars only because my KADEE couplers would fail here or there probably because of too much weight. I had affectionately named my DD40 “the bull”, nothing stops her(well perhaps a poorly transitioned rise into that heavy grade I had mentioned. So try those self stick wheel Weights for cars, and get creative if need be to even camo some of those weights on the lower exterior of your cars as another car funtion device. Paint and hide, but don’t be deterred. Enjoy.
For ceillng layouts try American made steel bridges
They have. Truss Bridges and grider if you want them.
Alan. A lot of work well done. Re scale and please take the right way. Your door on the small side extension if scale would be about 8 ft would mean that the windows in that building start about 6 ft from the floor inside. Also the door on to the flat roof looks again to small in height. The front shutter door looks to be too low in relation to the window height. Again well done with build it can be difficult to keep everything to scale but scratch built can’t be bad.
To caral in Kansas I. Think that a o gauge around the ceiling would look nice thanks for the help