“Hi Al
Thanks for all the great tips.
Picked up a bag of sand-blasting material from my local building supply store for free because it was broken.
The fine black glass material makes excellent roadbase sprayed with mate medium and sprinkled over the first coat of paint layer on mountains and rocks gives it great texture.
Put a spoonfull on a folded cardboard piece and you can blow it controlled into cracks and under overhangs to get some depth to it.
Regards
Matt”
“My Background/trade is printing and I used image resizing quite a lot.(old Reproduction Bellows Camera) Now with computers this is sooo much quicker.
I find this formula useful when resizing drawings to suit the scale I wish to work from – eg scratch building.
The formula is simple and I use it on printing from the ‘puter or scaling on a photocopier.
On the ‘puter the “File” “Page setup…” has a value there that can be changed.
If the “File” “Print” has a “Scale to fit paper” set to None.
On a photocopier use the input panel – Scale – varies from make and model.
The formula is:-
New Size divided by Old Size times 100 equals the percentage to use
ignore the decimals
Depending on your equipment there may be a variance of a percent or two but as a rule – works most times.
Sandy”
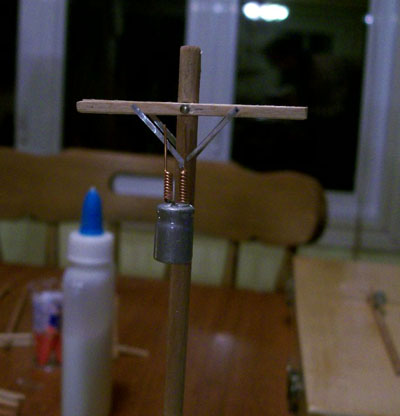
“Experiment my ho telephone pole made from scrap radio parts and food containers but not finished yet.Easy easy to make oh i plan to use my poles for real power. 6 or 12 volt.
Kim”
“If you want to make the windows of stores, passenger cars, cabooses opaque, just take some clear page covers from an office supply store, cut oversize, and spray with a flat clear spray. (Do a whole page at a time. The little pieces will blow away if you cut first.) It has enough stiffness to stay flat when attached. CA glue will hold in place on the inside of the car or the building with just a drop on the corners or a thin line on all sides. It masks the lights inside of buildings and railroad cars so they give a glow rather than the bright spots of light. Also you can’t see the individual bright bulbs. It sure looks better than a hole where the glass should be too if none came with the original car or building. This way you can use the original fitted clear plastic parts or replace with squares or strips of the clear plastic page cover.
This also works if the cars or buildings have a clear plastic covering the windows when new. Just remove and spray with the flat clear spray. Do it on the inside so the outside will still be glossy as glass would normally be.
For buildings, use a Elmers Painters Opaque Paint Marker in white, black, or brown to mark off the panes of glass (plastic) The point is sharp and a fine line can be drawn.
Gaines”
“Hi Al,
I found that the corrugated paper sleeves that you get with a cup of coffee on stations etc.can be quite realistic “ploughed feilds” or corrugated metal sheeting
Regards
Ray”
A real mix of tips this time.
Thanks to everyone. Keep ’em coming.
All the best
Al.


these tips are great, thanks to those who supplied them
wow!
I was constructing a Walthers plastic station this morning. Wonderfully detailed but very plastic looking……until I went out to my Weber charcoal BBQ, got some ash, and rubbed it on the plastic. Brought out all the brick coursing, smudged the brick in a very realistic weathering manner.
Good evening Lee,
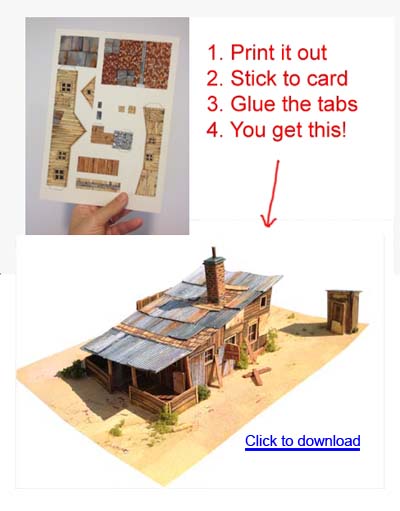
My wife deleted the email that you could print out building and assemble them for your layout. Could you repost that link.
I grew up watching my dad build models for his layout and I always like his models. When he could not model any more I knew it hurt him alot. He passed away about three years ago. My has given me an area in our house to start modeling again. I still have alot of my dad’s model stuff and it will be hard to start all over again without him. Thank you for all the tips that I can use, by the way my dad has shown some of your tips a long time ago.
excellent idea about printing or copying . Also like the “phone/electric pole” model.
To test sections of track and turnouts as you lay them use a small 9 volt battery. Engines run quite well on this voltage and the terminals on top are perfectly spaced for HO. They are also marked with positive and minus symbols. I found this technique very useful in testing grades on a really small, multi-level layout I am doing, well before any permanent track was laid. Also, use an old engine in case it falls off the layout during buiding stage.
It is not my first time to go to see this website, i am browsing this site
dailly and obtain nice data from here every day.
Hi, all the tips are really informative and will help me in my first layout design. I’m currently looking for lionel fastrack two train layout for 61/2 x 11 foot long plans. any information would be greatly appreciated.
I’ve never replied before, but I simply want to say – What a marvellous and interesting and helpful resource. Please keep them coming – So grateful!
i couldnt agree more with john b i look forward to checking my mails each day ikeep anote pad handy so i can take notes into loft whenbuilding layout if kim gives more info on poles please post thanks again to all
I think your ideas are brilliant and fab
I have been reading lots of tips and suggestions. We nearly have all the track laid. My eldest son and I are doing the track laying together. I have been taking photos along the way and will post them when we are a bit further along so you can see some results with the progression. The tips on how to do stuff have me excited as to what to have on the layout etc.
Thanks for all the tips. I pick up a lot of fantastic ideas from the posts and appreciate them a lot!
Great information and ideas.
Does anybody have the Marlin C track? Are they compatible with the normally tracks – or can hey be attached? (the old with the new)?
Somebody has experience and suggestion with using cork under the tracks?
Have enjoyed this chatter. After being in HO then G and now N scale because of
age and new knees on the ground just don’t work. Have really enjoyed this chat and will use many great ideas, Ron
I loved the idea of using the telephone poles to run actual power for the buildings. Now I am on my way out to my layout to see if I can do this to mine.
I with the kudos. This great information particularly while I rebuild nearly my entire layout. I moved to North Carolina about six months ago. Totally disassembled my n scale layout. I saved a few beautifully landscaped sections my wife built. Going from a 36″ x 96″ layout to a 54″ x 144″. I never had a mainline until some of your readers suggested this. This one suggestion has played a major role in the layout. Some pictures will be coming.