Small O scale layout

Jeff’s been in touch with his small O scale layout:

“Hi Al,

I have been receiving your emails for several years and have enjoyed them greatly. They have encouraged me in model railroading. I am from Ohio and a novice to this hobby.

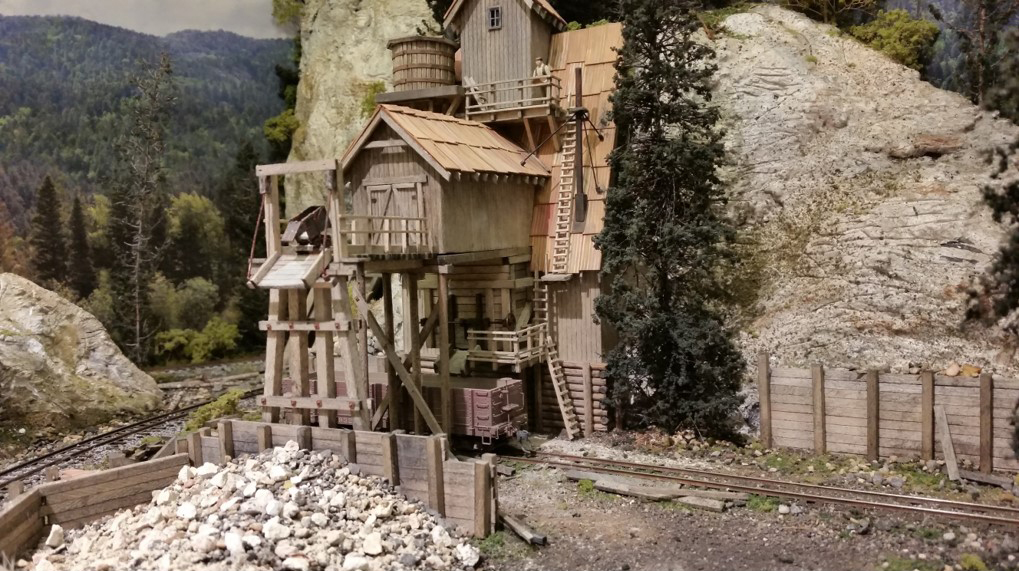
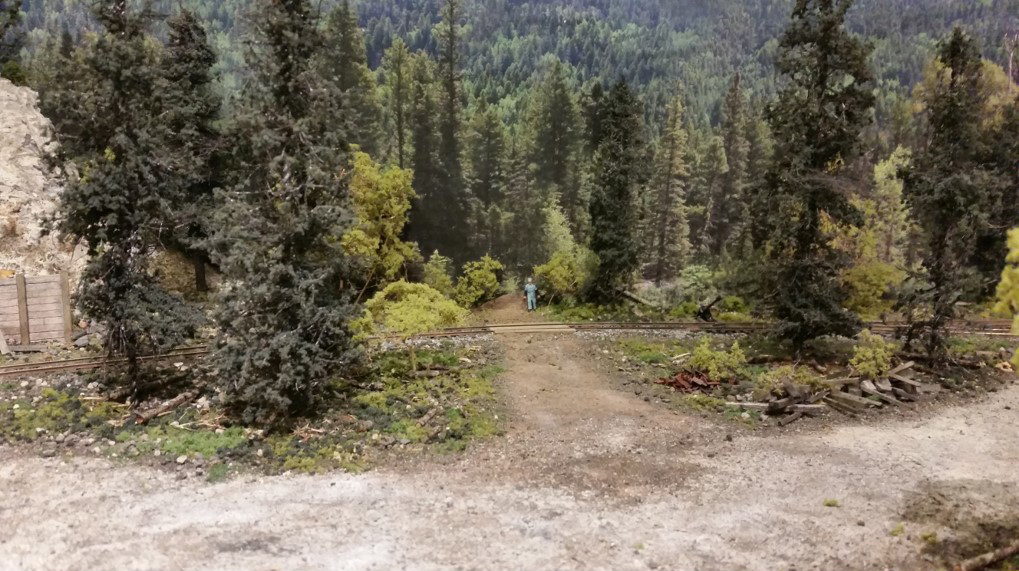
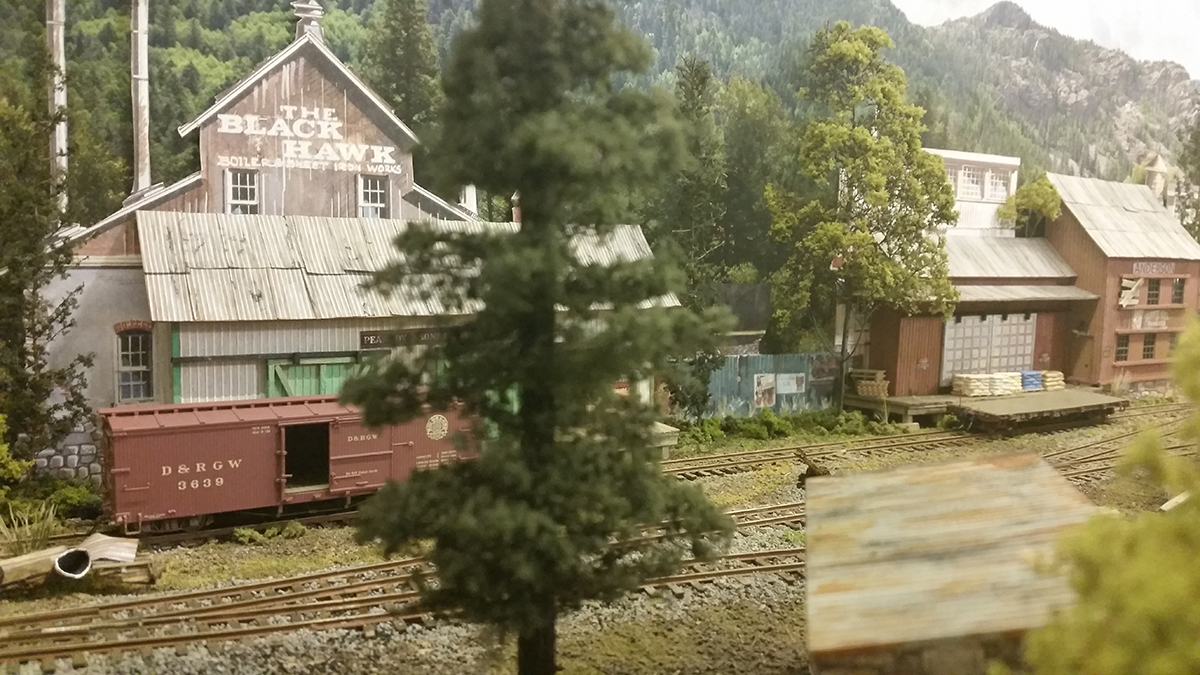
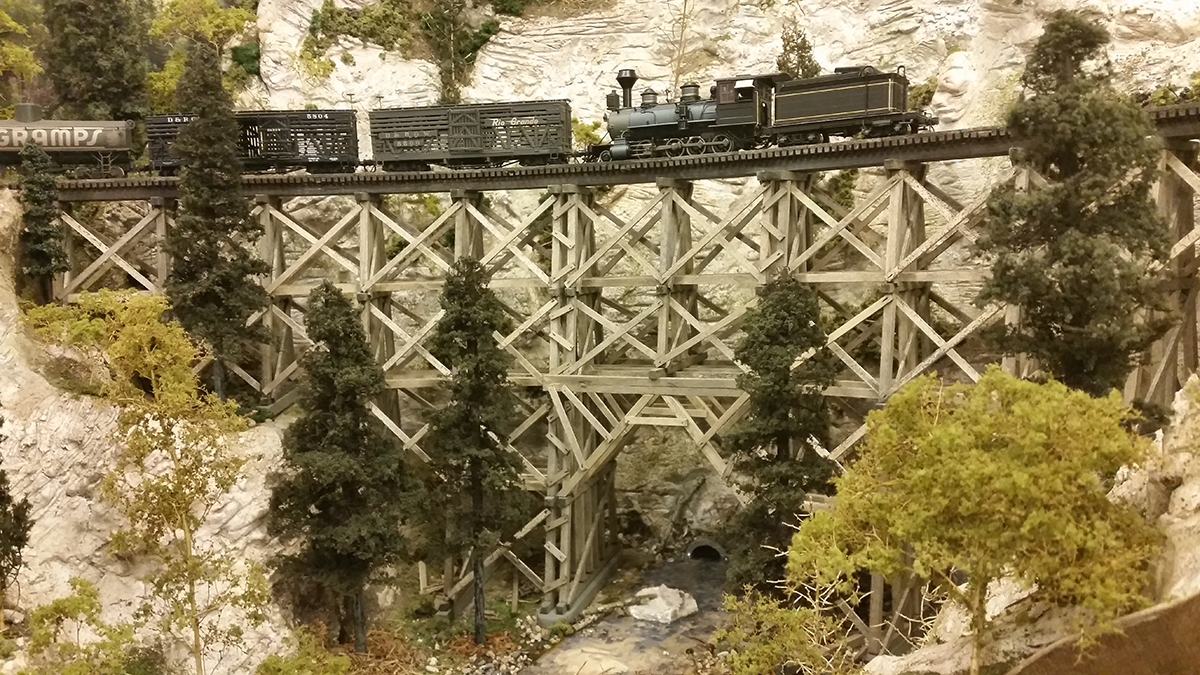
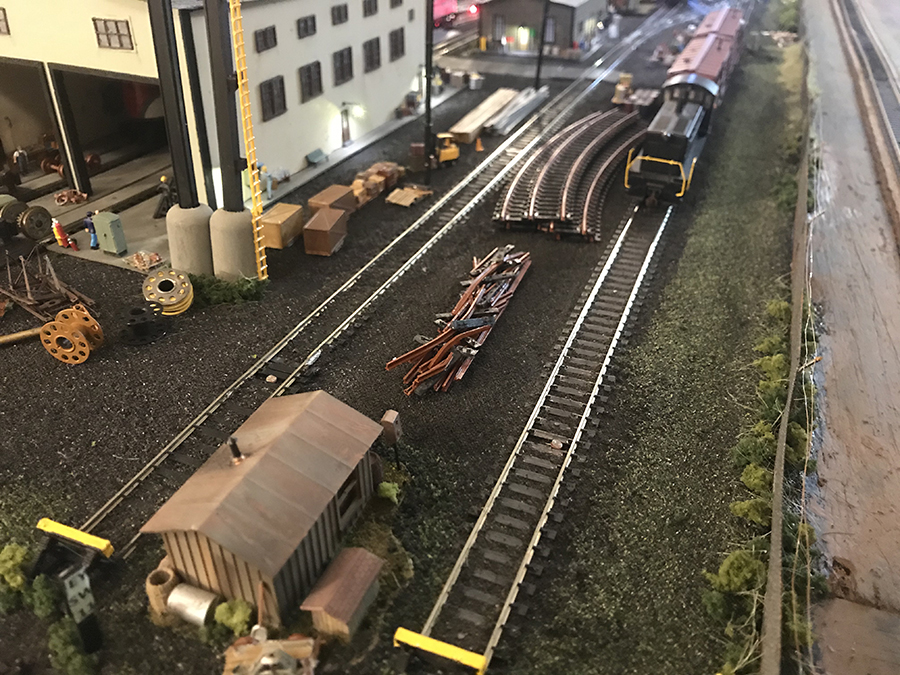
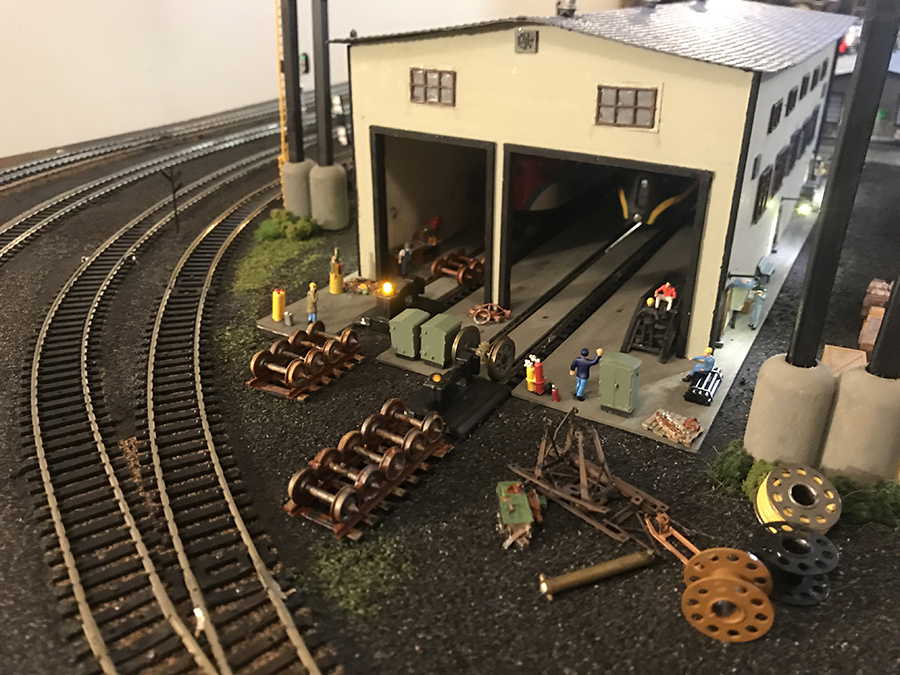
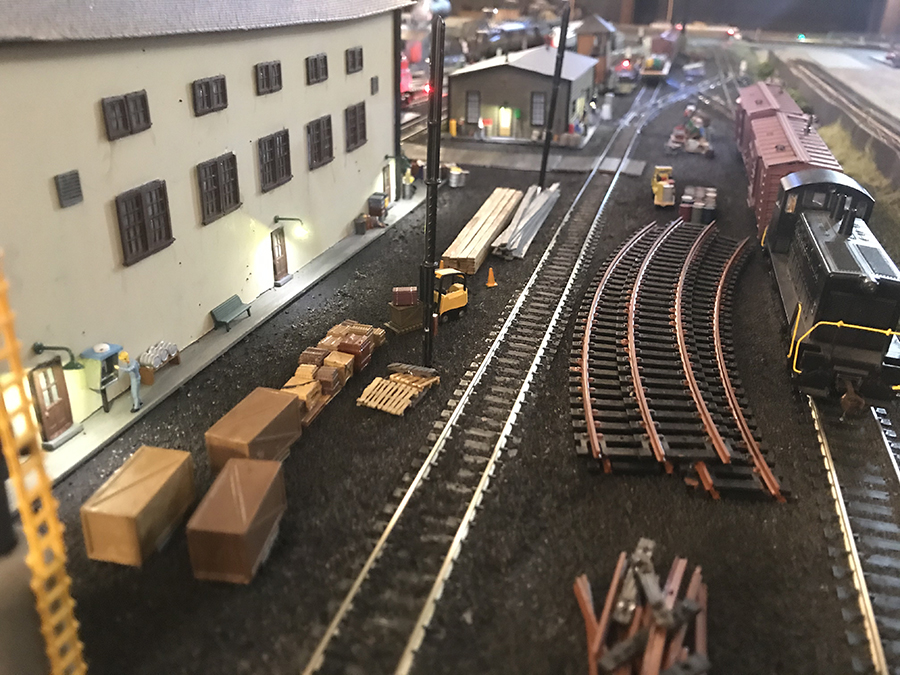
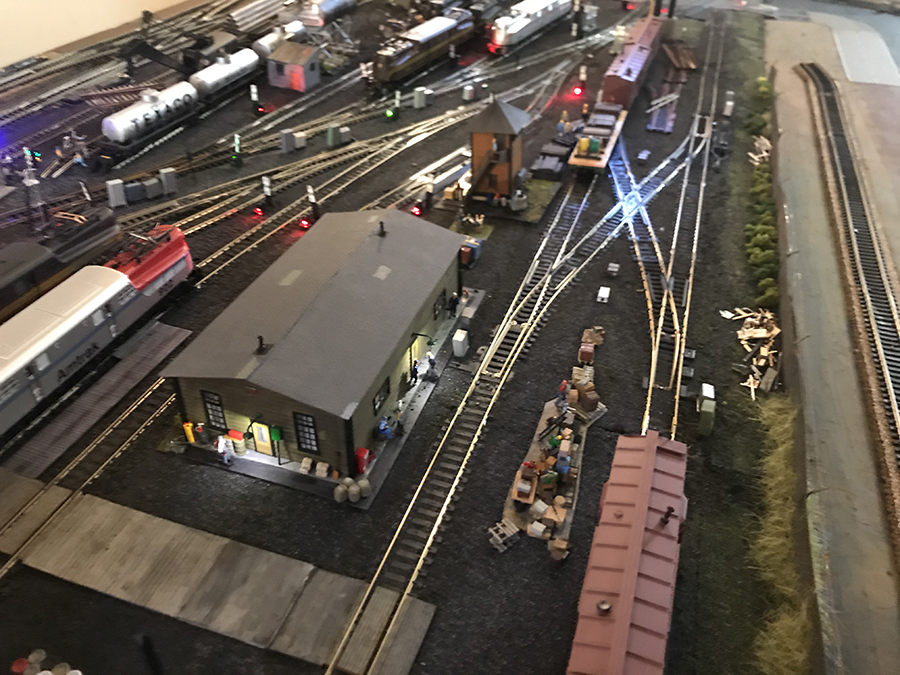
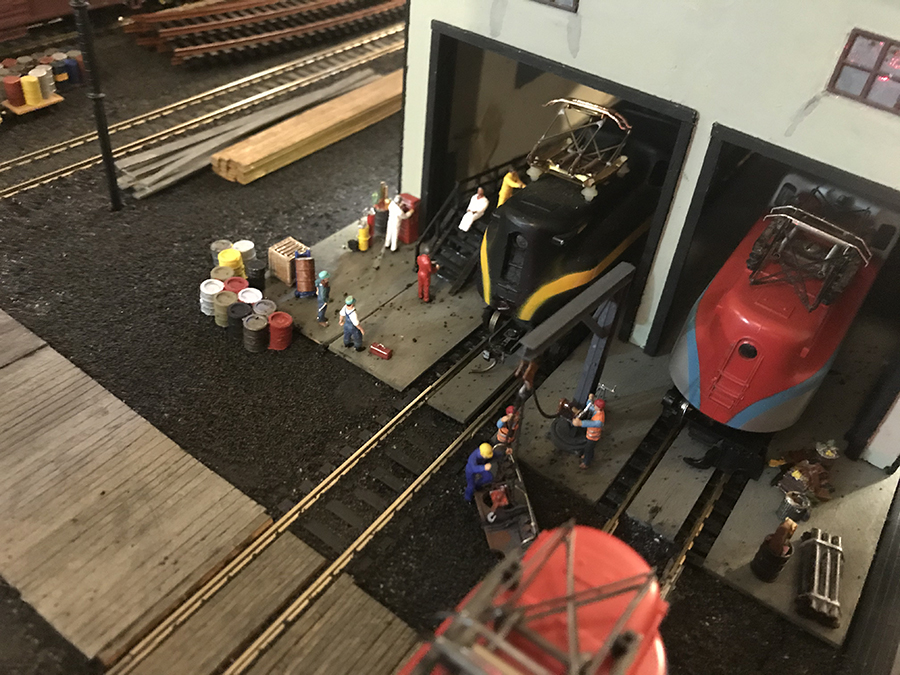
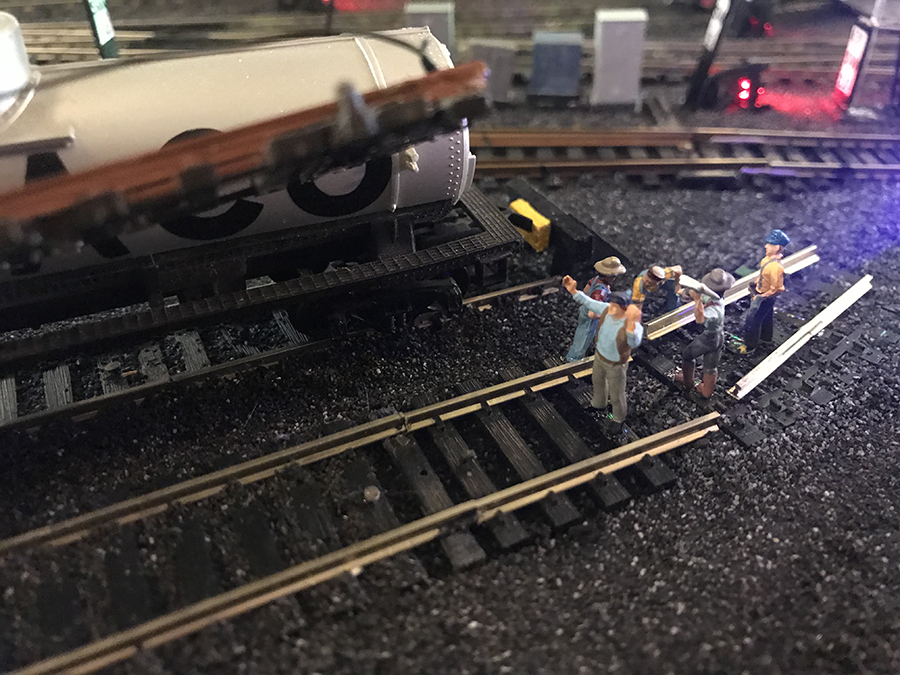
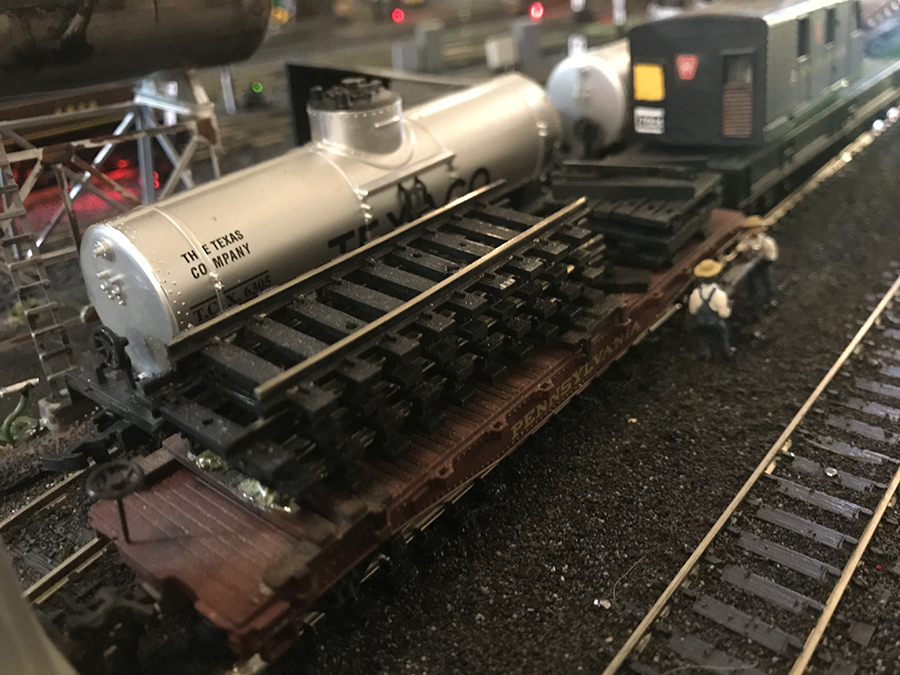
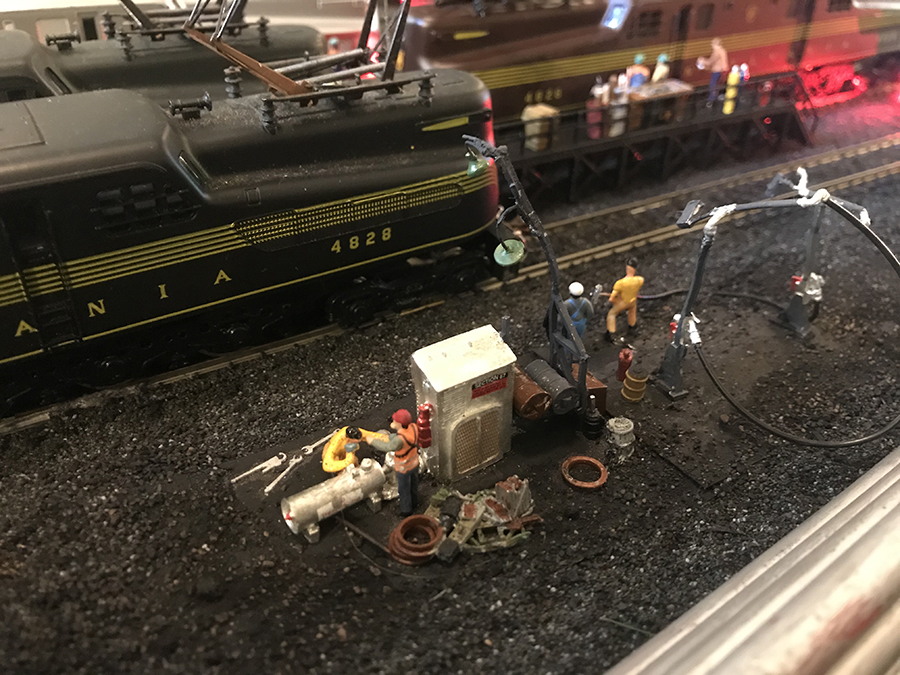
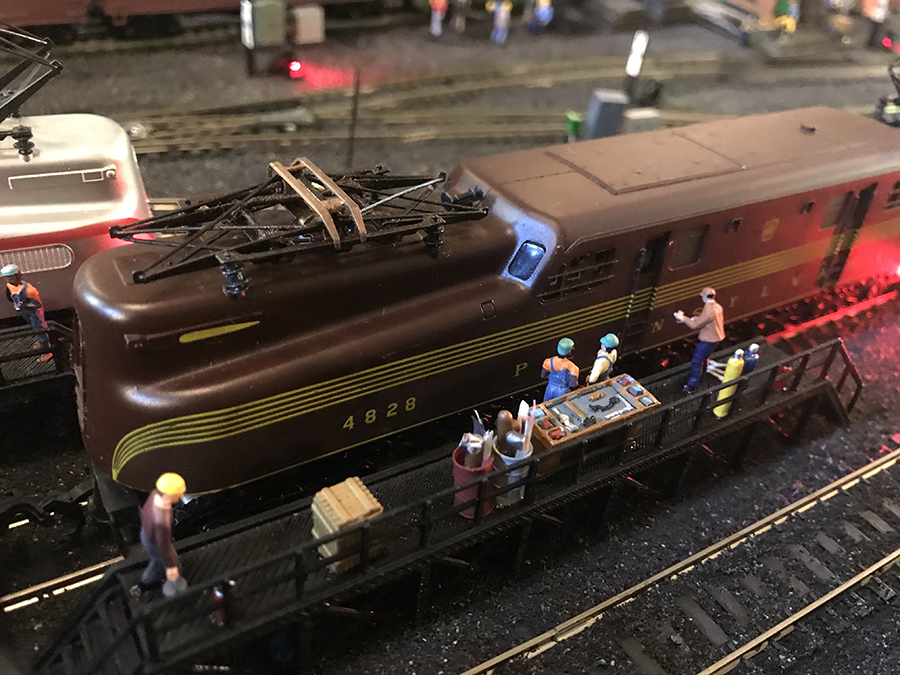
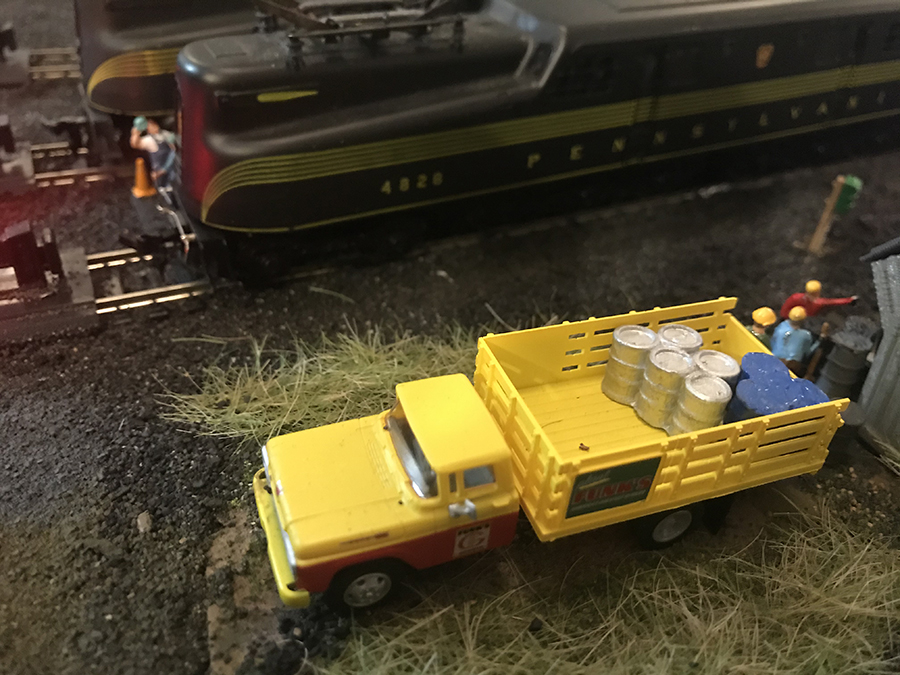
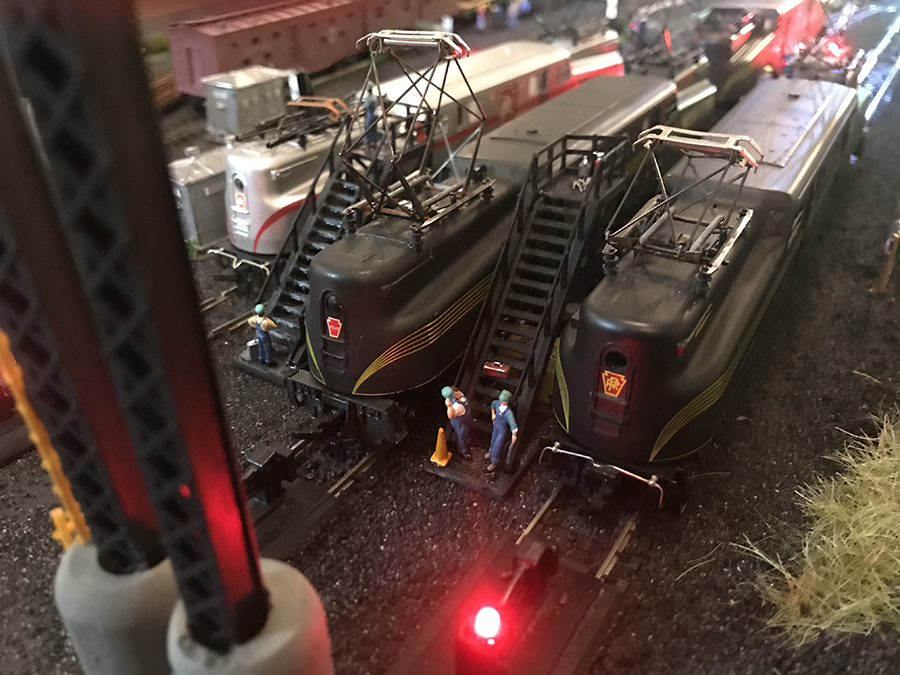
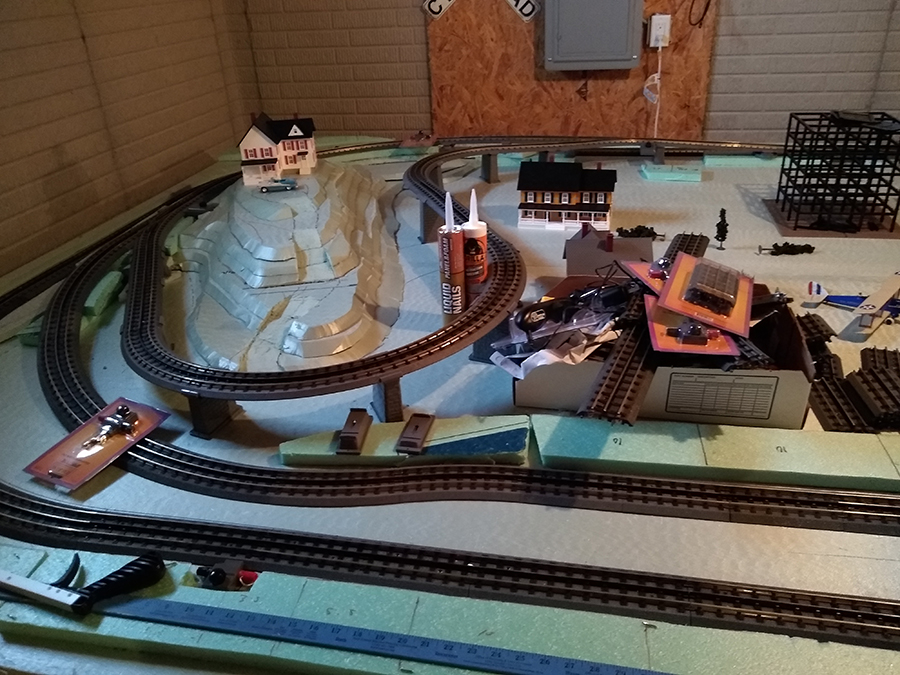
I’m sending you some pictures of an attempt I am making at a small O scale layout.

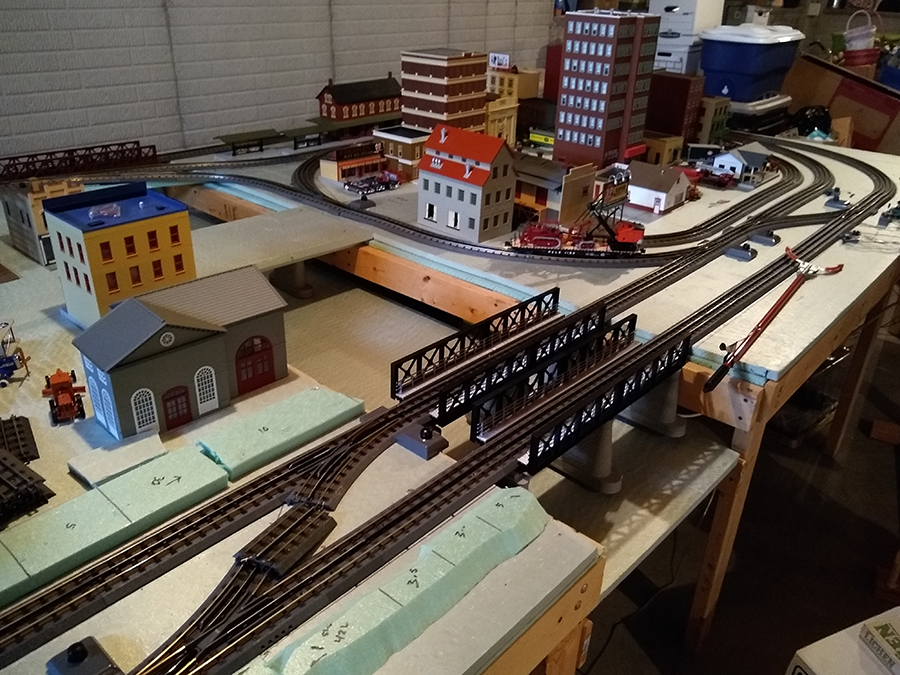
As you can tell I am running a loop within a loop. I have connected them with entrance and exits turnouts. I know I’m supposed to use insulated track sections. But I don’t know exactly how to place those sections or configure the wires underneath.

When my locomotive exits the inner loop to the outer loop or vice versa, it shorts on the insulated track sections. I would be grateful for any advice on this.

Thank you so much for your encouragement in this hobby.

I have included a couple of pictures so that you can see what I mean.

Have a blessed day.

Jeff”

small O scale layout

small O scale layout

small O scale layout

Next, Hall of Fame member, Rob, has been back in touch.

And it’s wonderful to see what he’s been up to (his last post is here if you want to get up to speed.)

“Hi Al,

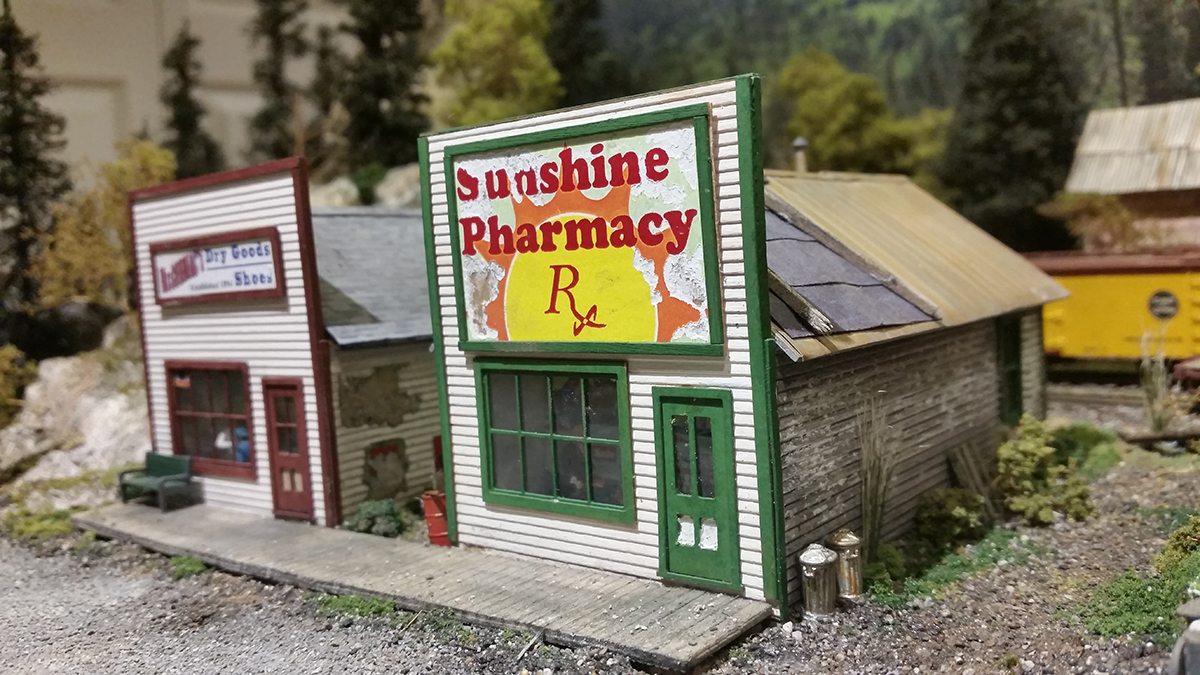
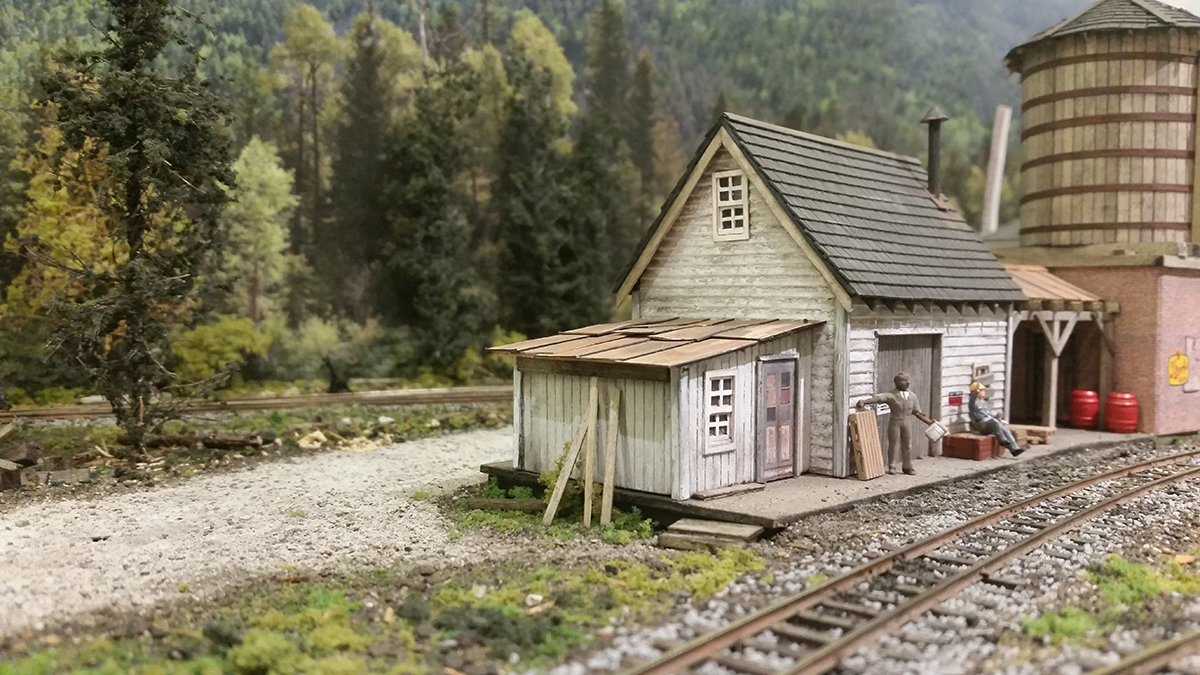
My Farland layout has seen a few changes which I thought some of your readers might be interested in.

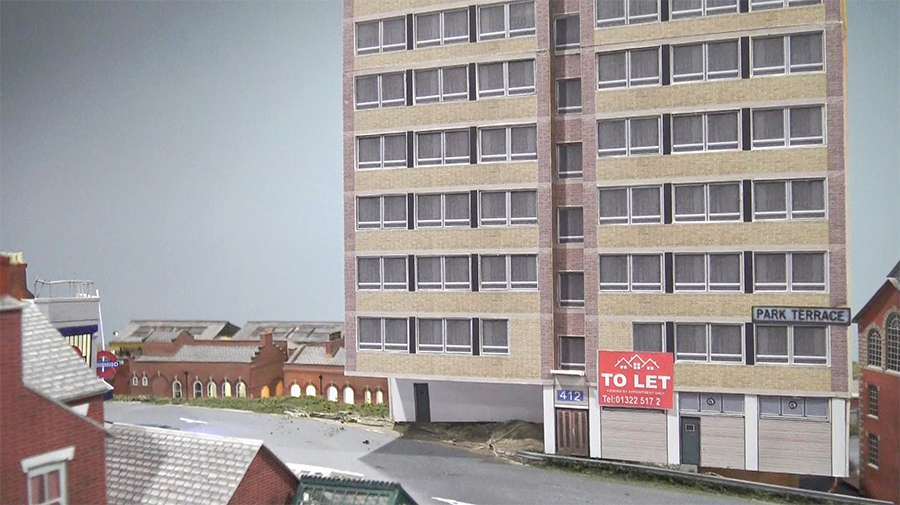
I decided I wanted to build a flats kit by Kingsway Models for the layout. I do not have any urban structures on the layout and I thought it might be fun. But where to put it?

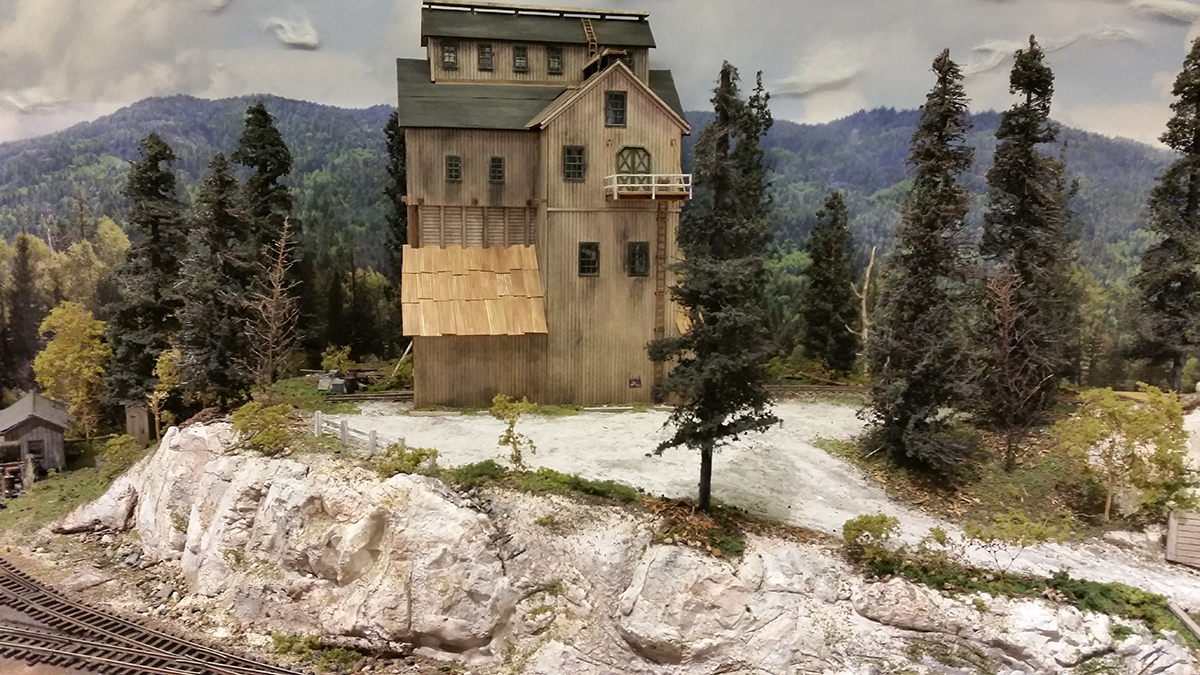
The only place that made sense to me was at a road intersection where there was a patch of level ground but then a fairly steep drop off. How could I possibly get the building to sit plumb?

I thought and thought and finally came up with the idea you see.

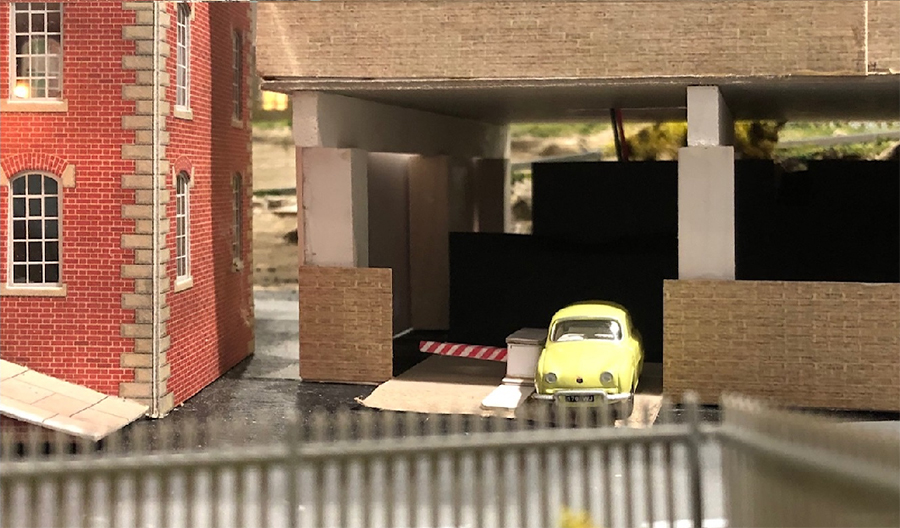
I cut out scale beams and columns form some scrap pine, then glued the columns to the beams and with superglue attached the columns to the beams. Knowing there would interference to the beams on the side with the hill, I estimated the lengths that would fit and left those parts out.

I then glued the beams with the columns to the underside of the building (it has a flat bottom). If a column hit an area that caused trouble I just broke it off easily since superglue is so brittle.


Since the building was going to overhang the road by a little bit and I didn’t want it to interfere with my Faller Road, I inset the column on the corner and hollowed out the lower section so it looks like it is buried into the hillside.

Since the train table is level it sits on the columns which sit on it and the building is plumb. Problem solved. It was a head-scratcher though.

Here is the before pictures where it is propped up on the box:

model railway apartment

model railway apartment

model railroad apartment

model railway

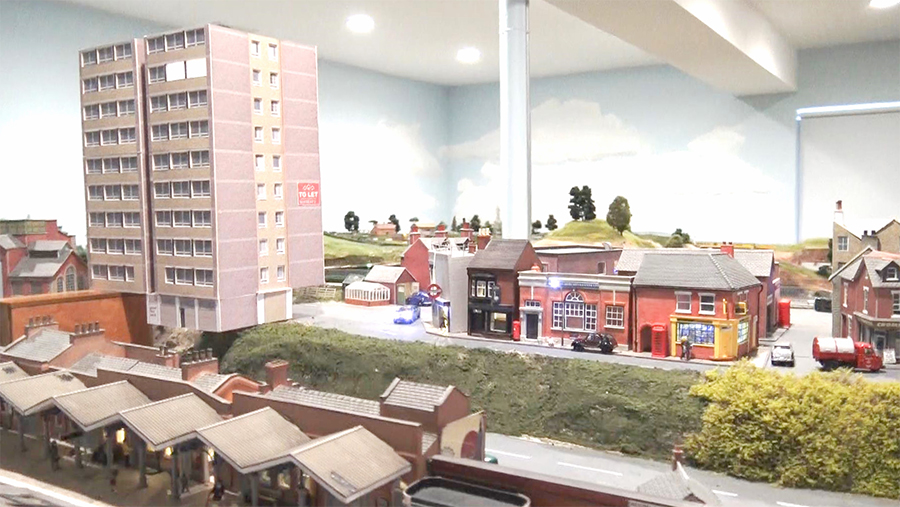
Below is the video after it is finished.

Rob”


Latest ebay cheat sheet is here.

A huge thanks to Rob. I do love his Farland Howe layout. There’s always something to learn with his vids too. Can’t wait for the next update.

And who can help Jeff? Please do leave a comment below if you can.

That’s all for today folks.

Please do keep ’em coming.

And if today is the day you get started on your layout, the Beginner’s Guide is here.

Best

Al

PS Latest ebay cheat sheet is here.


Minimum HO scale track radius

Dave has been in touch with some good advice on minimum ho scale track radius:

“I am very new to the hobby having started right around three years ago not really knowing much about anything involving model railroading.

My only real exposure was back when I was very young having a very typical DC train set. My new interest got sparked after seeing some different video’s on YouTube which re-introduced me into that world.

I first began by collecting photos off the internet of scenes that I liked and doing a lot of research into, well, everything.

The first really important thing that I learned was that the maximum/ minimum HO scale track radius one can fit into their space determines everything.

In other words, how large can you make your curves around the layout? That radius is the limitation to the scale you can work with and the type of track plan you can have. It is not just a mechanical limit to what can physically run, but also to what looks proportionally correct.

My space is a very small spare bedroom. I had considered HO to be my ideal scale to work with, but I figured that the broadest curves I could have were based on an 18 inch radius, due to the need to round a peninsula. So, it was N scale that would work perfectly with that radius limitation. It was far too sharp a curve for HO.

So, I spent several months learning different aspects of N scale and creating possible track plans all without any real understanding of how real railroads work, or what their operational needs were.

I then started to gather more photos of scenes that I liked and found a common theme to most of them. Nearly all of them were of narrow gauge railroads. I didn’t even know what that was. Once I had looked into it I found out that I could indeed model in HO scale and still stay within the track radius limits of my room by going with HOn3.

HOn3 works fine with 18 inch radius curves since the engines and cars are smaller and the track used is very close to N scale in width.

One other very important aspect that I picked up on looking at my gathering of preferred model railroad photos, was that the visual backdrops were of primary focus and not just an afterthought.

So, when I started actually building the layout the backdrop was the first thing installed and later all the scenery would expand outward from them as an extension creating visual depth.

I did my layout in stages choosing to nearly fully complete each section before moving on to the next. This way I felt the mistakes I would make in the track, scenery, etc. would be isolated to just that section. So, in theory things would improve as I moved along.

My railroad is DCC running the JMRI Operations software and called the Nickel Creek & Western. It is as freelance as one can possibly get. It doesn’t model any specific place, or time just a general feel of the Northwest sometime in first part of the century.

I consider it a facsimile of a reality rather than reality itself. So far I have basically gone with what I feel looks nice and not worried about counting the rivets.

A lot of my structures are scratch built from either my imagination, or from photos of what others have done. It isn’t finished. I still have a few small sections to complete as well as adding in a lot more detail such as people and vehicles everywhere.

Dave”

minimum ho scale track radius

HO scale coal mine

HO scale scenery

Minimum HO scale track radius


Minimum HO scale track radius bridge

HO scale old town shop

minimum ho scale track radius

HO scale shops

minimum ho scale track radius

HOn3 scale water tower

HOn3 locomotive

HOn3 factory

minimum ho scale track radius

A huge thank you to Dave for sharing his adivce on minimum ho scale track radius. And what a layout!

The pics are stunning, but for me, it’s the narrative that stands out.

It just goes to show how a little planning can go a long, long way. Spectacular stuff.

That’s all for this time folks.

Please do keep ’em coming.

And if you want to make that start on your very own layout, the Beginner’s Guide is here.

Best

Al

PS More HO scale train layouts here if that’s your thing.


Need buildings for your layout? Have a look at the Silly Discount bundle.

HO scale engine yard

Gary’s been back in touch with his HO scale engine yard:

And you all know how much I like an update.

Here’s his last post if you want to get up to speed.

“Hi Alastair…. I am about 95% finished with the HO scale engine yard for my Sunnyside yard layout and thought I would send you an update..

I still have some minor fixes for some scenery that I want to do and also in the video you will see an empty rail outside the fence in the middle of the layout.

I am going to use this rail to display some engines and also create a track crew scene working to link up this rail with the work train rail.

Also, I have to fix or replace two turnouts. I have learned the hard way that the under table switch machines are the best.

The Tortoise switches are very good. With the Tortoise you can throw the switch, change the color of the signal and also control power to or shut off power to a rail.

I am also going to try the Micro Mark Switch Tenders (they are a little cheaper than the Tortoise and are also under table). Even though Micro Mark does not advertise this in their switch machines, I have learned how to throw the turnouts and change the color of signals with one 3PDT toggle.

My next phase will be;

– building of the road coming into the yard for delivery of goods needed for the passenger trains
– building of the commissary buildings, power building, power station and main yard master towers at the north and south end of the yard.

When that is complete, I will start working on passenger cars for the passenger trains and then the main line blocks and signal system.

Much to do and it will be a while, but the journey is enjoyable although sometimes frustrating when things don’t work the way you planned. But then it would be too easy, right?

Again, thank you and all your model railroad followers for blogs, pictures, videos, ideas and information.

Hope you like the pictures and enjoy the videos.

Gary”

HO scale engine yard

HO scale engine yard

HO scale engine yard

HO platform

HO scale engine yard

HO scale flatbed


HO scale people

HO scale oil tanker

HO scale maintenance crew

HO scale engine yard

HO scale maintenance lorry

HO scale engine yard


Latest ebay cheat sheet is here.

A huge thanks to Gary for sharing his HO scale engine yard. I love what he’s done and the way he’s documented it all.

It’s wonderful to see how it’s grown in to this fab layout. Can’t wait for the next update.

That’s all for today folks.

Please do keep ’em coming, and don’t forget, it you want to make that start – just like Gary did – the Beginner’s Guide is here.

Best

Al

PS More HO scale layouts here if that’s your thing.