T-trak modules

Andy’s been in touch with his T-trak modules, and fun theme too:

“Alistair,

Some time ago some friends and I were discussing what we could do to capture the interest of the young and old. The advent of video games and “green screen” technologies produces a realism that really ups the stakes for today’s modeler. If we cannot capture and inspire then the younger generation will just move on to something that does. So how do we do that?

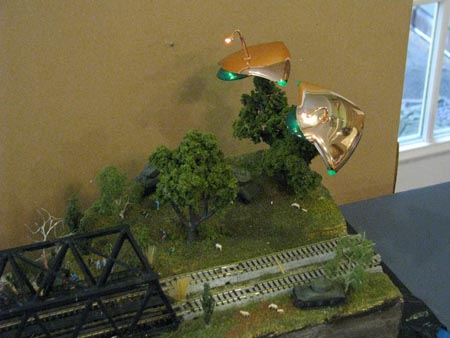
As such I like to build modules that capture the imagination, whether it is in the details or the entire scene. Some are serious modules while others are meant to be “Out of the Box” One such module is my “War of the Worlds Module” this is a double module (single wide) and it brings the 1953 George pal version to life with the 2005 Steven Spielberg version. You would be surprised at how the module starts some conversations with the young and old alike. Grandparents telling their pre-teen and teenage grandchildren all about the original and its effects on society then, Grandkids talking about the walkers and how the effects are so much better (of course) but yet did not have the impact of the original H.G. Wells radio version. Lots of attention grabbing and questions, lots of interest and after all that IS what we are shooting for if we want the hobby to continue.

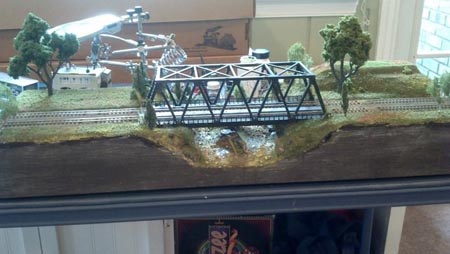
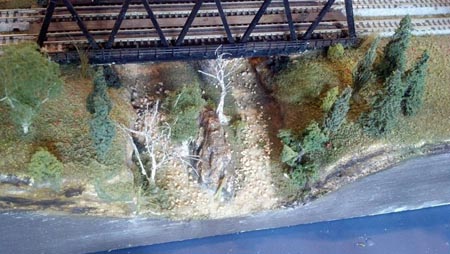
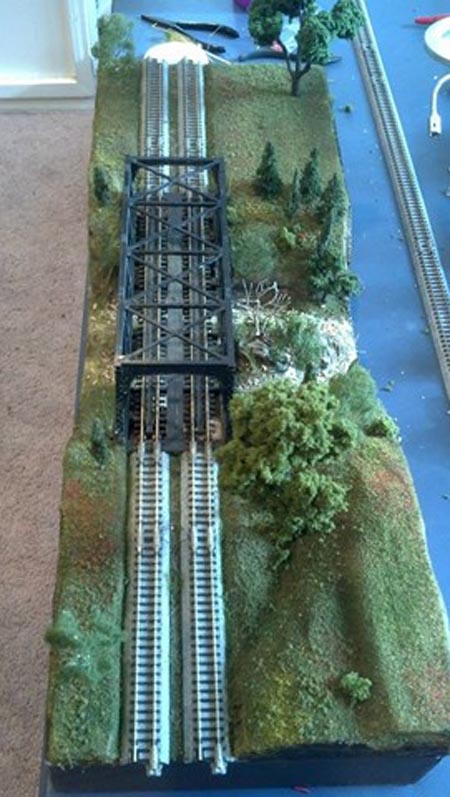
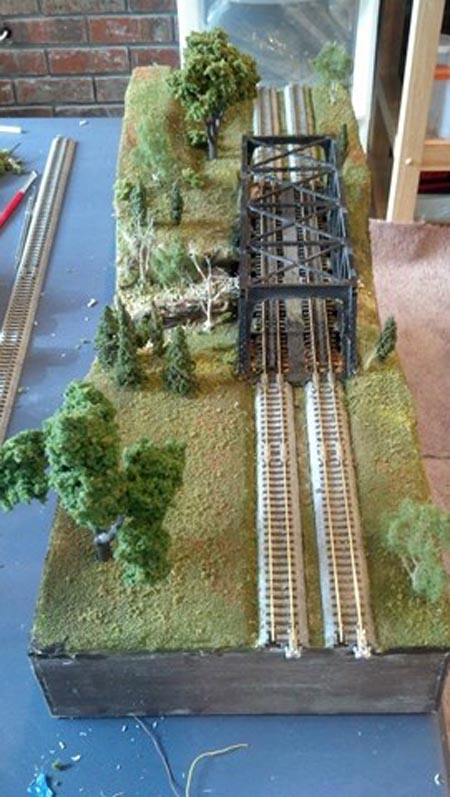
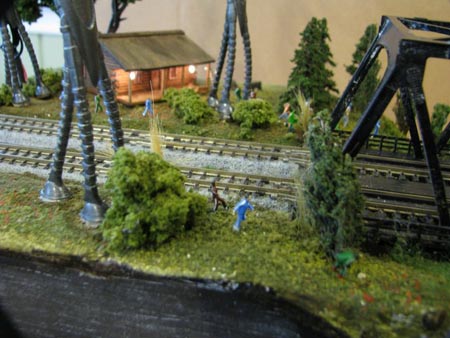
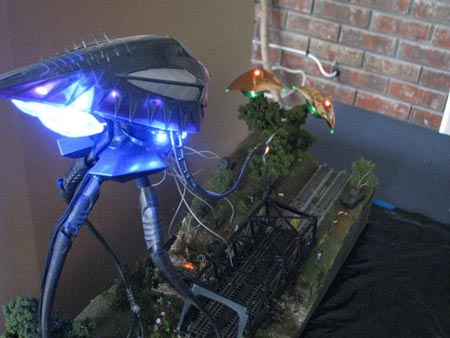
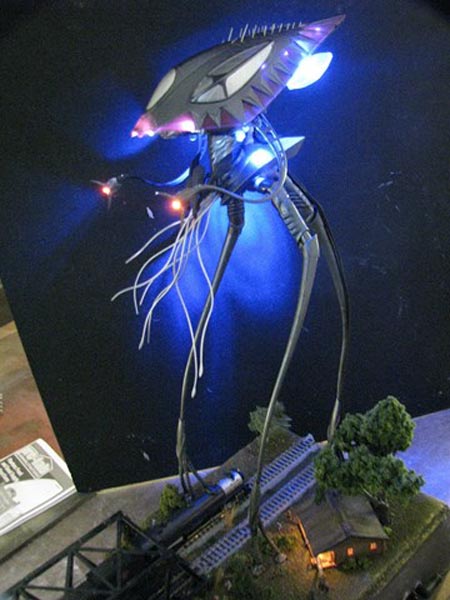
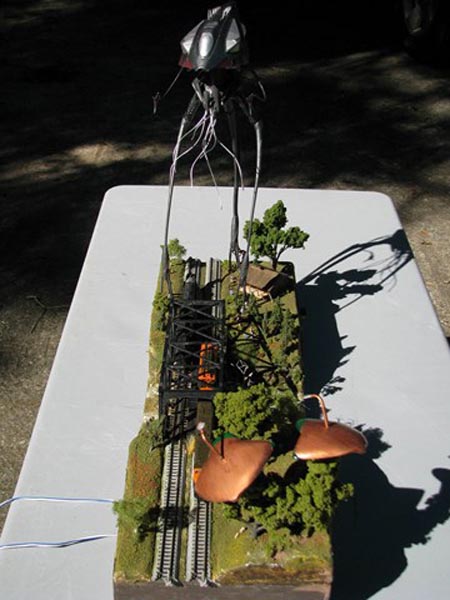
The Module started out with a double bridge and I had to come up with a way to make the ships seem as if they were flying. I used baling wire and some woodland scenic trees and produced a stand for each. I needed to be able to run the fine wire (magnet wire) down the trees and to the “Strobe” module and the power source below. It is easily covered with the foam from the trees. The strobe module comes from “Iron Penguin” and is actually a welding strobe but works great for this purpose.

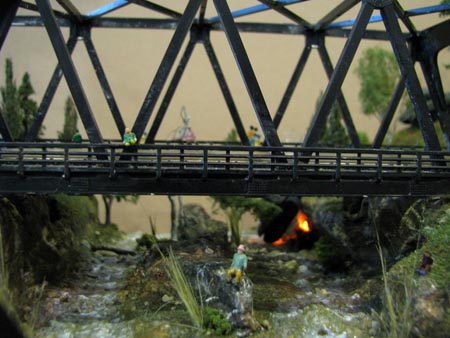
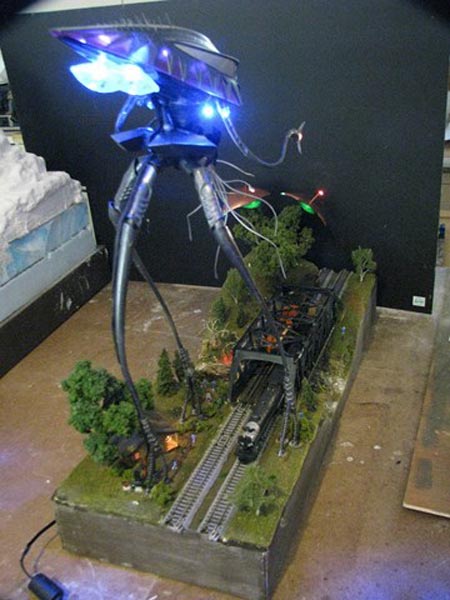
The walker is a Pegasus models offering and I built in a few “extras” the most obvious is the LEDs and SMLeds (look at the pincers) these were a meticulous labor of love and took some creative wiring to get it all into the shell. Along with that I added a “wireless: camera” that transmits to a receiver that puts the Pilots perspective up on the screen. People can watch the trains as they pass under the walker and through the bridge. I still have not figured out how to create the “Train on fire” from the movie but I am working on it. Here are some pictures of what I have created on this one module.

Enjoy!

Andy”

t-trak modules

t-trak modules

t-trak modules

t-trak modules

t-trak modules


T-trak modules:

model train module

model train module

model train module

model train module

model train module

model train module

A big thanks to Andy for sharing his T-trak modules. Just loved Andy’s take on War of the Worlds too. And to crow bar it in to a layout, too – genius!

That’s all for today folks.

Please do keep ’em coming.

And if today is the day you get started on your layout, the Beginner’s Guide is here.

Best

Al

PS Latest ebay cheat sheet is here.

PPS More HO scale train layouts here if that’s your thing.


Mike’s HO scale layout

“Al,

This is a HO scale layout consisting of 3 separate zones. Farm, Village and Mtns.

There are 2 bridges, 2 tunnels and lots of interesting things to see along the tracks. I use EZ track. It’s just easier for me to work with.

The platform is L shaped 4X8X6. DC powered.

I used plastic, laser cut; self build (balsa) and paper houses and buildings. A little bit of paint makes them look more realistic.

I purchased a bundle of paper houses I saw in your emails. They were easy to assemble and add a nice touch of realism.

The roads are made from a Woodland Scenic kit.

The little details like the billboards were made from actual billboard pictures I found on the Internet. I reduced them to the proper scale, printing on photo paper, and attaching them to a painted balsa wood frame.

Mountains are made from 1” thick rigid insulation, stacked, glued, cut, shaped and painted. I also added some natural stone; plaster tunnel portals, and paper retaining walls. All topped off with some mosses and grasses I bought at the craft store.

The farm scene is my favorite. The farm house is paper, the store is laser cut and the barn and silo is built. I added a lot of little touches like the wheat and corn field as well as the plowed earth.

I topped it all off with people, animals, fences, gravel roads, vehicles and a few other items to make it fun.

I added a few more pictures.

Thanks

Mike”

HO scale layout

HO scale layout

HO scale layout

HO scale layout


“Ground charcoal makes great scale coal…………keep breaking it till it’s the right size….then use the dust mixed with white sprit to age the rolling stock..

Dry cleaning hangers(plain) can be cut to make telegraph polls (solder cross bars) fence posts etc.

Eric”

“I use thrown-away charcoal filter elements (like body shop respirators use) stripped open for REAL looking coal in coal hoppers.

It is light weight, and an exact match for coal. It is a might large for N scale. but looks great for HO and larger scales.

Gregg”


“Hi Al , after a few more adjustments have now uploaded part 7 of the new layout , some have asked re fitting points motors , I shall try to cover this in the nest update , I wanted to get all the track sorted and running good before starting adding more lights and point motors.

Regards

Dave”


That’s it, we’re done for today.

Please do keep ’em coming.

And if today is the day you startle your loved ones with your new found love of all things trains, the Beginner’s Guide is here.

Best

Al

PS Latest ebay cheat sheet is here.


Perry’s waterfall

“Alaister

Here are some pictures of my waterfall scenery at Butt’s End Falls on my N Scale Greater Muttering and Cussing Railway Inc.

It’s an eclectic railway with diesel, steam, North American, European and British all mixed in together, set somewhere in a land nobody knows. Certainly not prototypical of anything but my imagination.

The pictures include a small campground on the left. Another trailer is just about to cross the bridge to the campsite.

Some logs were washed down during the last spring thaw. Looks like it would be good fishing.

The last picture is from the top of the falls looking down.

Hope you enjoy them.

Cheers

Perry”


“Here’s a trick I use to accurately start a drill in a piece of plastic stock.

Take a needle or pin and fix the head end in a bottle cork or dowel. Then heat the point in a flame and touch it to the plastic in the exact spot you wish to drill the hole.

The heated needle will make a “punch” mark in the plastic that will keep the drill point from wandering.

This is especially helpful when you need to attach or reattach a part, such as a locomotive bell, that has had the post or mounting pin broken off.

One can drill holes in both pieces of plastic and use a short piece of wire to serve as a dowel to glue them back together.

Jon”


“Hey there.

I noticed the last email showing tips, and some of them by mistake.

I don’t know exactly how this happened, but check it out.

I glued 4 Walthers walls together and the original plastic color was that lovely brown color.

I decided to go out to the spray booth in my garage and spray it a darker brown color using a Rustoleum spray can.

It was fairly cold in the garage, and I promise I sprayed the building very even from all 4 directions per wall.

When it dried, this was the outcome. Somehow the cold temperature affected the paint.

I could’t have done this if I tried.

After it dried completely, I gave it a wash for brickwork and a dull coat finish.

The picture attached was right after the “freeze dried” coat before the wash and dull coat.

Lou”


Love hearing about the mistakes that turned out well. Please do send ’em in.

That’s all for today my friends.

Please do keep ’em coming.

And if today is the day you decide you’re going to show everyone how it’s done, the Beginner’s Guide is here.

Best

Al

PS Latest ebay cheat sheet is here.