Ronald’s N scale layout

“hi Al,

My name is Ron, from manchester.

First of all i would like to thank you for al the hard work you must put in to keep us up to date with all the latest, etc, some really great layouts and tips from your subscribers, well done.

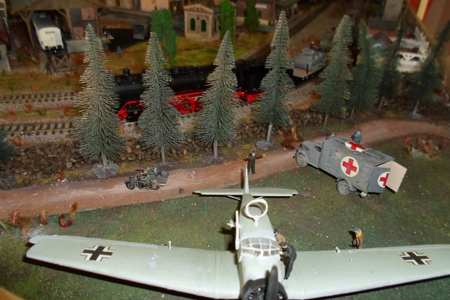
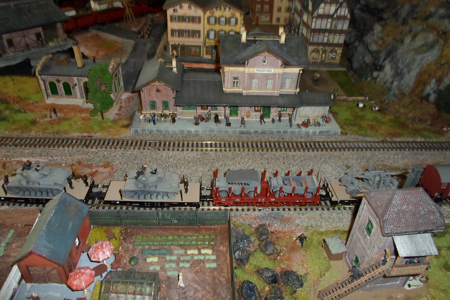
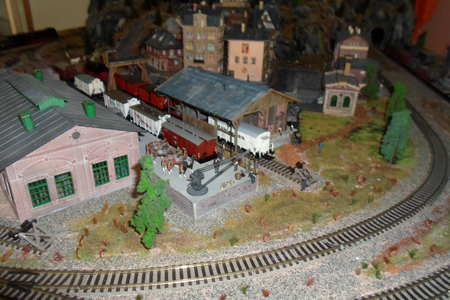
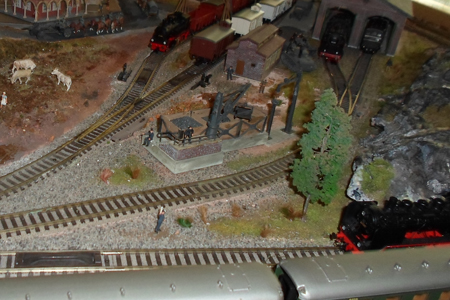
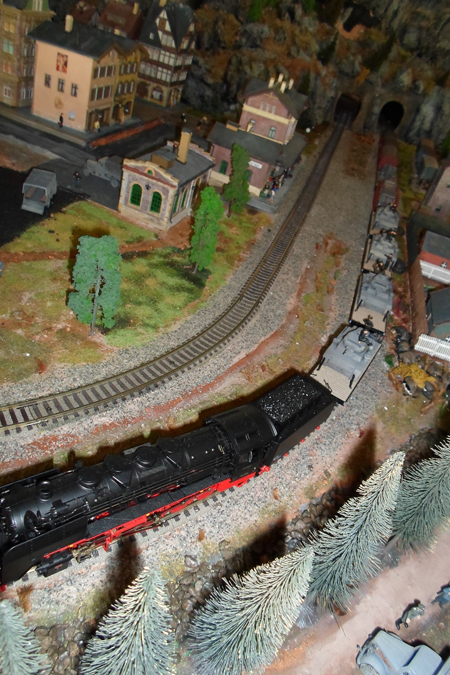
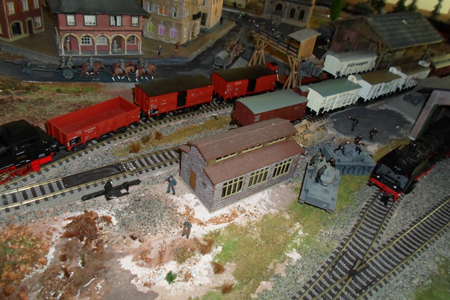
I hope you like my modest little n gauge layout, this is my first attempt, all the buildings etc are card kits as you will probably know, i am a pensioner so got to keep the cost down lol, the location is of nowhere in particular, i just made it up as i went along, most of the other constructions are made from cornflake boxes, its not finished yet, a bit of weathering and a few more vehicles, but the main thing is i have really enjoyed it , after all that’s what this or any hobby is all about.

anyway Al thanks once again , and keep em coming.

Ron”


N scale model railway

n scale model railway

N scale model railway

N scale model railway

N scale model railway

n scale model railway

N guage model railway

N gauge model railway

4 loop N scale with turntable track plan


“Another tip for retreving small parts – or other small items.

Have the wife donate an old pair of pantyhose. Wrap pantyhose tightly over the opening at the end of your vacuum cleaner hose – a rubber band or something similar should do it.
When the vacuum is turned on, the suction will drawn the part but the pantyhose will hold the part in place at the hose opening for retrival.

Jim”


“Dear Al

A great way to make pipe loads is to use drinking straws. Cut them required length and paint a grey/ silver.

Regards

Luke”


“SECTOR PLATE MADE FROM A CD DISK

This is how I made a sector plate from a CD disk.

1st I cut a length of track to fit on to the centre of the disk then glued it on with super glue.

2nd I modified the bottom of the cover, I used as the base by cutting away the outside leaving just the middle part.

3rd I soldered 2 wires on to the track to provide power for the track on the disk, the 2 wires were soldered on to both rails.

4th I soldered the other ends of the 2 wires on to the track leading to the sector plate,

when I soldered the wires on I made sure that the left wire was soldered on to the left rail and the right was soldered on to right rail. If you mix up the wires you get a short.

5th I then soldered 2 wires to the track leading off the sector plate into the loco shed, then soldered the other ends to the track leading to the sector plate.

As you can see I used part of an Atlas grade crossing tower kit to make the cabin for the operator. I then made a handle out of wood and painted it black.

I used modelling clay to make the scenery around it, it is not finnished as you can see from the photos.

I used black crushed stones to make a ashphalt road and carpark.

The loco shed was donated to me, I am not sure who made it, but I had to repair before I put it on the layout. I also put a light in the shed.

The reason this sector plate was made was if a normal siding was made, the loco shed would have been too close to the mainline. Also the track leading to the sector plate also serves as a back shunt. The sector plate was completed by gluing black cardboard onto the disk to look like a steel deck.

Paul”

Thanks everyone! Keep ’em coming.

That’s all for today folks.

And don’t forget the Beginner’s Guide, if you want to get going on your layout.

Best

Al

PS Latest ebay cheat sheet is here.


Dennis’ Model train layout

“Hello Alastair,

I’m not sure how I got on to your email distribution but I’m glad you did.

I really enjoy the links and other information you send out.

I live in St Louis, Missouri here in the USA and have been an avid model railroader (I think) from the day I was born.

My father bought a Lionel train set for my first Christmas. I’m guessing my mother probably wanted to kill him as at $25.00 is was the equivalent of a weeks pay.

I still have the set and it still runs very well. I’ve been O gauge since.

My current layout is loosely patterned after two of my loves, the desert southwest and Route 66.

Here’s a link to a video that was made of it when it was a featured layout for a round robin tour with the St Louis Lionel Club.

Enjoy and pass as you see fit. Keep those emails coming.

Kindest regards!

Dennis”

Latest ebay ‘cheat sheet’ here


Dennis’ mail says it all! That was a week’s wages well spent if you ask me.

That’s all for today folks.

Please do keep ’em coming.

And don’t forget the Beginner’s Guide, if today is the day you start your railroad adventure.

Best

Al

PS Latest ebay cheat sheet is here.


Military model train layout

Paul’s been in touch with his Military model train layout:

“Hi Al

Following on from an earlier lay out on your email, attached is another attempt at incorporating a military element.

The lay out represents the period around 1939-41 in Germany and combines military with civilian operations.

The town Fraustadt (in the then West Posen Province) exists but my layout is entirely fictitious.

The tanks are mark IIIs of First Panzer Division. It is still very much a work in progress.

regards

Paul”

Military model train and planes

Military model train freight

Military model train

Military model train platform

steam train

steam train

steam train engine shed


I have no idea why I like the military model train layouts so much – but I do!

Next is a ‘how-to’ sent in from Toni. There were lots of comments on Arnie’s layout, in particular the fire scene. Here’s what Toni sent.


“For the people who inquired about the burning building. You can create a similar building using a multi-floor building. Materials needed: one multi-floor hotel or office building model and about three or more electronic candles.

step 1) Assemble building and paint per instructions except for the floor(s) the you want engulfed in fire, and the floors above that if you plan on a huge fire.

Step 2) After the painted building is dry, add dark soot colored weathering material to the top of the windows, on the floor that is to be burning, with upward strokes using a wide brush.

Step 3) Paint the inside of the building, on the floor that is burning, a medium shade of grey. This will help to darken the room’s interior. You do not want it to be black. The grey helps to reflect the flicker of the electronic candles.

Step 4) If possible take the electronic candle circuits out of their casings.

Step 5) Disconnect the LEDs from their flickering circuit boards. Remember to mark which leads went to what pads on the boards. Attach long wires to the LED’s leads and connect the other wire ends back to the circuit boards. Remember the LED’s polarity.

Step 6) If the candles have On-Off switches, disconnect them and solder longer wires to the circuit boards and the wire’s other end to a switch that you perfer to use and connect that switch to your control panel or an unseen location on the building model. If you are using more than one candle, be sure to wire the them in parallel to the one power switch.

Step 7) Now secure the candle’s LED to the inside of the room that is to be burning. If using more than one candle per room, do not group them together. Secure the LEDs in different places in the room. You want it to look as if there are multiple flame locations in the room.

Step 7) Figure where your fire fighting models are to be and color the areas under and around the models to look wet. Remember that street asphalt and sidewalks will be a few shades darker when wet.

Step 8) Locate your fire equipment models for action.

Step 9) Step back and admire your work and bask in the ahhs and wows from your family and friends.

Side note:

I am retiring an old microwave and hand blender from kitchen use. The microwave will now be used for drying scenic material and the hand blender will be used for pulverizing the dried scenic material for spreading on my layout.

Toni”


A big thanks to Toni and Paul.

That’s all for today folks.

Please do keep ’em coming.

And don’t forget the Beginner’s Guide, if today is the day you start your railroad adventure.

Best

Al

PS Latest ebay cheat sheet is here.