More model rail tips…

This came in from Dave which I thought worth a mention – I thought it very impressive!

“Also the tunnel tips is most timely as I’m just planning a “shelf” layout for my garage, about 14 feet along one wall x 20″ wide with a corner return 6 feet long x 12″ including a lift-out fiddle yard. So a tunnel for the corner will be included.

All very “future” at the moment as all I have is a Bachman S&DJR 7F and about ten feet of loose track!

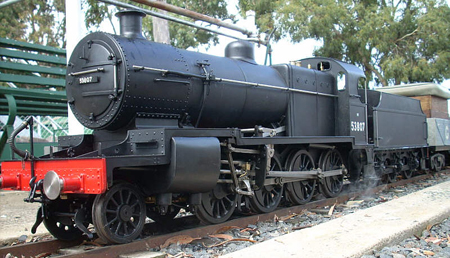
That loco was chosen because I finished building a 5″G live steam S&DJR 7F about nine months ago (see attached pics) and then Bachman brought out their OO model, so I had to have one, didn’t I?

7Fs are one of my favourite locos – anything with more than six drivers ….

Cheers,

Dave.”
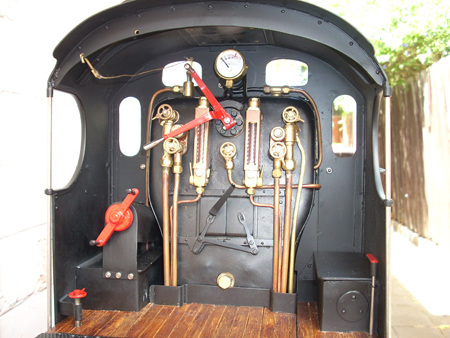
Wow! Now that’s either a giant bench in the background, or it’s a brilliant model!

And some more tips for you. Please keep them coming!

“I attach the anode of a red LED to the cathode of a green LED and then attach the other ends together.

I put a 800 ohm resister on one end (series)and attach them to a track.

When the train travels one direction, the green LED lights. When traveling in the other direction, the red LED lights.
It’s an automatic switching signal powered by the track voltage and polarity.

–Ben”

“When building mountains and hills I use Oatmeal (as in Quaker) to create texture. It’s inexpensive and easy to do and it dries hard as rock.

— Marc”

“I use free styrofoam. You know the stuff they use for packing. It comes in verious shapes, sizes and thickness. Carve it to shape then paint. I use spray paint to make it look like rock or granite. Vakspar Stone looks like grannit and Krylon has different colors in theiir “Make it Stone!” Both paints are Premium Enamel and they do not harm the styrofoam in any way.

— Wayne”

“I do appreciate the time you take and the information that you pass along.

So, I thought I would let you and the other readers know of something I have been doing.

Most home health stores and/or pharmacies receive in the shipping cartons for their lift chairs
two blocks of polyfoam, guessing it is polystyrene, that which I have gotten, measures 3″x4″x29″.

I have used it in pretty basic landscaping and it works well. My biggest pleasure is that I can
have all I want and free, because otherwise the rest is trashed.

— Bill”

“Great ideas,and useful.

Sometimes when adding car roadways in rural area,a possible quick way is to use the non skid grey tape that you put on stairs an maybe walkways It comes 4 inches wide and in long lengths up to 50 feet Looks good and its a quick way to modify an area It takes on the look of a gravel type roadway

Regards,

–Nick ”

And don’t forget the latest ebay cheat sheet is here. Thanks for all your comments and emails on it.

Best

Al
PS Beginner’s Guide is here.


Scratch built terminal

Alan mailed in with this excellent scratch built terminal:

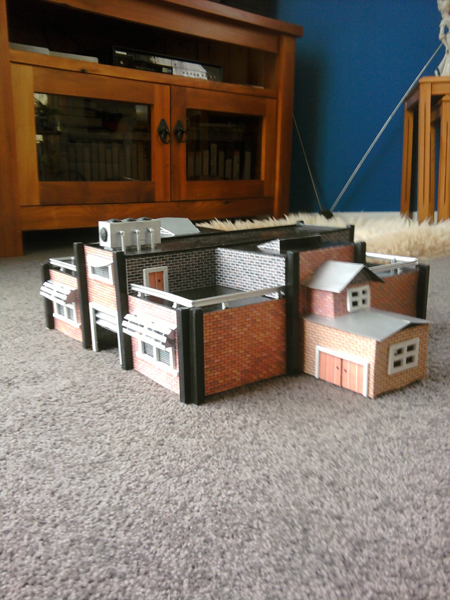
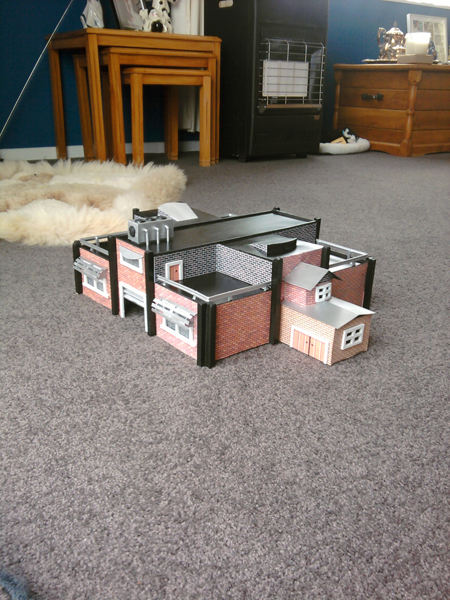
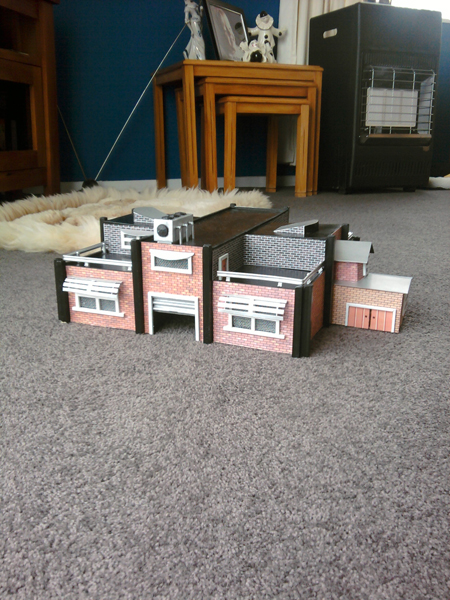
“Hi here is a terminal I built from scratch, I use AFX scale crash barriers for the roof barriers and they are also in my opinion perfect for road barriers.

The air conditioning unit on the roof I used loco fans to simulate the fan units, cheap easy solutions.”

There some great printable buildings here too.

Richard also mailed in with these:

“I use gypsum for scenery, which I buy direct from the maker. It works out real good, and can be mixed with dry colors for various shades of rock and dirt.

I also use in/out door carpeting, green in color, which I cover with colored gypsum, to simulate yards and fields. This saves time and money, and doesn’t look half bad.

For tunnels, I have molds which cover the outside with plaster, let set and harden, and then remove the tunnels and place them where they will fit on the scenery, before I build in the mountains.

This gives me the ‘rock-cut’ interior, which most tunnels have, although for me, you can only seee into the tunnels maybe 6 to 7 inches.

For bridges, I use scaled plans and structural plastic shapes, which I heat weld when building the bridge.

A current project bridge is being built using steel, for under-framing, with the plastic parts, (beams, columns, etc), heat welded together, so the steel will be hidden.

This is because I plan a bridge which will be built in a canti-lever style, and will measure around 12′ long (real time measurements).

This bridge is needed to span a walk-under part of the layout.”

A big thanks to Alan and Richard.

That’s all for today folks.

Please do keep ’em coming.

And if you want to start your model train layout, the Beginner’s Guide is here.

Best

Al

PS Latest ebay cheat sheet is here.


How to build realistic rock formations with 2″ high density foam house insulation

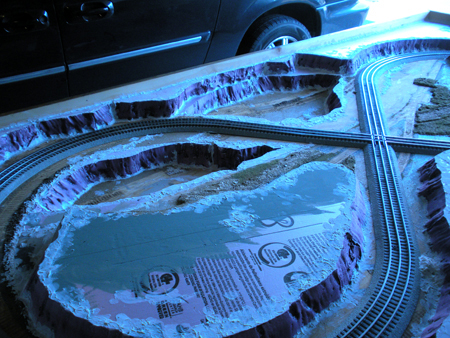
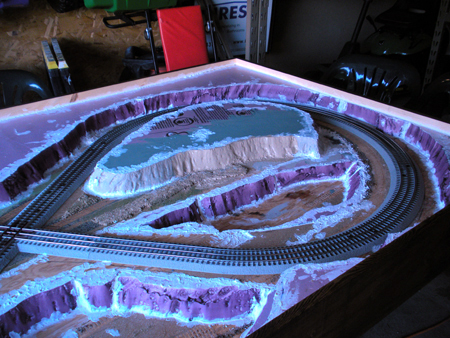
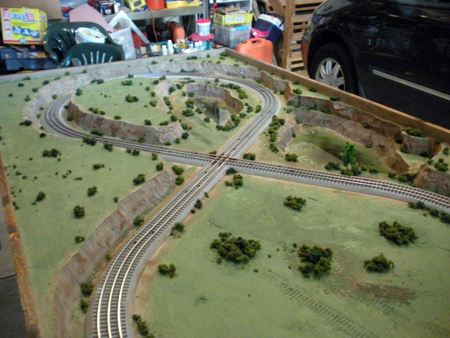
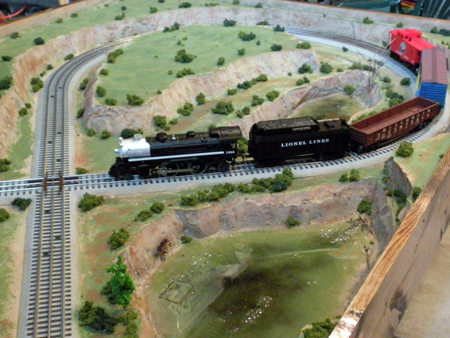
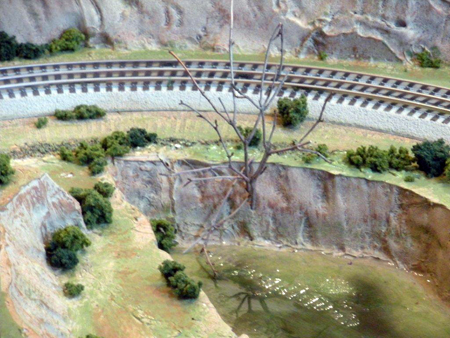
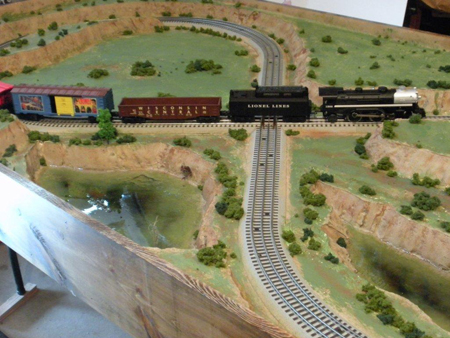
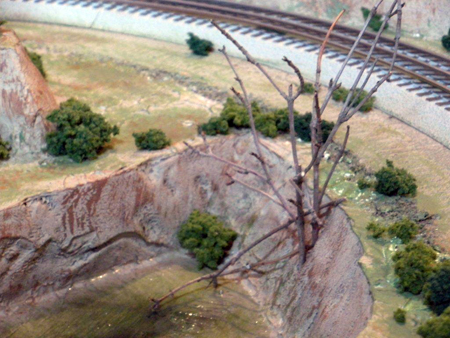
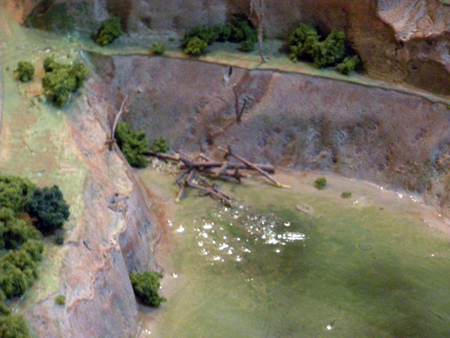
Barry’s finished his Lionel figure of 8 layout (pictures below). But not only has he sent these pictures in, he’s also kindly written this ‘how to’.

Many thanks, Barry!

Here’s what he sent in:

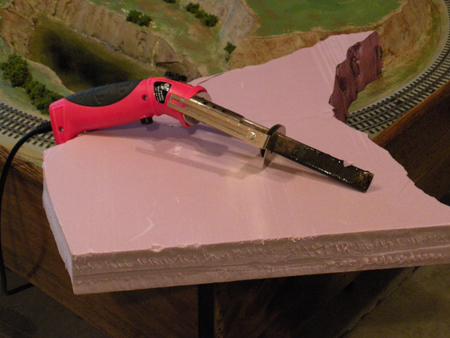
“1) Purchase a foam cutting “hot knife”. I think I bought mine from Home Depot for less than $20.00.

2) I use mine on the highest setting which is #6 on temp. dial.

3) Just let the hot blade do the cutting with twisting and reciprocating motions and occasionally changing the angle of the blade to achieve an unevenly cut edge that I think looks like real rock formations.

4) You can use 3/4, 1, 1-1/2, and 2″ foam. This shown with 2″ foam and that’s probably the thickest my knife can cut through. (enclosed is a picture of the hot knife That I use)

5) Caulk all the joints with painter’s caulk and let dry. Then paint the entire surface of the layout with a tan acrylic paint. (from Walmart or a crafts store—they are much cheaper than from a model train hobby shop)

6) Then using a darker shade of brown drybrush highlights on the rock formations to create depth and perspective.

7) Then paint the lakebed with an olive green color paint leaving some tan color around the outside edges to simulate sand in the shallow water. Then I use a flat black spray paint with just a few short bursts to give the illusion of deeper areas.

8) On this layout I only used a 2-part epoxy fake water from the crafts Walmart as I wanted the lakes/ponds to look like stagnant water instead of my normal ripples on the water created by the wind.

9) Last before the water is dry(approx. 24 hrs. add schrubs, fallen dead trees in the water and normal trees to the entire layout with white glue as desired.

I’ve enclosed (2) early stage pics showing the pink foam and the white caulk, (1) pic of the hot knife. And the rest of the pics are final results.

I also did not use foam grass on this layout to keep it more user friendly for the young operator.

Hope this help your readers to understand better and want to try it.

Regards,
Barry”

Pretty impressive isn’t it? Barry has done a superb job – again.

Have a look here if, like me, you aren’t as talented as Barry…it’s a great resource. As you know, I’m a fan of it.

Or just head off to ebay through the cheat sheet and dive in!

Best

Al