“Dear Alastair,
I have written you a few times and submitted some movies of the Leaky Creek railroad. You said that you liked the entrance of one movie where I closed up the loop and started the trains running. I was thinking you might like some photos of how the loop was built as you seem to like instructive material.
I have been in this hobby a long time. You know one way to set up trains is with blocks on DC currant. Two trains can follow each other but the block where one engine is and the block ahead is the one powered at the time. Other blocks can be off. You can set up a block signal wired with a red LED and supply one volt to light this up. When power for the trains is supplied in opposite polarity but forward for that engine, the red led will go off as polarity is reversed and a green aspect can show. Once the train passes, power is shut off the blocks and the red aspect reappears. The low voltage could be left on all the time to illuminate the layout and those nine volt plugs in for telephones and such is a good source of power for non operational layout lighting. Almost everyone has thrown away one of these old transformers at one time or another.
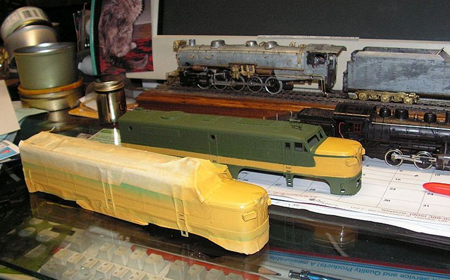
I like building models and painting them. Almost everyone models equipment near where they live and I am no exception. I love the long Alco PA diesels nut we only had two for a demonstration for a year at Montréal. Another interesting engine was a GP 7 diesel I saw one day down by the steel mills, except the end of the engine was missing. One end was like a GM GP7 but the other end had no hood The gP7’s were called geeps in slang but without the hood they were called sweeps, because they were often mated with a GM sw-7 locomotive. These were made from Athearn model kits.
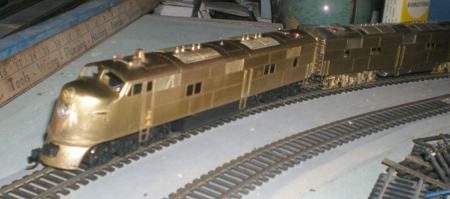
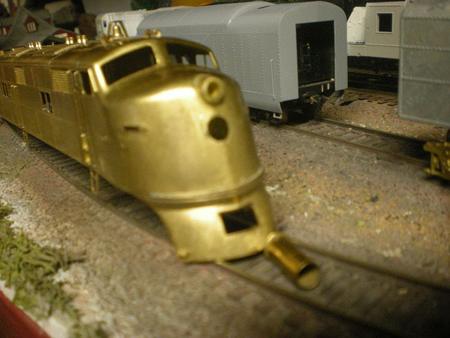
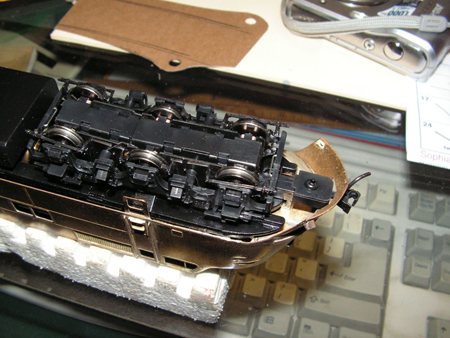
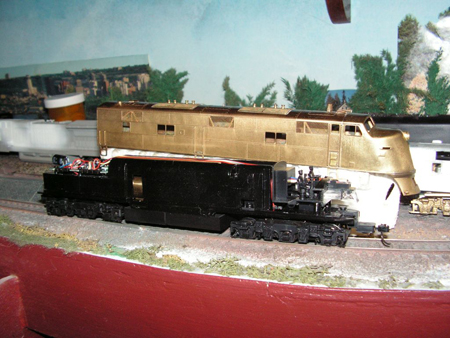
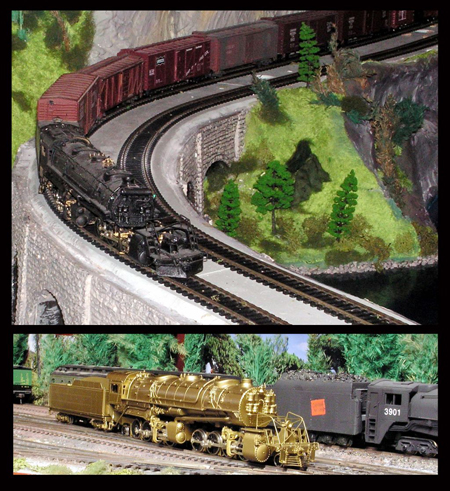
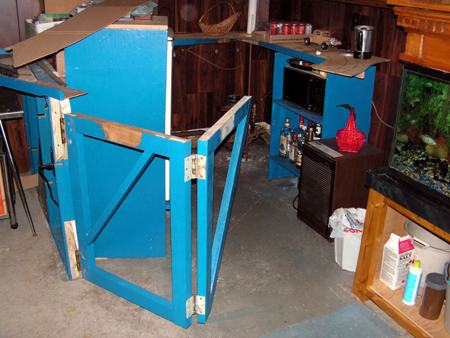
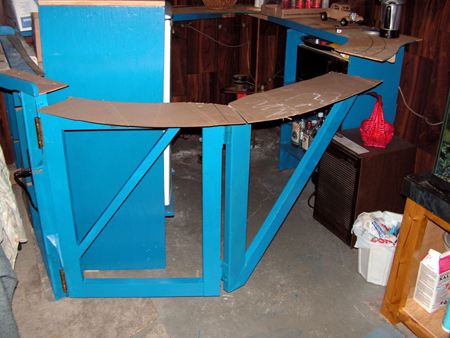
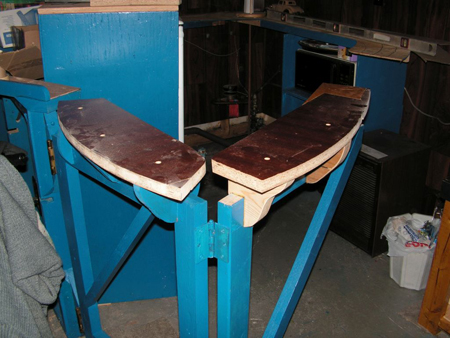
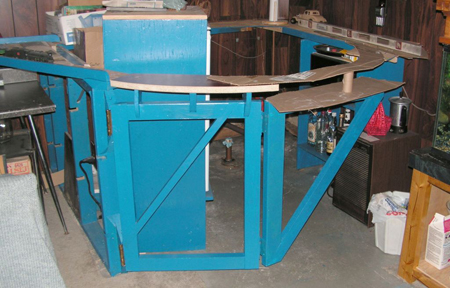
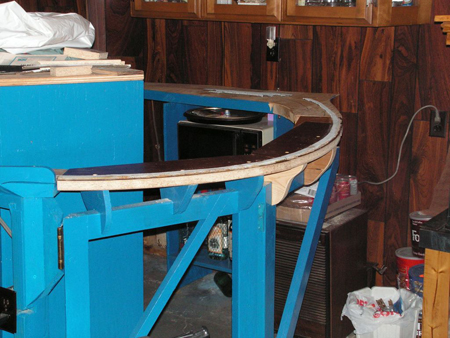
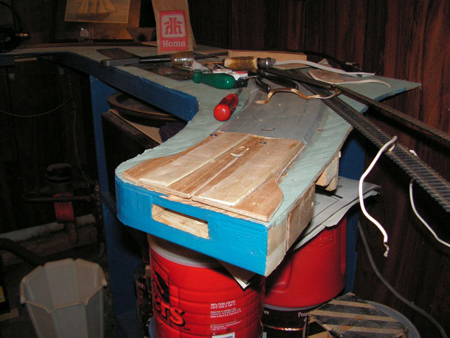
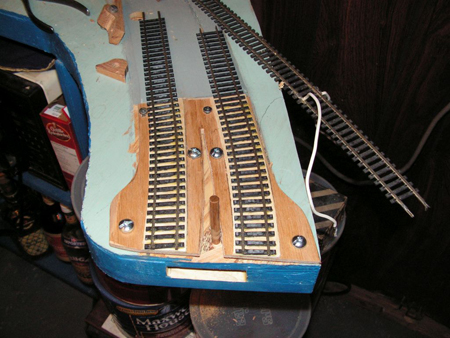
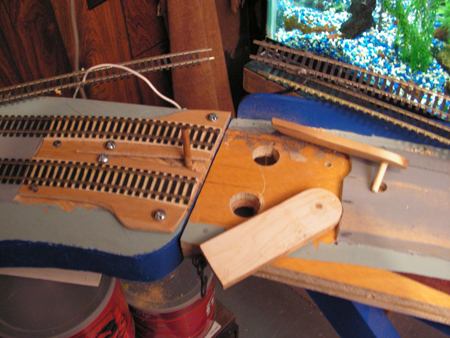
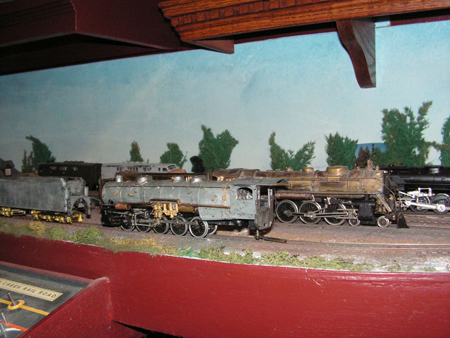
I sent you four more shots of the Hallmark e3/6 diesel I repowered with a Proto 2000 motor. Then there is a photo of a Mallet I modified before and after photo. This was a powerhouse model bought on Ebay. I lost my best friend a few years back but he used to say he would never ride on my railroad because it was all reconditioned junk! The next photos are of the way I built the moveable bridge. I saw someone else make a dutch door idea like this but his was straight and was cut on an angle where it closed where the tracks met.
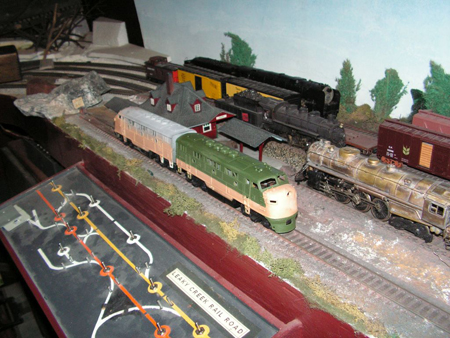
Picture 003 is of a F3 diesel that came from eBay made by Cox. I carefully cut out the plastic to open the side screens and used wedding veil for screening. I painted ot early CNR colors but the CNR soon found it more economical to use yellow paint instead of the gold leaf they started to use This color scheme did not last very long but I really liked it and so did a lot of other railroad fans. Picture 005-2009, the year was correct when I made these, is of a Bowser 2-10 4 I still nave not completed of an engine used in Toronto, CNR 4100, which was used to push trains up the hill leading north from Toronto. The other engine was my modified mallet, and the cow catcher on the 2-10 4 came from the original mallet engine.
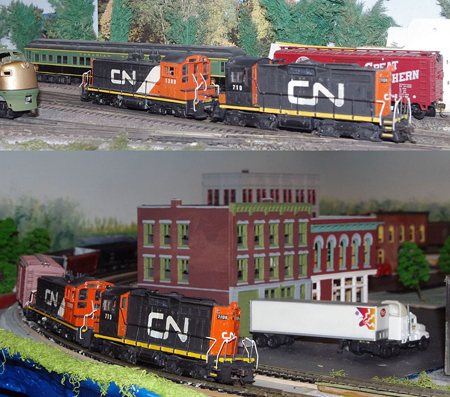
Picture 015ac is painting in progress of an Alco FA engine bought on eBay to match an older train I made of a CNR Via passenger set. The FA models were shorter than the PA models because they did not have a steam generator for passenger trains. However the CNR eventually retired the FA units to light duty passenger service as heavier diesel engines took over the freight business. The SD 30 units are an example in photo picture 20 with the new CNR colors replacing the old green black and yellow.
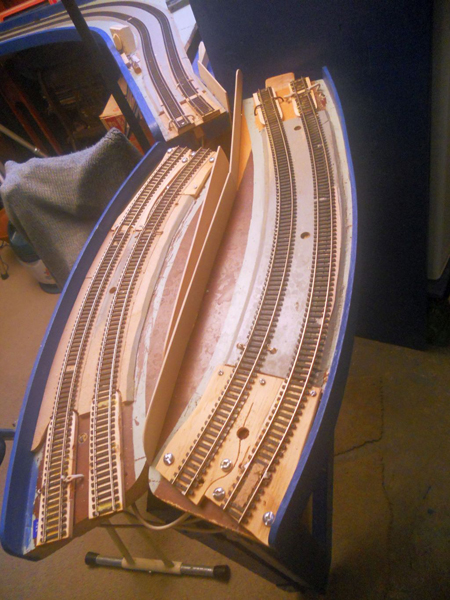
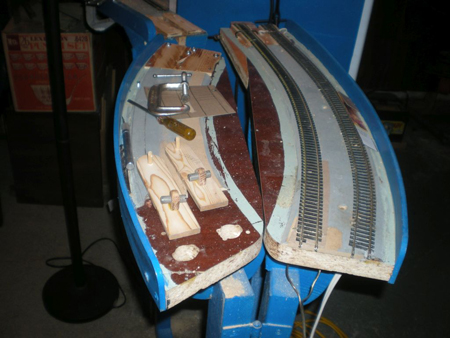
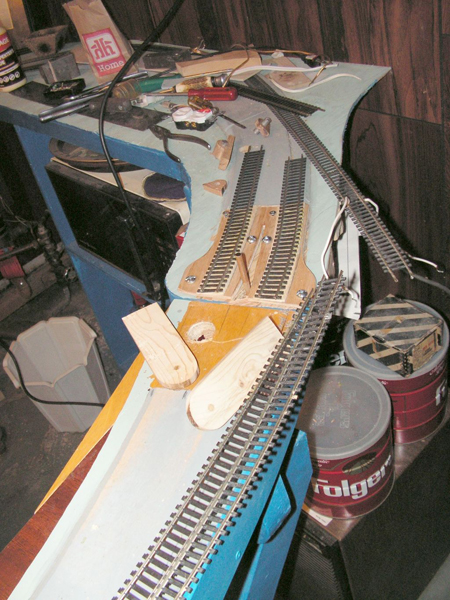
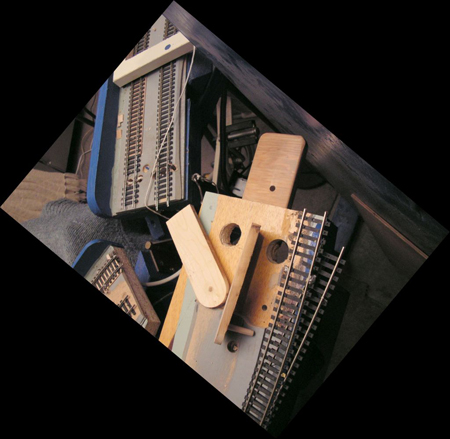
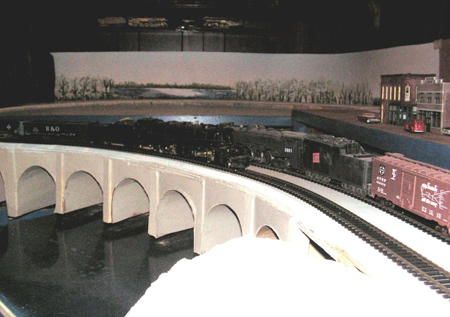
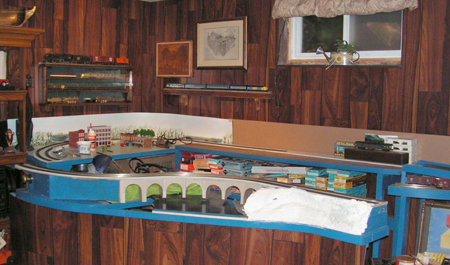
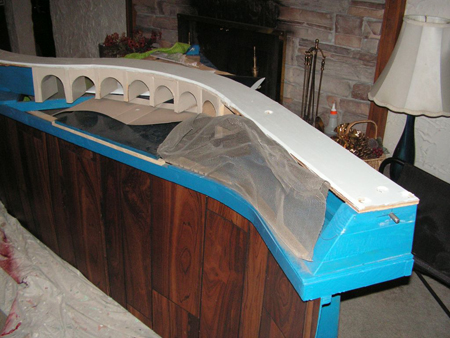
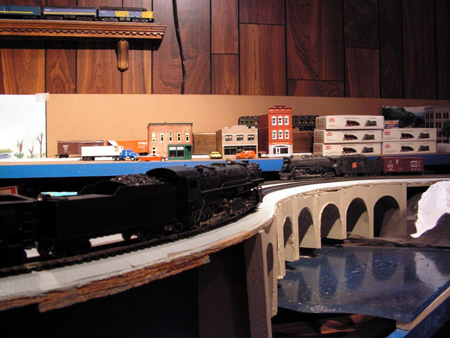
The rest of the photos I picked try to show how the table is built in sections with the section with the viaduct built on casters and car be opened by using the doorknob and pulling the table out and then pulling the table so that the locating steel rod is free at the end. The wiring for the tracks has a tether with two regular plugs and a wall socket is set up to receive these four wires near the locating pin. The plugs are color coded painted so polarity is respected as my trains only run on DC and no fancy DCC systems are in use. I do not have any models of the CNR turbo trains that ran between Montreal and Toronto but there are models of the turbo trains for sale. Speaking of turbines, about twenty years ago I tried to sell ideas to automobile companies as I always wanted to have turbines in each wheel of my car. When I was a mechanic I found hydraulic power can be used to great advantage and I believe we could use ery small engines to drive pumps and still have cars with lots of power but would be far more economical and efficient.
I hope these photos are of interest to you and you many fans.
Sincerely,
Bob”
Phew! Bob sent in a gazillion pics – I hope I picked out the right ones.
One last thing – some of you have got in touch saying the link to the silly ridiculous Big Kahuna wasn’t working.
I have fixed it, so I’ll run it for another day or two:
Big Kahuna printable buildings bundle for a silly $29.
Please do keep ’em coming.
And if today is the day you get going on your layout, the Beginner’s Guide is here.
Best
Al
PS Latest ebay cheat sheet is here.

Hi Al,
Can you tell me why some submitted pictures will enlarge if you click on them and those submitted by others won’t enlarge. The reason I ask is because I like to look at detail and my old eyes struggle on the smaller pictures.
Cheers,
Ian
Is there some very fine work here or not! I am very impressed by the paint schemes. The gateway with the track on top is very intriguing. I think I spelled that wrong, oh well. Very good work none the less.
Love the variety of methods to accomplish these layouts….
I have no idea why some photos can be enlarged and others not. I hope everyone enjoys these photos.
. . . . . Bob
Bob, that’s got to be the best-engineered fold-out section I’ve ever seen, super job. Have to duck under to get into mine and it’s not getting any easier!
Rod
Bob: Good layout great ideas….I’m an old block wiring guy myself but I’ve never been able to figure out how to get lights to work to determine block power. Your suggestions are great, but I need a little more information on how to actually wire the LED’S.. I’ve used old transformers to get 9v or more but don’t understand how you get “…with a red LED and supply one volt to light this up.”. Do you need resister to drop a 9v to 1 volt or am I just reading it wrong.
Thanks…
Terry
I am with Terry on the wiring, as I am lost. A picture of the lights and the wiring would be a big help.
NV Bob
Ian, I believe the reason why some pictures expand and some don’t is because of the size of the photo that is sent to Al. If someone sends a small picture, then it’s a small picture. If you’ve ever tried to enlarge a small picture, you’ll see it gets grainy and out of focus. If someone sends in a large picture, then when Al posts it, it can be zoomed in on. I hope this helps you. I also would like to be able to zoom in on pics, but sometimes that just isn’t possible. 🙁
TERRY, CHECK KALMBACH PUB. (MODEL RAILROAD PUBLISHER) THEY HAVE BOOKS ON WIRING YOUR MODEL RR, AND A SECTION DEVOTED TO LIGHTS.
Nice pics..……….I am glad you like Folger’s coffee…..so do we.
I totally agree with Ian Pickersgill About the photo enlargement of photos some can most can’t
Please explain AL>
Maybe Susan Cannon explained;is this true AL?
Fantastic folding access gate! That is very well thought out and built. Your layout looks great as well. Really like your curved bridge. Great job!
Fantastic stuff…
Would love to see more!
I liked the photos that can be enlarged. Other wise I don’t bother trying to read the story. I found yours description of the wiring most interesting. I have six blocks on each of two loops and would like to add the signals. Thanks for the idea. More details would be helpful.
Dave in North Carolina
Bob I really like the engines and your rolling stock!!
That’s is very impressive engineering!
Thanks for sharing!
Love the CN colors schemes, and your work is amazing, you got patients on those rebuilds and your gate way.
lots of good work. really nice.
To make pictures larger press the ctri key, and at the same time press the add
key as many times till it gets to the size you want. To reduce back to normal press the ctrl key and the the minus key till you get back to normal size. I hope this helps with the small pictures. Tom from MI.