Craig’s been in touch with his HO scale grain silos:
“Al:
Here are some pics of my silos.
Don’t know what they hold: fuel, grain, I don’t know, I just wanted to make them.
I had some bottle of large tablets called Airborne. I wanted to make several standing together, and they needed to have curved tops, not flat.
I found that my wife buys apples that come in a plastic container, curved for each apple. The curve looked about right to form the top.
Pic #1 shows how I cut out one of the curved sections, and glued it to the top of the tube.
Using a pair of scissors, I cut the apple container pretty close to the tube, as you can see from the two tubes.
Then I used a piece of sandpaper to get it down to the edge of the tube.
Pic #2 shows the curve of the apple container on the top of the tube, which looks about right for a domed top.
I painted them white then tried to weather them with rust colored paint. I let the paint dry for a few seconds then streaked it downward with a tissue, drawing the paint downward as if it ran down the side of the silo.
I don’t know where I’ll put them, but they look OK, for something. They might look good as a fuel container or grain silo in a field with some ground foam or “weeds” around the edges More later.
I look around while travelling to see what I can model and put on my layout, like everybody else does, I guess.
On a trip to Idaho recently, I noticed a workshop that was covered in corrugated sheet metal. It had a section on one side cut out and a door installed.
Then I noticed another one a few miles up the road that was slightly bigger, all covered in corrugated metal, but it had a door in one end of it. I decided to model the shop for my layout.
I needed the corrugated metal and decided that cardboard might work, but it had to be small cardboard or the curves would be huge for HO scale. An oatmeal box provided the answer.
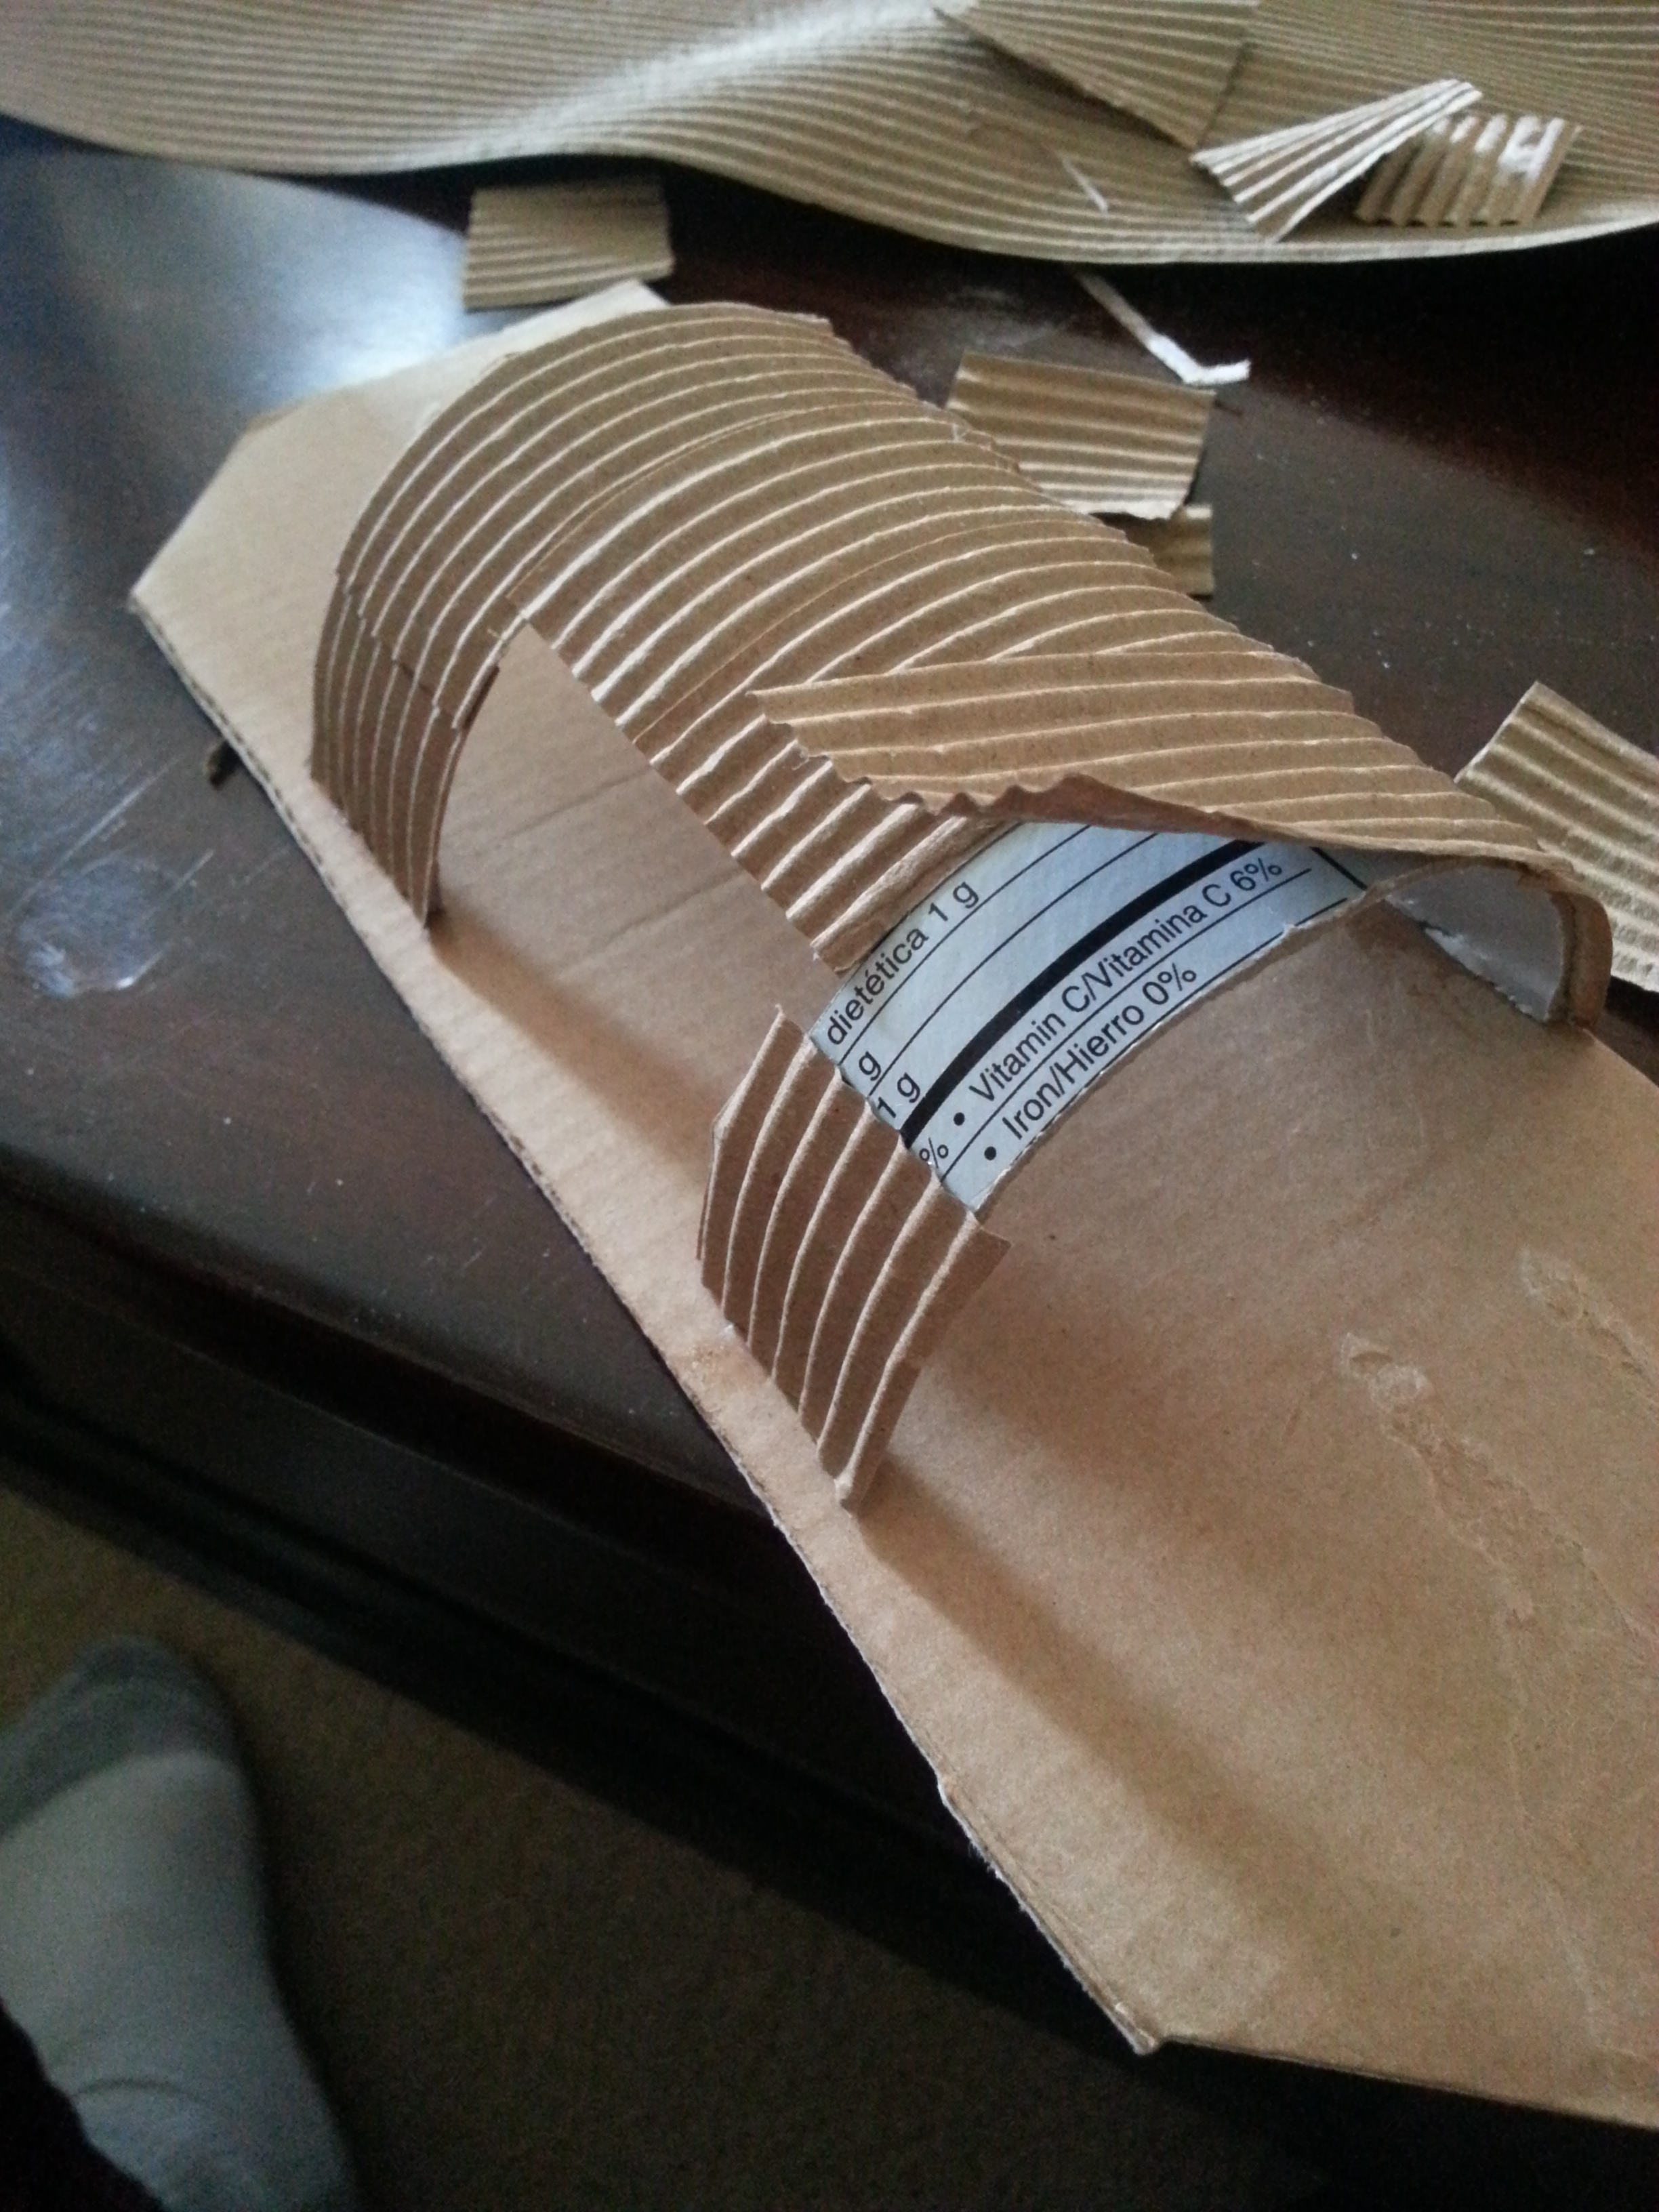
See Pic #1 I cut out one side of the box and held it under the tap in the kitchen sink and the inside layer came apart quite quickly (pics 2 and 3).
The outside with the graphics needed more persuasion, so back to the water and I soaked it. I carefully started the edges with a knife blade slid between the layers until I had about an inch free, then held it down with a wooden spoon and gently pulled back.
I had to apply water as I did this step as little pieces started tearing off the outside and adhering to the corrugations (pics 4 and 5). You end up with pic 6. Let this dry and then cut out sections of the metal sheets that will go on your structure (Pic 7).
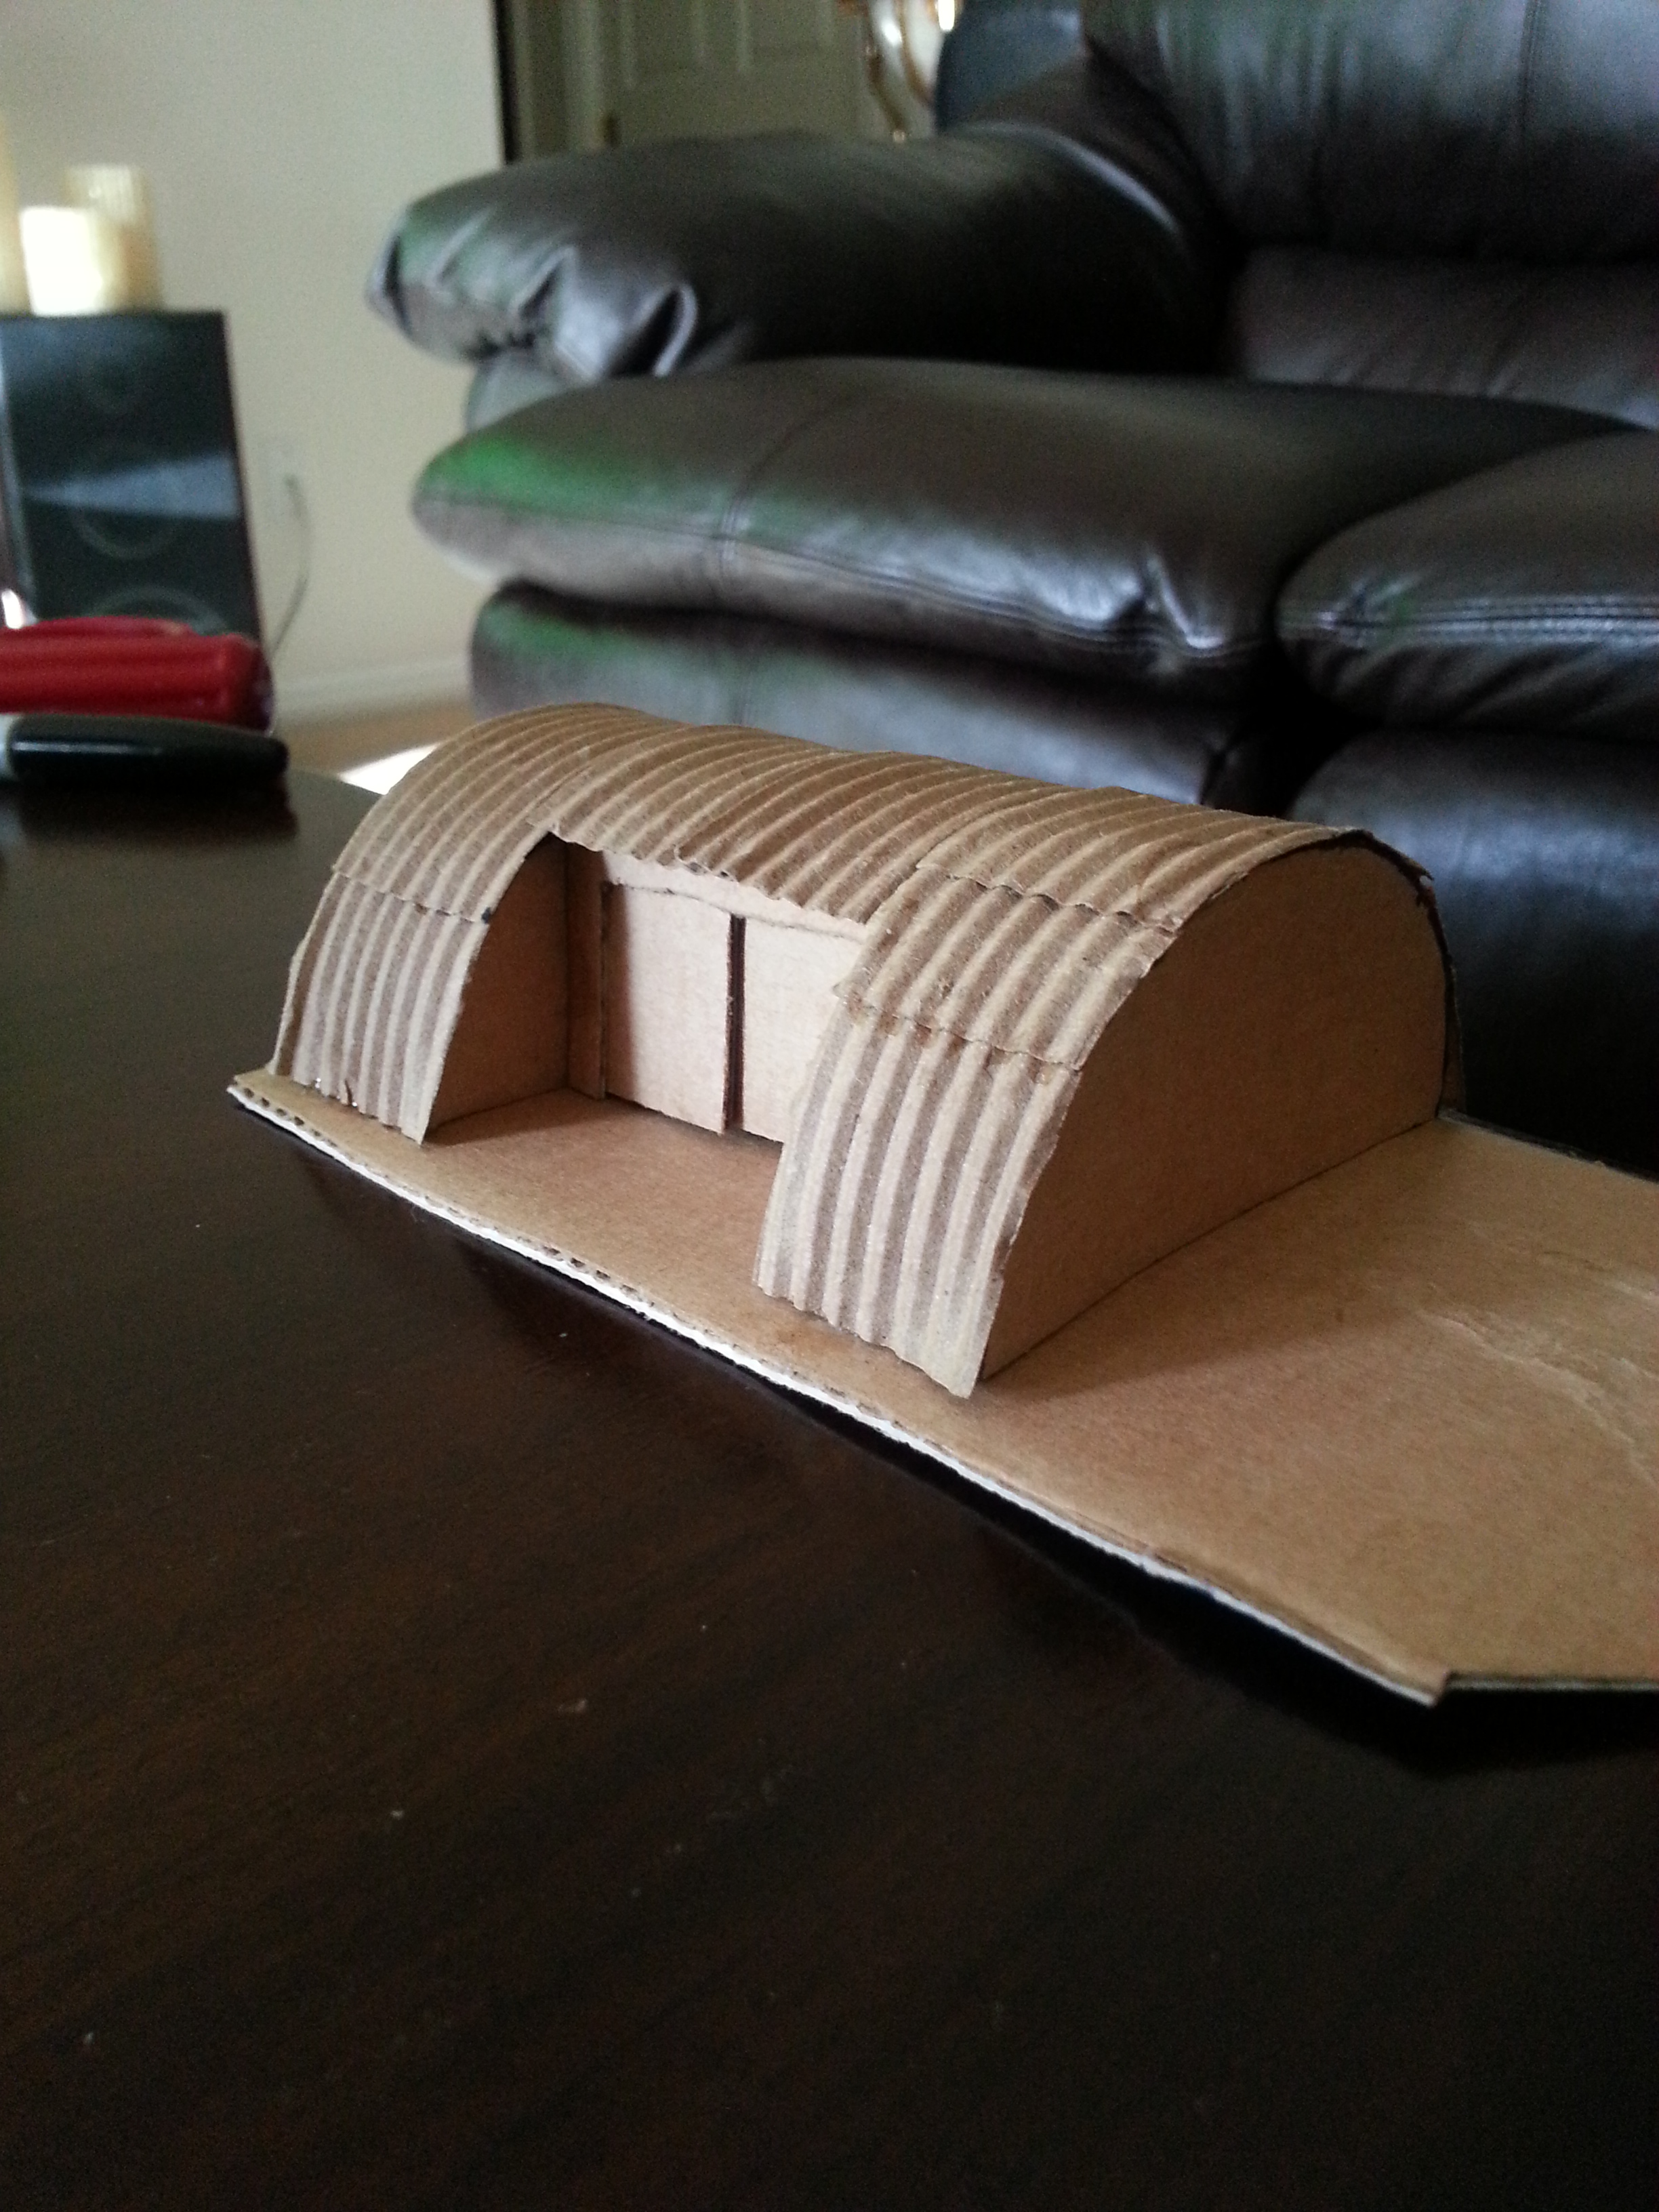
I needed the curve of the shop. A Pringles potato can provided the answer. I cut out a section of this, then cut out the doorway, then glued this to a sheet of cardboard cut from another section of the oatmeal box. I then started gluing the sections to the shed, overlapping by a row (pic 8).
I cut a doorway frame, sized to fit just inside the cut out opening, laid this flat then glued two doors to this, overlapping the doors in the middle seam area, so they would look like they slide by each other as they open (pic 9). One could be left ajar a bit so tools and equipment could be modeled on the inside of the shop. And you could easily wire it for interior lights. That would look really neat.
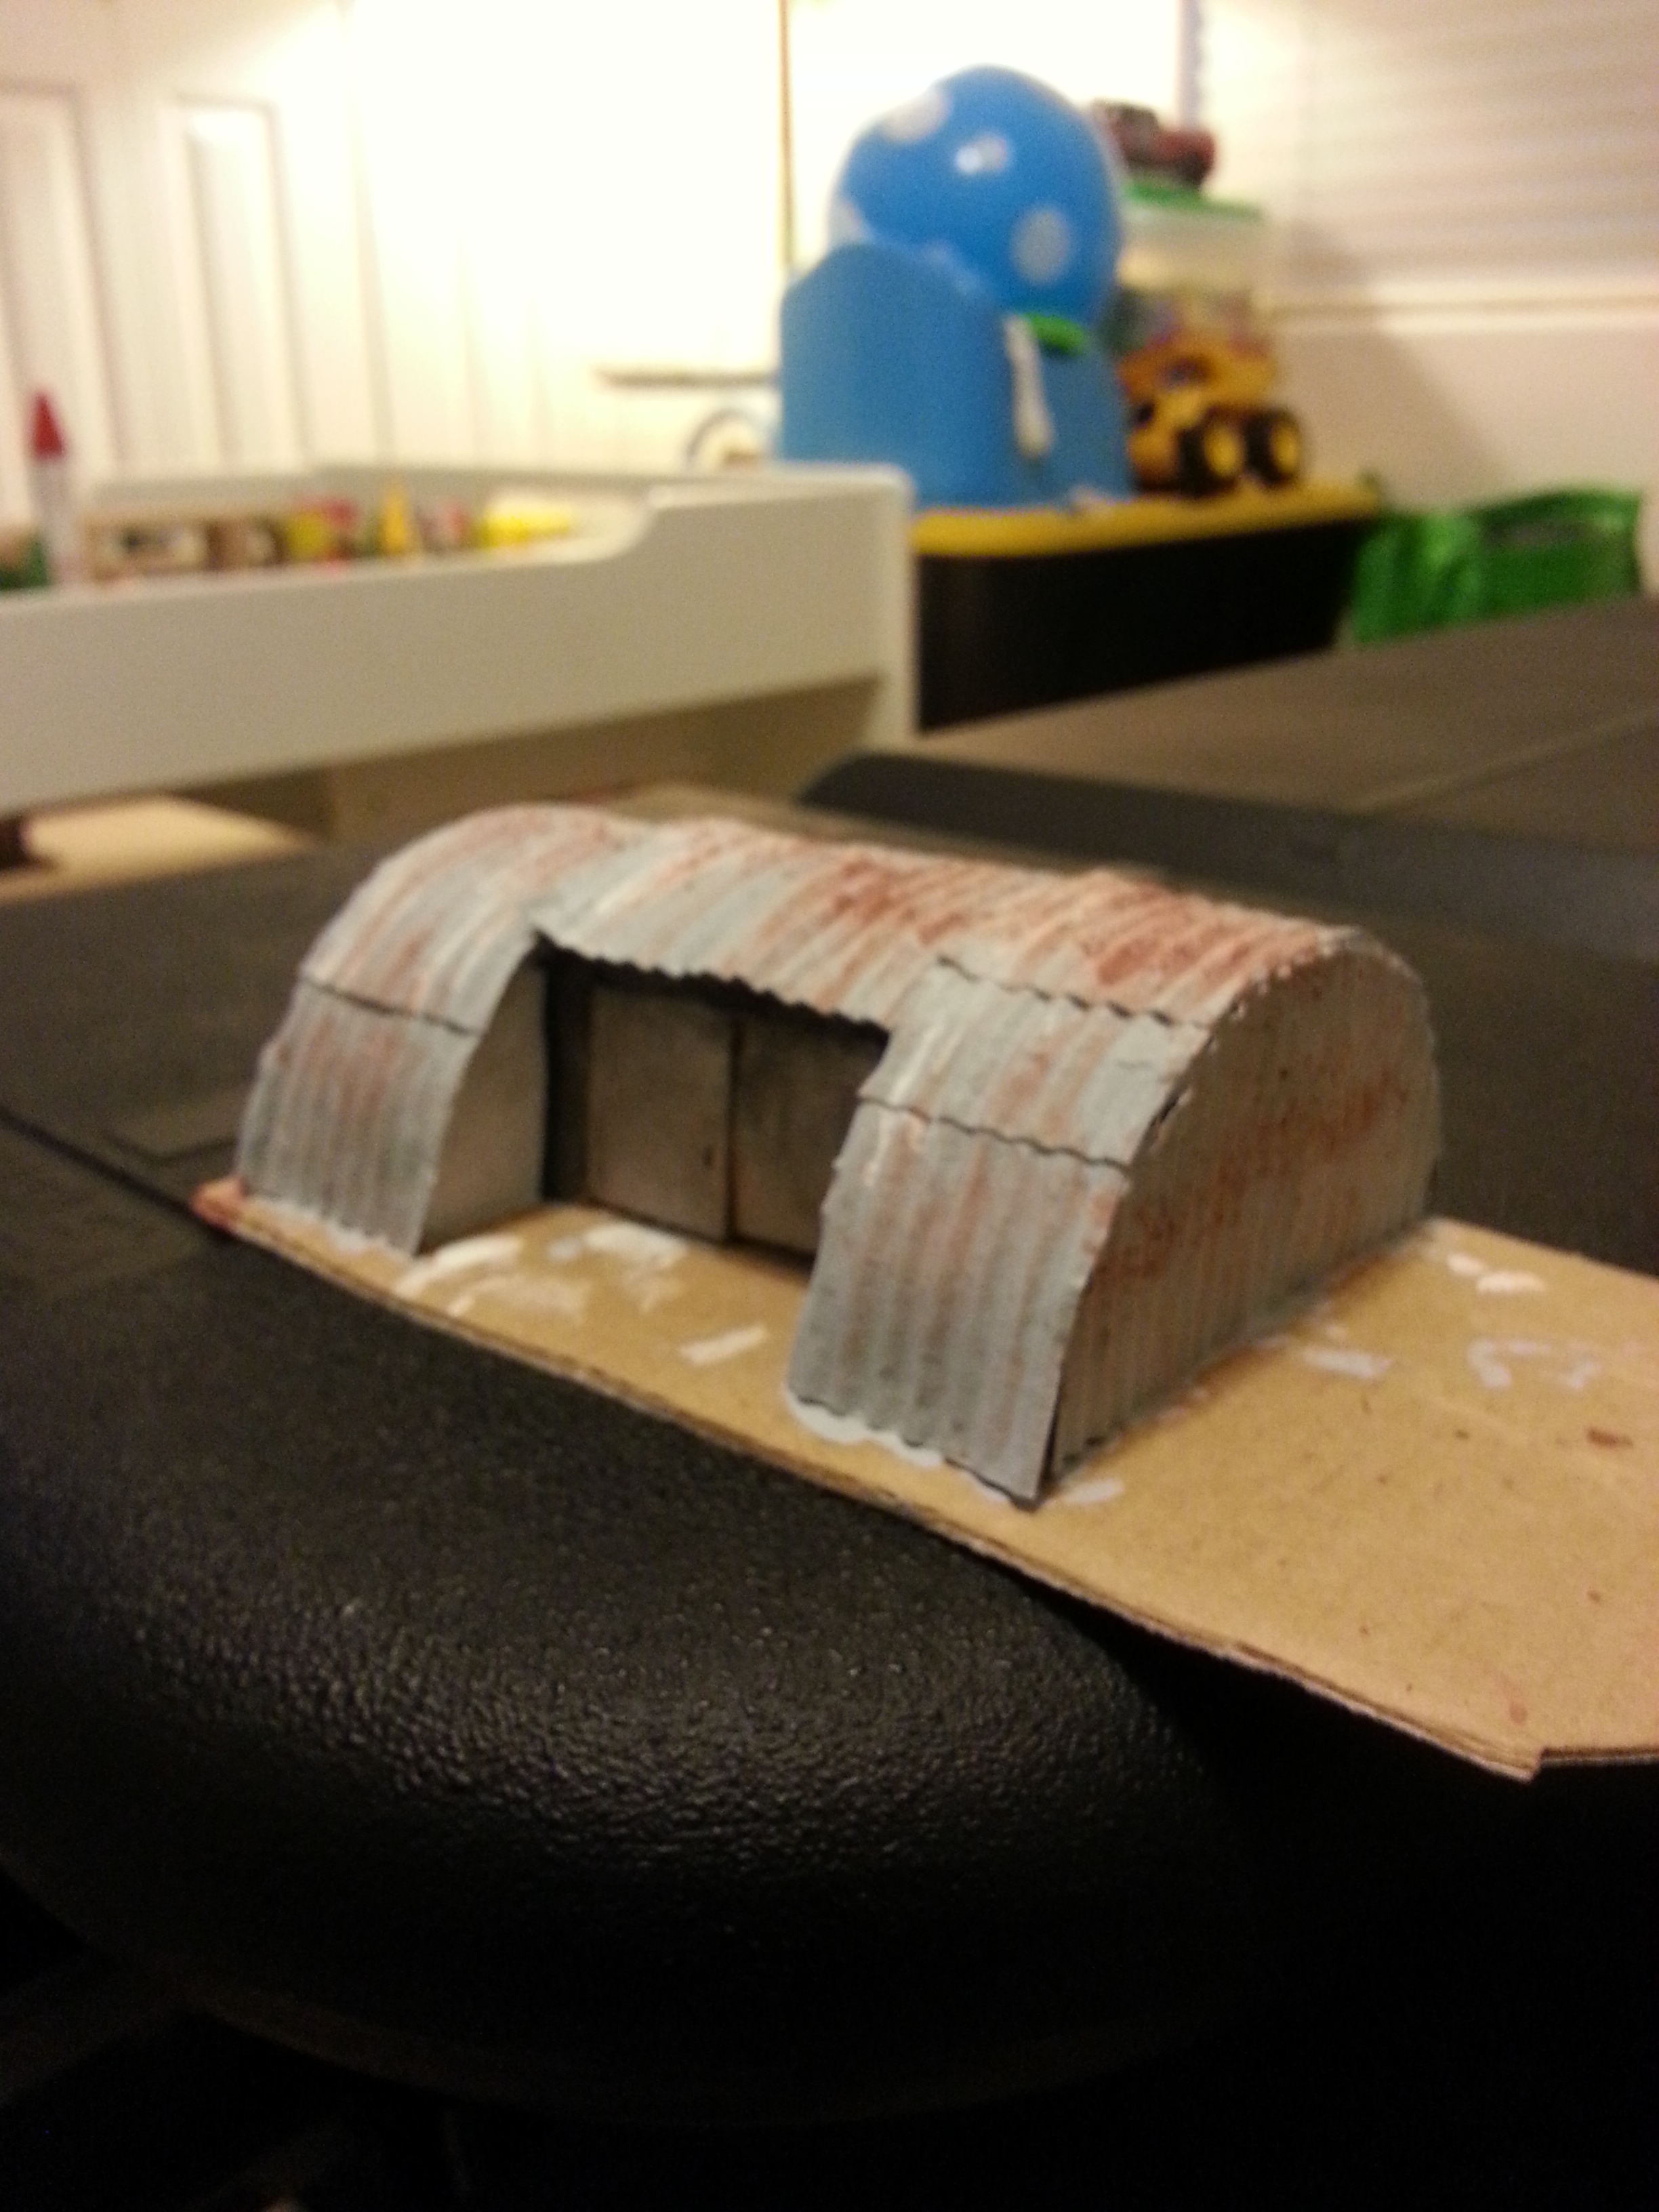
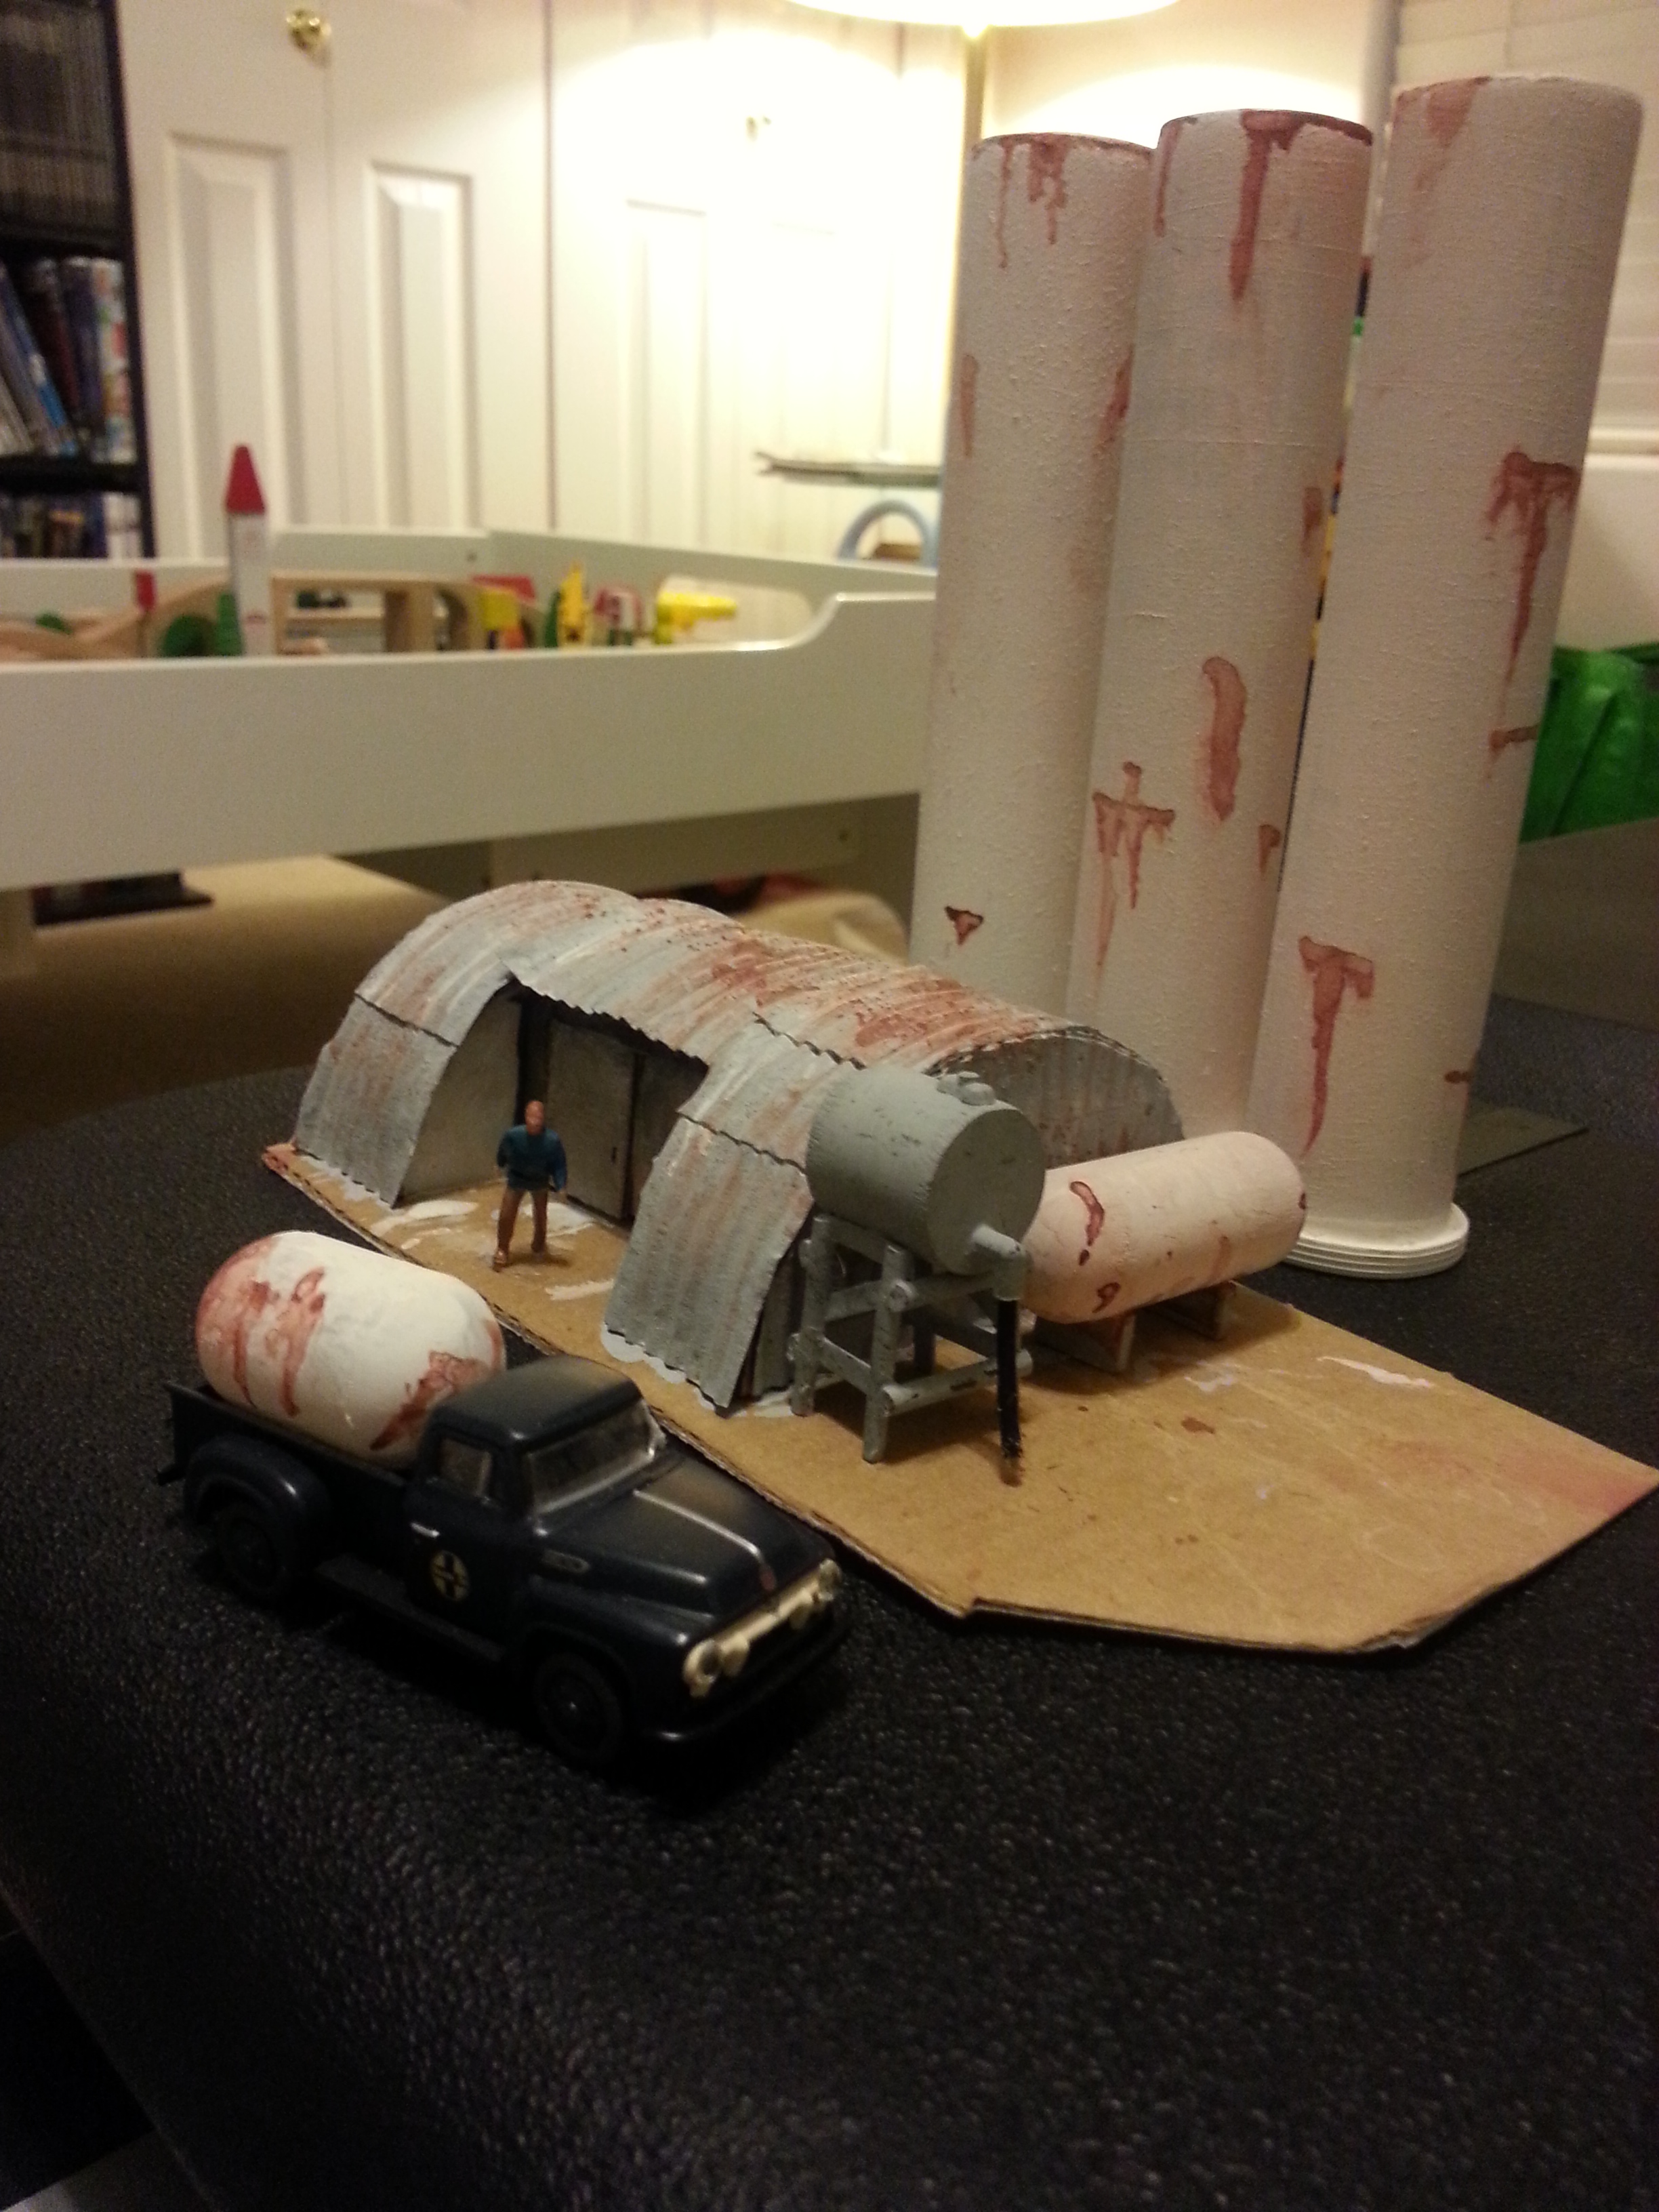
Pic 10 shows my attempt at painting and weathering the shed with gray (silver would look more like galvanized sheets, I think), then I used brown or rust to create the weathering on the top. I also weathered the doors to show the dirt and grease and grime that would eventually show up as the guys opened and closed the doors repeatedly over many years of use. Pic 11 shows how this would look with people, vehicles and other stuff around the shed.
A fuel tank holding diesel fuel is in every farmer’s and rancher’s lot somewhere. I saw this one sitting in a field all by itself, nothing else around, and wanted to model it. Another farmer had converted a propane tank to a water tank to haul water to his cows in his pickup, and I wanted to model this as well.
The roller from the inside of a roll of paper provided the right diameter for the propane tank against the shed and the tank in the pickup.
Hope this was worthwhile.
Craig”
HO scale grain silos:

A huge thank you to Craig for sharing his HO scale grain silos- some great modelling advice there. It reminded me of Brian’s post: Model grain silo kit bash.
That’s all for today folks – please do keep ’em coming.
And if today is the day you scratch that itch, the Beginner’s Guide is here.
Best
Al
PS Latest ebay cheat sheet is here.

Really fantastic ideas and techniques on farm equipment I shall have a go as they look really impressive, thanks Craig
Pretty good Craig, nice and simple, the best usually are.
Steve R UK
Fantastic, ,
Impressive, love it. Thanks so much for sharing Craig. Some fantastic ideas that I shall out. Happy Railroading.
Craig , that is an impressive bulk storage terminal that you have there. You take recycling to a new high. Fine job.
.. Fitz
Love the corrugated iron Craig. Does anybody have any ideas for doing something similar in N gauge?
Thanks…
Hi Craig. Pretty good idea’s you have there.Scratch building is more fun than buying already painted and designed plastic stuff you end up paying way to much for.I sent in a really easy how to on making tin roof’s and sideing. If you eat take out. Collect the tin container’s and use them to make corrugated tin.I sent the how too. Great job .keep sending in photo’s as you go thanks.
that’s too cool , I just took some (empty of course ) beer cans painted them silver and turned them upside down
wow craig… wotta brilliant concept for ‘scratch’ building
and you can find materials anywhere
one man’s junk is another man’s treasure!!!
yeh keep it runnin !!!
Thanks Craig – You’ve stirred me to recheck our waste bin for appropriate corrugated cardboard sourcing for a steel shed.
Dave in Ontario
Great stuff and all made from things that would otherwise be thrown away.
Such semicircular huts clad in corrugated galvanised iron sheet are known as in the UK ‘Nissan Huts’. Thousands are still in situ and many still in use for a multitude of purposes. Plymouth still has a couple that were erected as temporary shops after the city was ‘Blitz bombed’ in 1941 and a couple are still there and still used for retail too.
yep … recycling material to a model railroad … now that is a pleasant thought!!
Atta boy Craig! keep up the great work thanks for sharing.
Thanks Al
regards.
Tom
That should have read “Nissen Hut”, sorry!
Superb!!!
Great use of left over materials Craig. This is the stuff that makes this a great newsletter.
Corrugated cardboard can be used for lotos of things including fences.
Paul Otway
hello nice way to replicate corrugated iron as they used to call it the building was known as a Quonset hut used a lot by the military they used to be sold as surplus very low priced !! were easy to assemble and with stood snow loading and high winds .
Very well done congrats.
I was going to add a military camp to my layout, that corrugated cardboard sure looks like it’s perfect for making quonset huts!
Those are really clever projects! Thanks for the step-by-step instructions, too.
You have created exactly what modeling is all about, 10+
Keep the ideas coming, that corrugation also for silo’s too!
Very impressive work, makes me love oatmeal all the more.
Some sandwiches you get from fast food (especially the big M) come in boxes with very small corrugation. Good for HO and maybe some N projects. Painted dirt brown could even look as a fitted field for crops.
Y’all keep up the good work. Don
I think you could make corrugated paper by super gluing lengths of the correct diameter wire to a piece of ply making sure you had ‘end stops’ (something like similar thickness veneer) to stop the wire bursting out sideways. You’d want to do this to two sheets of ply and then crush damp (steamed?) card in between them in a vice. Or stand heavy weights on top of the former to compress the sheets in a similar manner. I think you might need to spray the corrugated card with watered down PVA glue, once formed. You can get lengths of wire from a florist shop. They are about 10″ long and vary in thickness/strengths. I guess you could form curved sheeting by winding copper wire on the correct diameter piece of wood and then wrapping the card around it and then winding copper wire around the card. NOTE – I’ve never tried this, but given a challenge I can soon come up with an idea, good or bad. 🙂 Full-size corrugated sheets are probably 6’x2′ or 6’x3′, so you just need to scale things down to suit. Regards, Dave
groovy layout.
looks great, I did mine with mimes M &M containers
Great ideas. Glad you shared them. Your work looks great/
At least you are eating the oatmeal as I get it at Costco, too, as I have for more than 40 years, and in these later years with 1% milk and nothing on it. You could put fruit on it but no sugar. You will live longer without the fried stuff. Great idea with the corrugated sheeting, but don’t they have corrugated aluminum in the train hobby stores? I do believe i have seen it there. You would have to form it over a mold, I would guess to make what I recall is called a Quonset hut, much like they have on farms or at military facilities.
WOW! Very creative.
I think you have some really good ideas/a great eye for transforming one product to a completely different one.
As an Idahoan…..those metal sheds are potato storage sheds. Usually the entrance is on the rounded end and they are buried in dirt about 1/4 the way up the building. (keeps the potatoes from freezing in the winter or ripening in the summer.
Great idea and project.
Wonderful use of leftovers . Reminds me of the barn at my father in laws place, and his fuel tank. Also like the buildings of Camp Guernsey in Wyoming. Keep them coming.
Mn Dan
Craig , you show that imagination is the main ingredient of model railroading. Great idea that can be used in other areas as well….Thanks
Nice use of trash Craig. Stuff looks great.
Great building, in Canada and U.S.(I think), it is call a BUTTLER from the name of the maker.
Léo
Québec, Ca.
Very creative Craig. It gave me several ideas which I could apply to my layout.
Neat i am going to make mine something like that.!!!!
I’m familiar with these as quanset huts. A neighbor has a large one. My uncle said he lived in one on Guam during WW2 while serving in the US Army Air Corp. They’re cheap and quick to set up when a building’s needed in a hurry, especially a temporary building. They don’t hold heat well the way a thicker walled house would require, but are especially handy for a shop.
Great idea. I’ve also used this method for plowed farm fields from light bulb boxes.
Very interesting and informative – great ideas to think about.