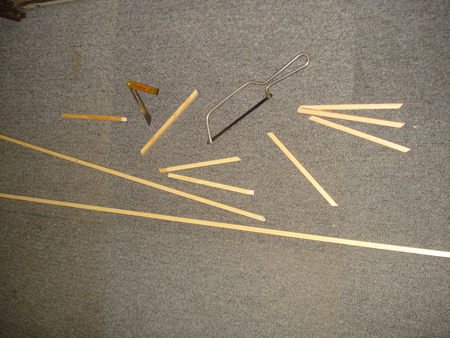
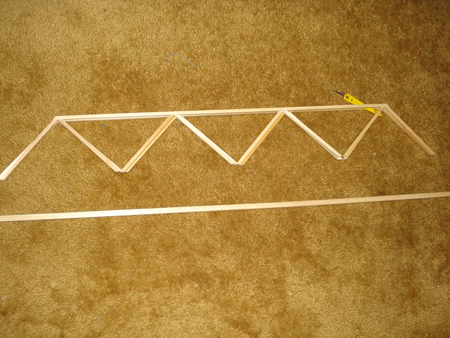
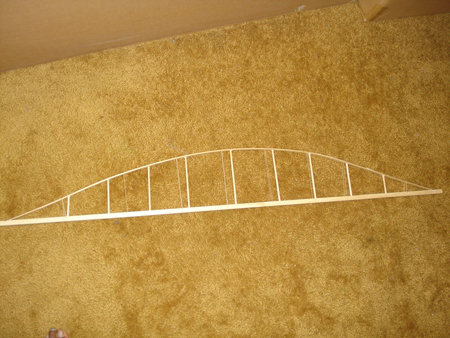
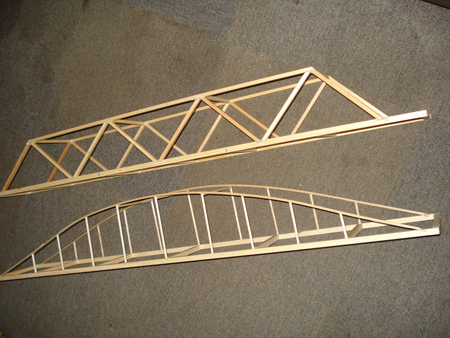
“Hey Al i`ve attatched some pics of my 00 gaugemodel railway 4 track bridges that i made from scrap.
It has worked out a lot cheaper than buying the plastic single track bridges sold in shops.
My layout is outdoor so there is good weathering on them but no signs of fading colour.
All you need is lots of time and an idea (drawing) of what you want your bridge to look like and some materials…
Hammer, small pins, wood glue, outdoor gloss paint, wood preserver, small saw and the bits of wood.
Best Regards,
Eon”
More stuff like this here.
And don’t forget the latest ebay cheat sheet (did you know it’s been running since 2010?)
Best
Al


Thank you so much! You send great pictures and information. It’s awesome, I look forward to opening your emails! I am fascinated by model railroading. I live in a small apartment and don’t have the room for setup as much as I wish I could. Have thought of taking out the dining room table? Bed? You name it, small sacrafices to have a nice layout!
Thank you again!
Ernie
Hello Alistiar
Thanks for you railway tips, I do find them interesting.
However I have had to get rid of my layout and I do miss it. So I do look
forward to seeing your tips even though I cannot use them. Do keep up
the good work, it is much appreciated.
Cheers
Jim
Wow! What a great tip! You make it look so simple and easy, no muss, no fuss.
I will file this tip away for the near future.
Thank you
Great How-To Al! Don’t know how you keep up. It must be nearly full time.
We’ve moved from Maryland where I had an outdoor railroad set up. That’s all gone now, but I’m working on a corner of the basement of our new home where I hope to build a self layout for shunting games. The layout will be base on John Allen’s “timesaver” with some added features.
Thanks for all you do to support the hobby.
Warmest regards.
done
Look forward to trying out the idea(s). Thank you.
Regards,
brian Selby.
I have just started to receive your e mails. I find as a novice your tips and advice are first class.
The picture guides, like the latest on building bridges and other extras for a model railway instead of going out to buy them I feel is again first class.
Because of what I said above, I have not started my model railway as yet so in one folder I have a good collection of your e mails.
Keep up the good work.
With regards
Mark
Many thanks to both Eon and Alistair for passing this on. I’m printing everything you send out Al, so keep em’ coming. I haven’t decided on adding a bridge to my layout yet, but this piece has me thinking. I only have a small temporary layout at present, but I’m clearing space in the basement for at least a 4′ X 8′ spot. Slowly sorting through all the junk, and actually making some progress. We are providing storage space for the kids too, so this will take time. 🙂
Thank you -one can never have enough building information. I keep all your emails as a reference guide. I am not sure what you want me to write in the “website” space.
Thank you for all your comments and tips. I wish I could mail you more.
pretty awesoem.
i havent had a medel railway since i was 7 but i might start again
very great help for some like me new to modleing cant wait for more thanks again kenny
Great info. and timely too as I am about to build a girder bridge and this is what I had in mind. Coincidentally, I am also building in ‘OO’ gauge but could not find what I wanted at ehattons.com – must be the Brit still left in me after 43 years in the States.
Very impressive. Looks great. Does that design hold up to the weight of properly weighted locomotives and cars?
Eric
Sometimes its the simple things in life that make the most sense. Thanks for this. I live in Cape Town, South Africa, and enjoy reading your emails. There is not much activity in this hobby here, as you can imagine with all the lions, elephants trampling all over the track and the dust and heat! But seriously, there is not much interest in the hobby here at all, so the internet is where I get my inspiration. On this note, some of you guys out there in the first world have outdoor HO/OO gauge layouts. So, how do you keep the track clean? What about rain? What about the odd bit of sunshine and heat you may get? (mmm?). We get up to 38-40 degrees Celsius when its mid summer. I think my plastic sleepers would melt? You see, we have lots of space here outside. Its a shame to waste it. Might get the odd snake in the tunnel though. Any advice is welcome and thanks for the tips and tricks!! Garth
Thanks for this. I will give it a try.
You are the best, thanks for your tips. Enjoy all these how to do’s.
Thanks Al,
As usual, you’ve presented great pictures and advice. All your work is highly appreciated.
Nice work and attractive on any layout. I suspect you are an ex aircraft balsa wood modeller in the past.
I like the bottom one in last photo but the top red one does not look very prototypical to me and engineering wise looks very weak. Still in real life there has been few bridges fall down over the years. I suspect that would be one of them. LOL The bottom one seems to follow good engineering practice. I like the bottom one. looks like it is made for the job and could carry heavy loads.Nice work and if they stand up to the weather outside in the garden a very good idea and cheap. I made very similar bridges myself years ago for a friend who’s railway was outside but I used to use Brass sections or black mild steel bought at scrap yards. Brass is easy stuff to solder but better braised . But I was a black smith and plumber and used to working with metal. My carpentry skills would leave a lot to be desired. LOL…………John
Al,
Excellent, once again.
I am getting rid of my RTR buildings and greatly appreciate this sort of post as I begin my complete redesign of my layout. Individual design and ingenuity appeal enormously. My old layout was built for my children, but now I have retired and they have flown the nest I have a more serious and compact agenda. Previous dabbling with Linka – plaster casting of building sections has proved interesting as I try to produce something like the buildings in my chosen location. And for those who may ask – I have no commercial interest in Linka.
The community which contributes to these postings is also appreciated.
Andrew. Norfolk UK.
Great workmanship. A little light in spec for 100 T K-forces required for USRA specs.
Well done great construction job with the Bridge …Dave
Nice work! Thank you for all these great tips.
Seeing this reminded me of a project I did at school in Technology. Build a bridge out of drinking straws and card. The straws were the wider thick paper type. So I built a two track 00 gauge girder one and put it on my railway after presenting it for assessment..
Great ideas and photos
I purchased a trestle making jig from blackbearcc.com several years ago and wow was it a time saver. give it a look.
Garth in South Africa, dunno if it’s still there but there used to be a thriving OO/HO section with indoor layouts at the Cape Society of Model & Experimental Engineers near the croquet lawns at Rondebosch.
If building a large flat assembly like a bridge side, you might like to draw it out first, tape the drawing down top and bottom on a piece of leftover melamine or similar, lay a strip or two of double-sided sticky tape across the drawing, and make up your assembly straight onto the drawing – very easy to get everything at the right angles, holds it all firm while glue dries in the joints, and when you’re finished, just knife the tape holding the drawing down to the board. You should now be able to peel the drawing back gently off the rear of the completed framework. Did this with my old avalanche shelter side.
Rod
It was good to see this again.
Paul Otway
Love the idea of how to to do the bridges, that is awesome. That’s for sharing this Al.