The Rev John has been in touch with some help when it comes to a HO train curve radius.
(Thank you all so much for your kind mails after the last post. I really do appreciate them.)
There were more comments about Stephen than Todd’s question, so I thought I’d lead with this today:
“Hi Al,
I endorse the multitude of comments that were posted in support of your emails. However in looking through them I did not see a complete answer to Todd’s questions.
Q1 How do I know if a curve is too tight?
A. Experience of rolling stock de-railing.
Manufacturer’s recommendations.
Tips form others who model in your scale.
Q2 What’s too tight?
See answer to Q1. The consensus of results from the emails on Al’s site would suggest a minimum radius of 27 -30 inches or 70 – 75 cm for the metric minded.
Q3 How do I measure the radius of a curved section of track?
Regards Rev John.”
Hi Al.
I’ve attached a photo of a simple conversion to turn an ordinary wooden clothes peg into a really useful clamp.
I know this has been around for a while but there’s always new people coming in to the hobby and also those who’ve forgotten this simple tip. The main problem people have when the try is that they change the position of the two peg halves. If you look at the photo you can see that the peg itself hasn’t changed, but the spring has been reversed and moved to the middle notch. Although its not necessary you can make two little grooves for the repositioned spring and enlarge the middle notch. Even without this the clamps are very effective and useful model building tools.
Ken”
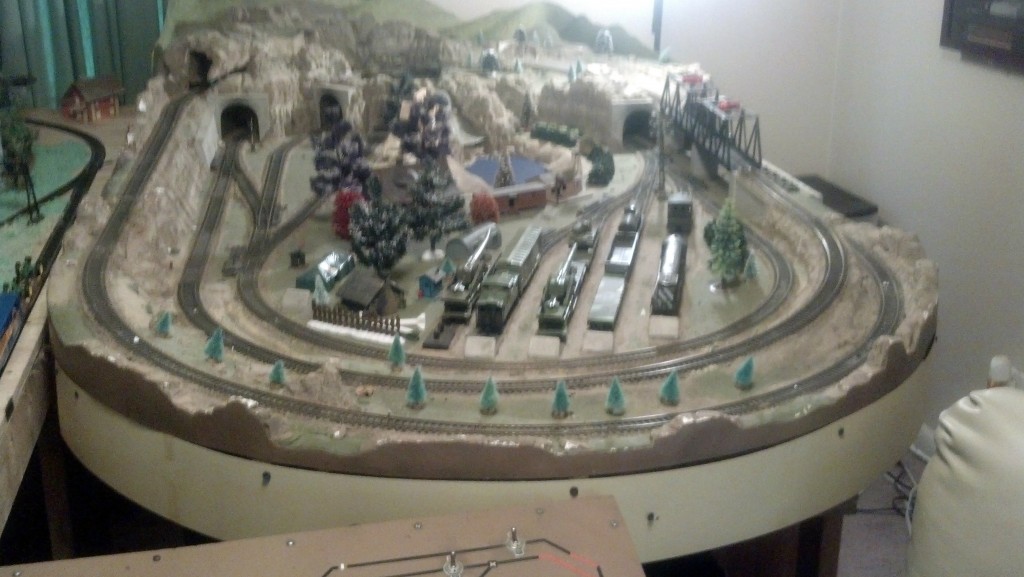
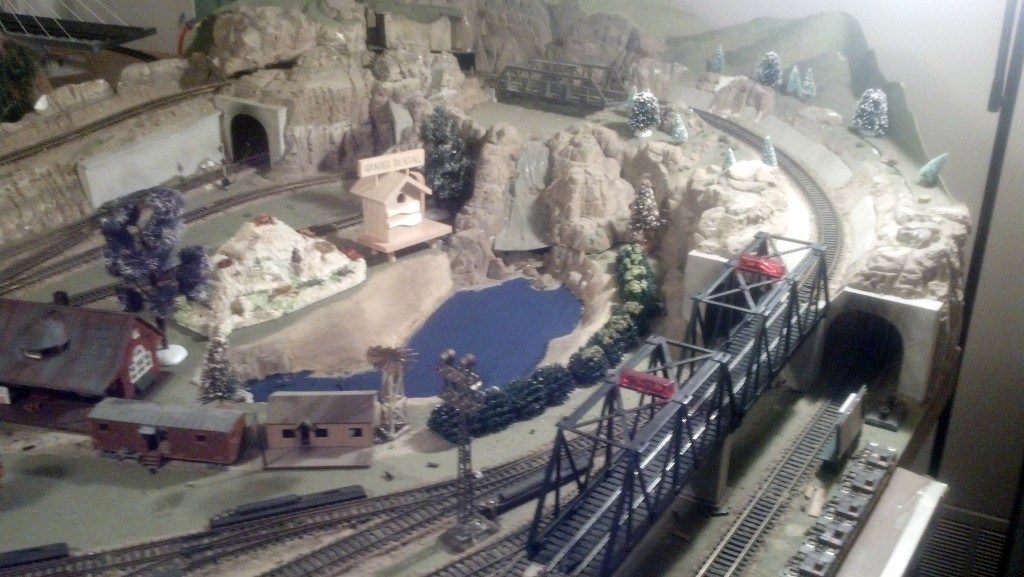
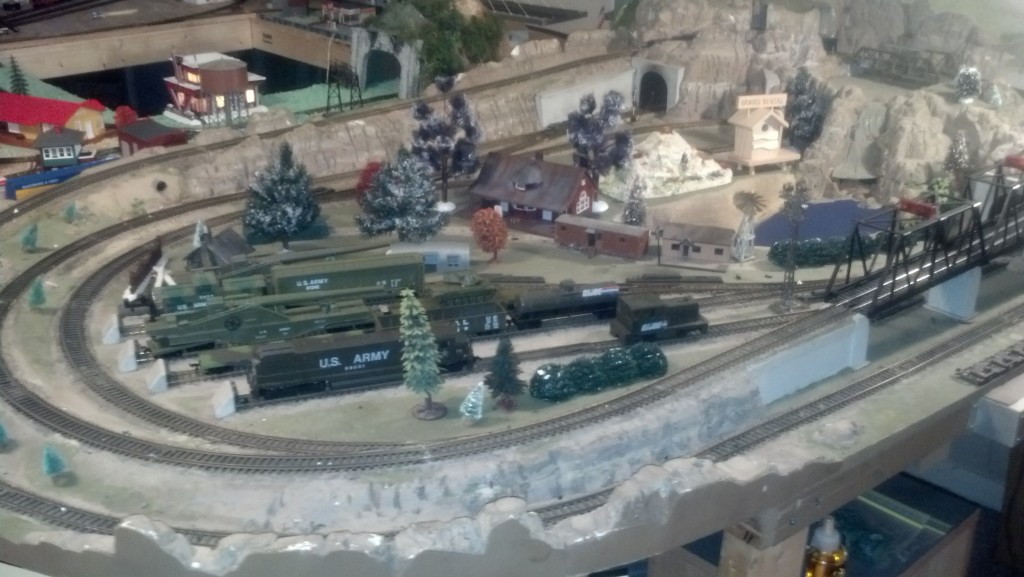
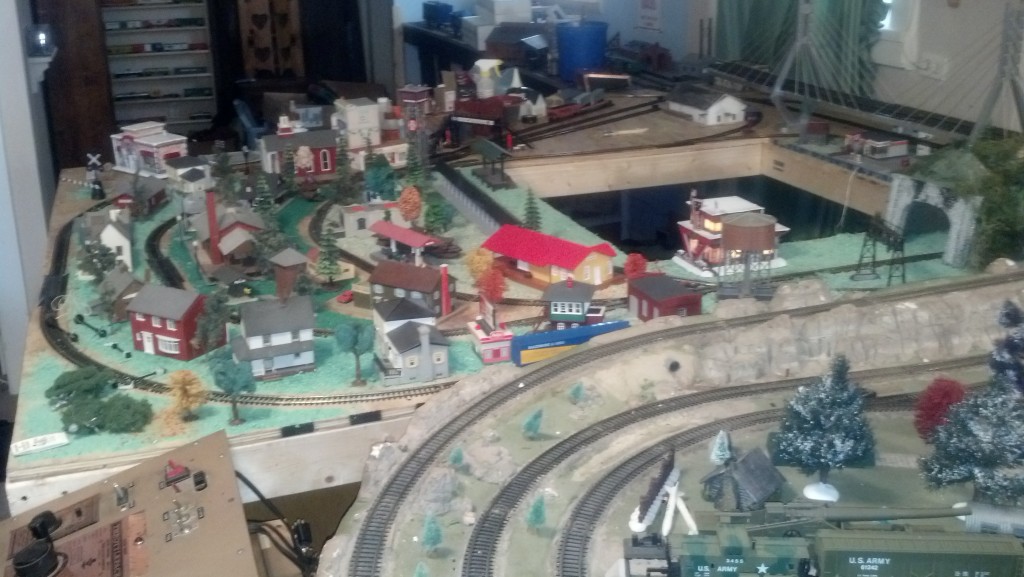
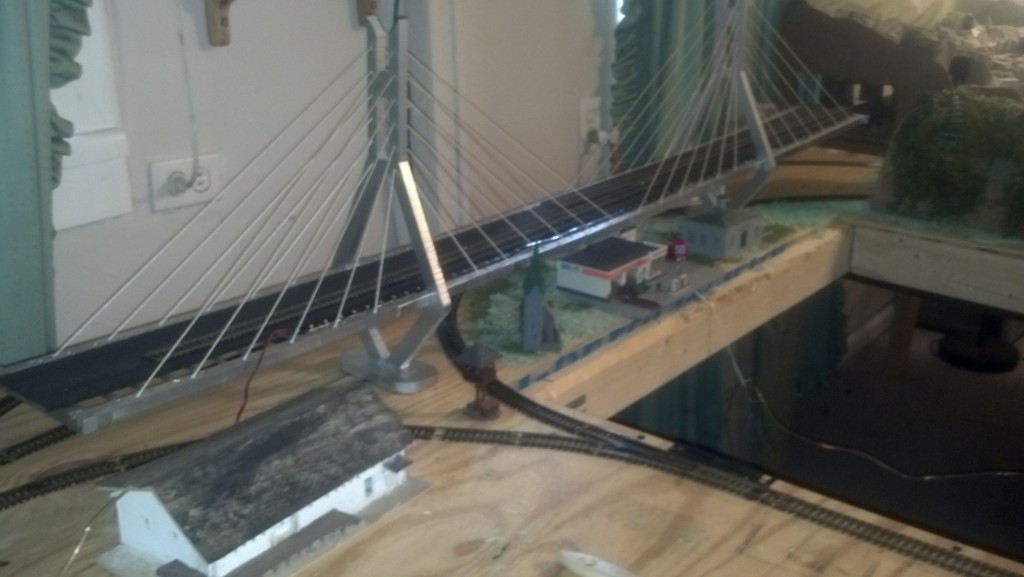
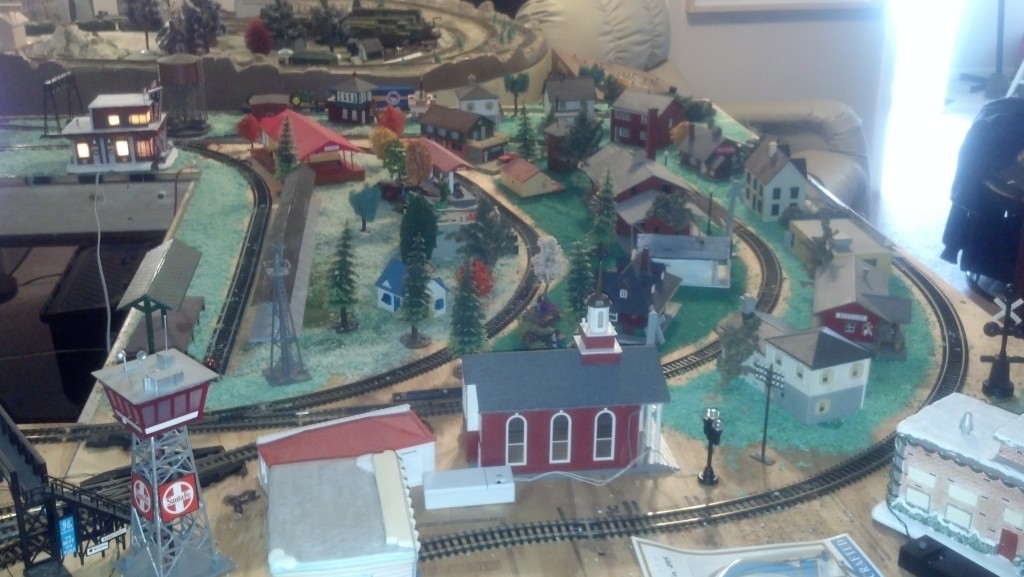
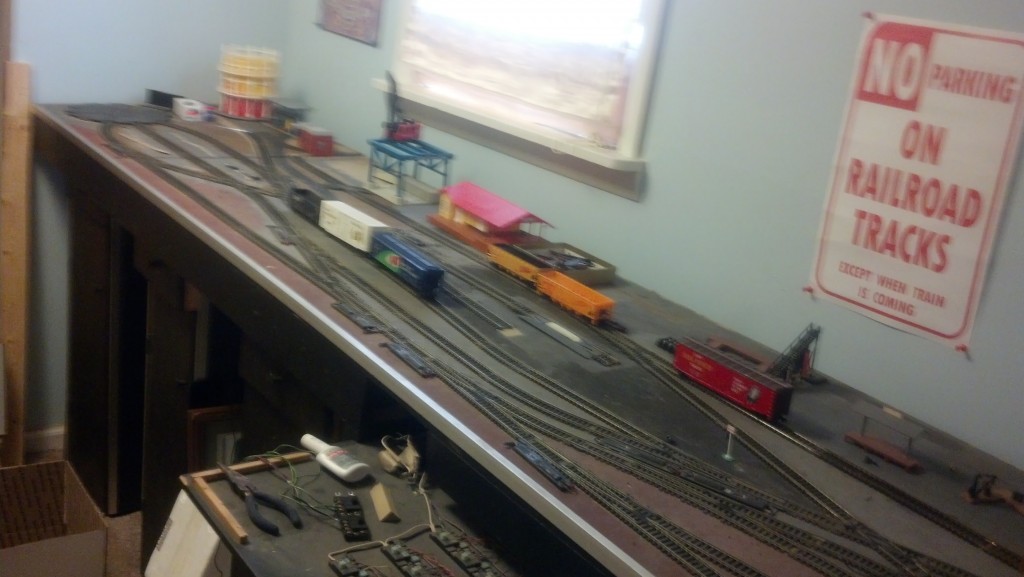
“hello – here is some pics of my layout im working on i have actually 3 tables linked altogether the first one is a mountain table i converted to a army base theme then the second table was created for passenger trains and residential theme basiclly i have some big boy trains and needed to create a layour they would run on the radious of first table was too tight so then i started the second table.
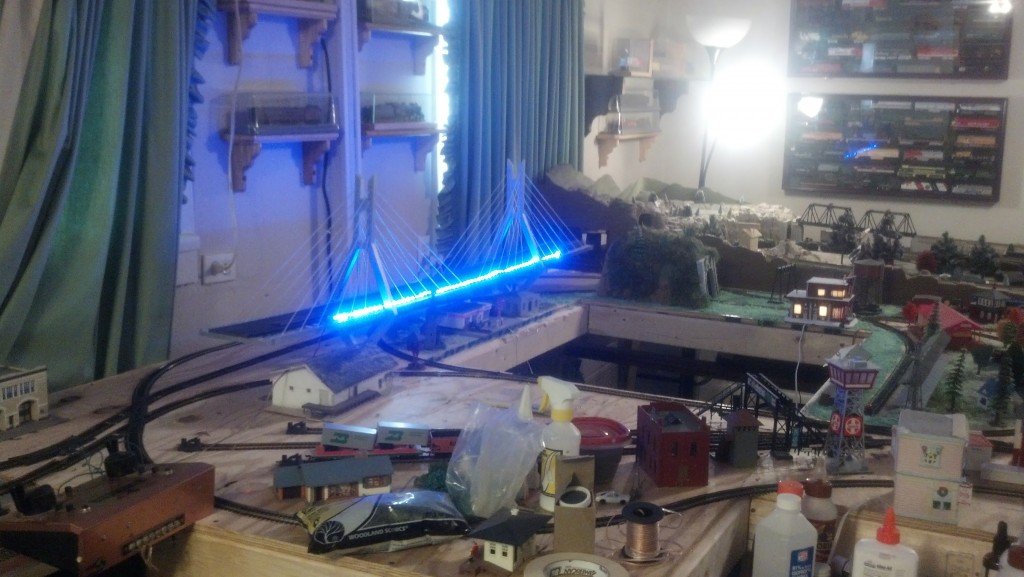
i have built a suspension bridge to link the mountain table to the yard table (almost completed)
then i will finish up with ballast and street lamps with telephone poles on middle table
i get great ideas from other peoples pics and layouts so i hope everyone can give me some feedback or any helpful hints my project has been on the works now for about 8 months and work on it in my spare time
thanks again for looking
Thomas
That’s your lot for today peeps.
A big thanks to Rev John on his HO train curve radius help, and to Thomas and Ken.
Please do keep ’em coming.
And if today is the big day when you make a start on your layout, the Beginner’s Guide is here.
Best
Al
PS Latest ebay cheat sheet is here.



Lovely layout – it would be nice to see the track plan.
Al.
have you obtained any video`s of loft layouts with tunnels using woodland scenics,and if so could you put them on your web site.
I`ve with help relayed my layout 11 foot x 8 foot x11 x8, with 4 lineson flat boards,but it looks bare.
I want something to make it look better,if it can be done.
Thanks. Mike M
Al, there appears to be a bit missing from this explanation of calculating curve radii by Rev John. Could you possibly make the explanation a bit clearer? Thanks and keep up the hints and tips as I find them very useful and informative.
Hi Al,
I was out of internet reach for the last week and saw this post first before your last marathon commentary filled one! All I can say is that you have received a near 100 percent vote of confidence, so just keep this email blog as it is – very user-friendly for all your friendly users! You’re on the right track!
Hi Doug:
If you happen to have a piece of curve track handy, perhaps a section of Atlas snap track for example that has a fixed radius, you can test this formula.
Notice that measurements are taken from the centerline of the track piece.
An example would be a 12″ long curve piece measured from it’s centerline from end to end with a ruler. This is W(the tangent). With the ruler still in place, now measure up from the 6″ mark on the ruler straight up to the middle(centerline) of the curve, that is “H” in the formula.. For simple numbers just say that that measurement is 1″. Now put the 1″ in place of the H’s and the 12″ in place of the W’s and finish the math.
R=1/2 + 12×12/8×1. R= 1/2 + 144/9. R=1/2 + 16. Radius = 16.5″
Hope this helps.
This is very handy in Garden scale as the track is so large.
Dick
My thanks to Ken for a new way to use clothes pins. I am one of the new (to modeling) guys, Thomas your cable stayed bridge is great. Cable Stayed bridges are my favorite bridges to model. I have 9 completed & 2 more in progress. Al keep them coming.
I have used the peg clamps for many years but it is not untill someone puts them in a book and everyone reads that the idea is spread. Plus cant they get into such a tight space.
Dont forget that you can thin them down to almost a point for very difficult places or soldering something in place!!!
Ok it had to be done…My daughter 6 1/2 talked about a model so out came 3 metres of lining paper and several hours later a Southern Railway line emerged just ready for the mass of RTR models in 00 gauge to run on?
And here am I building a Pannier, Prairie and a Bulldog when I get the time!
David in Reading.
Thanks Ken (and Al); for sharing the tip for converting clothes-pegs into useful modelling clamps. At 75 yrs, I’ve been into modelling, airplanes and RR layouts for many years, and had never previously seen this handy suggestion. I only hope that Ken and other RR modellers, will continue to share even the simplest of tips. Most of us are like damp sponges, ready and willing to soak up all the available help from anyone who cares to share. I’ve always considered every day that I learn something new is a great day; so, I’ve just now raided the laundry basket, and built myself a few clamps.
Regarding the radius of curved track I think the easiest way to determine the radius is to use a drafting compass and draw segments of circles with different radius. The most common radius sections I am familiar with for HO are: 15 inch, 18 inch, 22 inch and 24 inch. Draw 1/4 circle for each radius and lay the track section on each curve. Note the radius of a track section is measured at the center of the track.
I am unaware of any rule regarding derailing based on car length and track radius, but as many have said the smaller the radius the smaller the car that can traverse a curve. Someone else also advised to look at the box the Engine or car came in for guidance regarding minimum radius. Train speed also affect derailing on a curve. If curves are in a yard tighter radius may be used than on an open section of track. 15 inch radius will only allow cars with short lengths. 22 and 24 inch track will handle nearly all cars. I haven’t found a car that derails if I use 22 inch radius.
Hi Ken, Thanks for the peg tip, never knew that. I tried it and it works very well. Did you know you can use a peg as a return spring if you have manual wire operated points? I saw that tip on you tube, and I never knew that either.
Barry, 66 and 3/4’s
Replying to Barry Read, glad you liked my peg clamp tip, but can you direct me to the You Tube video on using a peg as a return spring for wire operated points? I couldn’t find it.
Just wondering do peole draw there layout on paper first before you start to build it. I have got the base board made so i know the size
All this work to get your radius correct, I’ve been in construction work over 50 yrs and I believe in kiss construction (keep it simple stupid) I took three pieces of per made track that had the curve already and I solder them together, I laid out my whole layout with this. No figuring and no math, works perfect
Alistair,
Just a quick point about railway turns. On the full sized rail lines turns start out gently, and within 10° of radius or so, the full radius of the rest of the turn is accomplished. This is called the “spiral” of the turn, and allows the locomotive and car trucks to adjust to the transition from tangent track to the turn. If we look closely we see model train cars wobble as they start into a turn laid out with no spiral. Using model railroad sectional track a spiral is not possible, however it may be desirable when designing layouts using flex track.
John
Love the glowing bridge… How did you do it?
John
In answer to the determination of radius of track here is an answer from a math degreed person.
The perpendicular bisector of the cord of the arc of the circle will run thru the diameter. So, having said that here is how to apply that. Draw two different lines across the curve. Get a vertical bisector of both lines that you drew and (bisector means center) those lines will meet at the center of the circle.
As for drawing out a layout ahead of time, I did that recently. I have a nice piece of building insulation board (2″ thick). I bought the pieces I needed from Bachmann (HO EZ track) and put together something I thought would be interesting. I then decided I wanted to try layout software, and so purchased AnyRail software (you can download it for free to try it out) The price for a licensed copy is £35 GBP or $59 USD. This works quite well, and has libraries of track from different manufacturers in many different scales. I was able to blow up just the part I wanted to turn into a diorama and print it out, and then the section next to it. That made transferring details to the layout very easy.
Problem with using HO track for On30 is the rail is a nice size, but the ties (aka sleepers) are not the right scale (the difference between 1:87 and 1:48) PECO makes a On30 track that is much nicer and even colours the ties brown (a good start).
Ken (in the States)
Real nice layout Thomas. Looks like you know what you are doing ! Bill
Hi Alistair
I just read Bob’s letter about his depression and how your articles has helped him.
I am a teacher and find myself in the same boat as Bob. I ended up in a psychiatric hospital in September 2014 due to stress and severe depression here at school caused by learners and management. I am 59 years of age and found it more and more difficult to cope with this problem.
The good news is that during the workshops we had at the psychiatric hospital we were told to seriously get into a hobby that would stimulate our senses and that we would enjoy. Well as it was my life dream as a youngster to one day build a model train diorama I thought that it is time to get started and try my hand at it.
My grandfather planted that dream into my mind. As a child from the age of four years old he would always buy me a train set or rolling stock to add. On the other hand my own father was very negative towards me ever since those years whenever I tried to start a layout. He was against the fact that it would cost a lot of money, money that might be needed for more important things in life. This caused me to be very afraid of even trying to do a complete layout.
I mentioned that that the good news was to start a hobby. I must give praise when praise is due. Your emails and the positive way in which people reply have inspired me tremendously. I am much more relaxed and have found something that adds to make it worthwhile getting up in the morning.
I began my layout in N-scale soon after I got back from the psychiatric hospital and all I can say is “WOW” what an experience it has been so far. I never knew that I could be so fulfilled with joy as with this hobby. I spend each and every moment I can, to work on the scenery. I cant wait to get to the next free moment just work on the layout again.
So I want to thank you over and over again for the the great grand difference you and your email readers has made in my life.
I do not think that people really know how much it means to people like me when they share their videos and pictures. So to all you guys and galls out there, thank you and please keep it up because I thrive in watching and reading your videos and articles.
Yours faithfully
Deon Joubert.
With smaller layouts 22” plus curves won’t fit. So you do what you can with 18” curves: run shorter engines and rolling stock. But sometimes changing to a longer coupler can help avoid derailments on smaller radius curves. The wheels may bind a little and cause some drag with longer rolling stock but with slower speeds, they get through the curve.
Jim AZ
R=1/2 + 12×12/8×1. R= 1/2 + 144/9. R=1/2 + 16. Radius = 16.5″
Hope this helps.
In reference to this formula, isn’t 8×1=8 and not 9?
David
I like seeing the track plans too. I would especially like to see the one at the header of this email.
Deon, best of luck in your endeavours. There is great comfort in working on layouts and rolling stock. Warren, AL, USA
Thomas , track layout plan please , got ideas
Where did You get the bridge?
It seems that tight curves get you in the end.real o life they can not get it right.in Denver Colorado just yesterday a lady lost her leg because the turn was to tight and the train de railed. This is light rail by the way. Also years ago the we’re putting a big boy on display in down town den museum. The did not widen the rail width between rails enough and when it was pushed in place it laid the out side rail over on its side. Just some food for thought.
The NMRA has the following guideline:
Take the ratio of the rolling stock length to the radius of the curve.
Ratio of 2.0 – Generally considered pushing the limit.
Ratio of 2.5 – Most equipment will track reliably if everything is of similar length.
Ratio of 3.0 – All equipment should track reliably; coupler performance adequate if altered to allow 50% car width swing.
Ratio of 3.5 – Equipment will look less toy-like when viewed from inside the curve.
Ratio of 4.0 – Equipment will look less toy-like when viewed from outside the curve.
Ratio of 5.0 – Most reliable coupling on curves with body-mounted couplers and near-scale draft gear boxes.
Great feedback guys, Rev John on math that makes q great circle, I was not that good on math “but” I will be looking at that. Ken on the clothes pen, thanksmfor that because I never seen that for clamps, purity cool. And last but not the lease Stephen, cool lay out, how long have you been working on this, from the get go? I see that you have laid grass on some and I see you still have to lay some more unless you plain to do something else. Keep us posted. Keep on railing and keep it on the rails.
SDG SSt.Petersburg Fl USA
I agree with Davie Wright. Some of us have to go back to grade school.
it is any chance to know what is H and W ,where this come from? how to measure this two incognitos?
Hi Al,
Greetings from Long Island, NY. Thank you and your readers for all the help you have given many of us. I enjoy your articles and always look forward to the next one.
I am building a 4×10 HO layout, ( my wife let me have half of our washroom).
I am using Atlas turnouts for my switching. The problem is when the locomotive goes over the turnouts it stops in the middle of it. Is there anyone who has experienced the same problem and how did they solve it. Thank you for your help. Looking forward to your answer.
Frank
Rev. John, Thanks for that radius formula. I should have remembered something like that from Trigonometry class. Good thing we have some smart guys around to remember those formulas. 🙂
Ken, i’m 72 and have never seen the clothes pin trick before either. Maybe it’s not as widely known as you thought. I do appreciate it (and all the other tips and tricks that Al so generously send our way.)
Finally, Thomas, your layout looks great and you don’t need a lot of help from the folks here, but they will help wherever possible. I’m not sure what kind of camera you’re using for your photos, but they’re a bit blurry when blown up to see the details. You might try adding some better lighting while taking them or using a tripod.
Frank : A couple of possible causes for your locomotives stalling – 1) If the turnout has a plastic frog and the turnout is not perfectly level (the frog is higher or lower than the points) the weight of the locomotive as it crosses the heal, pivot point, causes the points to move up and away from the stock rail. This breaks the power connection to the rail that’s connected to the frog and can also cause the following truck to split the switch and derail. I had this problem back in the ’60’s with some of my Atlas turnouts and had to tighten the swivel rivet at the heal of the points to keep them from jumping around. 2) If the frog is insulated from the rest of the switch and your loco has a single wheel pickup connection to its motor then the frog needs to be powered for the direction of movement by a frog juicer or power switch connected to the turnout motor.
Great post as always! Nice job Ken!
I got two great tips today- here’s a tip for tips. I have a sheet saved (I use Word) and I simply copy and paste any good tip I see. Then I can go back and look at them all in one place. I try to keep the ones I copy to a minimum- just the best tips. Also- I purchased the search function for Alastair’s blog- that is really helpful.
Thanks Ken for the peg tip- and John for pointing out that prototype trains ‘ease’ into their radius turns.
With regards to derailments due to small radius curves. I am new to modeling and bought some used UP carriages at a swap meet. My grandsons were given an old layout with 18” curves. Many derailments later I changed the couplers using Kadel 451 extended swing couples, problem went away.
Hope this helps.
Replying to Ken G, I found this on YouTube around the 5 minute mark, he shows the clothespin mounted and how he did it.
https://www.youtube.com/watch?v=4EoPhNLs-t0
Hope this helps.
For Thomas, once you get the suspension bridge finished, pls post how you built it…wood, aluminum? Also, how you built and installef the lighting. I’ve been working with metal and I think I could make my bridge from aluminum (TIG welded). Thanks and great work
Bill