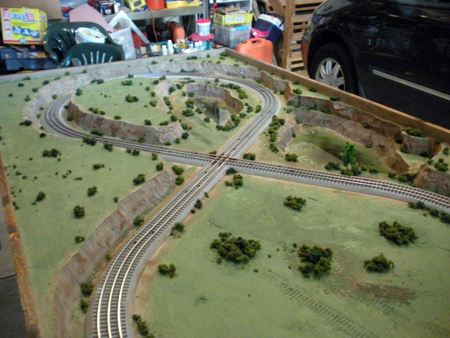
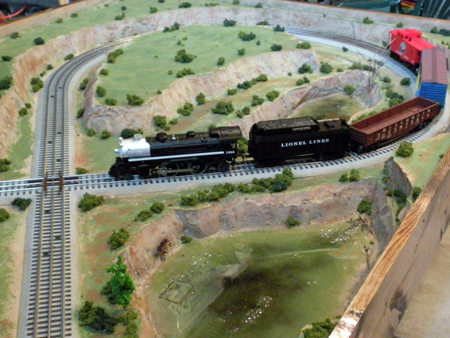
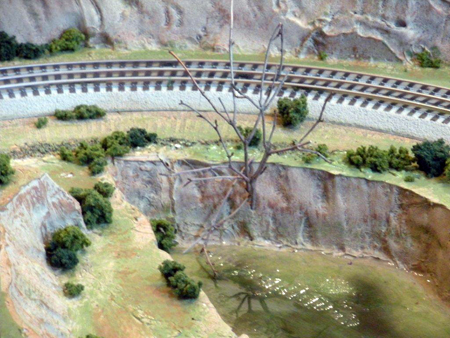
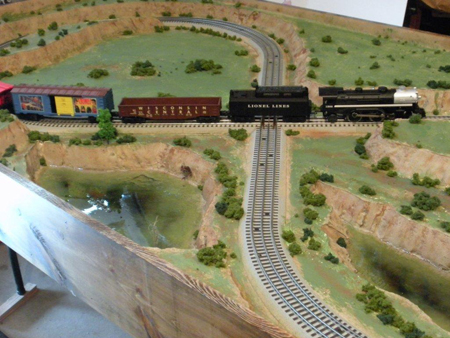
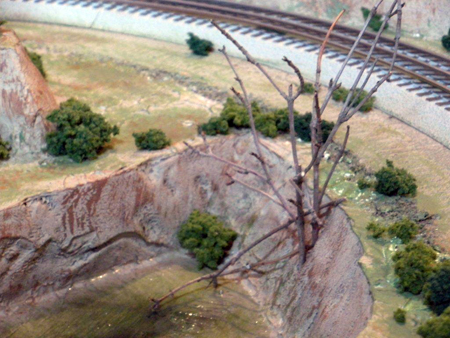
Barry’s finished his Lionel figure of 8 layout (pictures below). But not only has he sent these pictures in, he’s also kindly written this ‘how to’.
Many thanks, Barry!
Here’s what he sent in:
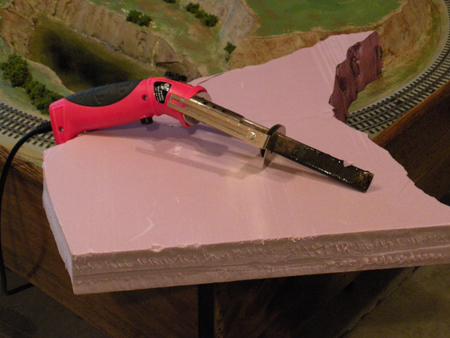
“1) Purchase a foam cutting “hot knife”. I think I bought mine from Home Depot for less than $20.00.
2) I use mine on the highest setting which is #6 on temp. dial.
3) Just let the hot blade do the cutting with twisting and reciprocating motions and occasionally changing the angle of the blade to achieve an unevenly cut edge that I think looks like real rock formations.
4) You can use 3/4, 1, 1-1/2, and 2″ foam. This shown with 2″ foam and that’s probably the thickest my knife can cut through. (enclosed is a picture of the hot knife That I use)
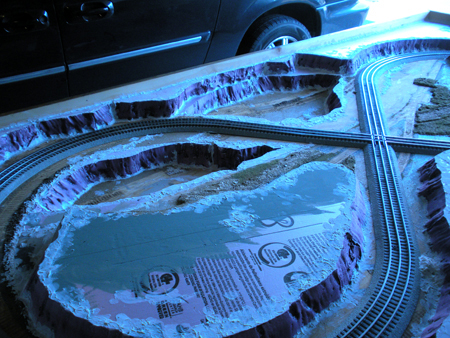
5) Caulk all the joints with painter’s caulk and let dry. Then paint the entire surface of the layout with a tan acrylic paint. (from Walmart or a crafts store—they are much cheaper than from a model train hobby shop)
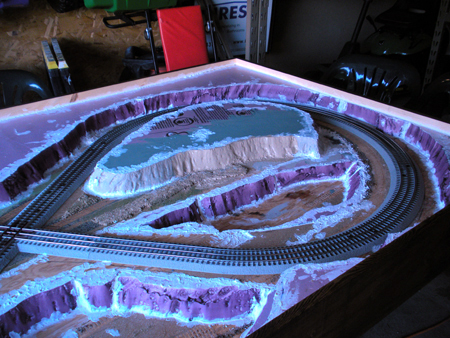
6) Then using a darker shade of brown drybrush highlights on the rock formations to create depth and perspective.
7) Then paint the lakebed with an olive green color paint leaving some tan color around the outside edges to simulate sand in the shallow water. Then I use a flat black spray paint with just a few short bursts to give the illusion of deeper areas.
8) On this layout I only used a 2-part epoxy fake water from the crafts Walmart as I wanted the lakes/ponds to look like stagnant water instead of my normal ripples on the water created by the wind.
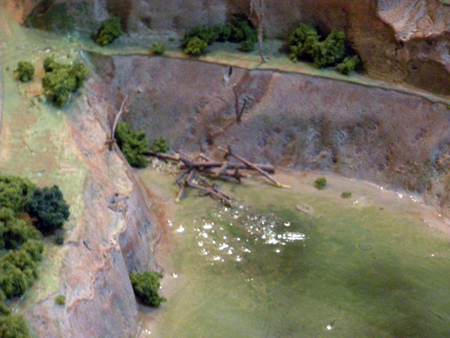
9) Last before the water is dry(approx. 24 hrs. add schrubs, fallen dead trees in the water and normal trees to the entire layout with white glue as desired.
I’ve enclosed (2) early stage pics showing the pink foam and the white caulk, (1) pic of the hot knife. And the rest of the pics are final results.
I also did not use foam grass on this layout to keep it more user friendly for the young operator.
Hope this help your readers to understand better and want to try it.
Regards,
Barry”
Pretty impressive isn’t it? Barry has done a superb job – again.
Have a look here if, like me, you aren’t as talented as Barry…it’s a great resource. As you know, I’m a fan of it.
Or just head off to ebay through the cheat sheet and dive in!
Best
Al

Very nice job. I model in H0 scale, but the pictures are very useful for me to pick up ideas.
Guillermo, from the Patagonia Argentina
this is a superb job,extremly imaginative.I’ll keep these for reference in putting mine together.thx.Regards errol golding
Really good,I shall use the idea on my oo layout,I do need a rock face.
Thankyou will keep it by me.
John Harding UK
That was quick Barry, well done
It’s just a great idea Barry, don’t expect it not to be copied!
WOW…Way to go Barry! Thanks for sharing both the pictures and the tips.
Barry the foam looks quite dense have not seen it in this part of the world.(NZ)
Great effort in a short time providing realistic appearance. Thanks for sharing
Thanks – great to see such talent. Thanks for the inspiration and tips!
Thanks Barry, your set looks great and the tips are very helpful. I use a foam cutter with a 1/16 dia. wire I got at Michaels Craft Store for $23.. I didn’t know about the cutter you show. I’m modeling a very rocky area and I think the two types of cutter will give me the results I’m looking for.
As one with limited creative abilities, I very much appreciate this. Your directions will keep me from gluing my fingers together.
Thank you.
well done its given me food for thought its looking fantastic
This will help me no end. Did a loft conversion two years ago and have lots of 4″ foam insulation left over, ( 14, 8′ x 4′ sheets) so I may get some good terrain modelled. Thanks for your superb ideas. Good luck in the future.
Great Job, Barry. You’ve given me some ideas for my HO scale Branford & Southern Railroad. Also some encouragement to recommit to putting in more time scenicing my layout. Again, Bravo, Barry !
Great job, impressed with the simplicity of it. I have used foam in the past on HO & O guage.
A great outcome in a few short days!
Awsome!
Barry,
Cheers from San Francisco California. A simple figure-8 layout made interesting by the great landscaping. I plan to start modeling in HO but will definitely use this as a reference. Well done, Barry!
it looks great from a person who is new at model railroading i have got some great ideas just from seeing the different stages and tips thanks alot.
This layout looks fantastic to me. Good job
Nice work from van bc canada Barry if you look at model clubs in the uk east mid beds model railway society I use to belong to them before moving back to Canada there layout suttcliff i did alot of the scenery on itthe layout turn outs are hand layed from scratch the layout. is nice
what a great layout,and i like the water ,well done
Thanks for the great tips. Will use them Layout looks superb
Not only are the suggestions helpful, the ability of whom ever makes the information available has very strong computer skills. What I have watched over the time I first signed up has been most helpful. I look toward the next update as the months pass. Thank you all that offer their information and keep up the spirit of model railroading. I started 76 years ago with my first O gauge Lionel. “Thanks !”
very good tips
Really nice Barry, my wife likes crossovers too, although modelling British Landscapes. The rocks and water is super detailed effects.
It is a very informative series…almost like having several articles in MR greatly simplified for my simple brain. Thanks. Can someone here describe “drybrushing” as mentioned above? Drybrushing what?
M
Brilliant. If only ahh well if at first ect.i will try again,
Well done Superb
Barry, you are true artist! I wish I had seen your project before I started my layout 4 months ago. Oh well.
Frank
Al, I have a problem I hope someone can give me some advice. How do I remove the worm gear from my old motor without damaging it?
Frank
That looks Fantastic, I am starting a N scale plan of Sydney and I hope to use some of your ideas. Thanks
Excellent execution and a perfect example of the KISS principal applied to model railroading. I hope I do as well. I have fallen in love with Fleischmann’s Magic Train line and wonder if there are any modelers out there who are so afflicted and could offer some layout tips and the like.
Also, for Frank Cortese; you’ll have to fabricate a gear puller sized expressly for the worm and it’s shaft size. Or, go to MicroMark-dot-com’s web-site and order one of their mini gear pullers that will fit. I’m relatively sure they’ll have what you need. If they don’t, use their design as a template and build one to suite. If the worm is really stubborn, or has been mounted with Loctite, you’ll need to set the puller first, then very carefully apply heat to the worm while applying the pull. I wouldn’t recommend this on a good motor though; the heat can result in unintended and unwanted consequences to motor internals if improperly applied.
Nice job Barry, I will keep this for future reference. Thank you
Nice Job Barry…
Future Model Railroading…
Wow! So easy, a caveman could do it! Well done!
great looking layout, Woodlawn Scenes has a new product
on the market that should make mountains and scereny
a lot faster to make
very nice job some of the spots looks real like in southern alberta
A VERY NICE SMALL LAYOUT.
like the water, simple layout yet very effective
neat
40 years of collecting trains ,track and bits and now its time to start.Have been reading all the tips from all you guys to try and get it right and this rock formation looks easy.
Cheers Dan from Australia
A most wonderful piece of work … thanks for sharing!
best regards,
Tom
Thanks Barry for giving me some great ideas for my layout. Cheers Rossco
Thanks for info, a figure 8 never looked that interesting until now.Great job.Charlie
Nice Job! But I would think that he would have glued some scenic elevations above the flat plains above the track level, and placed some talus, or other broken rock features at the base of his cutouts.
Roger
Why would you go through all that work, which is beautiful for
a simple “8” layout. Seems a waste of time and energy.
Hi Guy:
Job well done and worthy of good comments for sharing freely. Your work is to be commended and WE are so glad to have one of your caliber wasting his own time doing something he loves.
“Pickles normally come in sealed jars”-they are ONLY openned when needed.
Keep up your good works.
Harold Jr.
Just a line to let those that want to know about the dense foam used in the rail layout, it is used a lot in the building industry and is known under a variety of names,kingspan, celotex and styrofoam are three that come to mind. The first two have a reflective foil but the third is just the foam. For stockists etc go on the net and put in polyurethane foam insulation. Hope this is a help. By the way a really lovely layout Barry. Regards Edd Lees.
Hey, this great!! I have been overtime for a larger layout. We this you can be up and running and having fun. What time does the passenger train come through??
I think Barry has done a really great job building this layout. Now he can put some buildings around and have a super layout.
He could advertise in his area and make layouts for people who are not as talented and crafty as he is. I am sure there would be a number of takers.
Again Barry – a really nice job and I have seen many layouts being in my late 70’s. Good luck in your future plans. RJ Sappelli
Great work Barry! You have inspired this lazy modeller to get going again!
Many thanks for showing us your work. Cheers!
Very effective use of this useful material. I especially like the cliff faces: most realistic.
I used the same material on my own layout but in a totally different way. Yes, it is very flexible and a gift to modellers.
CM.
wow what can you say about it but awesome. brilliant job .jealous
well done
Very good construction article. However, I have one concern-there is no mention about foam safety. I also do RC foam airplanes and there are articles about cutting and sanding foam that have caused medical problems. Maybe some of your readers can contribute to this aspect of foam cutting and sanding.
Dan
Really nice and much appreciated love for 3 rail Lionel!
Great job on the contours and the lakes. I have been using foam for a while now and it looks really good and I like how you did yours and the coloring. Again great job and now I will start on my hills and streams since I got some encouragement form seeing yours. Thanks
Larry
WOW…..What a great job. You give us who are new to modeling encouragement.
THANKS
RICHARD