“Dear Al,
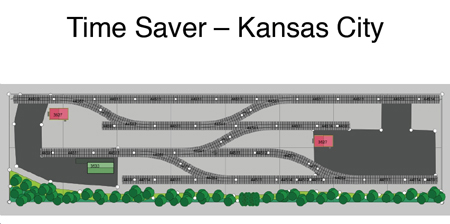
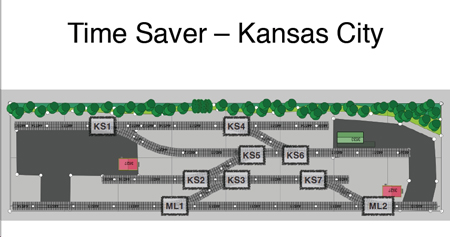
I have been enjoying your emails and website and thought I would send you a plan (attached) and some photos (to follow) of my 2×8 Kansas City Time Saver layout that I have recently completed.
As I am sending this through my iPad the photos my be in a few installments.
I used Bachmann EZ Track for this layout as it was my first and I went digital with a NCE Power Cab system so that I could have it as a stand alone layout or as a module (I am currently working on two other layouts, a 9×5 and a 6×4, that will link with this eventually).
Hope you like it.
Mike”
Wow! A superb layout. And thanks to Mike for sending in all those pics – I love the start to finish story pictures tell.
That’s all for today folks.
Please do keep ’em coming.
And if you think everyone else is having all the fun, the Beginner’s Guide is here.
Best
Al
PS More HO scale train layouts here if that’s your thing.
Need buildings for your layout? Have a look at the Silly Discount bundle.


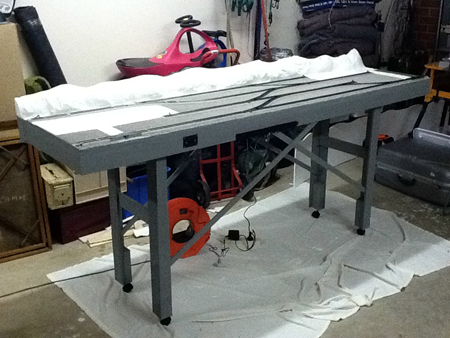
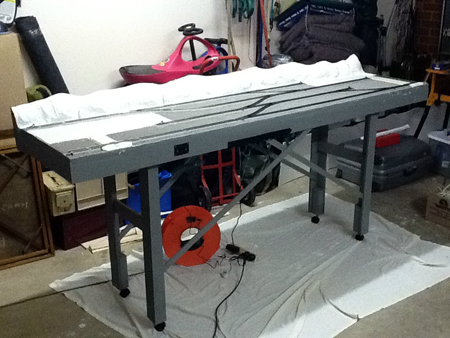
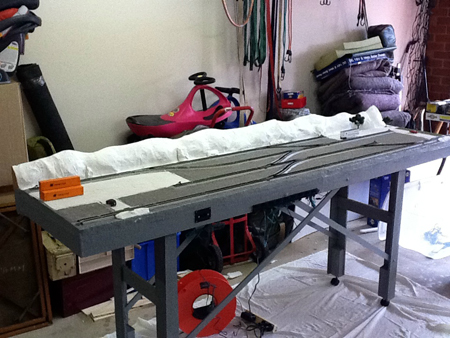
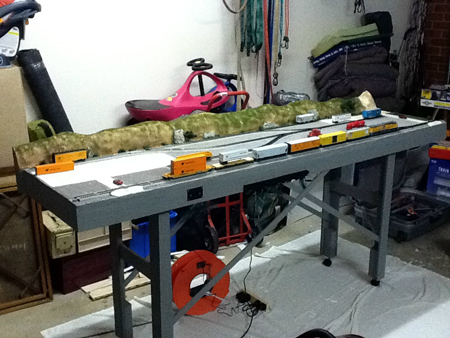
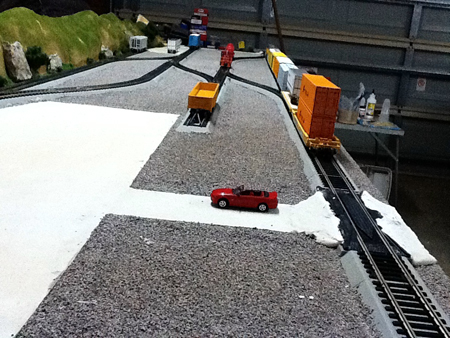
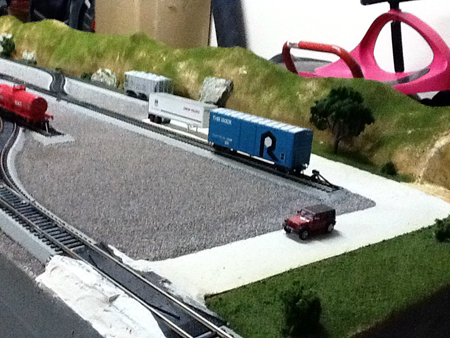
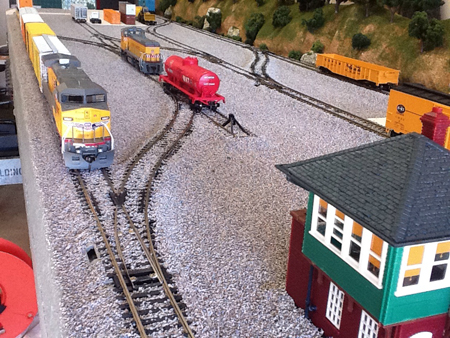
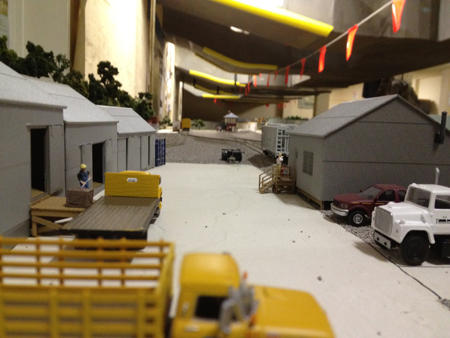
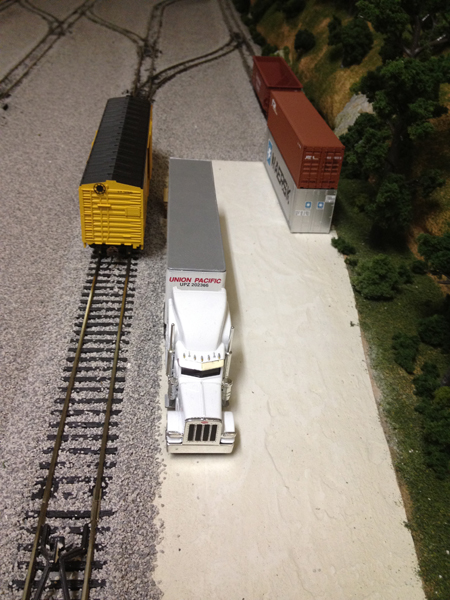
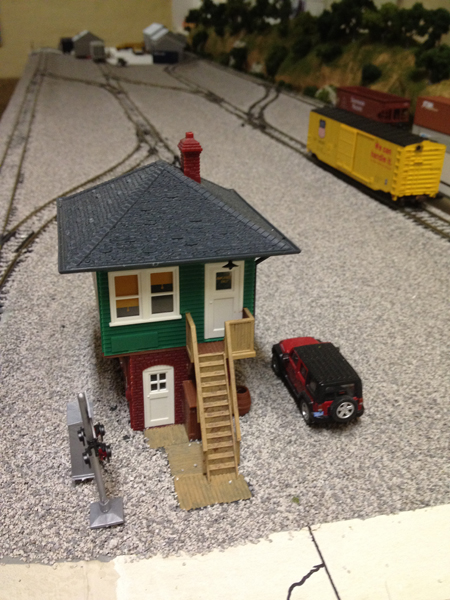
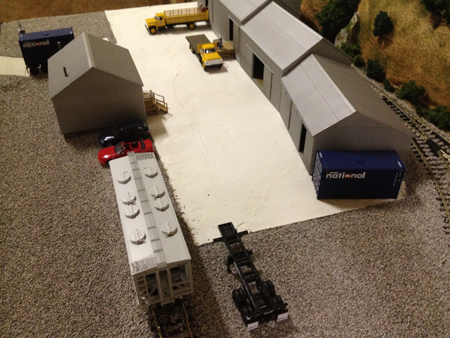
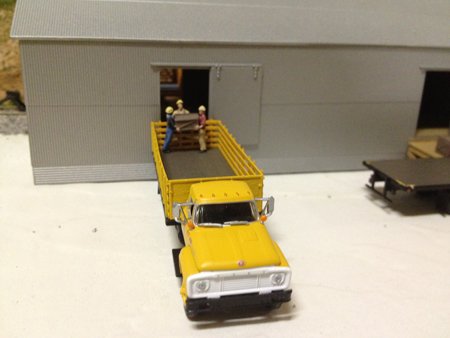

Great looking railroad.
I hope to see your two other layouts linked to this one. Nice clean layout. JMB
What a masterful job! You’re obviously not a newbie at this hobby.
Your layout will forever silence the Timesaver nay-sayers. And your use of E-Z Track and the way you applied the ballast could make the Bachmann Hall of Fame.
Thanks for sharing your work with us.
Wonderful yard in a concise size. Detailing is very good. (1) Looks like HO — What scale is it? (2) About how many man hours of fun have you invested so far? (3) Noticed the castors — Is that for storage between “play times” or another reason?
I like the modular approach that the use of CAD facilitates. Have you found Bachman’s software easy to work changes in elevation combined with multilevel tracks? I am planning to have an HO subway running under the perimeter of one table and an ~1FT above level “mountainntrail” in N. I also have a Marklin Z that is very nice and I will have to use somewere. very tall mountain I guess.
Mike, very nice. gives me ideas for my yard when I get to it. Hope you enjoy it as much as I and others have looking at it. great work.
as i have very little space,i am now inspirered!!(i can’t spell ).
i’m having all kinda thoughts! thanx,jb
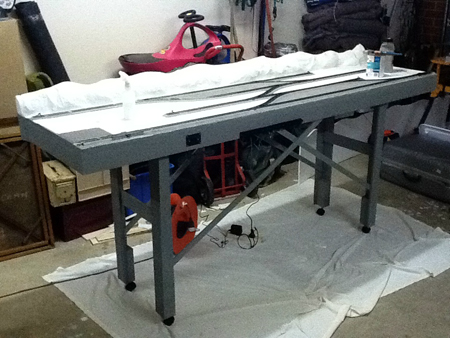
Thank you all for your kind comments and I would once again like to thank Al for hosting the site and sending out the updates. I do not know the character limit on this so I will answer you questions with seperate posts. @ Frank: The scale is HO. To be honest I have not kept an exact track of the man hours. I spent a few hours every day for about a month to get it mostly done (around 100-150hrs I guess) and then I have been tinkering and adding buildings and lights etc (around another 20hrs or so) but as you would know no layout is ever really finished. The castors are for “location flexability” (not only day to day but I am in the military and move a bit) 😉 but they are also height adjustable as the Time Saver is very sensitive to level so I need to be able to adjust the legs so that all the rolling stock doesn’t just roll, pardon the pun, to one end.
@ Alex: CAD is great and allows you to visualise the layout before you start. I do not use Bachmann’s software. I use AnyRail. I have found it to be the most easy to use and includes many other track types apart from just Bachmann E-Z Track. To be honest I have not dabbled in multi level yet. The software does facilitate it but I have not used it so cannot comment. Your plan to use multiple scales on your mountain to give a sense of distance sounds awesome and will be great to see when its done. For those of you who are interested I will send the CAD file to Al to make available if possible. I got the track plan for the Time Saver out of ‘E-Z Model Railroads: The E-Z Track Planning Guide & Layout Book’ By Chris Lane with H. Lee Riley then modified it on the CAD. The main changes I made were the addition of the main line and I put 2.25in straight sections in the ‘S’ curves to minimise car offsets that can cause uncoupling and/or derailments.
i like it, its very simple but looks very real, a great design along the edge of our sheds and still get the car in and around thats what i am doing at my place. thanks for the ideas.
Very nice Mike, you have done a good job, very realistic!
Very nice Mike. Please tell us about the details… are you running DCC, remote control, or rail power? How do you handle coupling/uncoupling? I’d also be interested in your buildings. Where did you get them? Kit of scratch? And what industries do they represent? Are they protypical of the KC area indicated in the map? Com’on, ya got our attention so let’s have the rest.
Thanks
done
VERY NICE YARD LAYOUT
@Done, OK, OK, OK. 🙂 I am using a NCE Power Cab for control. I was discussing control with my local train store and their advice was that if I was thinking about DCC then I should do it from the get go as the wiring in particular is simpler as you do not necessarily have to worry about block control etc. They recommended the NCE system as it is easy to setup and can expand easily as you add more modules to your layout. This has born true in my experience. I have found it very easy to use as a DCC beginner and it is relatively intuitive as my needs expand with bigger layouts and programming CVs etc. I have another Power Cab setup on my Hornby 6×4 layout and a NCE SB3A on my 9×5 as I needed extra amperage.
Coupling/Uncoupling. This is handled with E-Z Mate No. 78999 Magnets with Brakemen. The magnets are hidden under the roadbed. During operating sessions the Brakemen mark the magnet locations. Cars remain coupled as they are pulled across the magnet locations. When the cars are pushed slightly towards one another, the magnet moves the metal air hoses out, separating the couplers. Cars can now be pushed, ensuring that the couplers meet in the ‘open’ position with the unsprung part of the couplers together, with the locomotive/train to their final location. When the locomotive/train pulls forwards the uncoupled car will remain in place.
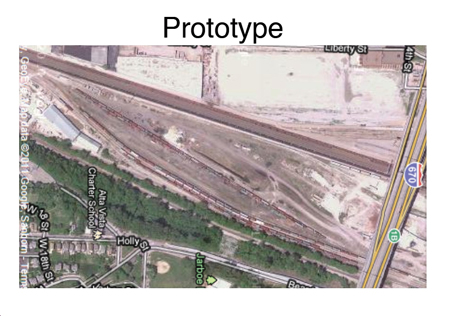
Buildings. I lived in Leavenworth KS, about 40min from Kansas City, for two years (incidently this is where I got into the hobby) and I like to model prototypes from around where I have lived. (Although the Hornby layout was built for the kids to run Thomas Trains) The signal tower is Atlas’ HO Signal Tower Kit that I built as was although I painted the stairs a wood colour. I then ballasted over the base to integrate it onto the layout. The signal tower is prototypically correct for the US but there is not one in the prototype yard and was included to add interest to the layout. The freight sheds are from a Wathers’ Cornerstone Series kit called Clayton County Lumber. I airbrushed this kit prior to building it to get the look I wanted. These sheds represent the freight sheds that you see in the left of the prototype photo down to their curved appearance.
Hope this answers your questions. Let me know if you have any others.
Great job!
Excellent job, nice detail. A little less ballast inside the tracks and more tie exposure. Otherwise scenery detail is awesome!!! Great job!!!
i think it looks great Hope you show how you tied into bigger layout you have inspired me to build a bigger yard now with that same kind of idea thanks for sharing
This design was made to be a puzzle, not an operating switching yard. It is a surprise that Bachman published it in their newest book. It may look nice, but try to use it. No real railroad would build such an atrocity. It is a time waster. Play tic-tac-toe instead.
I have been a train fan for years, but work all the time. I really enjoy this site. This is a good ideal!!! This makes us guys who don’t have time stay interested. Keep up the work!!!
Mike,
Contrary to John Sprague’s comment about it being a puzzle – A layout like this can be just a fun layout to run switching moves. Very similar to RR’s that are located within a large industrial complex, ie – The Niagara Junction RR that serviced the many plants and industries in the Niagara Falls, NY area of which I am familiar having grown up there. That being said, I would make 1 minor change/addition to the layout as you have it presented and that would be to extend the track at switch KS-7 by at least 1 straight section to allow for setting out at least 1 car at that point. Include enough length to get your uncoupler magnet in there to clear the switch travel.
@mike SWEET SWEET SWEET JOB!!!!!!!!!!! @ALEX Rosental….I. think you and I could get along really well!!! I LOVE YOUR COMMENT!!!!! I have all 3 myself…..HO,N & Z scale. I can’t make up my mind what I like the best. I love nscale cause you can set up anywheres. Z scale is endless but cost a lot !!!!! The HO takes up to much room. The nscale locos and rolling stock look more realistic to me! But I will buy all there til the day I die. Which maybe Monday cause I just got that new autorack STEEL graffiti 5 car set and didnt tell the women I had to pay list price. Lol I had to share that with everybody….cause I’m sure I’m not the first and won’t be the last! Everybody enjoy!!!!!!!!!!
VERY NICE SETUP,CAN IT BE ALSO DONE ON N-SCALE,SINCE MY GRANDKIDS LOVE TO PLAY WITH IT. LOVE IT,LOUISIANA STATE TROOPER
Great, I have being using E-Z track from the word go. It started with a Bachman train set my wife gave me for Xmas 4 years ago. Everyone told me I shouldn’t have used…cos doesn’t look authentic. Well Mike has proven the nay Sayers wrong. Good job Mike!
Wow, this is great and I agree with one of the other responses – inspiring!
Now I think that I can possibly do this with all the trains I have had since I was 8 (that was a long time ago!) and others that I have picked up about 30 yrs ago not to mention the ones more recently inherited from my dad 11 yrs ago.
But I’m curious about the “software”? Seems also a mention about CAD? not aware of that and might be something I could interest my boys in since they are extremely into computers.
Thanks for sharing.
This is a beautiful Time Saver layout. Long ago the railroad club I was in built the Time Saver modular layout. So kids could earn their Engineer certificate, at the yearly train show. This layout concept has introduced many a boy and girl to this. WORLDS GREATEST HOBBY.
John Allen was the man who designed the ‘Timesaver’ layout over 50 years ago. I first saw it at a Pacific Coast Region (NMRA) convention as a contest. There was a nice article in Model Railroader magazine I believe in the 50s or 60s. At one convention two timesavers were connected so contestants could interchange cars with each other. great fun if you like to switch!
A very nice layout indeed, I have just finished designing my proposed layout in O scale using Lionel Fastrack system and using SCARM to design it all. My Engine “Shed Arrives in April so I guess I will be busy from then on in will send in some picks
Well done all of you from the UK you have all given me a lot of inspiration
Can someone tell me how to post pics please?
I like to run trains, not get tangled up in a maze of switches that go nowhere. Or is going to be part of something bigger? I would hope so.
The timesaver layout by Mike is just what I have been looking for. I plan on a shelf type layout for point to point operation. The shared pictures of layout progress are awesome and have given me many ideas. Thanks to Mike and Al for sharing.
Cary B
Mike. You demonstrated “timesaver” in your beginning pics. You had your plan laid out on the table board prior to any other layout build. That is a good tip to all of us. Your layout is indeed a very nice job. Been getting a lot of tips on Al’s site. Thanks to all. Thank you for sharing. Bruce in the South Carolina mountains.
Very nice well constructed, good job!
Very inspiring I will be going HO with your inspiration.
I really like the idea of modules! Very impressed.
regards,
Dirty Dave
Hmmm,as a “want a layout” aka wannabe I have been gathering items in HO scale.Will start after my eventual move to another house.My question right now is which track type to use.The E-Z track may be the way to go since I have never built a layout.Most use cork bedding,so my question to you is was the glue used for ballasting different? What products did you use? I have a ballast spreader but not sure that will work with E-Z track.So would be interested to know how wxactly you put the ballast down.I am also planning something modular,so i can “play” while I am building other mods to add on.Thanks for all the pics!!
Very nice layout. I will keep it mind when I build my On30 layout
Great layout loved seeing the benchwork. I am in process of buying a new house. LOL One of plans is to take out wall btwn 2 bedrooms and have one large room for layout. LOL who really needs 5 bedrooms
Interesting , Mike ~ your idea is a rather cool concept.
I’m from the U.S. I noticed your reference to “card”. Is this referring to what we call
“Cardboard” here in the U.S.?
Nice layout. Was it based on the John Allen original “Timesaver layout”?
This is my very first post on this site – it is not a duplicate comment
This layout looks like the one for me to try. But how does the action work? Where are cars located to start. And how is the destination figured out for each car? I would appreciate any help so I can get started
I like that you showed the bench and how you built it. I want to setup a slot car track and then dig out my HO, N and old Lionel equipment and at least set up a simple layout for each scale.
The Lionel is mostly to show off the stock as it was a gift from my Grandmother. But I have lots of stuff for HO and N scale, So even a switching layout, book shelf or a small layout would get me into model railroading.
When I look at your work, it seems more do-able and possible for me to have something I can indulge in and show off what I got and my modeling skills.
Really nice, but how can you have fun for a long time with a set up that doesn’t go anywhere, all in all it looks great.
Looks good so far. I assume you still have a lot of detailing to do regarding the ground cover and foliage. It looks so bare just a large expanse of gravel. Please send in more pics when completed.
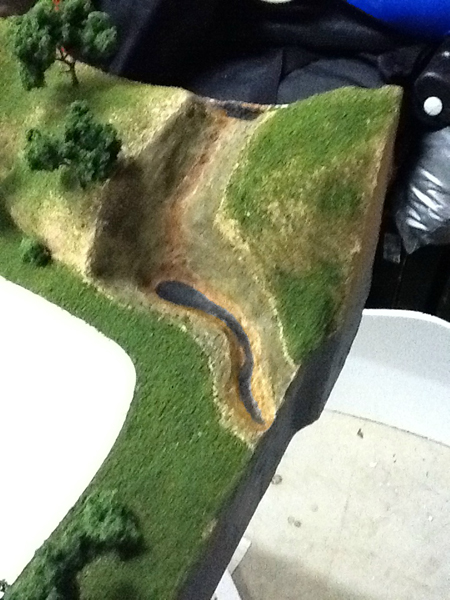
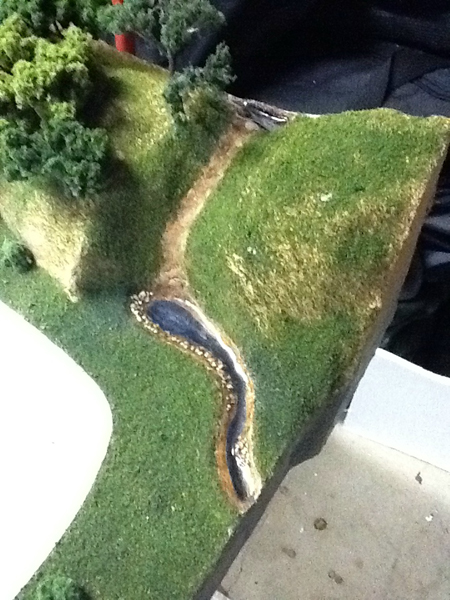
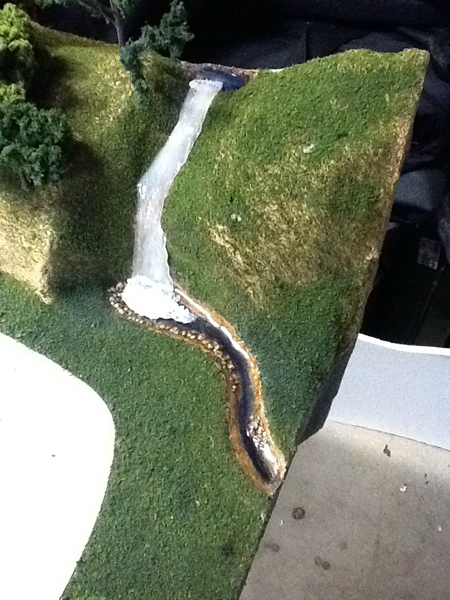
Mike…. Nice job. I particularly like how you did the hills.
Great to see the bench work. Worth the effort.
Nice switching layout Mike
very nice setup. i like a lot of the smaller setup, mainly because they show so much precise work.
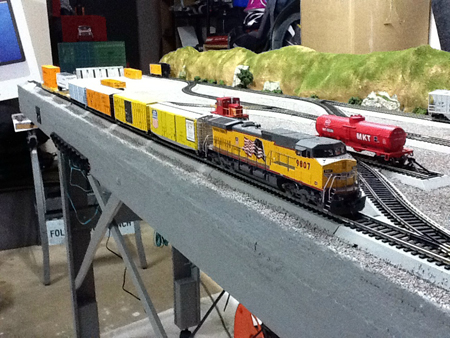
Nice layout. Like your long low hill along the back edge.
Nicely done. Great looking deck with wheels and paint. Interesting track planning with enough landscaping and buildings. All you really need to do is add ten plus inches of backdrop with blue sky. Foam core boards work well and can be found in art stores. Again, great work.
Jim AZ