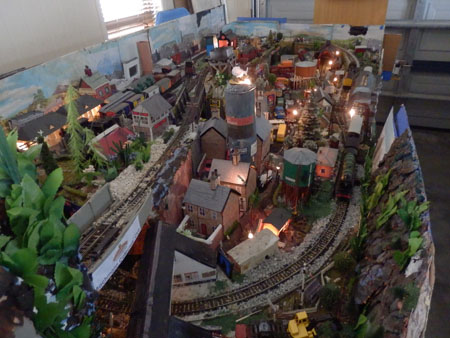
“I have been working on this for just short of 3 years now. had a spare room full of junk so i made this out of it. hope you like it. any suggestions will be appreciated.
Bruce”
“Hi Al,
Here are some photos of my layout at night time.
I have model power street lights and I also have lights in my buildings as well.
I have no lights in my cardboard buildings, as they have printed windows.
With the other buildings I drilled a hole in the base and in the baseboard, then installed the light bulbs.
Paul”
“Sometimes it is difficult to get a radius just right on a curve, or the track springs out of shape at the joiners, or it just doesn’t look right. The thing to do is to separate the track joints a bit, about 1 to 2 inches, then solder the rail joiners to the track. Be sure to solder the track so all of the track will slip on one side, then it can be adjusted and evened as you wish. Don’t solder all of the track, just on the curves. Then run wiring to each track. The trains will run great, and the curves will be super smooth.
Craig”
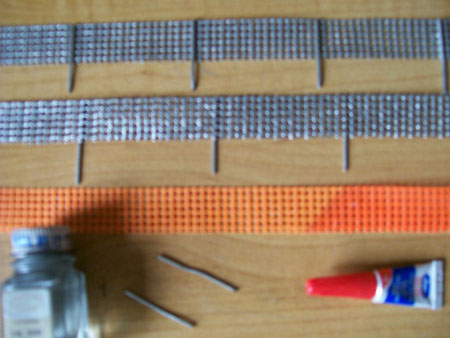
“Hi Al.Remember awhile back i talked about the orange road flags construction crew’s use.Cut in strip’s like in this photo.I also painted some, came out fantastic.I used model silver paint and sturdy wire for post’s.Chain link fence.Even feel’s like it.You find this styrofoam white board in craft shops cut and shaped for road bed was easy.builder
kim”
Hope you liked ’em. But please keep them coming!
Dont’ forget the very latest ‘ebay cheat sheet‘. Really appreciate your comments on it.
Best
Al


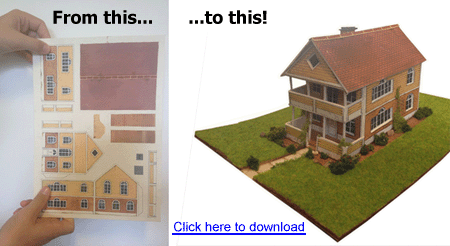
Do you ever have city buildings for the cut outs? All I ever see is houses.
Thanks Bruce
Once again my hat is off to those that take the time to contribute to this site.
Those modelers willing to share what they have learned and built: to pass on to all of us for our own use.
And last but certainly not least: Thank you Al for bringing it all to us.
best,
Keep on Training!
Tom N
Bruce, Great layout. What did you use to create your mountain peaks?
Also did you build or buy your round table?
Thanks,
Don
truly a work of art. Thanks for the tips. Hope to see more, how about going on utube and make a movie. wondeerful work thanks.
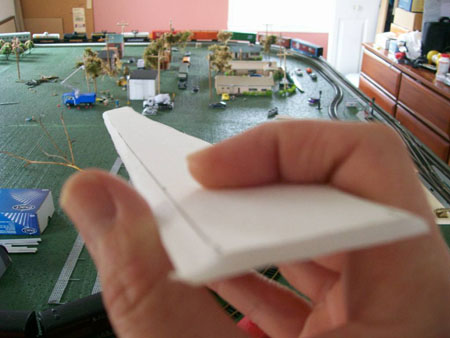
How did he cut that styrofoam so straight for the roadbed??
Bruce,
The only tip I have for you is “Enjoy”. Looks great!
Always enjoy the information, layout pictures and video that arrive regularly via email. Can tell that Bruce has invested many hours in his layout – very impressive! Did notice on the second picture above, it appears he has twin tracks sitting side-by-side with little or no space between. Looks as though this would not allow for two trains to bypass each other. I am anxious to start working once again on the HO layout I started last winter. Had to take about six months LOA to work on house and yard projects! Thanks to Al for your time and effort in keeping all of the information coming!
Is you lay out ho? And how bir is your lay out? great job. thanks rocky
I can only hope that my room full of junk will look like a railway layout as good as that someday!
Cheers
Ralph
THOSE ARE SOME NEET PICKS.
Always great to see the time and effort that people put into their railways and then take the effort to show them
Hi Glen.Been busy building lol.Check out my locomotive replacement lights and rear end train flasher.I got the sheet from a craft shop.I cut to the lenght size and width.I then layed it on an edge of a steel table and used a new craft knife and on an angle slowly cut along.Dont use ya mothers or wifes kitchen table holly cow your going to mess it up lol.Any hard long surface will do.go slow.paint it after to the color you want useing a strofoam friendly paint.I have both DC and DCC track running together on my layout best of both worlds.just couldnt give up my ho dc.
Bruse i have some telephone or power poles you sure be interested in made from junk radio and stuff.Very realistic.not sure i sent al any yet.