Brian, the Brit living just outside of New York has been in touch and added to the narrow gauge railways on the blog:
“Hi Al,
Its been a while since I last sent you an update on my model railway.
However, before I go on, I want to thank you for this wonderful blog for the model railway community, I look forward to receiving it in my inbox every morning and am fascinated by the skill of all the contributors. And we all have so much fun sharing our models on your site!
I have been cogitating as to whether to tell you about a new project I started about 2 years ago as I have not been too happy with the outcome. I have decided to tell all, so here it is.
Back in the summer of 2023, I was in the UK for a couple of weeks and visited my favorite model railway shop, Invicta Models in Sidcup.
They now have a section dedicated to narrow gauge railways. I have been interested in them since I was a kid when my parents took me on holiday to North Wales, so I just knew I had to build my own OO9 model railway.
The OO9 scale is OO (or HO here in the USA) but running on N scale track. The idea is to replicate narrow gauge railways which served mines and their local communities in the early 1900’s.
Peco and Bachmann, in particular, have launched some excellent products including models from the Ffestiniog Railway in the Snowdonia region of North Wales.
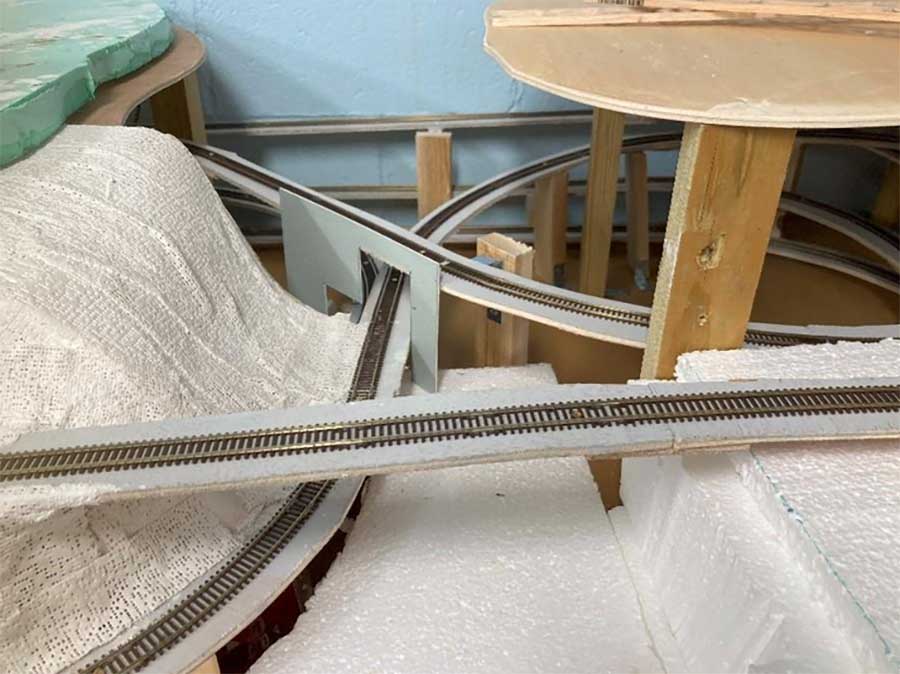
I decided I would build a layout which went in and out of mountains on a number of different levels. Because I did not know how much track I would need, I decided to use Atlas code 55 track as I can buy it over here in the States; I was expecting it to be similar to the Peco narrow gauge track but sadly it is more like main line track – my first mistake but I am stuck with that one.
On my OO layout, I have fastened down the track using spikes sunk into cork track bed. With this project, I decided to put the track directly on the plywood and the next challenge was fixing the track since there were no nail holes in the sleepers on the Atlas track – I don’t know why.
I didn’t want to glue it down in case I needed to make changes so I ended up using tiny screws (#2 by 1/4in) between the sleepers, not the perfect solution but one that worked.
I wanted to build something that would be easily transportable and started with a board 24×34 inches but this proved too small so I cut a new board 36×48 which is more satisfactory. All curves are 10 inch radius. The power is DC.
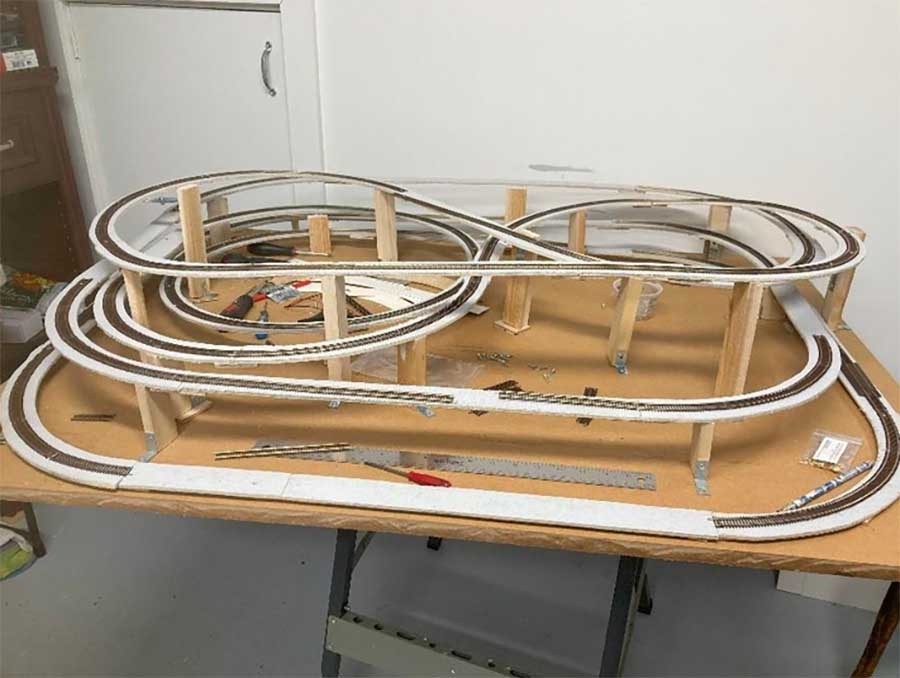
I had a vague idea as to what the finished product might look like but was not sure how to achieve it. I started by cutting lengths of plywood marginally bigger than the track and slowly started putting the layout together. Here are a few photos of the construction:
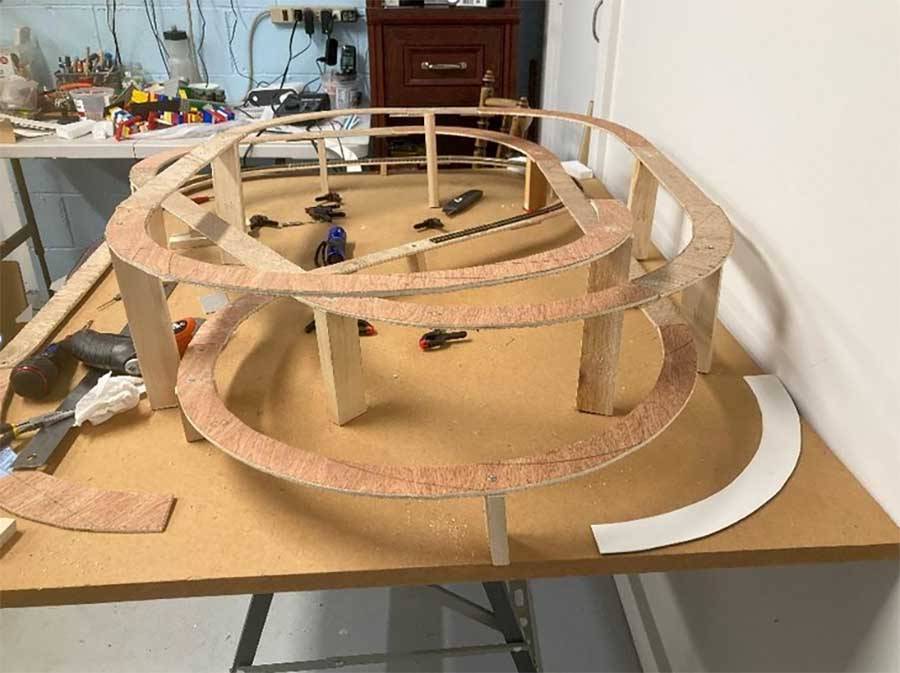
One of the recommendations experienced modelers is to make sure the trains run well on the track before adding scenery. I decided to keep it simple by not having any points (switches) but clearly the track has many loops and curves and gradients.
I finally got it working well with the Hunslet 0-4-0 which I bought and so was able to start the mountain construction.
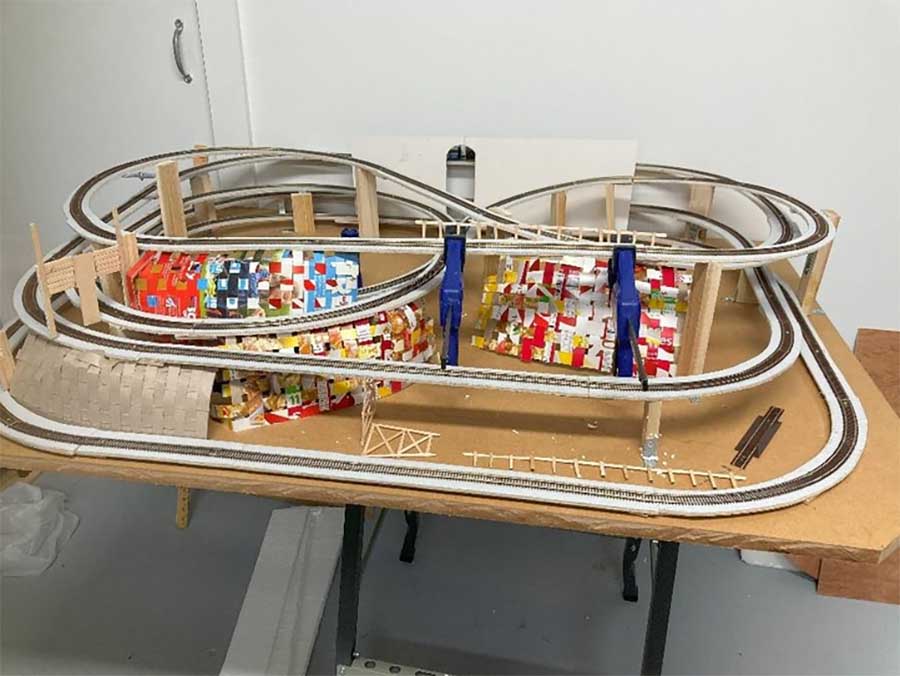
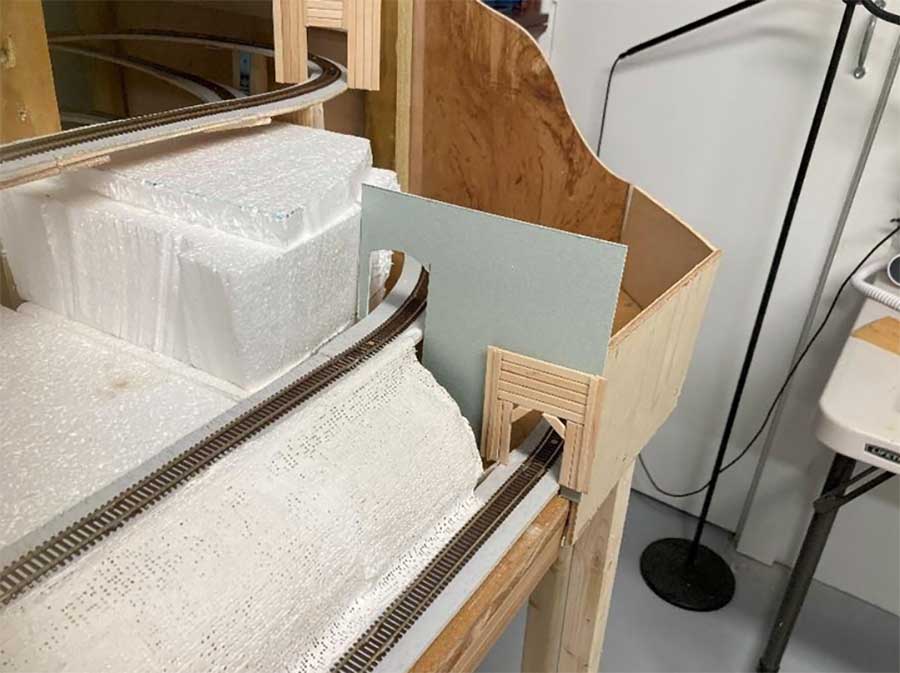
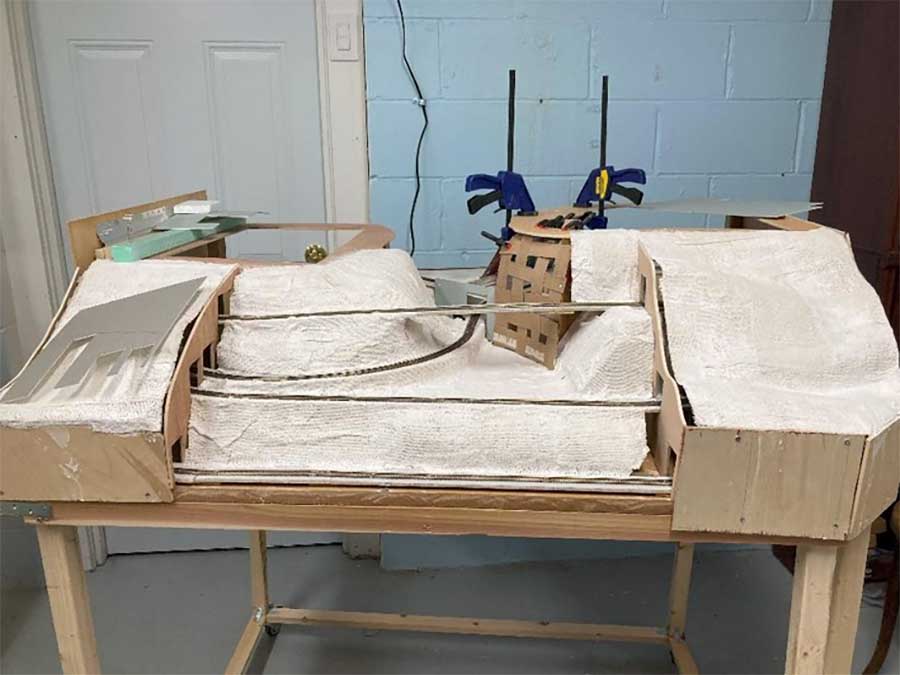
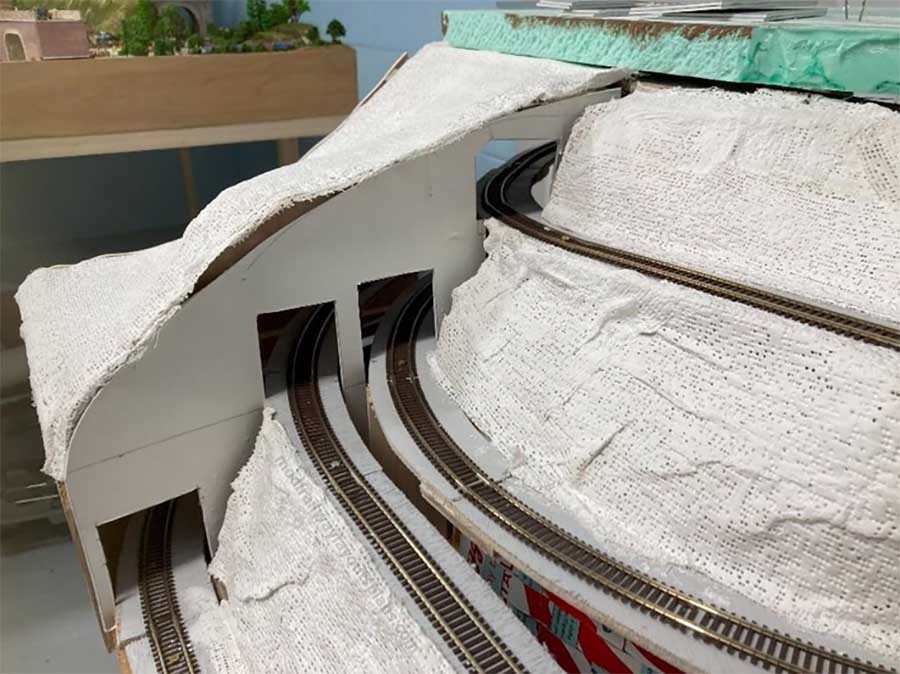
I made the mountains out of plaster cloth laid on top of platted strips of card and polystyrene sheets. I have been able to remove some of the polystyrene once the plaster cloth has hardened.
I made tunnel entrances out of craft sticks to make them look like mine tunnel entrances.
Finally, to ensure that any problem could be reached within the 2 mountains, I cut 1-inch green insulation board to cover the access holes at the top of each mountain and so the tops of the mountains are easily removable.
Not everything went smoothly. It’s surprising how much the track moved once the hardened plaster was in place.
Although my engine performed well before the mountains were in place, the tolerances for the clearance was too fine in places and I had to make difficult adjustments for the engines to pass under the track in places which left one gradient as a challenge for the Hunslet at a point where its hard to adjust the track.
I spent a lot of time trying to decide what to put on the top of the two sides. Initially I was just going to have the tops of mountains but this did not suite.
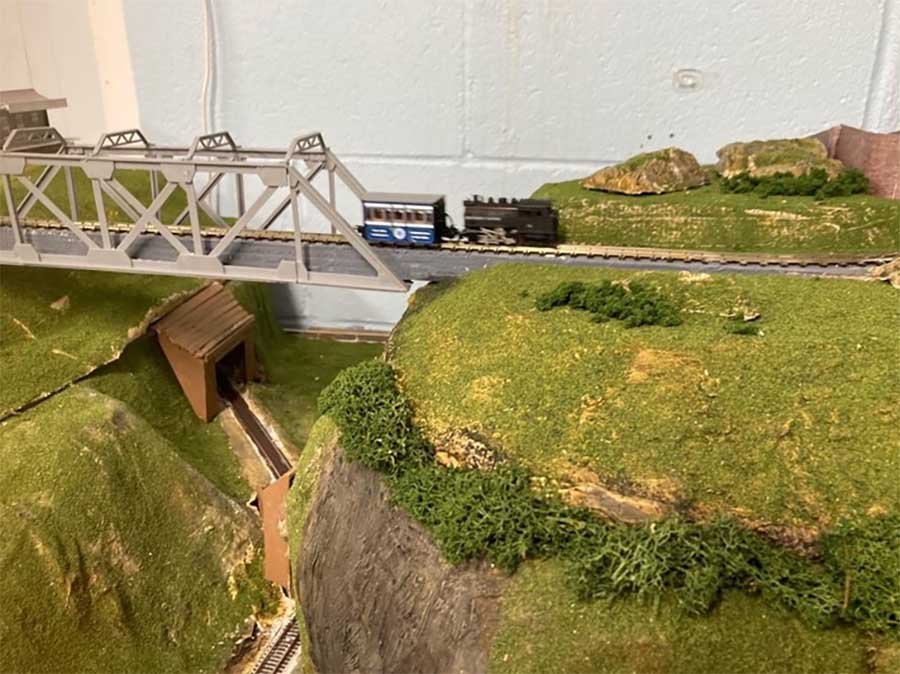
I finally decided to link the 2 mountains with a bridge and railway line, also N gauge, to cross between the 2. This will be independent of the main track and have the shuttle electronics so I can let the trains run.
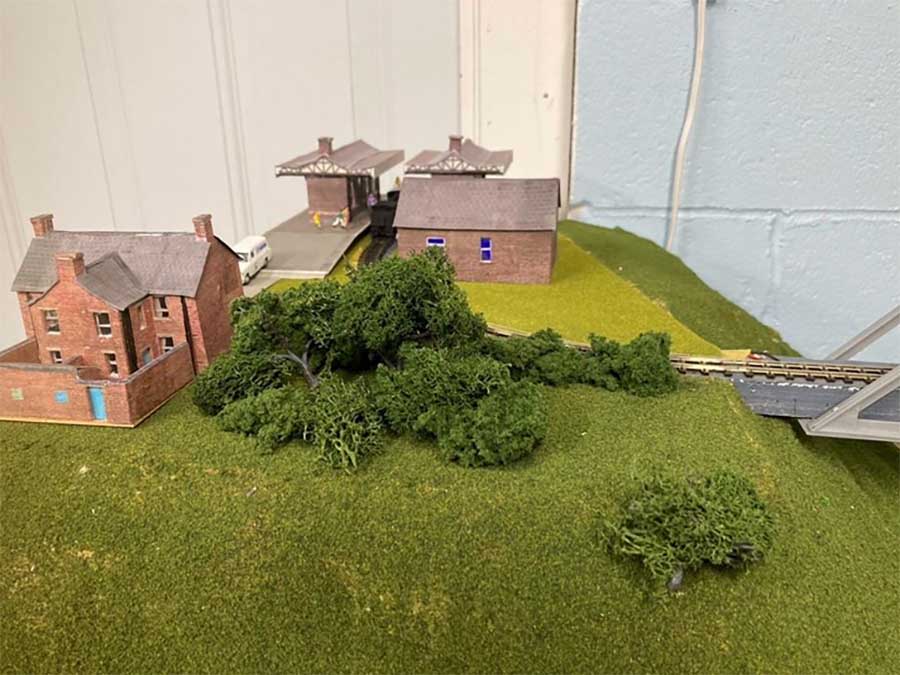
On the left side I have a small station an on the right an industrial complex.
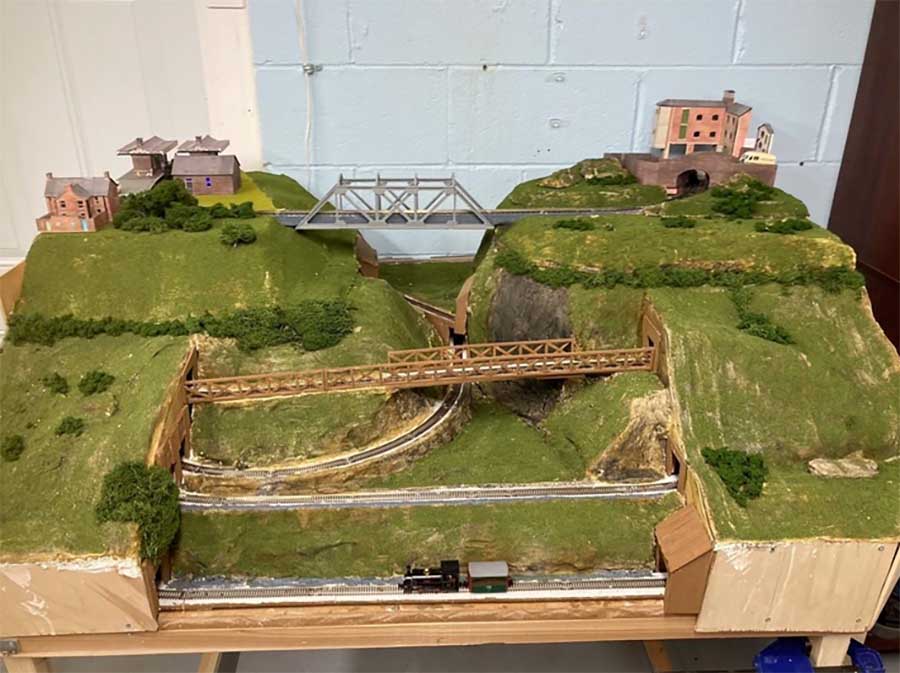
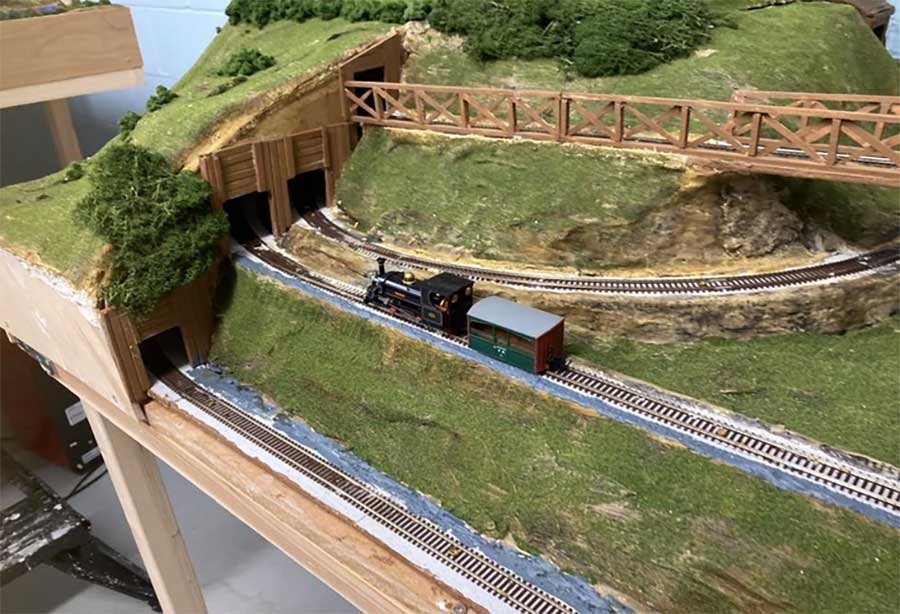
Its been an interesting exercise although I can’t say that I am totally happy with it. The transformation from the track layout to the finished model has left me with too much track hidden so there are only brief times when the train can be seen, otherwise it is in the tunnel most of the time.
Also, with the Hunslet I have problems with one of the gradients inside the tunnel which is impossible to change – before the scenery was added, the train and 1 coach ran perfectly but now the train and coach struggles to climb the gradient.
Then I had a lucky turn. This year when I was back in the UK I visited Sheffield where there is an amazing model railway shop – Rails of Sheffield.
From there, amongst other items, I bought the Ffestiniog Railway Double Farlie which is clearly more powerful than the Hunslet and has no problem with the gradient even with two coaches. So I put the Hunslet on the shuttle line at the top. At last I can run the trains with no problem.
At least now I can see what it looks like. Maybe at some point in the future I will dismantle it and create a simpler layout for my narrow gauge railway..
Thanks Al for publishing this for me and I look forward to comments and suggestions from the contributors.
Brian – Brit living outside of New York”
A huge big thanks to Brian for adding to the colection of narrow gauge railways on the blog.
Here are some more if they take your fancy:
Narrow guage layout – Julian’s
Narrow gauge model railway – Keith’s
Narrow gauge model railroad – Bill’s
On30 Narrow guage – Jeff’s
Narrow guage layout ideas Grant’s
That’s all for this time folks.
Please do keep ’em coming.
And if today is the day you get started on your layout, the Beginner’s Guide is here.
Best
Al
PS More HO scale train layouts here if that’s your thing.
Need buildings for your layout? Have a look at the Silly Discount bundle.

Hi Brian,
I agree with you o0n the matter of too much tunnel time, not enough train viewing. I’d be thinking of stripping back more of the hill scenery to expose more track.
Also have a tip for folks – my N scale track is all Peco flexitrack. It is pinned down with two panel pins set either side of a sleeper mid way between the tracks every few inches. They are set to hold the sleeper from moving, but not so tight that they distort the sleeper. For those who have track with holes in the sleepers, be careful, as driving pins into those holes can distort the sleepers.
Thanks to Al too for all his good work keeping this site alive!
Plunko in Oz
Very nicely done Brian. Love the bridges and the buildings. I would have liked to do a smaller scale than HO but my fat fingers wouldn’t have allowed it. I’m having a challenging time as it is with HO. I’m getting closer to finishing my “folding table” layout and will be posting the wiring section soon but I still have a long way to go. I’m jealous of all of you that have “completed” your layouts and hope to have mine done soon. Keep up the good work!