The talented Dave sent me this.
It’s not one of his – but I know if he found it useful, the rest of us probably would.
I certainly did!
Wish I’d seen it a long time ago to be honest…
Don’t forget the latest ebay cheat sheet to hang on to your hard earned cash.
Helpful video? Let us know below…
Best
Al


Very good, but I use the normal method of filling in with ballst then dropping a solution of diluted PVA glue, mixed with a drop of washing up liquid, onto the ballast. The most important part is keeping the ballast away from the moving parts. Touch wood, I have never had any troubles.
Very useful video from Dsve. Wish I were as fast as him with the glue and ballast.
Dave,
Great video you make it so simple. I’m getting ready to do this though on a bigger scale. thanks again.
Ron
I found a safe way to be sure ballast doesn’t stick to the mechanism or hinge points is to put a drop of light grade machine oil on those places before laying ballast. Works every time.
Many, many thanks for directing us to this, Dave. I’ve downloaded the video from Youtube with iLivid and filed it. Points ballast was something that was bothering me. Thanks again.
Roger.
Very helpful. Thanks so much. Now if you could teach me how to loops!
very good but I’m still part of the “old brigade” and so far no problems, enjoyed the video and wish that I could be that quick
An alternative way of doing it and okay if you only have a small to medium size layout with limited points. As it’s a bit time consuming if your building a club layout or a large staging yard, with 15 or 20 sets of points. As I have always found the old method 100% suitable, with diluted glue with a touch of the wife’s dishwashing detergent, to make it spread through the balast, then a few days later go over the points with a 2 inch paint brush to remave any loose balast. But whatever works is great and your method looks like it works okay, just a bit slow for me personally.
thanx for the the advice!! very helpful. a job well done!
I have done it with glue and not had alot of problems but I have had to replace a turnout due to glue getting where I didnt want it. The method I use now and not had any problems is I put black electrical tape on the whole turnout facing up, but I do not put any under the switch bar. then I brush the ballast in the center of track and along the outer edge. The far outside edge I then use the glue method. Works eveytime with no problems.
great video very helpful made me feel alot easier when i come to doing ballast.
I have just joined a railway club, two of the guys are laying around 12 points, they are stuck on how to ballast the points after watching your video, I will take the information from your video so they can get an idea of what to do.
Thanks for the video.
Michael
seems so simple yet i have always used brushes. shall be using my fingers alot more from now on
Great tip. I am a beginner in model railroading. I love all of this great tips. I don’t think I will be adding ballast as I am using Bachman’s black track,but who knows what the future may hold. I am concentrating on an industrial layout; warehouses, oil refinery, coal and lumber, all on a 4 x 8 layout. I may not be able to get it all on, but I can always expand.
Everyone has a slightly different method for Ballast, all are good and useful. Thanks for sharing your techniques……..nice layout from what I can see.
Alternatively, mark carefully where the tiebar assembly comes, remove the point, spread glue thinly, replace the point and pin in place, the glue will squish up slightly into the beds between the sleepers but without you accidentally brushing it onto the rail sides or foul of the moving blades, then ballast over the top.
If you ARE going to set your points down like rock into glued ballast, better check very carefully the wiring under the crossing beforehand – I have had a couple of Peco points suffer from loss of supply across the crossing due to ‘dry’ joints. A little soldering job if done first, a major excavation (or in my case some jury-rigged rewiring) if you find out too late.
Rod
Fantastic simple demonstration on how to ballast around points. Most enjoyable.
great video very helpful
Aloha Al, dave makes it look so easy.
WISH I HAD SEEN THIS VIDEO BEFORE 6 SETS OF POINTS WERE LOCKED IN AND BALLASTED……THEN PROGRESSED TO THE BIN 🙁 GREAT VIDEO MATE! KEV, AUSTRALIA
Very Valuable information about ballasting and I enjoy watching all your video clips. Thank you.
Really helpful video, see what happens when i try on my N gauge layout.
Thanks
Glad I saw this tip, handy when doing
Points. In the middle of doing a big layout
and I have lay my oo layout now I now how. GREAT TIP
Thanks for you video,it was very useful,as i have not ballast any of my layout yet.
What sized balast did you use ,ie, med oo small?.
Mike
Hello to all, and I do certainly enjoy reading the ideas, and tips from other modelers. Please keep them coming so all may learn and learn. If I may add an idea. Years ago I built a 4 x 6 layout using Bachman black set track and two ( points or switches ) on eitherside of layout. I carefully removed the trackwork ( including sleepers or ties ) from the black bases. iI then drilled 1/16 holes through the black plastic bases where power connectors were located. I used a light grey spray paint. From the hardware store, in a :/ aerisol spray can. Let dry overnightt Replaced trackwork into plastic base. I then used a number 1 artist paint brush and dabbed small black dabs of paint along sides and a few here and there around (points or switches)the small layout. I then gave the whole trackwork a spray cote od clear dull lacquer. Dull cote could be used instead. I cleand the railheads and around switches. After letting the layout dry and rest for three days. I continued on with the two structures, and rest of layout. This was just my way, to solve a problem. I do hope this helps in some small way. Michael C.
Excellent – well done!
I’ve been doing it all wrong…. Thanks for the vidio……
Great video, very instructive … I have always been very wary about ballasting turnouts. Thanks for thid one.
Well done! thank you
Great video! That was the first time I ever saw anyone do ballasting.
Thank you for sharing.
Mike D.
I have had occasional loss of ballast, and the cork shows through. I now paint the cork the same color as my ballast (or a shade darker), then lay track. Now if I loose a spot of ballast, it hardly shows, and I have time to repair it at a later date.
Still in training,
Carl in Kansas
To bad he doesn’t English !
Great video! I learned alot,thanks Dave,keep em coming Craig
Have looked at some other Videos from Everard Junction, they are very good. A little intimidating as the quality is first rate. Ballasting makes me twitch! Ballasting points makes me shiver! Thanks for the video – great stuff!
Dirty Dave
A very nice and smooth job.
Definitely makes less of a mess and is an efficient and quick way of getting the job done. Thanks.
Thanks most useful. I have never used ballast before. Was planning for it on my upcoming layout build. Now I have a better idea on how to do it and items to look out for
i dont have a layout right now but for switches i used to use masking tape under the switch the sprinkle on Ballast press it down then turn over and shake off lose ….all have to do is remove any that is making points not work right
Great tip! I am new to model railroading working on my first layout and have definitely been intimidated by ballasting points. I’ll try to tackle these again now.
Thanks for the idea, I can always use other ideas.
Chicago Bill
That was very intresting. I have been gathering material to start my lay out over the last few months. I go in for my first hip replacement soon and after I have the second hip replacement on the other side I am going to start my layout. I figure I will start my drafting this coming week when I come home from the hospital. Thank you again.
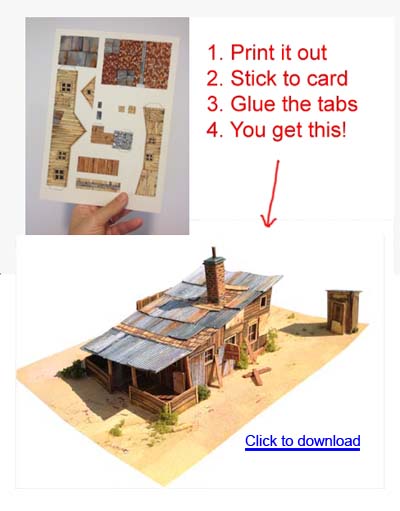
I have a question ? what type of paper or board is being used for the print out buildings and such ?