Rick’s been in touch again with his 4×8 HO layout:
“Al,
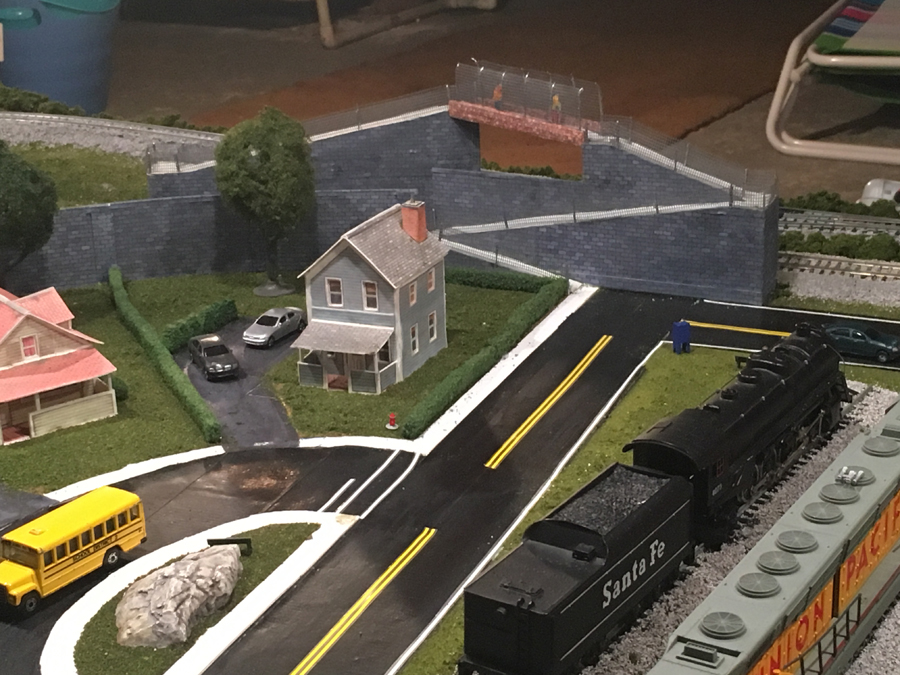
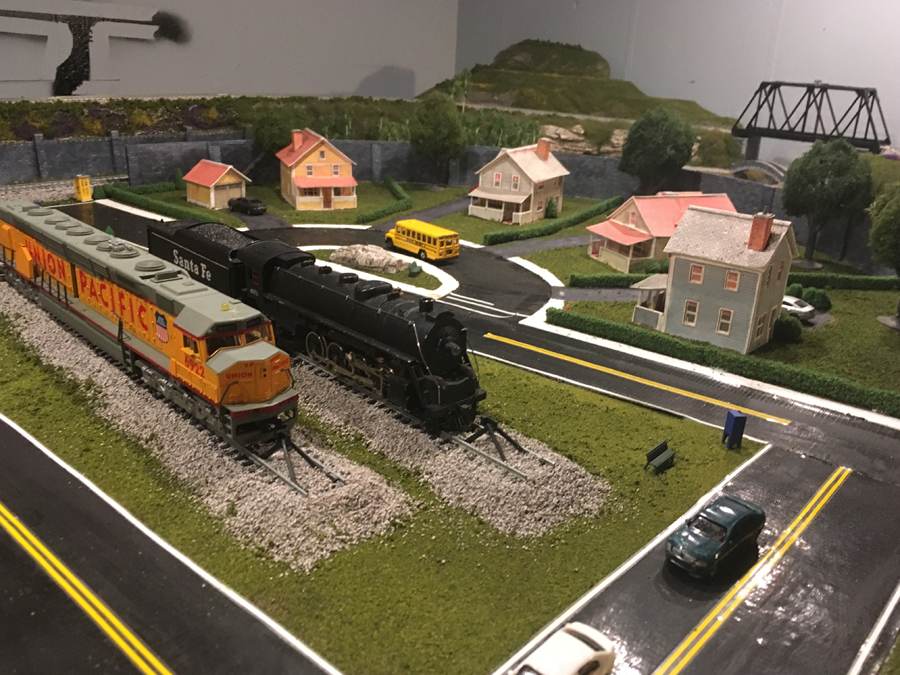
Attached are photo updates for Grand Junction, the layout I built for my grandkids in our crawl space (4×8 HO layout).
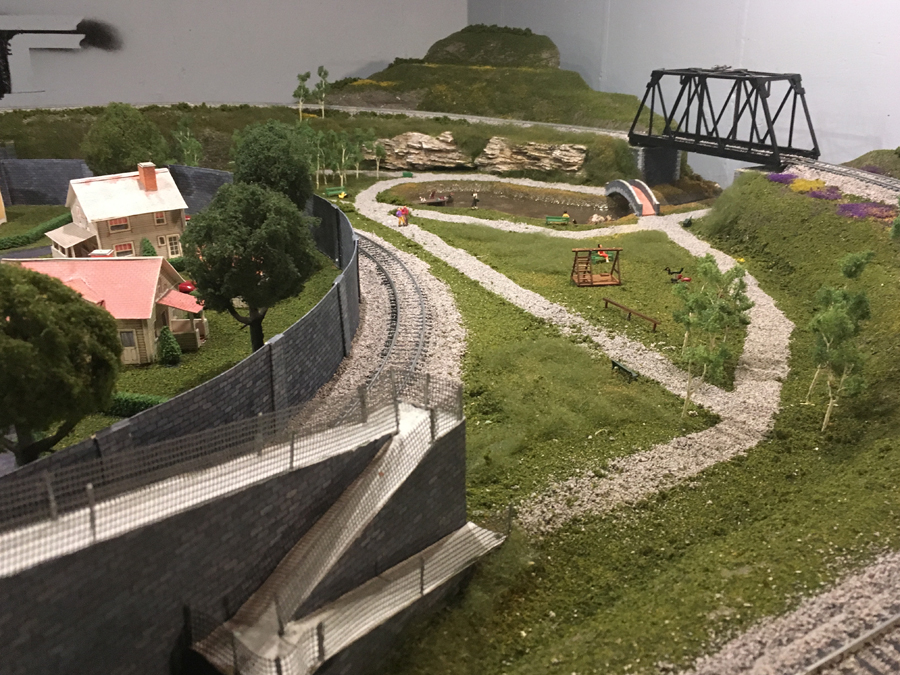
As you can see, we’ve been busy adding details to the layout including finding pin-striping that was nearly a spot on match for road dividing lines and parking lot markings.
Someone asked in the previous post about the inclines I used in the layout and in case someone had not answered, they are from Woodland Scenics. While I like to create most of the scenery myself, these precut inclines are too good to pass up.
I also realized a part of this hobby I do not enjoy and that is ballasting switches. It seems no matter how much I brush away the excess, there seems to be a little piece that gets stuck in the switch which the trains do not like!
All in all, a great hobby supported by your ongoing articles and sheer fun we have with the grandkids.
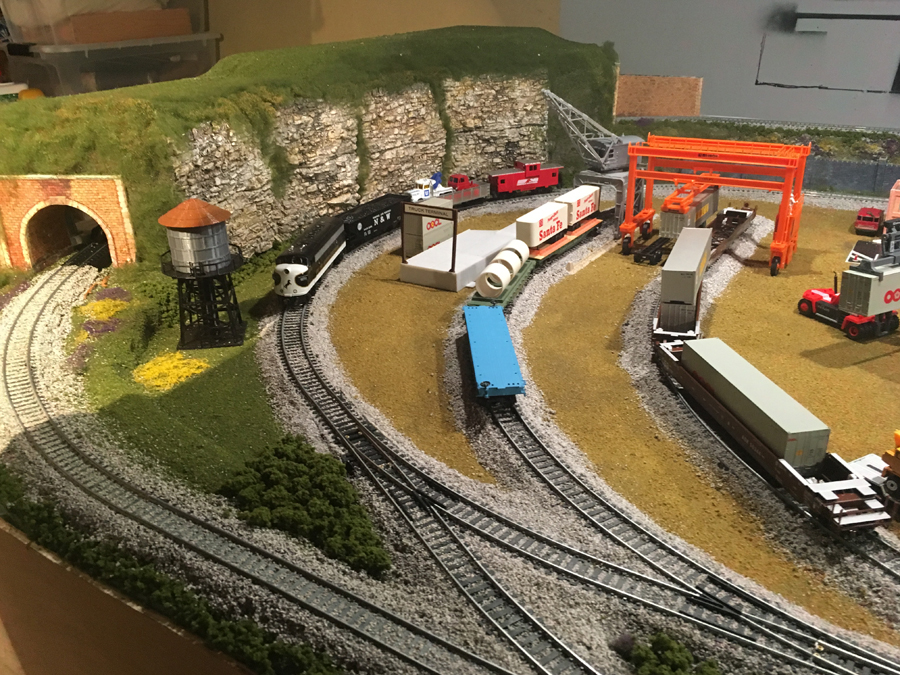
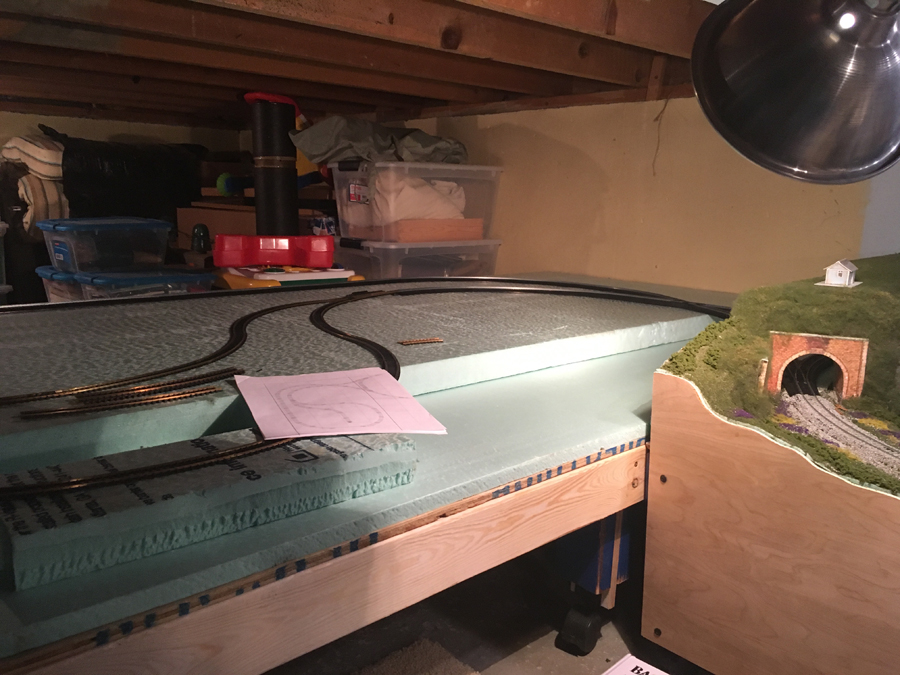
So much so that as you can see in the final picture, I’ve already built another table and started an extension to the existing layout. The new track extends from switches in the tunnel and will roll around a few new houses, a church, another lake and a construction site.
More to follow as the new extension unfolds!
Thanks again for keeping us engaged with your reader’s posts!
Rick”
A huge thanks to Rick – wonderful to see his 4×8 HO layout growing. Can’t wait to see the next one (his last post is here by the way).
It’s wonderful to see some of the printable buildings on a layout too.
“Hi Al
I have been a silent reader of your hints and tips for some time.
I live in Australia and since retiring have moved into a unit (apartment) with a double garage underground. Because we have only one car there is a space where I have set up a layout.
It’s been 2 years of frustration because every time I came to run the trains, I would have to clean the tracks and even then the engines would stop in places. I told my cousin about it . He works in telecommunications. He suggested a product called no-ox-id. It’s a conductive grease. I put a little on the rails and on the wheels and after 2 circuits the engines were working smoother than they ever did. And what’s more, they work first time even after a few days.
Best wishes
Geoff”
“Hi Al.
Got a bit further with the layout and the re design, this shows adding ballast, painting it, and adding rust to the rails, then showing a new station Platform I built using the Peco Platform edging…
Regards
Dave”
Latest ebay cheat sheet is here.
Thanks to Dave and Rick.
And if you feel you’re missing out on all the fun, the Beginner’s Guide is here.
That’s all for today folks, please do keep ’em coming.
Best
Al
PS More HO scale train layouts here if that’s your thing.
Need buildings for your layout? Have a look at the Silly Discount bundle.

Once again Dave makes it all look so easy. Thanks for keeping us entertained
Dave, I’m so glad I’m not a health and safety officer, you’d give me apoplexy. The shelter on the island platform is far too tight to the edges for safe walking room, and the doors on the low level station building which open directly into the cess of the main line are horrendous. How long did it take to get all the glue and ballast out of the mechanism of that poor little point? Love the sound effects on the 37, by the way, they used to work rush hour commuter trains to Rhymney up the line behind our old house on quite a steep bank, proper fireworks!
Rod
Nice layout Rick, plenty of action going. Thanks for the tip Geoff. That’s nice progress Dave, coming along quickly.
Cary B aka cbgadget
Al,
How do I send you pictures as my layout develops?
I am building a new layout in S gage (1/64). I installed a 400 inch incline at 2% up to 8 inches into a reversing loop. I used a laser to shoot the grade to get it bang on at 2% – worked like a charm. The beam carries around the corner so is a marker for the elevated reversing loop that rises to 8 inches and back down at 2 % to 6 inches to meet the switch again. I would like to ask your readers the best way to scenic a 3 inch wide incline that is up against the backdrop. The lower reversing loop main line runs in front of this incline about 3 inches away.
How high is your crawl space? The crawl space I am familiar with are only 3 feet high.
Rick, thanks for the incline source!
Appookta
To: Geoff in Australia
If as you say your layout is below ground you might try a dehumidifier. The moisture that’s causing the oxidation of the metal parts (track, wheels, etc) is probably where the layout is physically located. It probably is also causing oxidation on other parts of locomotives which haven’t appeared yet. Have had several layouts below ground. If you are parking a car beside the layout and driving it in after a rainstorm that greatly adds to the moisture. Regards from USA, Ray
My crawl space is 40 inches floor to ceiling so everything is either pre-cut and assembled on hands and knees in the crawl space or built from scratch in the crawl space. I’ve carpeted the space where I work around the tables which are both on wheels so I can move them where I want them to do the work I need to do. Thanks!
I like your work
Does the no-ox-Id grease cause any slipping or traction problems? It is available in the UK but a quick look at the pricing of the tubs scares me!
Looks like a fun layout to just play trains!
Rick
you need a tweezer with very tinny points on the tip to remove the ballast from
the turnouts if it gets stuck in the points , I ground the tips of a good bent knows
tweezers to do it on my N scale track and it works great !
Be well and stay safe Sir !
George
To the person working in S who asked about scenicking an incline with just 3″ to play with, I’d suggest no one way, you could have a bit where the line passes behind a bit of rocky cliff-like outcrop, a bit on embankment where it’s low, a retaining wall where it’s higher, and maybe a short viaduct or bridge over a stream or road. Breaking it up visually and having the train pass behind even a short viewblock should make it look longer and seem more of a varied landscape than just one type of finish.
Rod
great to see another new layout coming along enjoy watching it grow .great video Dave must admit you do make it look easy. who said you can finish a layout. thanks for sharing.
Where can I get the NO-OX-ID in the US? Sounds to good to be true, I would like to try it. Thanks so much Tom in Payson AZ
Just to Keep Rob Happy and Health and safety LOL ..I have scraped the small platform , I was hoping it would first in with a track down the rear , but It did look out of place , so now the track has been lifted , the platform scraped and a new station In progress of being built, thank again for comments ..Dangerous Dave
here in the states we use brake fluid on the track
To Tom in Arizona, re NO-OX-ID
Easily found on eBay various sizes and pricing isn’t bad: $8-$9
Bests-Lee
No-Ox-Id
I used this a few months ago and it has greatly improved the running of my trains. I My railways live in a garage with no cover. t hasn’t sorted out all my problems. However that may be a combination of rail dirt and still sorting out electrical wiring problem because I still in the track construction phase. Don’t apply too much! I am N gauge and getting a thin skim took a bit of trial and error
Rick,
Your layout is coming along great! I can’t imagine trying to build a layout with only 40 inches of height to work on it. I’m impressed with the quality of your scenery and the little details that make it more interesting. Are you really able to run that DDA40X on a 4×8 layout? It looks like it should need at least 24-inch radius curves. Are you sure this is just for the grand kids? 🙂
Dave,
Thank you for posting your track ballasting and painting method. I’m sure you’ve probably posted some of it before, but this video covered it all from start to finish really well. Are the paints you use acrylics or oil based?
Geoff,
Excellent info about no-ox-id. So far, living in dry New Mexico, I haven’t had much problem with the track and wheels getting oxidized. Only some of my oldest HO locomotives have needed some serious wheel cleaning and lubrication to get them running well. Thanks for the tip.
Good Workmanship? I just hope mine comes out that good.
Dave, love your layout and espeically your treatment of aging rail -s it is simply the best treatment around and should be mandatory on all layout!!!! Well done and keep enterating us, we love it
Regards
Peter
from Australia
Rick….. nice job…..beautiful looking layout.
Dave….I always enjoy and learn from you videos. Great job.
Re: No-ox-id, I have a 4×11 ho layout and found this stuff on e-bay. i was getting tired of wiping down tracks so decided to try it. after a little trial and error i found that a little smear on my finger made the best applicator. very little is required and it lasts for weeks with no issues. now i can walk up to my layout. turn on the controller and run my trains. perfect for a lazy railroader like me. the three little tubes i bought should outlast me. great product.
Automatic transmission fluid applied and then wiped down once a yeay will fix all your rail oxidation problems. Model railroader magazine came out with an issue on it many years ago and I have been using it consistently for ten years on my large N scale layout in a bedroom of our Arizona home now with complete success. Note: It already has a chemical agent in it that won’t harm plastic parts. Plastic ties won’t be affected and there is no residue slippage.
Way to go Dave !
I just love to watch your trains run !
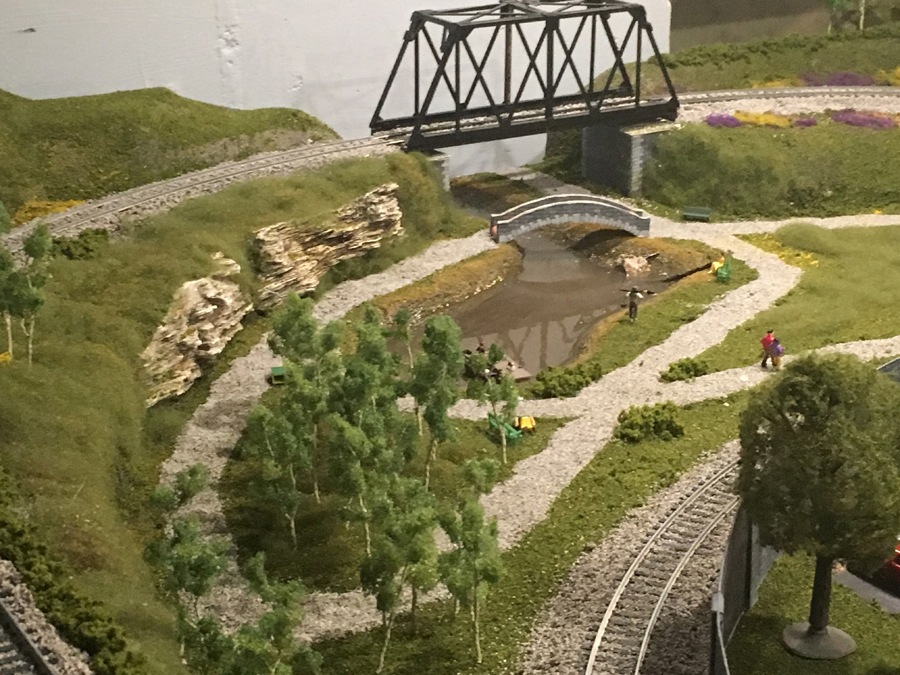
Rick, really nice work. Very relaxing to view it all. But the walking trail seem like they’d be mighty rough to walk on, possibly even causing a broken ankle or two. I suggest removing the “rocks” and replacing them with “sand” or “dirt” -sized grit.
Dave, your video made my day …AGAIN. Thanks so much for sharing. You provide an easy method for ballasting that I’ll keep handy for years to come.
Al, thanks for providing the platform for all this useful information.
Rob Schweitzer
St. Goar & Murren Scenic Railway
Ann Arbor, Michigan, USA
Regarding No-Ox-Id. I understand it works really well but cautioned that it is not good for locomotives that have traction wheels. Yes/No?
4X8 ??? Who’s measuring this?
I keep reading articles about having “no space”, and then I see layouts that are 2 to 3 times the size of anything that will fit where I live. I am hoping to be able to put up a garage or work shed in order to be able to have an indoor O layout some day. In the meantime I am going to try to put a garden railway in the yard sometime soon. Both layouts from todays edition we’re very good. I enjoy reading about and seeing them.
Rick great looking layout!! Nice Job.
no-ox-id is available in many forms thru Amazon and several others using your search engine. Prices vary and shipping costs also, so it pays to shop around.
How tall is the crawl space?
Man, in picture #7 that big zig zag hill looks to steep to even walk it! 😲
very nice set up. well done.
The photos look great, how about showing the track plan for us dumb heads who might like to reproduce it for our self.