Laurence has been in touch with his DIY model train roads:
“Hi Al, I wondered if this would be of interest to your readers.
You put on line the layout Santa’s little helper at the end of December and as I have taken photo’s of the build in progress I thought your readers might like to see how I constructed the bridge and roadway.
I got quite a few wonderful comments and some readers couldn’t understand how I got so much on a 5’x3′ board, some even thinking it was “N” gauge. It’s “OO” gauge and I think the secret is not to clutter it up with too many buildings.
I hope the pictures are ok for you to use and hope it will give encouragement to some of your readers to have go at something different.
Best Wishes
Laurence”
DIY model train roads:
A huge thank you for Laurence for sharing his DIY model train roads – it’s wonderful to see all the different ways folk come up with to acheive an effect.
If you missed Laurence’s last post, it’s here.
It’s also quite a topical post, because today is the last day you can grab the tunnels and bridges print-out-scenery at for just $10.
You get three buildings (two tunnels / bridges and a grain elevator) for just $10.
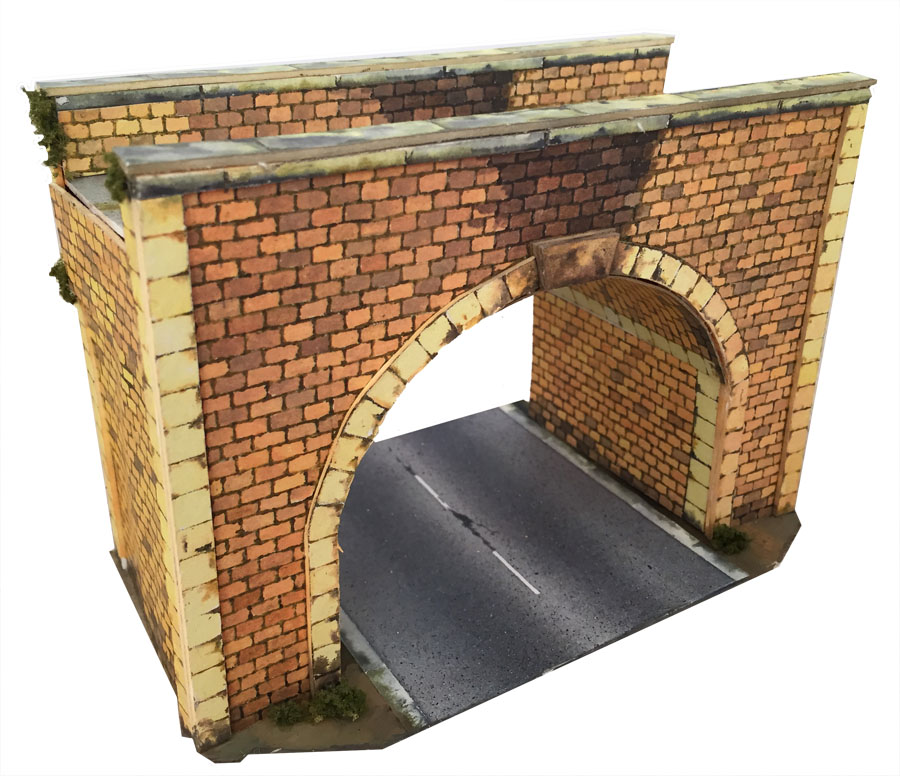
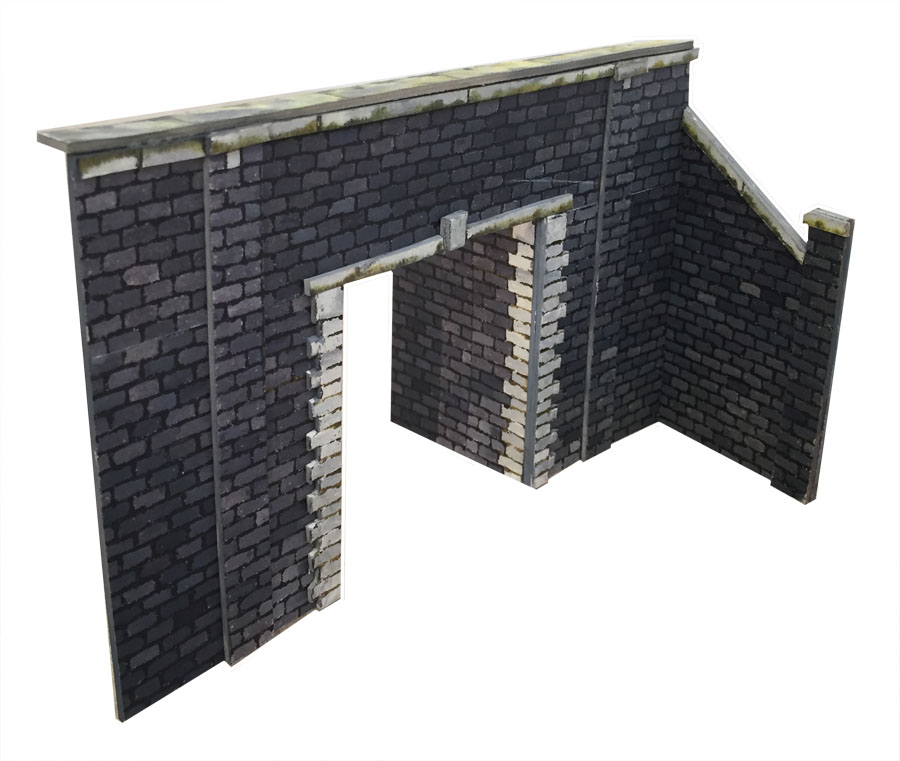
Here’s what the tunnels / bridges look like if you missed them:
If you’ve been mulling the bridges / tunnels over, you can grab ’em here at the launch price.
That’s all for today folks.
Please do keep ’em coming because it’s getting very quiet this end.
And if today is the day you get started on your layout, the Beginner’s Guide is here.
Best
Al
PS Latest ebay cheat sheet is here.
PPS More HO scale train layouts here if that’s your thing.

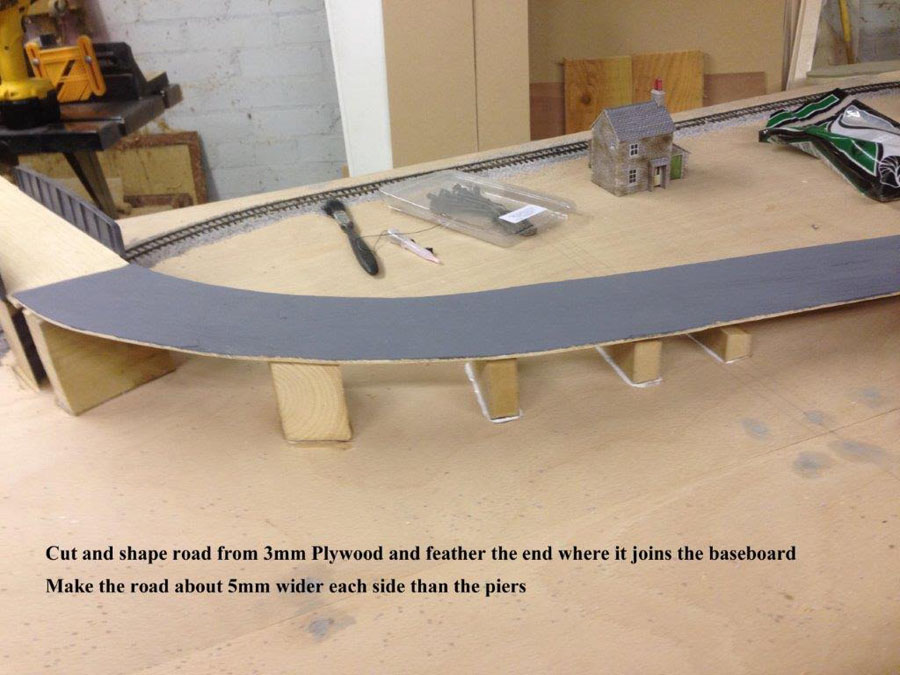
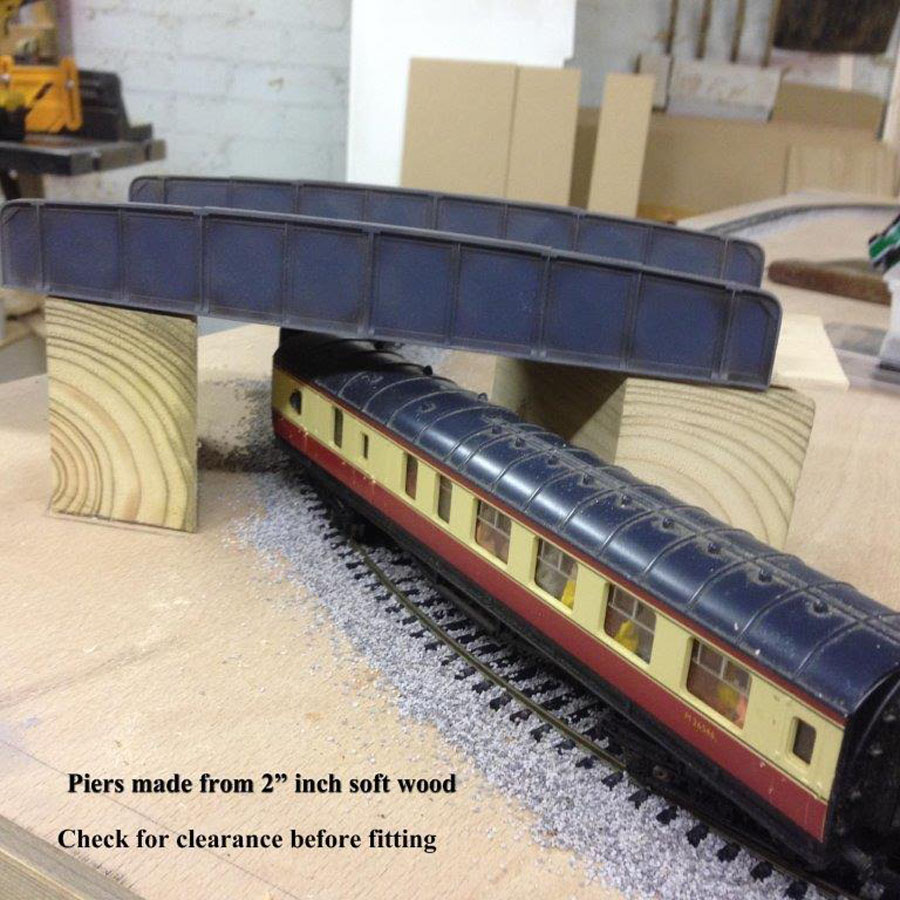
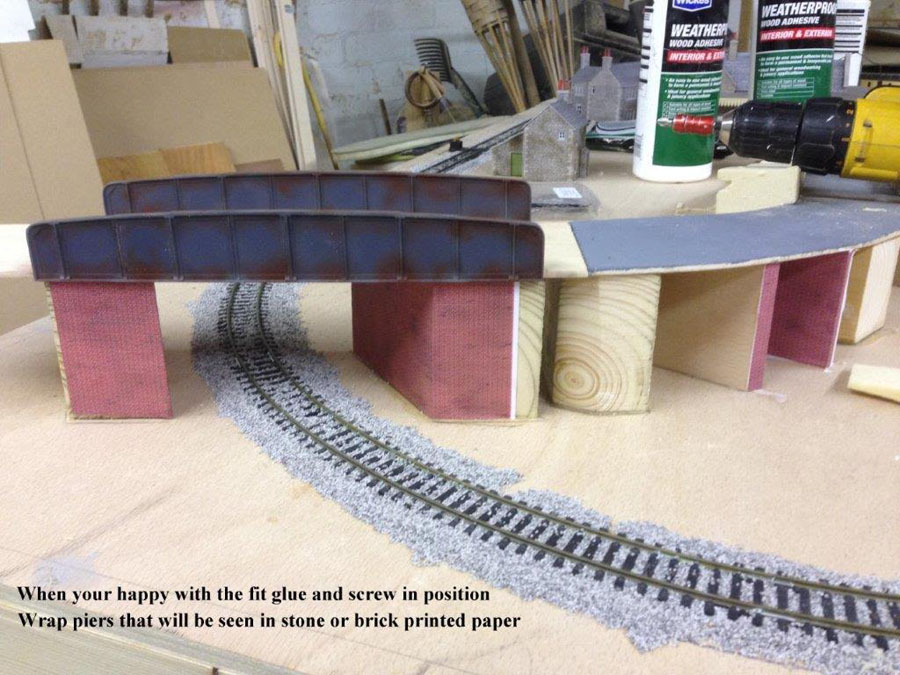
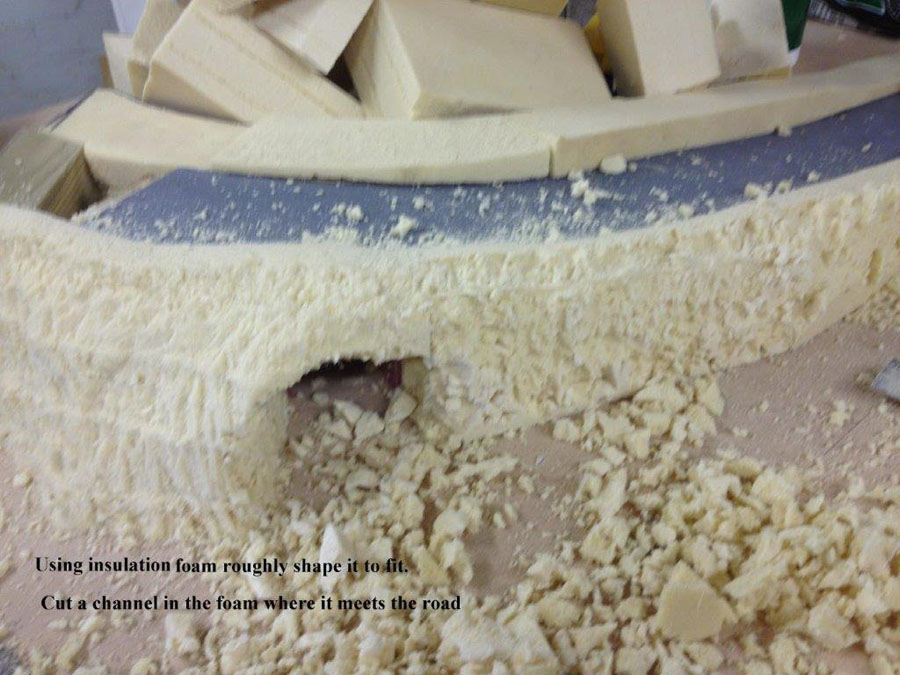
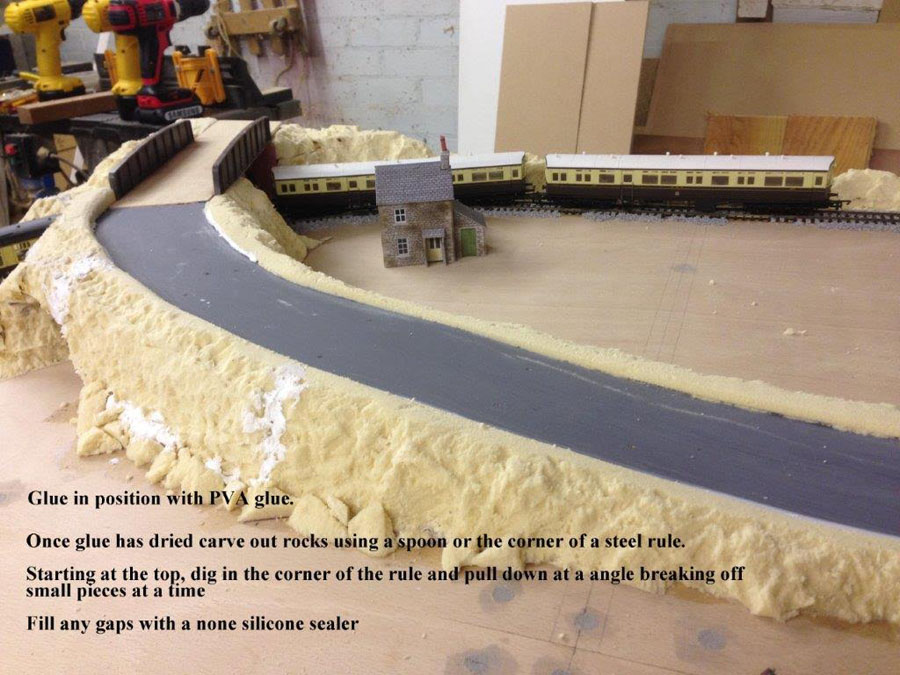
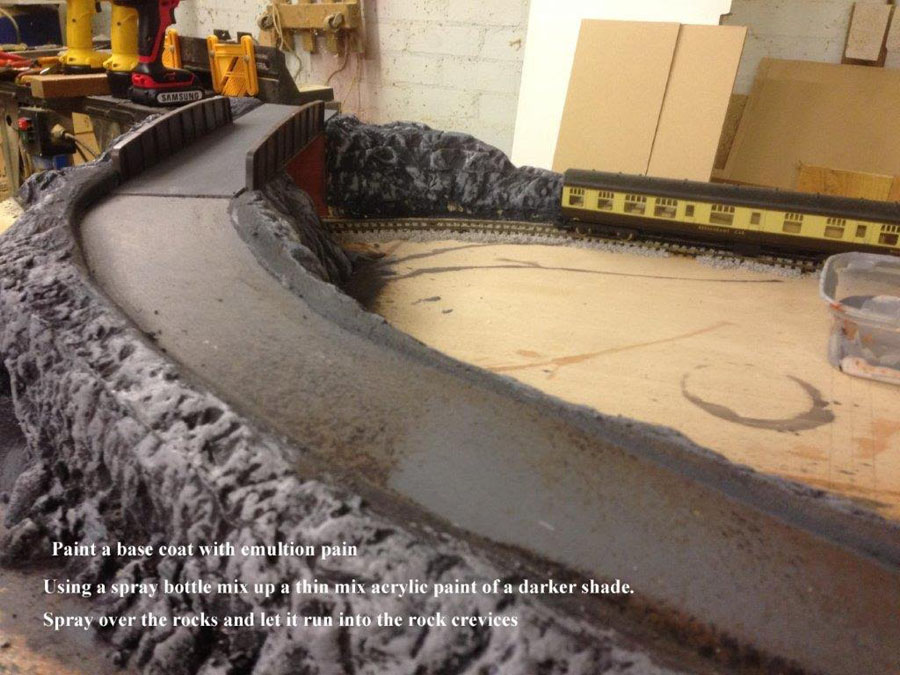
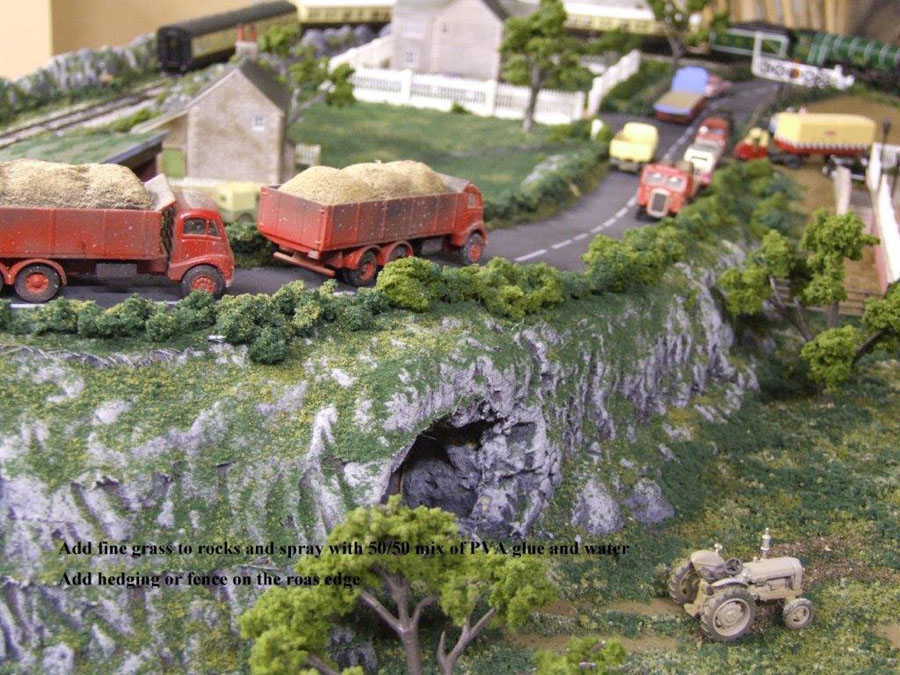
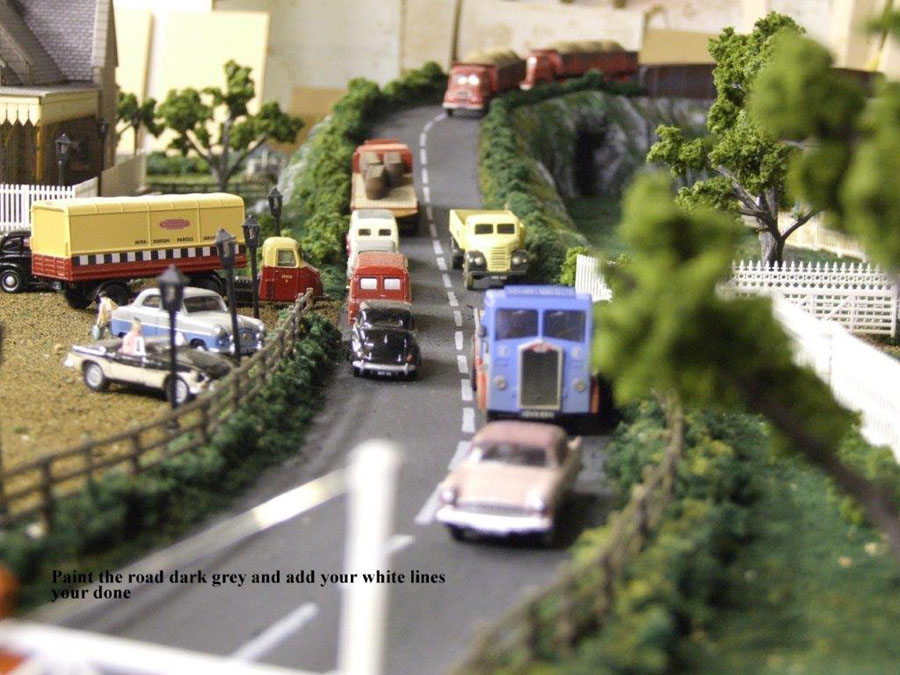

some pretty sharp I like it.
Domie
Thanks for the tips keep up the great work.
Love the pictures.
Is it just me, or is the type getting smaller every day?
Putting the lettering over various colored backgrounds can also make it harder to follow all of Laurence’s efforts.
Thanks!
Andy
Well done Laurence. Looks very good and keep it up. Brian
It is tips like this that allow entry level folks gain the confidence to do more work on their projects.
We need more of this for the new guys! Now I wish I had saved my Plaster Molds I used for making buildings & other structures. It was so easy using plaster, however…it did make the layout very heavy. Foam is the way to go nowadays!
Thanks for the step-by-step. It applies to a lot of designs.
Thanks to Laurence for demonstrating a layout can look good without a huge clutter of buildings.
Way to go Laurence, your ability is quite impressive. I want to try your techniques.
The white lettering stands out better that the black lettering over the layout.
PS: The dark lettering stands out well over the solid light colored background in the first two slides.
wow nice work
keep em runnin fellas
stjohn in long beach calif
nicework so realistic
I love seeing the extreme talent of so many model railroaders. It is truly amazing to see the various techniques and materials used to get such great scenery!
Cheers! NJ Mark
Very nice work on the road and the rest of the board ,it makes it look to easy
to be true !?
Al. I wish I had a good camera to be able to send you a few pics of the layout I am building for my Grandson I finally got some worm days in the front room to start gluing down the road bed and work on the P.to P. upper level and a start on the road bed on the lower level including the tunnel at the one end ! Be well and stay safe every one !
George
Like the shape of the road with the hedging very realistic. hope to see more, thanks for sheering.
Thanks for the tips! I’ll give them a try.
Nice job you have done Laurene ..and good tips ..Dangerous dave
Very well done, as already mentioned the type is almost to small to read, you may want to use a bigger font great work even so.
Was wondering what type of paper you are using, anything special??? Thanks for sharing…
The paper used for printing of tunnels and so on…. Sorry, last post was not worded right….
Great rock work! Roads look great. So many great ideas.
Interesting and a good job! HEY the vehicles are on the wrong side of the road!!
🙂
John From Baltimore
Jim Scancarelli in Charlston NC is as good if not better then what I see here. Jim and I were in the Navy together in 1960-62 on the back yard fence in his layout is an ho scale coke bottle carved out of one of the tines of plastic combs the exact same color as coke bottle. He is now (and has been for some time) the artist drawing “Gasoline Alley” comic strip. A “master” HO model train fabricator. Love your site.
Very Impressive Laurence, Great job! Craig
Nice project. From Indiana, a “colonial” wonders why everyone is driving on the wrong side of the road? 🙂
(sorry – could not help myself)
Awesome and inspiring. I’m gonna try it
Can we have a track plan of Laurence’s layout please as I also have the same restricted space where I want to create my OO scale layout. Thanks. Peter
Very lucky for the builders to have found a ramp shaped spur of natural rock like that, leading up to just about where they wanted to put a bridge! Most roads leading up to bridges are on earth fill embankments… lovely bit of rock work though!
Rod
nice work. keep going.
This is very nice. The roads, especially mountain work is excellent. Another method that works. Just makes me think of bridges, tunnel portals, retainer walls can be made of wood. The idea is to lightly sandblast these items as the softer wood will slightly etch and grains will not… spray paint with cement greys, tans, sand color. Looks like poured cement structures with wooden forms used to construct.
My first arch bridge was a 2X4 with spaced holes made with hole saw. Table saw used to cut exactly in half lengthwise and match together both sides. Sandblasted and spray painted. Any length or width can be made. Concrete arch bridges.
Ivy looks great running all over using small brush and Elmer’s to make vines and sprinkle on grass. Instant ivy, grass sticks to the glue, dries quick.
Rich, regards
I was able to click on the picture with my mouse, which increased the size of the picture and the font, making it easier to read. Give it a try.
very nice
Nicely done, looks great !!!!!
I love the insulation foam idea. First time seeing this… And teh results, well done Sir!