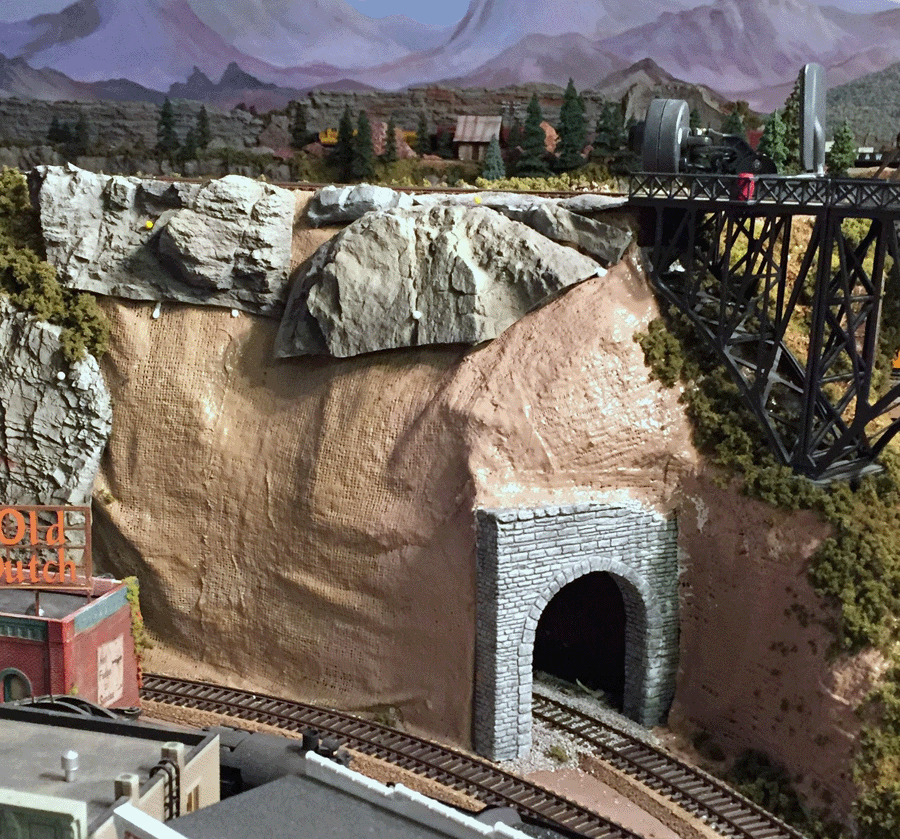
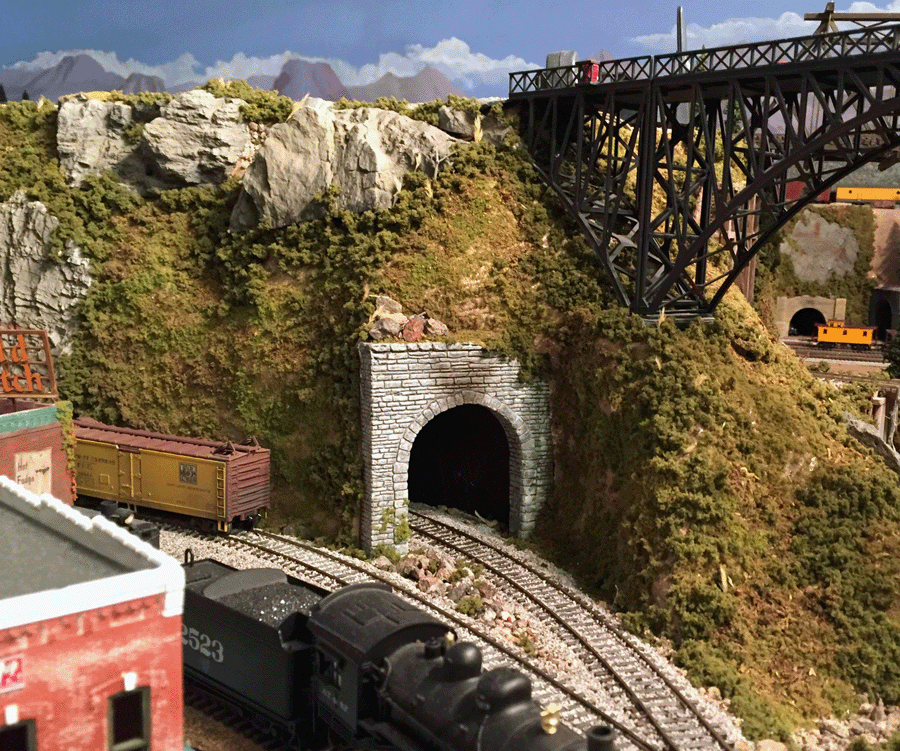
Mark’s been in touch with a post on making a cliff face for a model railroad layout.
I’m constantly banging on about making a start.
Inertia affects us all, even Hall of Fame member, Mark.
But as you’ll see, it’s all about rolling up your sleeves and having a go.
And that’s the same for a brand new simple oval, or one like Mark’s that is 6 years in the making:
“Hi Al.
My Tip for Today is “just do it”.
After six years, I finally accepted the challenge…
It was a relatively small project, but very difficult to reach and extremely annoying.
This scene went unfinished for years as it is over five feet from the front of the layout and almost impossible to reach.
The height of the upper track is a little over five feet high.
The only possible access is over the top of the upper deck reached from the “canyon” isle in the back.
That meant doing scenery from a step ladder, bending over the top about two feet in to the layout and working upside-down!
I accepted the challenge and actually completed the scene in a timed 53 minutes! (not counting time for the glue and ballast to dry).
Just one more thing to scratch of the “this is probably never gonna get done” list.
Cheers!
Mark”
A huge thanks to Mark.
You can see more of his amazing working work in the Hall of fame.
It just goes to show, your layout is like most things in life: starting is more than half the battle.
Though I do concede, I think what took Mark less than an hour would take me an afternoon or two…
Mark’s post also reminded me of Bill’sModel train cliffs.
That’s all for today folks.
A big thanks to Mark for sharing his take on making a cliff face for a model railroad layout.
Please do keep ’em coming.
And if today is the day you get started on your layout, the Beginner’s Guide is here.
Best
Al
PS Latest ebay cheat sheet is here.
PPS More HO scale train layouts here if that’s your thing.


Good work!
The hours work done looks fantastic, I have been through that process on my previous layout and know exactly what you have been through. Keep up the excellent work. Brian, RSA
BRAVO !
Perfect timing… I have been looking how to “merge in” a portal at a point in track very similar. Love the look (especially of the top right)…..
Mark,
Excellent. You made a wonderful improvement that looks like it’s been there all along. Keep up the good work.
Great work in tough conditions! Looks really good!
Very nice! A lot of detail achieved in a short time. Also a good painted backdrop. Well done
Now I know what to do with my unfinished corner
I looked at the first image and thought it was very crude. How wrong I was when I looked at the second photo. It was like magic or more specifically, like a magic wand just covered everything. Mark’s imagination to create beauty from what looked like junk is a lesson I shall not forget. I am truly jealous of Mark’s foresight and skill. Well Done!!!
WOW. I went from “what a blah mountain” to “Holy mother of God what a beautiful mountain” and in only one hour! You even have weeds etc in the track bed. This looks real. Outstanding job. I really like the little details, like adding staining from smoke to the portal. Looks fantastic.
Well done, the details are absolutely fantastic. Once I get myself in touch with how to send attachment pictures with emails I’ll show you how my layout us coming on.
Very nice work.
Keep up the good work, remember it’s a work in progress that we all enjoy. It looks like it was worth the wait.
VERY NICE !!!.
Great looking scenery
That is so cool is it O gauge its a fantastic layout
What a great result Mark.
If I can get my cuttings to look as good as that, I’d be ecstatic.
David D
Looks Great
I, too am impressed with the realism. I bought an overhead creeper that auto mechanics use to prevent scratching car fenders while they work under the hood (bonnet). It helps me work comfortably in some of the more difficult places to reach.
Well done Mark, grand job done here, what gauge this is as for a lot of space required l think. Roy
Hi guys. Thanks for the kind comments, I am humbled. The gage (scale) is HO. The total space allotted for trains is around 500 sq feet (150 sq meters) including display and work area, with the actual operating layout presently at about 330 sq feet (100 sq meters). All under refrigerated Air Conditioning as the heat here in Las Vegas can easily reach 115 to 120 degrees F (48 C). …and no, I don’t know what the electric bill is as my sweet wife handles that and says that my happiness is worth any price. Feel free to share this last comment with you loved ones. 🙂 Mark
excellent detail and work
keep em runnin fellas
Enjoyed The Pictures! Now there’s a real diusplay of talent and skill.
gives me good ideas for my track. keep up the good work
looks great for an impossible job good on you for having go and upside-down as well truly a very skilled gentlman
Beautiful job, great blending of scenery.
AWESOME!!
Looks great! By the way, in the first photo what are the 2 objects in the background? One is round on the left and the other item near the bridge looks like a side mirror from a truck. Just curious!
The little worlds you guys build and create are nice and cute but I would rather see a train running now and then . There are enough movie sets … Please run some trains … Thank you .
Mark
You are a winner. Your best Mate knows you are talented and and your easel is a train layout. In Vegas there is no better win.
Be well & safe
George from LI, NY
Well done Mark! Your final results look fantastic. Of course, a better solution would have been to design the layout so there were no unreachable areas. 🙂
Inspiring! Looks great as well.
Only about an hour? WOW!!! That is extremely impressive work for only an hour!
Pretty Nice.Love the mt.
If I hadn’t seen the first, unfinished photo first, I wouldn’t have thought that the second was a model railroad! Well done!
What better way to show it than the before and after pictures. Shows the effort put into it .Makes the corner compete. I really like it.
Scenery the most favorite part of the hobby for me. Once in a while I even run trains!
very nice.