Alan’s been in touch with some simple but effective ways to weather your model railway:
“Hi Al,
I have a few tips that I have picked up which may be of some interest to your disiples.
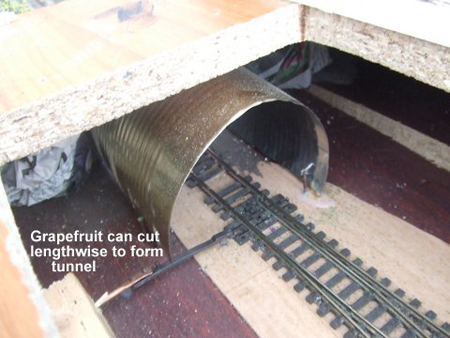
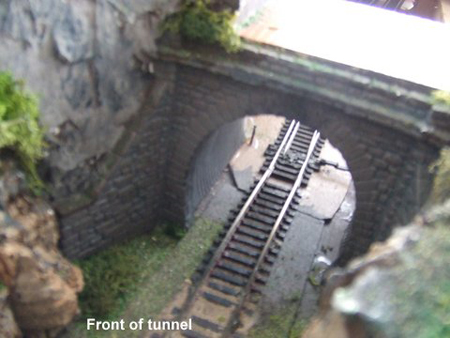
First, when making bridges & tunnels for single tracks, I generally use grapefruit cans. Remove both ends & cut along the length to open it out. It may require 2 cuts depending how high it’s needed.
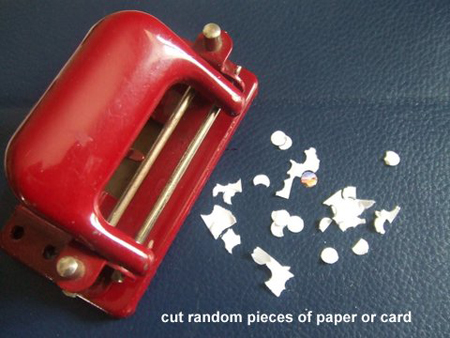
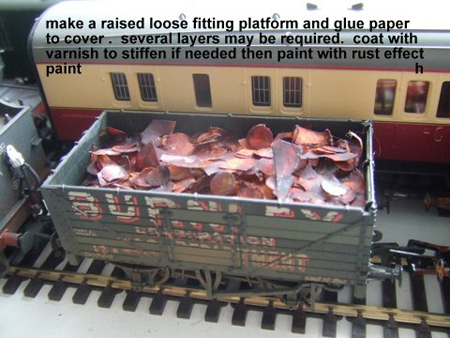
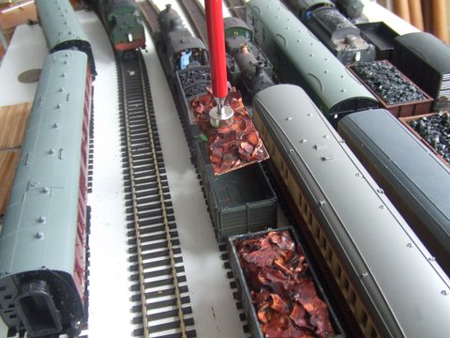
Scrap metal is a load that’s often carried by rail, but finding very small pieces of the real stuff is not always possible. So I came up with using paper or thin card. You can see from the picture how I formed the ‘scrap’.
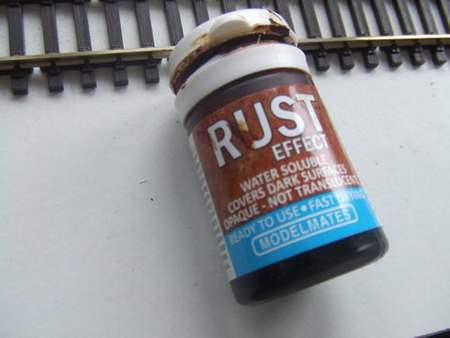
After making a raised platform to fit the wagon and painting it black, I glued the paper to it, several layers may be needed, then let it dry. I found the load was a bit ‘spongy’ when touched so I put a liberal coat of varnish on it & when dry painted it in rust effect.
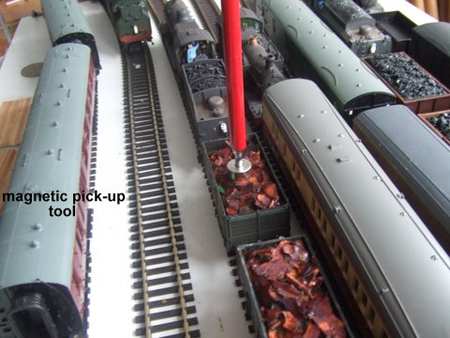
If the load needs to be removed at times, a quick way is to glue a small magnet under the load then using a magnetic pick-up tool the load simply pops up.
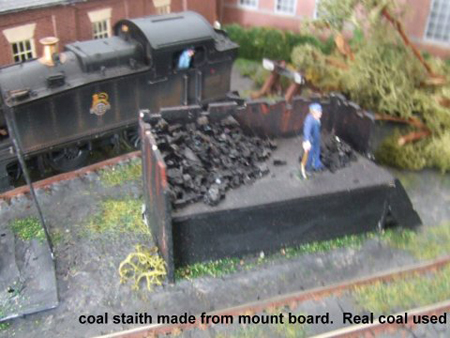
To save money, I make as much as I can, and I find artists mountboard very useful, the coal staithes are made by scoreing it to make it look like it’s made from sleepers. Many of my other constructions are made with it.
Finally, NEVER throw anything away!! You never know when it might come in handy.
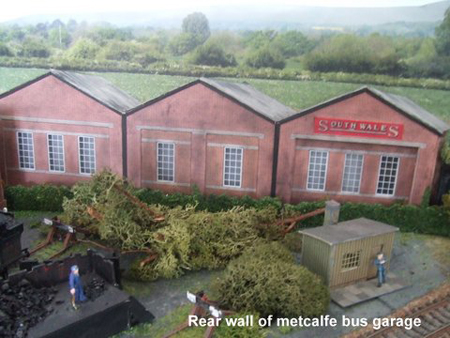
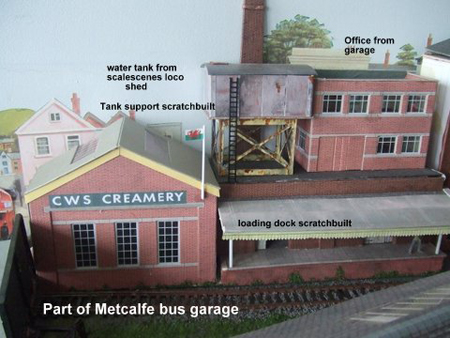
I had the Metcalfe bus garage in the corner of my last layout, but no room on this one.
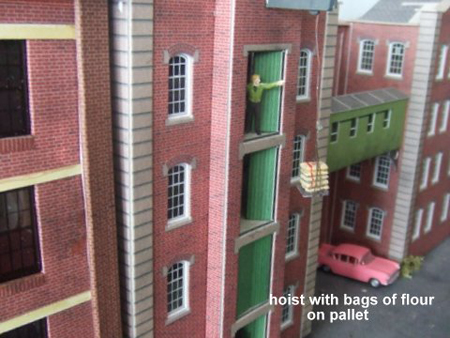
But after about a year I realised I could canabalise it to make a Creamary,- see picture.
The rear of it is now being used as a low relief bus garage.
Old ball point pens, the springs & barrels from some of them, Q tips ( cut the ends off) they make good wagon loads, or pillars, old scouring pads, the list is endless.
Thats all for now, Happy modelling
Alan”
Wonderful tips from Alan on weathering your model railway.
That’s all for today folks.
Please do keep ’em coming.
And if today is the day you get started on your layout, the Beginner’s Guide is here.
Best
Al
PS Latest ebay cheat sheet is here.


What a great set of ideas, Alan. Thanks
Great job Alan like the great tips especially the can and paper sheet metal …. I to believe never never throw anything away …. I think this hobby is the only way you can get away with being a Hoarder ….. Is that hoist work???
Great ideas Alan! I agree, never throw anything away. You never know when it will come in handy. I have used corn dog sticks cut to size for HO wood fence. They’re a little wider than HO scale wood fence but not by much. They can also be used as planks for a fishing pier on a small pond. Just be sure you clean them with soap and water first to remove oils. Also, cereal boxes can be used in place of card stock.
a friend of mine is useing 2 liter milk carton to build his grain elivater and a 4×4 block of wood for the grain annics
Alan,
Great ideas … and I also agree to never throw anything away. In fact I have a fairly large box of junk. Before I go out and purchase anything I look in that box first.
Thank you Alan for the tips.
popsicle sticks, straws, sponges, pieces of wire, pencils, tubes from toilet paper, towels, card board, all kind of foam packing, etc. A Handy Man’s toolbox.
model railroading what a unique pleasure.
regards,
Tom
PS: Al, thanks for keeping the key open for a little longer. interested. Been doing some research on 3D printing … really finding an interest in it.
Some great ideas there Alan, cheers.
Ron.
the mind is a wonder thing when put to good use, thanks for opening mine up, love it
Great ideas. I’m all for recycling and doing stuff on the cheap.
Thanks
Being in a Veterans Nursing Home I have access to all kind of small “things” that I save. Never through it away. Corn dog sticks also make good vertical bats for board & batten buildings. Lances that are used to take blood samples [diabetic] make good Gondola loads. They are about 3/16″ by 1/4″ & 1 ” long yellow/with blue ends & McKESSON written on one side. Paint as needed. Al’s site is a Gods send for someone brand new to modeling & Model Railroading. Only a couple of years now. Thanks Al your site keeps me going every day with new ideas & things to try.
Bunch of great idea’s.Get’s the brain juice flowing.Could use an rc servo to run that hoist.Up and down with a switch.I go into the dollar store and look at everything to see what can be made.even take cheap kid toys apart to use the parts for build’s.Friend gave me a clock with the glass dome.the one with the 4 gold ball’s orbiting it lol.I used the plastic parts inside to make garden tools.
everything looks fabulous. my question is pertaining to the aroma sticks as logs photo. did you make the people in the scene because they hold the logs perfectly. if so can you explain how. thanks
Great tips and photos nearly everything i look at to see if i can use it on my layout.
Great tips there. Must remember not to run your fingers around the inside of the tin until you’ve run around it with a file or smoothing spoon.
Another tip is that if you use the small ‘TeePee’ tooth brushes they do break quite easily but the handle part when painted matt grey look like electric traction motors and the brush part can be made to look like a small shrub. I’m building a small electric motor rewire works just to use them up. Incidentally the fairy liquid tops when stuck together can look like a larger electric motor or generator.
Thanks for the tips, interesting ideas
THOSE CANS MAKE GOOD TUNNELS. I WOULD NEVER HAVE THOUGHT OF IT.
I had some old wind up type wrist watches from the fifties or sixties which I took apart. All those gears and odd shaped pieces made great looking scrap metal loads. Don’t throw anything away, you never know what you might need.
The perfect way I found to make scrap metal for you Gondola loads.
Take a sheet of Alum .foil spray it rust colored paint and put in a blender .
the blender will shred it into metal strips that looks like metal shavings . .Build up the inside of gondola and white glue the shavings to the base.
Your gondola is now ready to run. Have fun Al.
I never throw anything away much to my wife’s annoyance. The latest project I’m working on is running cotton between telegraph poles to simulate the wires (okay nothing from my box of goodies there) but the guy wires from the top of the pole to the ground are made from the metal wire from an old computer printer cable and the ground connection is a small split pin from a cheap pack of nails. screws, etc. I’ve just completed a wire fence using the skewers from kebabs as the main posts with the metal rods from rivets as the wire posts in between.
By the way, the paper “metal” scrap load is a great idea as you don’t want tiny random pieces of actual tin or steel on your outlet to get into the works of locomotives by magnetism.
Your scrap metal load looks great. I especially like the idea that it is not metal. Does it sit directly on the bottom of the gondola? It seems to me that here is another use for scraps. Cut a toilet paper core or paper towel core to the appropriate length, glue it to the bottom of the gondola load, and you will have a full load. Use two lengths for a longer gondola. Also, on your magnetic removal tool, you could glue a washer or two to the bottom of the load rather than a magnet. Your magnetic tool will still work.
Still in training,
Carl in Kansas.
I have a suggestion for using cans in your model. There are several new types of can openers that don’t leave a sharp edge. They actually unroll the lid from the sides of the can, rather than piercing the lid just inside the can sides. No sharp edges! You could also repurpose the lids now too.
Some good tips there Alan …Dangerous dave
To the RailRoader in the Veterans’ Nursing Home: Thank you for your service, Sir. I too receive medical care from the VA and, as a retired EMT I, find the level of care to compare very well with what I saw in hospitals on the “outside”.
Great tips from Alastair and all of his friends. A big help on my developing Post War Lionel O gauge set up.
Thanks for the ideas.
I would appreciate any insight into the use of “scale” that we all use all the time with our train sets. I have an S Guage collection and I find that some 1/64 scale items don’t fit the size correctly. S is 3/16 inch equals one foot, Right. So a 6′ figure would be 6 X 3/16 = 18/16″ or just over an inch.(1 1/8″)
Most doors on the A/F equipment are closer to 1″ and figures advertised as S range from 1″ to 1 1/2″. So I am just wondering if others are experiencing the same thing. Figures at 1″ seem to be the best fit. Thanks. WLR
More fun making your own detailing and reusing odds to complete the look .I think what you have one is excellent and gives us all a few additional tips to add to our knowledge …thank you for the tips
Lots of great ideas to make things from, thank you for sharing your ideas.
we buy junk computers and then strip them of inside parts……………makes great “loads” for your gondolas……..
I love these kinds of tips. If you carefully organize little bits and pieces and even make notes on what they are and their potential uses, you have just added materials to your collection or stockpile of model railroading supplies.
This is not just keeping junk, but resourcing materials and useful items.
The cereal boxes are great for buildings or roadways. You’ve already paid for the cardboard when you bought the cereal same as anything that comes in a metal can. And many things we buy have big oddly shaped foam pieces which can be cut, shaved, melted or chopped up and used as stones or to create terrain. If you “melt” it with acetone (fingernail polish remover) it can be molded like putty.
I keep chopsticks, popsicle sticks and other small flat or round pieces of wood. Consider the price for balsa wood. Even if you buy these things they’re still cheaper. Repurposing materials and small things lets us use the more specialized materials for specific projects and saves us money by making our dollars go further.
Frank in Orlando
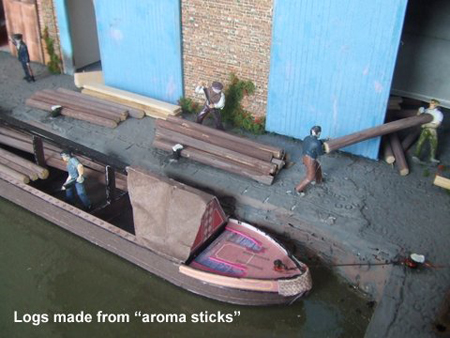
Really like the idea of using “aroma sticks” for logs!! Great idea!! I’ve got a couple of bags of those laying around so off I go to make logs! Happy modeling.
Wonderful ideas. Alan. The bags in the hoist could be dried milk bags. Creameries in the US often had a steel beam sticking out for the hoist which was for the dry milk bags. The can could be a form to be removed later. In any case, it is a nice consistent look.
Many thanks,
MN Dan
Alan
Much thanks for the great tips and narrative. I’ve trained my wife to ask before she throws stuff out. LOL. I’m the “Junkman”.
WLR
It is because of S ga that us S guys have to search the wide world over for stuff, You are so right about scale. Most venders are not close to being right in any scale I might add and I find that frustrating. 3D printing is changing all that and now you can exactly 3D print people in S ga that you can never find to be exactly 1/64 th. I’ve just begun this adventure and made shop tools, junk, people and boats to exact S scale and it looks so correct. The card stock buildings need to be printed at 1.3 x HO to get the doors at 8ft scale height so you have get an 11×17 printer and paste your print to a substantial cardboard or wood. You can rarely get true S scale building kits.
Big Al
Some mighty clever blokes you got there. The comments have some gems too so you cant speed read them. Cool.
AAhh coffee, big Al’s blog- It’s gonna be a nice day.