Got a blast from the past for you today.
Pulled these two out of the archives:
“Al:
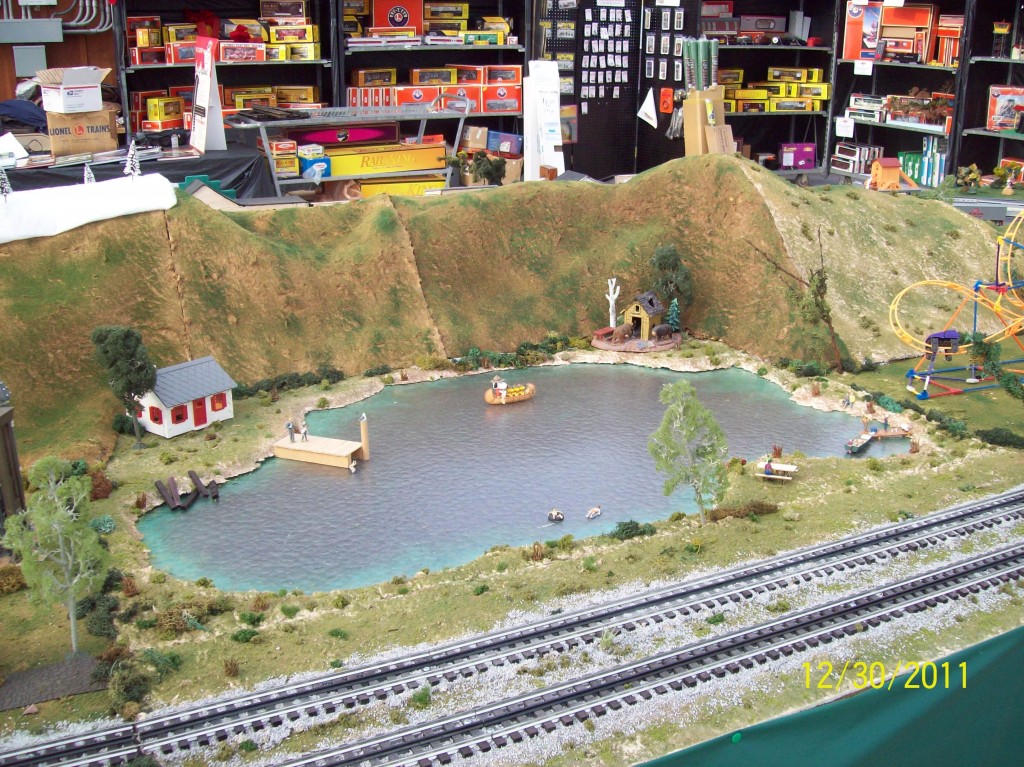
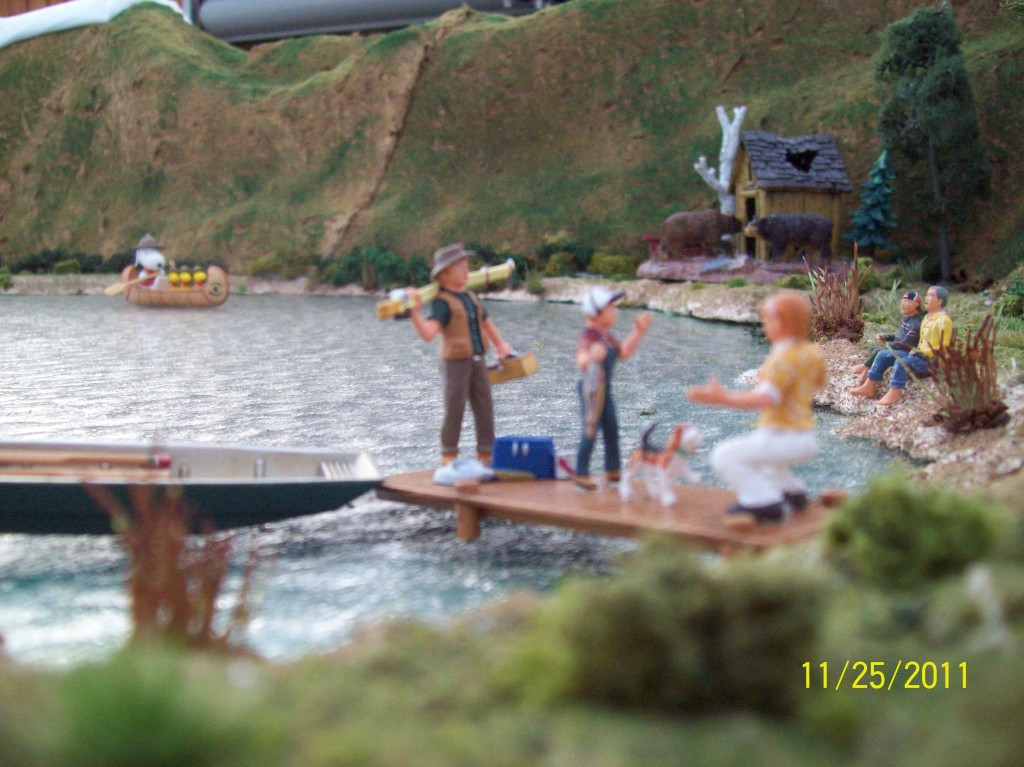
I learned this technique from a professional builder of architectural model for making artificial water for a lake or harbor scene.
Take a piece of sanded, dress plywood (luan will work well) and paint it the color you want you water to be.
Once it dries, over the top of it, place a piece of randomly rippled sheet acrylic, the type that would be on a shower stall door or a ceiling light difuser.
I buy mine in 4′ X 8″ sheets from a commercial plastics supplier. The result is as shown in the attached photos.
Sincerely,
Randy”
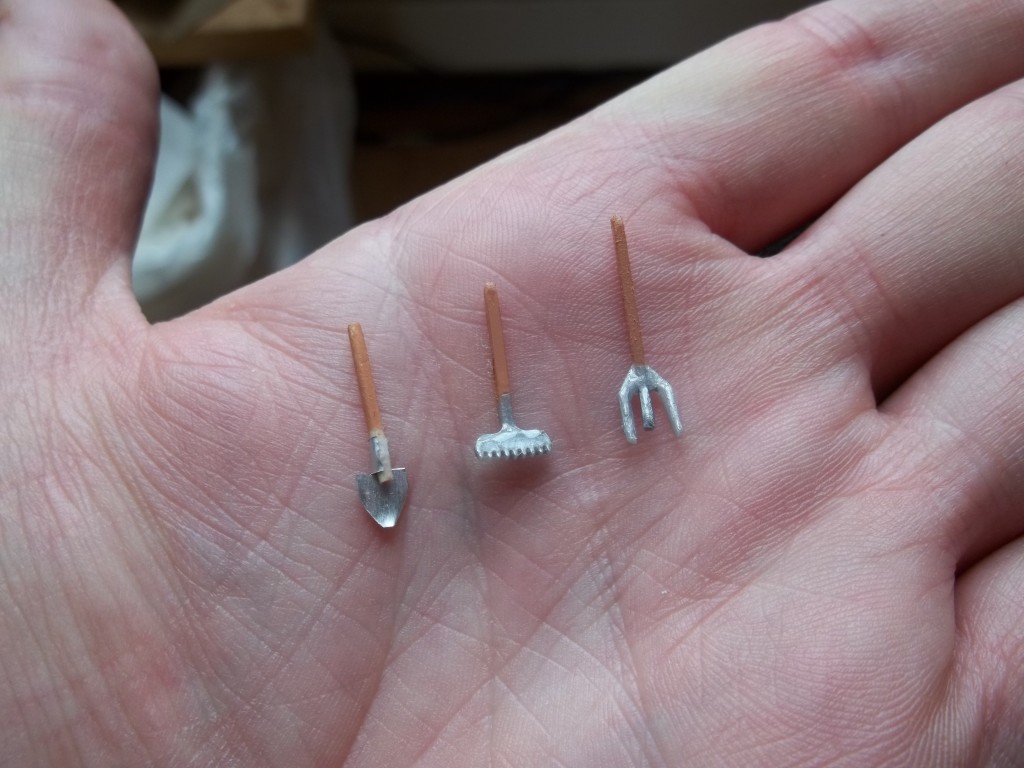
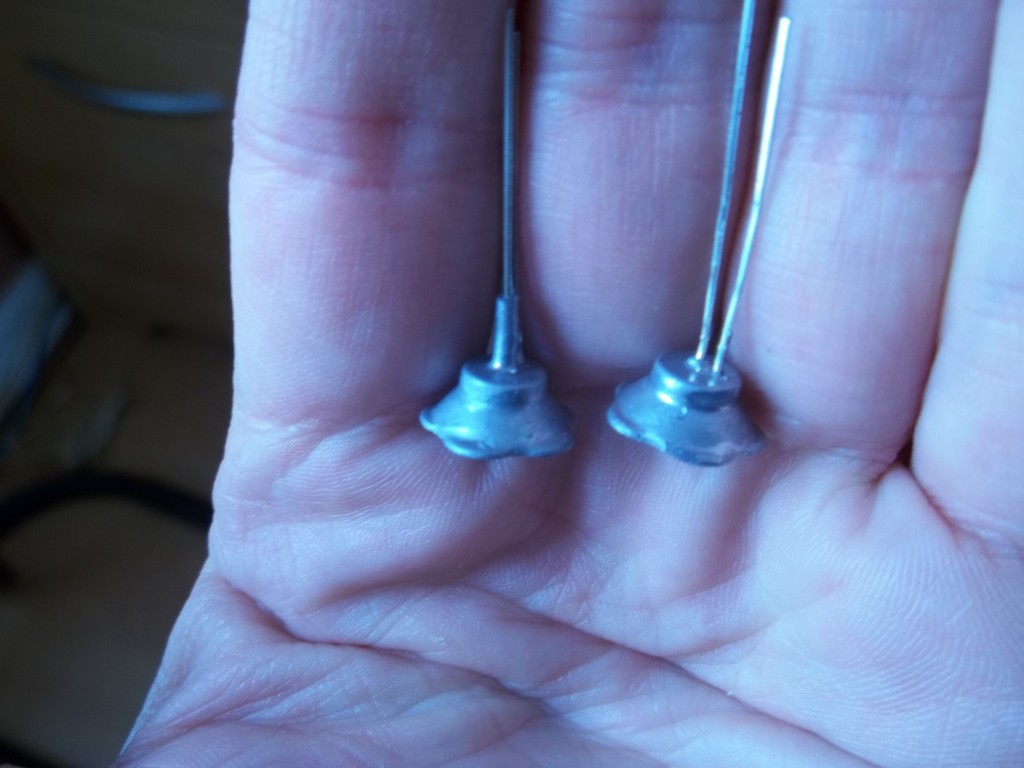
“Tools made from an broken clock.And lamp shades from birthday cake candle holders.The project the light very well.going to use them in my green houses and such.And a fast build of a N scale kayak boat for Thomas river.It can be done.
Kim”
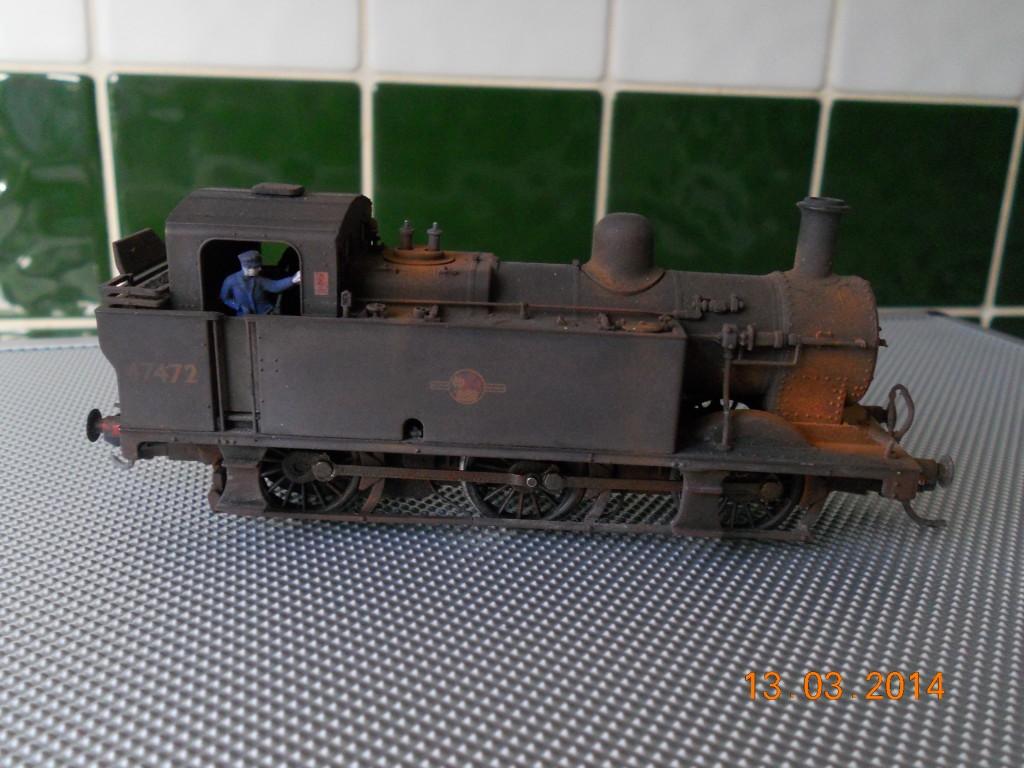
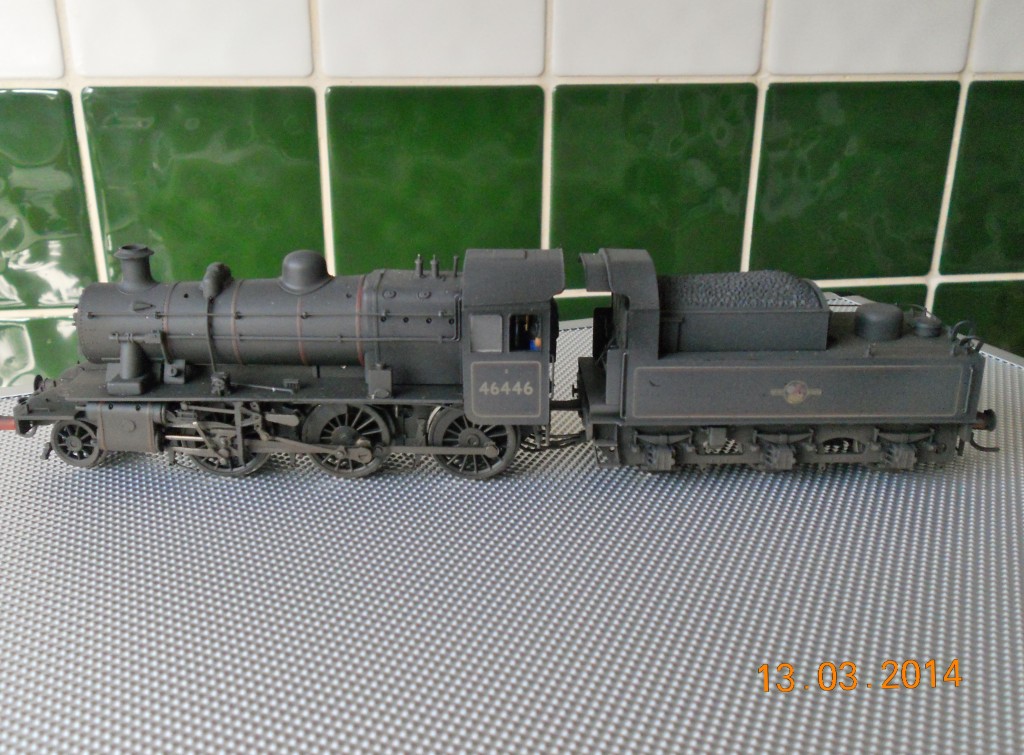
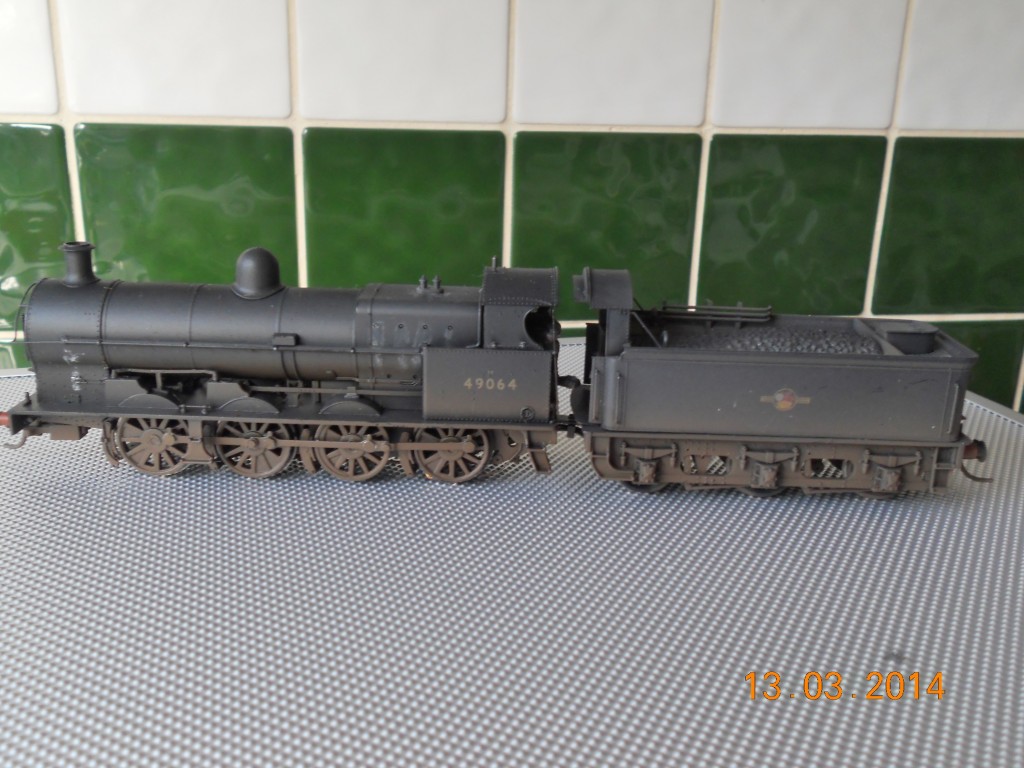
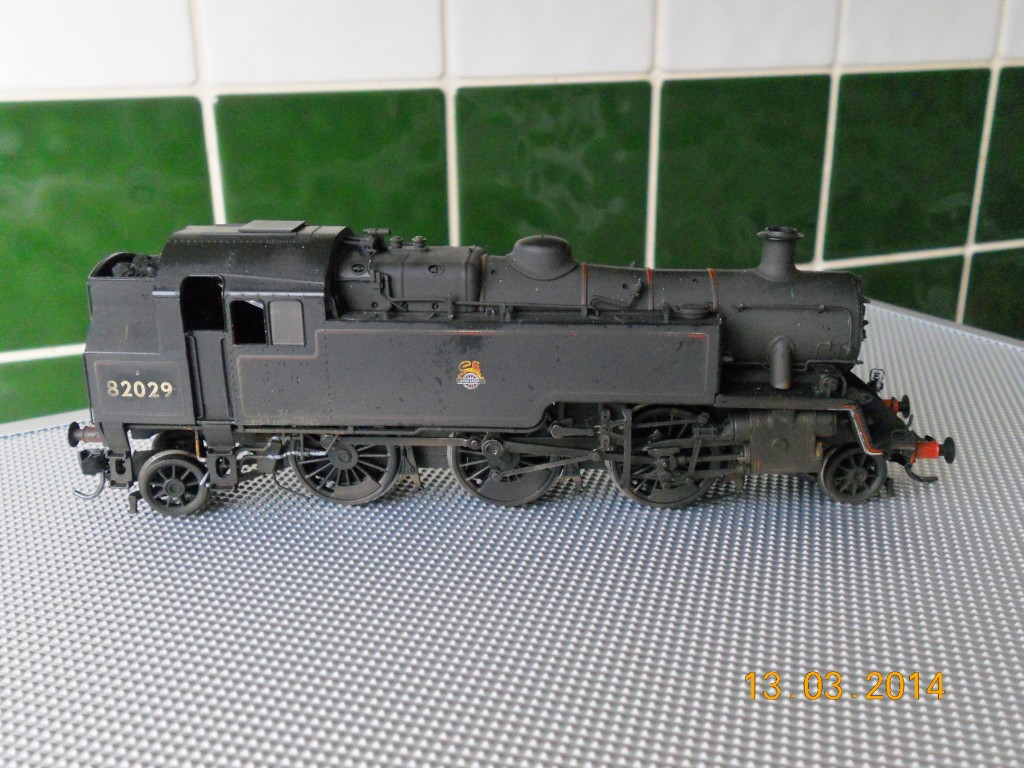
“Hi Al, a subject that is not often mentioned on this brilliant website, is weathering locos.
Using basic weathering powders, not an airbrush in sight, you only need the basics, ie smoke, rust, white and dark earth.
The thing with powders is if you put to much on you can take it off with just tap water, but when you are happy with your results you just give it a very small dusting of No 49 matt varnish to hold it in place.
The first example is a j3 jinty at the end of service, (they tended to be a bit neglected) so quite strongly weathered, the other examples are in service condition, the point is you rarely saw a loco in mint condition straight out of the box, anyway just another aspect of modeling I thought would be interesting to post.
Cheers, happy modeling.
Ron from Manchester.”
Nice collection of stuff this time – big thanks to everyone.
That’s all for today peeps.
Please do keep ’em coming.
And if today is the day you stop dreaming and start doing, the Beginner’s Guide is here.
Best
Al
PS Latest ebay cheat sheet is here.



Thanks Ron for the weathering tips, I will have a go at that.
Willie
Randy’s water trick looks very good – I hadn’t thought of that as a solution to quay-side issues!
Ron’s weathering looks very good, powders and varnish are certainly the way to go for the amateur (me).
The weathering info makes it seem so simple. I’ll give it a go on an old Jinty body
The rippled acrylic sheet is a great idea. I have used the new Woodland Scenics realistic water right out of bottle in preformed ponds that I painted first. Once it dries it looks good. The ripple effect would give more realism.
Happy Modeling!!!!
Tom
I like Randy’s artificial water; but wonder if both the boat and the canoe could be set ‘into’ the acrylic, rather than setting ‘on-top’ of it ? Perhaps careful cutting and burning out the acrylic with a small butane lighter would also create a boat-side wave effect. Thanks Randy, for the inspiration to further experiment.
Great tips, as always, especially a new “wrinkle”
on creating great looking water, from Randy.
Randy, that water looks great nice touch fine detail.
Ron, that weathering is great fine detail.
THANK YOU BOTH FOR SHARING!
regards,
tom
For those of you that want to try weathering with powders, try the Humrol vids on you tube, its amazing what you can achieve with them, the guy will take you step by step and show you what different methods you can use, you will be amazed how easy it really is.
Randy thanks for the water idea, that’s something I will try, it looks great.
Regards.
Ron.
these type of tips are great i have never tried weathering so i should give it a go. i will also give the water tip a go when its time to do my lake.
Great water scene Randy.
Ron how did you find those giant cutting boards to sit real locos on to photograph and pretend they are models?
thanks for the tips, will give the weathering a go on my next loco
A VERY NICE LOOKING LAYOUT.
Hey Ron from Manchester,
Your Jitty loco closely resembles the “30” class locos (although they weren’t as ‘weathered’ as yours) the New South Wales Railways used to pull passenger trains (prior to the railways going diesel) from Maitland to Newcastle until the early 1980″s.
I used to work in Newcastle and so spend many hours being hauled between Maitland and Waratah.
To Al and all his contributing modellers — thanks for a great website.
Amazing tips…
The water one is old but refreshing… I want to swim in that pond!
Thanks Ron for that! The locos show that you’re from Manchester! Me too! I do the same with mine and it works so well doesn’t it!? Us Mancs are good! 🙂
That water scene is the most realistic water I have seen to date. Superb! The weathering is also of a very high standard. Thanks for sharing Steve
One trick with the water effect is to leave a small space between the acrylic and the painted base, then cut model bathers etc and glue the upper part on the top and the legs below, it gives a fantastic 3d effect.
Enjoy life.
Bob Sangster
Great tips. Thank you all. I’ve recently tried weathering with powders and it works really well. Just posted a video on YouTube (running trains, not how to) with some weathered rolling stock. They turned out ok for my first attempt but it takes time and with trial and error. Will try posting with Alastair.
Jim AZ
Really like the acrylic sheet water effect. See what is meant by boats and such not set in water but on top (still looks fine). I would just sand down bottoms of boats etc to get the settled in look. If sanded right through just leave as sunken boat or black out water showing. Any and everything goes here with trains……
Rich
Al,
Would a piece of randomly rippled sheet acrylic used to make a water scene, work in n Scale?
OMG the water looks so real I have to try that. I think plastic drop ceiling tiles would work as well. They have different textures.Thank you for the idea.
Robert B
ref. randomly rippled: for N scale the ripple affect would just seem to be more breezy on the water,higher waves.
The water effect must be the best I’ve ever seen – even on this hallowed site. Kudos.
Great lake, river, water tip suggestion ! For people, including me, who wish not to spend a fortune on messy and time consuming stuff that most times turns out to be junk.
Great tips from both modelers. The use of sheet acrylic is great. I see where that has numerous applications. In addition to locomotives the chalk technique works well on anything you can think of – roads, buildings, autos, and various scenery like rock faces.
Great stuff!!!
Great idea, Randy. And, its always great to see the work of fellow three rail
modelers.
shlack
Randy nice looking lake. You can also paint a light wash of different colors in spots
on the smooth (under) side of the acrylic to give a varying depth effect. I have used rectangles cut from the stippled style of acrylic to make loads for gondolas and hopper by painting them a flat black or rust color. If you don’t want a flat look to the load you can use a hair dryer set on hot to bend and shape the acrylic before painting. Be sure to make the rectangles larger than the size needed and then file them down for a snug fit.
How does Randy cut the plastic for his scenes?
Great tips, thank you for sharing.
Really good tips. Thank you.
Al, I love the water. I think I would buy the light fixture piece. How do you cut it? I’m a novice at that kind of thing.
Thanks!!
You can cut the acrylic sheet with a fine blade in a coping saw, a power saber saw or a band saw. Saw slowly so the plastic doesn’t melt and freeze the blade. Support the piece so it doesn’t vibrate which could crack it.