Bill’s been back in touch – he’s added to the HO switching layout track plans on the blog.
If you missed his last post, it’s here.
What’s clever about Bill’s module, is that he’s designed the second module so it can plug in at either end, for maximun switching fun.
If he get’s bored, he can unplug it, swap it round, and play with the different switching combinations. Genius!
“Hi Al,
I continue to be in your debt. Having come across your site months back and seeing everyone’s work really motivated me to get started again.
You don’t need the dream layout room to build and have fun in our modeling hobby. You just need to start.
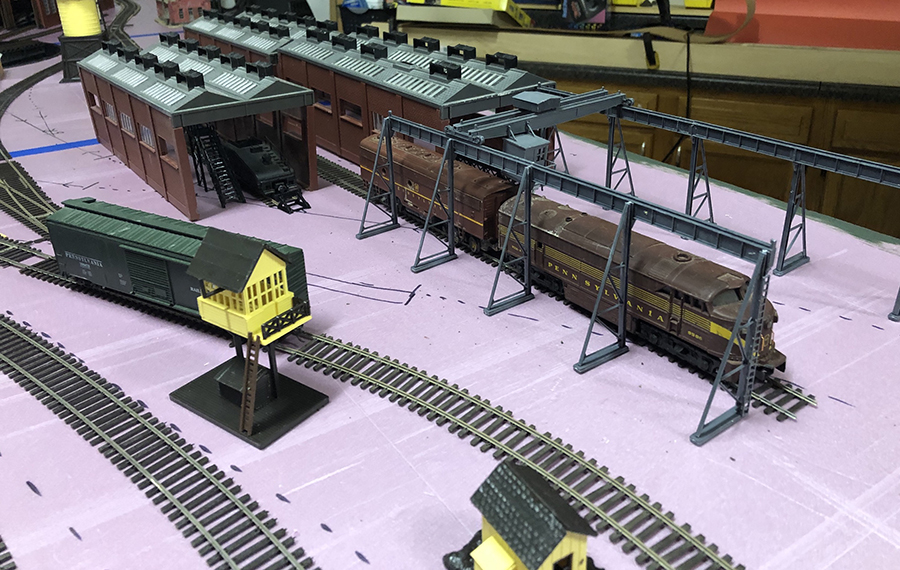
It’s the day after Christmas as I write this and my work has slowed down a little so I took over the dinning room table and started to build a number of kits I had for my engine yard, shops and yard.
Some of the kits are almost as old as I am and have been in storage far too long.
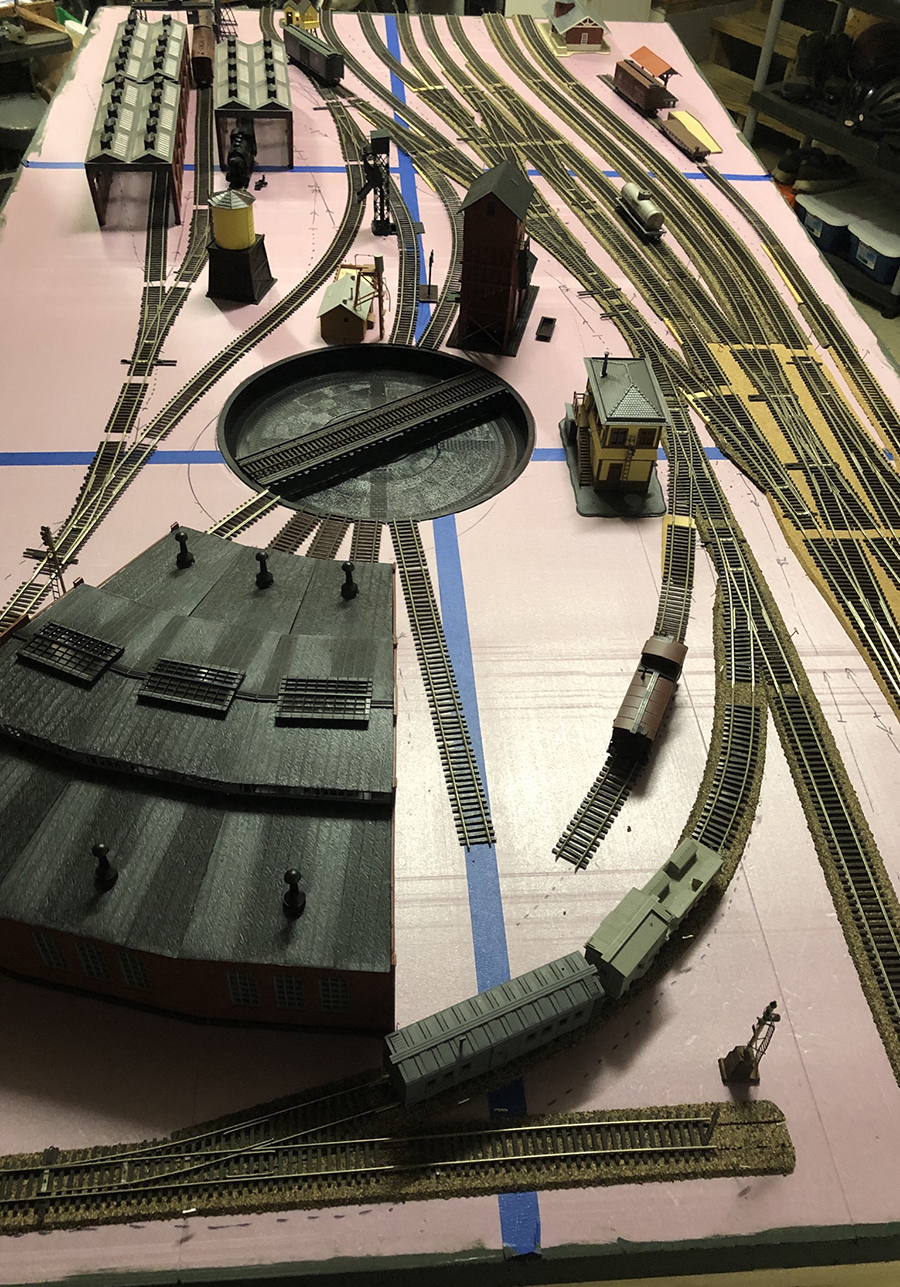
I now have all major structures positioned where I want them. All need painting and weathering but that can come later.
I also have all track located and cut and fitted. I’ve run rolling stick over every track to ensure I had no derailments. The track is code 70 so I’m going to use semi-Scale wheels.
Next step is to mark our locations for everything using a red marker and then start to glue the cork down. Once that is done I’ll start on the track.
I have some old track and switch’s I’m going to practice my very rusty soldering skills on. I will add feeders near rail joiners in most cases and once all is set and tested I’ll solder the joiners as well.
I’ve plenty to do for a while!!
Bill in Virginia”
A huge thanks to Bill for adding to the HO switching layout track plans – there are quite a few on the blog now.
Here’s one of Bill’s earlier posts if you want to see the progress: 4×8 layouts for model trains.
It’s wonderful to see his layout coming along. He’s right about one thing too: making a start is what this hobby is all about.
That’s all for today folks.
Please do keep ’em coming.
And if today is the day you get started on your layout, the Beginner’s Guide is here.
Best
Al
PS Latest ebay cheat sheet is here.
PPS More HO scale train layouts here if that’s your thing.


this is the first time I was impressed enough to contribute. very thoughtful and complex system. I am anxious to see a train or two using that round house. great work and thanks for posting.
I’m just started into n scale. with kato track. changing it to dcc. been hard with doing wiring it, with inter /outer track. using 2 y switches to cross over with out shorting with the engine crossing the switches . any wiser way of doing this ?
Looking forward to seeing the finished product , look great ,a lot of action potential.
Impressed by your loco servicing yard, great work.
Nice yard What is your Width and length
Very impressive. I have been in this hobby for a while and Alastair is always harping about getting started. I think I finally got the message. One has to have fire in the belly approaching this hobby so re doing old kits is a good start. However sometimes you encounter a problem that sets you back and that is why some people leave the hobby. I have a number of projects that all have a stumbling block and these need to get resolved through growth in your skills. Sometimes it is as simple as not going to the store to get something simple like a piece of cork or a bottle of new paint that will easily go through the air brush.
Hi, Bill;
Your layout is looking great!
Keep up the fine work.
Warren, AL, USA
I enjoy switching layouts I get nothing out of watching a train run around a layout. Keep up the good work
WOW!! He has an arrangement more like real life than what you see on a model layout. All the tracks seem laid out to fit the imagined property, and the realism of the operations must be very high. Great job!!! Bud
I forgot to mention: Hooray for using F-M power!!
Great looking layout – hours of fun making up trains.
Don’t want to use red marker since it may bleed thru your landscape later. Stick to pencil.
Keep posting!
Very nice work, and also very ambitious.
Good luck with the soldering. Technique is everything!
I very much like the track plan. It seems quite authentic and useable. If you ever got tired of going back and forth, you could easily add on to it. Well done.
Rob McCrain – Farland Howe
Bill,
Once you hone your soldering skills consider using the rail joiners as the attachment point for your track feeders. Then when you solder the joiners to the track rail you know that both pieces of track will get the rail power and it amkes for a few less soldering points for you.
Use longer switches where you can and when you get to ballasting the track, use fine colored sands and not big gravels as some modelers use. Remember, 1/87 of 2.5″ real crushed rock the railroads use is 0.028″ in model diameter. A nice switching layout to have fun with at least to move cars around on.
Bill
No offense but the picture you supplied looks more like a train yard are than a switching layout. You have many tracks able to go to the roundhouse but not many ( any ) industries to take a train to. MAYBE itis me but re think what you have.
The track set up you have is great just not for switching .
Where did you get the housing for the engines? They look great!
Bill,fantastic job on the rail yard setup. Looks like you could put together and take apart a lot of trains. The structures look like classic old Revell and Atlas kits. Very nice. Looking forward to seeing updates as you move along.
Great job on your railroad yard Bill, looks like it will look like the real thing once you get done. But there will always be changes, lol. I have one question, what are you using on the sides of the styrofoam? It looks like Olive dab primer. Can’t wait to see the whole layout. Keep on railing.
SDG St.Petersburg Fl
Hi all it’s Bill. First thanks for the comments it’s much appreciated. I must say I compliment you all as the posts, the pictures and the ideas all have given me guidance on how I want to take my layout.
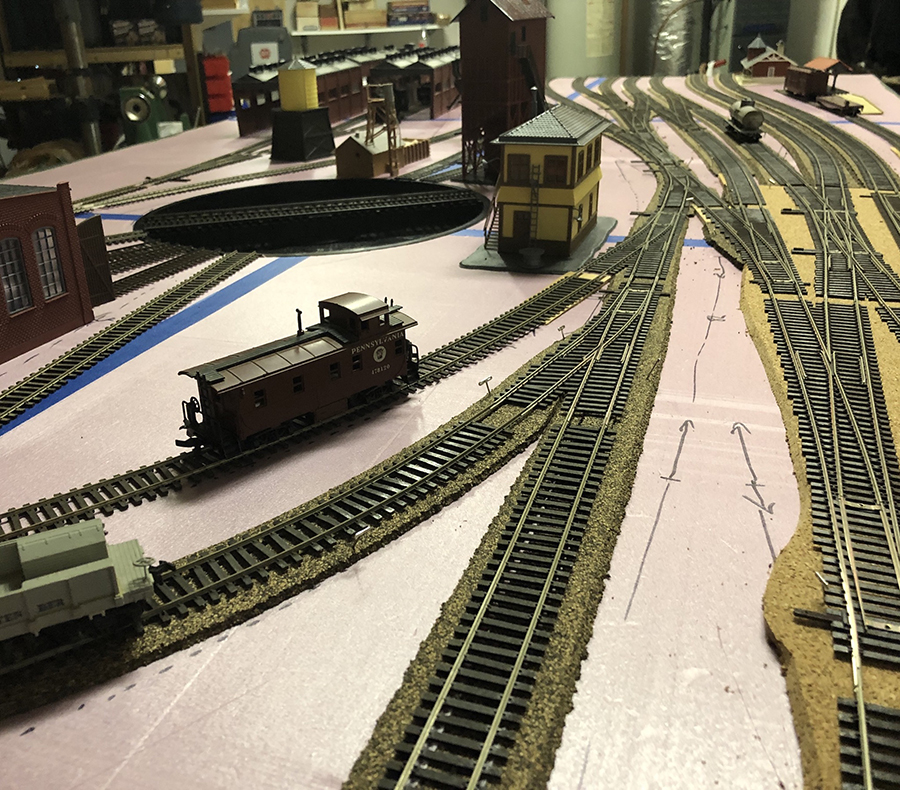
A few updates. Since Christmas I have the roadbed glued in place and I have all my feeders on. I practiced with my soldering pen and found I could add the wires beneath the tracks and not melt my existing ties. Currently I’m waiting on some min on/off switches so I can add some blocks as I wire it up fully. As it stands I have had a PRR F Unit starting to do some test runs. My track is a mix of new and old so everything is getting a slow deep clean before I apply power to other sections. I’ve found that a standard pencil eraser on s pencil works to remove build up while giving me tight control of where I’m going with it at least for the first cleaning.
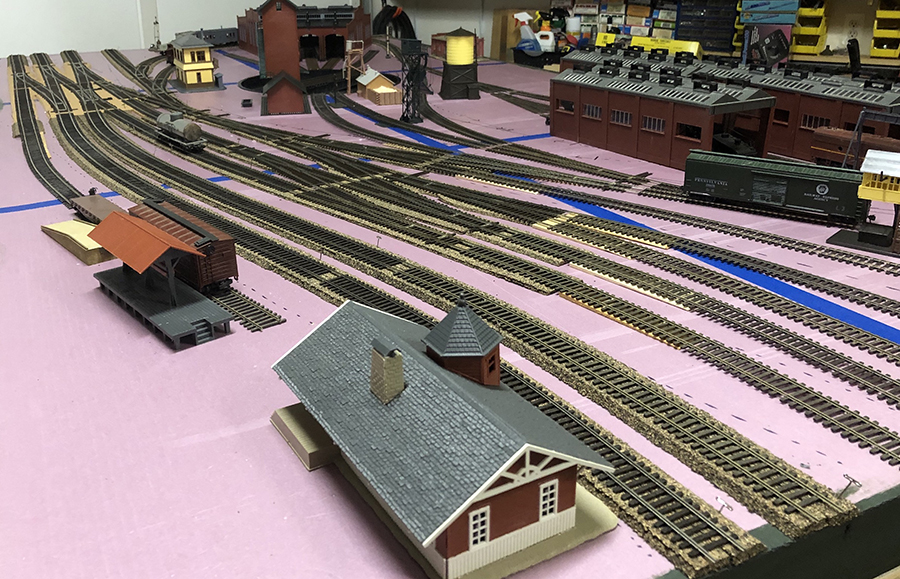
A few questions have been posted. The size of this piece is 4 X8. It’s the first of probably three portable sections I’ll end up with. I have materials cut for the second table base and folding legs and will put together soon.
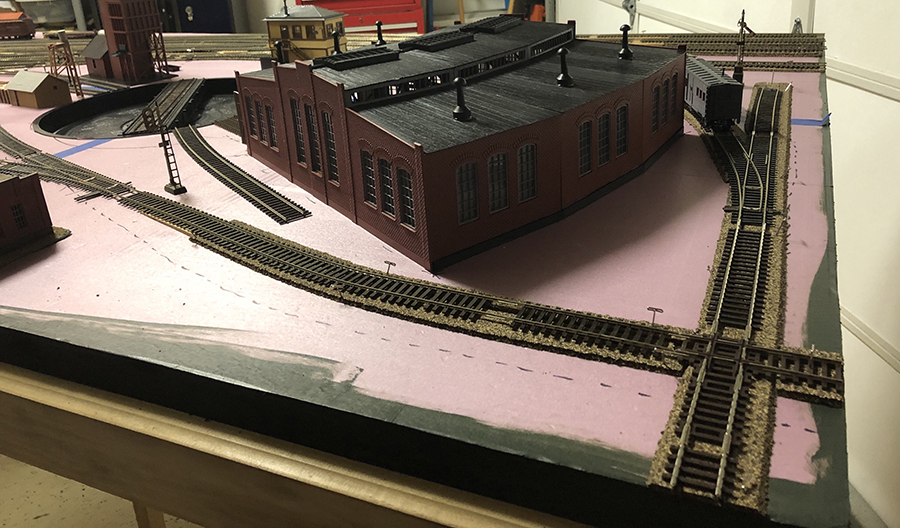
The repair shops I actual hot as part of an eBay purchase and I was going to scrap them but got thinking about what would be an interesting modeling opportunity and while they need some major work they have a home on my layout. I think they may have been and AMH or Revelk kit when new. Not sure though…
For switching the layout does afford some good opportunities on this piece but not industrial switching. The repair shop has both light and heavy repair so many cars engines can rotate in and out. The old line by the roundhouse will have MOW gear so more switching. The long line near the tables edge is a team track so plenty of opportunities there as well. The next section I build will have more industry and yard switching. When I get around to the third section that will be almost exclusively industrial switching. I just hope st some point I have a larger place to set up permanently. But until then I’ll keep plugging along 😀
Thanks!
Bill in Virginia
sounds like you need an auto reversing module, and create insulated gaps in the wyes, separate feeders where needed. Hard to tell w/out track diagram
Has the look of a real railroad location already, well done.
Rod
Great job Bill, will look forward to seeing this one come together. Good luck and have fun! Cary in KY
Hey Bill!
Totally awesome switching set-up. Will this eventually tie to a larger layout in the future? Great job!! Thanks for sharing.
Rob
Superb! Love it. I wasn’t anywhere near as successful as you.
Bill,
I am really interested in your full sixteen foot (2- 8′ modules) track plan. I am in N scale and would like to use your plan to construct a 30″ x 12′ copy. Since imitation is the sincerest form of flattery, I hope you could provide it., I live in South Carolina and my daughter lives in the Washington DC area and would welcome an opportunity to see your layout first hand on one of my trips to see her.