Here’s the easy way to make printable buildings – I’ve made so many of them now, here’s exactly how I do it.
I print the downloads on cheap, everyday printer paper.
I glue them to 2 x 300gsm card.
I find 600gms to hard to handle, cut and fold.
But two sheets of 300gsm glued together feels right for me (but may not be for you).
Also, it’s thick enough to stop the card curving – because when that happens, the buildings do not look good at all.
I stick them together with cheap white glue. I use a paint brush and just apply a really thin layer. If the glue is to thick the paper will tear and the card will buckle.
Once the prints are stuck fast on the card, cut out the building shape with a sharp craft knife.
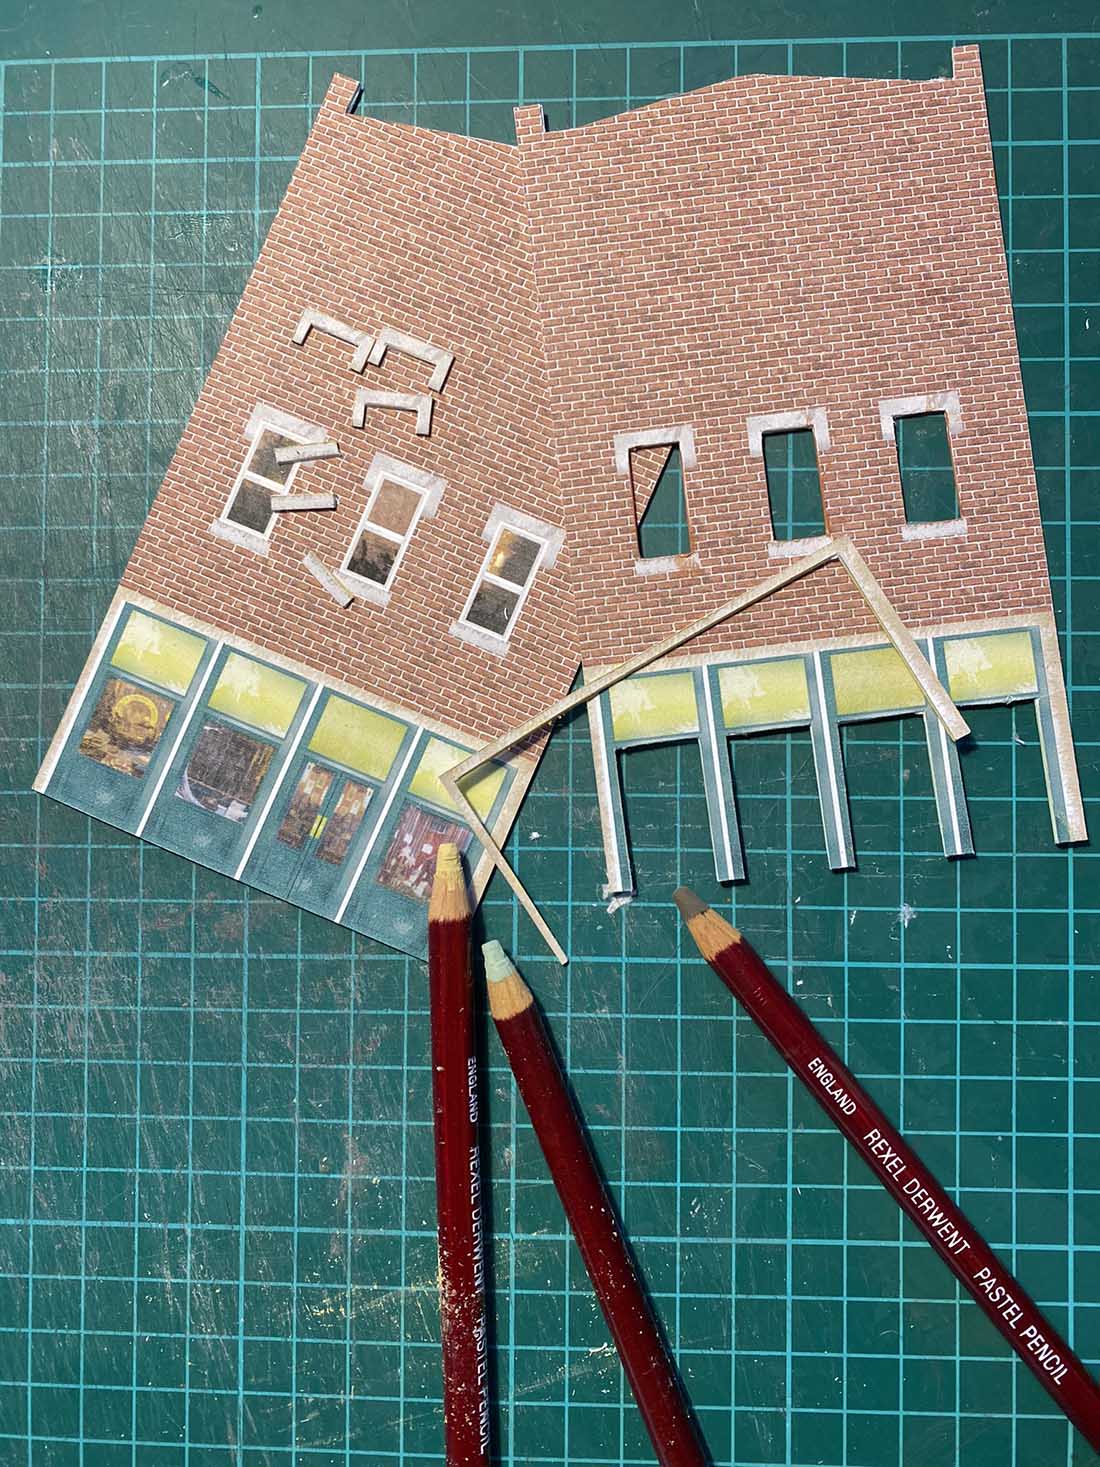
I always use a minimum of three layers for each side of the building:
1. The base layer.
2. The window layer.
3. The ‘anything on the building that sticks out’ layer, like the windowsills or door frames.
Above you can see the base layer, the window layer and the sticky-out-layer.
Use Crayons or pastels to shade in any bits of white card you see before you glue them all together. Pay particular attention to the inside of window frames and door frames.
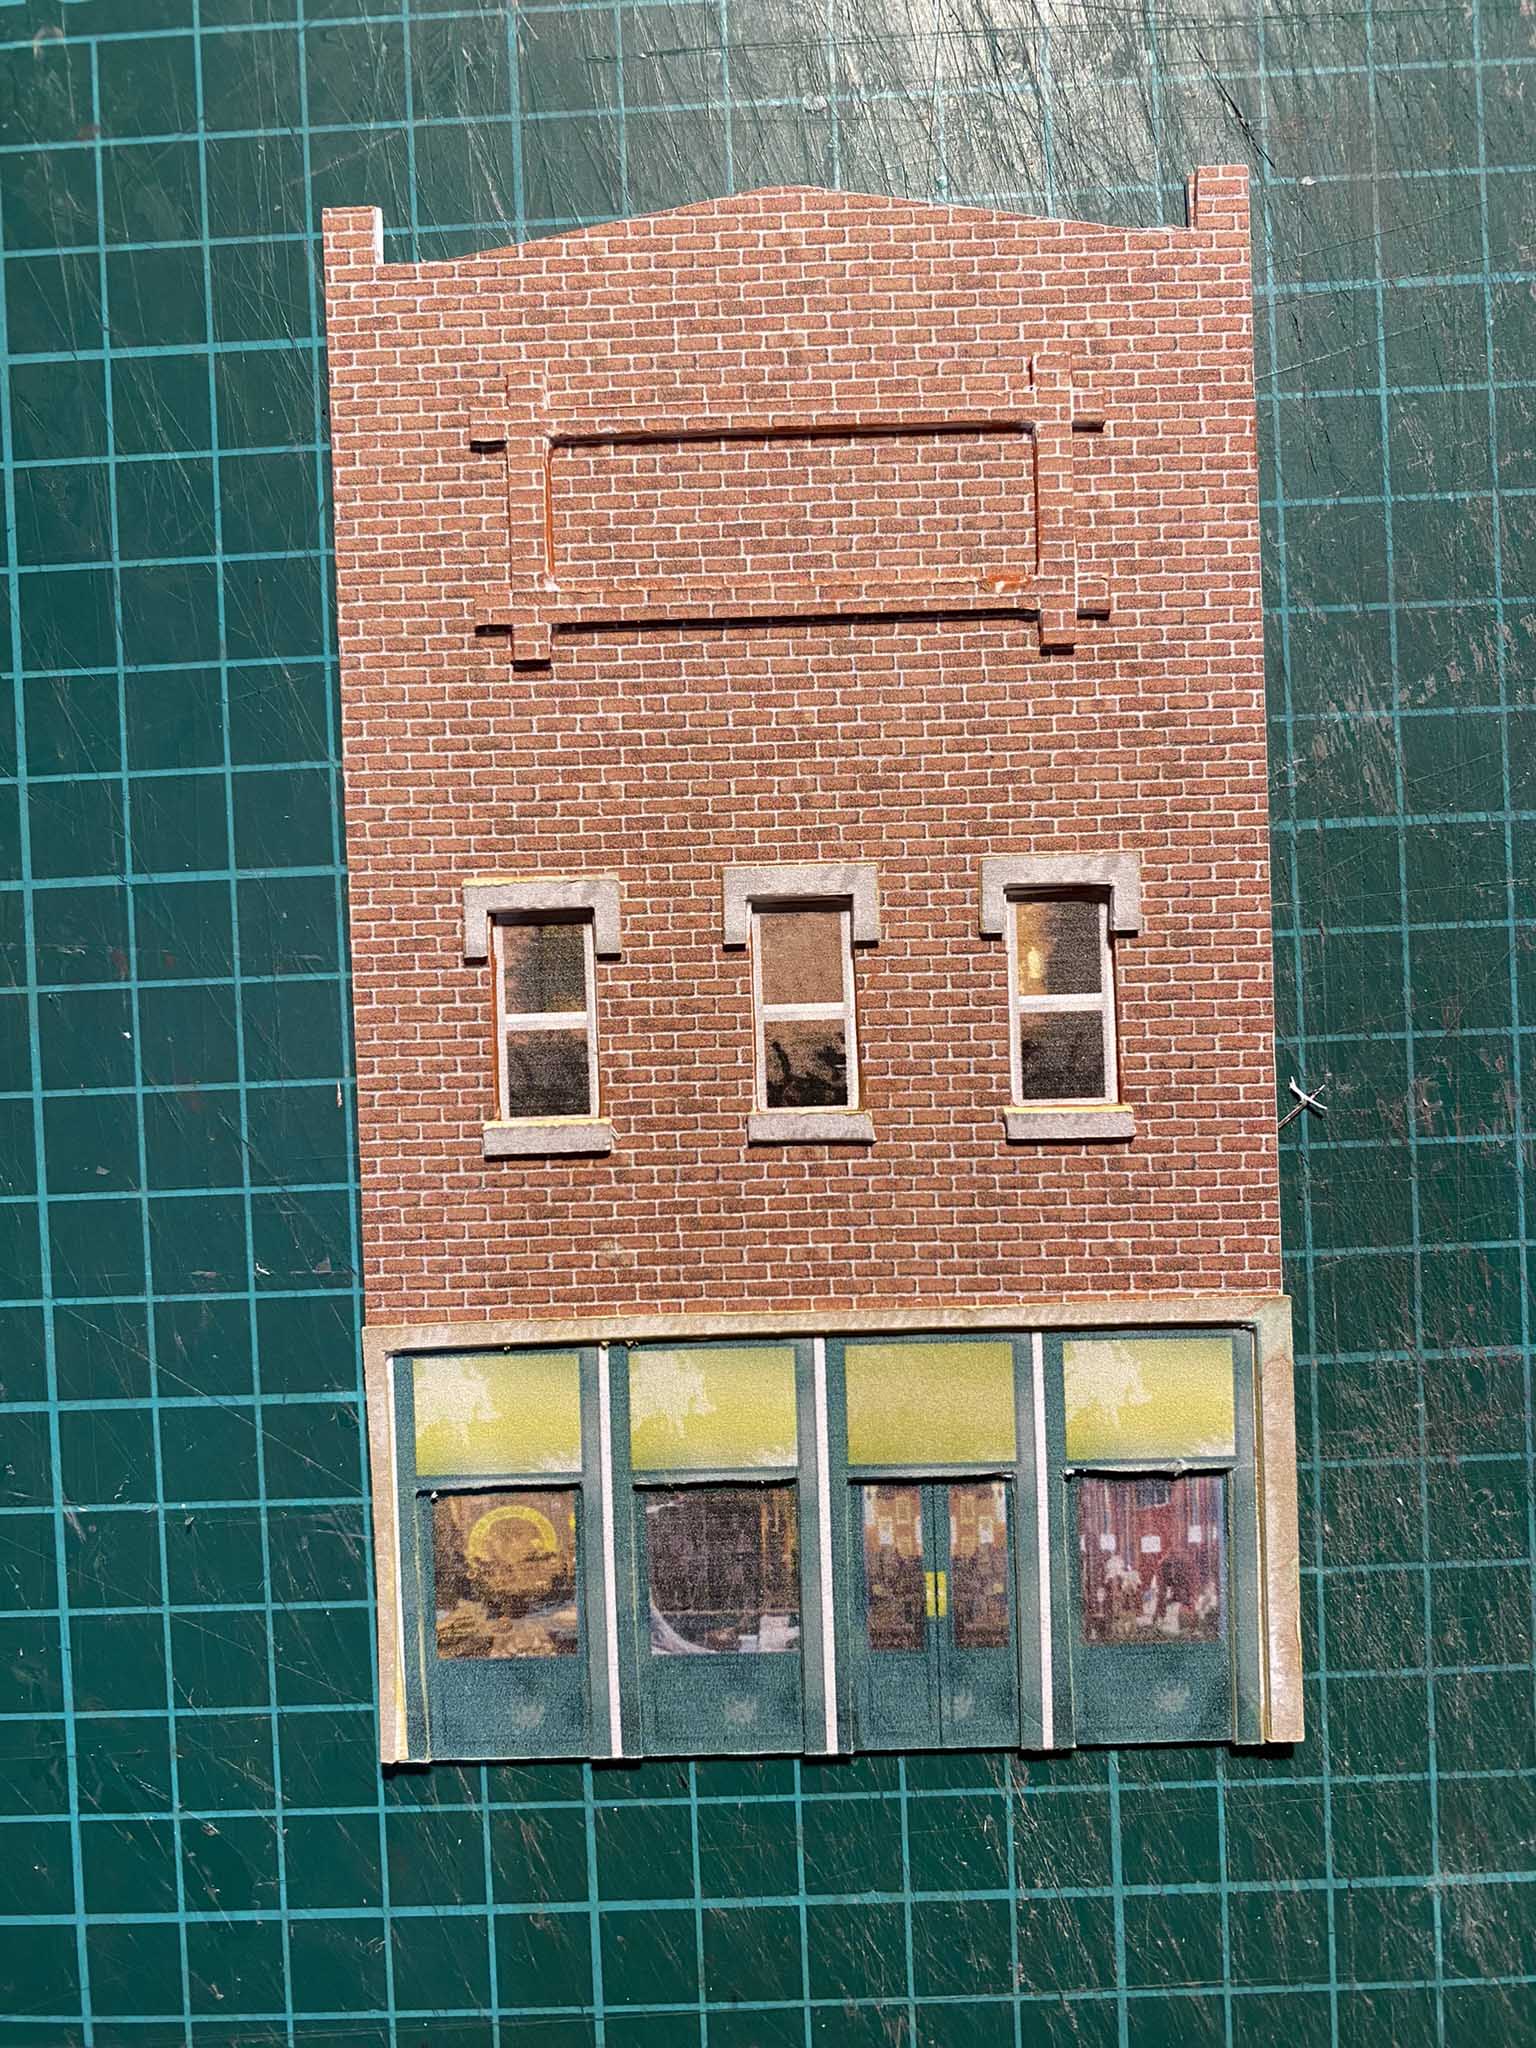
Above you can see all three layers stuck together – they give a nice 3D effect.
Do the same with all four walls of your printable building (above).
If the design has a roof where you need some brick on the reverse side, glue it before you glue the side together (below).
Trim the roof to size (below). I use foam board (any thick card will do) to cut triangles for gluing the walls together. Three on each side does the trick, and the top one also holds the roof up.
That’s it, you’re done. Easy right?
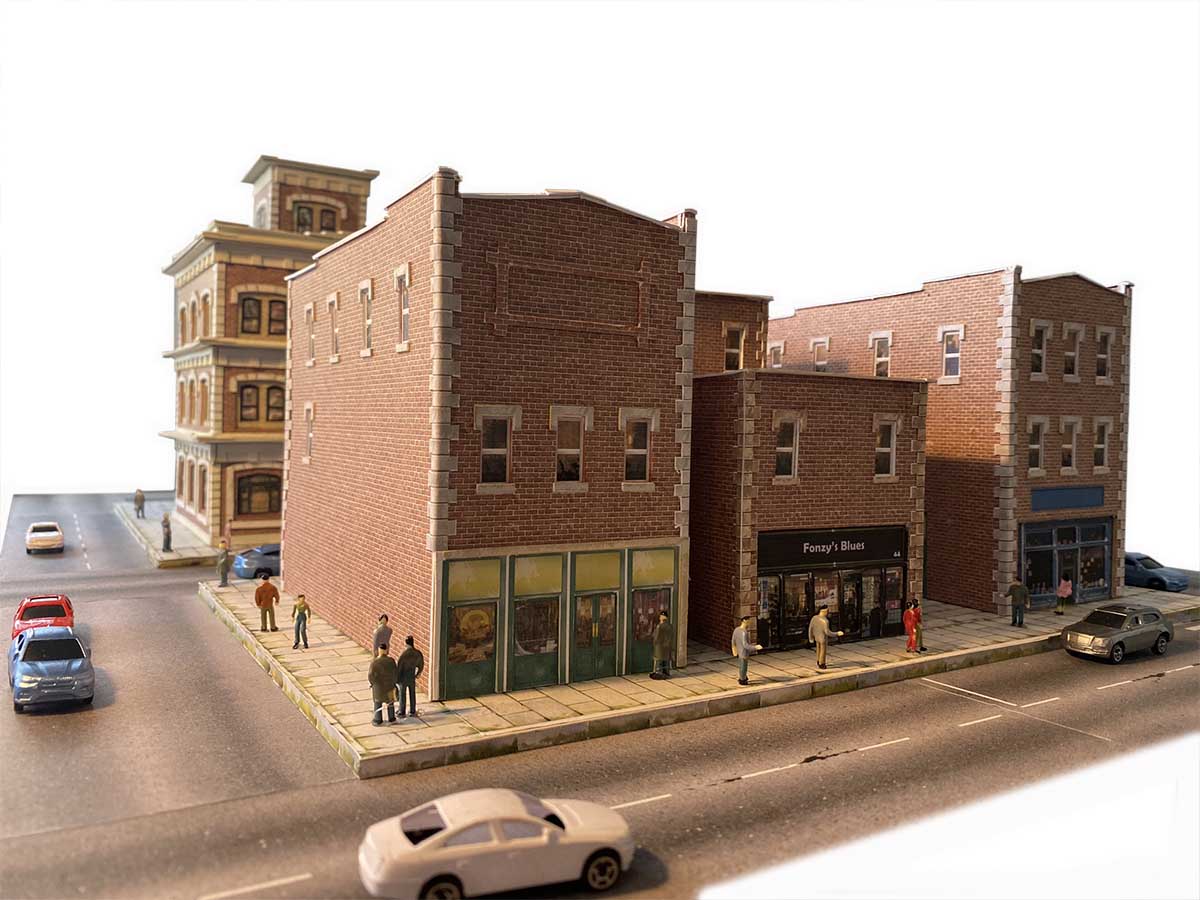
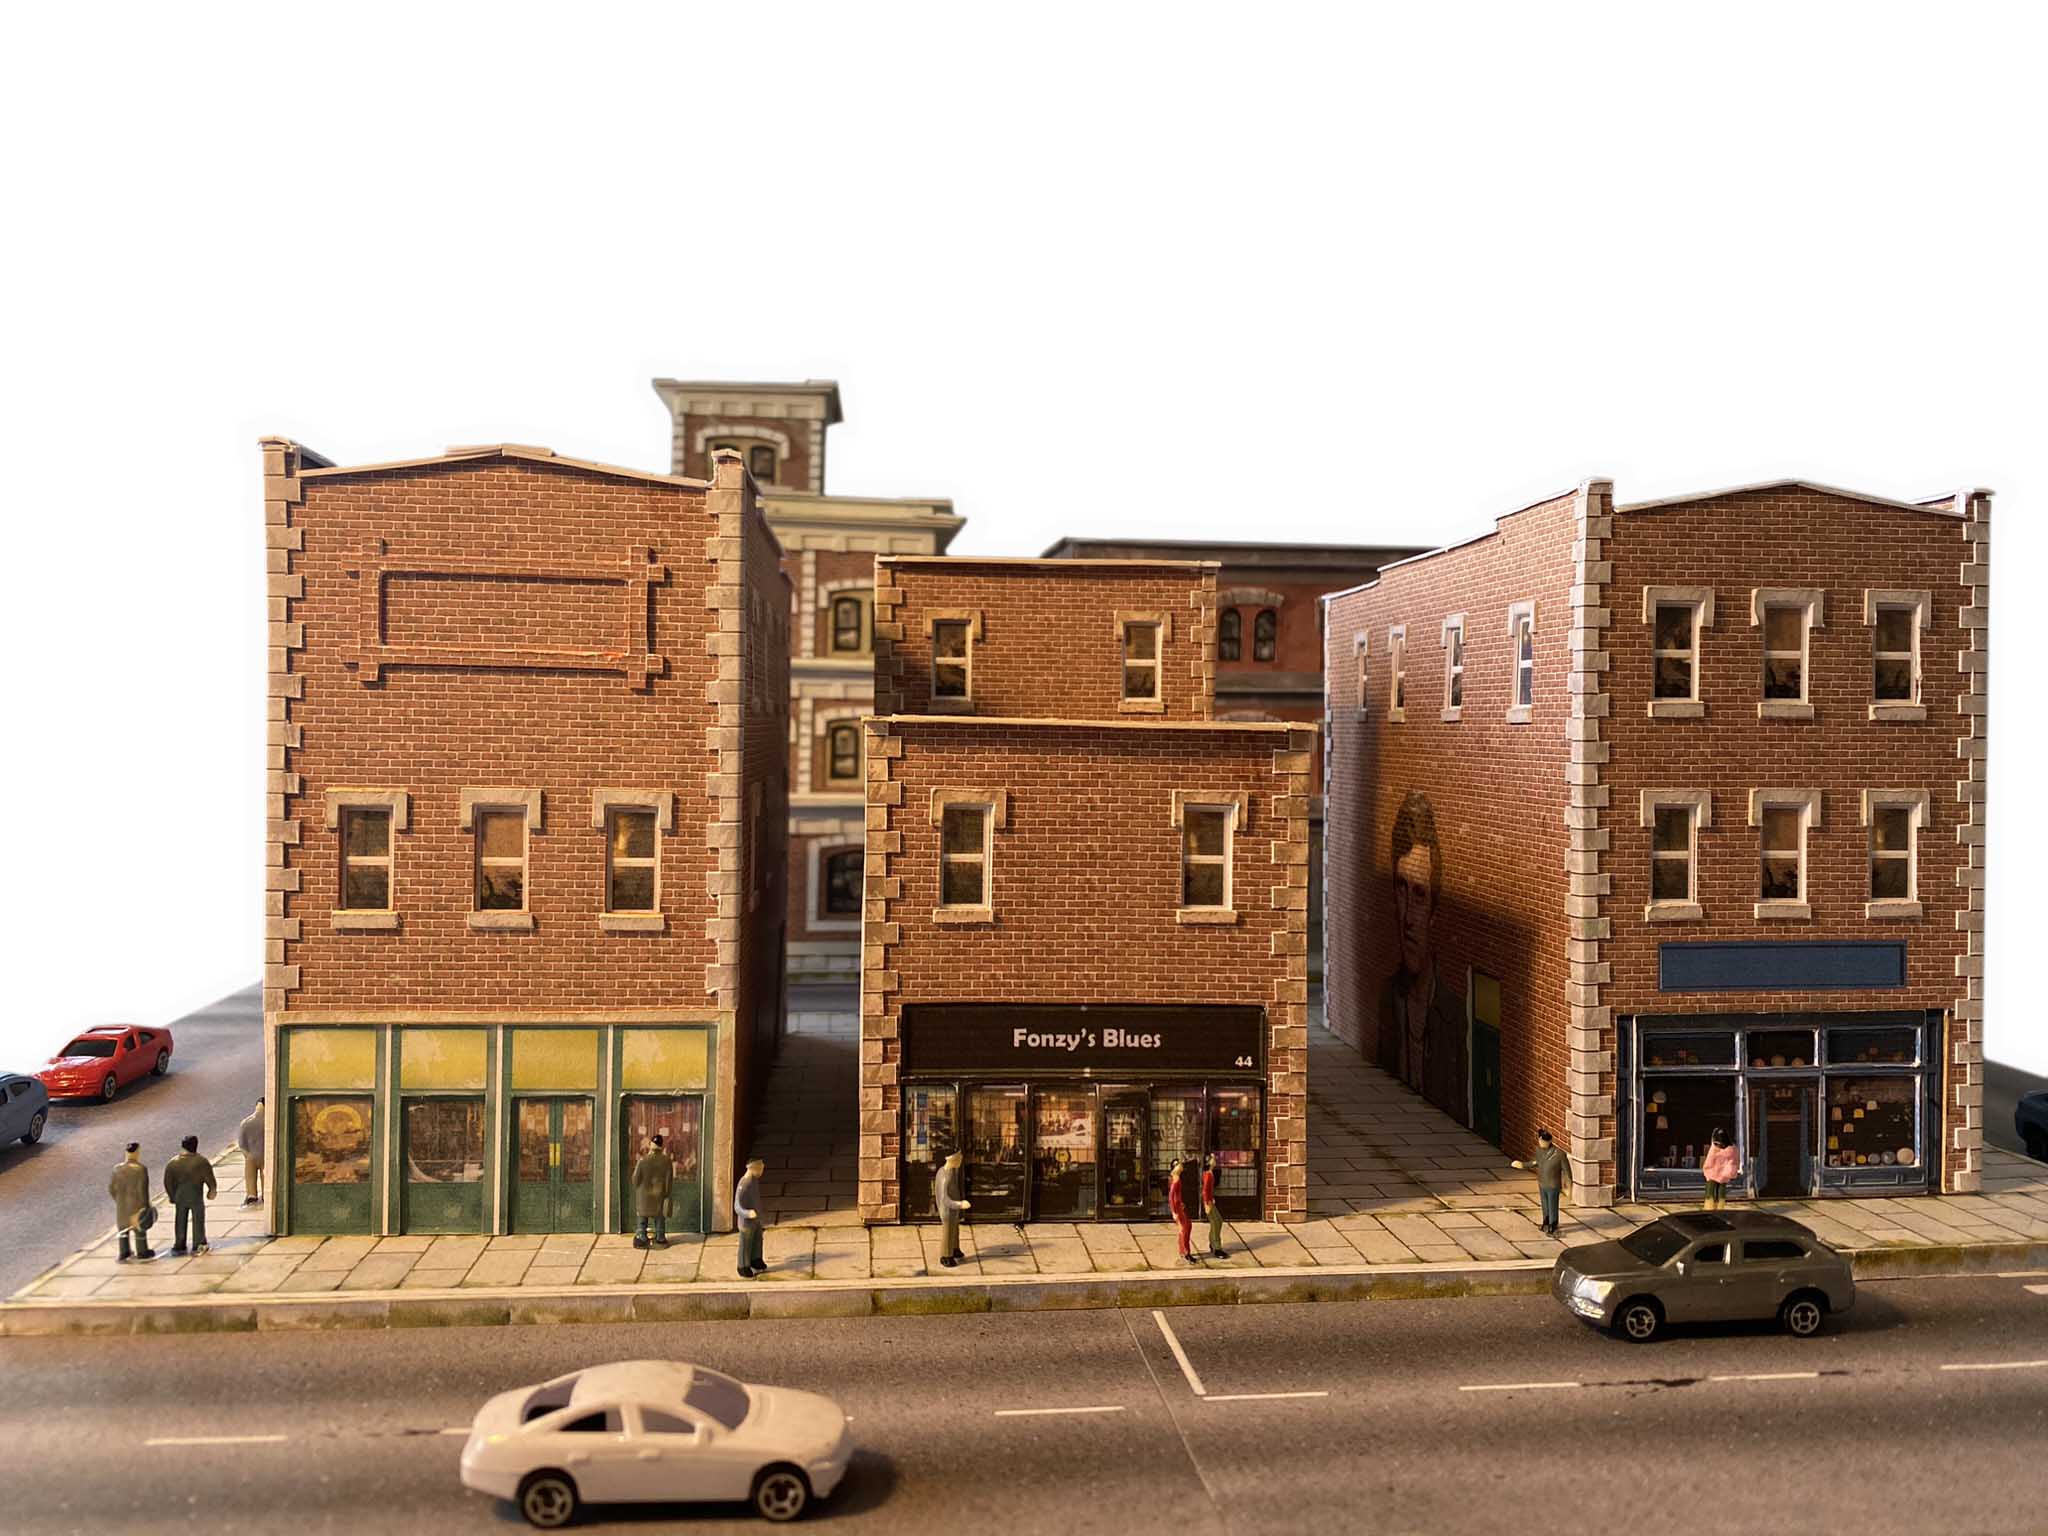
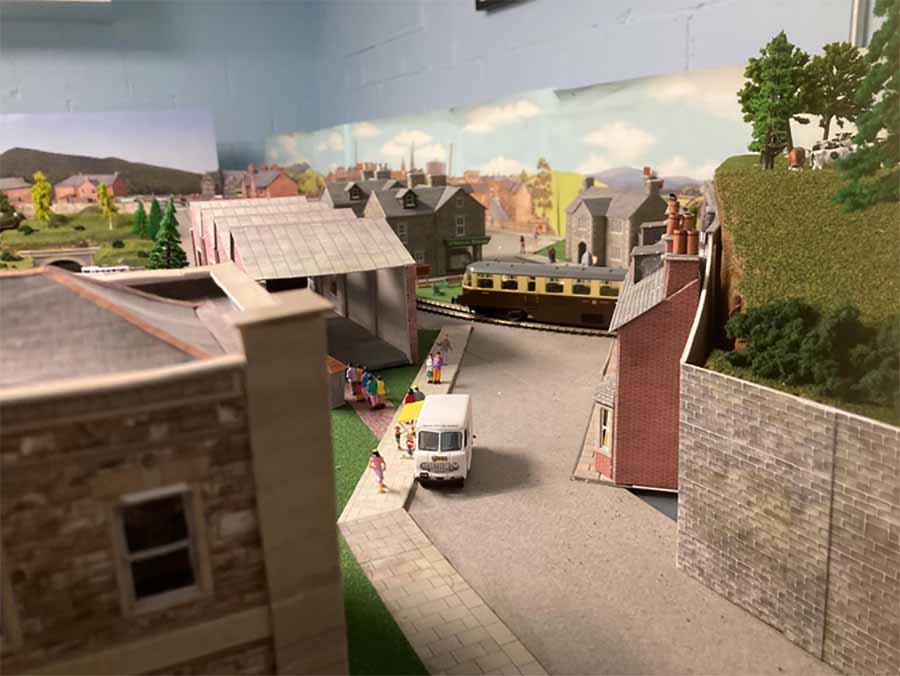
Here’s how they turn out – and they are a lot of fun too:
The scene above is all printable buildings.The front row of buildings all come from this download.
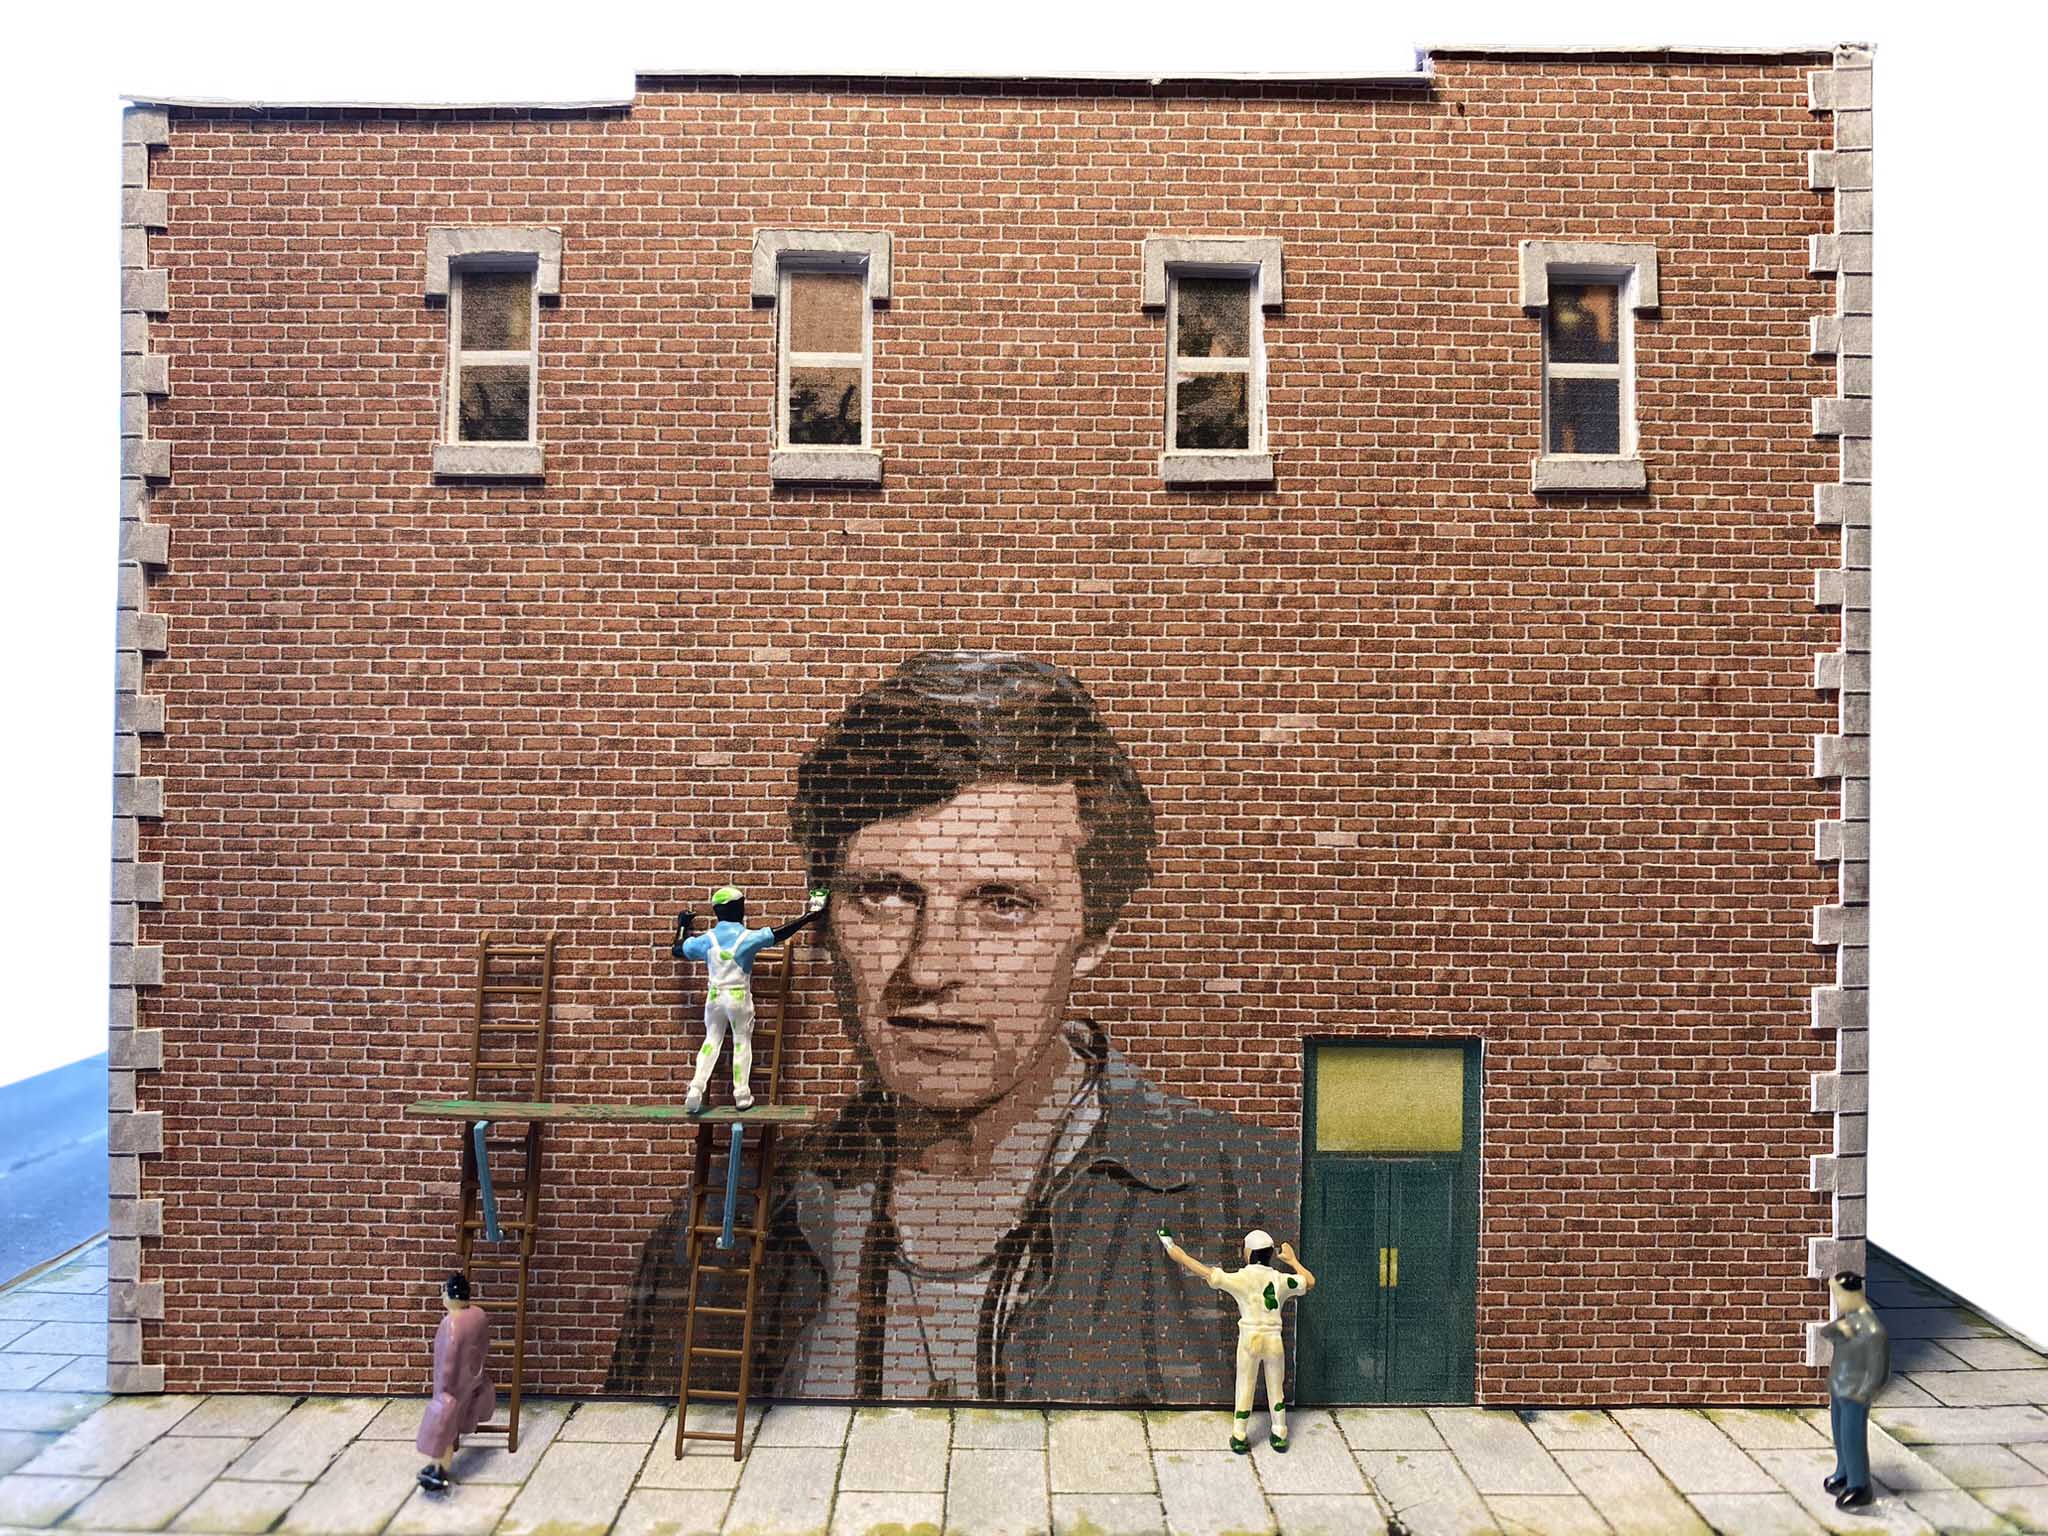
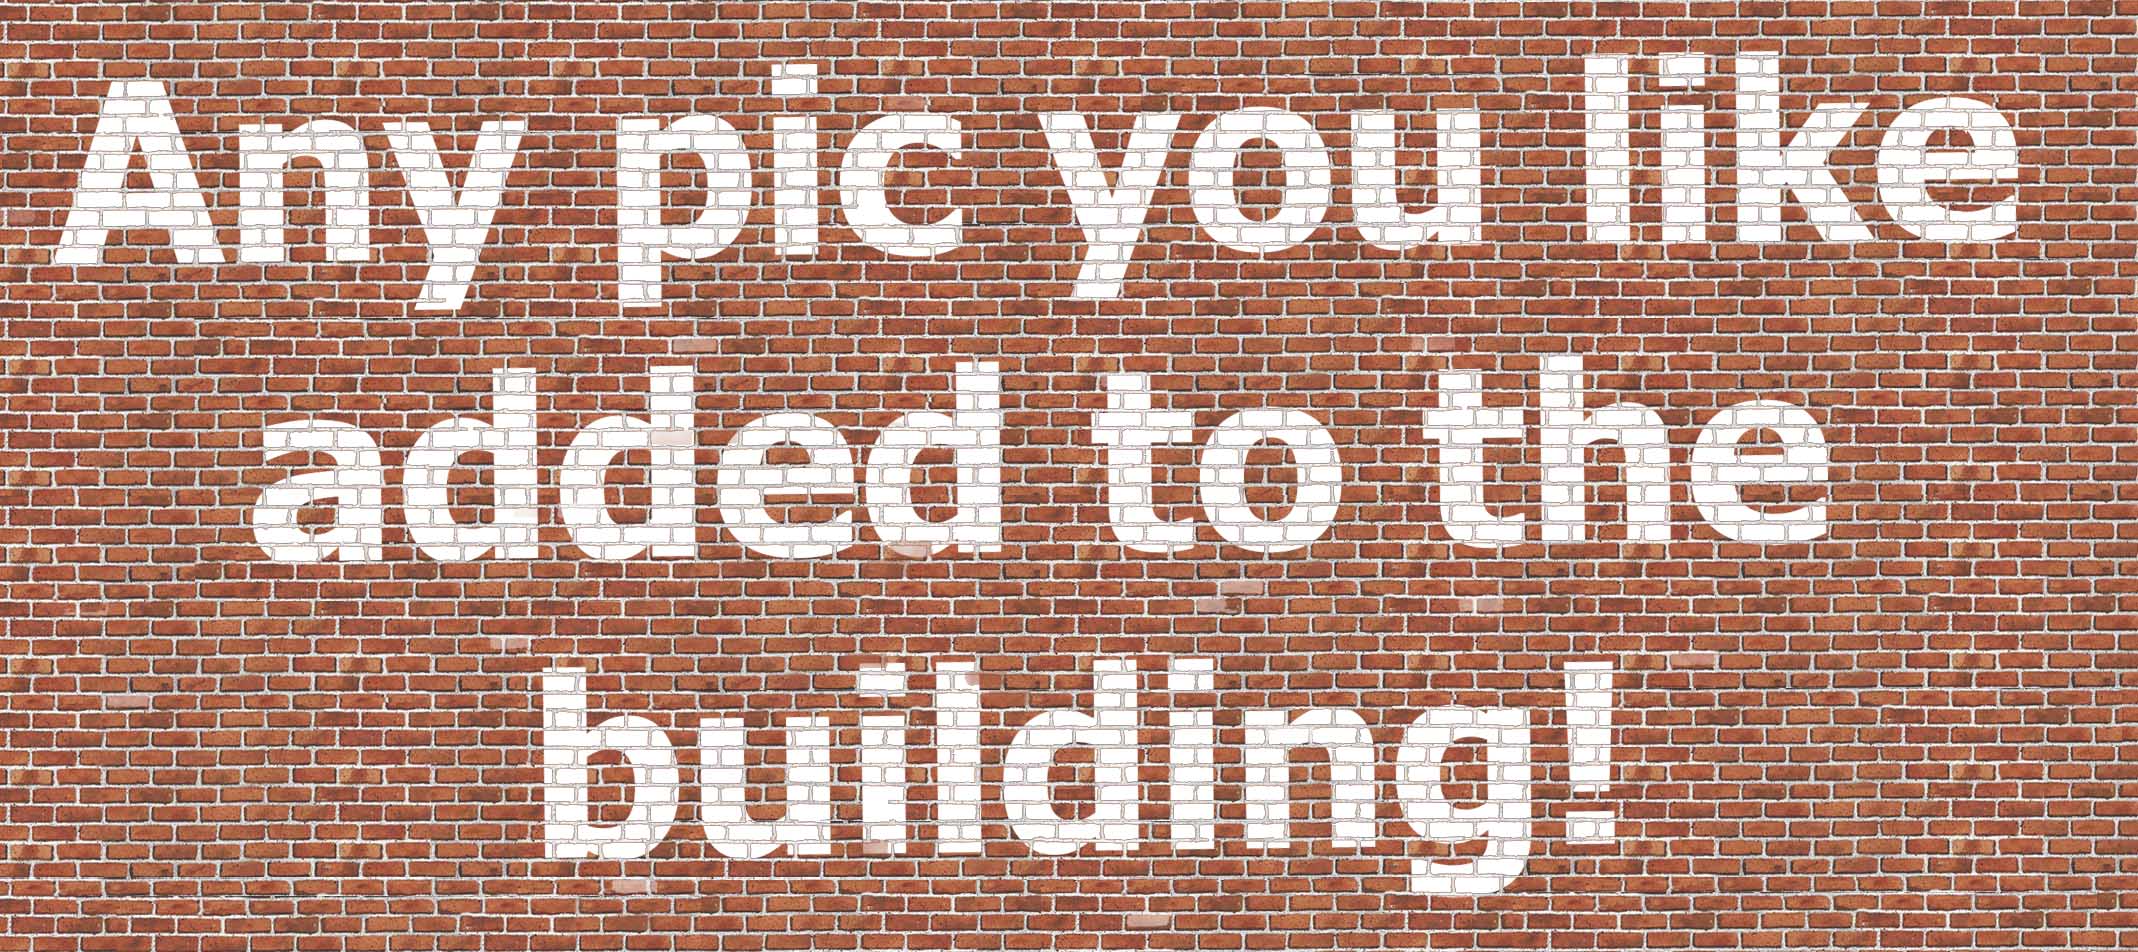
You can also add any picture or image you want to add a mural to your wall, like this:
Here’s how to do it.
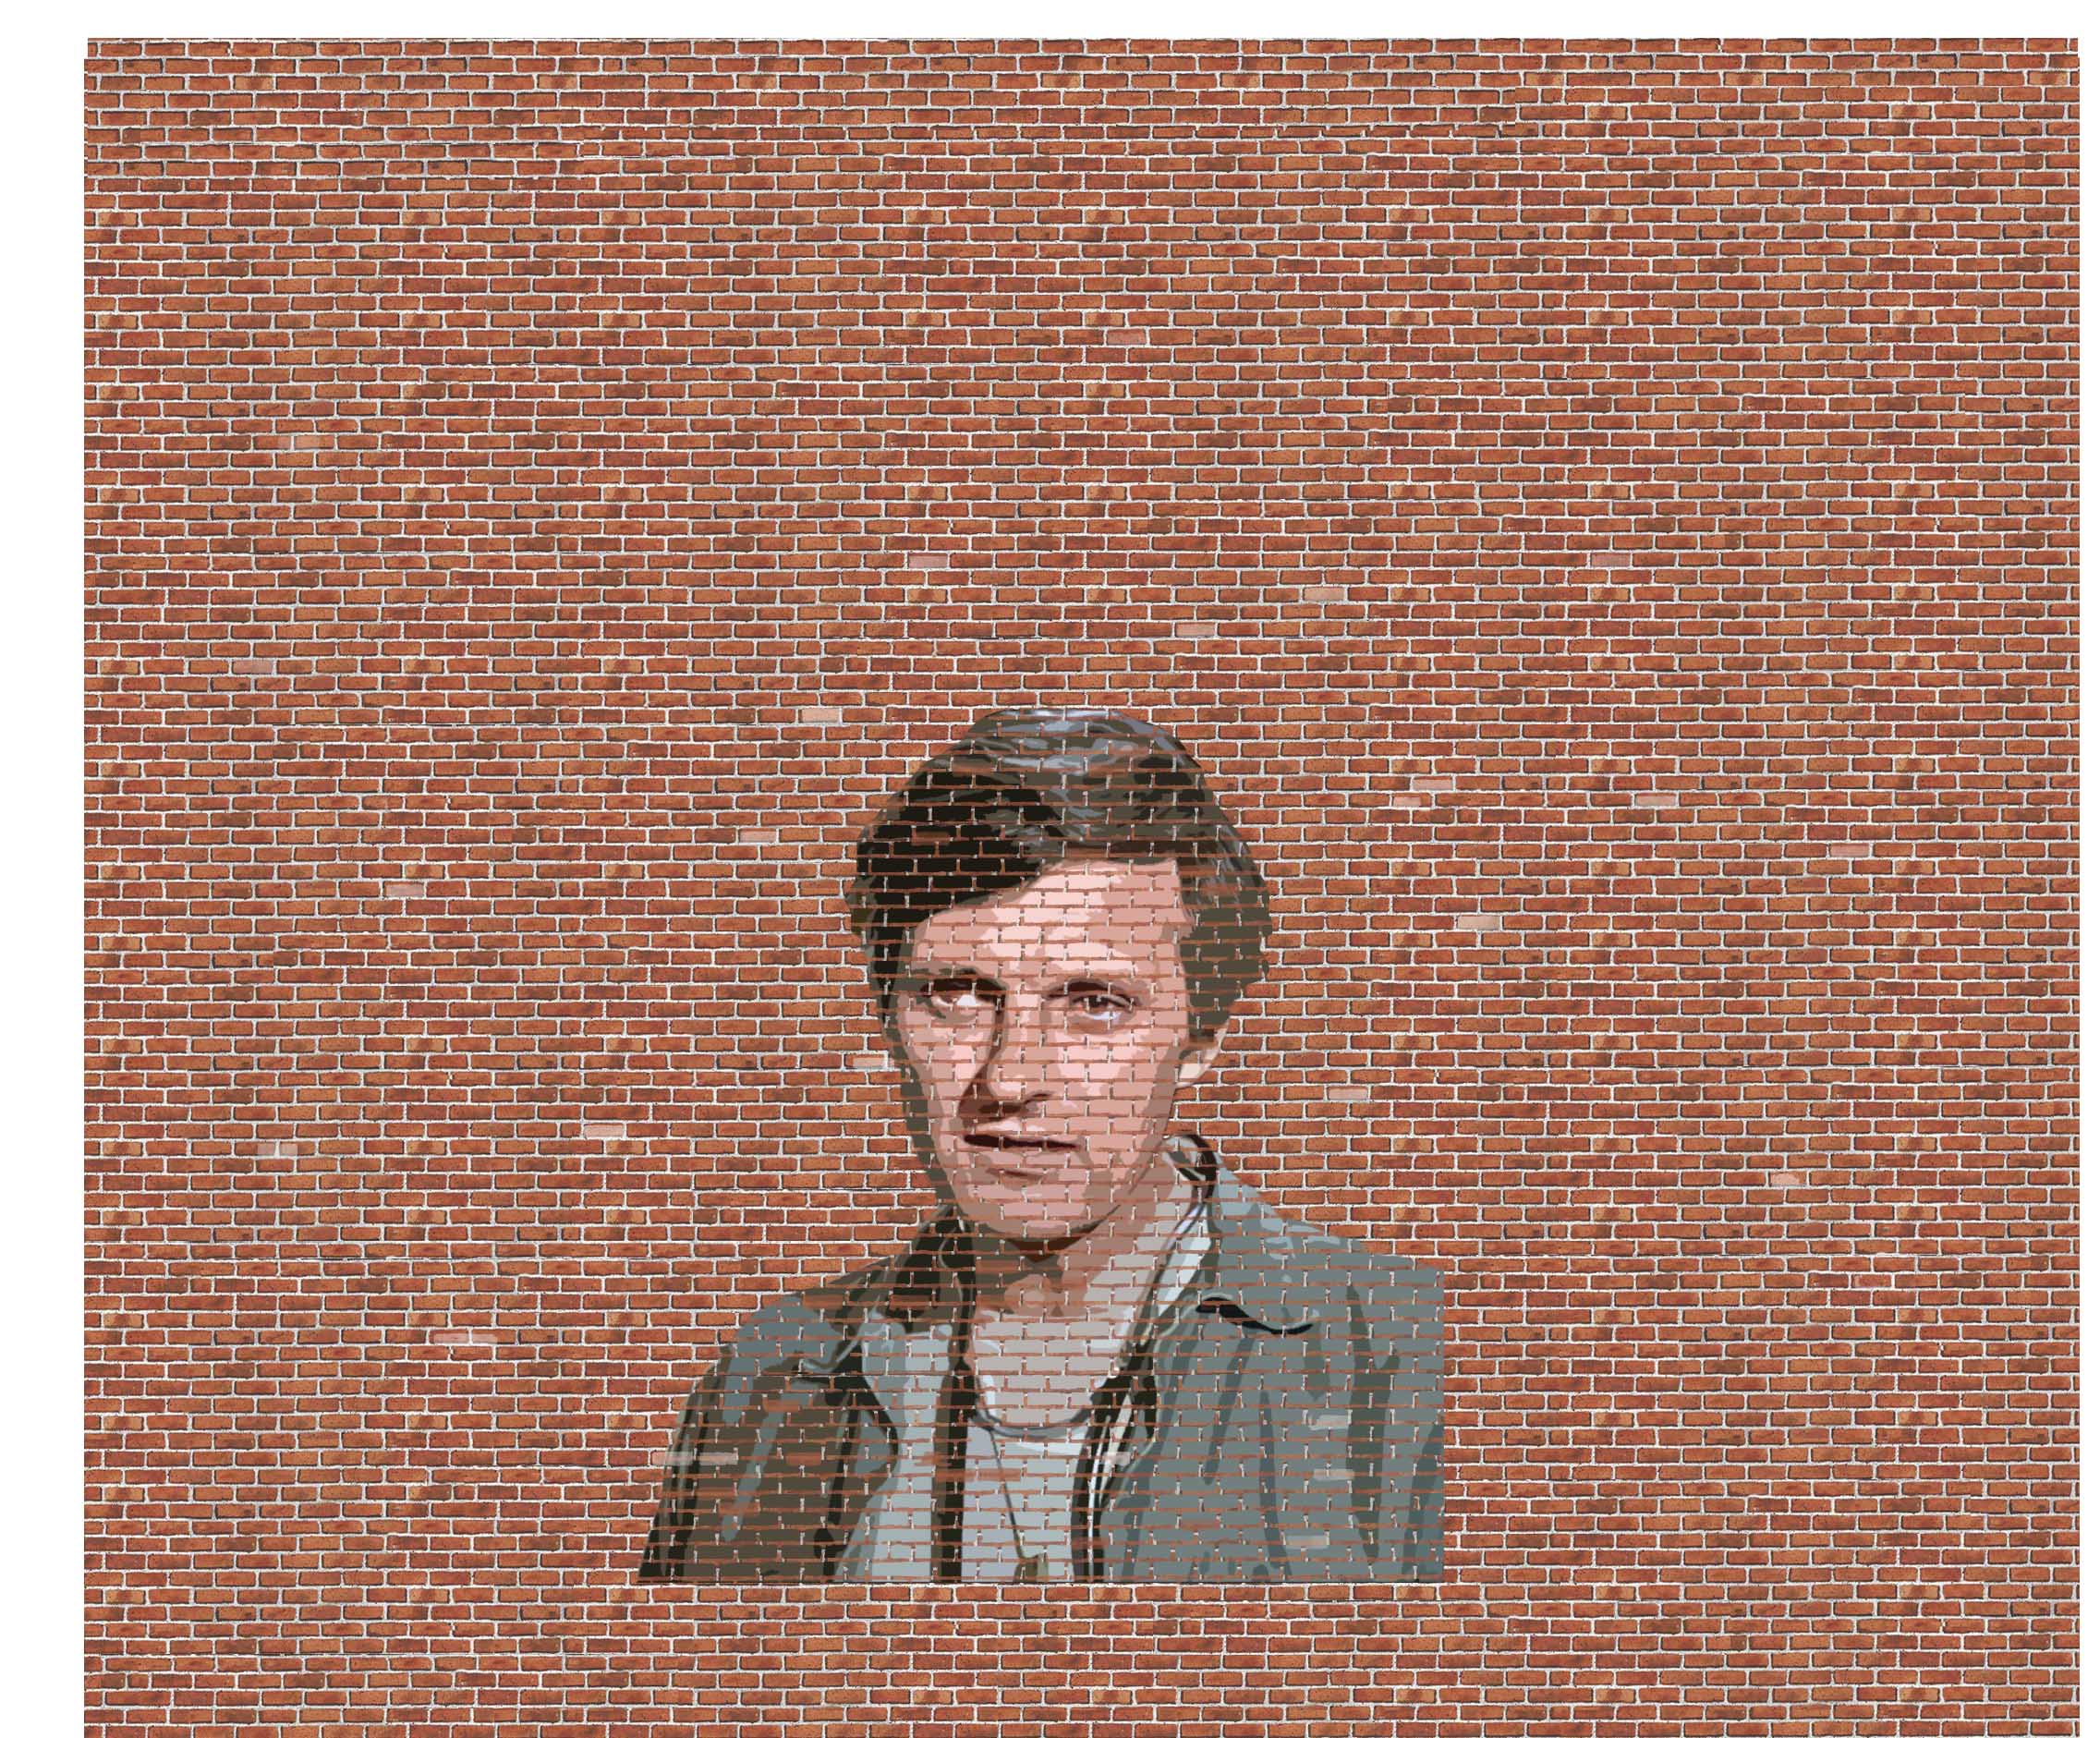
Once your wall with the picture has been email to you, here’s what it will look like (but obviously with your pic):
Now you can put it on to any wall of the building.
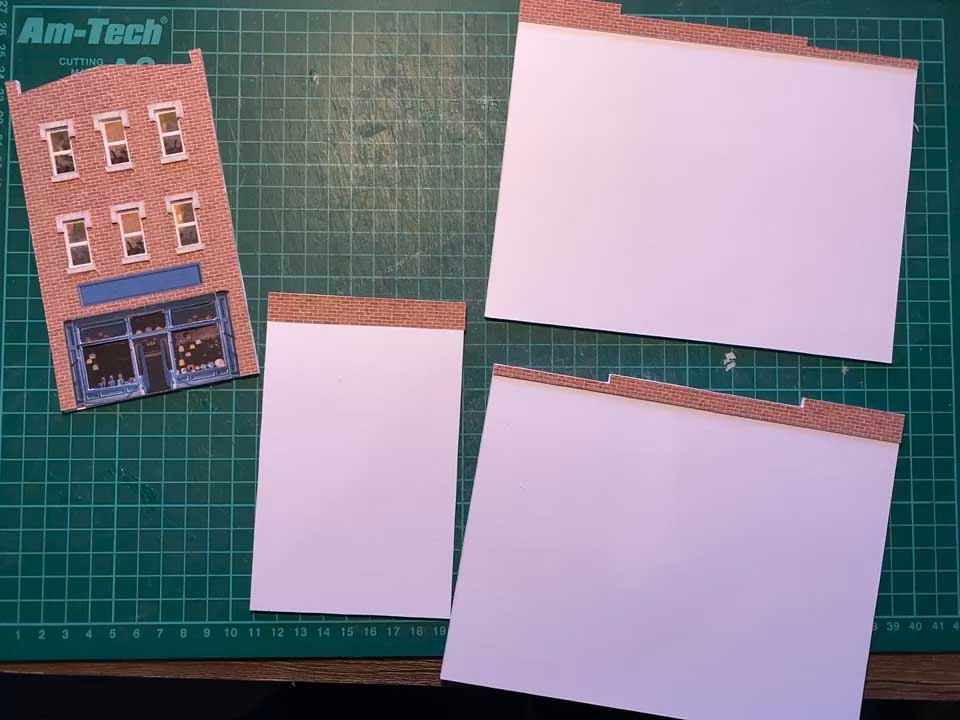
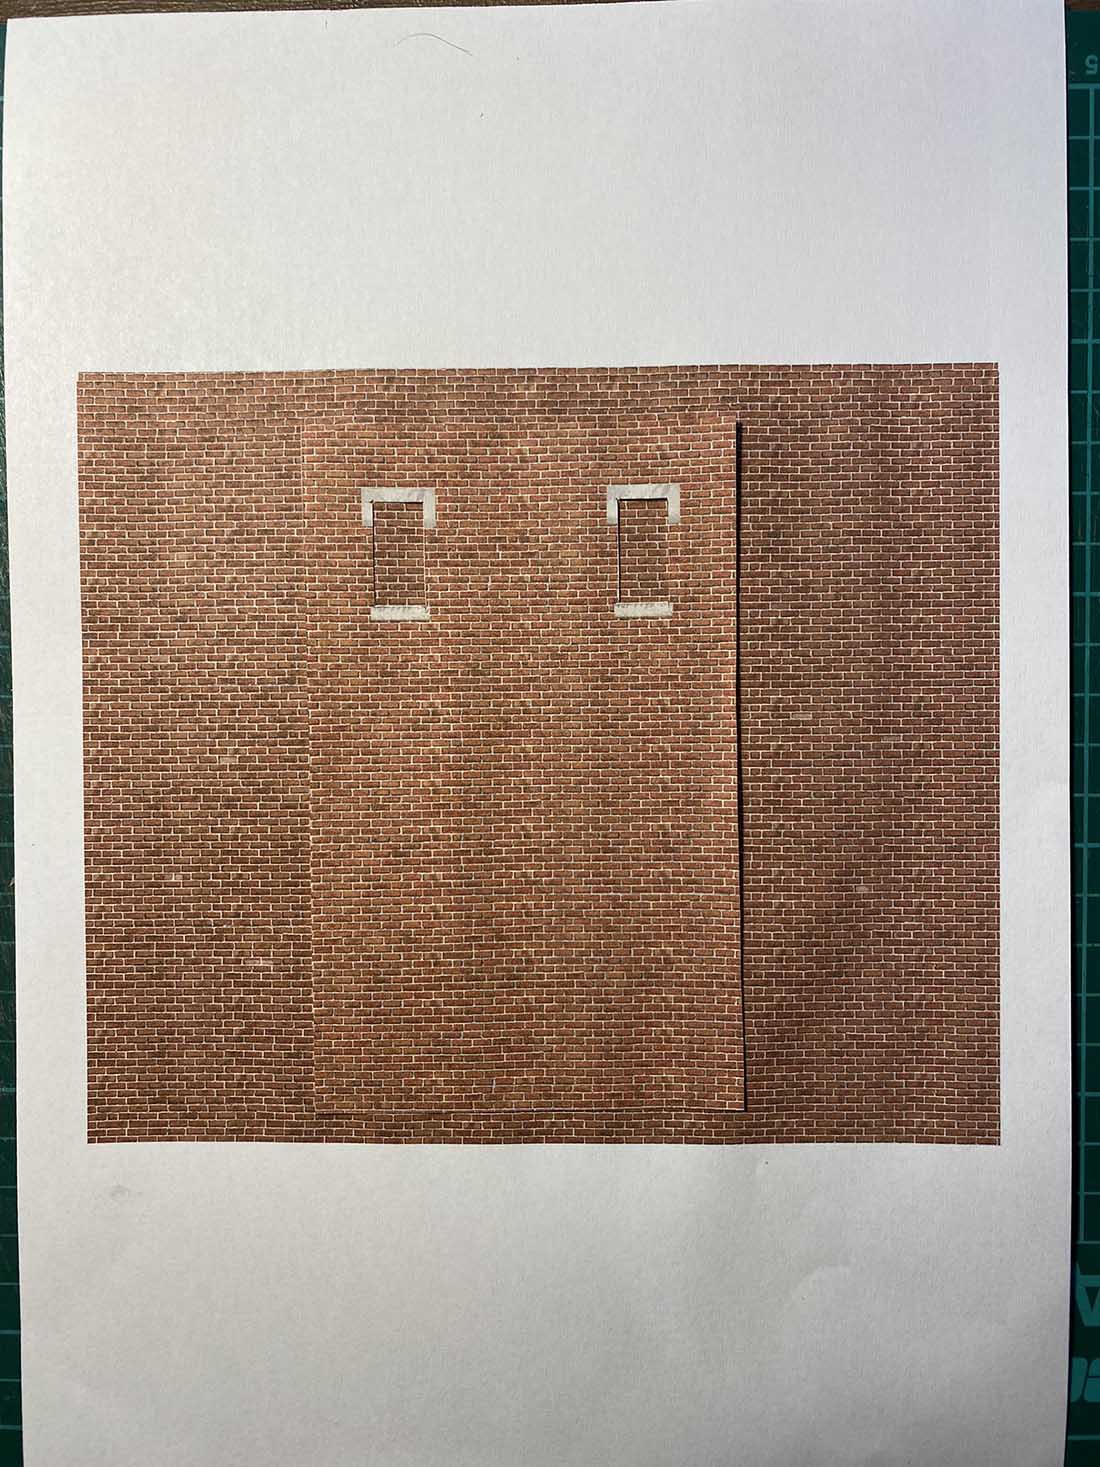
Lets say you want it on the back wall – you would just make a template from a back wall print:
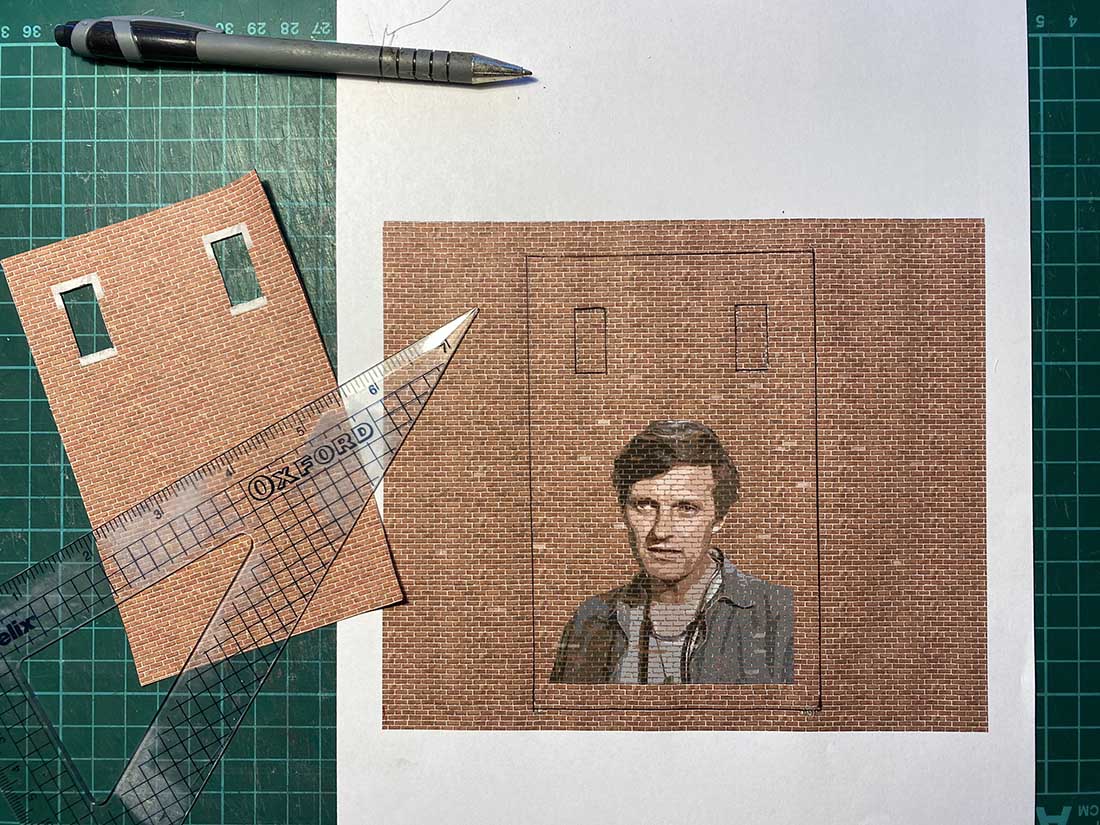
Place it over the mural print – you can position it anywhere you like.
Trace out the shape.
Now it’s just a matter of cutting and you have your ‘middle’ layer that sits on top of the base layer, and below the ‘sticky-out-bits’ layer.
You really can have a lot of fun with them:
And you can add anything you like – it doesn’t have to be a photo:
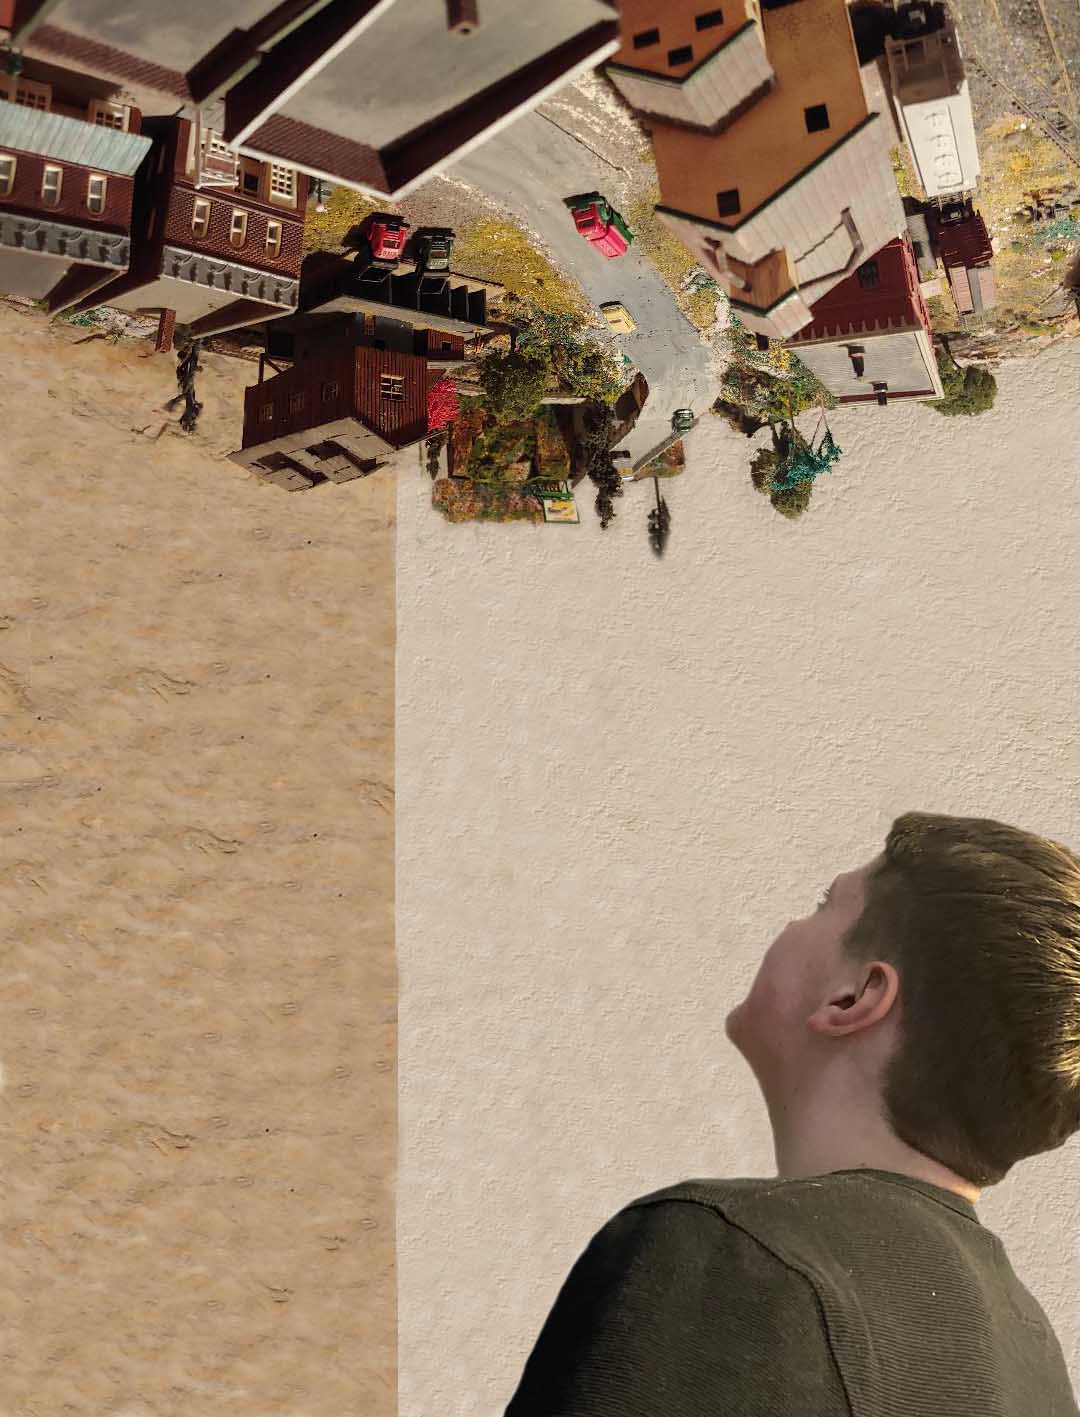
Stan’s been in touch with his upside down model railroad:
“Hi Al,
I love seeing some of the inventive ways people have found space for their trains and track on your blog.
Like many of your readers I am very short on space too.
In October last year we downsized and moved to a much smaller house, which I thought would be the end of my layout days.
But as you are always saying – where there’s a will there’s a way. So I got to work.
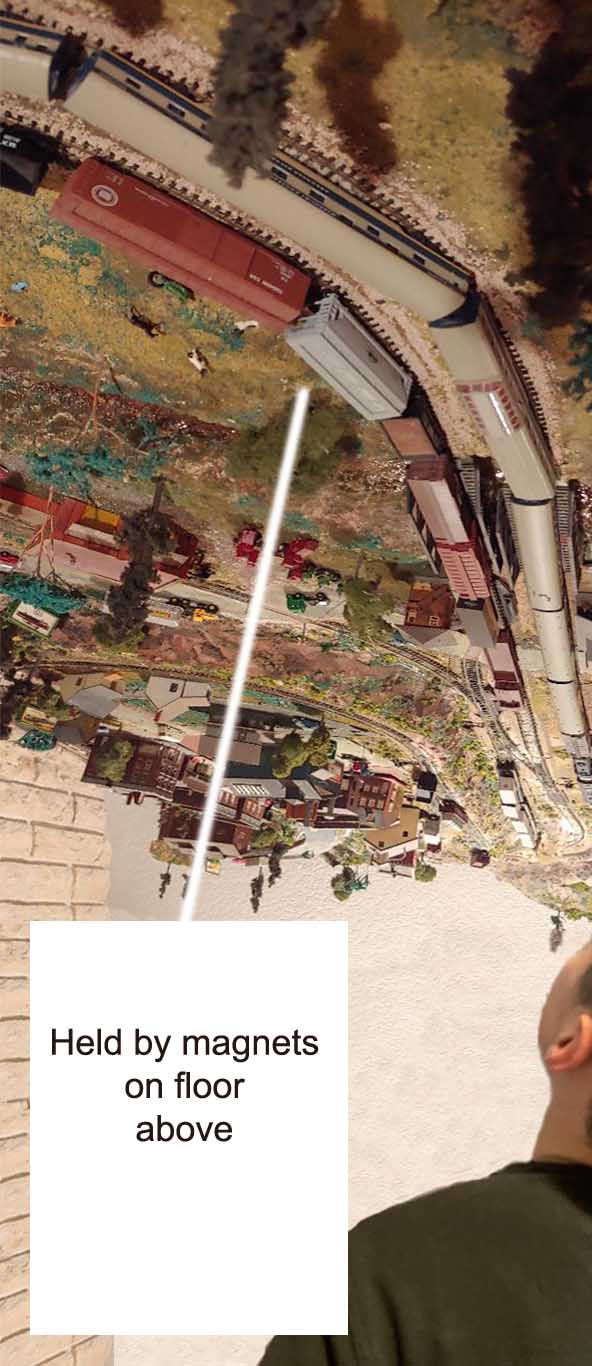
Rather than a ‘ceiling layout’ on a pulley, I decided on an upside down layout.
The track and scenery were very hard as my back ached constantly, but it was worth the effort.
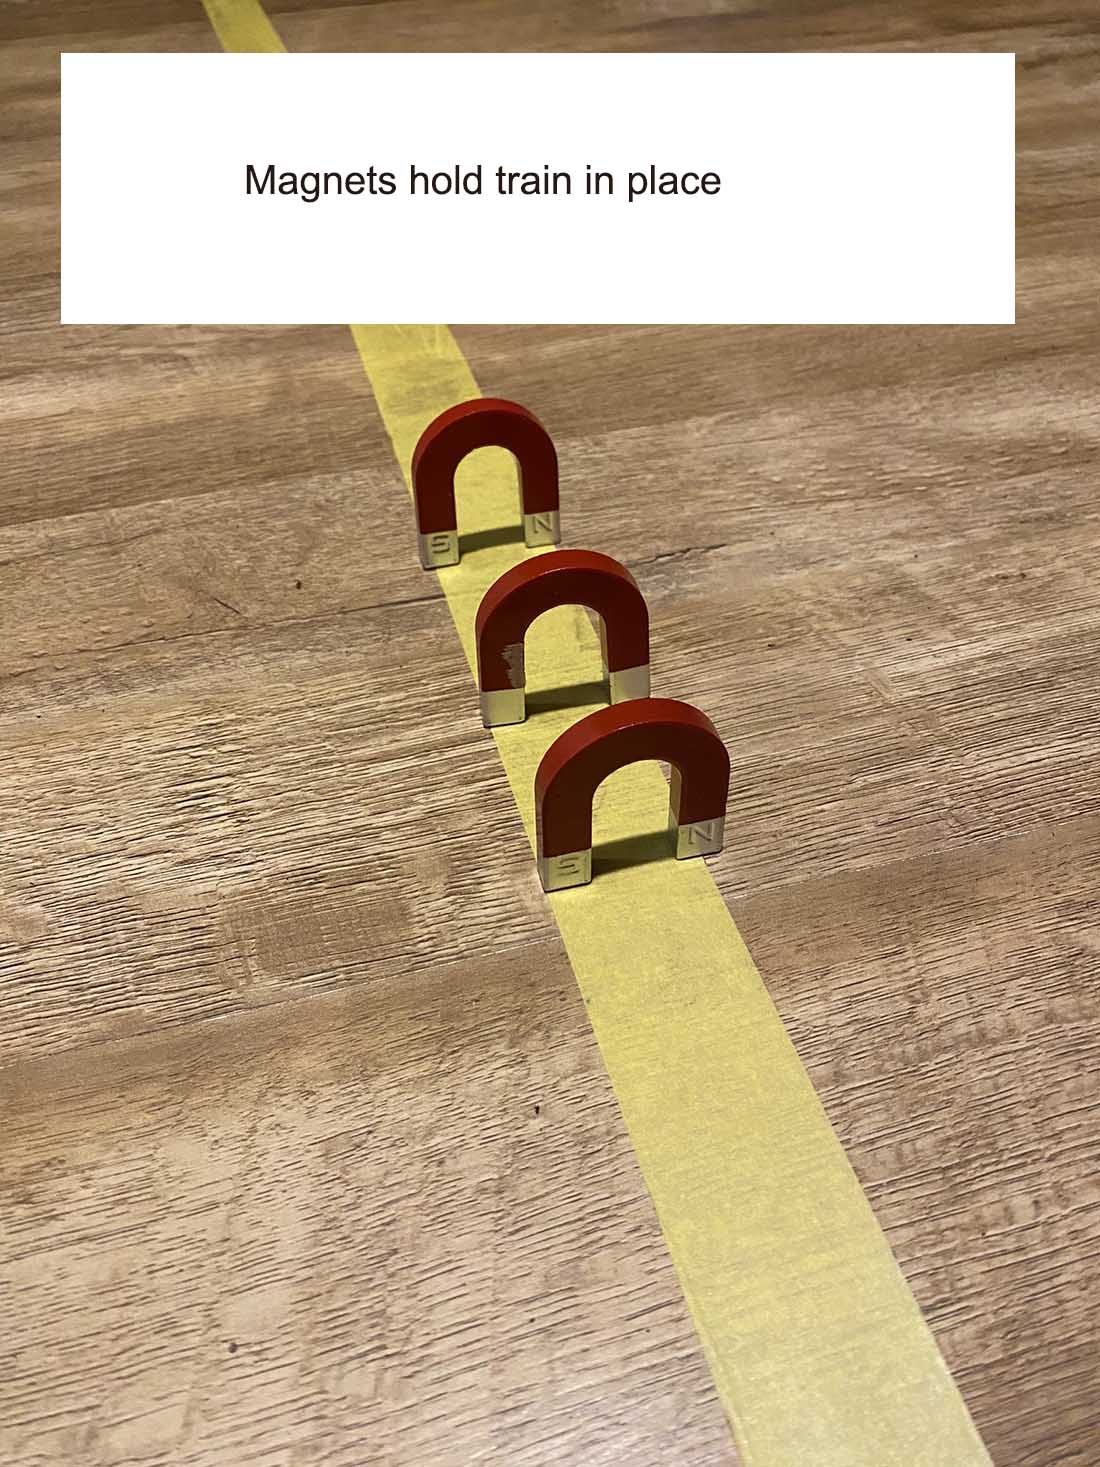
There are no electrics on the layout at all, but locos and freight cars are ‘powered’ by magnets on the floor above (spare room).
The floor above is an exact ‘trace’ of the layout – I simply move the magnets along the floor and it moves the loco along the track.
It took some getting used to. If I hear a crash I know I’ve gone too fast or outside of the track.
Even my eldest grandson loves it and they hoot with laughter at the trains going round, shouting up the stairs, “Faster, Grandad, faster!”.
Stanley, Ulverton, Lancashire”
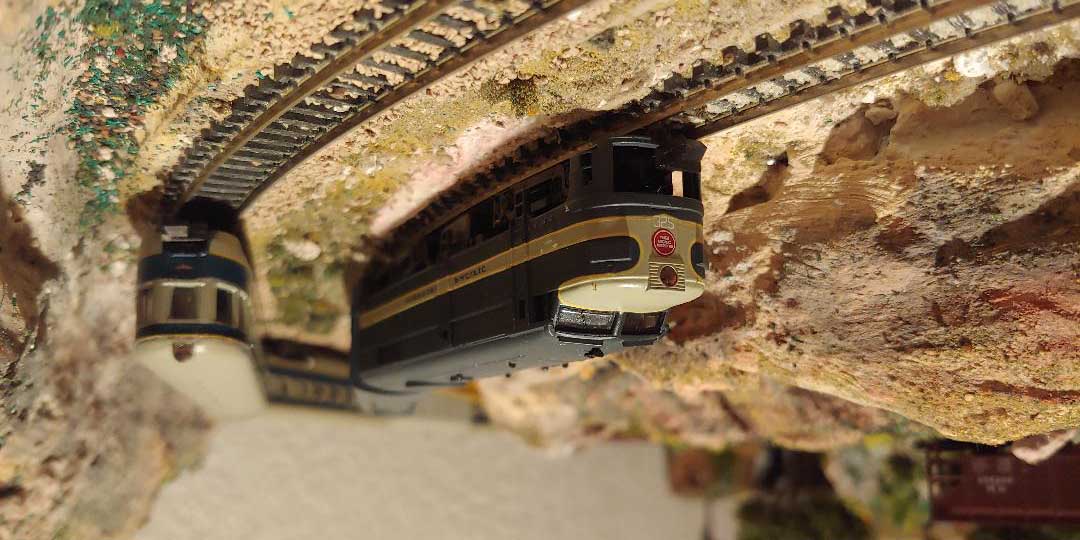
Now on to Ollie:
“Hi Al,
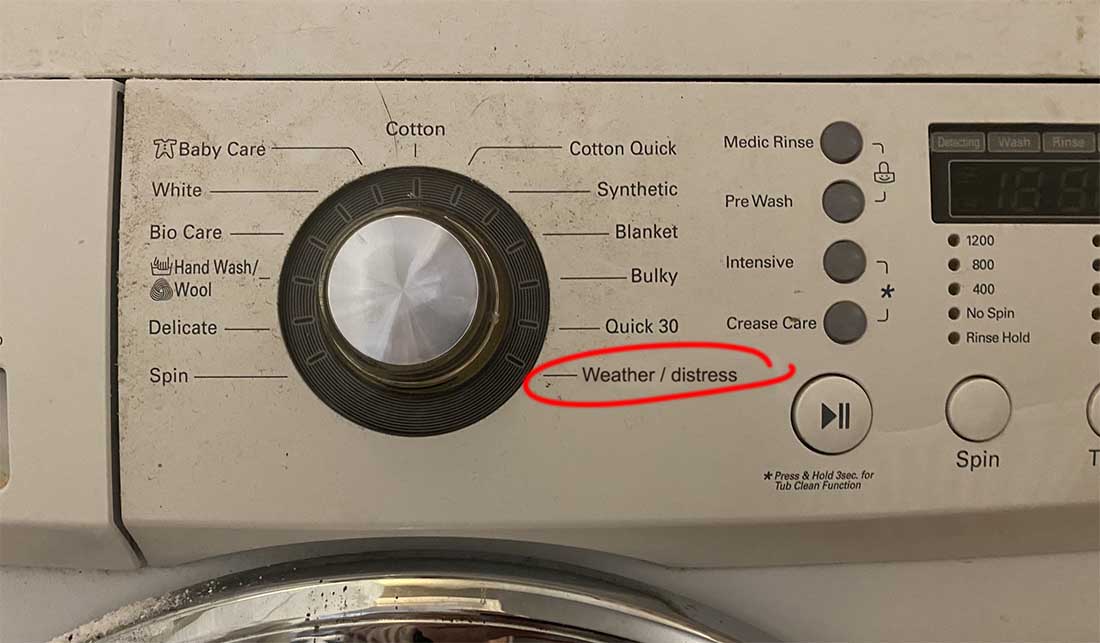
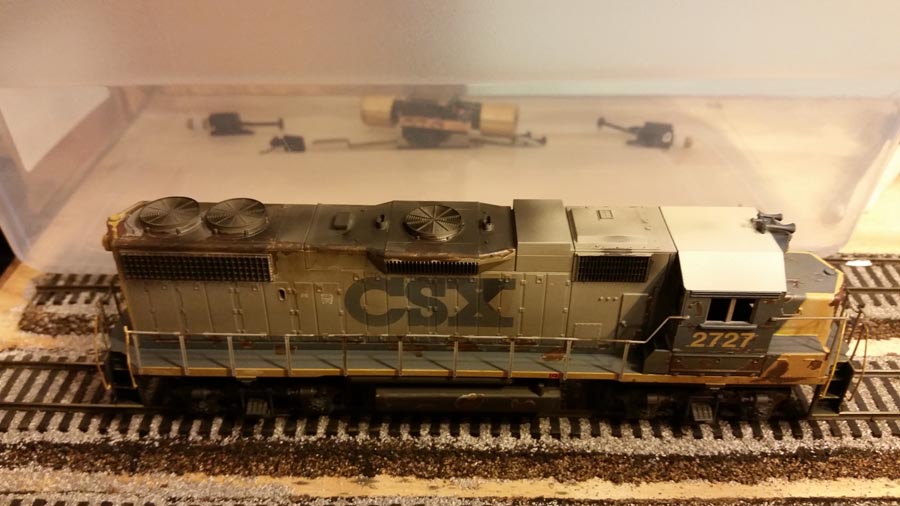
I keep my washing machine in a shed next to the house, so it gets a little dirty and dusty.
I went to give it a little clean before putting a wash on and noticed there was a ‘weathered / distressed’ setting.
Presumably this is for jeans or other clothes people like to look ‘worn’, but I wondered if it would work on my loco casements.
I decided to try it.
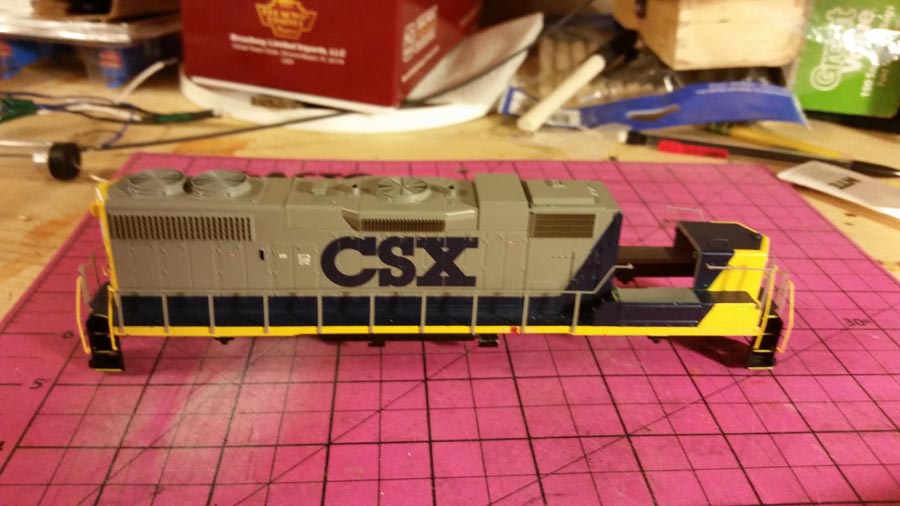
Here’s the pic before I put it in the washer:
The wash cycle lasted for about 45 minutes and I was really pleased with the result:
I am trying some track next, I shall mail you when I’ve done this.
Oliver,
Harlem, Georgia, USA.”
A big thanks to Stan and Ollie.
Please do leave a comment below if you enjoyed their posts as much as I did, and if you didn’t, you probably need to have a quick look at the calendar.
Now we’ve got the laughs and the guffaws out of the way, here’s something that I’m hoping one or two of you may like.
The posts I enjoy the most are the ones that add personal touches to their layout.
In yesterday’s for example, Brian went on a cruise and loved how the trains pulled the ships along the Panama Canal. So he added a nod to that in his layout.
So you get the idea, there are many ways to do it. I wondered if could do something to the printable buildings to make them personal.
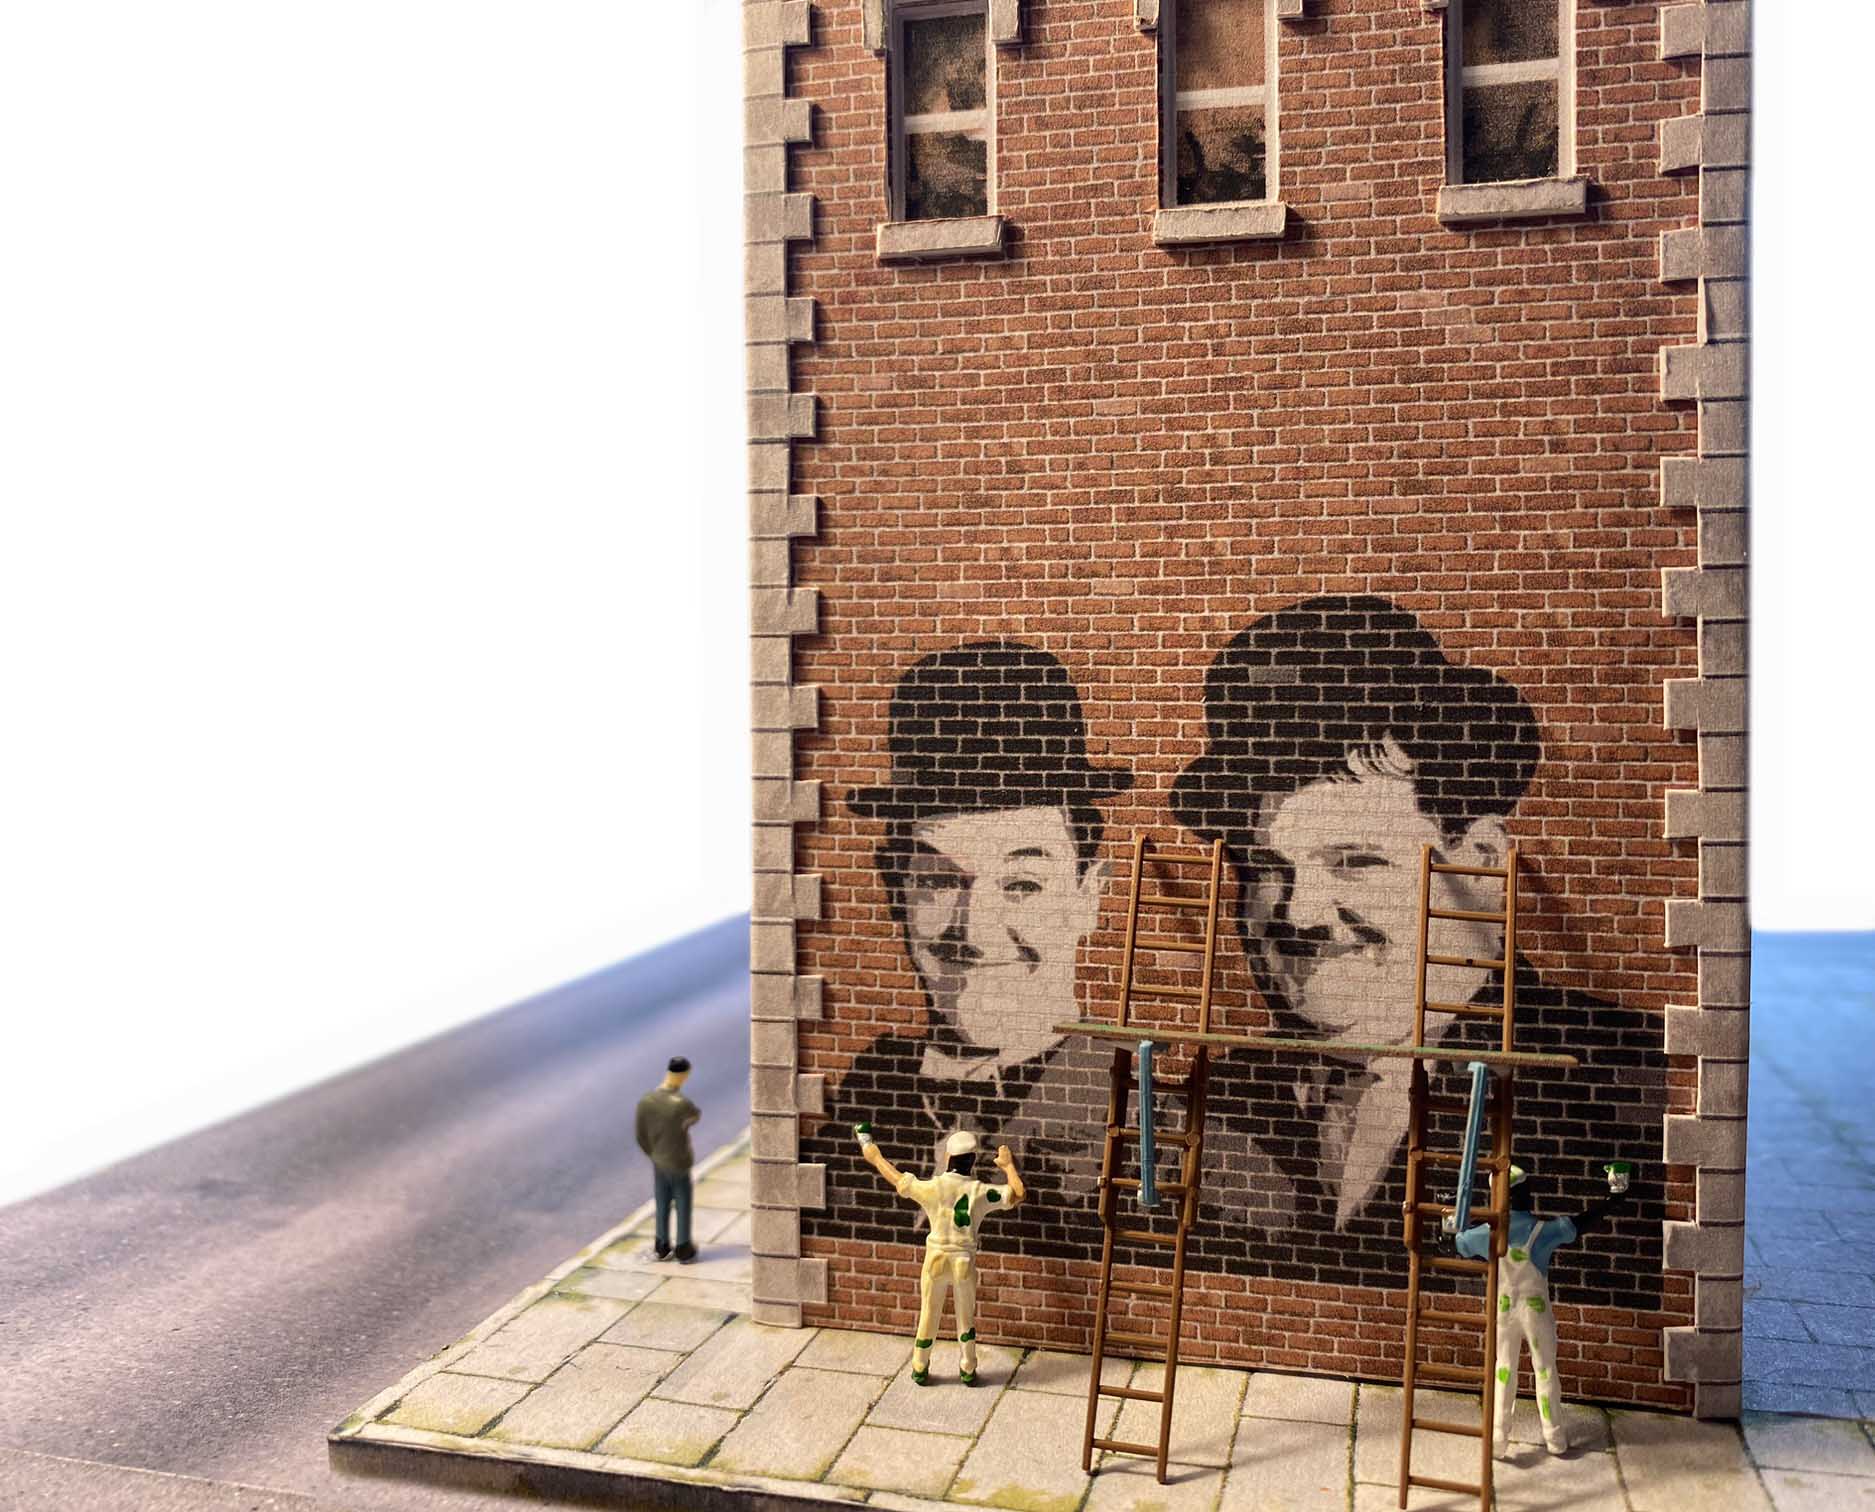
Here’s what I came up with after seeing a painters set by Woodland Scenics.
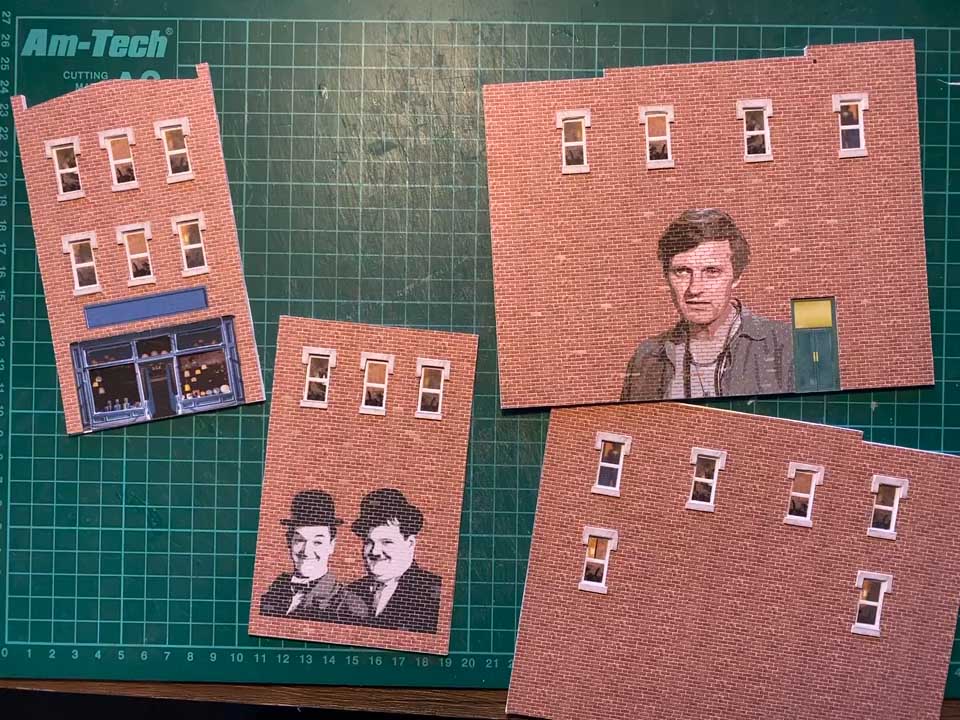
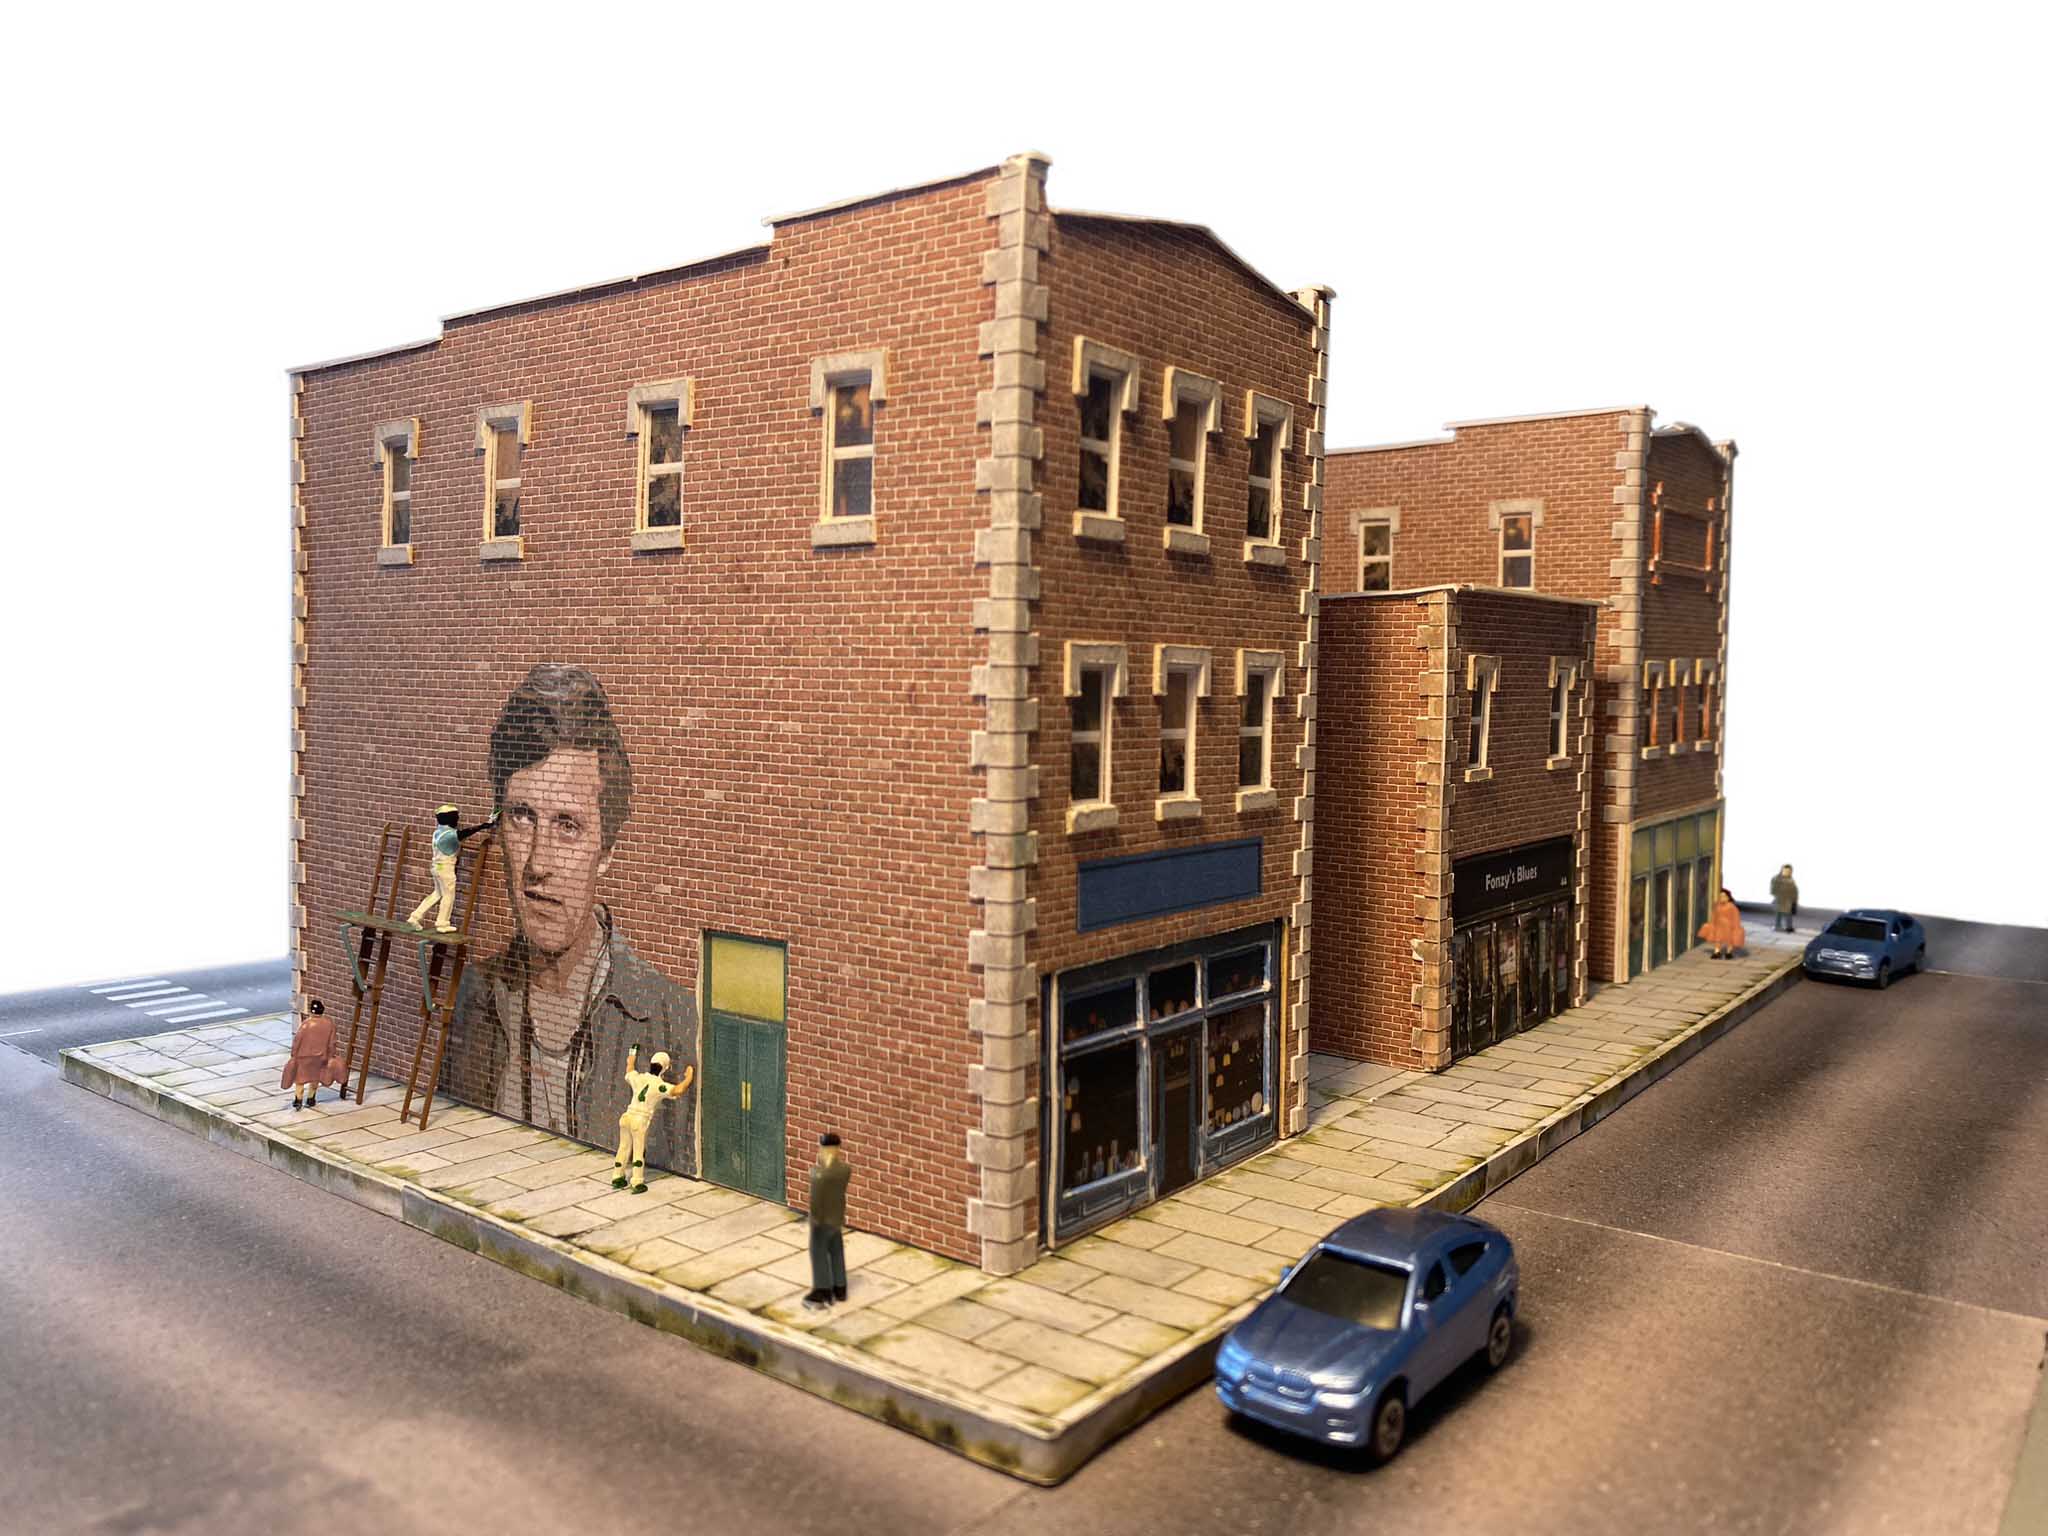
If you’ve got a black and white picture of the old man, why not put him in your layout?
Here I’ve used Laurel and Hardy to show how it would look:
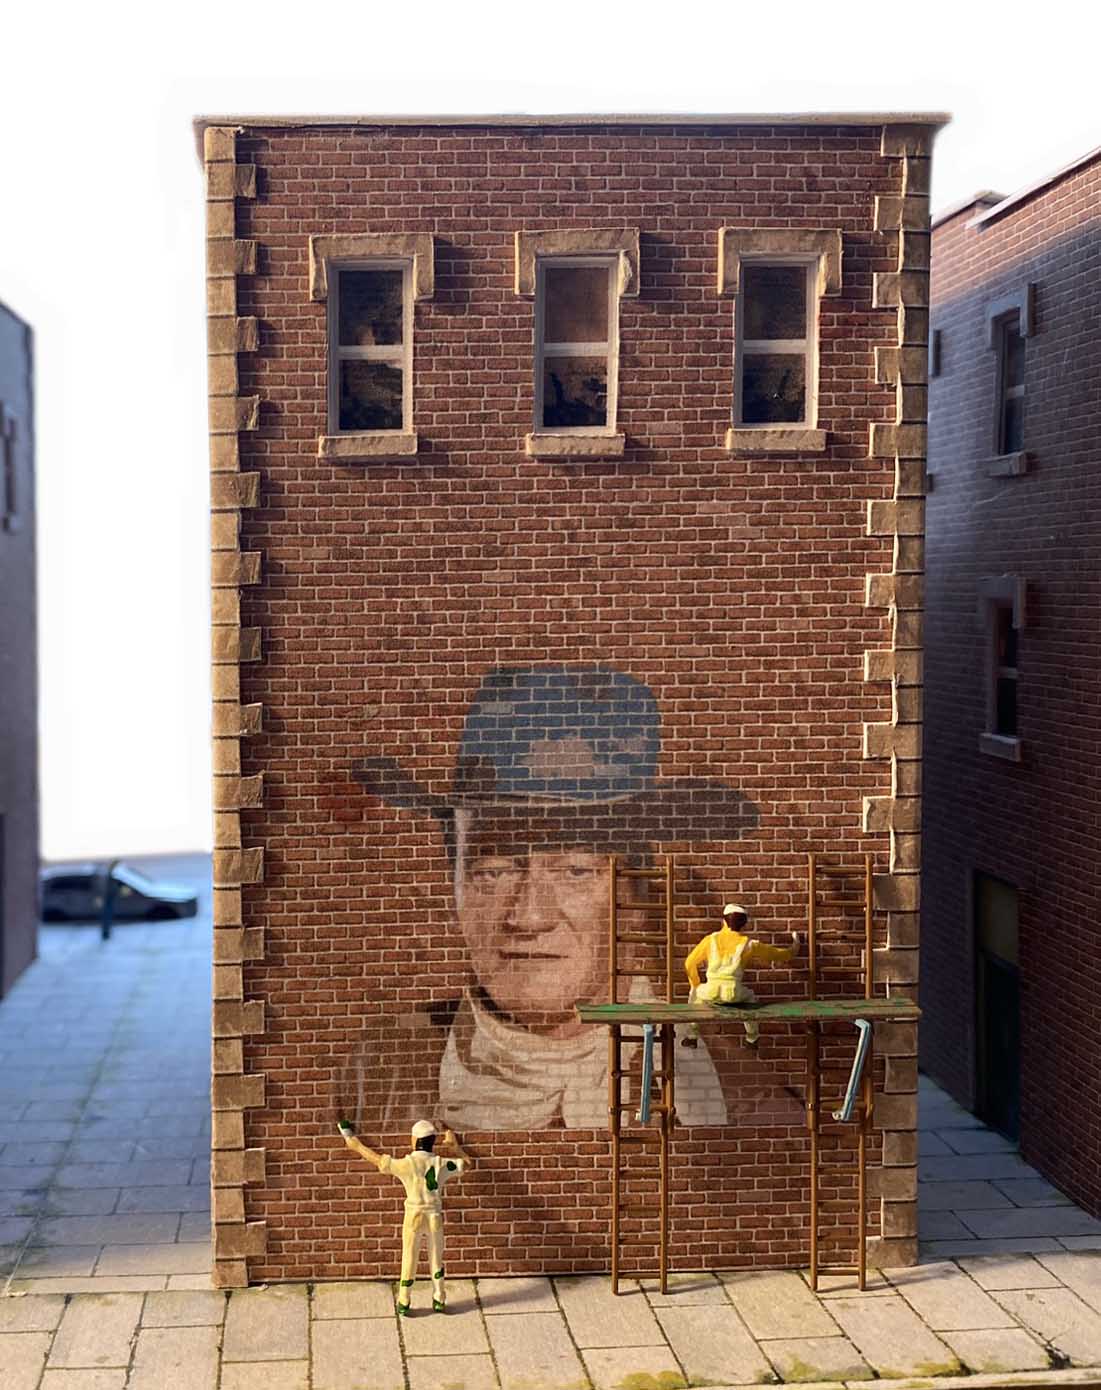
Or perhaps you are a big fan of the Duke:
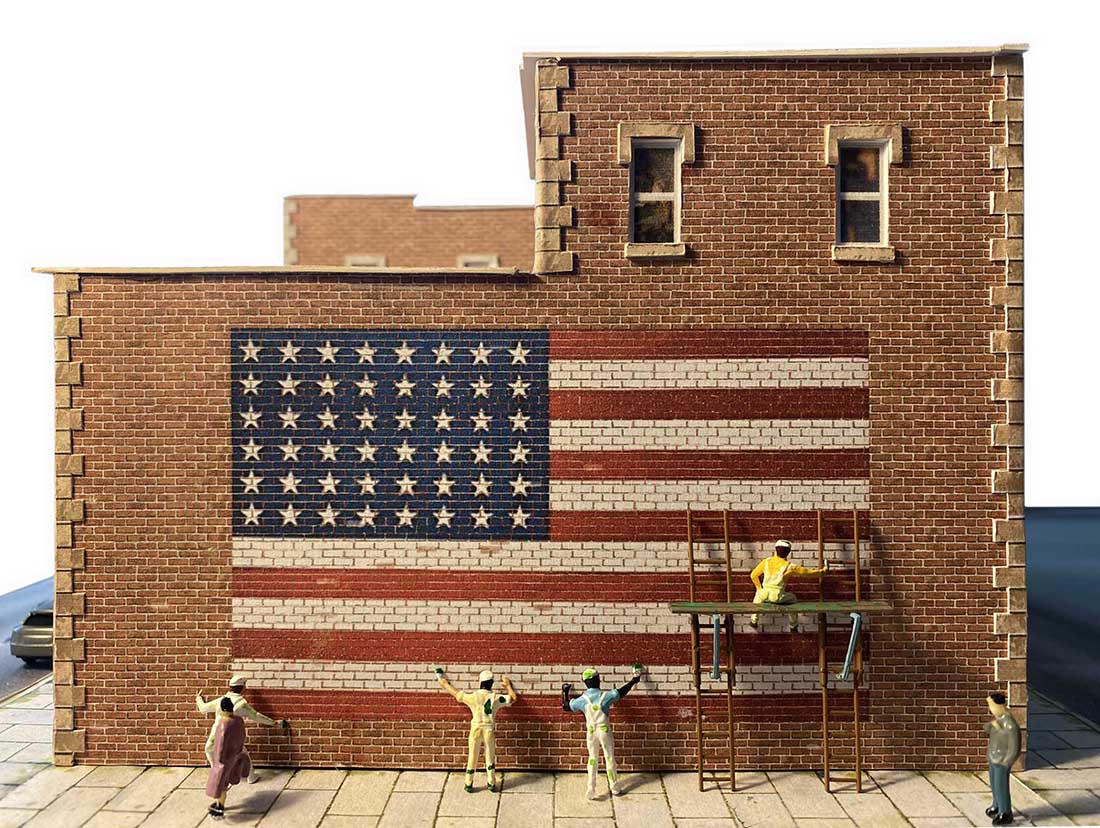
It doesn’t matter what you want on your building wall – anything can go there.
A picture of you, a pet, a flag, a logo, anything!
And just to prove a point, here’s some more:
I hope the pics get across how any image can be added to this printable building (all you need to do is email the image you want on it after ordering).
Like all the printable buildings, they are HO scale. For N scale just reduce the print size to 54%.
For all other scales, have a look at the chart on this page (by the way, O scale prints fine but is too big for a standard desktop printer – you’ll need to go to an office stationers).
This print gives you lots of options, so you are able to make three buildings directly from the prints without any scratch building:
But there’s a catch – there’s always a catch isn’t there?
Each order for this new bundle means there is quite a bit of faff my end: I have to get the picture or image that you mail me on the building, and then get it to you.
So to be honest, I have no idea how long each one will take me.
That’s why I’m only looking for a few orders.
They may take me a long time to do, they may not. But if they do, I don’t want it getting in the way of the blog.
So if you can’t see the ‘order now’ button, it’s because I’ve taken it off because a few of you have been kind enough to support the blog and buy.
I suspect I’ll have to charge a lot more after my trial run, but let’s see how long they take (or rather, how long they take the Boy Wonder to do).
This building (or buildings should I say, because you get three to make direct from the print) is a little more expensive than the others because of the extra work my end to add your image.
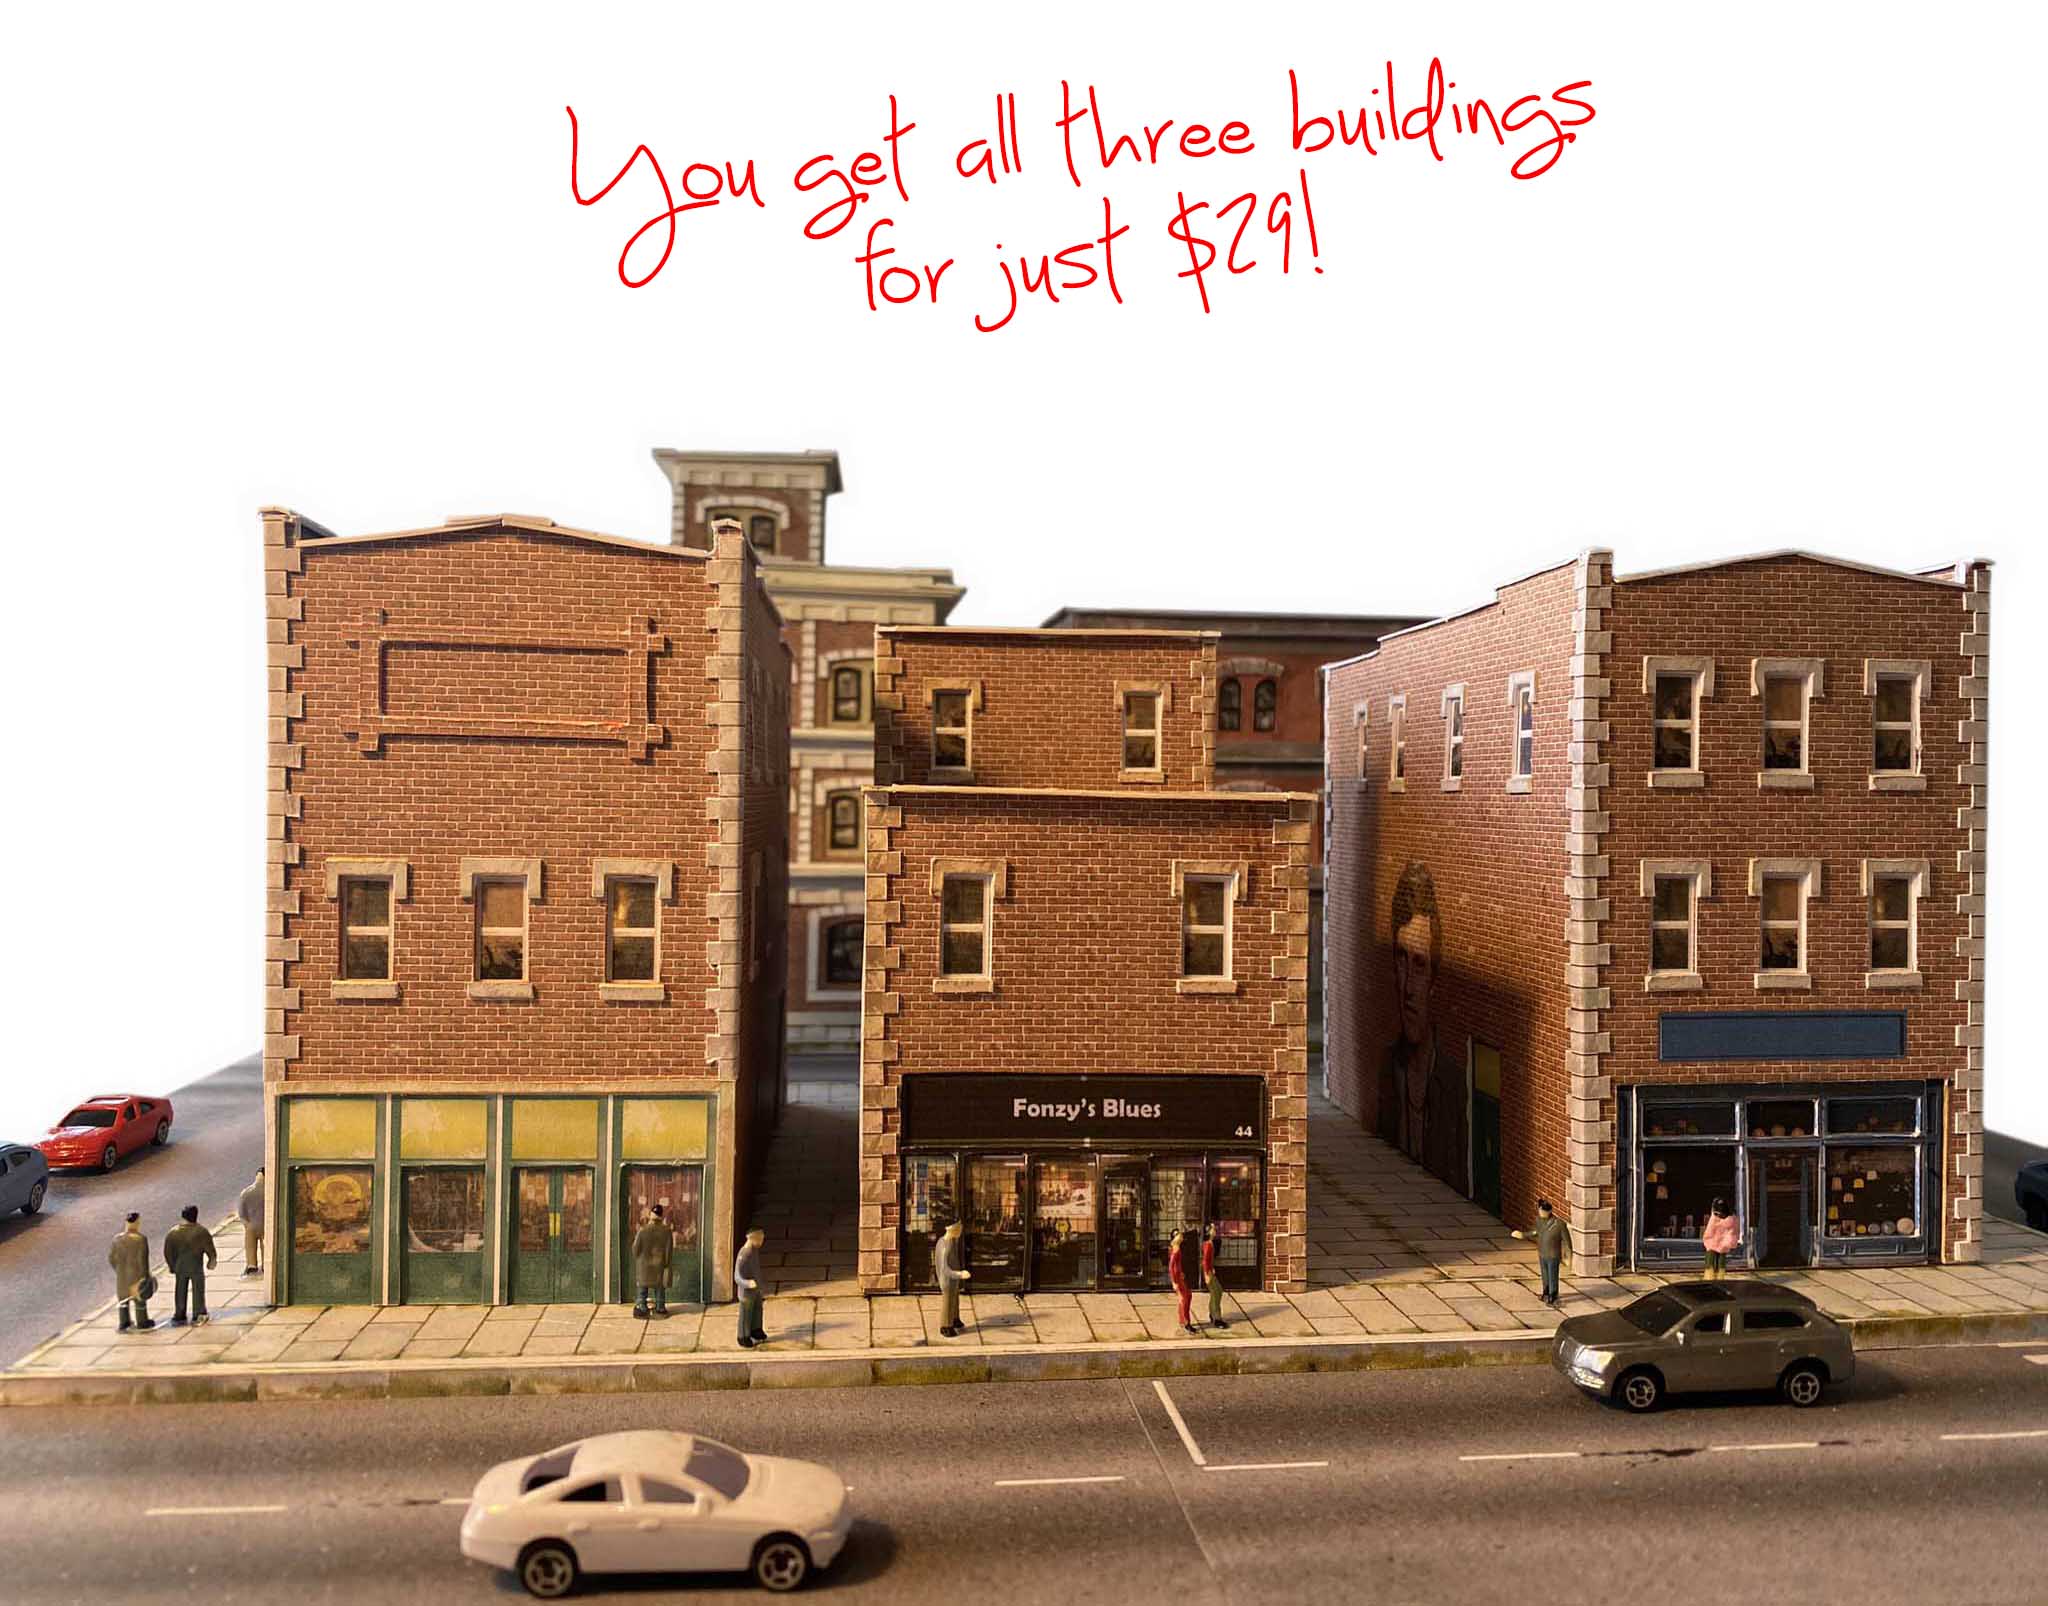
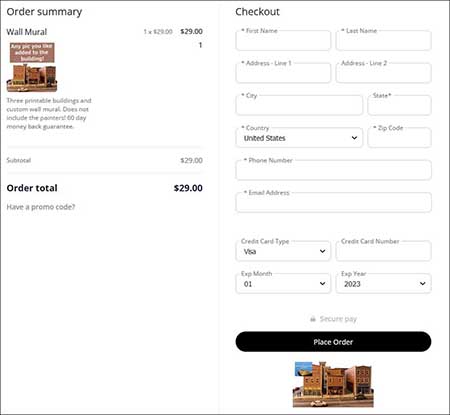
It’s a whopping $29. But still good value when you see the price of other normal buildings out there.
And you’ll get a personal touch to your layout that will make everyone who sees it smile.
Picture the love of your life, or the grandkids seeing their face being painted on a building wall of your layout. Priceless!
So, to make it really clear, $29 gets you these three buildings and a ‘personal’ wall:
Any pic, flag, logo or whatever you wanted added to the wall of your choice:
You get the buildings as soon as you order – I’ll email you a link.
Then you just need to choose an image you’d like on your building, mail it to me, and you’ll get the second part of the order shortly afterwards.
Full disclosure though, I don’t know how shortly – might be a few days to be honest.
Brian’s been in touch – he’s added to the U shaped model train layouts on the blog.
He’s in New York, but being a Brit, so is his fab layout:
“Hi Al,
Its been a few years since I last sent you a note about my OO (HO) model railway.
Before I tell you of my progress, I want to echo what many others say and thank you so much for your hard work in maintaining this blog. Being in the US, it always arrives by the time I wake up in the morning and it’s the first email I open every day.
I am a Brit living some 40 miles outside of New York, came here in 1990 for what I thought would be 3 years and am still here!
It’s very interesting to see what fellow modelers focus on, Brits tend to have rural and urban settings whereas Americans in general focus on mining and logging interspersed with small towns.
Despite being in the US, I decided to build my model around UK trains and scenery, which presented a challenge during covid because I was unable to travel back to the UK to buy supplies as often as I would have liked.
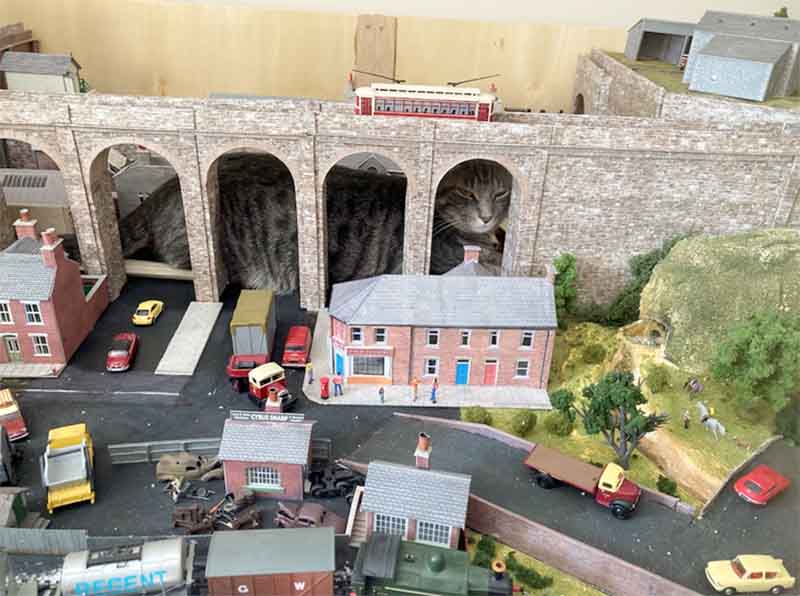
So, my first layout, for which I sent photos, was 8’x4’ was built on the landing of my home. This was fine till my daughter visited with her cats – I found out very quickly the model railways and cats do not mix- we called the cat Catzilla! (look through the arch in the 1st photo!)
So, my plan B was to finish off the basement in which to build my next layout.
My new “man cave” is 19’ by 14’ and I painted the walls a light blue hoping it would blend in with the scenery.
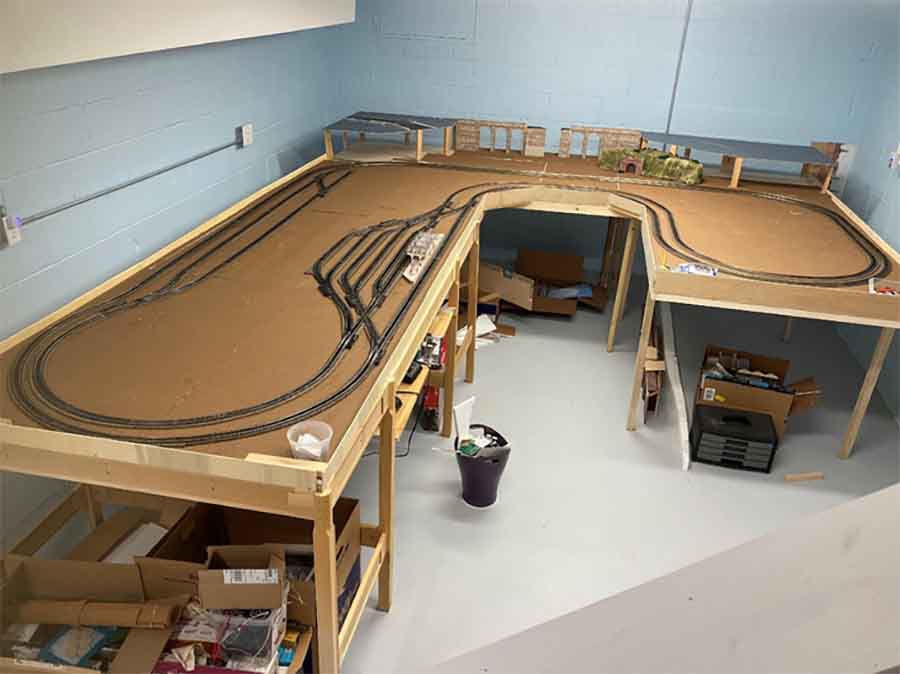
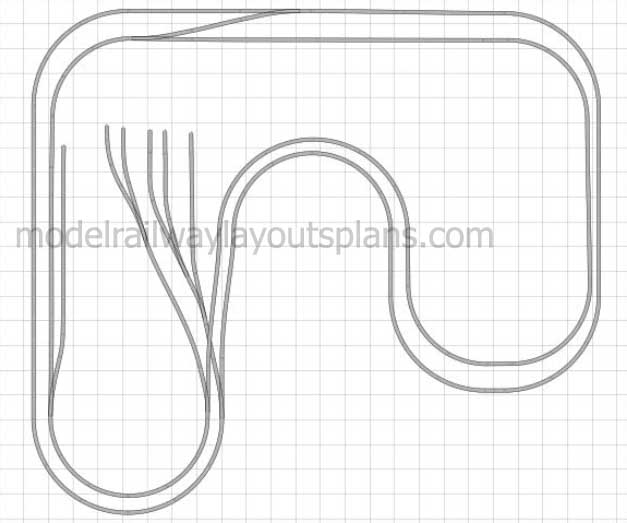
Because of the stairs / door configuration, I built the train table U shaped with one leg longer than the other.
I decided to build it approx. 16 inches from the wall so I could reach all areas resulting in the table, which is 4’ wide throughout, is 11’ along the top with the left leg 14’ and the right leg just over 8’.
The track layout in the photo is pretty well how it has ended up. I decided to keep it all on one level but create height with the scenery etc. It took 8 months to get from Catzilla to my new train table.
I laid white 3/4-inch insulation on my board and painted it earth brown, this helped when I created my lake and canals as I was able to cut out the bits I did not want, more later.
I did not model anywhere in particular but my theme is pre diesel, so all my engines are steam and most of my model cars are from the 1960s and 1970s with a few exceptions.
I have a mixture of GWR, LMS, LNER and BR locomotives.
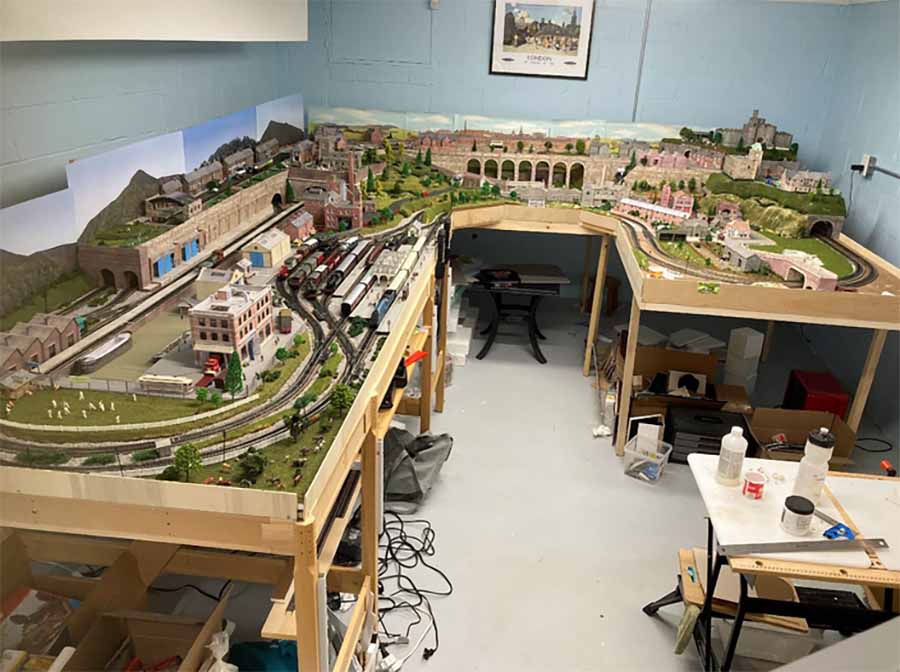
Here is the current layout.
I started by creating the upper level which starts on the left side and goes round the top with the track in the tunnel for half of this distance.
The main part of the railway is DCC but I put a tram on the upper level which is DC. It operates on a simple shuttle so I just switch it on and leave it to run.
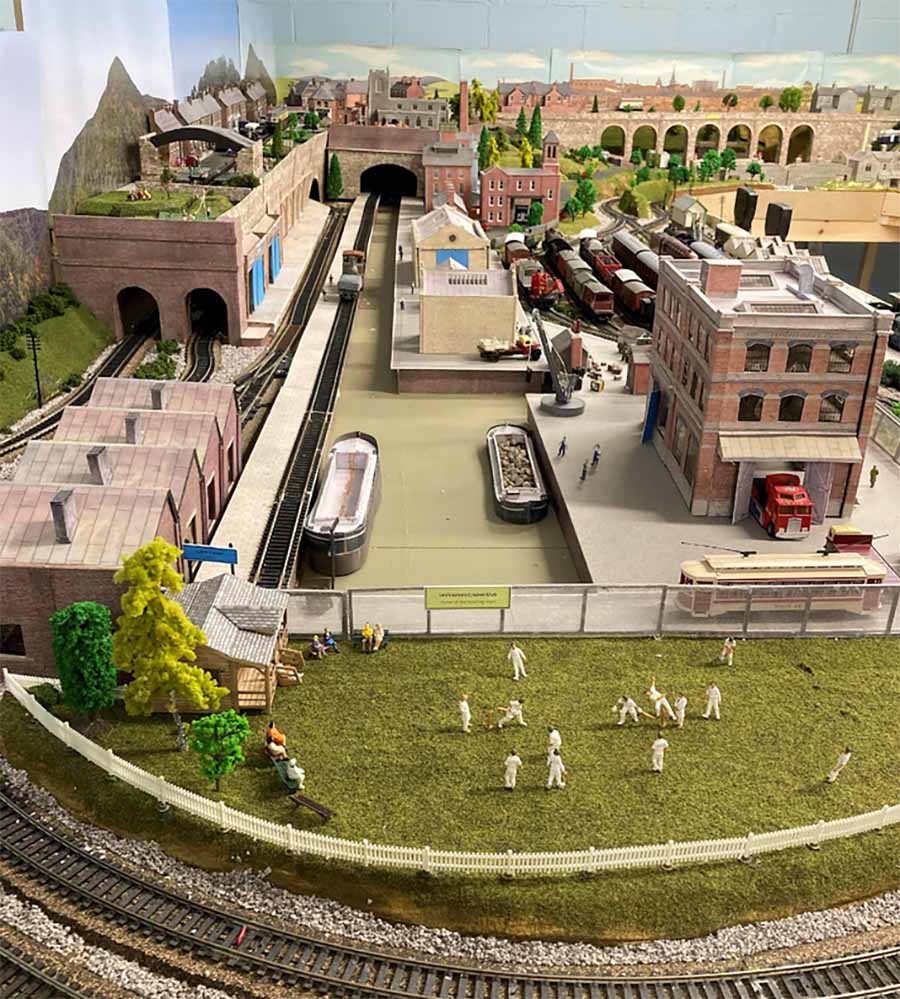
The scenery is of a northern England town with terrace houses, church (with wedding of course) and school just like the one I attended.
U shaped model train layouts – the track plan:
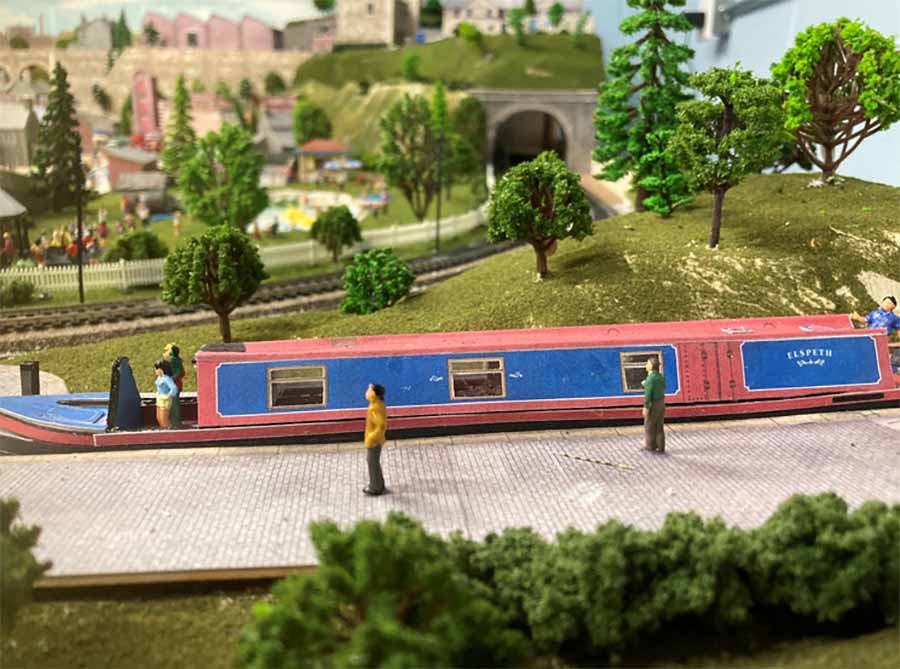
Shortly before I started to build the model, my wife and I went on a cruise which included sailing through the Panama Canal. For me, the most interesting part were the locomotives which pull the ships through the locks, so I decided I needed a canal with track up the side which would pull barges. I ended up with this-
This line is also DC and on a simple shuttle. I have not yet worked out how to successfully have the canal barge attached to the locomotive so that is work in progress; I don’t want track down the length of the canal.
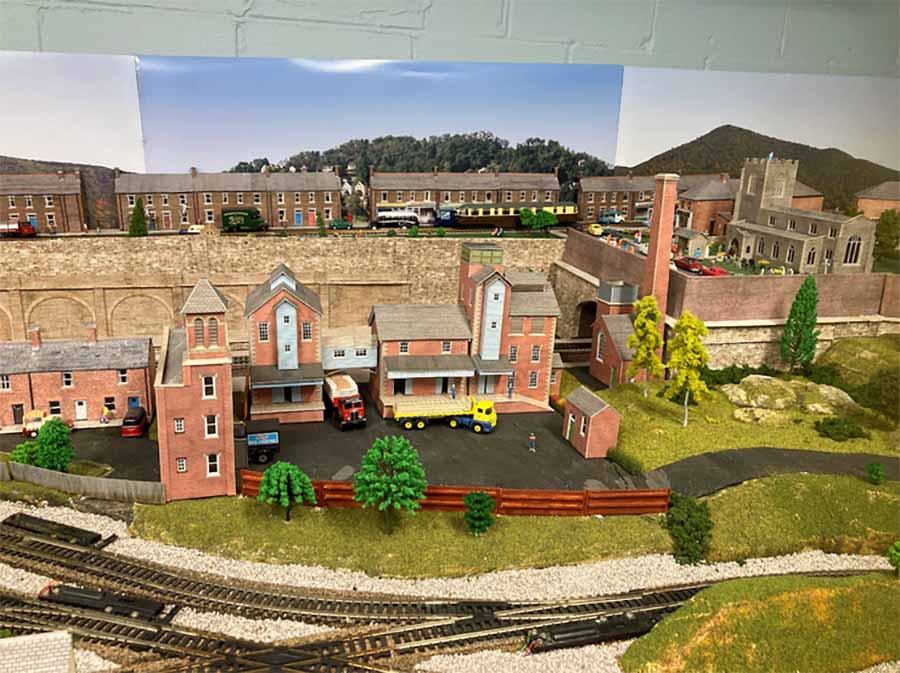
Along the side of the canal are warehouses and a brewery as well as a row of cottages. Looking for something to put at the bottom end, I chose a cricket match complete with pavilion.
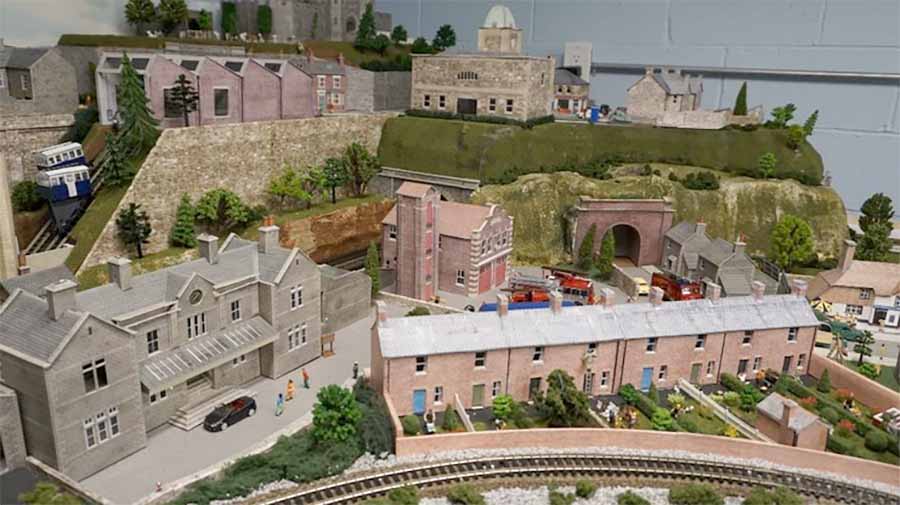
I have always liked the idea of a high level viaduct (we had a 3 level one in my town before Beeching pulled it down) so that links the 2 sides of the upper level, and the tram transverses it.
Below it is a station and one of the biggest challenges of my whole layout, the funicular, links the lower level to the upper level.
It has taken 3 years and a lot of angst to get it working properly. However, now passengers can alight at the station and go to the upper level and visit the castle and town.
I am particularly pleased with the castle, a Metcalfe model. I wanted something to be a focus and decided that this is ideal. It’s the most expensive structure on the layout but well worth it.
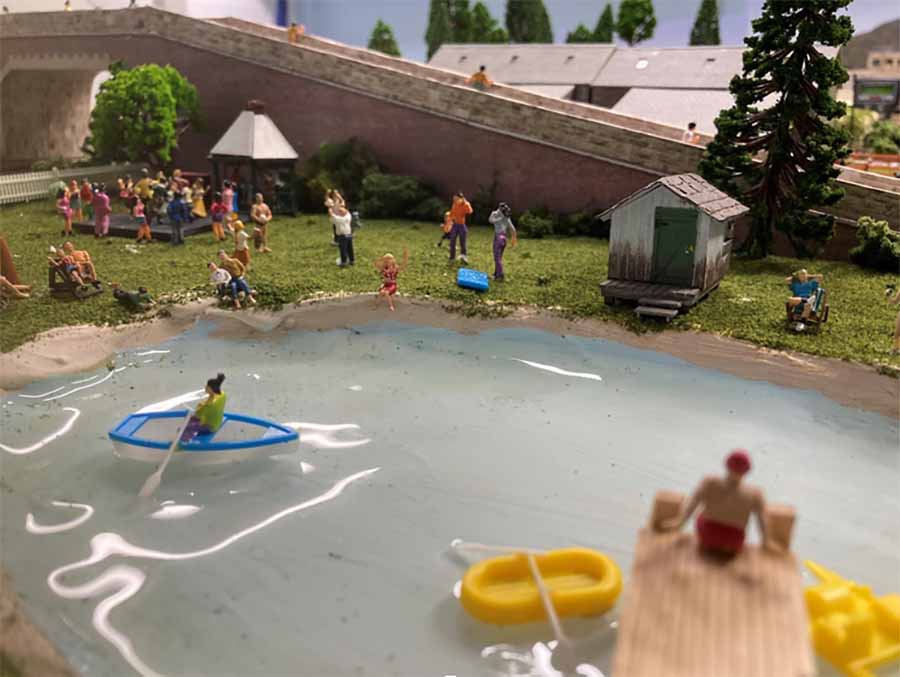
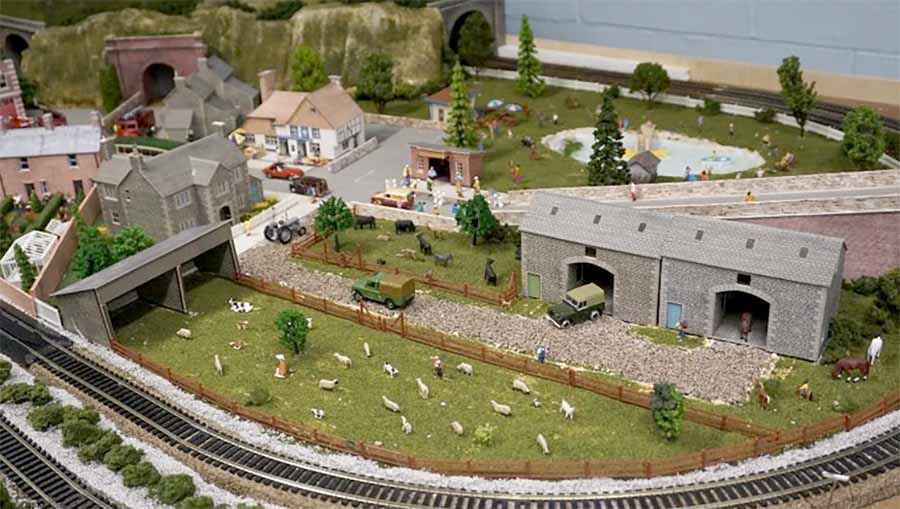
Moving round to the right leg of the layout, I have a village scene with fire station, farm, pub and park complete with boating lake and outdoor concert. And then another, smaller canal with lock and canal boats.
As many contributors have said, a layout is never finished. However, much of the work is now complete and now I need to add more scenery etc. It’s the building rather than running trains the I enjoy the most.
Sorry I have not worked out how to video yet, that may come soon.
Happy modeling,
Brian”
A huge big thank you to Brian for adding to the U shaped model train layouts.
For me, it’s the personal touches that make a layout, and Brian’s is packed full of them: Loved the small diesel pulling canal boats, and the funicular railway too.
That’s all for today folks. Please do keep ’em coming though, it’s still ghostly quiet this end.