John’s been in touch with the latest lot of printable HO scale buildings.
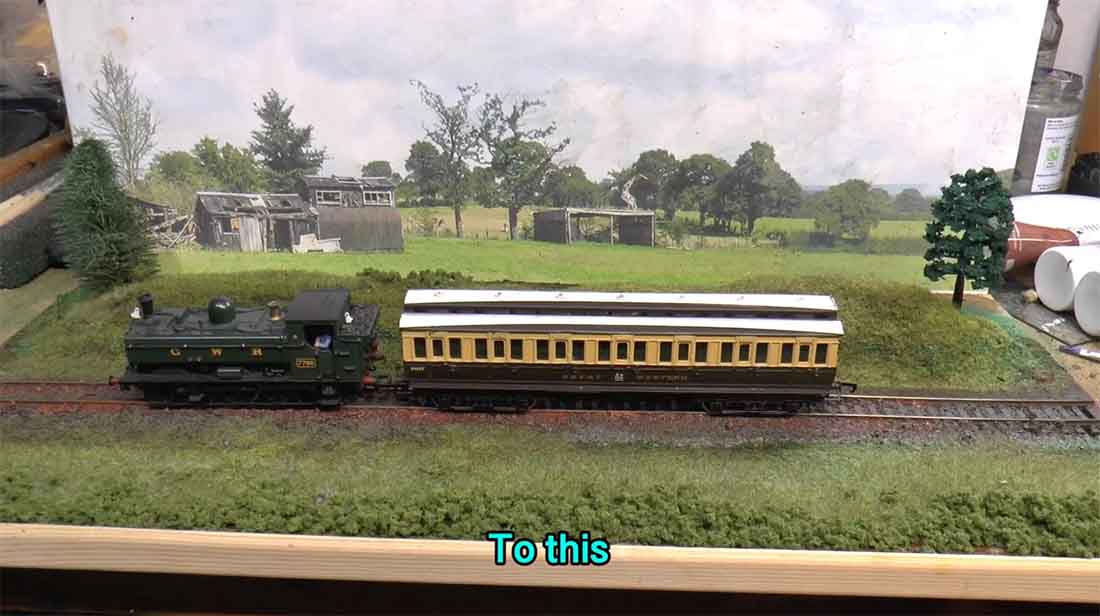
But first, we start today with Ben.
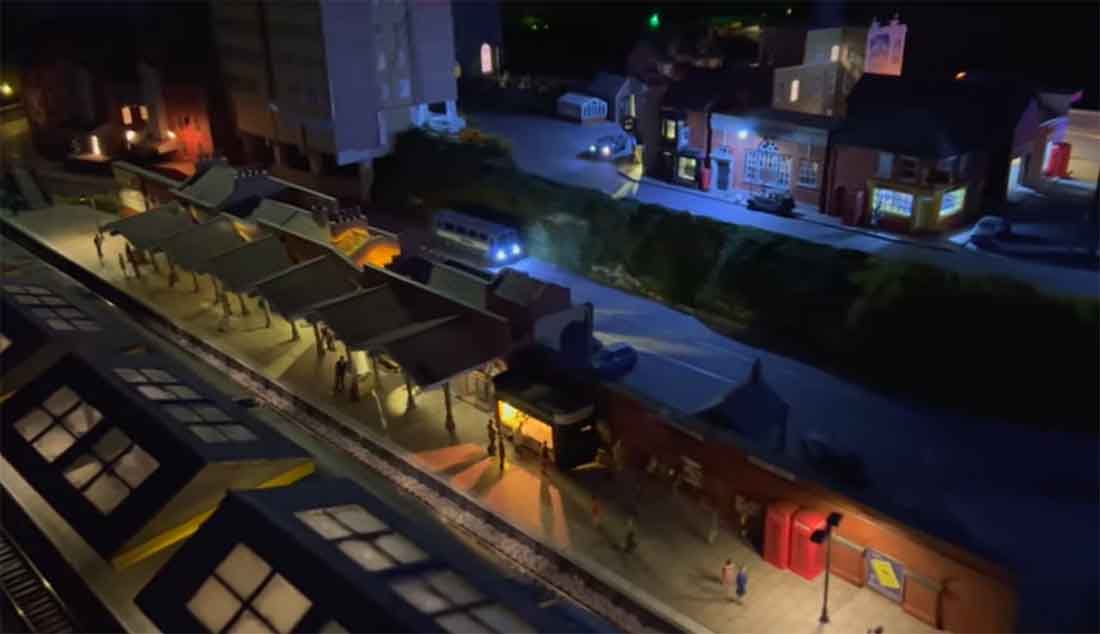
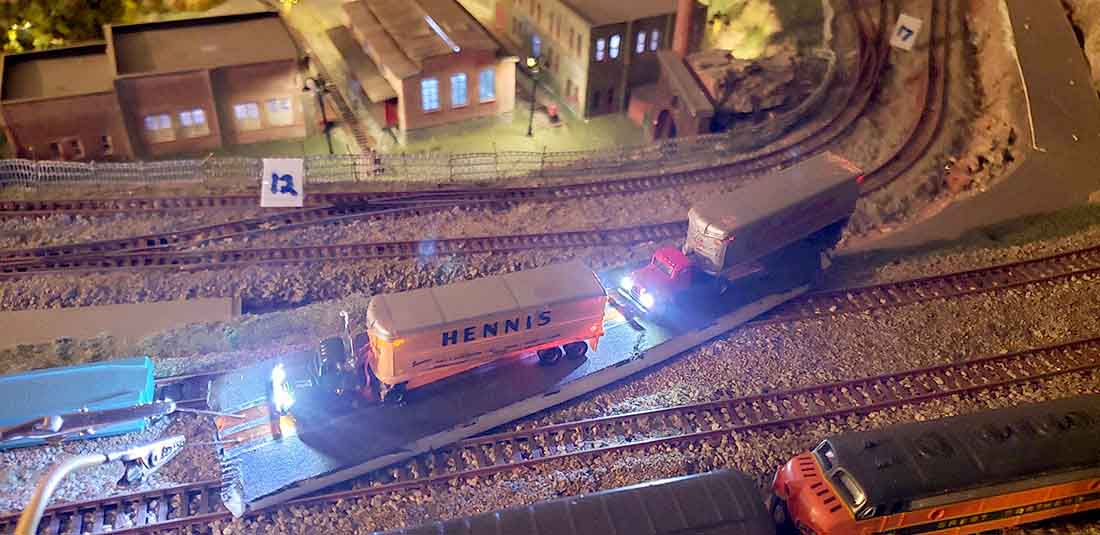
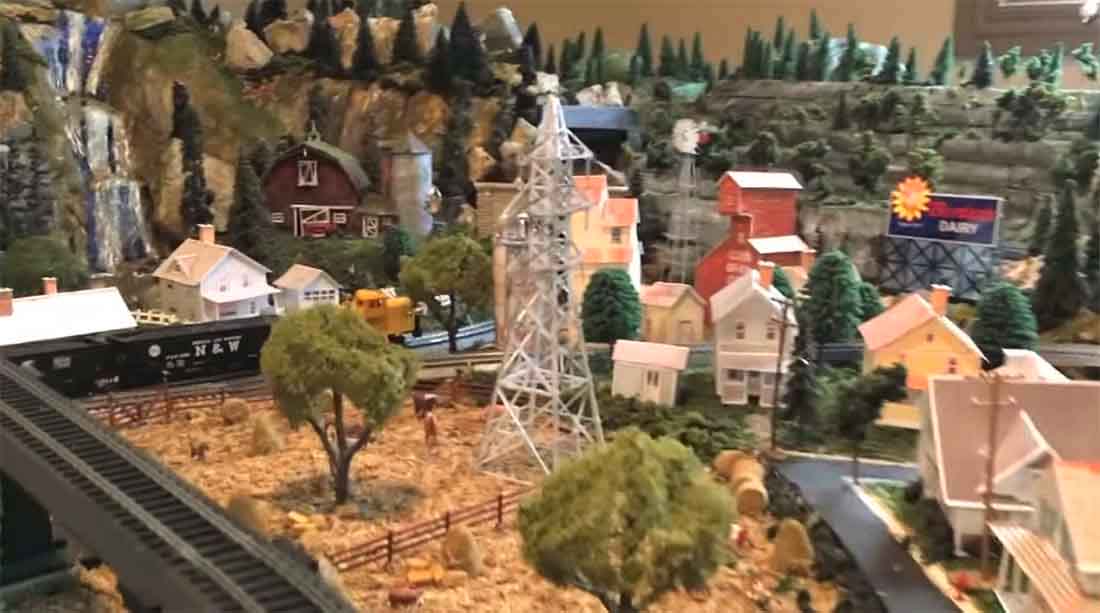
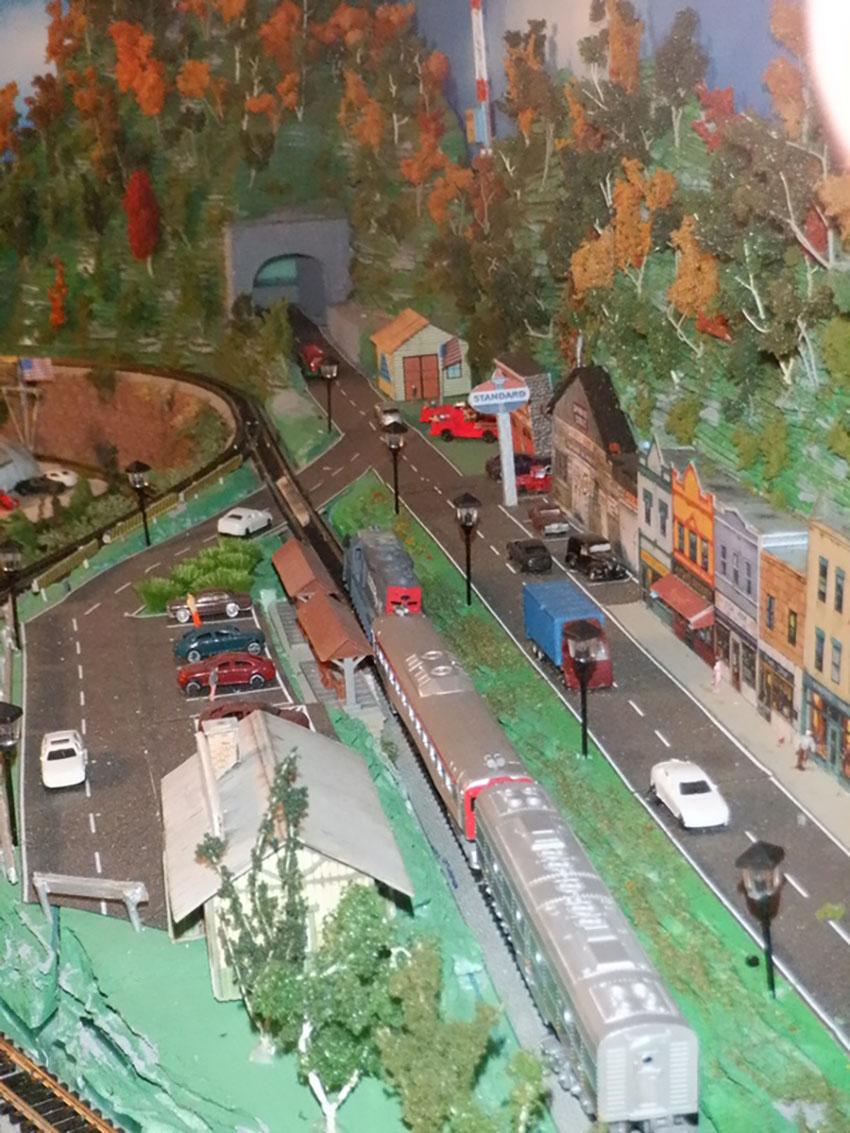
There are no trains or scenery for the first 30 seconds or so of his video – but then it all falls into place:
“Hi Al,
Greetings from Chicago, Illinois, hoping all is well with you and all our good friends “across the pond”.
As I read the daily posts, I’ve noticed that many folks often blend other interests into their model railroad hobby.
For me, in addition to my freelance model railroad efforts, I enjoy playing guitar and videography. I am NOT an expert in any of the three, but they are my hobbies, and all that really matters with hobbies is that we are having fun with them.
It is in that spirit that I share this short video with you and your followers, if you choose to post it.
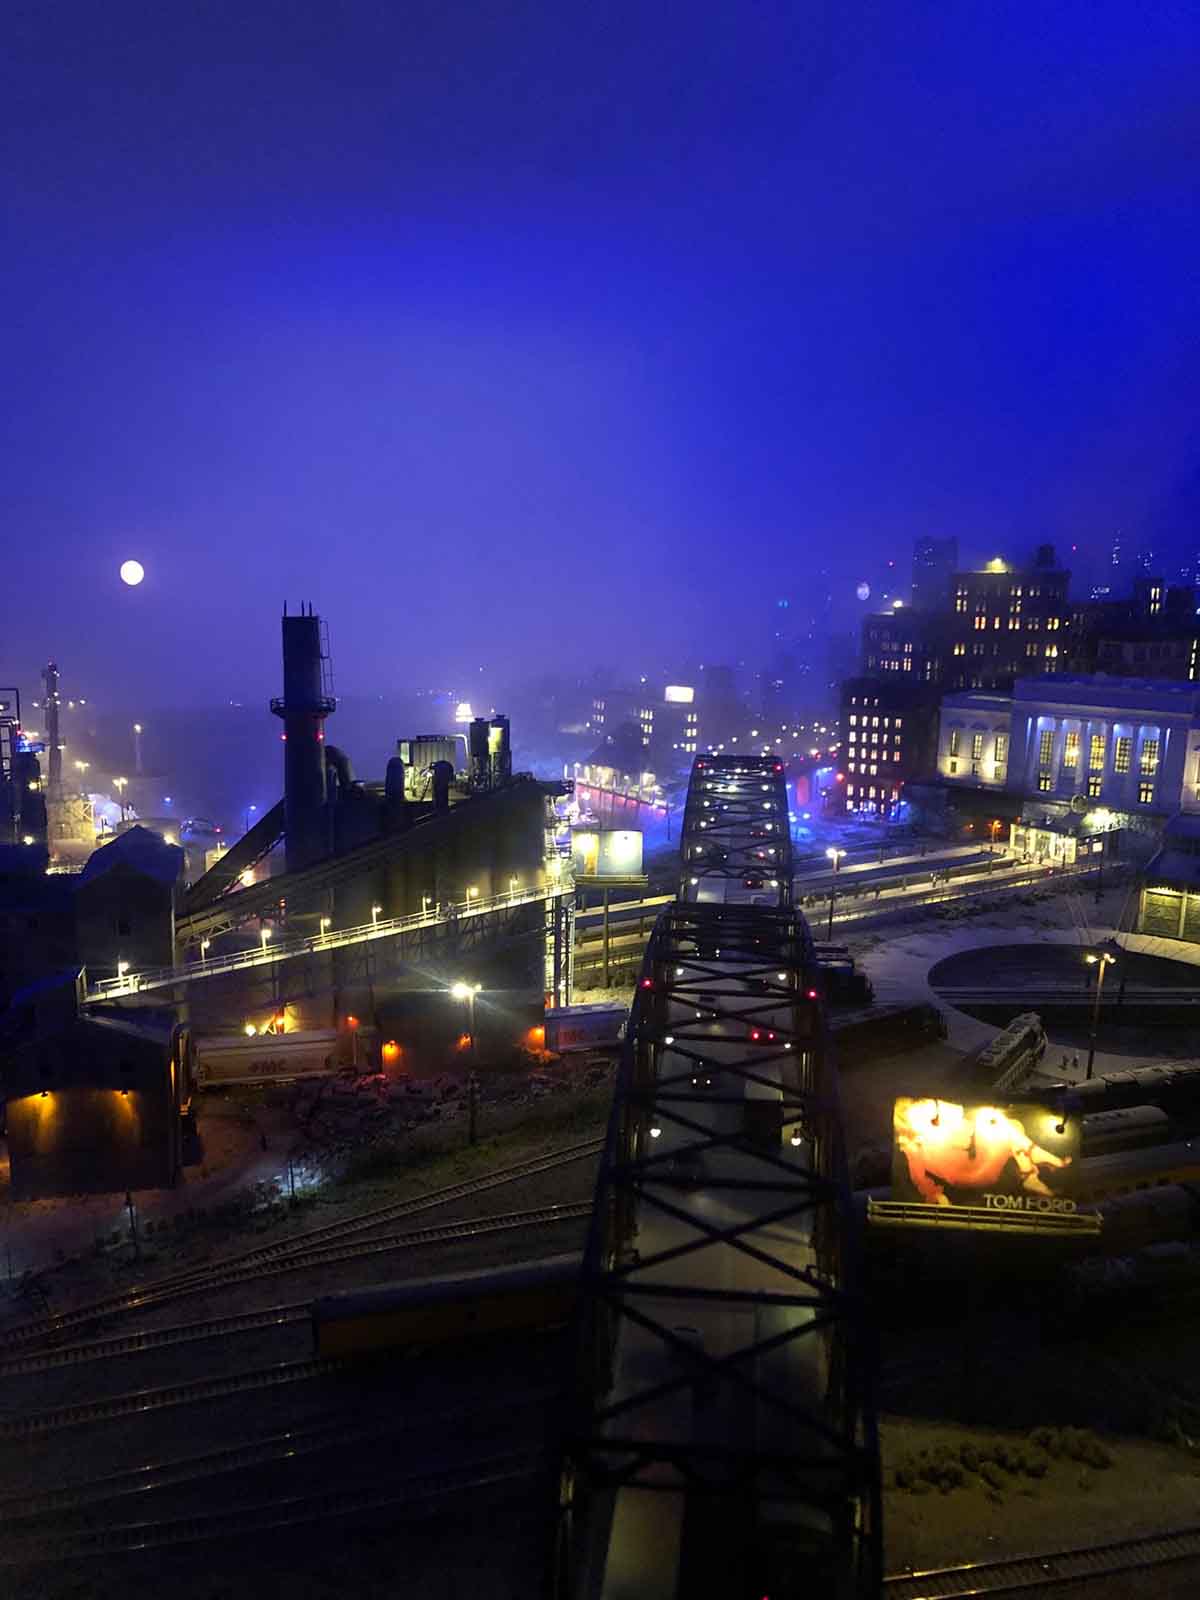
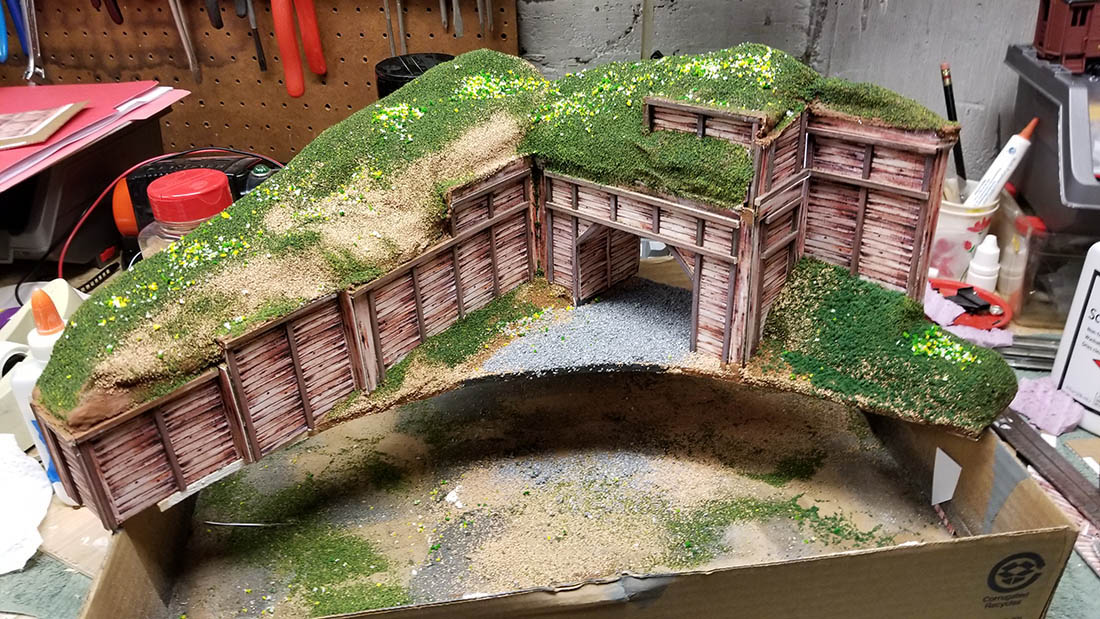
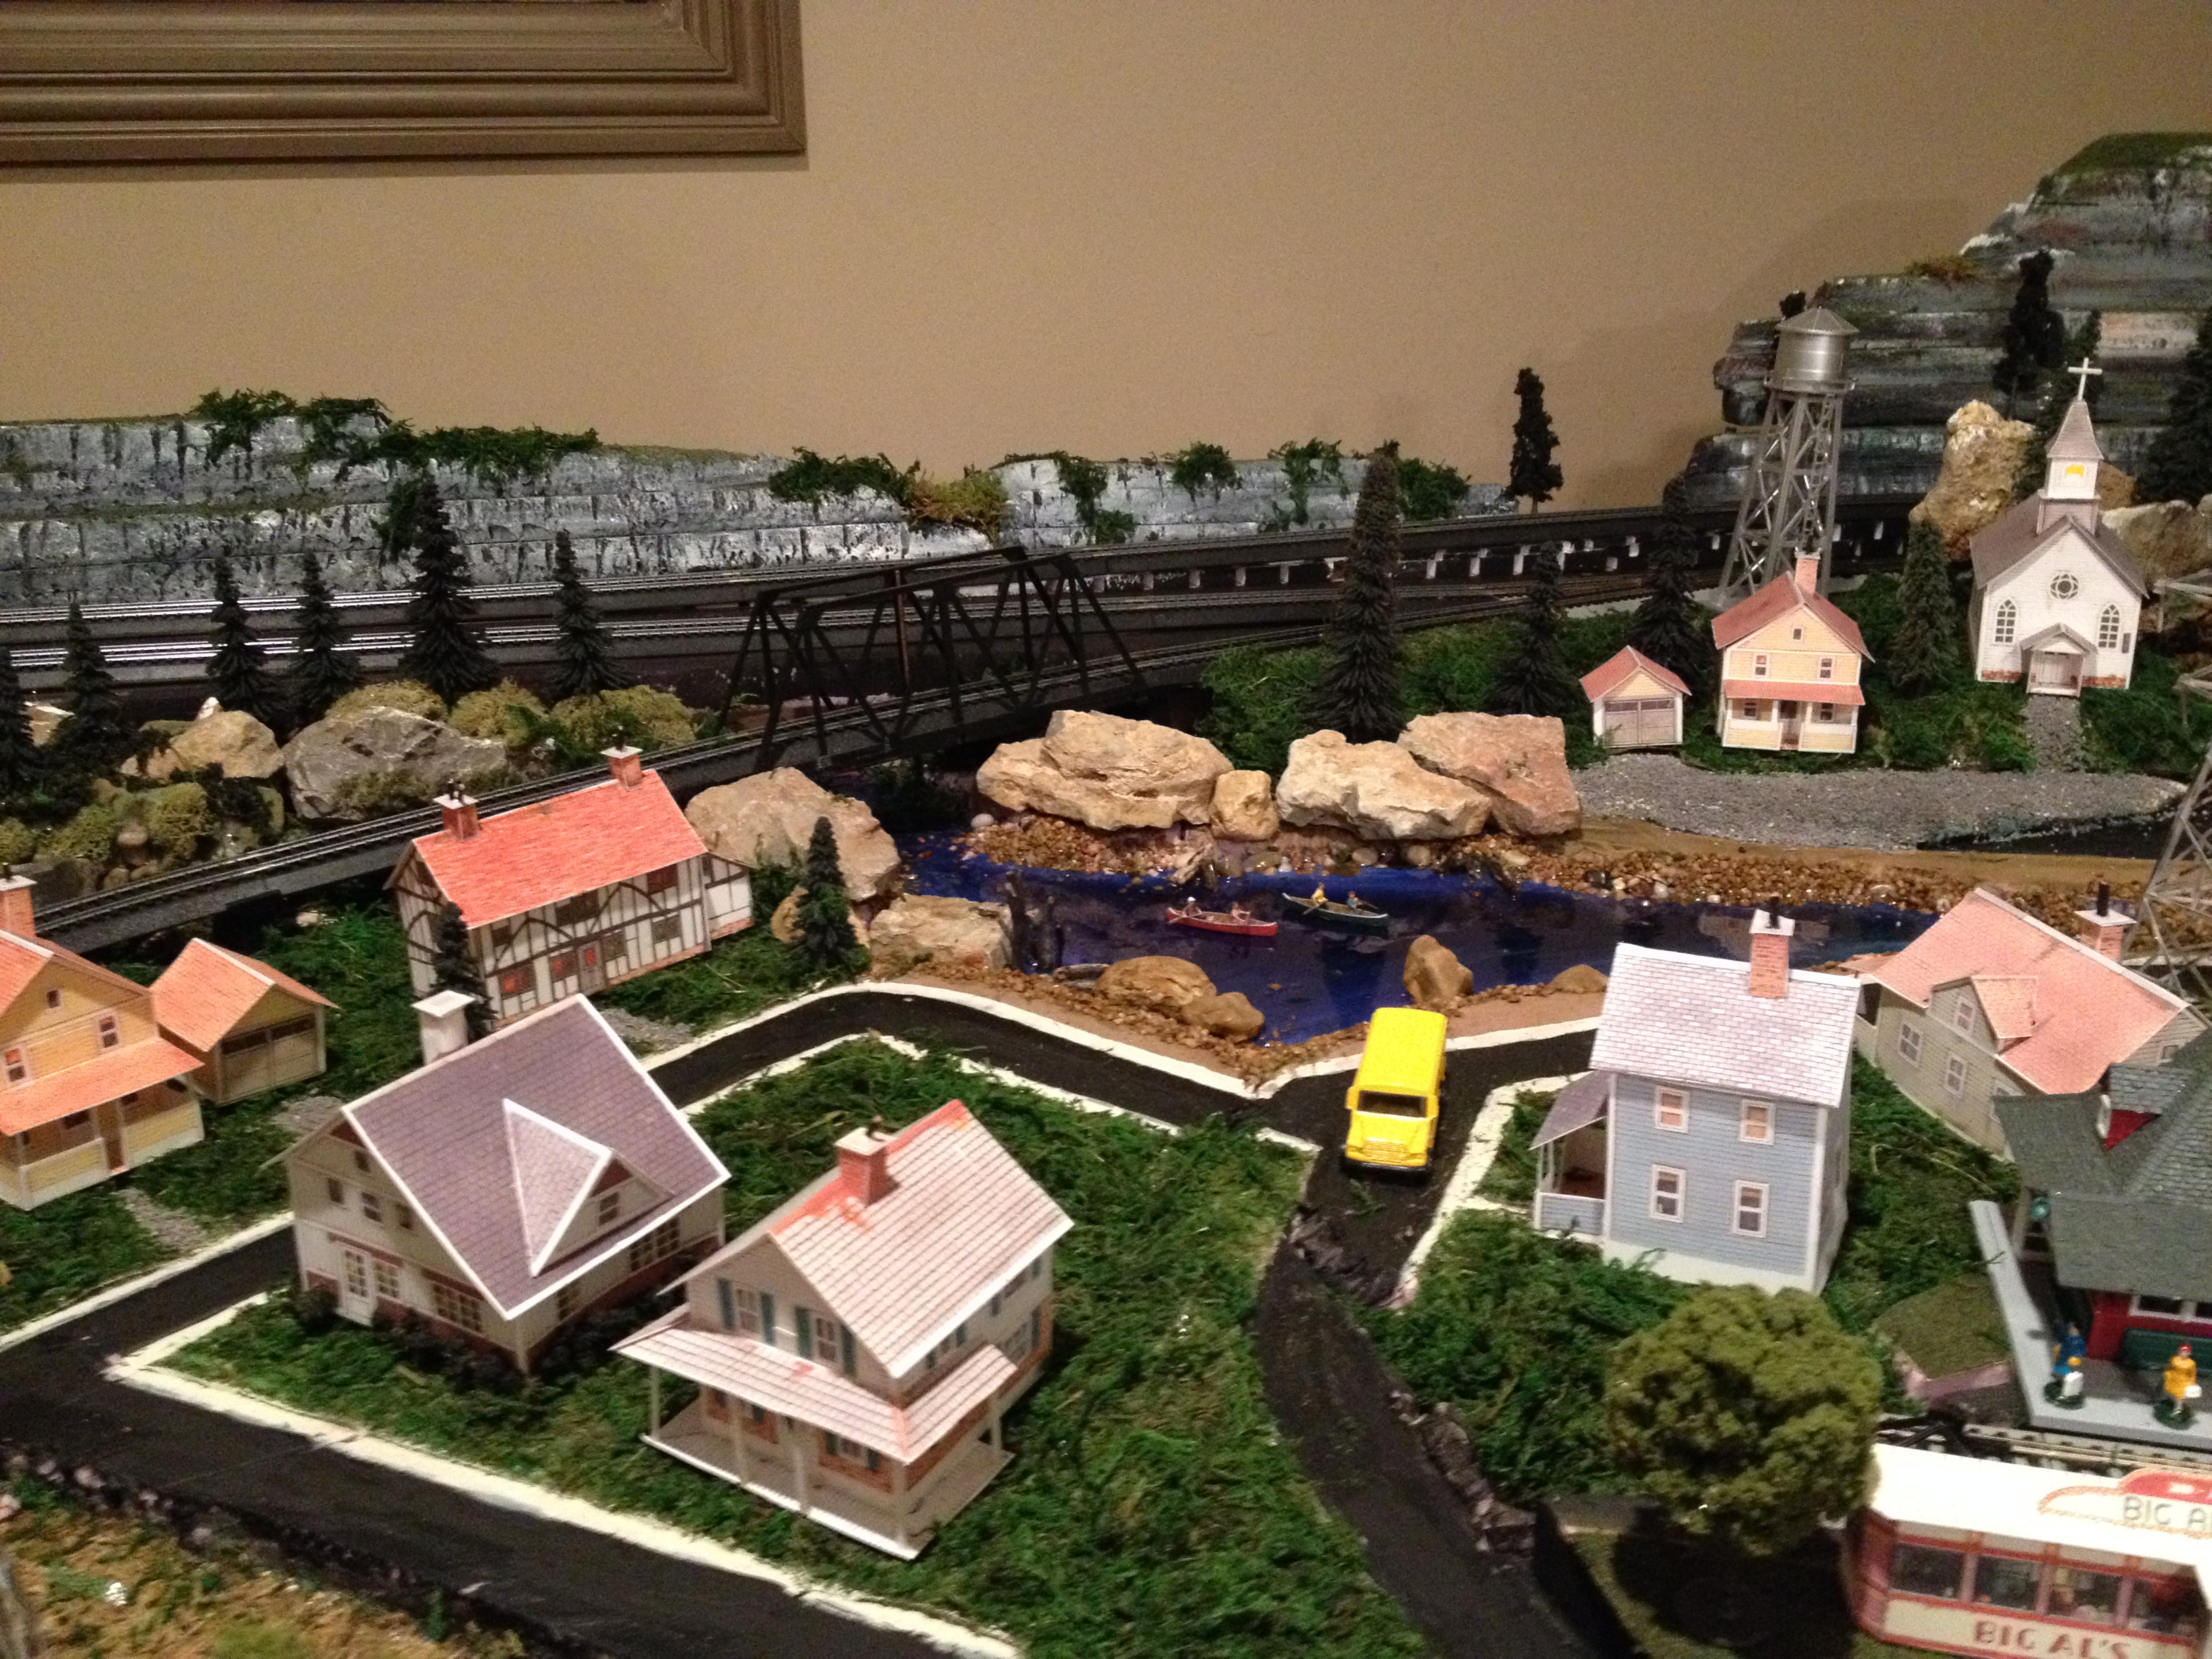
In addition to the musical aspect of the video, it highlights two scratch builds I did; a trestle bridge and a small tree house. I’m finding that with a little patience, practice and help from other modelers, I can build some things myself; saving money, learning new skills and having fun, all at the same time!
Thanks again for all you do by hosting the Blog. I can’t begin to list all the things I’ve learned from the posts, your “Beginners Guide” (awesome!) and experts like Dangerous Dave.
Wishing you all the best this holiday season and beyond!
Ben From Chicago.”
I thought Ben’s music went very well with his trains.
And he’s absolutley right, whatever hobby you fancy, it’s all about having fun. Otherwise, what’s the point?
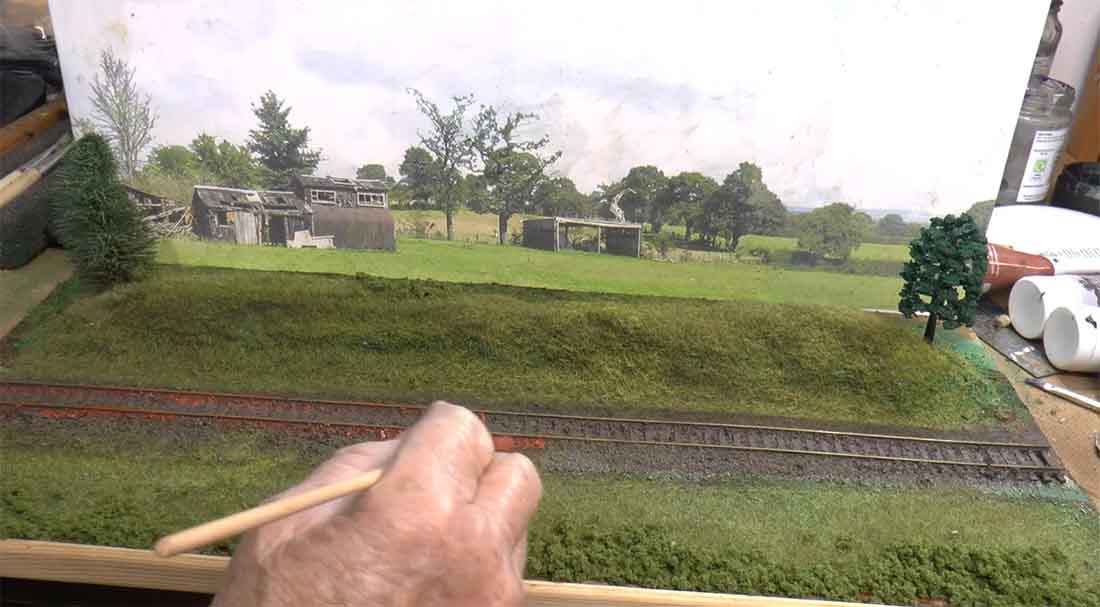
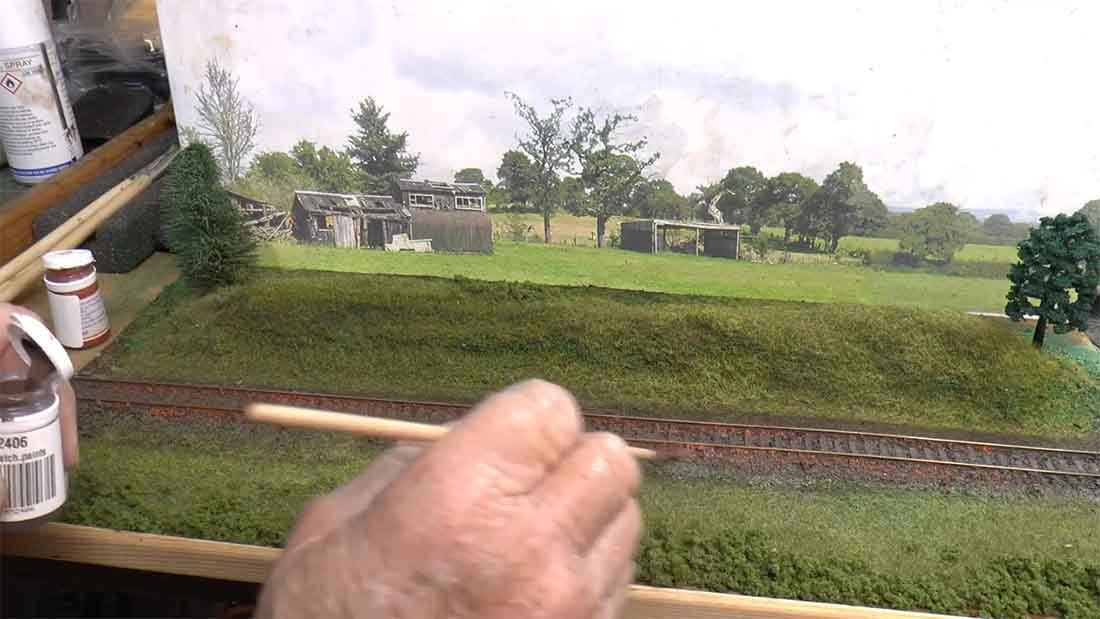
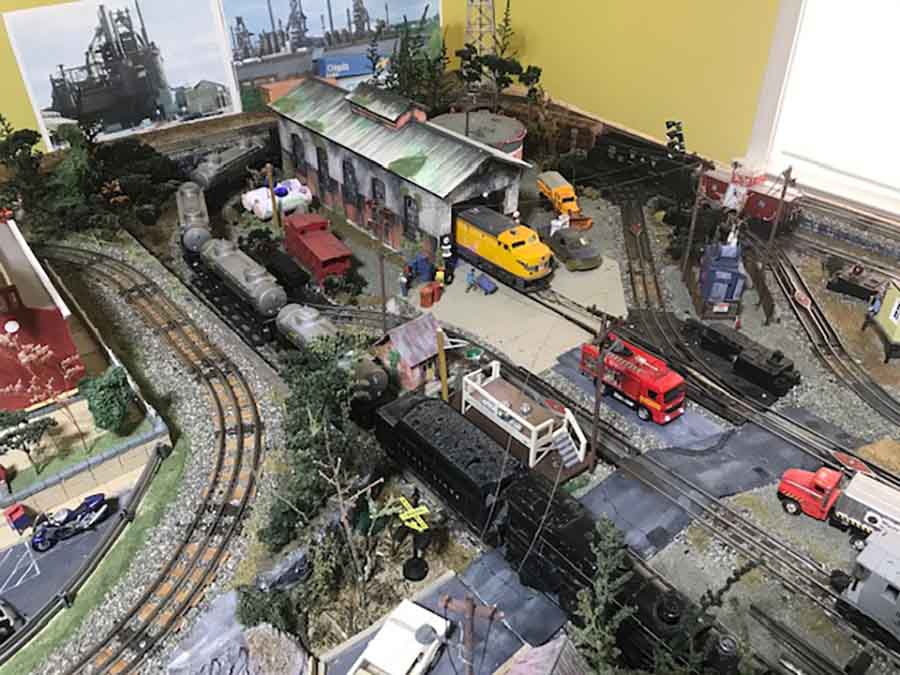
And here’s someone who always has a lot of fun – and spreads the joy too:
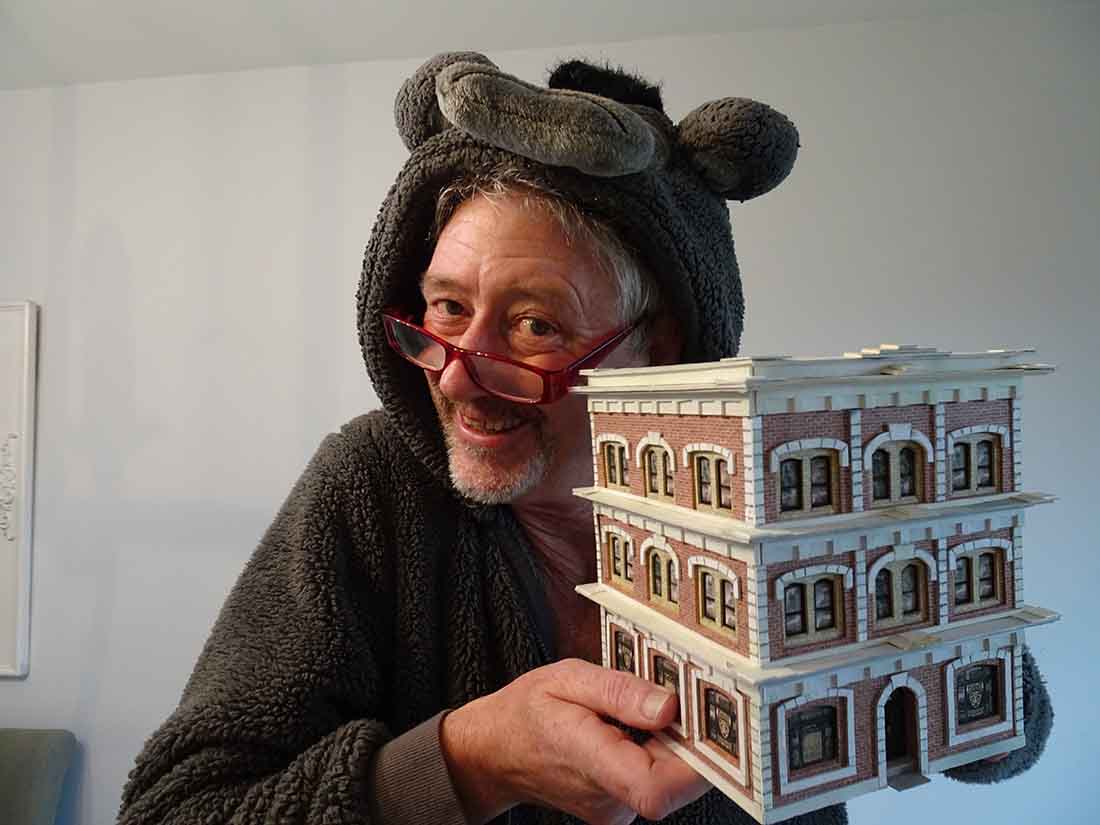
John’s been kind enough to put together the latest addition to the printable buildings.
To those of you who are new to the blog, the printable buildings below are made from downloadable prints, which are stuck to card.
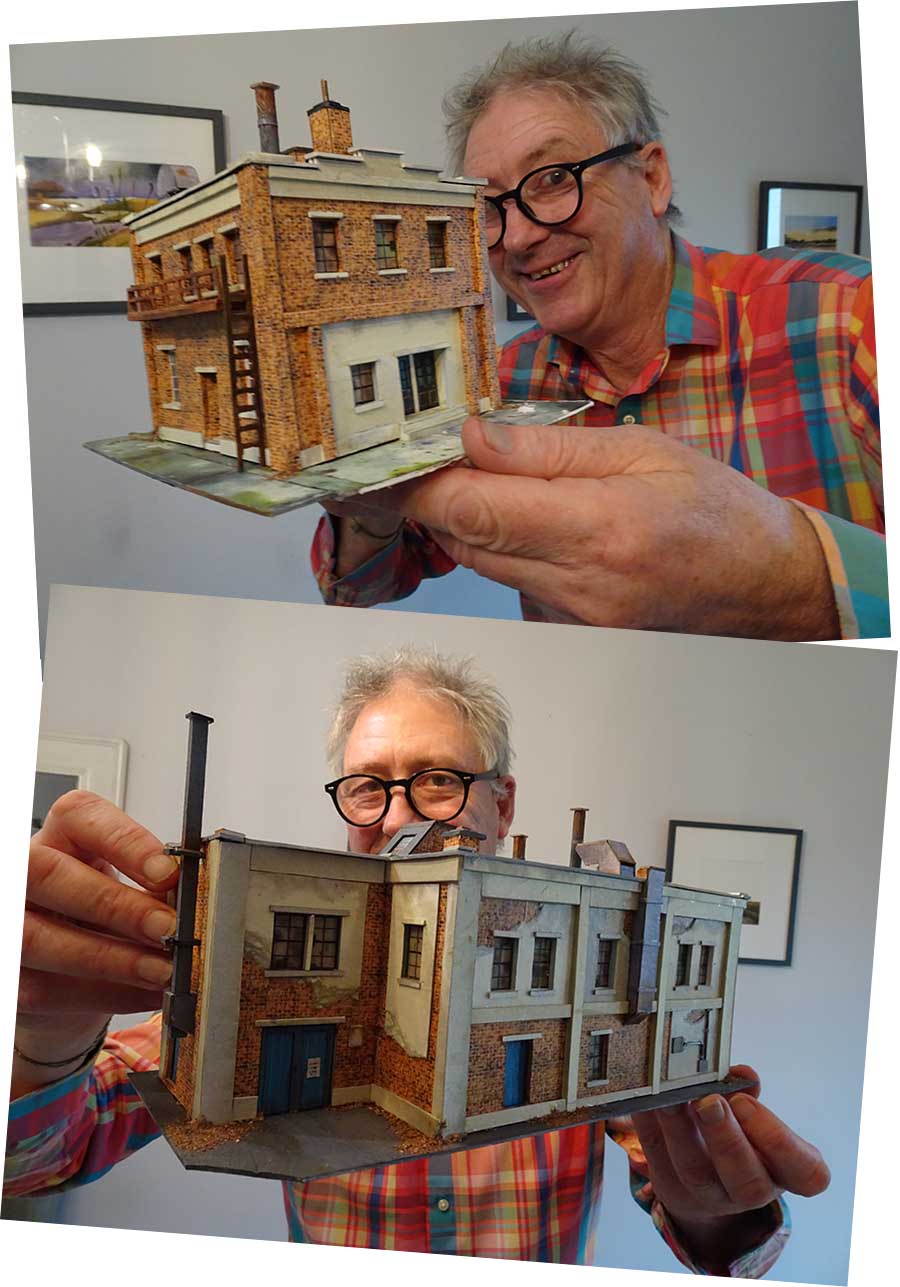
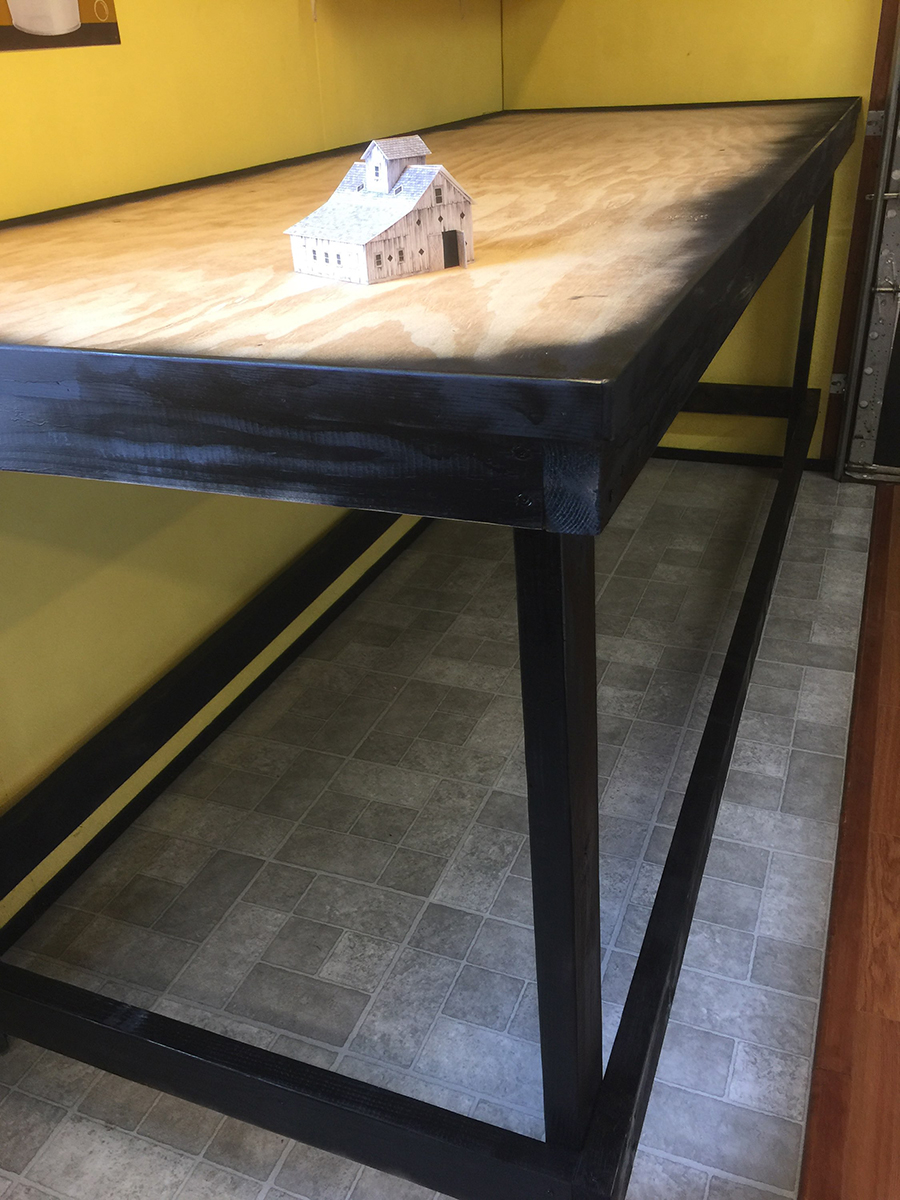
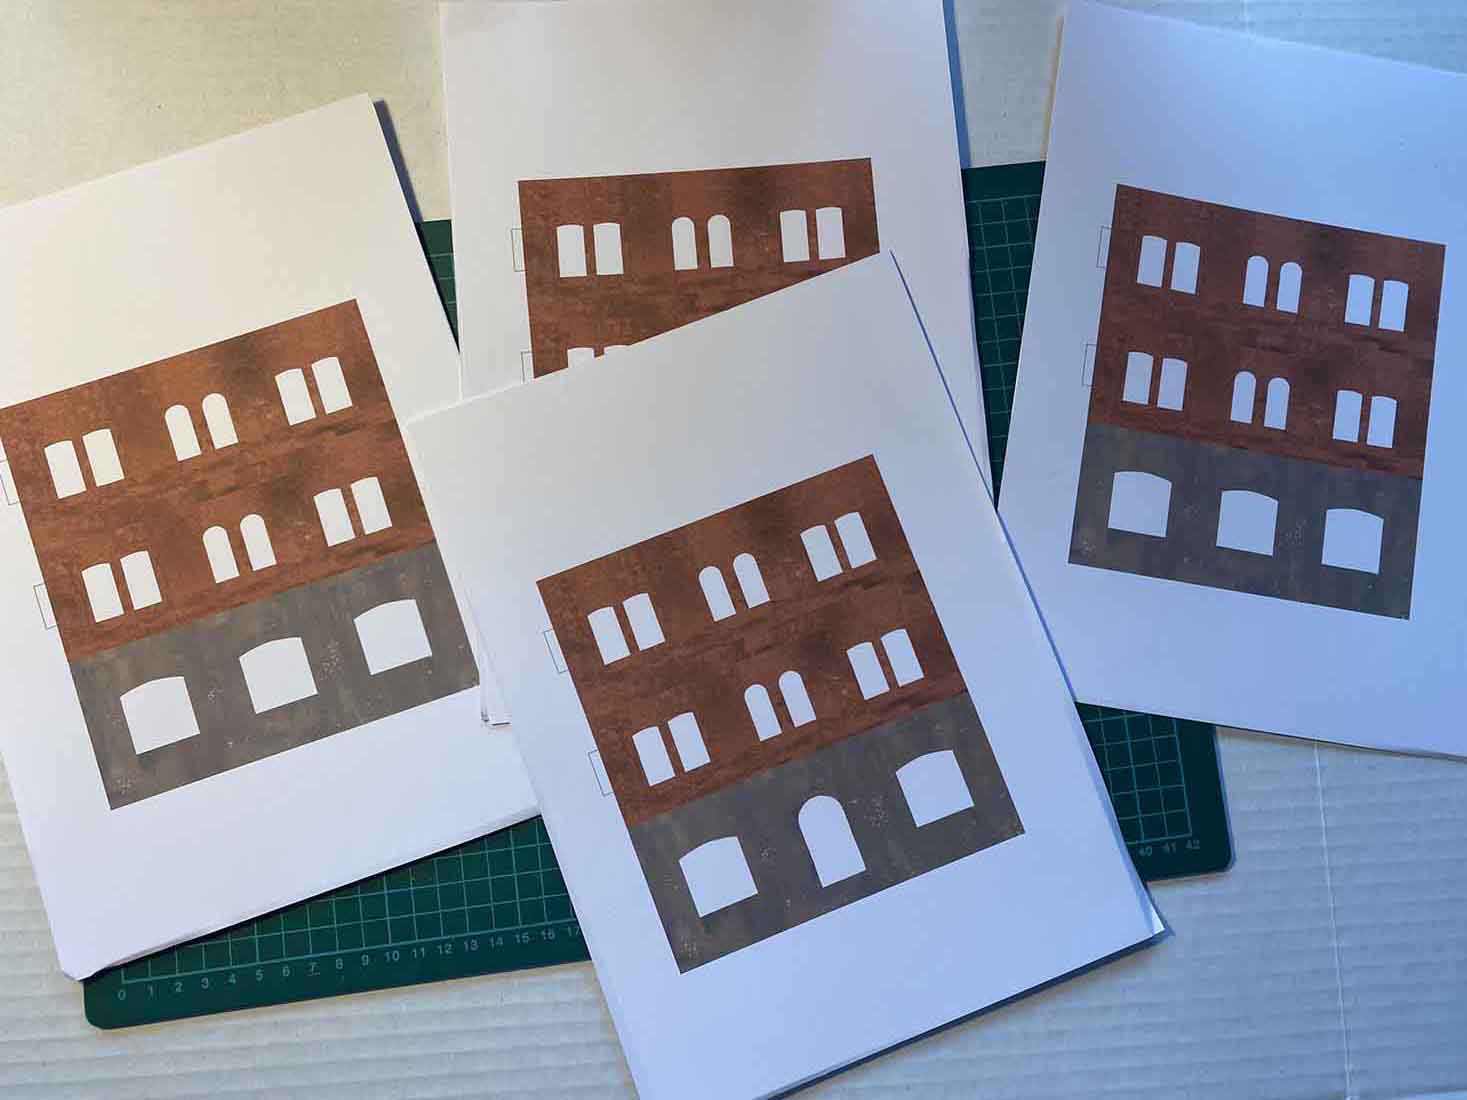
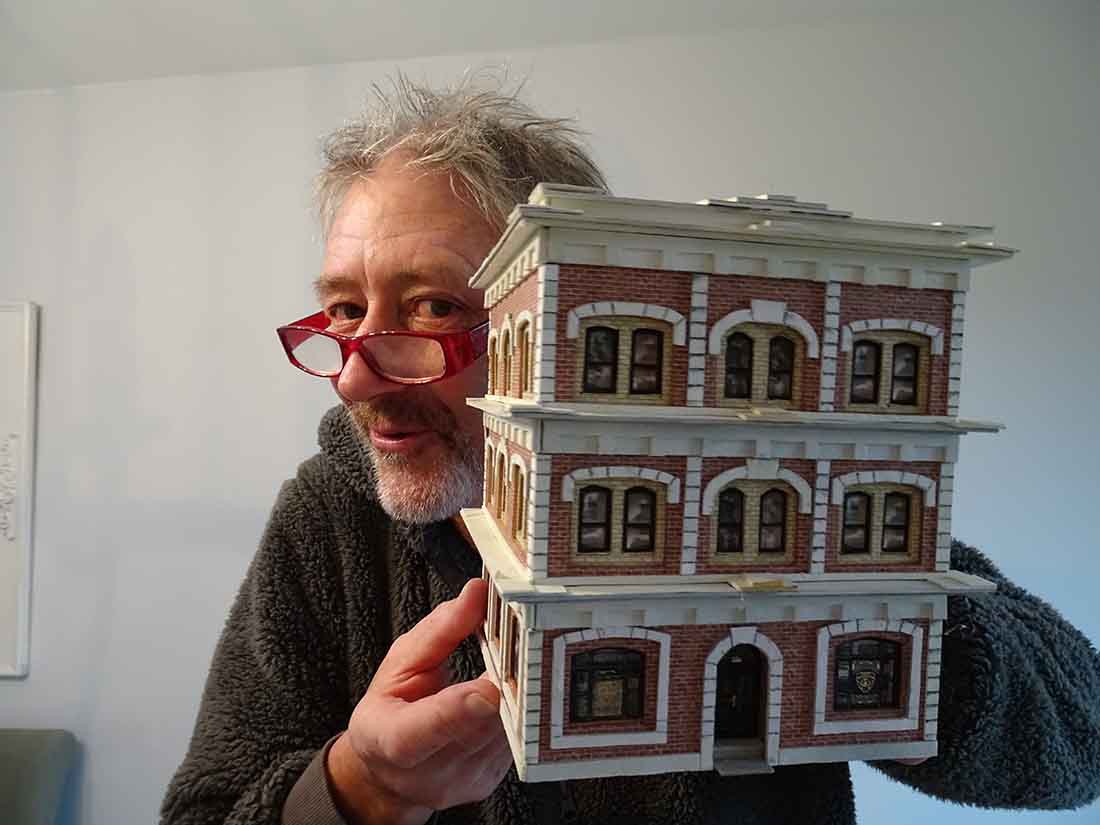
Here’s John holding the print outs:

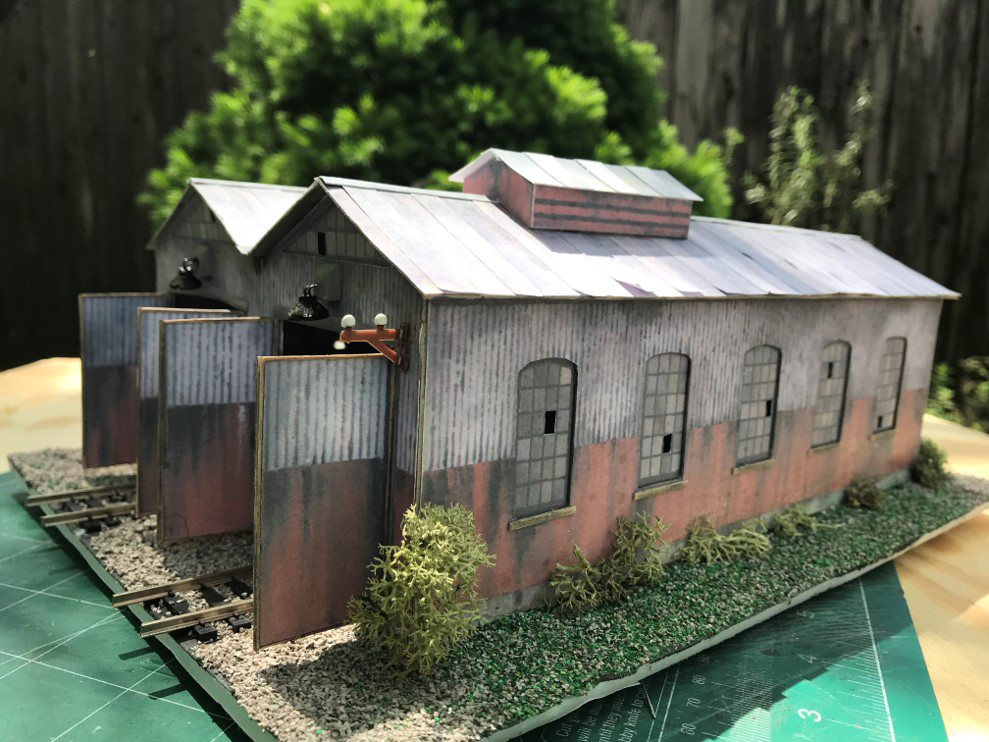
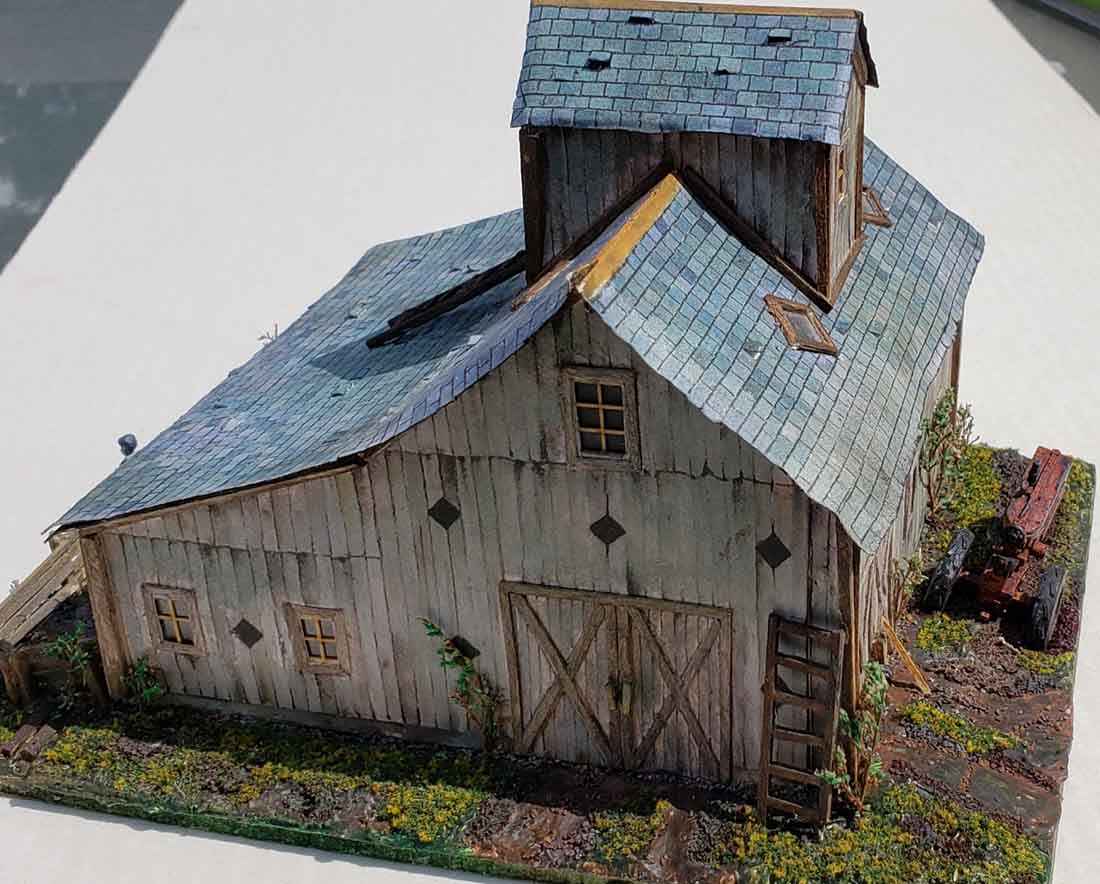
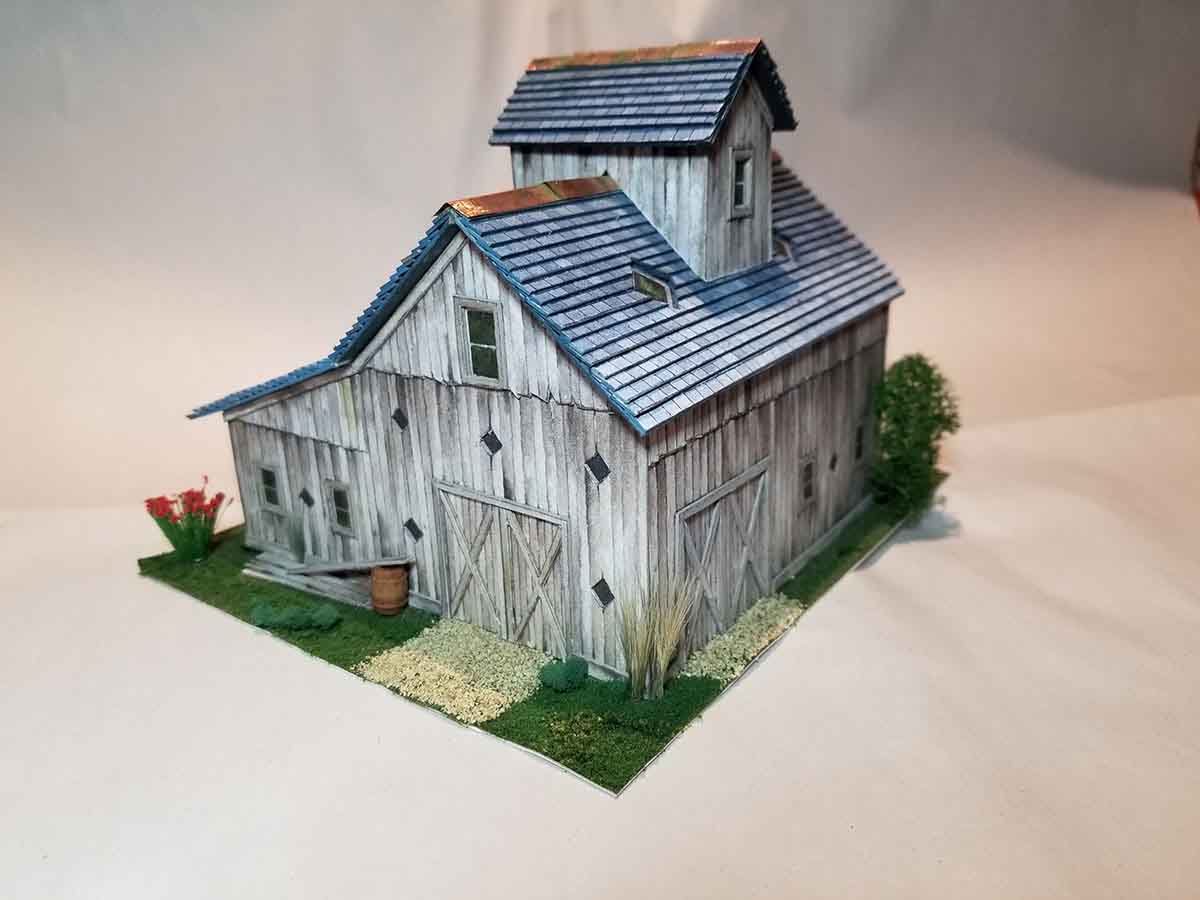
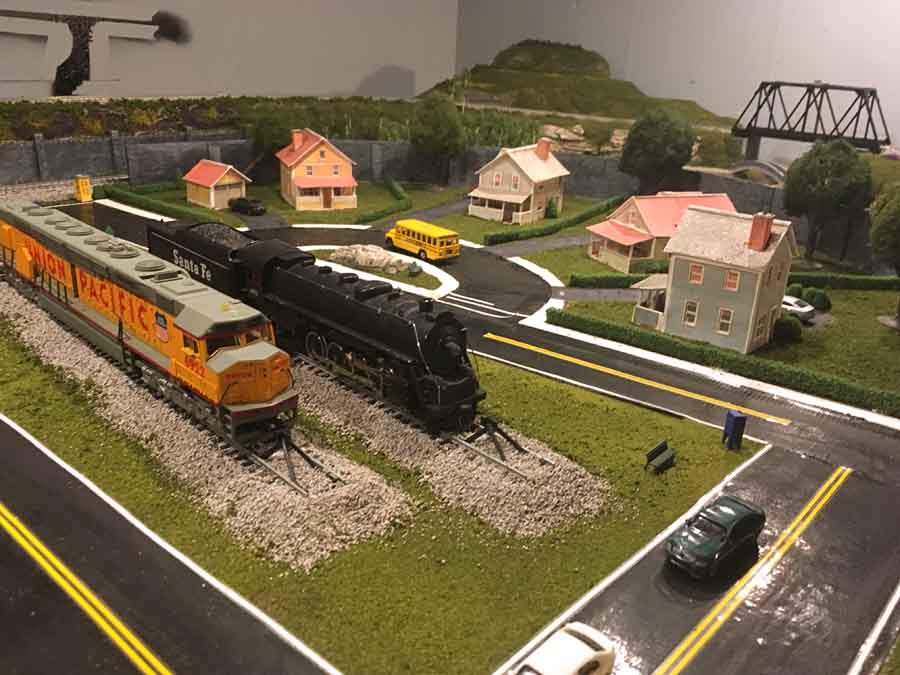
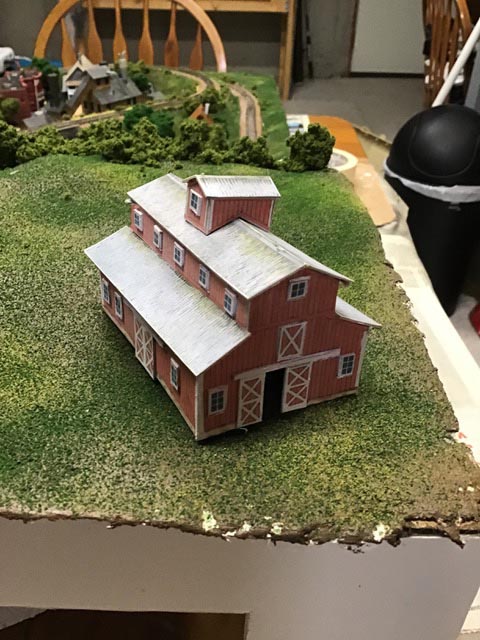
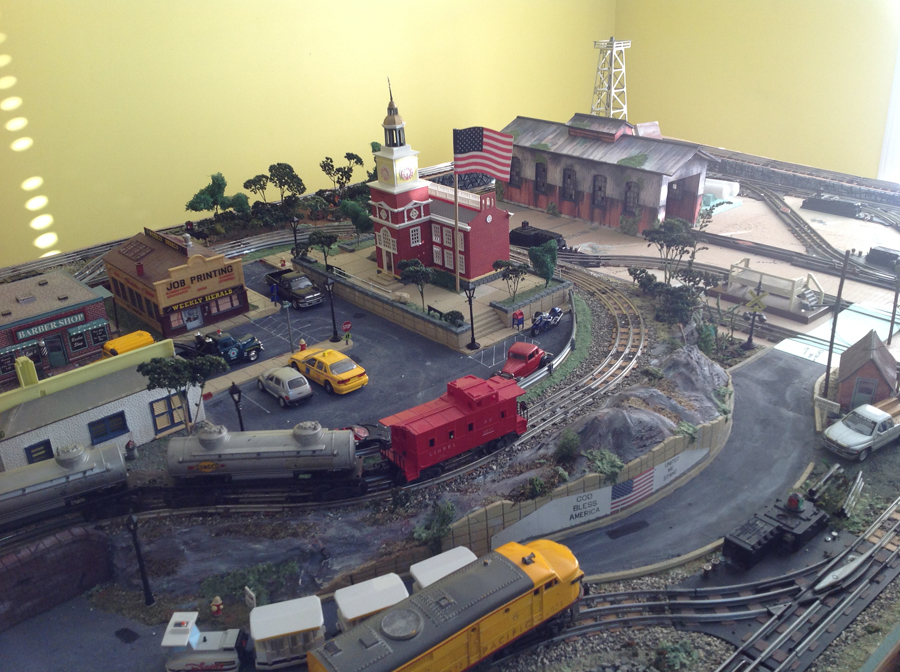
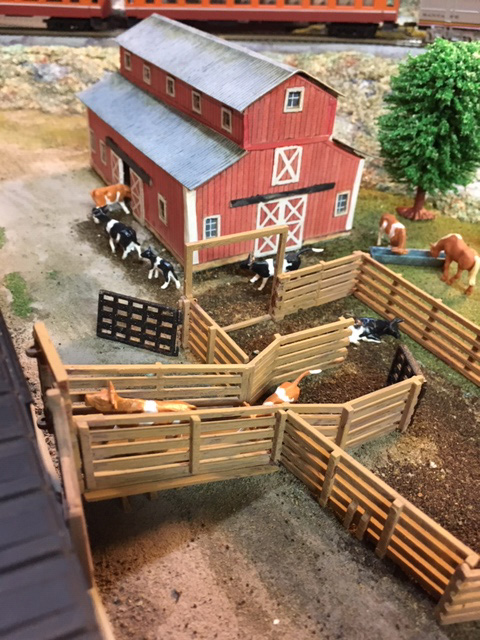
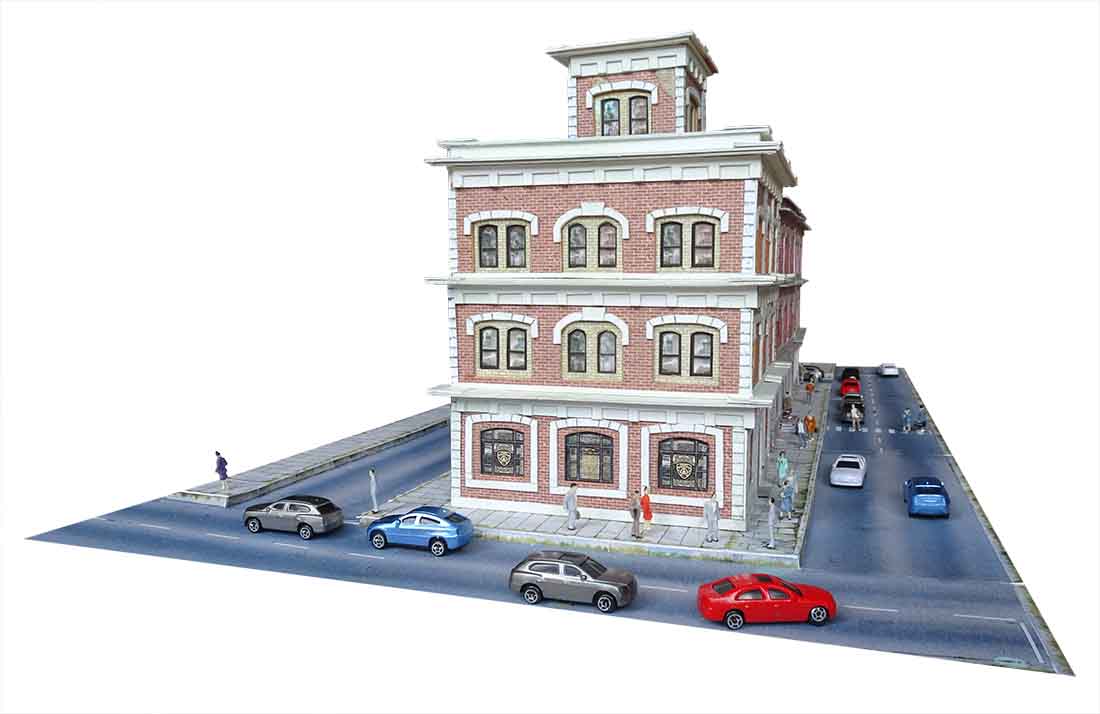
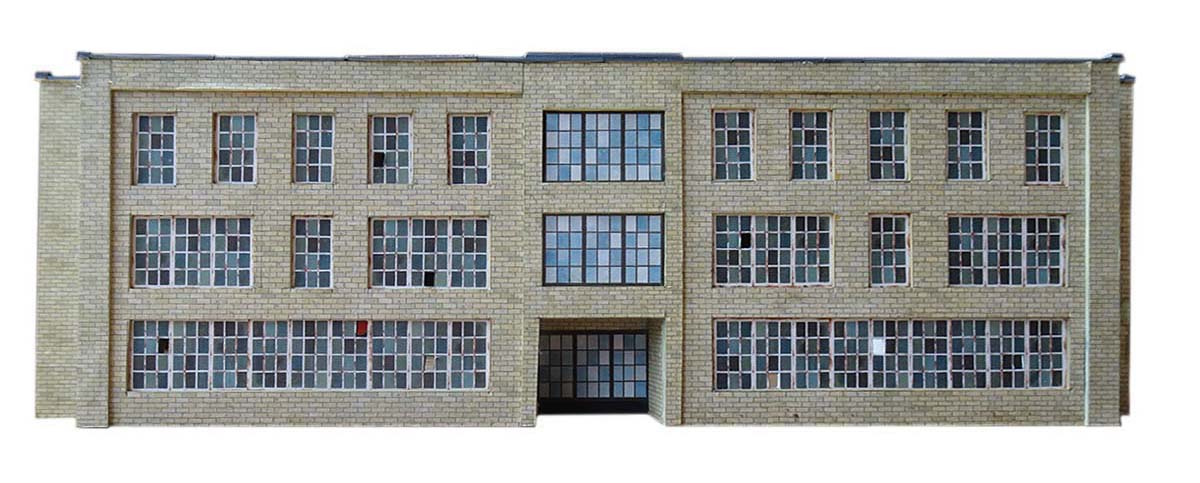
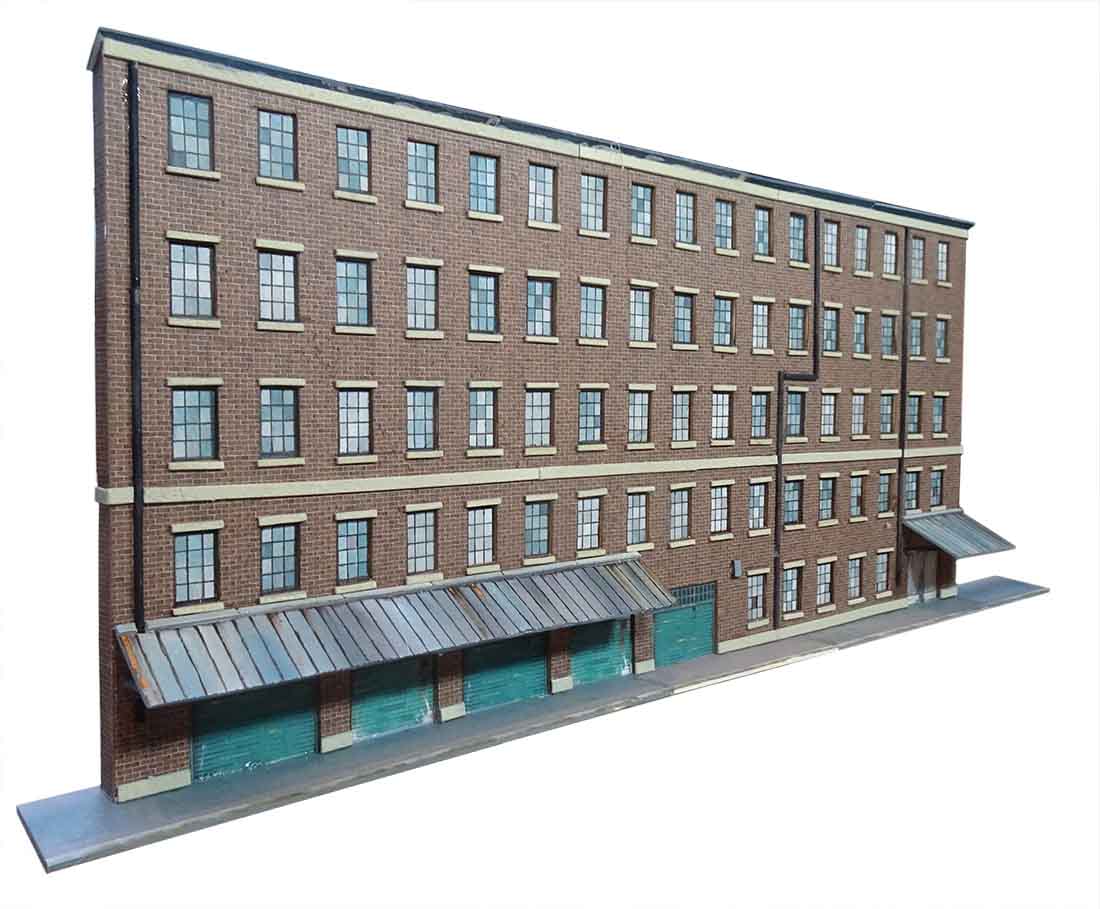
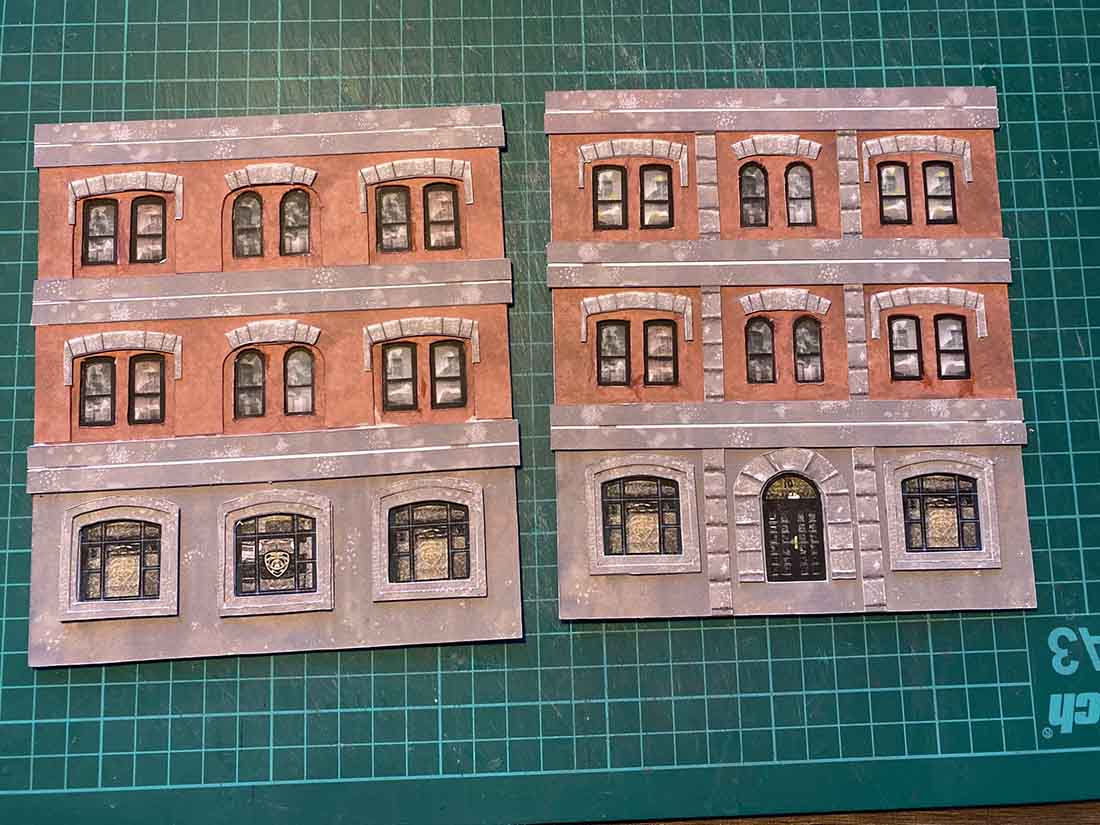
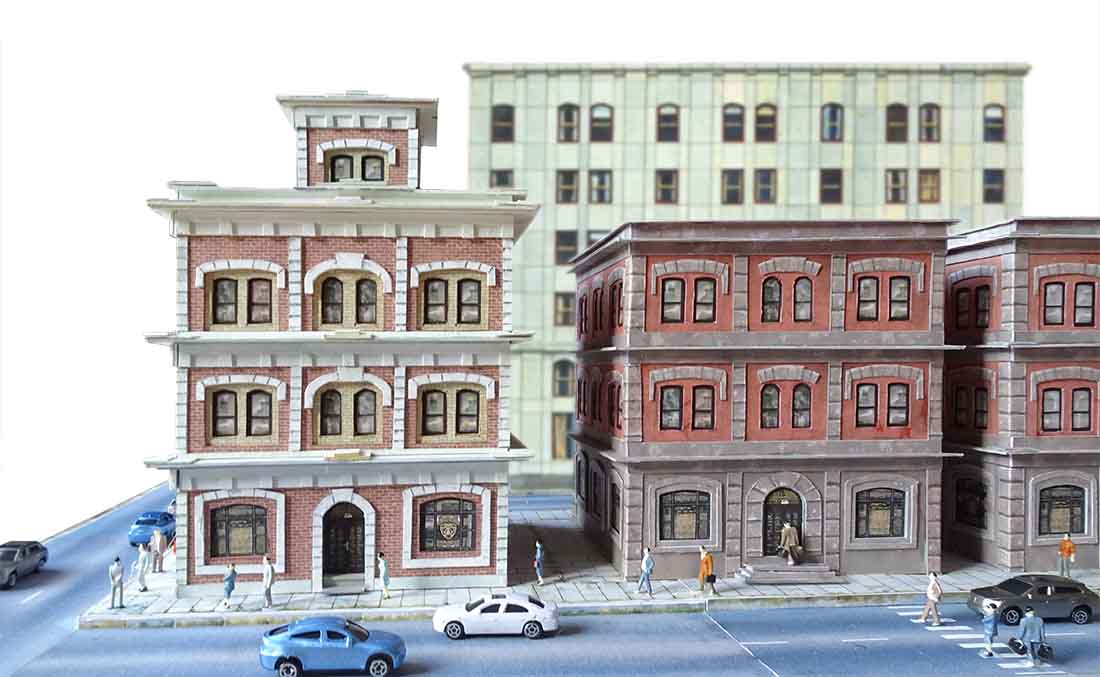
And these are the buildings made from them:
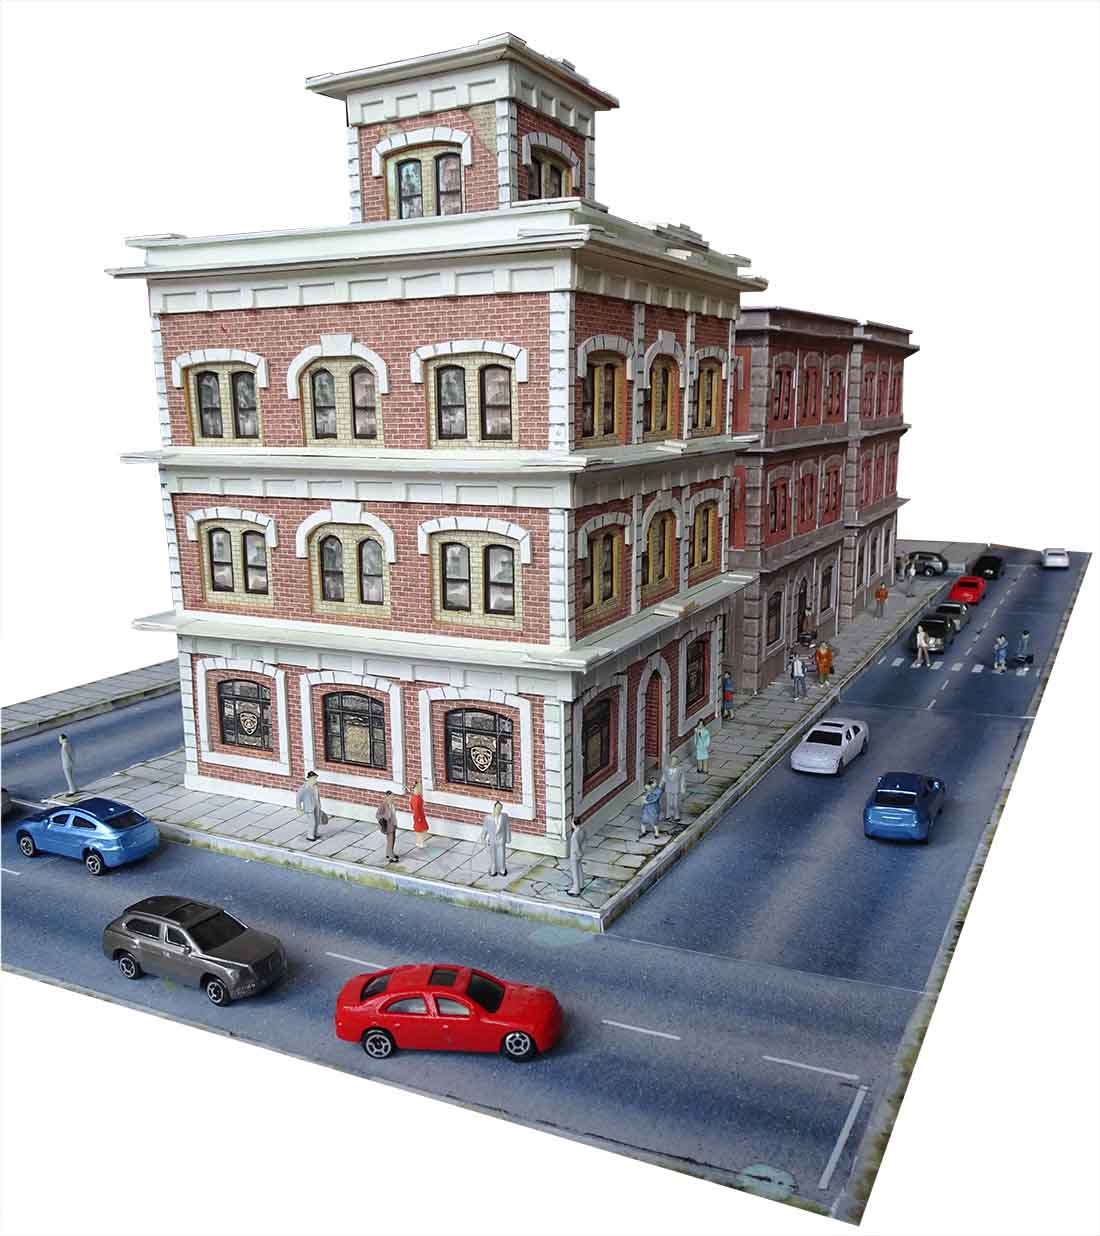
All of these buildings are made from the same print.
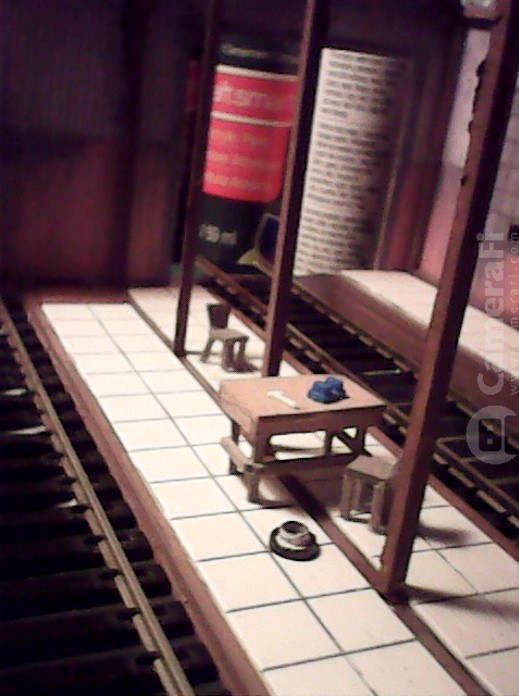
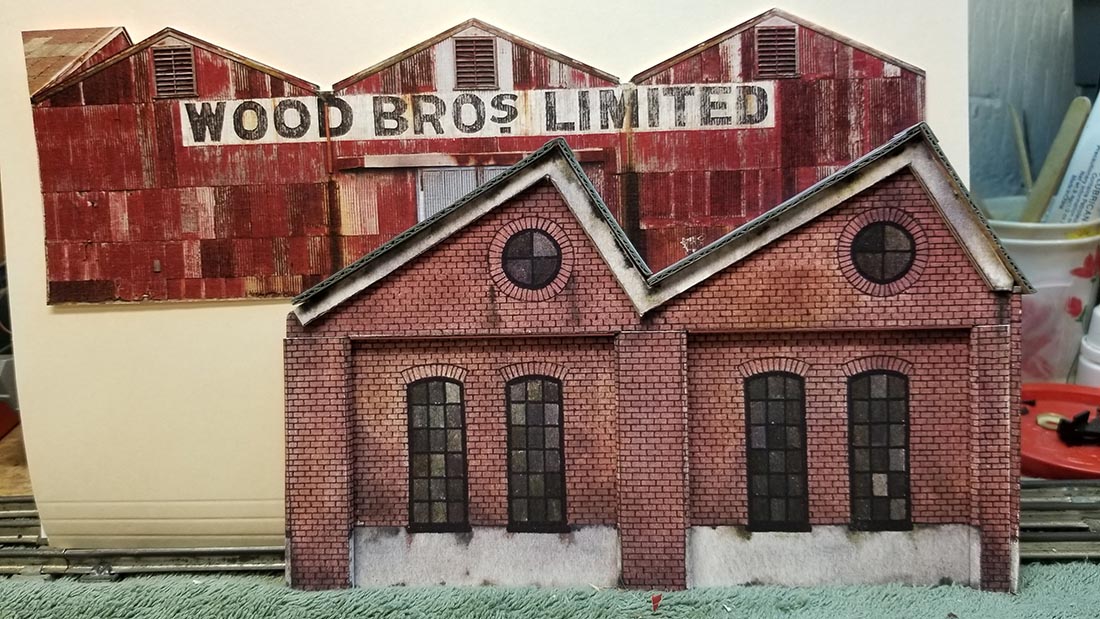
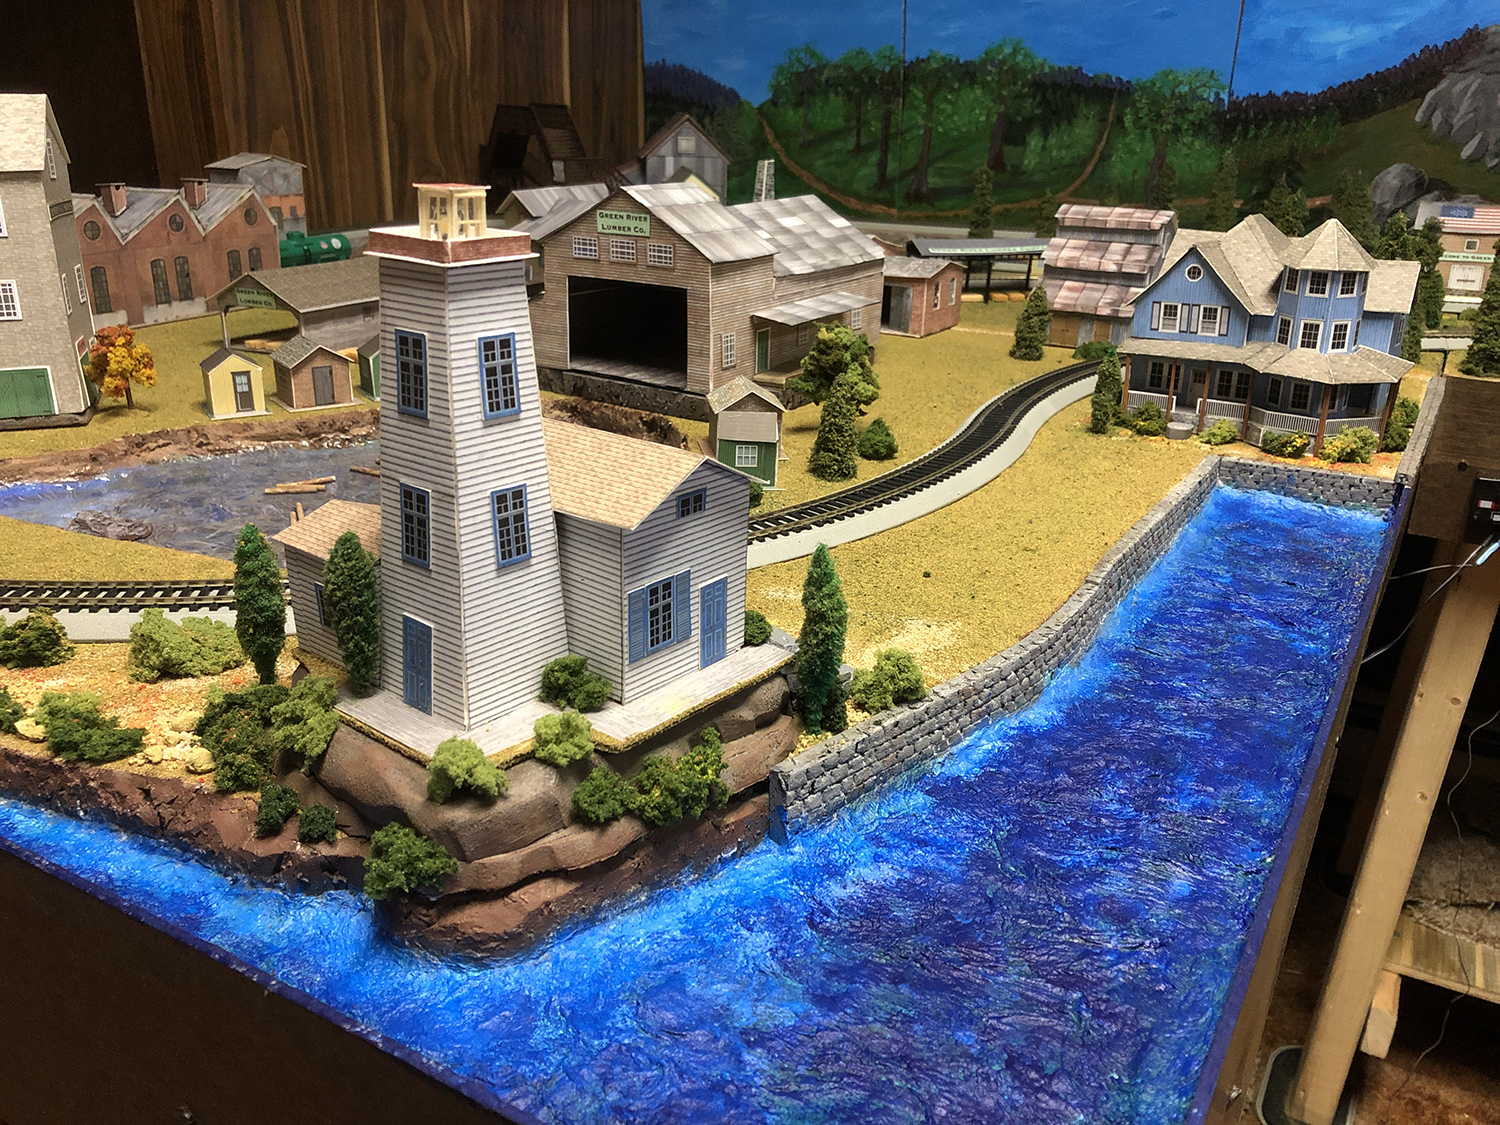
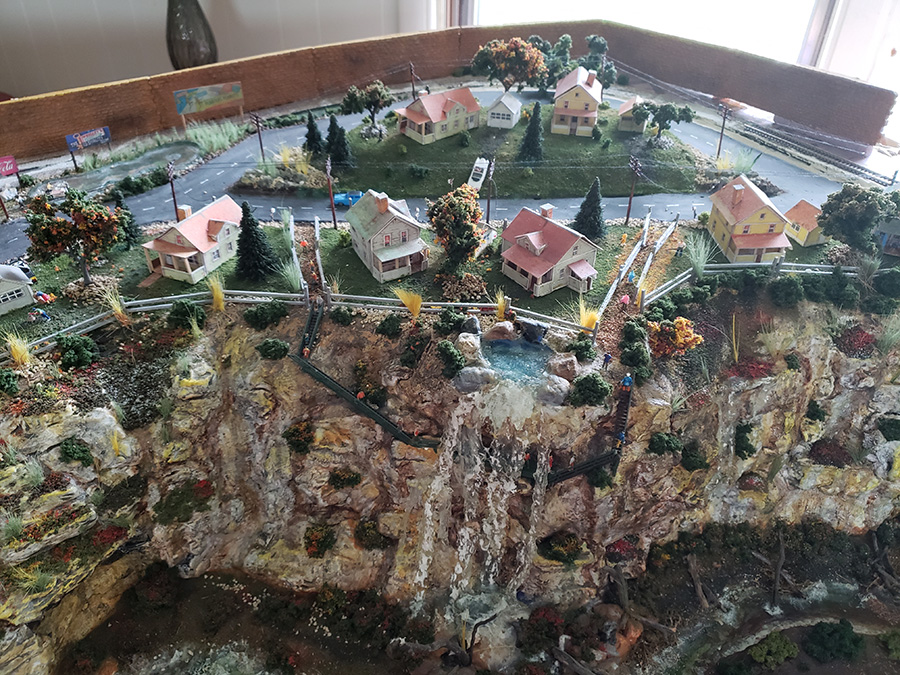
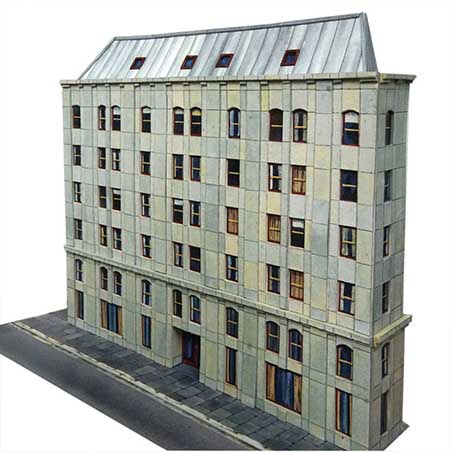
And in the one below, a different building has been dropped in to make a back drop:

Here’s a quick youtube John made on the new printable buildings:
Best of all these two new buildings are bundled absolutley free with the Beginner’s Guide – which for the next few days is at the crazy price of just $9.
This building has been added to the free bundle too:
I know many of you already have the Beginner’s Guide, and buy it just for the new buildings, and that’s absolutely fine.
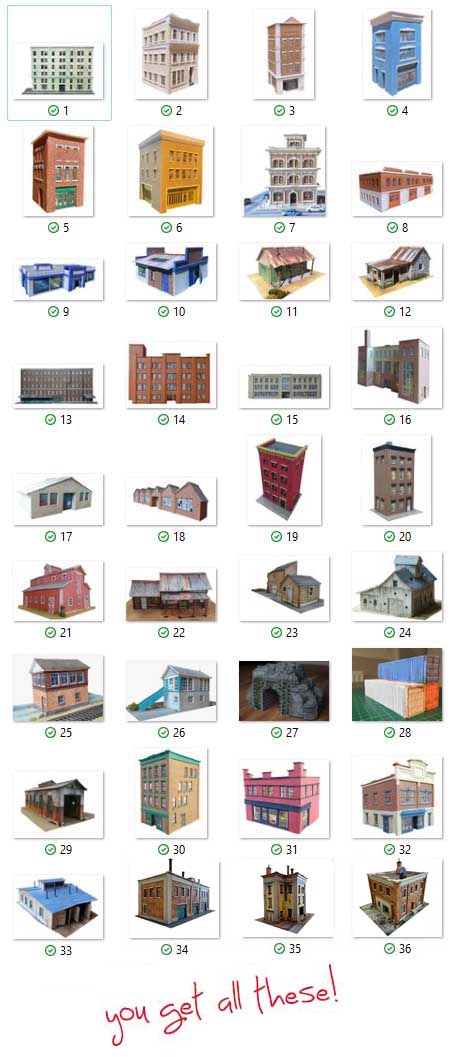
In fact, you’ll be getting a fabulous deal, because you get all the below printable buildings free with Beginner’s Guide:
(And yes, it’s just $9 for the lot. Everything.)
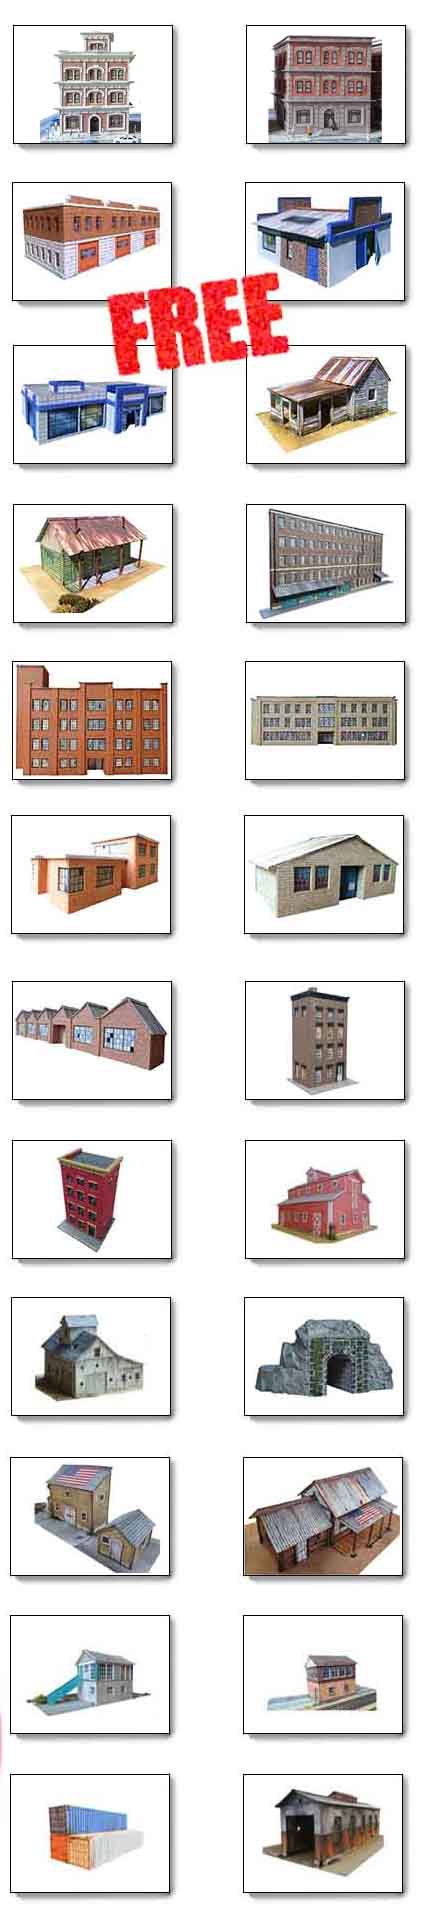
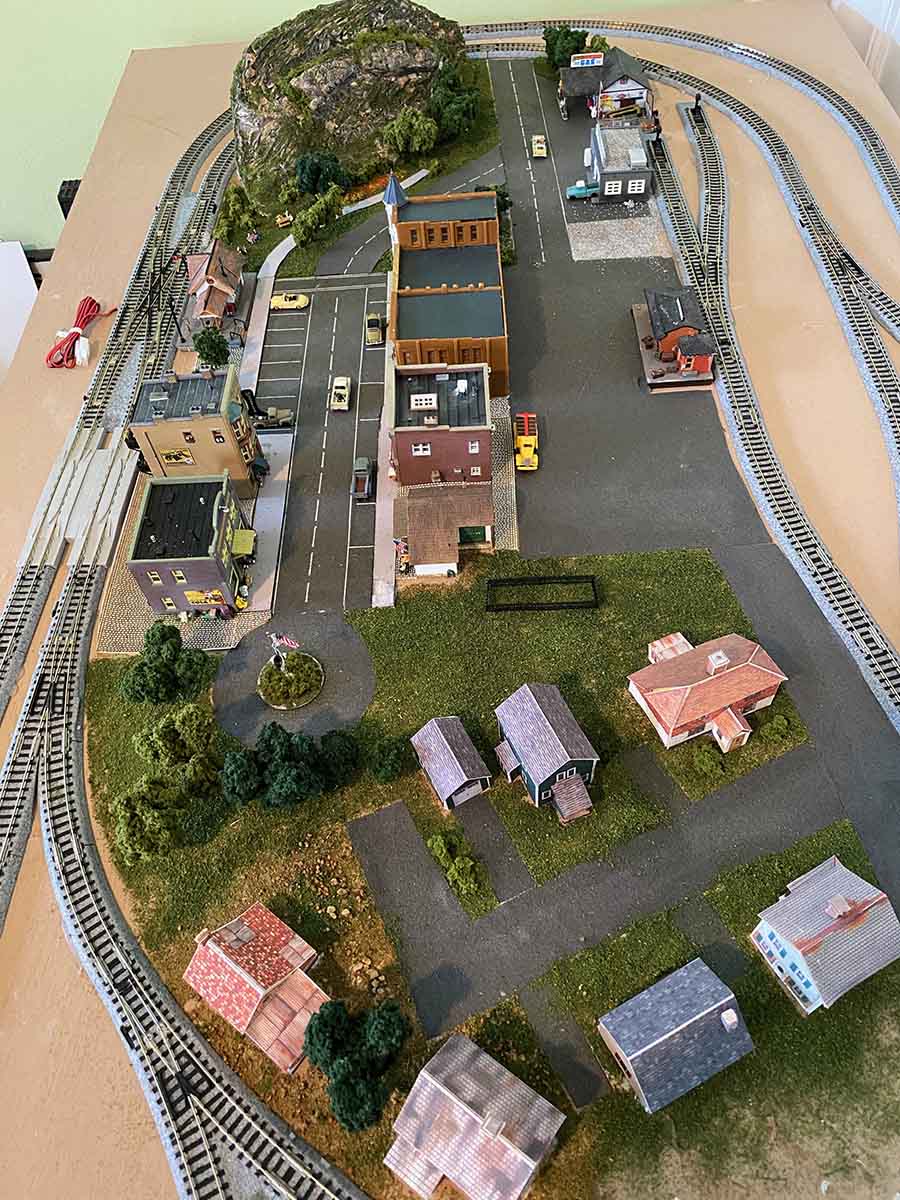
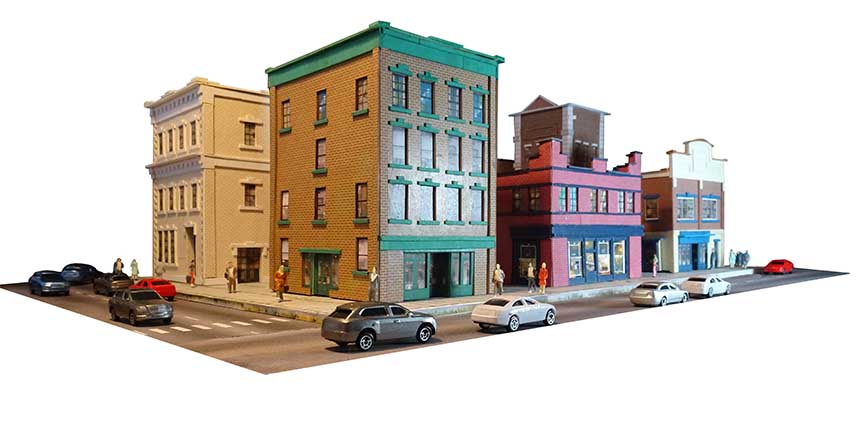
And here are some better pics of what you get – all for $9.

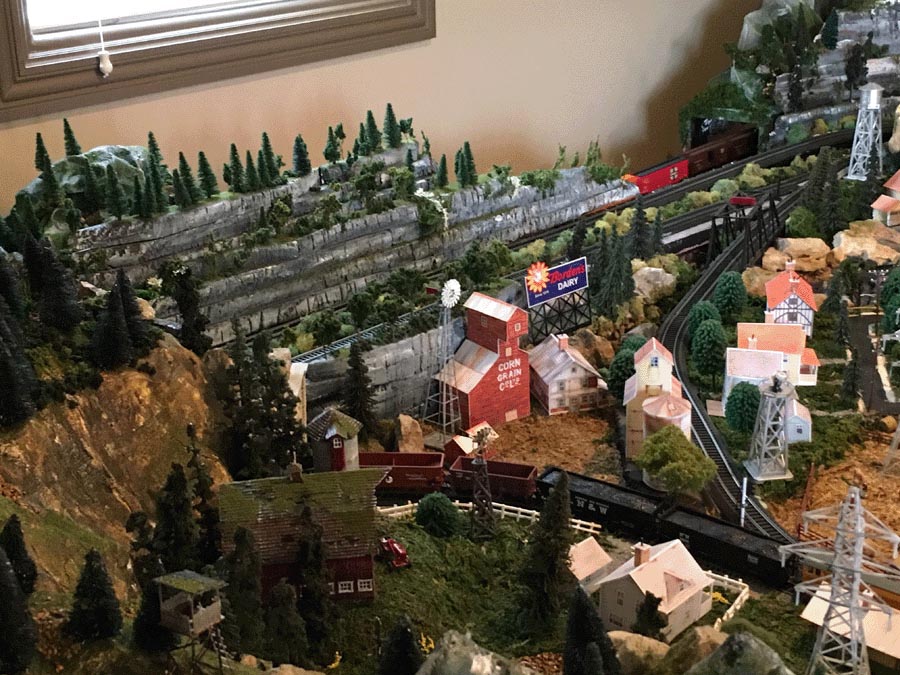
The prints make up a ‘scratch build kit’, and you are only limited by your imagination.
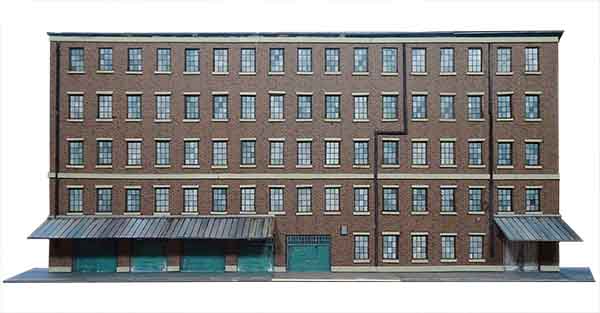
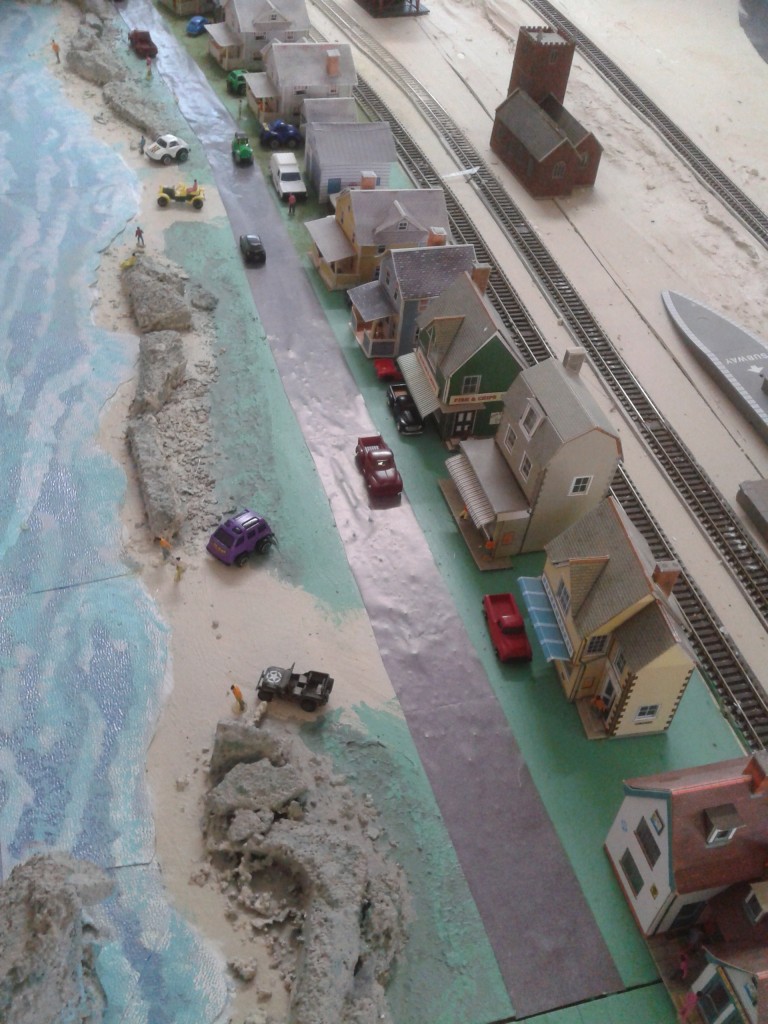
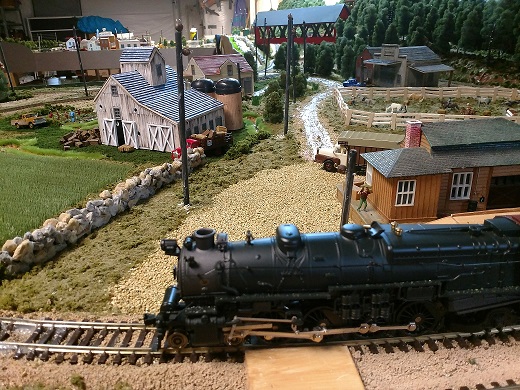
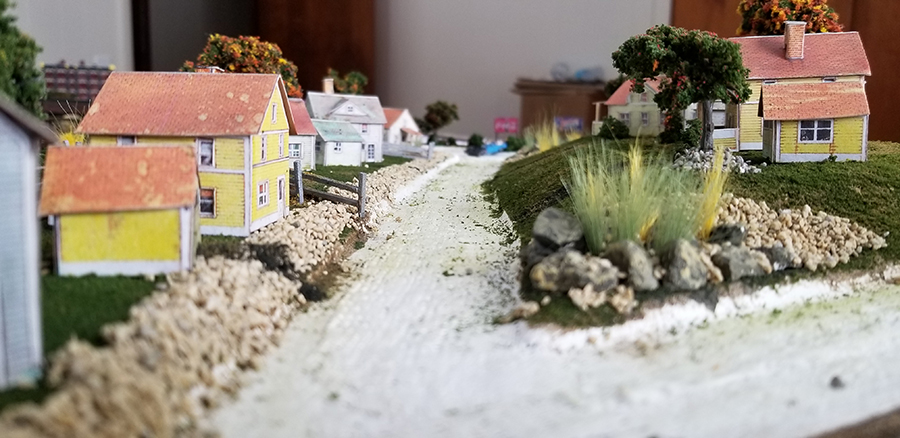
Here’s an example of the backdrops you can build.
But don’t forget – it’s not just the printable buildings you get – it’s the Beginner’s Guide too:
Of course, I’m biased so here’s what others say about it:
“Al,
I really like the Beginner’s Guide. As a true beginner it helped me quite a bit. The Guide answered questions I didn’t know enough to ask.
I haven’t gotten to the building prints yet, still working on my terrain.
Bruce”
“Hi Alistair,
Your print out building kits have saved me hundreds of dollars on buildings and they provide the unique option of being able to customize the builds most any way I desire.
Until I came across your kits, I was very limited on what I could add to my planned N-scale layout. Commercial building kits are way too expensive for a retired person’s budget.
I now have the ability to not only build nice scenes, they don’t require weathering. Something I’m not terribly adept at accomplishing. Also, as a 70 year old kid, working in N-scale can be challenging for clumsy arthritic fingers. Your kits eliminate most of those issues. All I need is a sharp blade, scissors, glue and my imagination.
Also, your beginner’s guide is invaluable. I’m a retired network systems architect, so tech is not scary to me yet surfing the web for information can be tedious. I was a pre-teen the last time I played with model trains, and a lot has changed in the hobby since the early 60’s. You’ve solved all of that by providing one source for virtually all my basic needs, plus your daily email blog covers it all. What an incredible resource you are to this hobby.
Thanks for doing all of what you do.
Best Regards,
Ken”
“Hi Al
I really enjoyed the beginner’s guide book. I’m new to the train world. I have just retired and trying to make an attempt to start a hobbie with HO scale trains. You and your followers have encouraged me for the last two year’s. I Thankyou and your followers for sharing their train world
Sam”
Of course, I’m very biased, but I think the Beginner’s Guide and all these printable buildings bundled free are a real steal.
I think Ken’s quote above puts it best:
“Your print out building kits have saved me hundreds of dollars on buildings and they provide the unique option of being able to customize the builds most any way I desire.”
You get 25 printable buildings with the Beginner’s Guide (although with a bit of imagination you can make, many, many more).
You’ll see these buildings sell in the store for $7 each or more.
So you getting $175 of printable buildings.
And the Beginner’s Guide sells for $27.
So that means this silly $9 offer saves you $193.
What’s more, have a look at throughtthe store and you can see it’s a real, genuine, saving.
But please bear in mind, this silly sale is only for a few days, and then it’s all goes back to normal.
I do like to think that when I have a sale it’s genuine, and there is real value.
So if you fancy this bargain before it disappears like a shadow in the night, grab it right now.
Or, I know some of you good people just buy it to support the site. God bless each and every one of you.
Whatever your reasons, the Beginner’s Guide for $9 and the free printable buildings make it easy for you to make that all important start.
And that, my friends, is what it’s all about. Making that start.
If I can help you do that for $9, this sale will have been entirely worth it.
And whatever start you make – have fun.
Again, I’m biased, but the buildings are very enjoyable, as Mike shows us with the new prints.
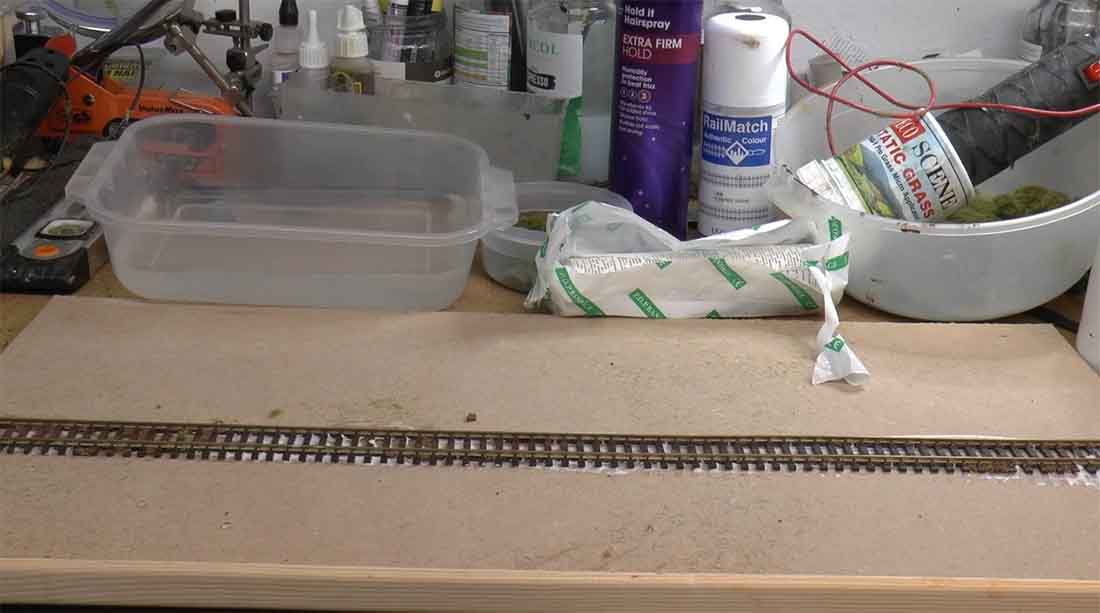
“Okay, the first thing to do is simple enough, print out and stick to card.
Here I’ve used 100gsm card, but you can use any thickness you prefer.
‘Bonkers John’ for example, uses old cornflake boxes and very thick art board.
The thicker the card, the harder it is to cut out. However, the thinner the card, the more wibbly wobbly your buildings will look.
And to be honest, if they look wibbly wobbly, the will look terrible no matter how long you spend on them.
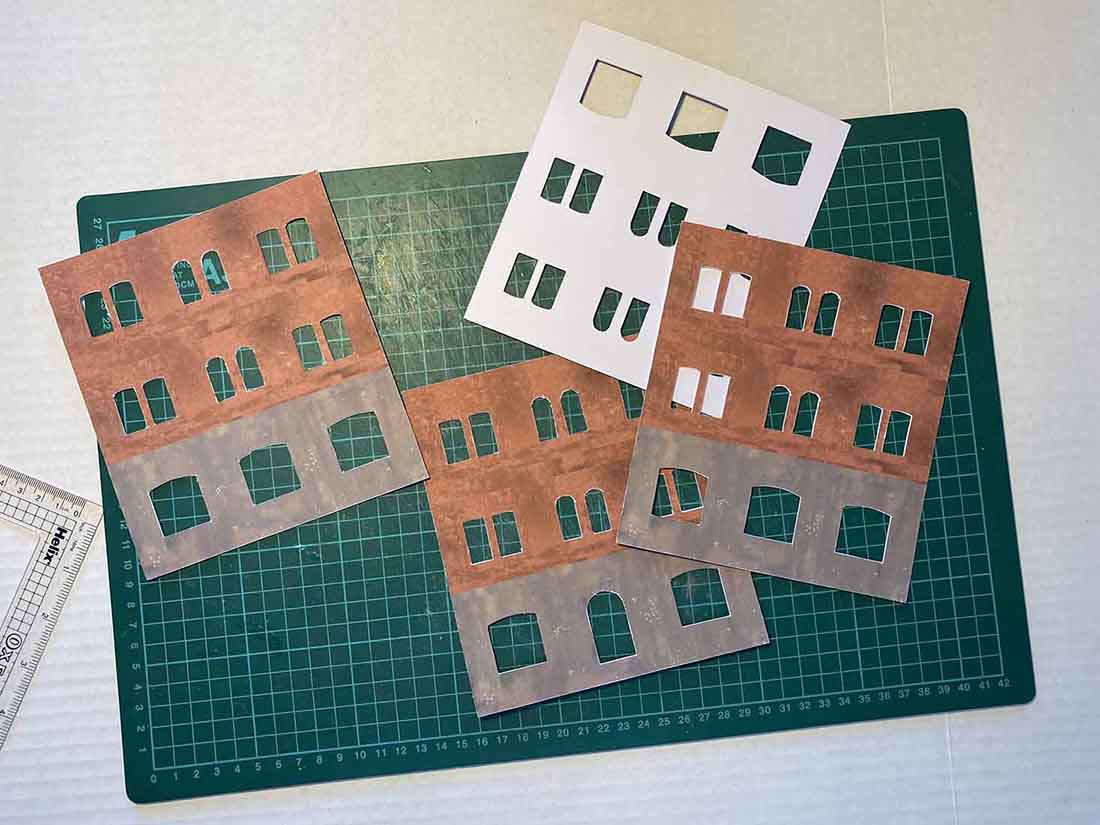
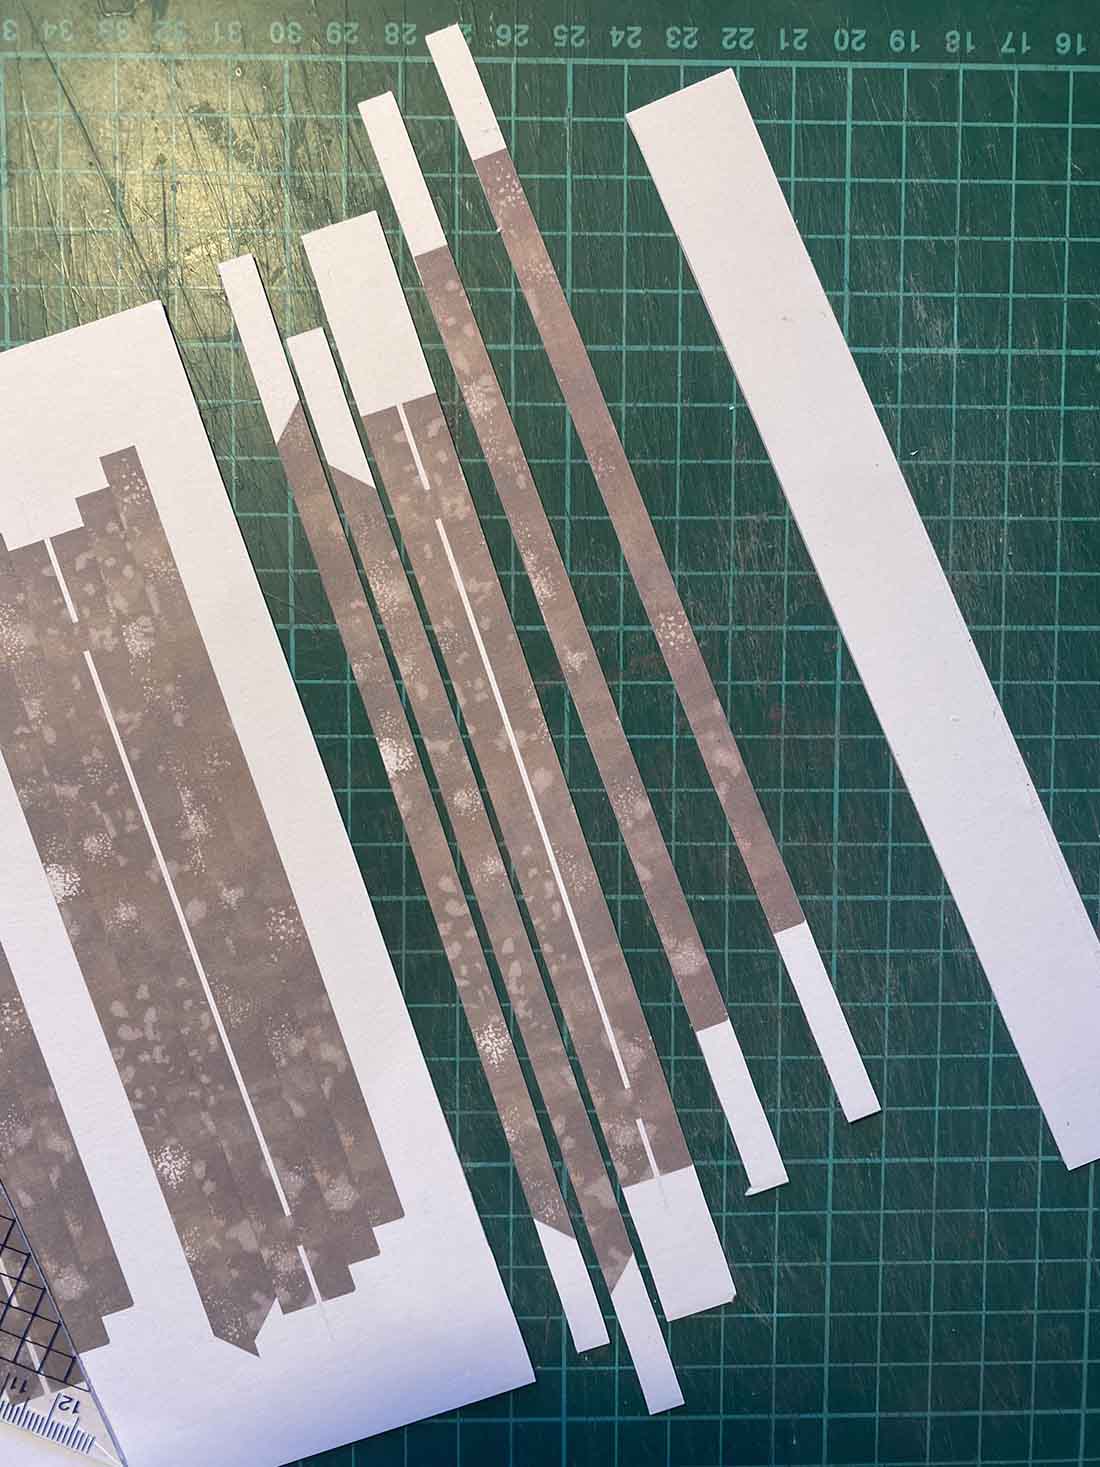
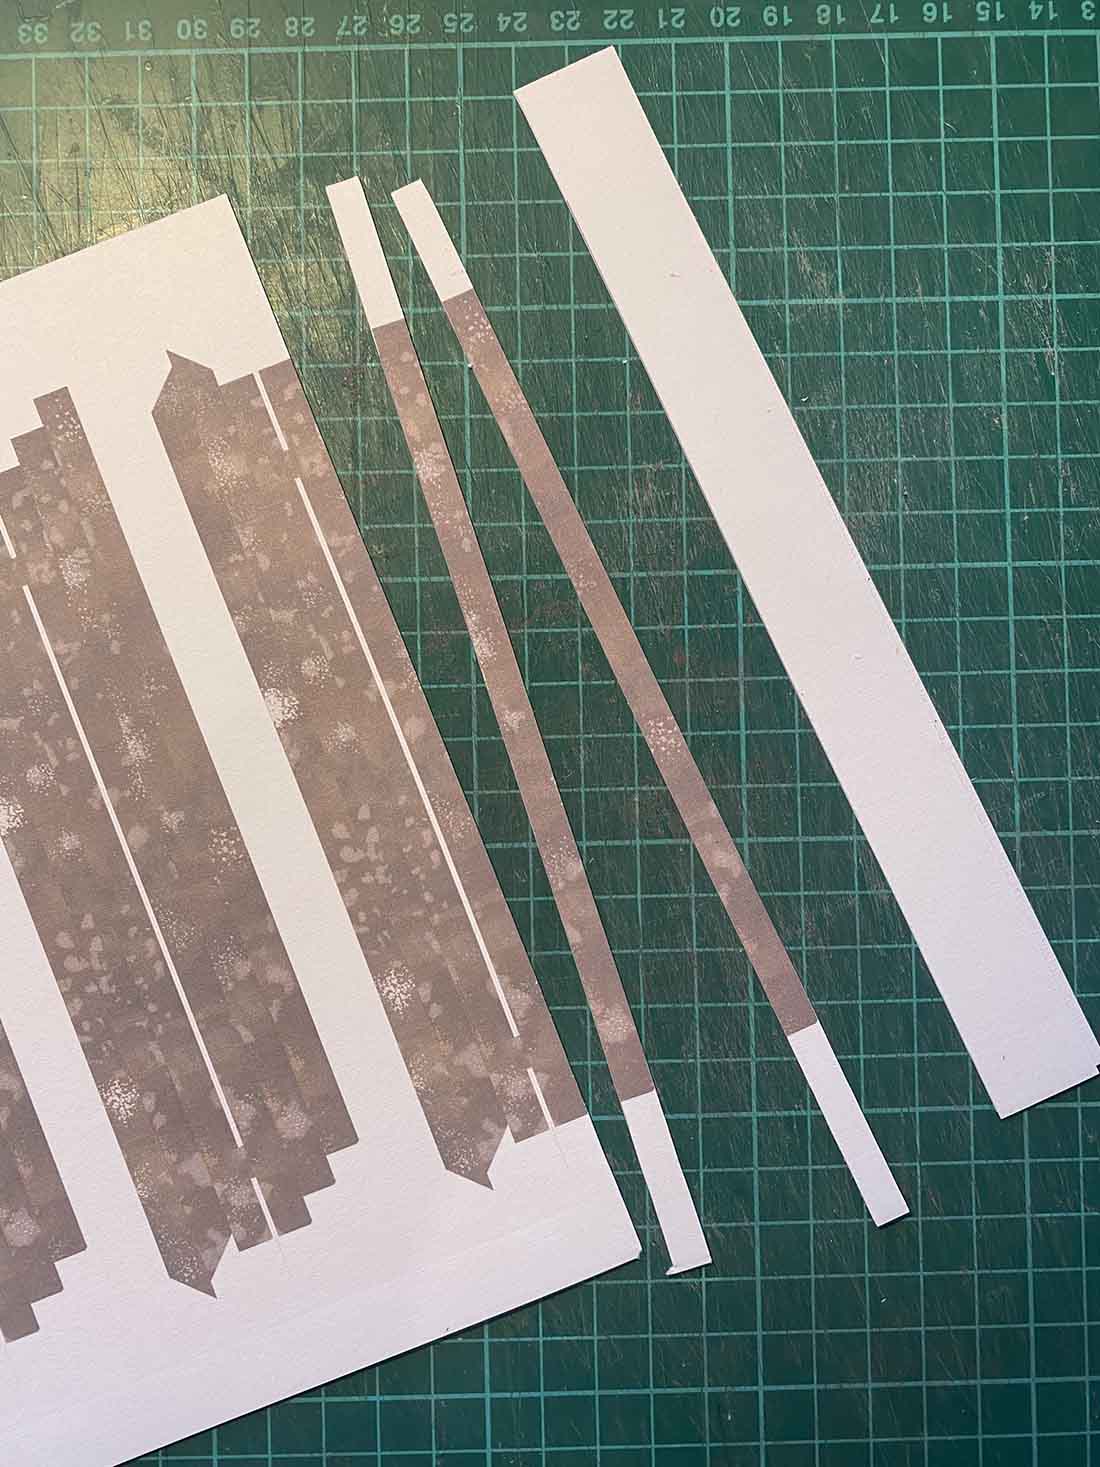
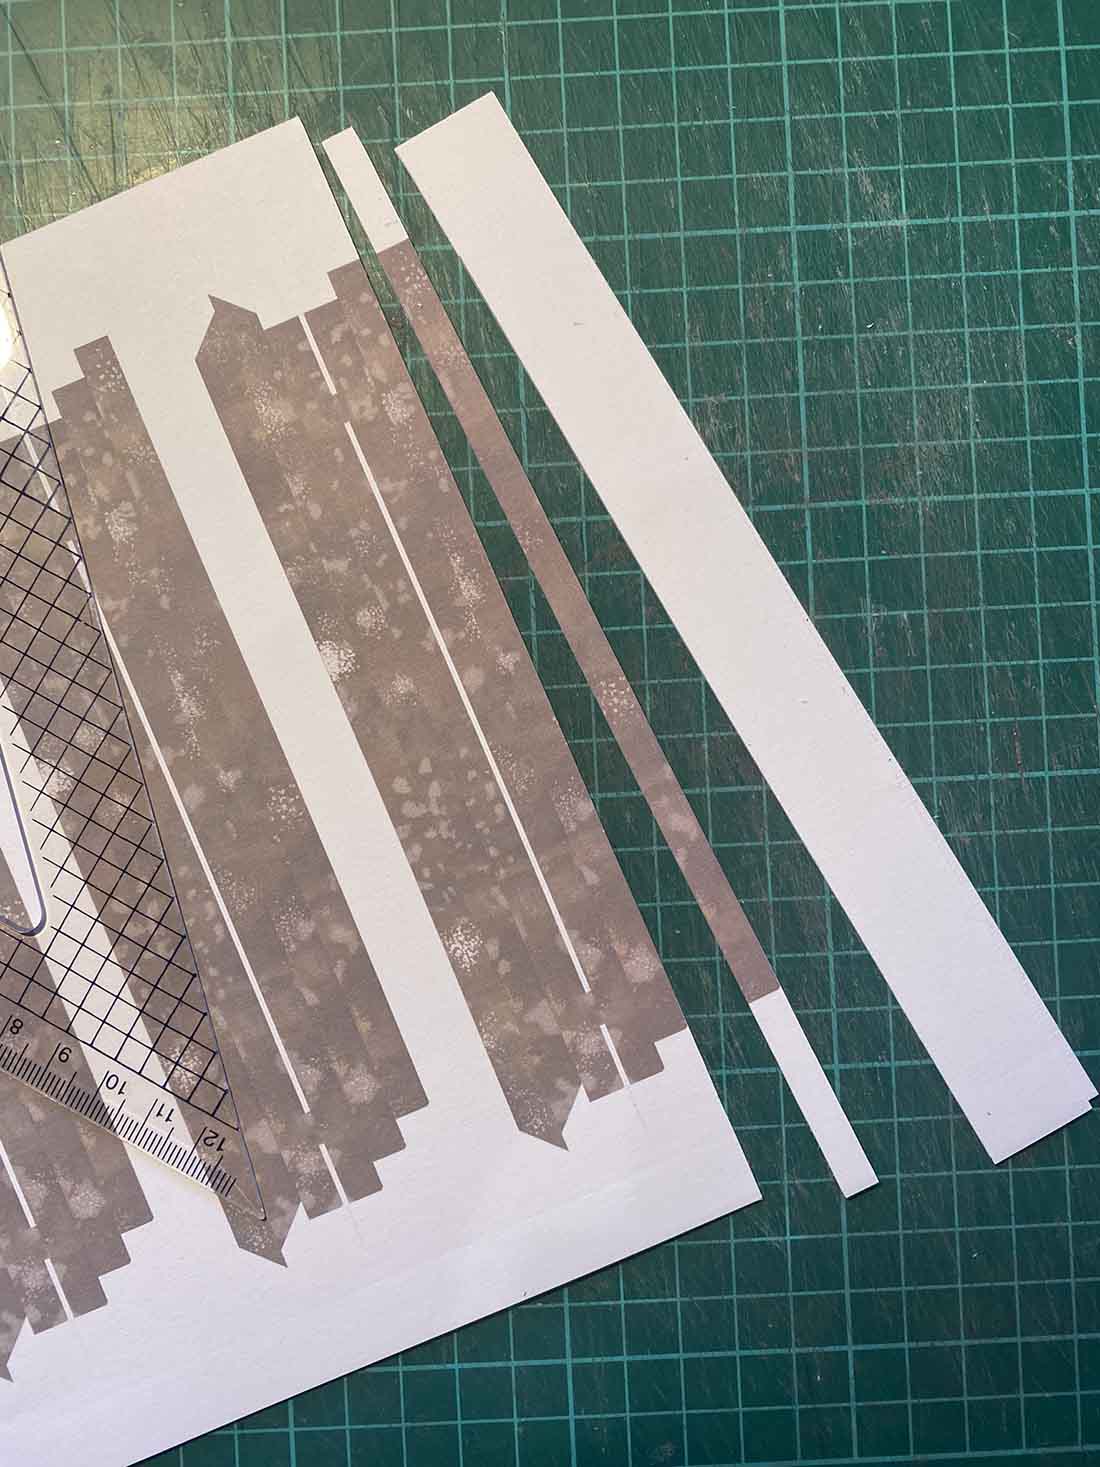
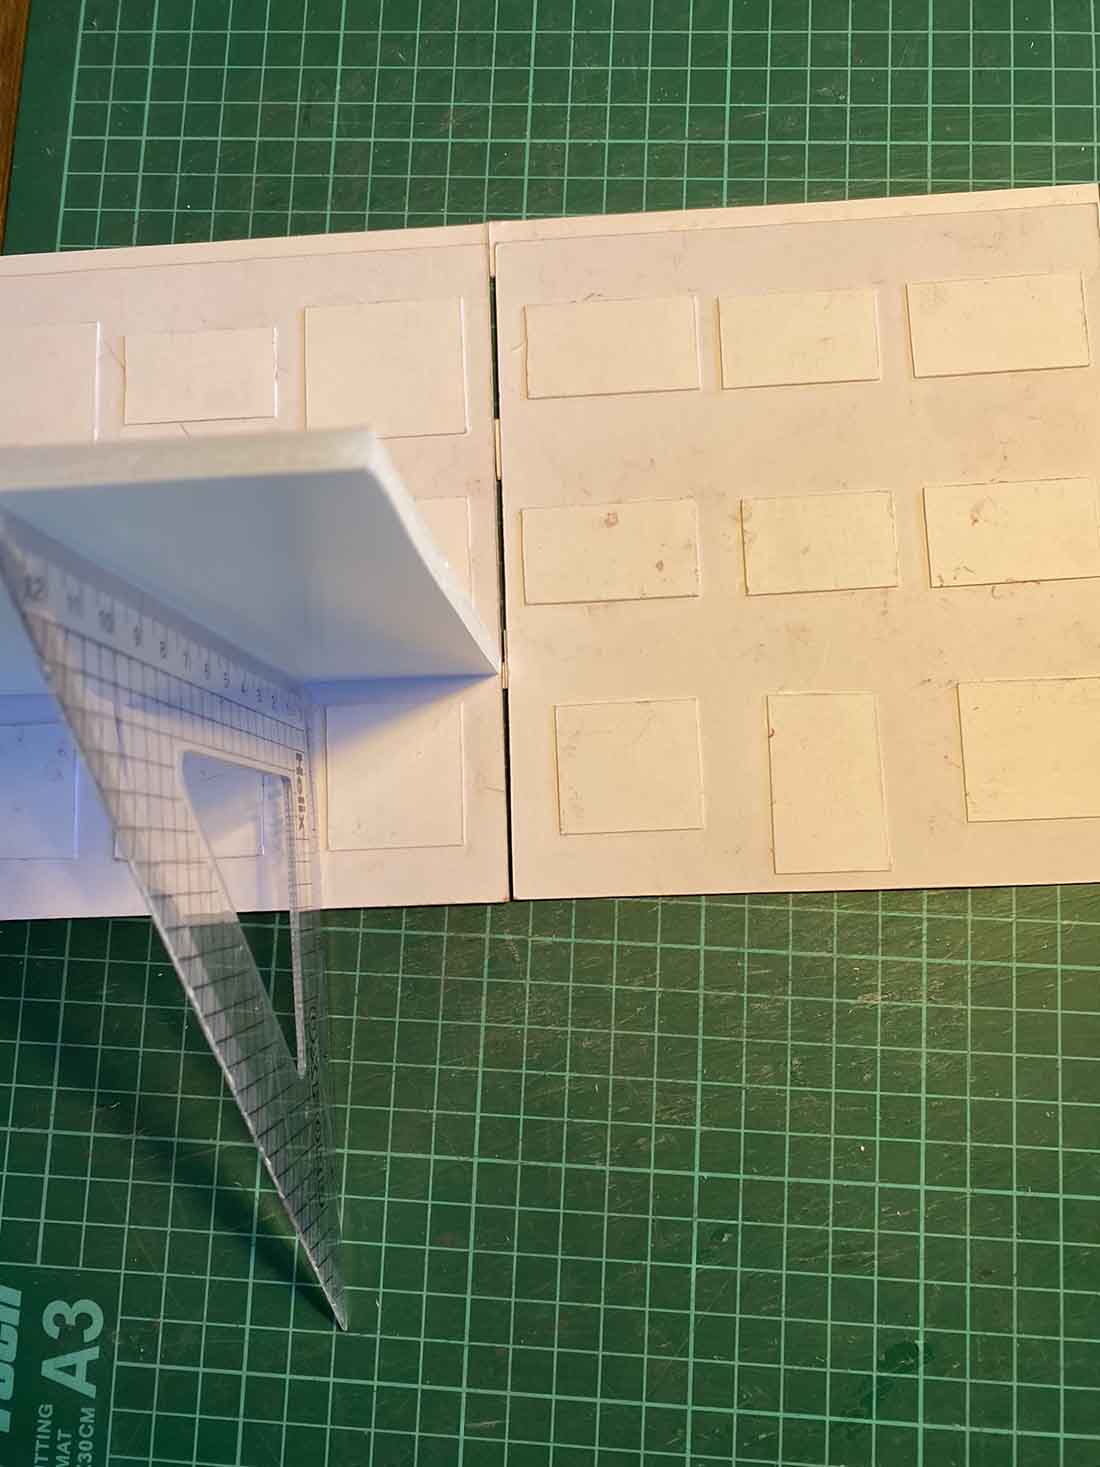
Once they are stuck to card, start cutting them out.
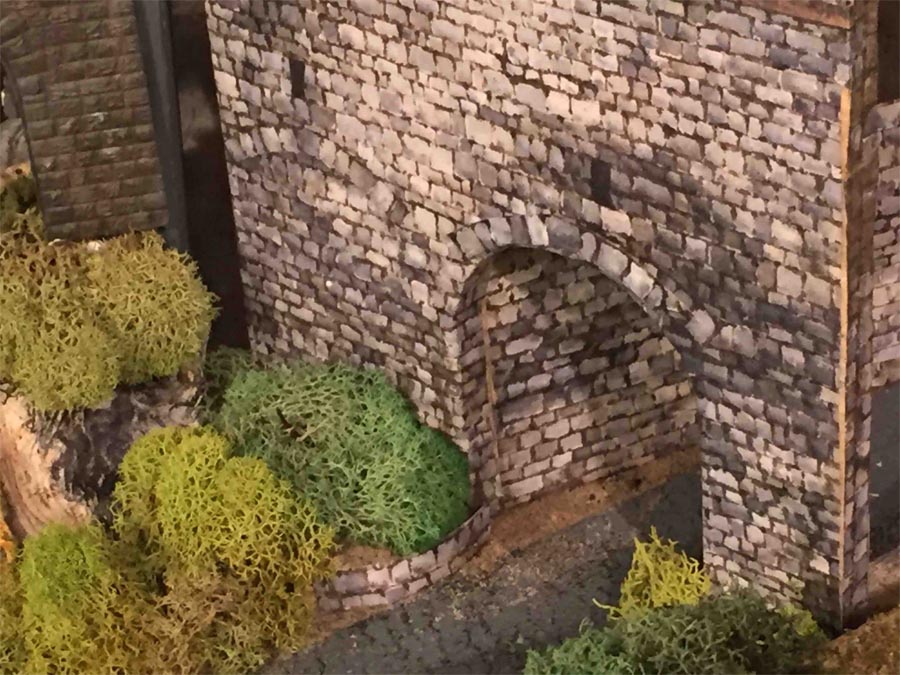
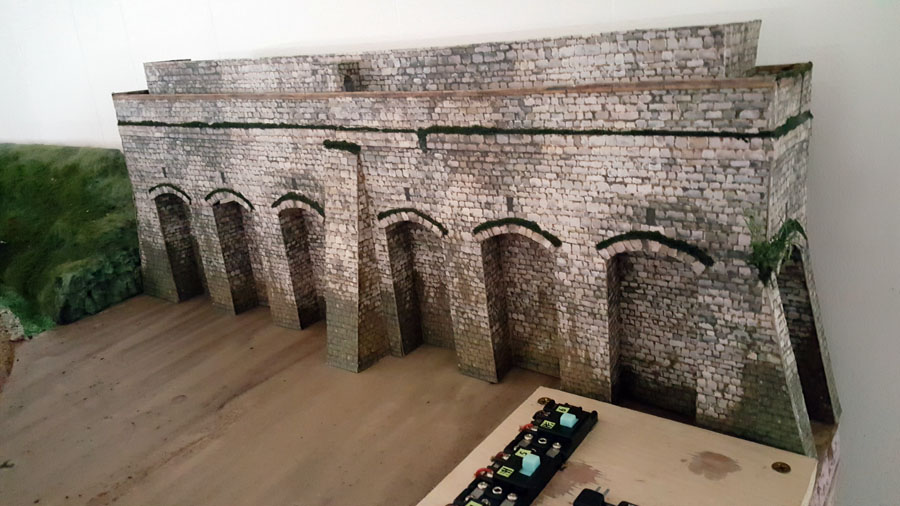
The arches on this one are a bit tricky – I cut lots of strips that you can see in the pic below – which makes the curve cuts easier.
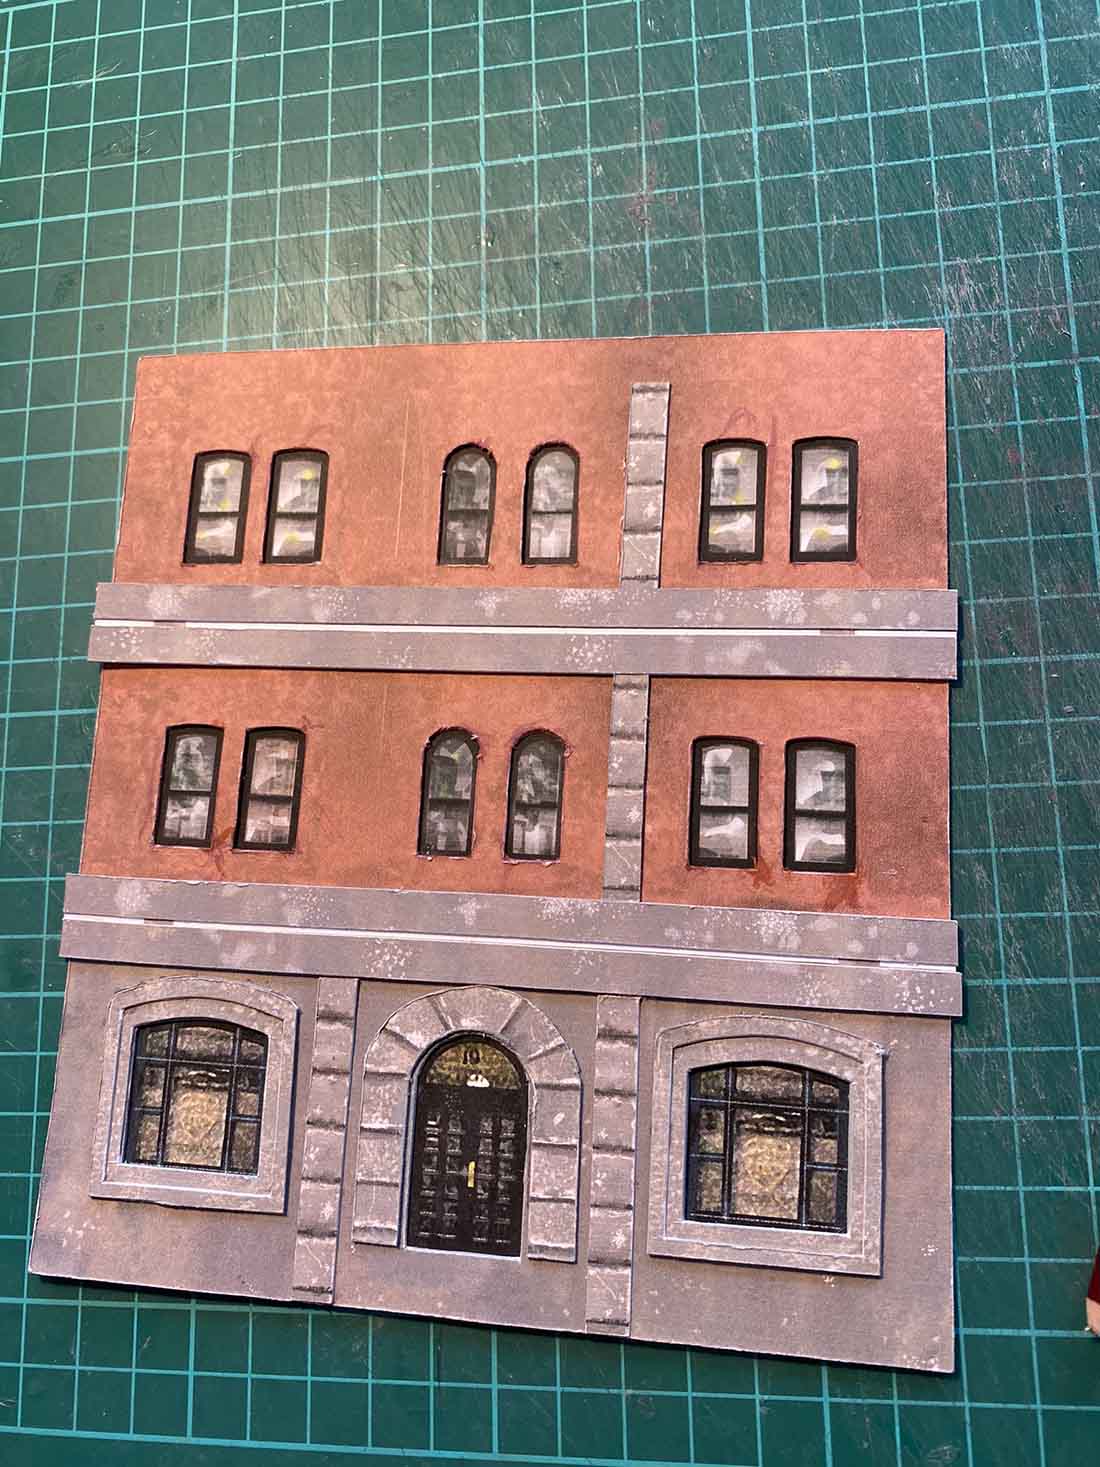
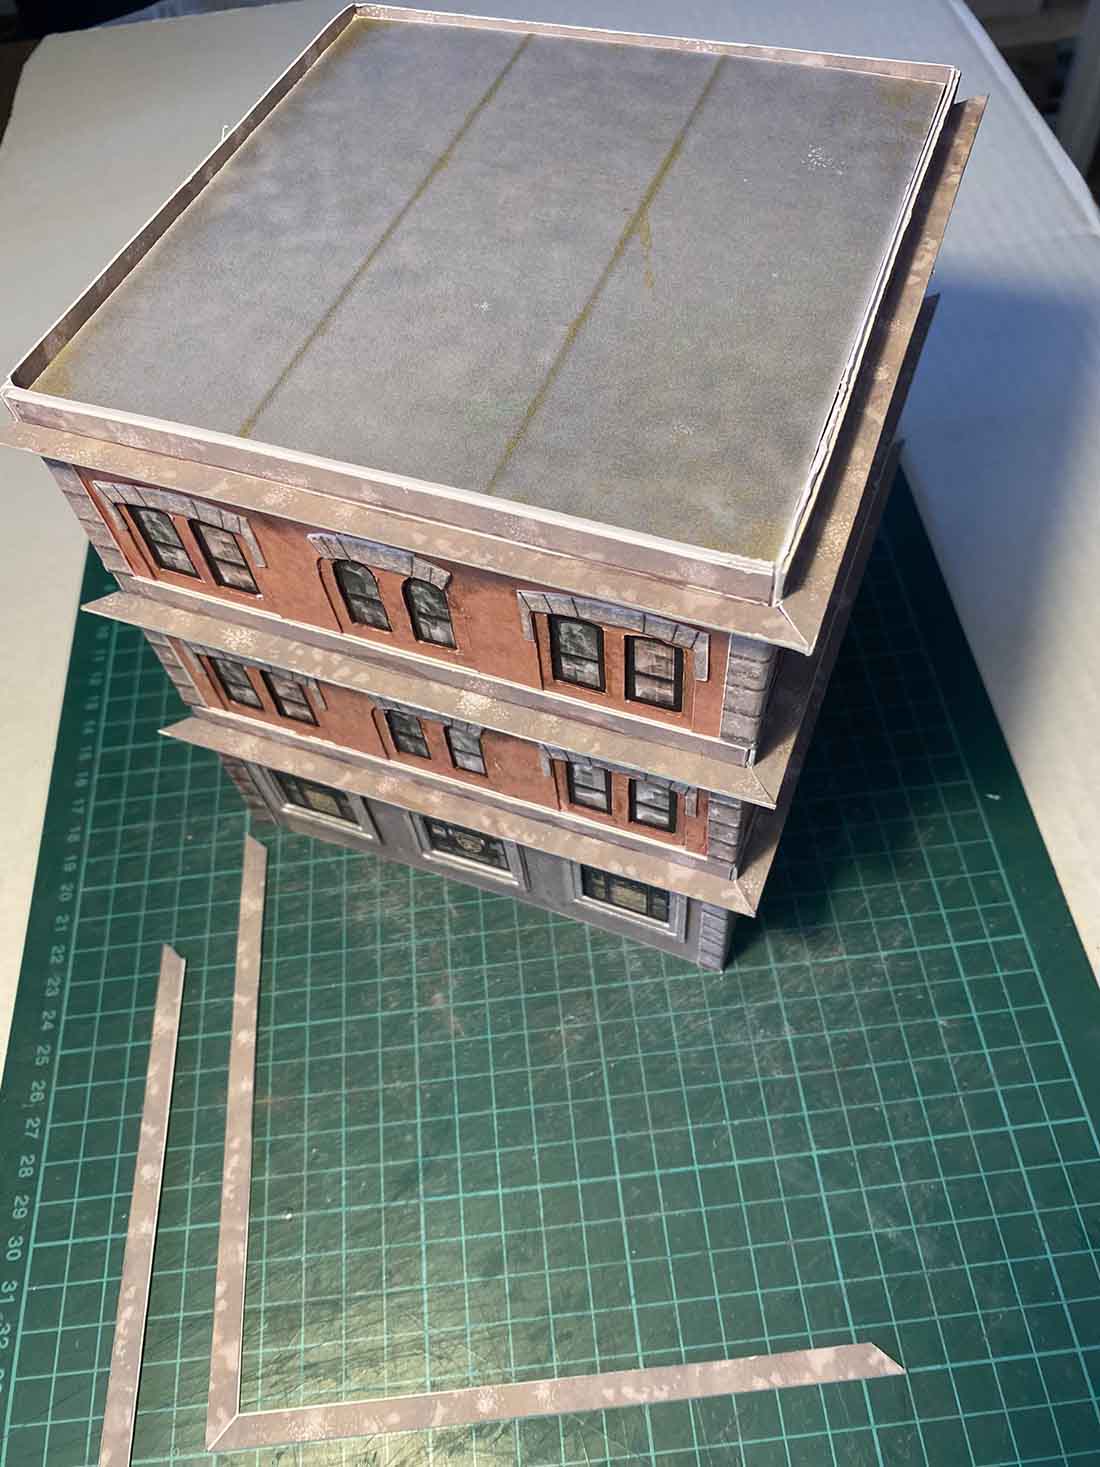
Once you have all the sides cut out, you can see how the building comes together. Obviously, there are 3 identical sides, and one with a door:
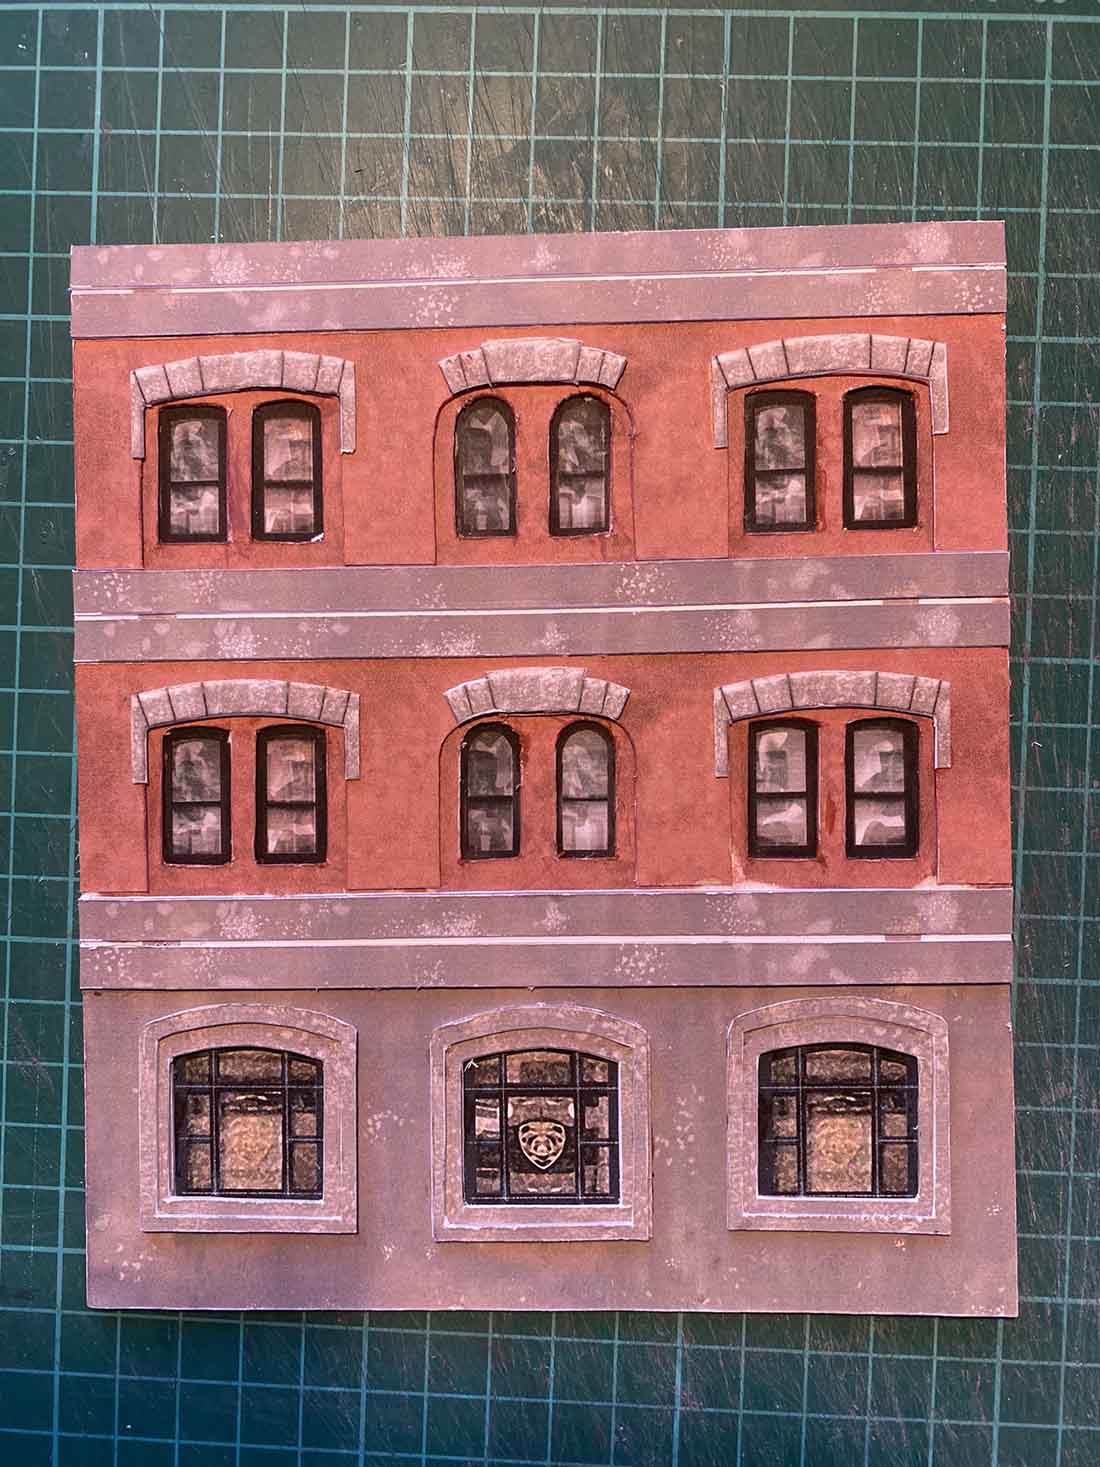
Now we can see what really makes a difference to a printable building.
Can you see the white card on the bits we have cut out?
And if you stack them up, they really stick out. Horrible.
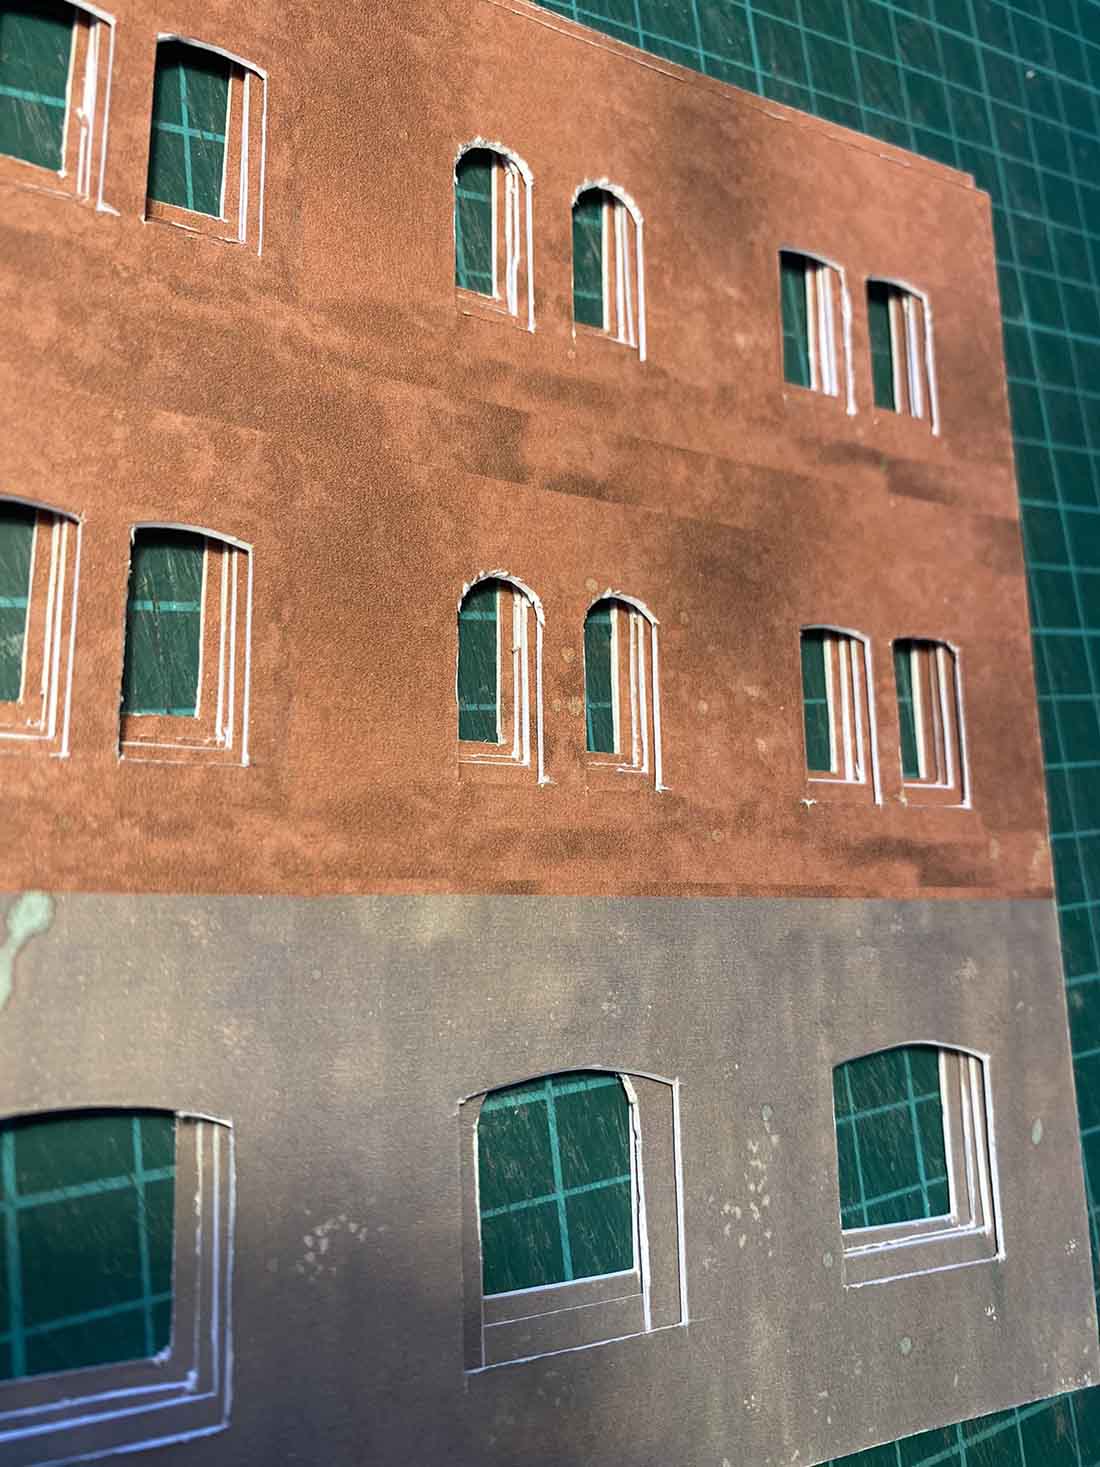
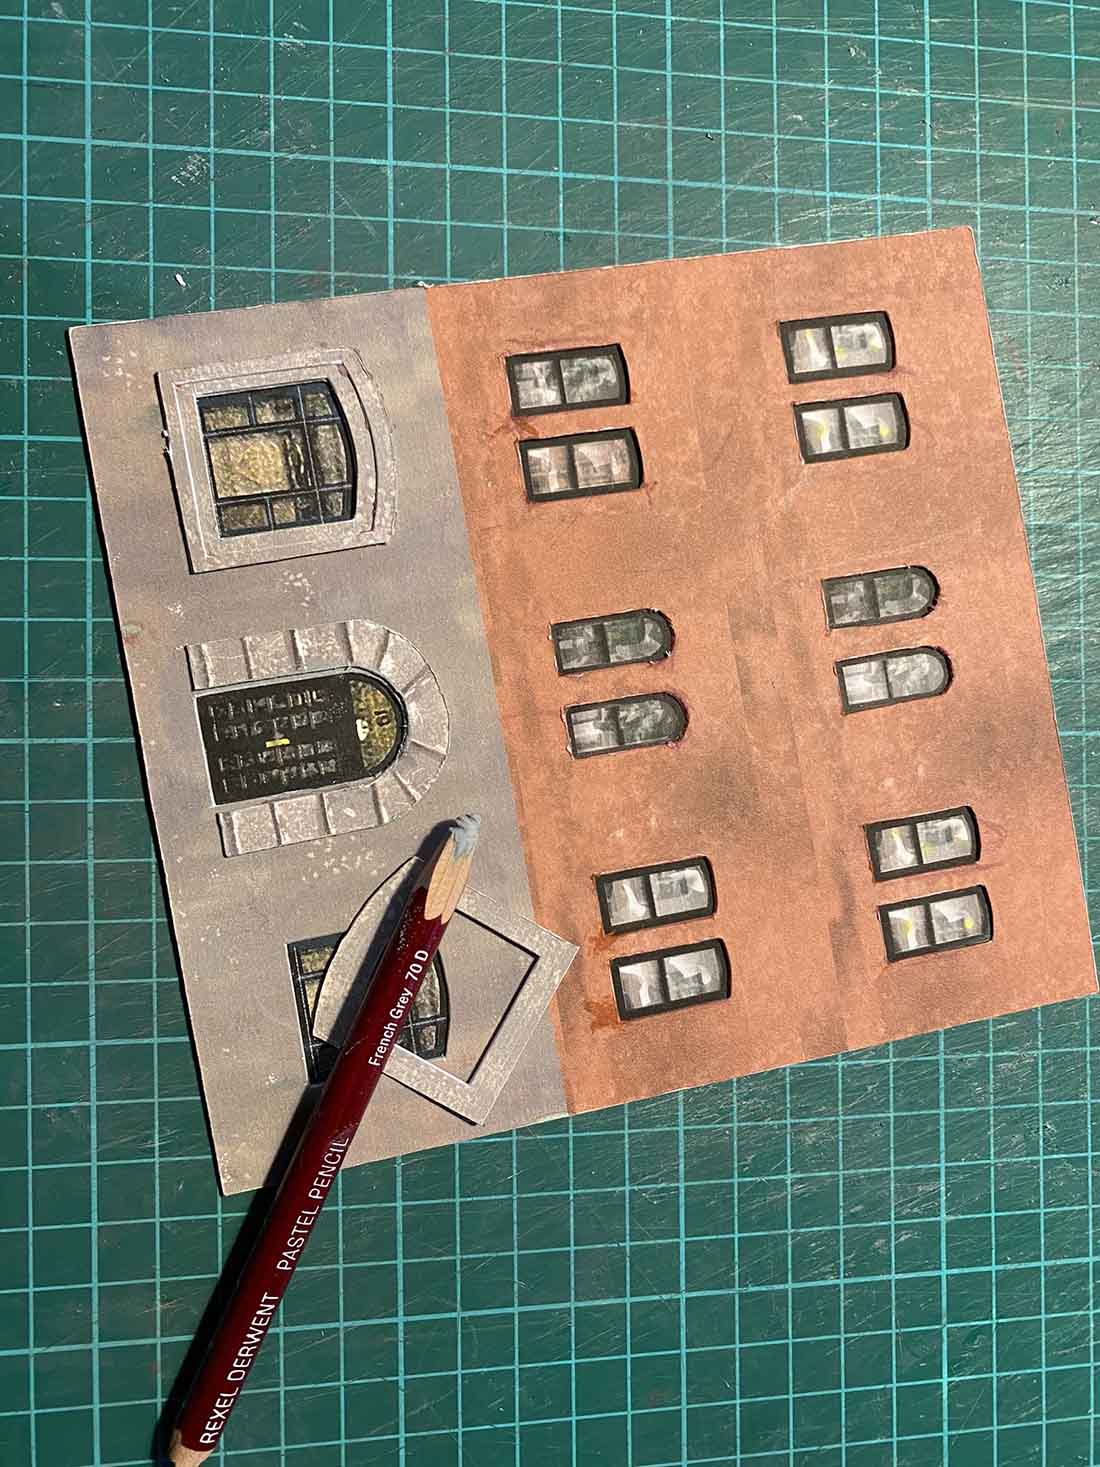
All we need to do, is grab some crayons, pastels or paint and go over the white in a suitable shade.
I mainly use pastels. If I use paint, I never mix it, I just choose a tube that looks near enough.
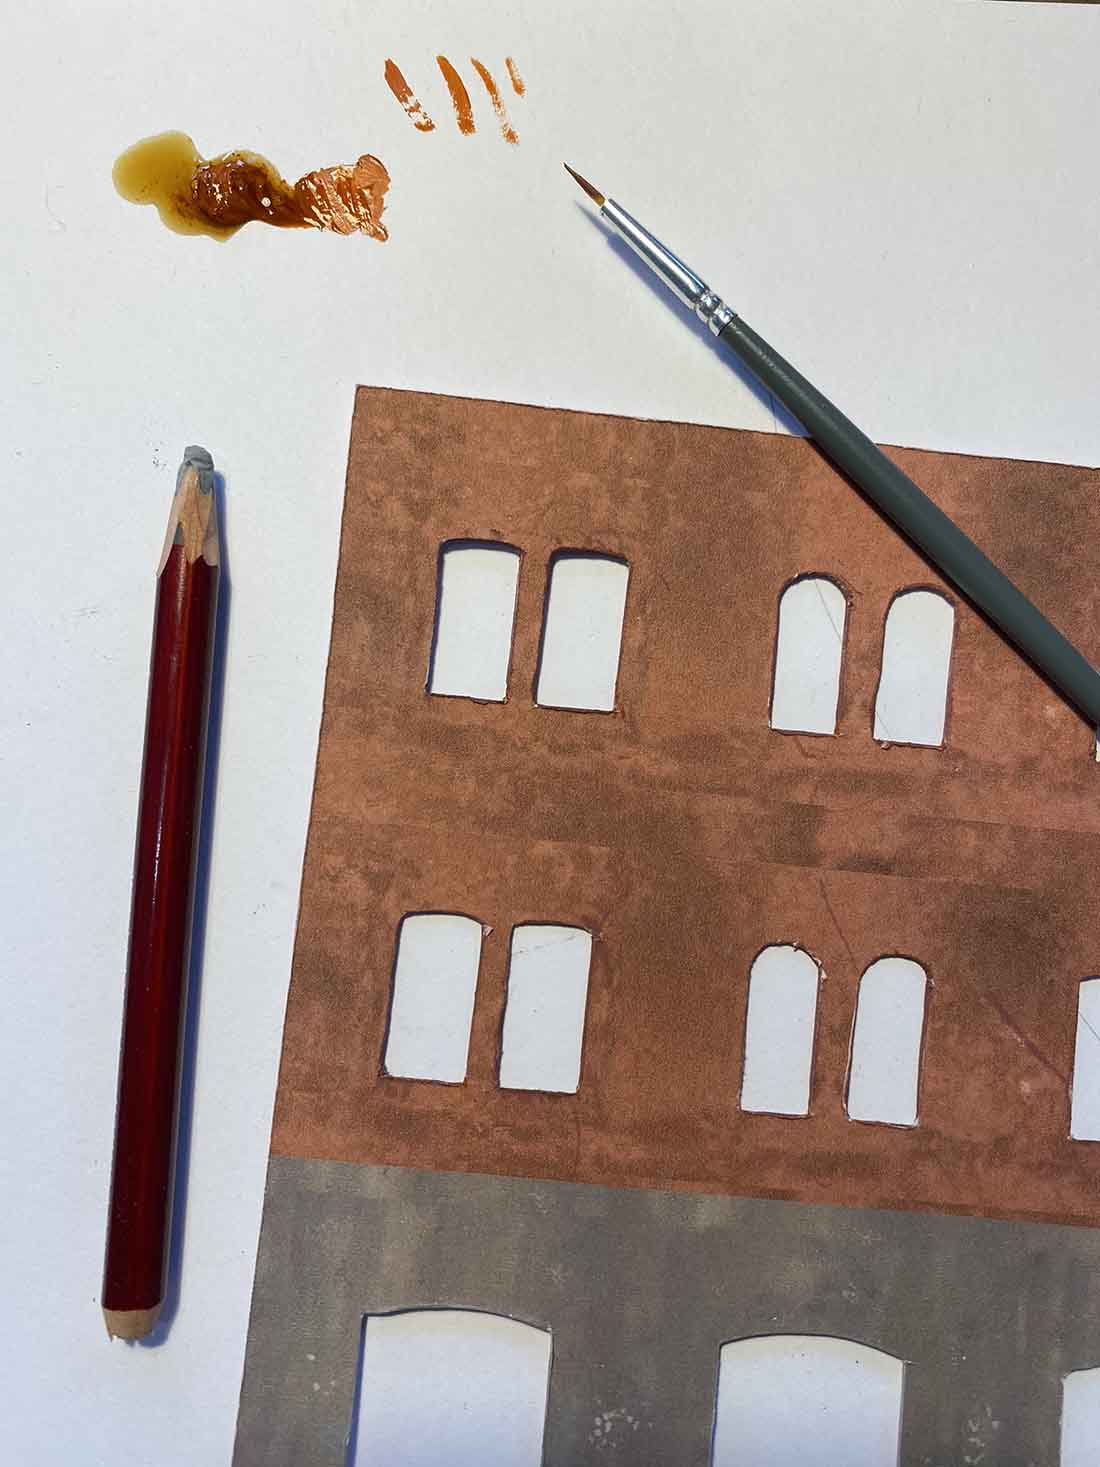
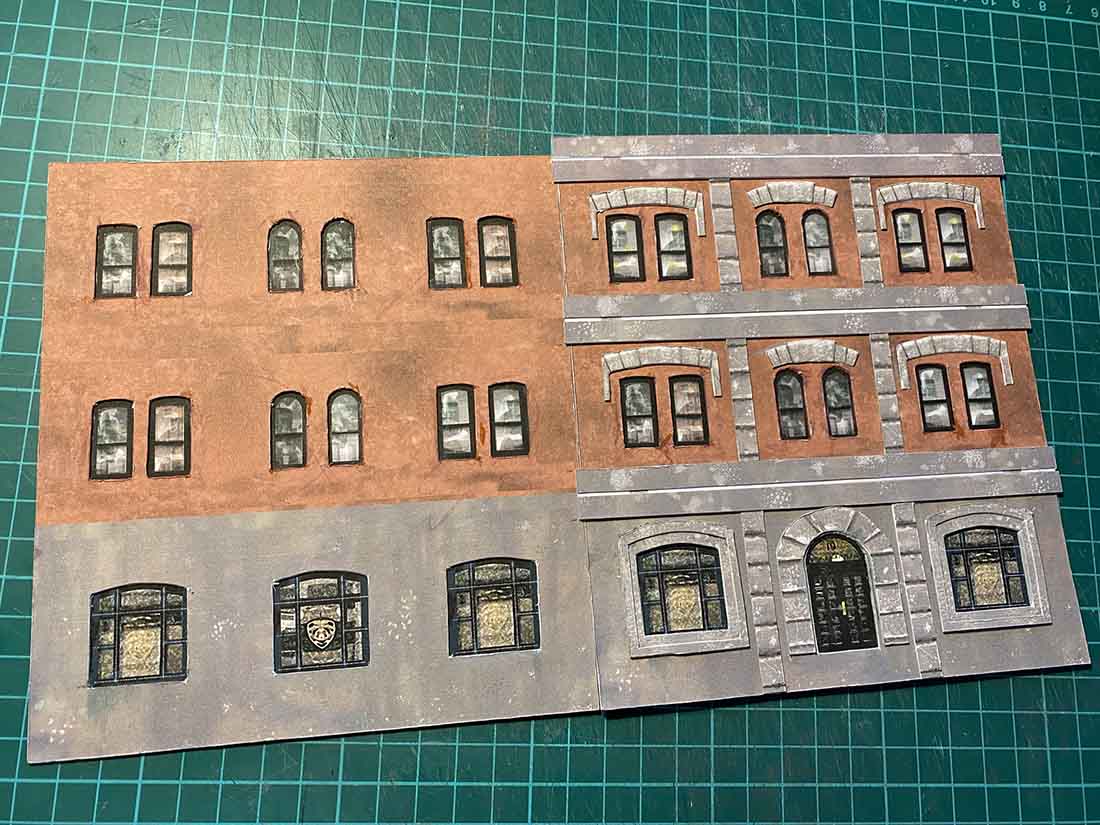
You can see the difference it makes:
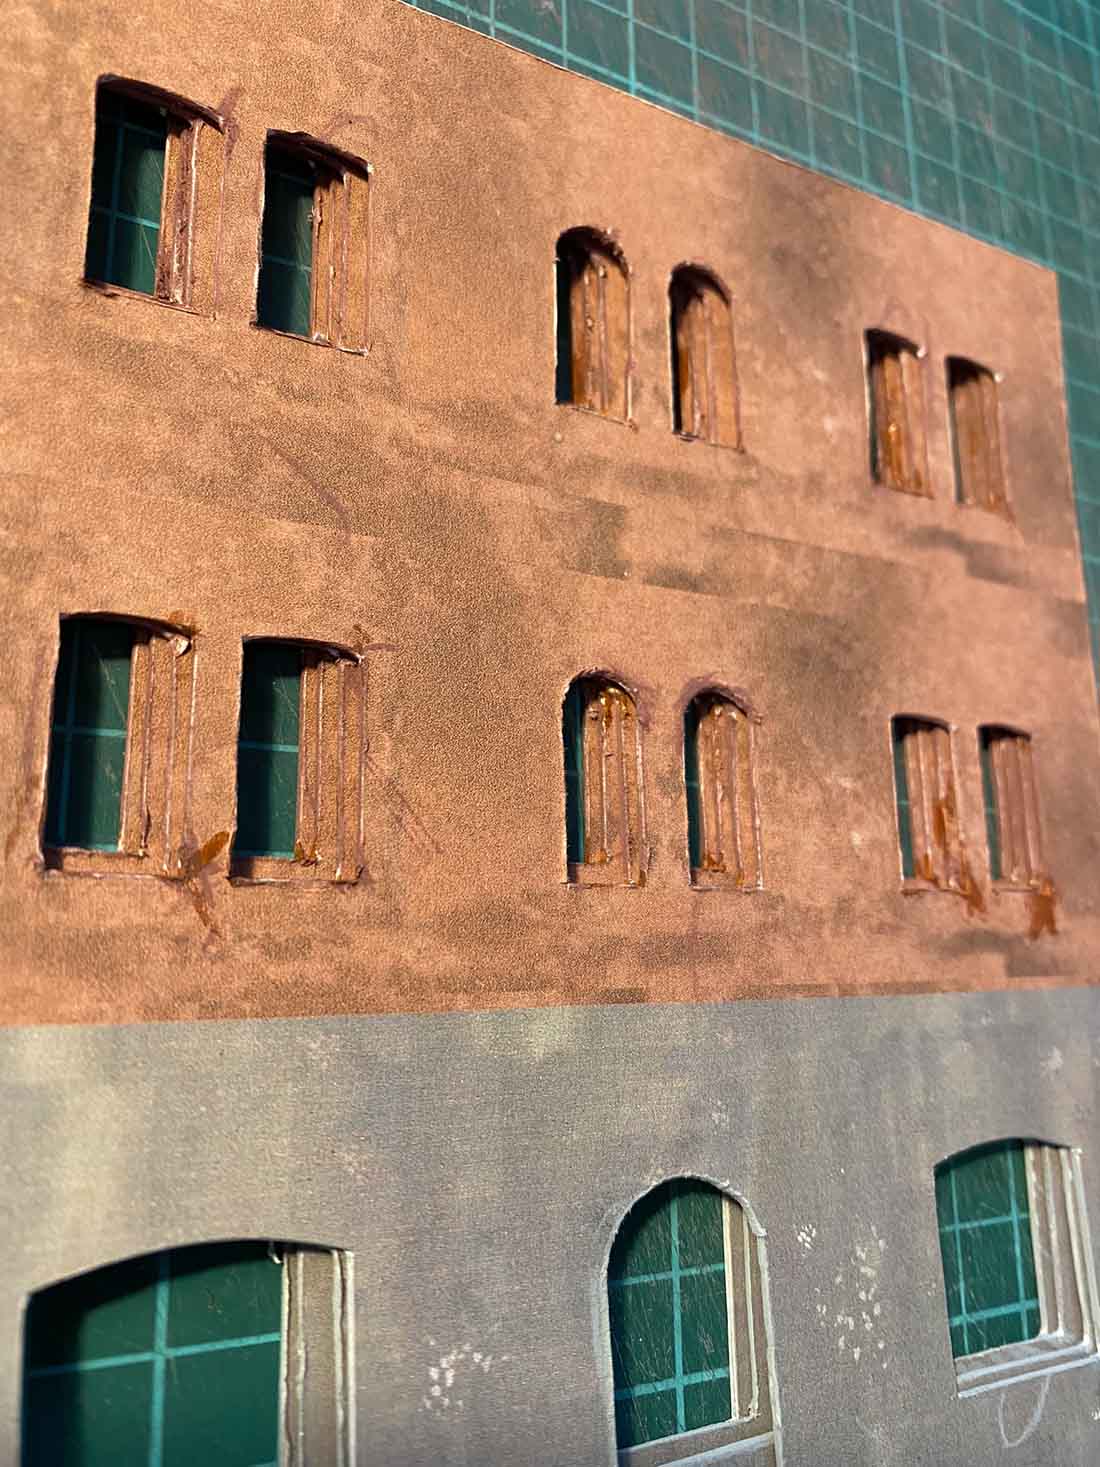
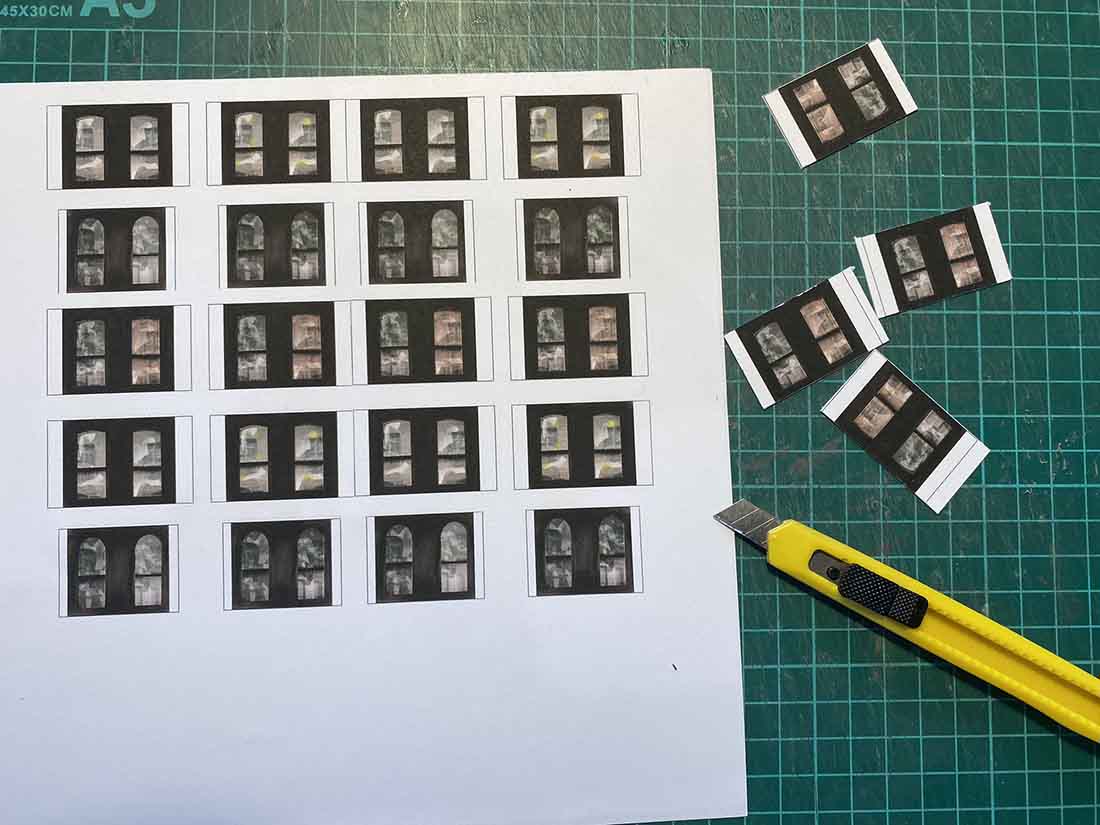
Now on to the windows. First, cut them out:
Then turnover the building sides, add some glue, and slot the windows into place.
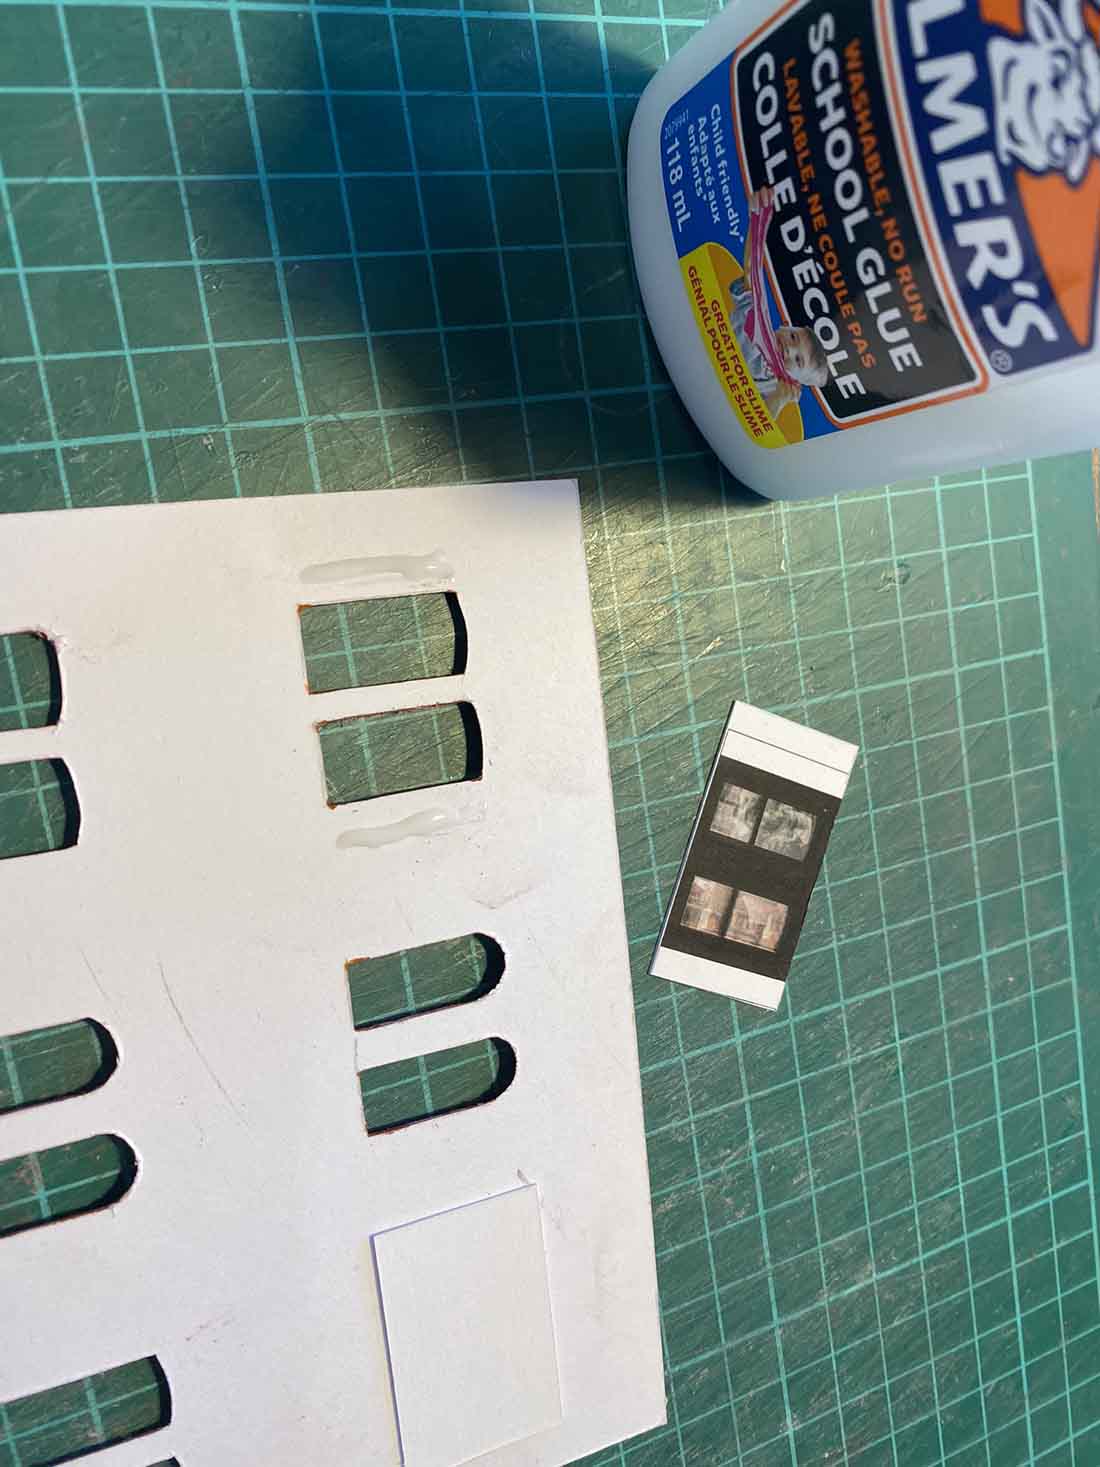
Turnover the sheet, and make sure the window lines up with hole.
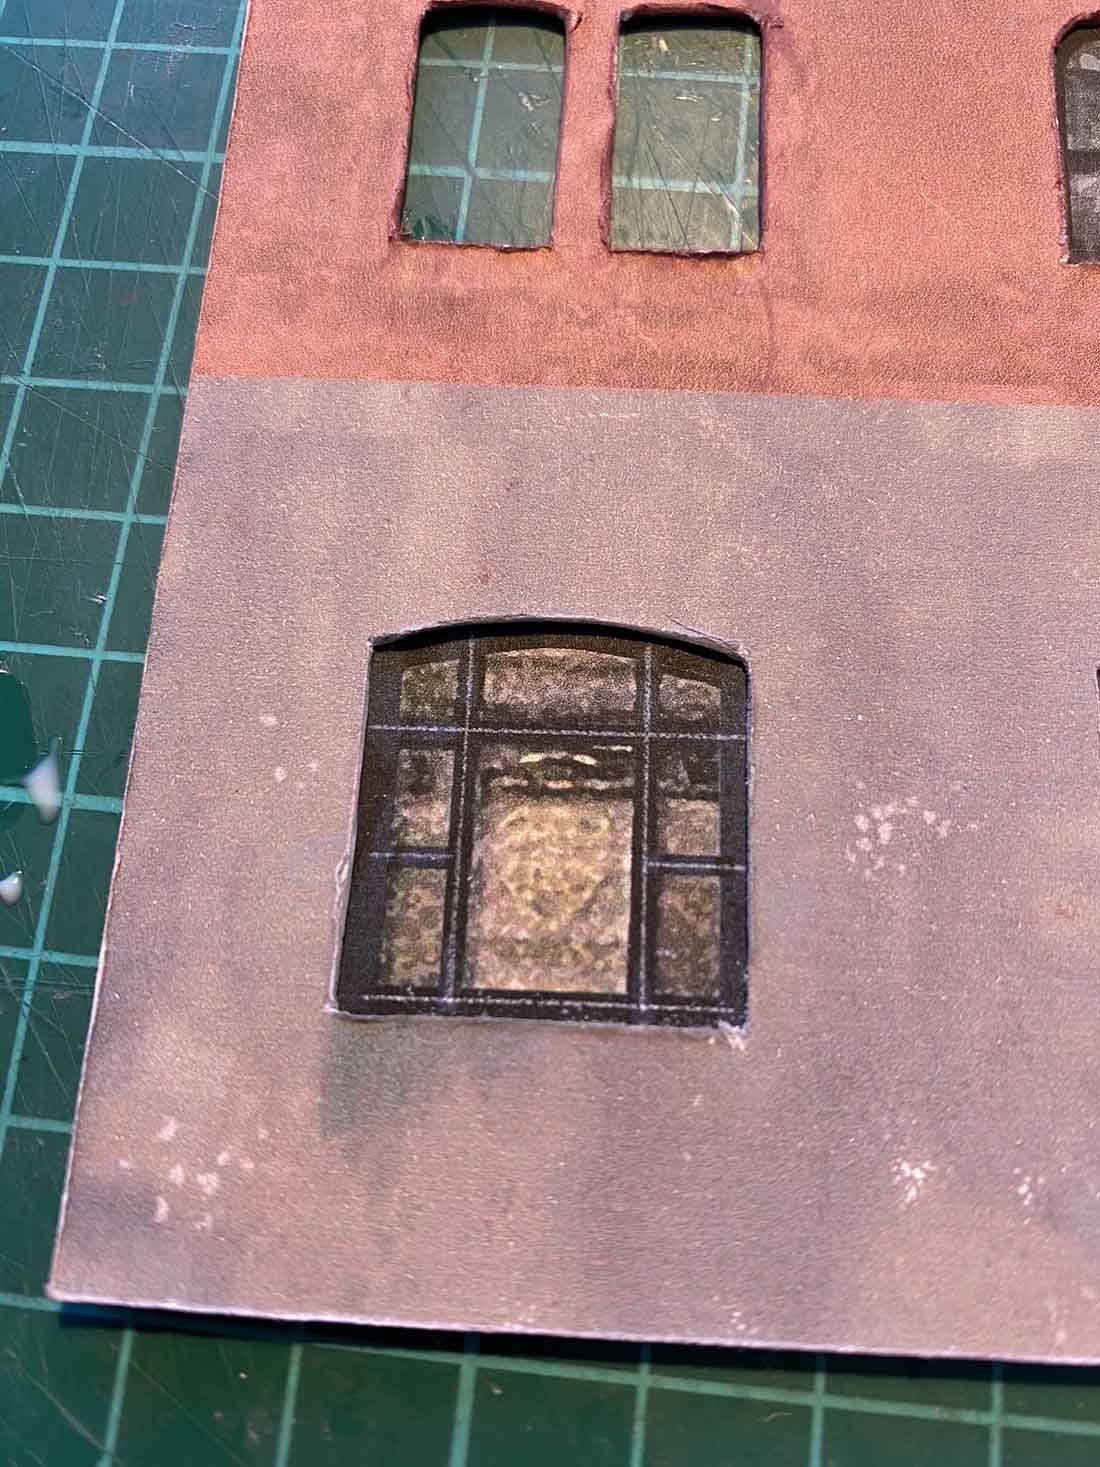
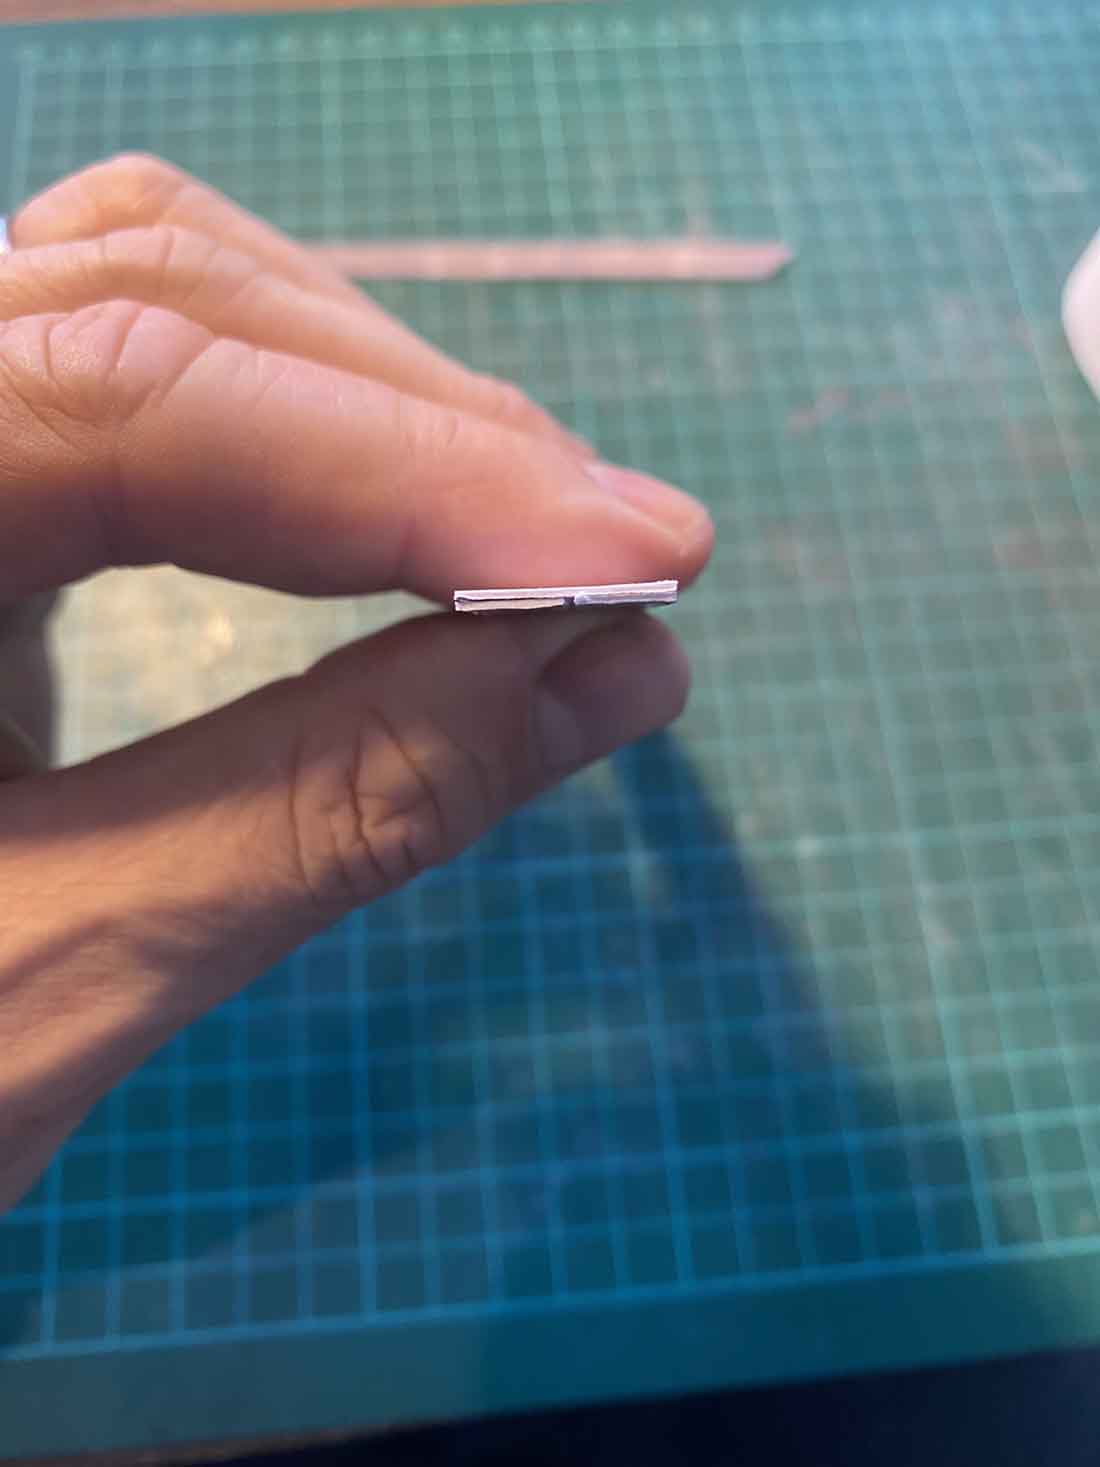
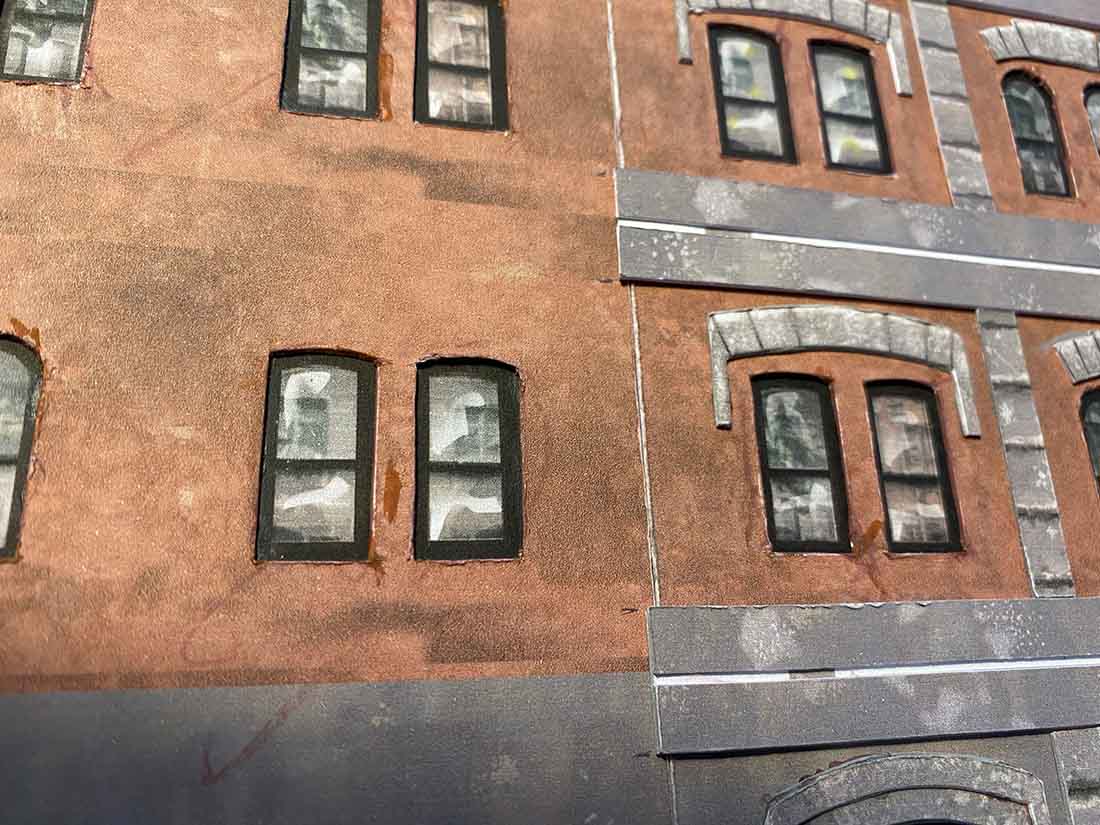
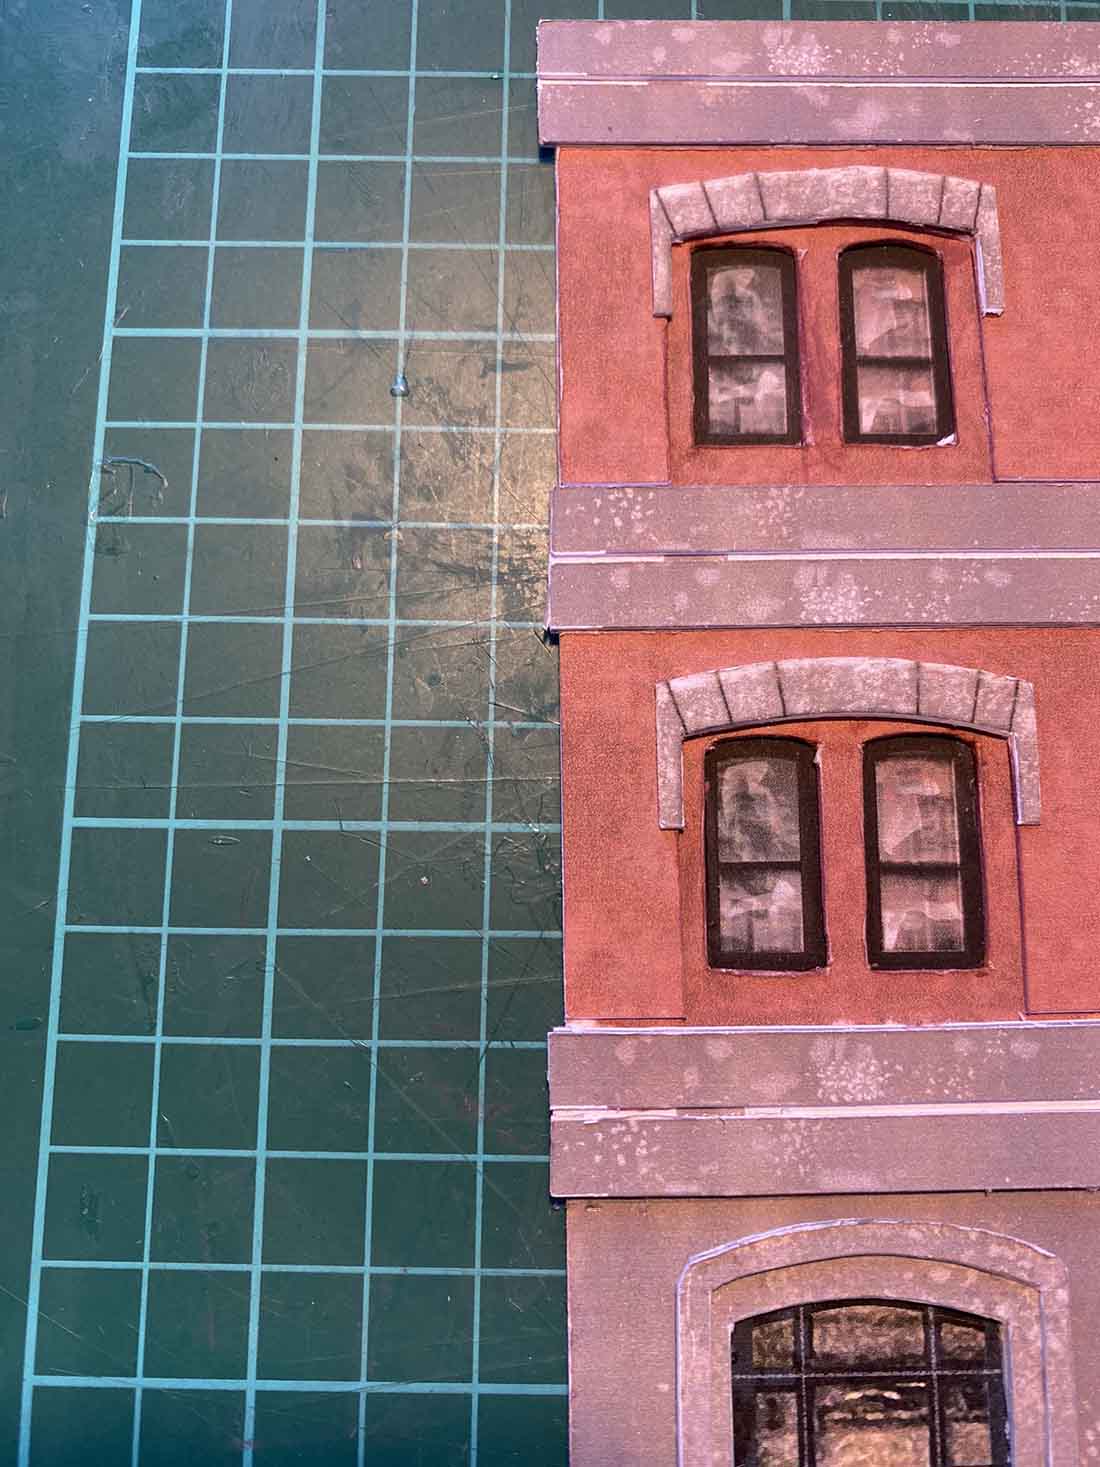
Also, you see on the pic below there is an unsightly line at the bottom of the window where the card has been cut.
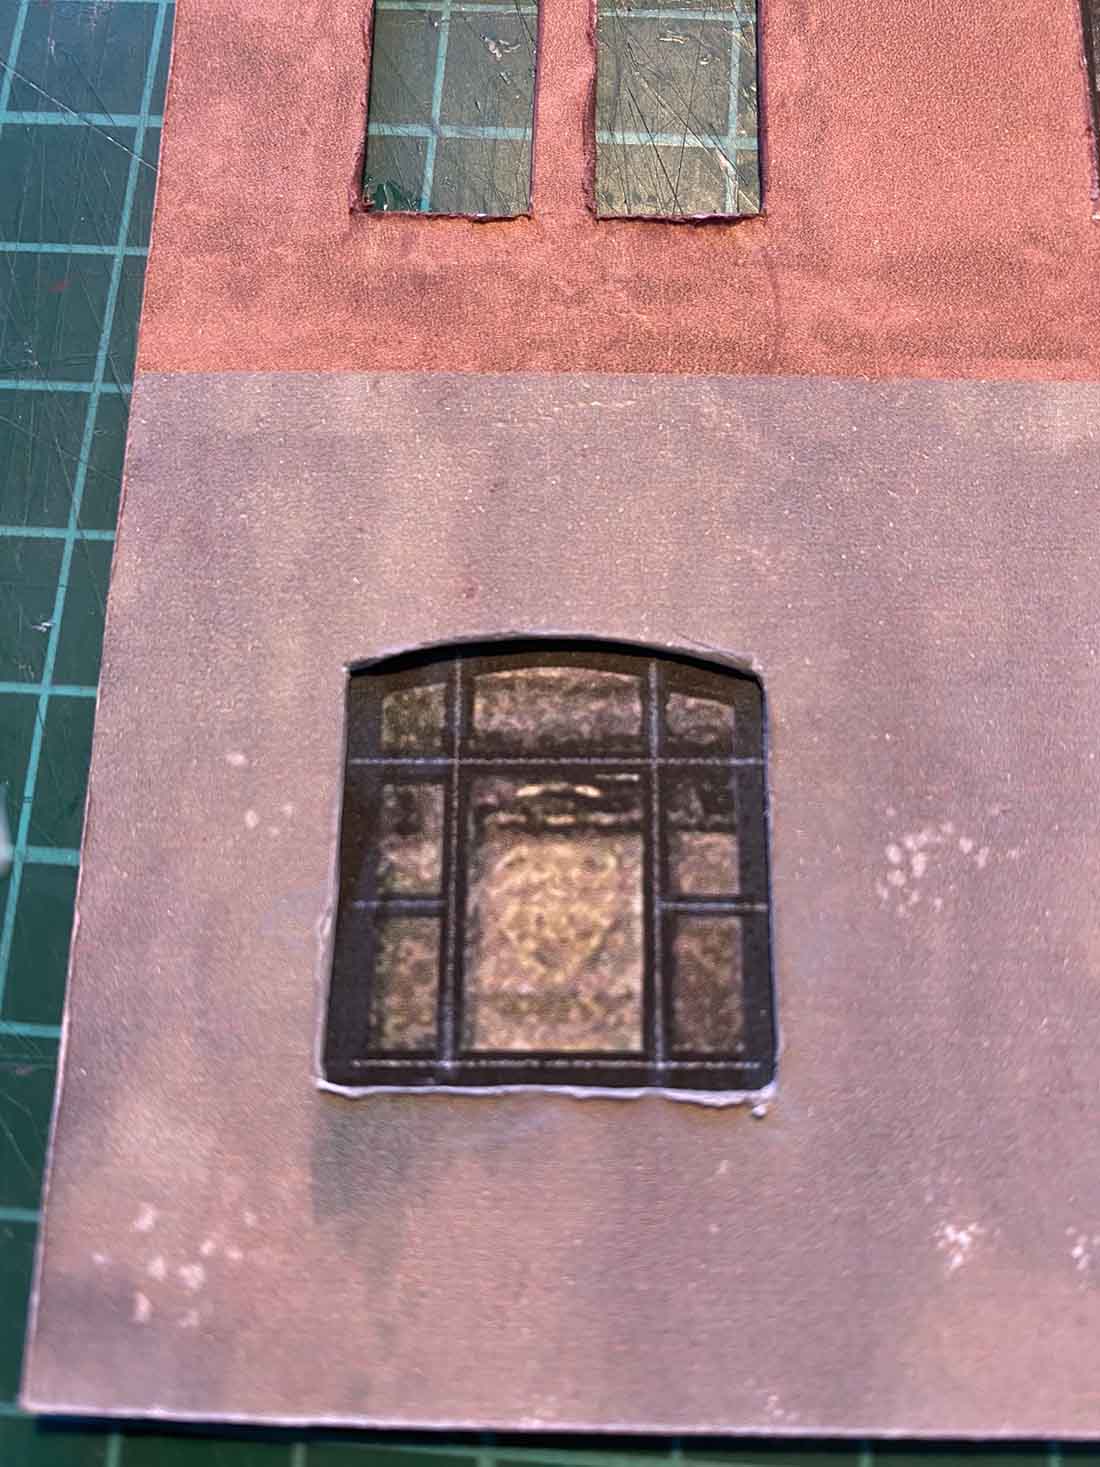
You will get these with most of your cuts. So how do you get rid of them? I just run my nail along them:
I have found, that the difference between a good printable building build, and a bad one, is just down to 3 simple points:
1. Wibbly wobbly buildings look appalling. Just add card to reinforce them (as I have done below).
2. Any white card showing through spoils the illusion. Paint over it.
3. Card cuts that leave a ‘furry’ line need to be flattened down.
I really do believe these 3 points will allow anyone to make any building look great on a layout.
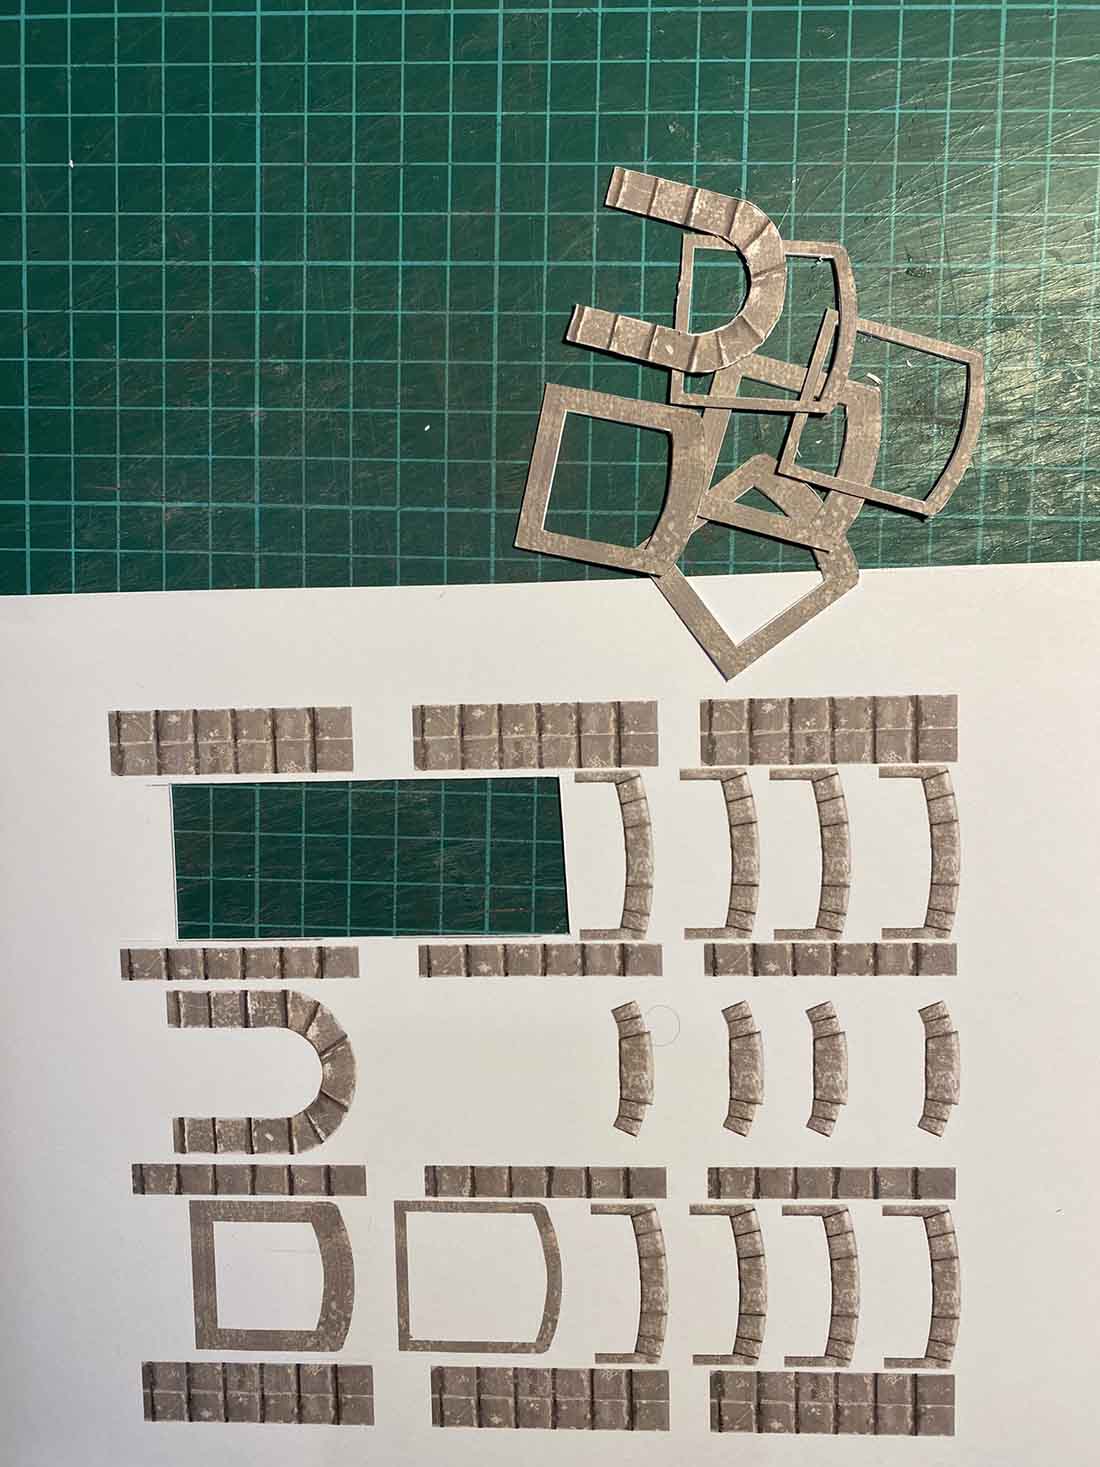
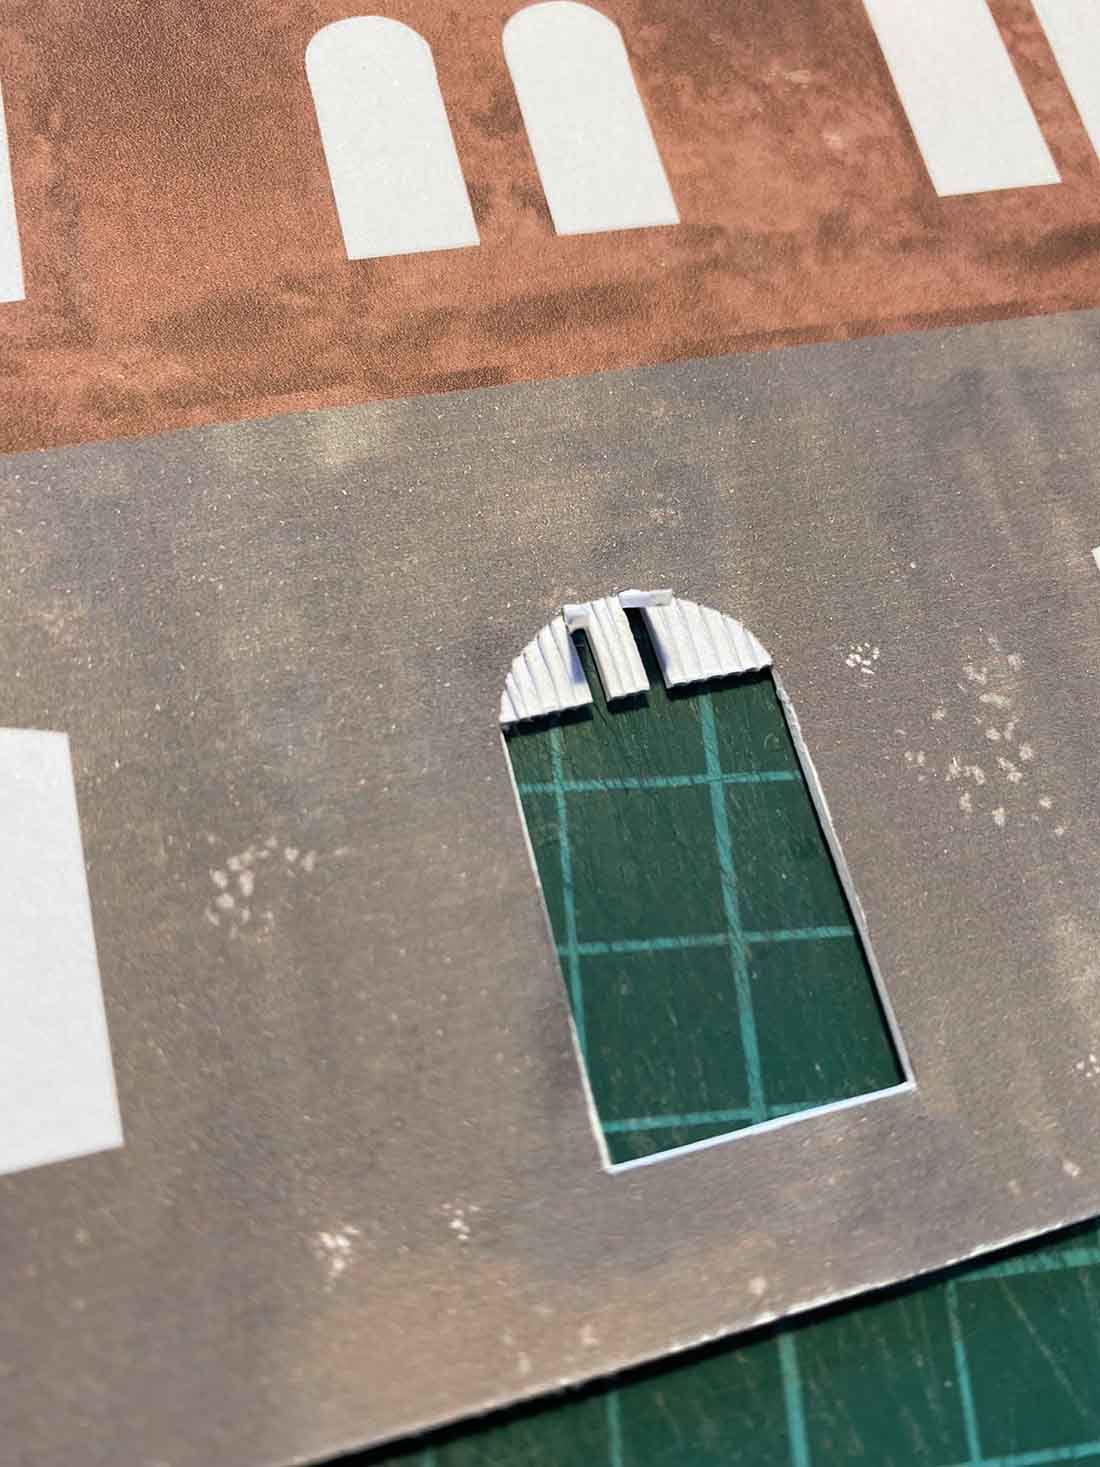
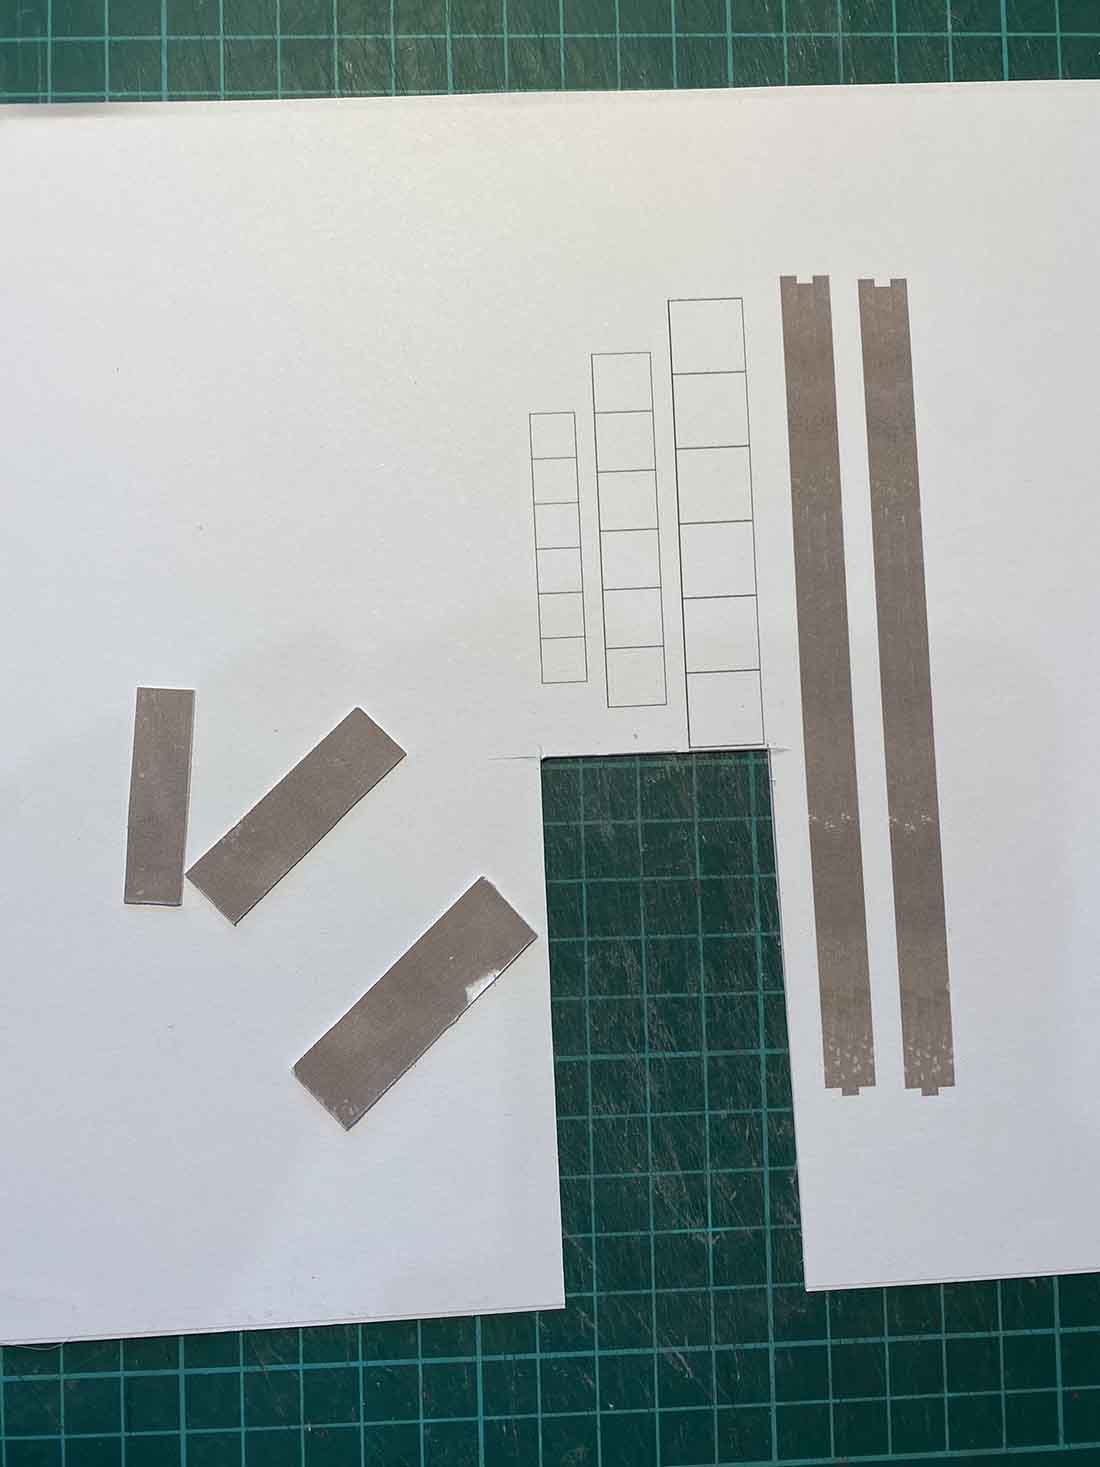
Now for the fun part. Print (and stick to card) the window sills and arches:
Start glueing them into place:
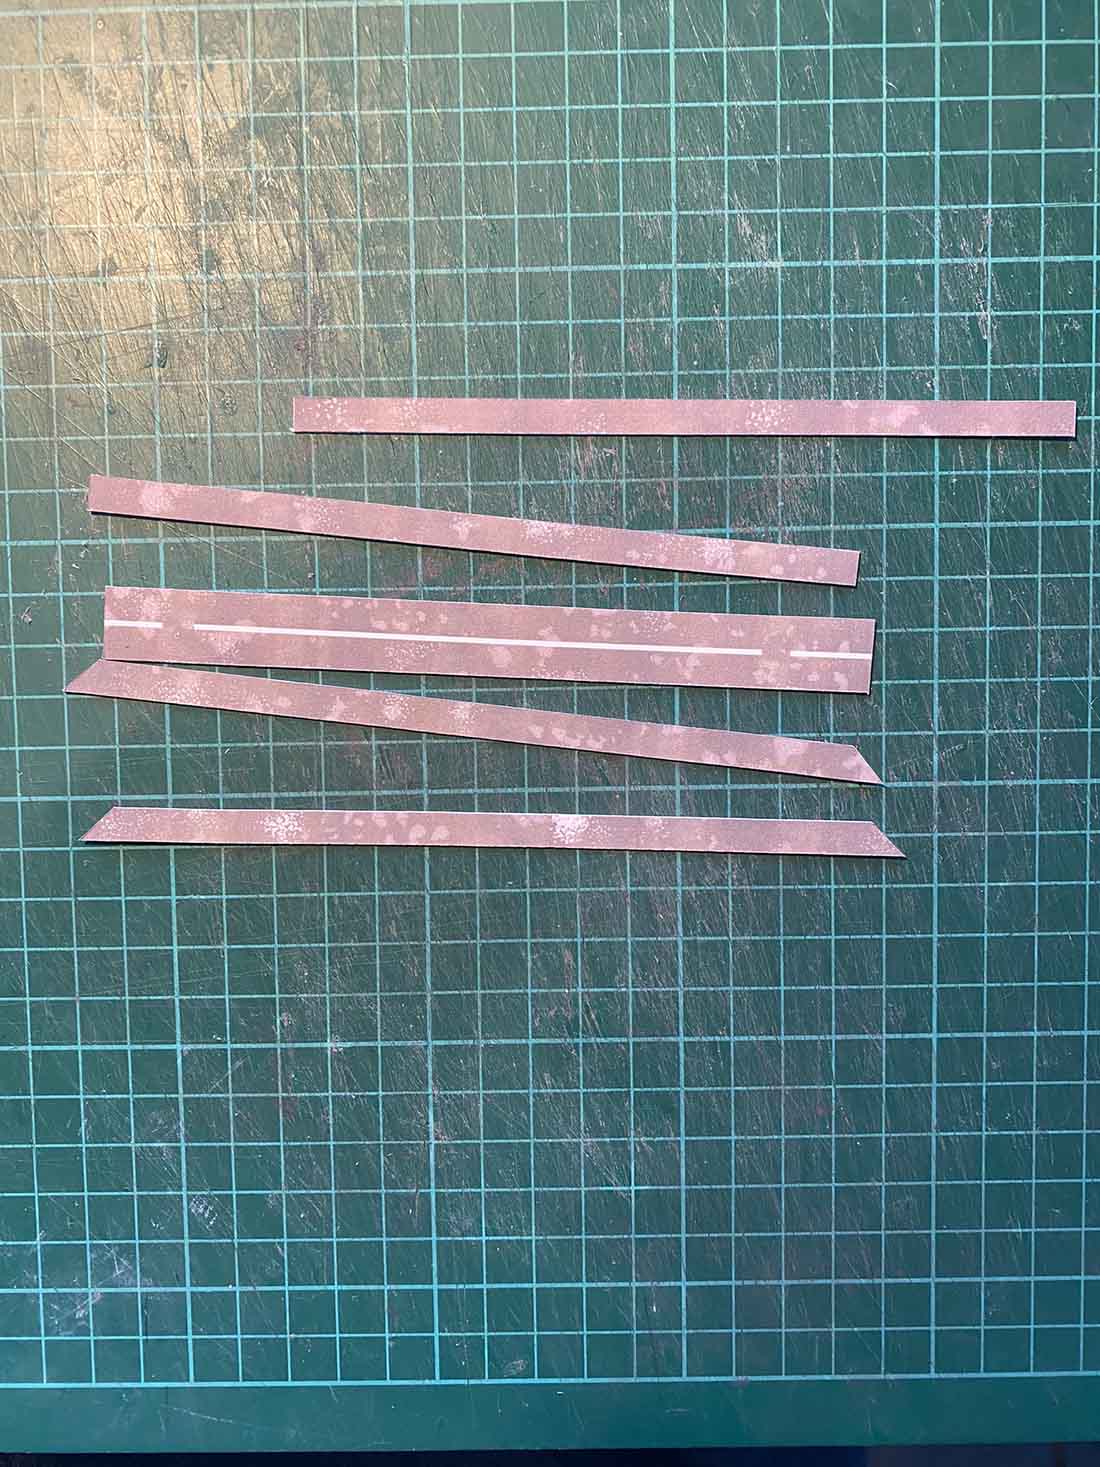
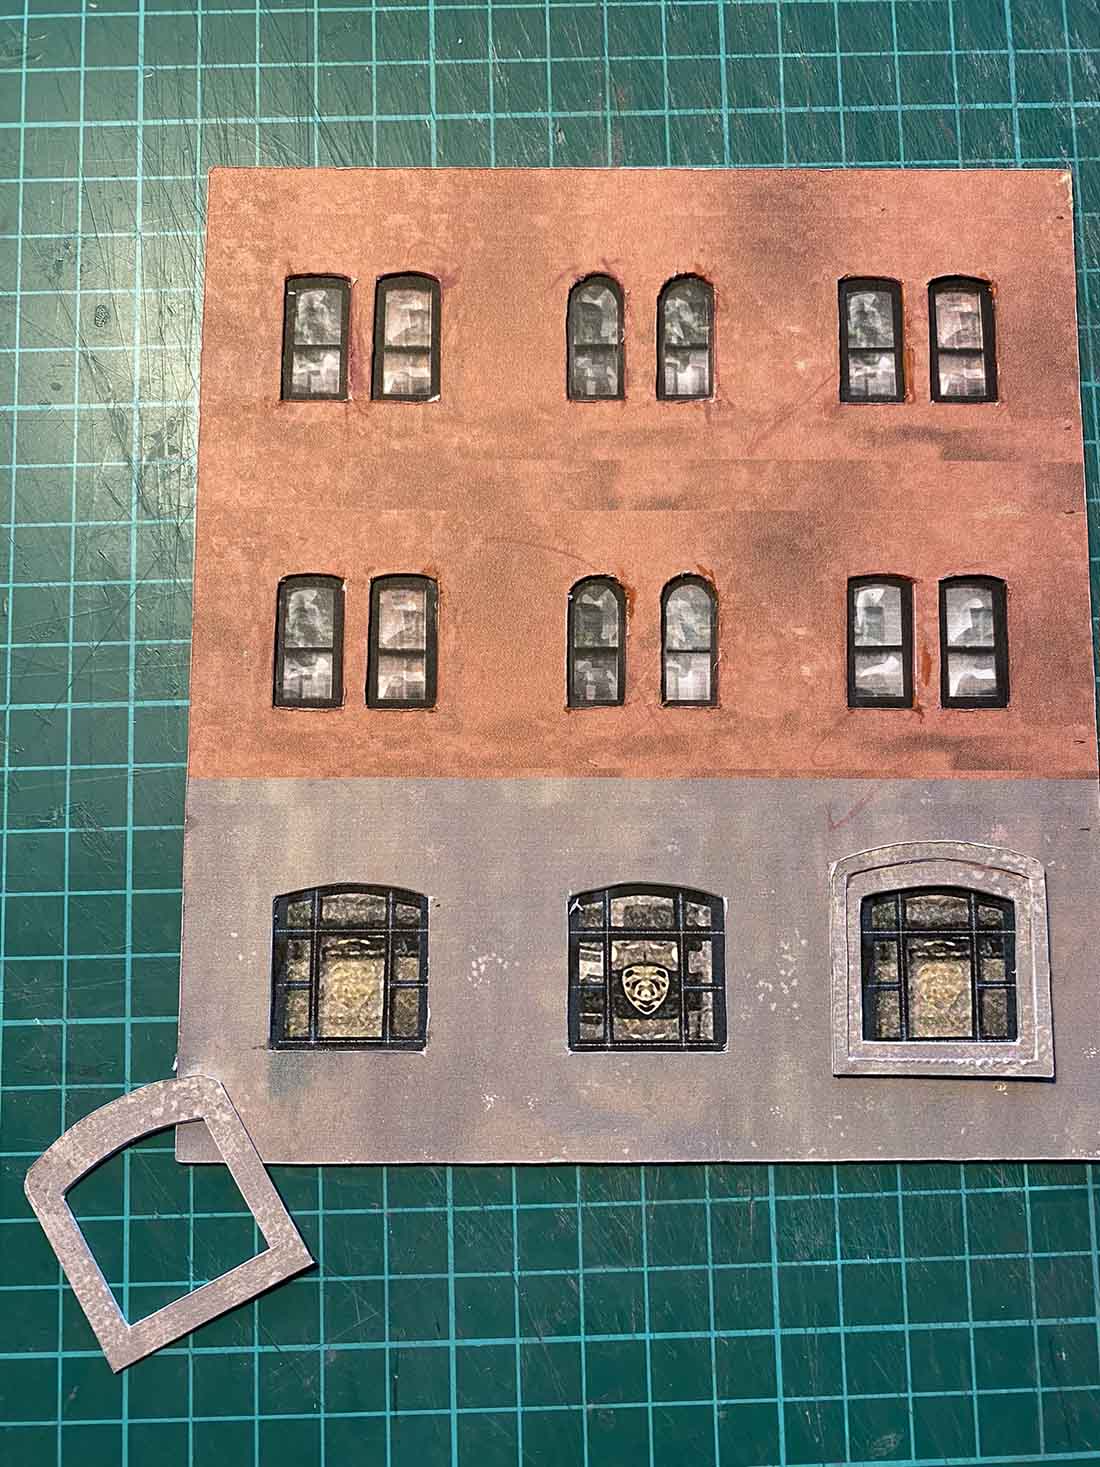
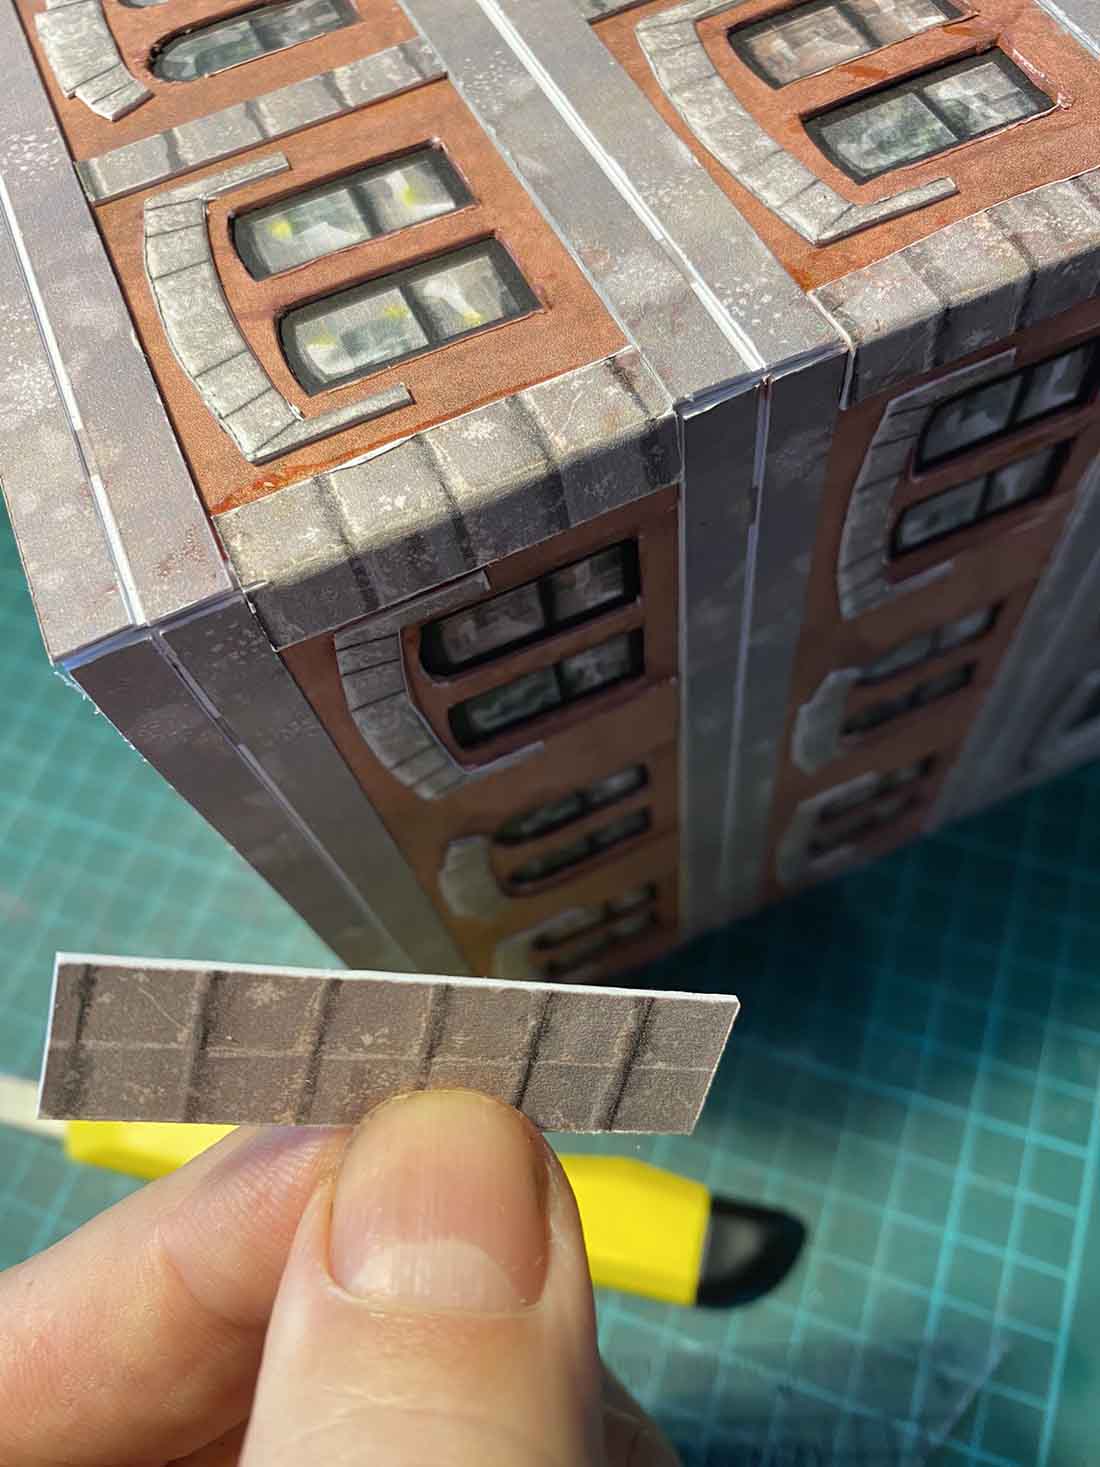
Next, the ledges. Perhaps this looks a little tricky, but it’s very simple indeed.
Print out the ledges sheet (yes, and stick to card…)

To save the amount of cuts you have to make, they ledge parts are all pushed together.
Just start separating them – but watch out, they two strips with two small connecting pieces, is actually one strip. Watch out for this, it’s easy to get carried away:

You can see the piece here that looks like two pieces, but is in fact just one:
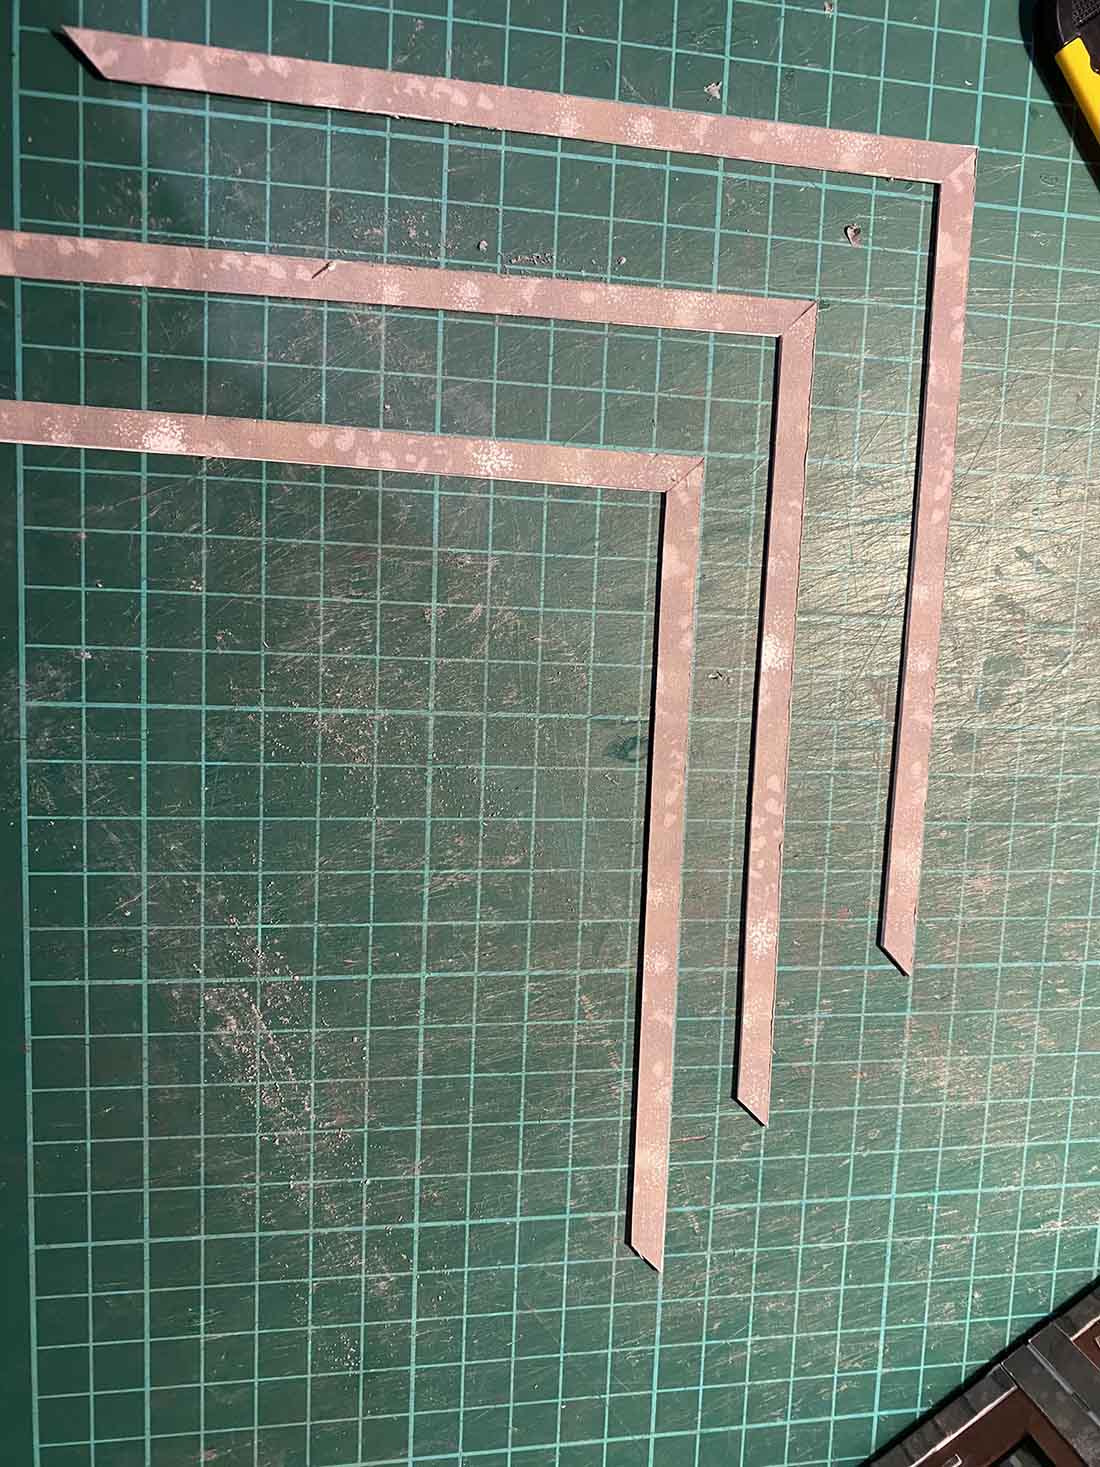
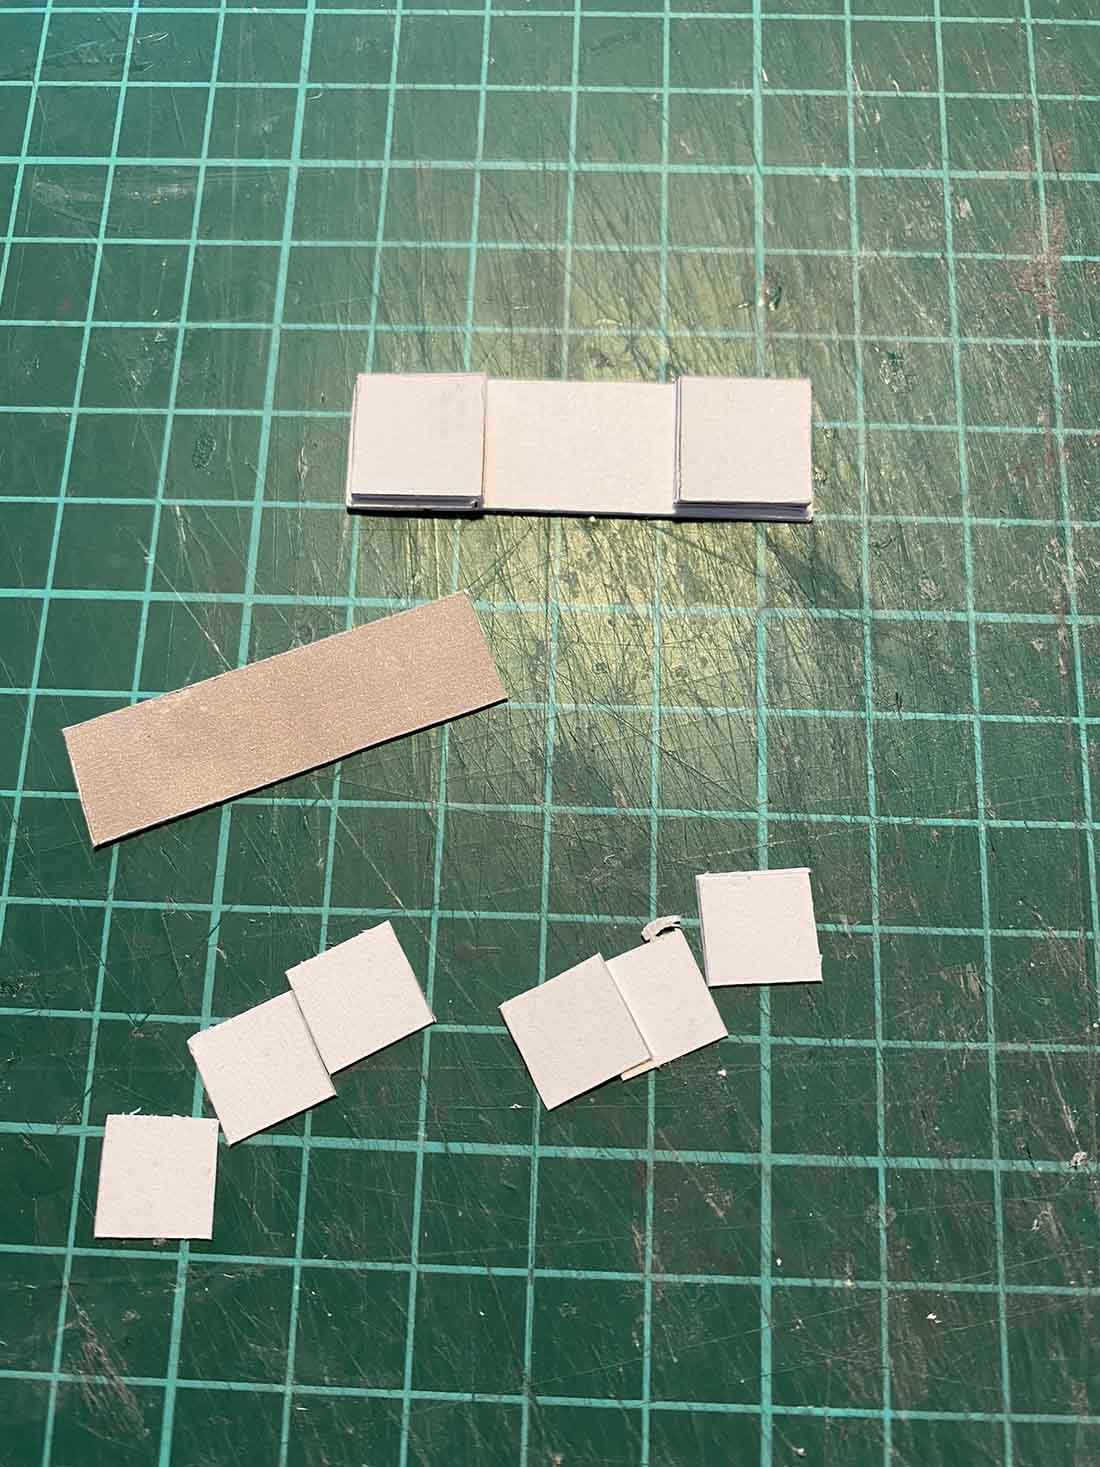
Okay so now you’ve cut out all the pieces:
Using the pic above:
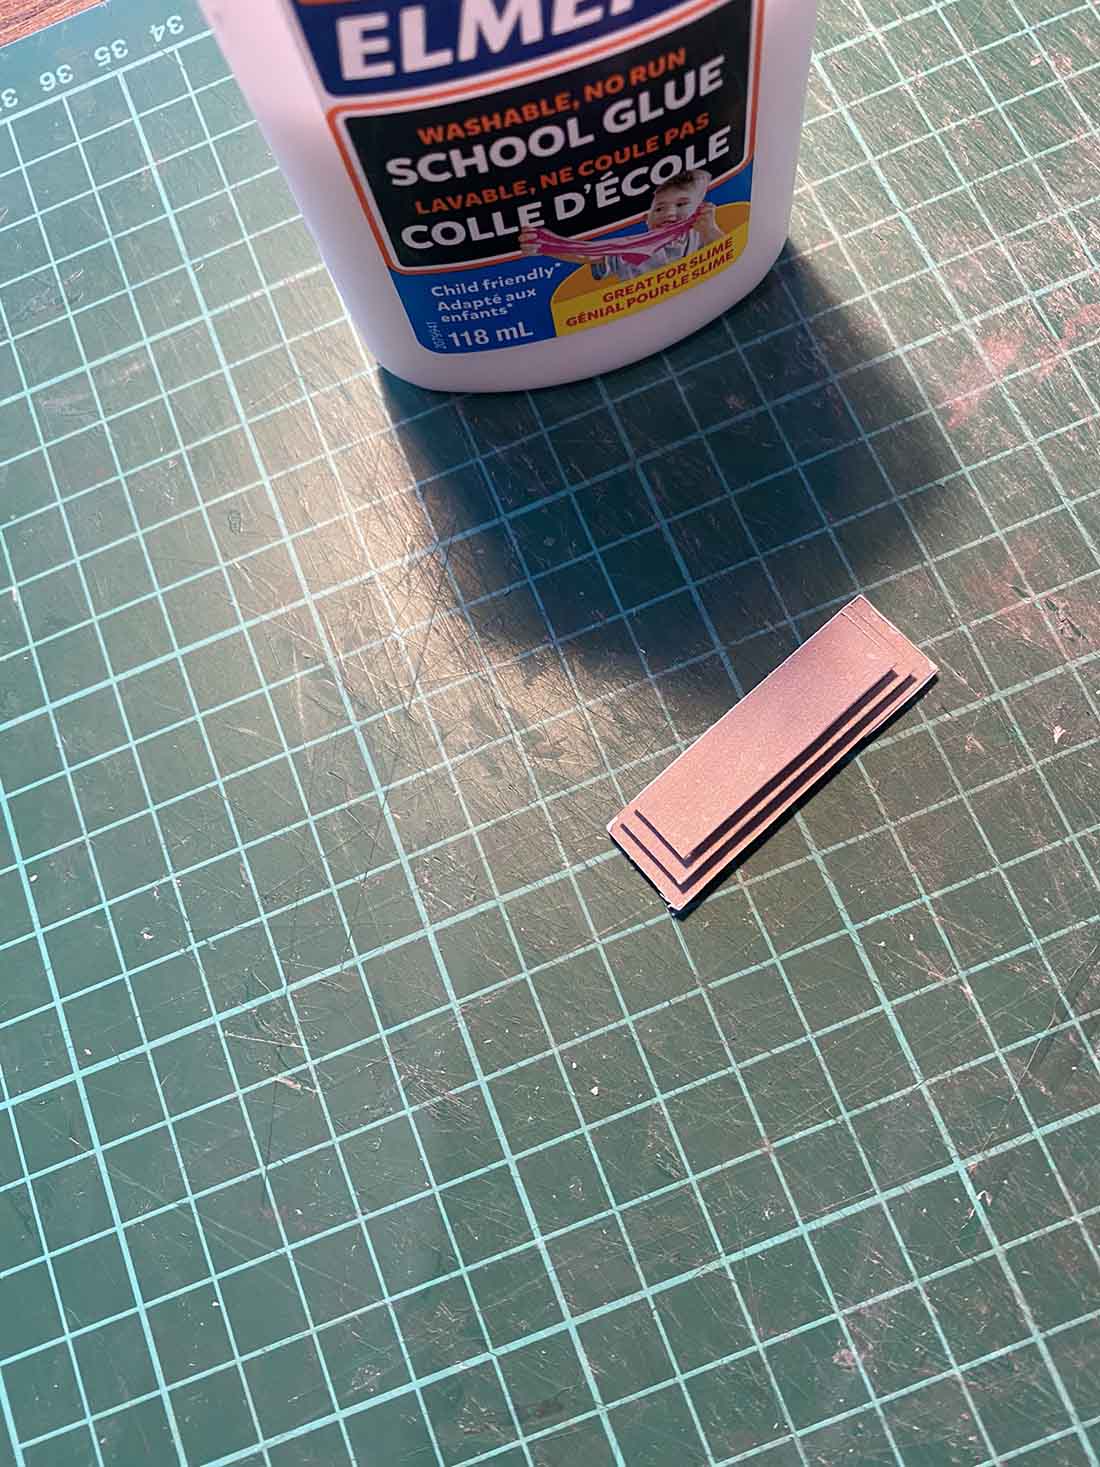
The two pieces at the top of the pic, are glued on the third piece, so the white gutter can still be seen.
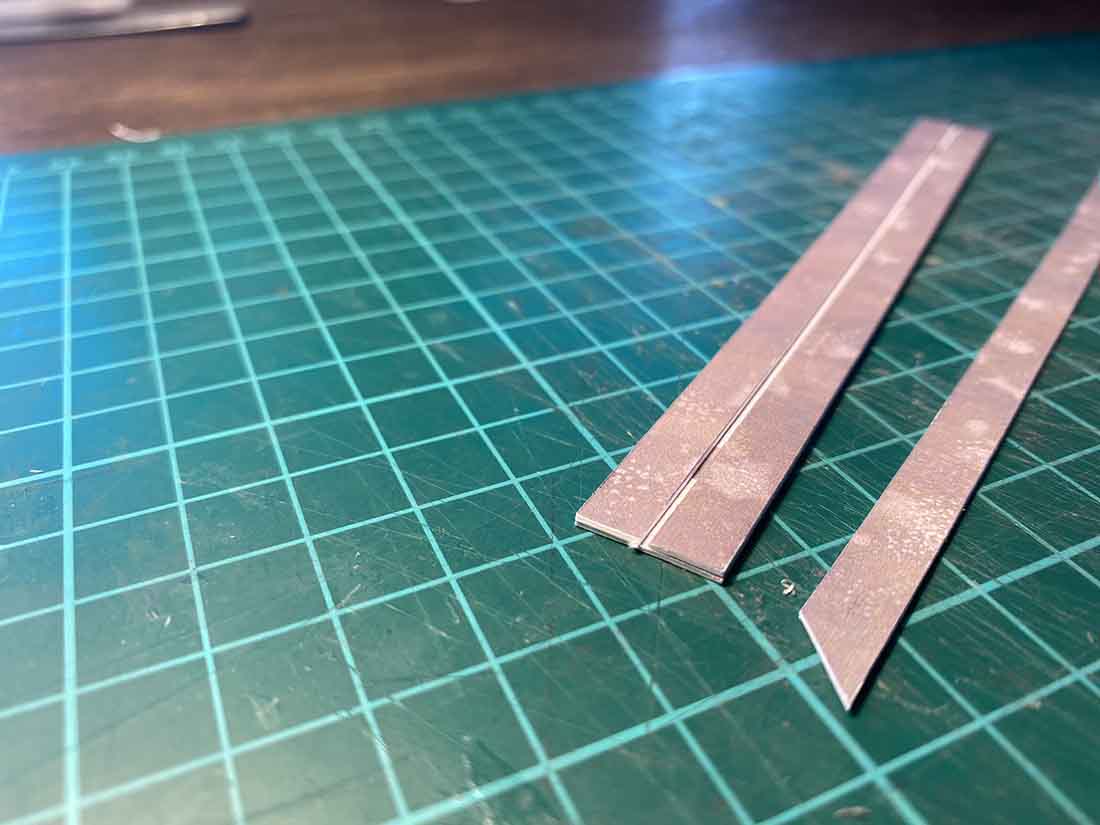
The two pices left over, are glued together. They slot in the ‘white gutter’ and become the horizontal ledges that stick out from the building – but leave that part until later.
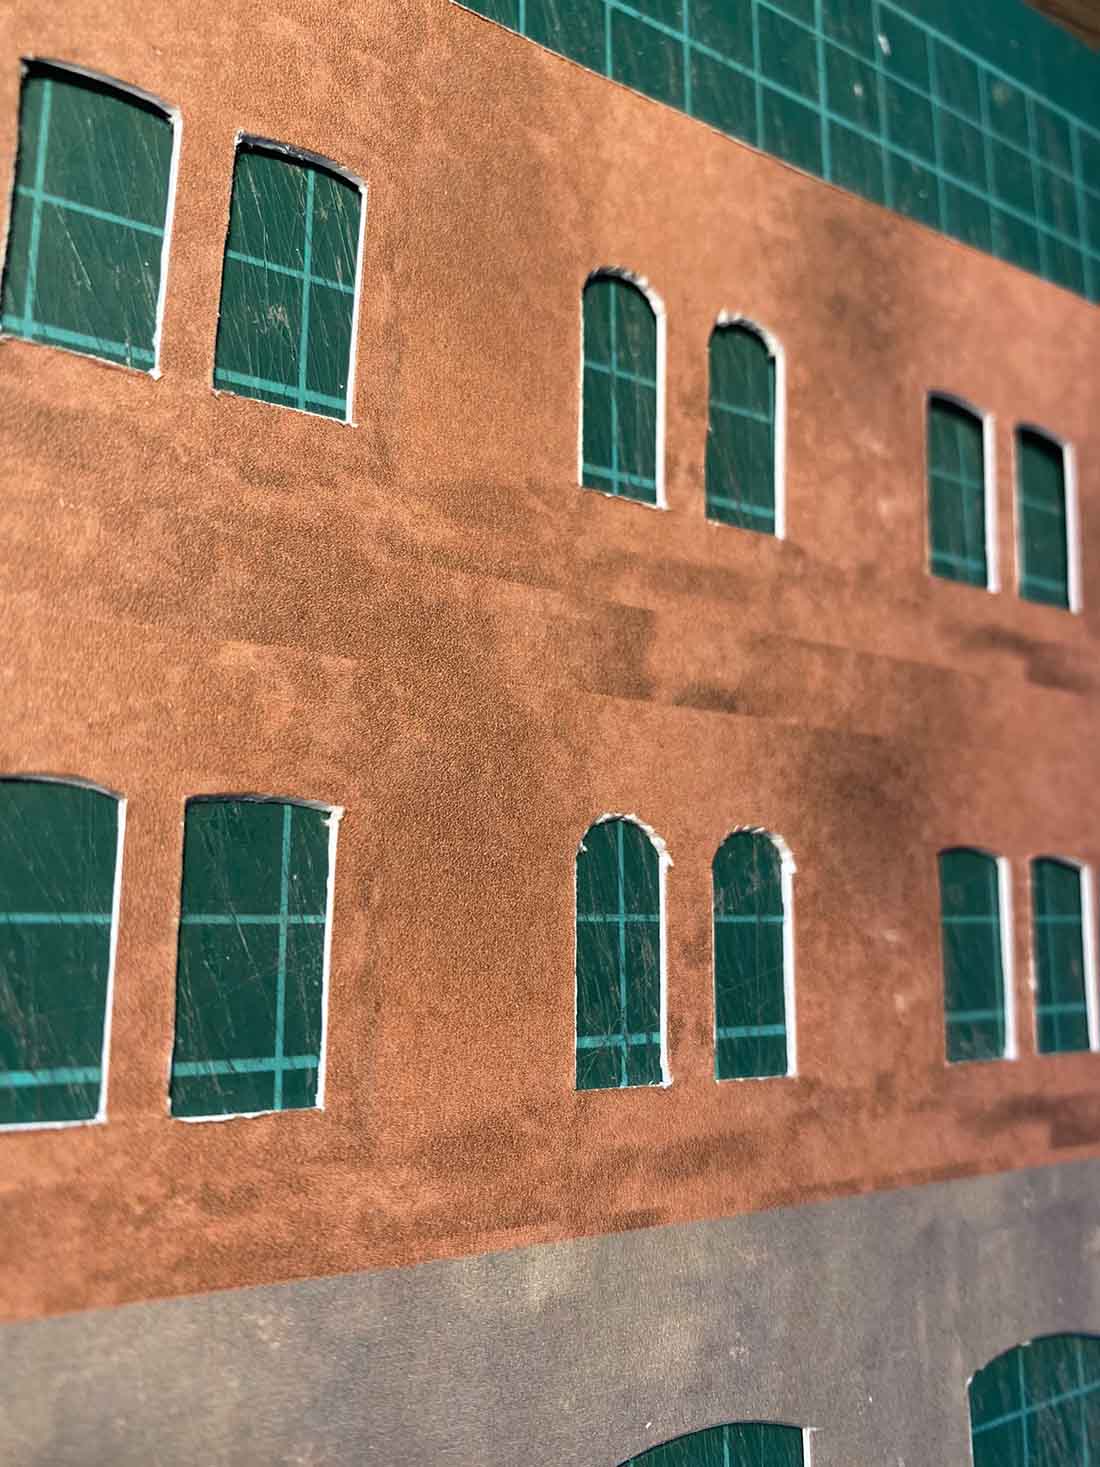
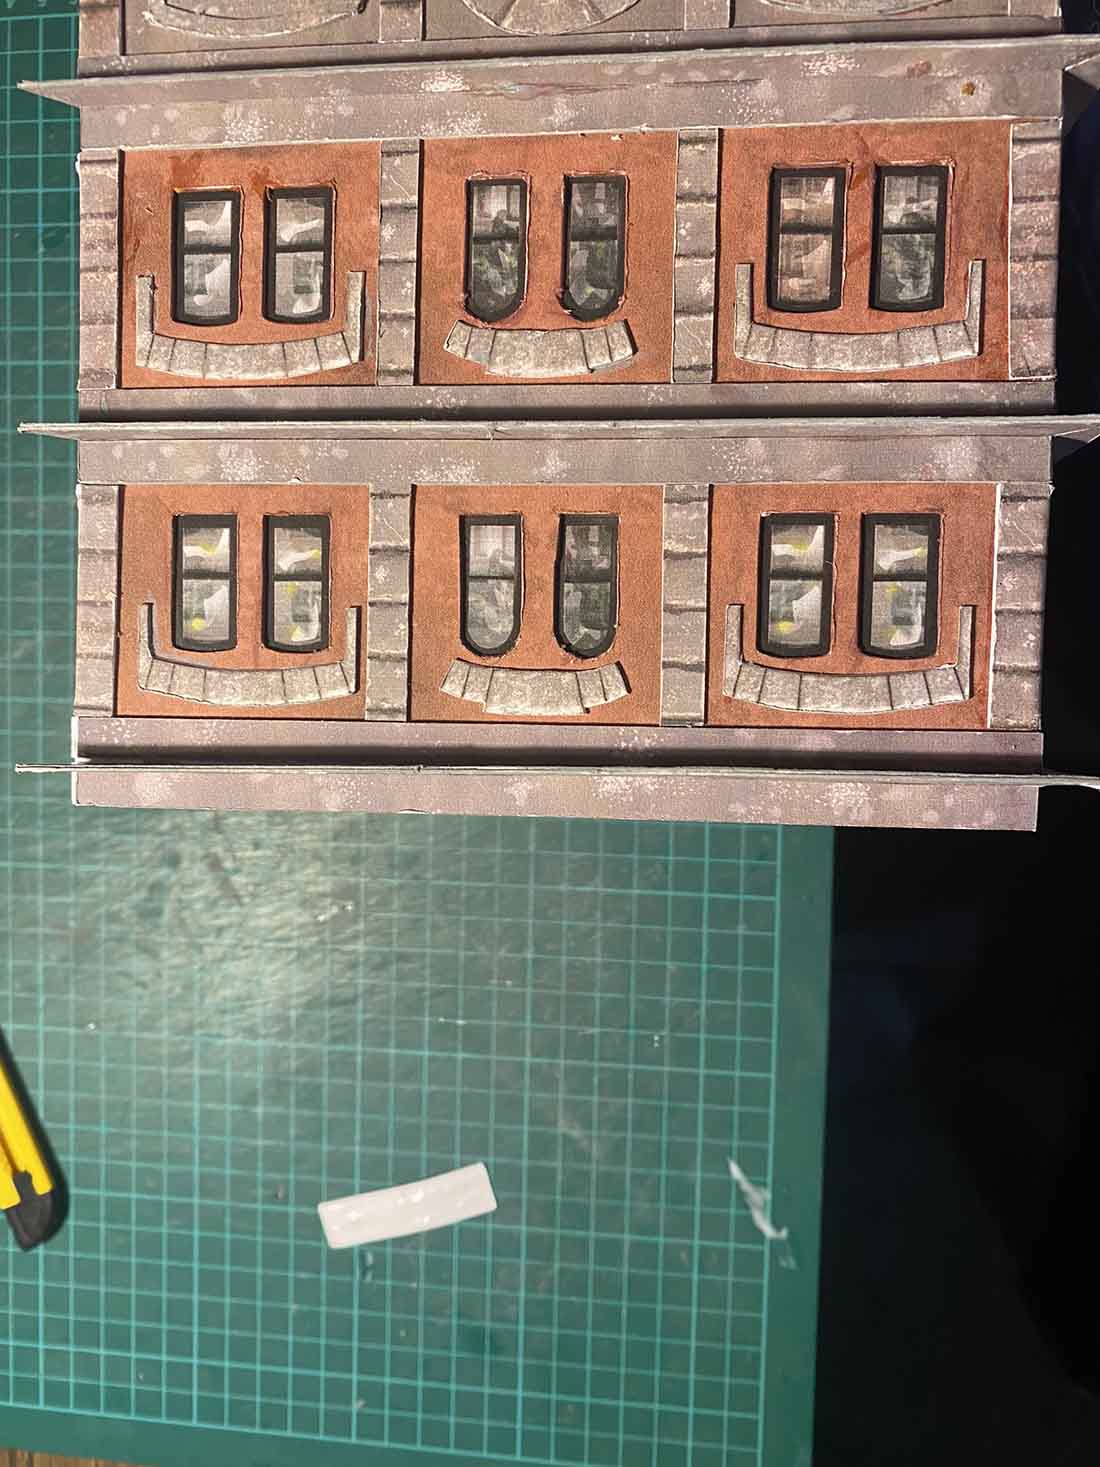
Carry on sticking down the ledges and pillars.
If you look carefully, you can see very faint lines in the red render to help you line up the ledges:
Add the window sills, pillars and ledges to the side prints:
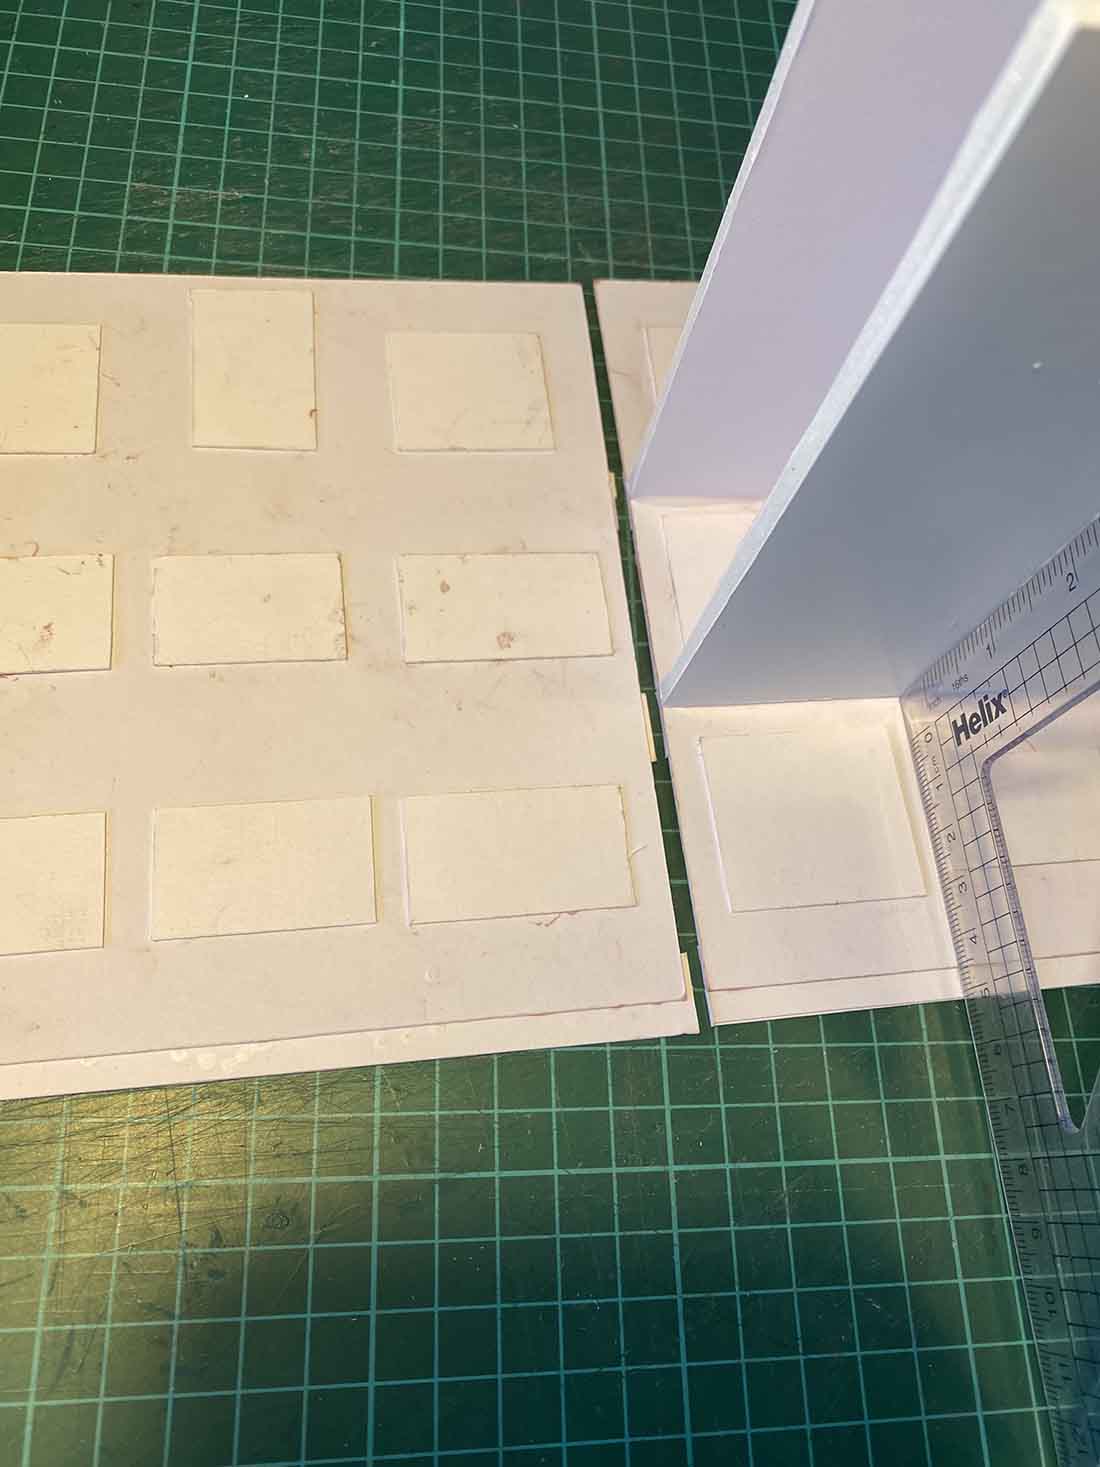
Now, here’s the important part. You’ll see below how the ledges overlap the print:
On the build sides (not the front and the back), cut the ledges so they are flush with the print:
Now, when the 4 sides are stuck together, the ledges will sit flush against eachother.
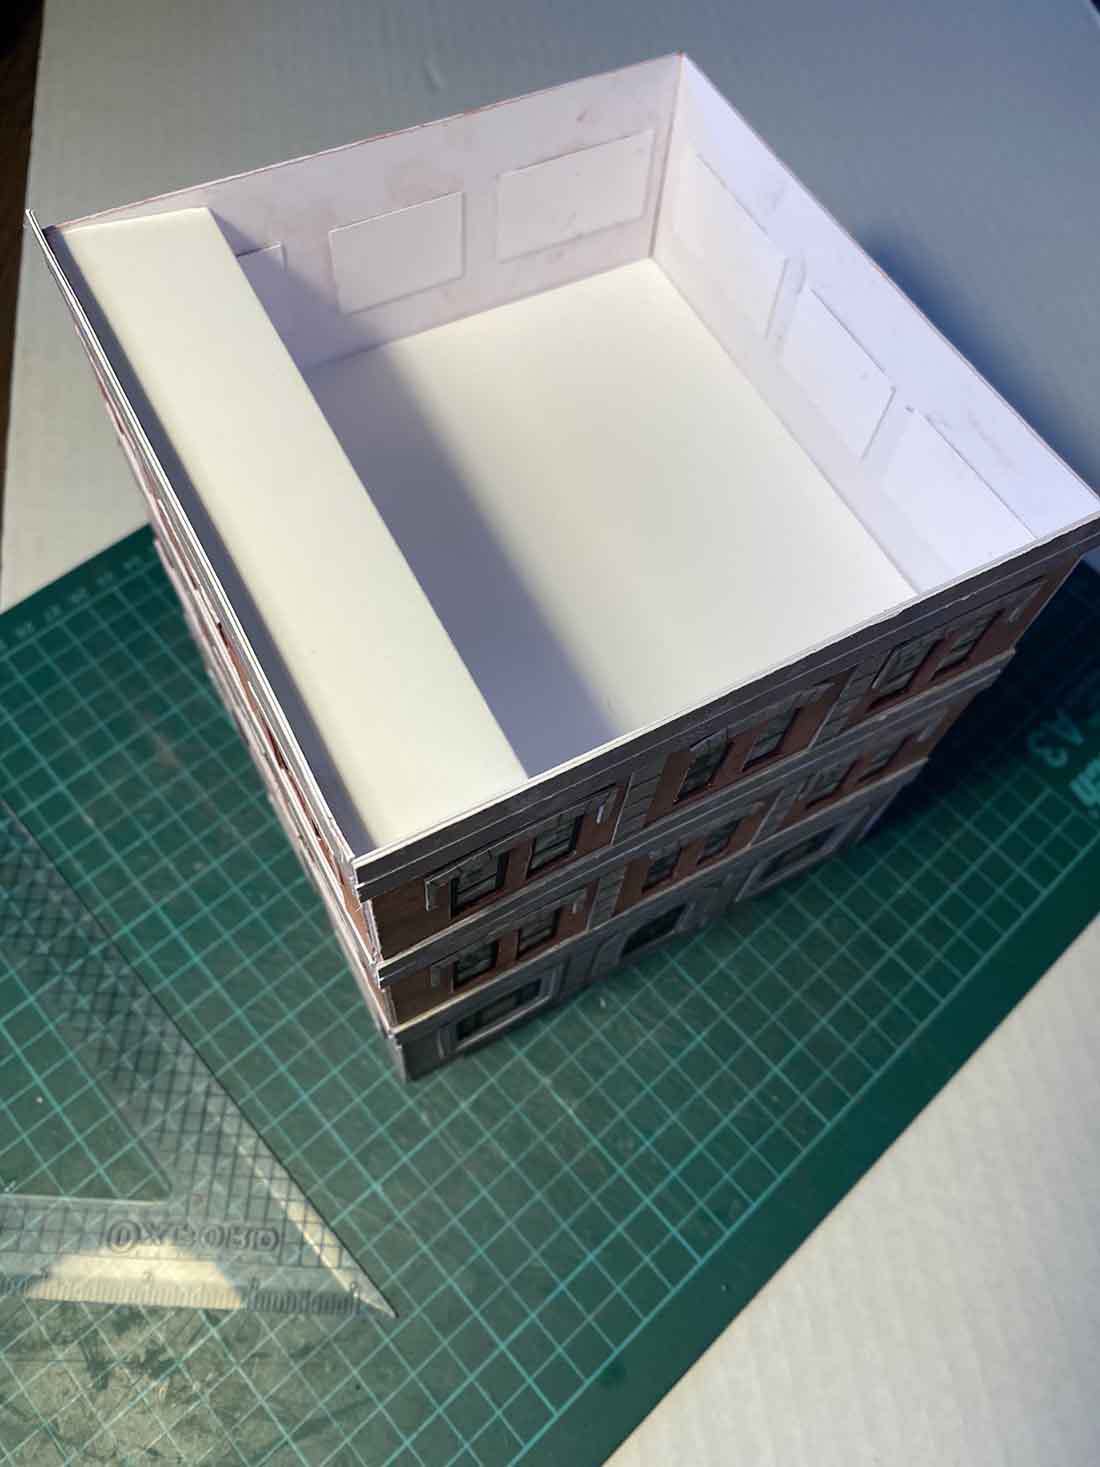
Next, we just give the building some rigidity and strength – you need to get rid of any wibbly wobblyness. I had some foam card left over from last time, so I just used that:
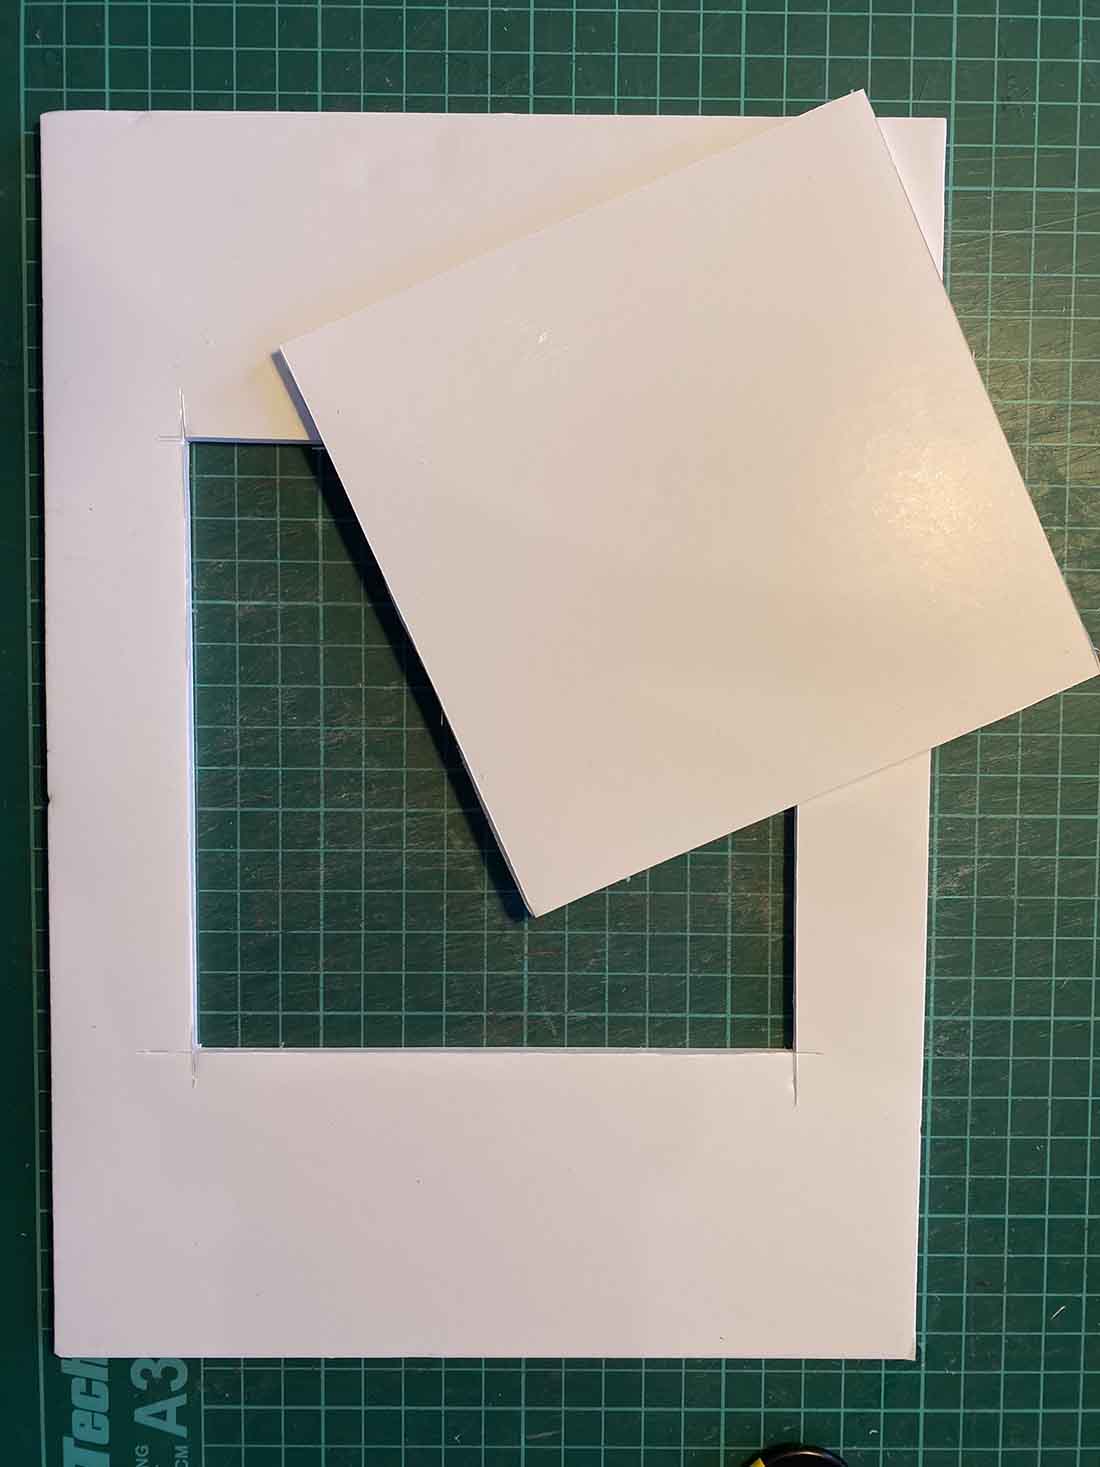
Turn the prints over, make sure you glue the foam card so it won’t be up against the windows:
I did two layers:
And a bit for the roof to sit on too:
Now the really fun part, sticking the sides together:
With the printable buildings, you’ll always get an unsightly join at the corner, that’s why most have a design to cover them up – here’s it the pillars:
Then glue the horizontal ledges together so the form a right angle:
Then stick them on the building:
Next there is the roof to do.
You’ll need to add some of the stone render to the inside of the uppermost ledge:
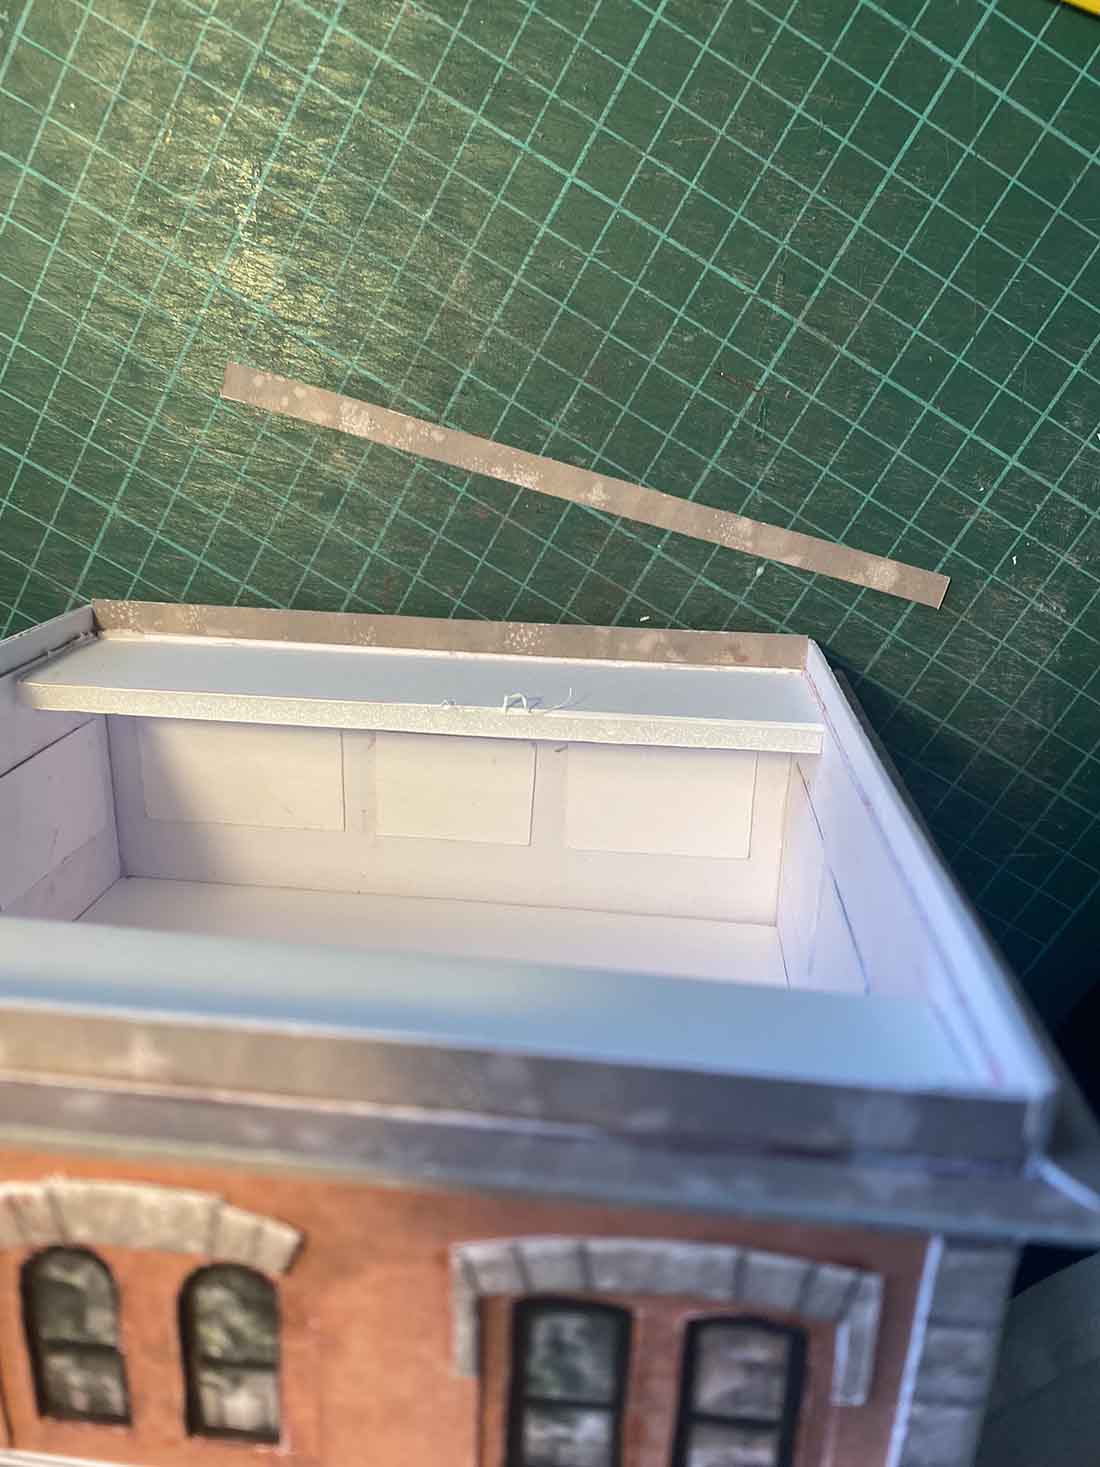
Almost done….
Lastly there is the steps:
Once you’ve done this it’s easy to say the building is finished. But it’s not.
I like to leave them, return to it a day or so later and there will be bits out of that jump out at you.
Usually these are bits of white card, or something bending that should be ruler straight, that kind of thing.
I’m forever touching the buildings up too. If I see a gap where there shouldn’t be, I like to fill it with glue, then add pastel. Let it dry and add more pastel. This works surprisingly well.
M”
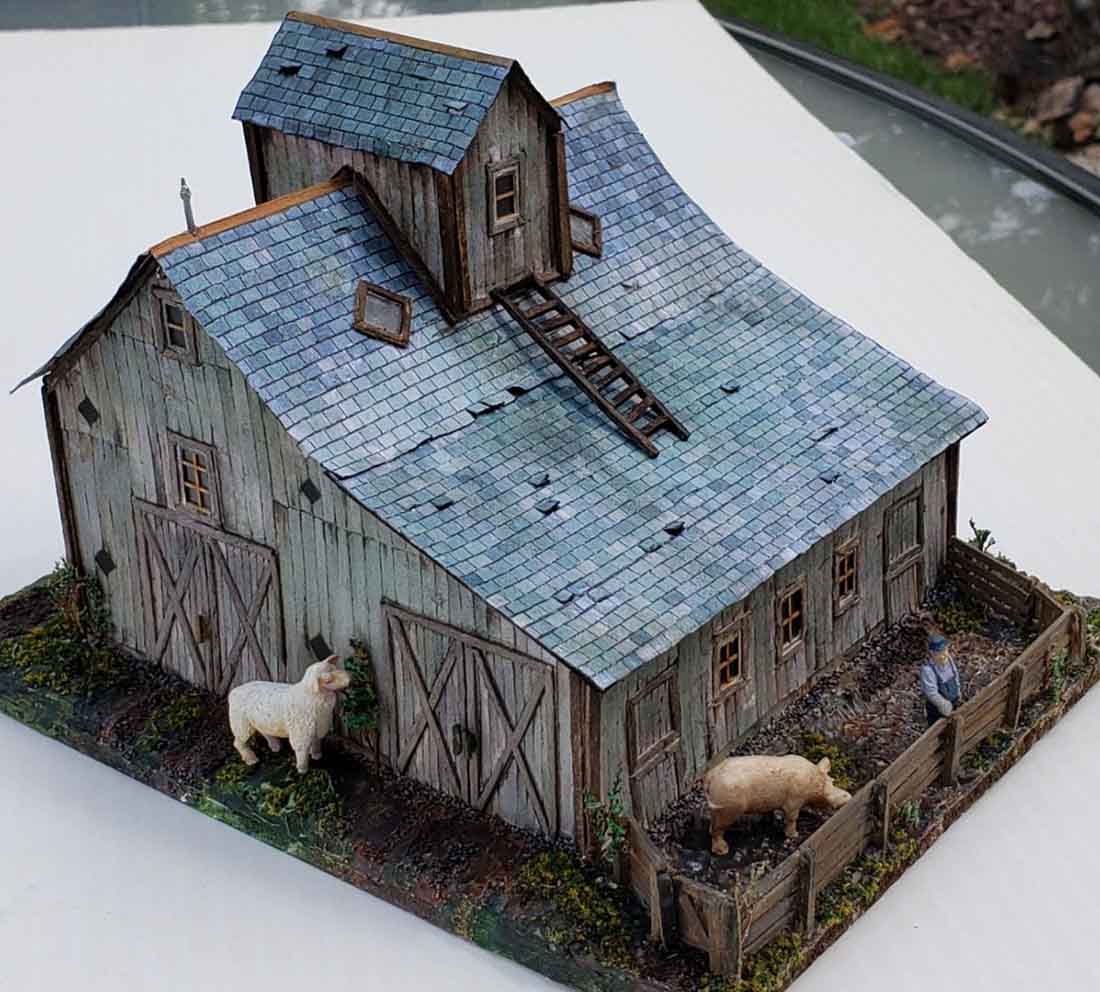
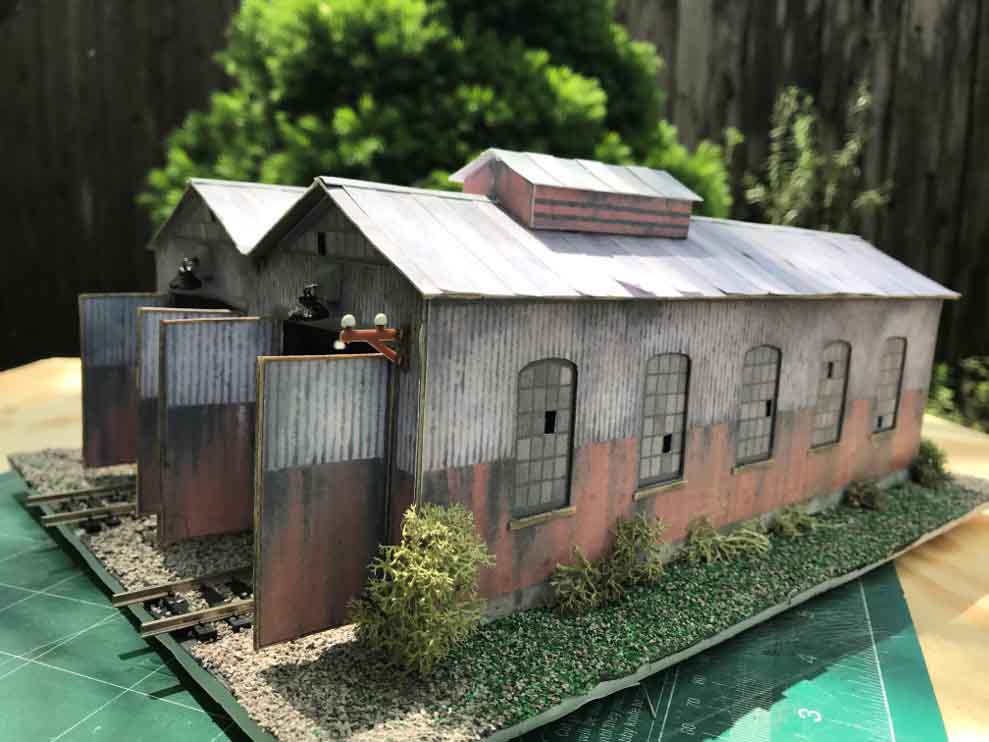
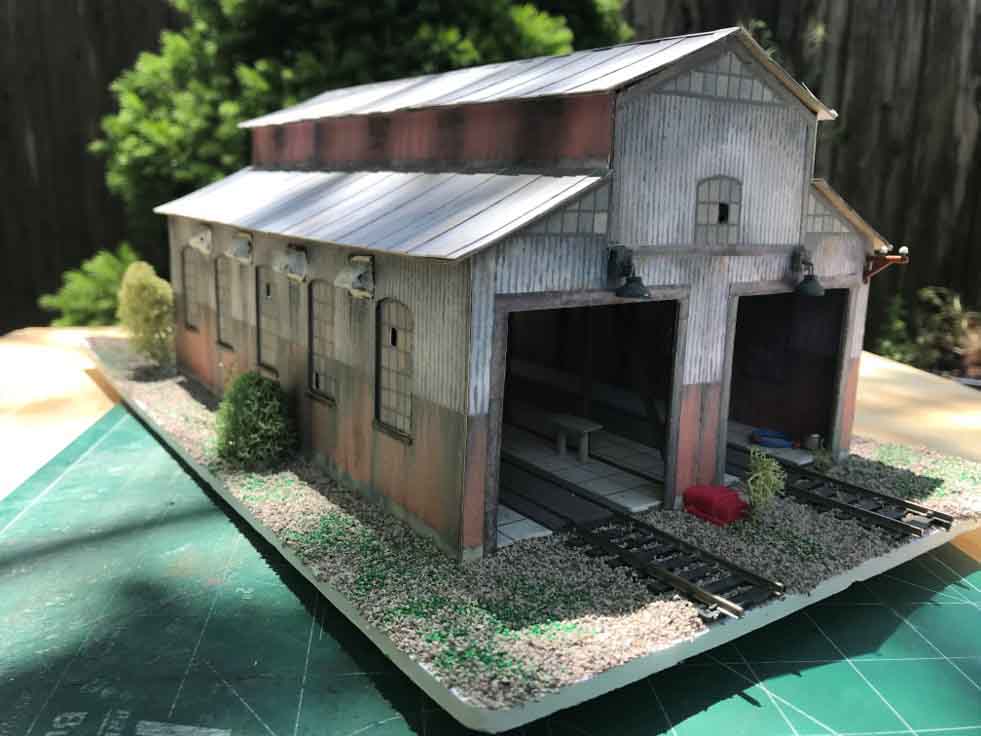
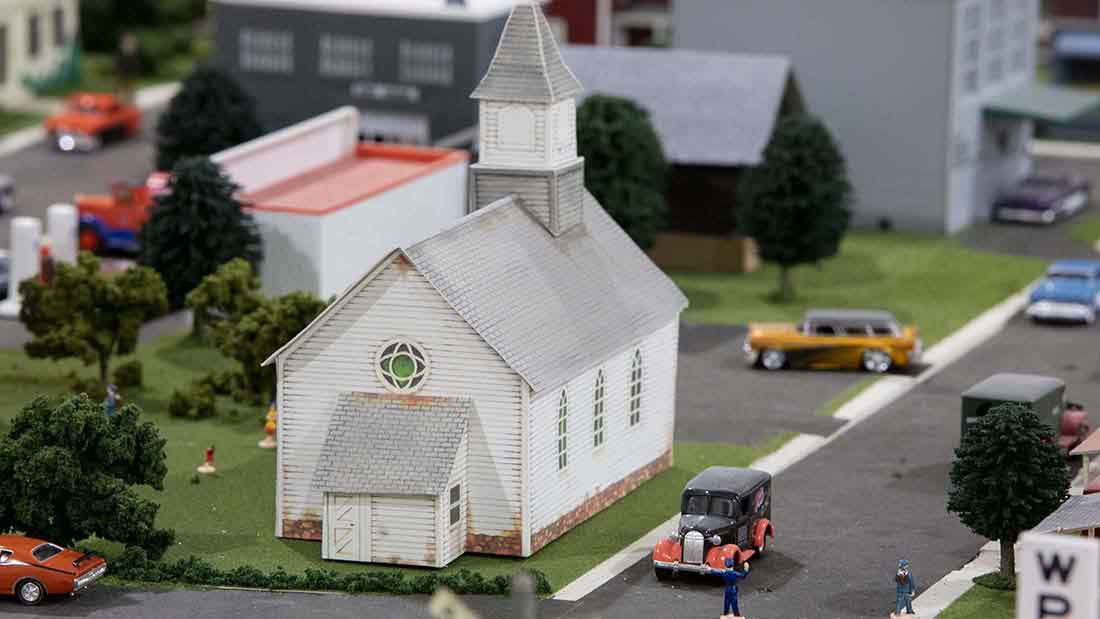
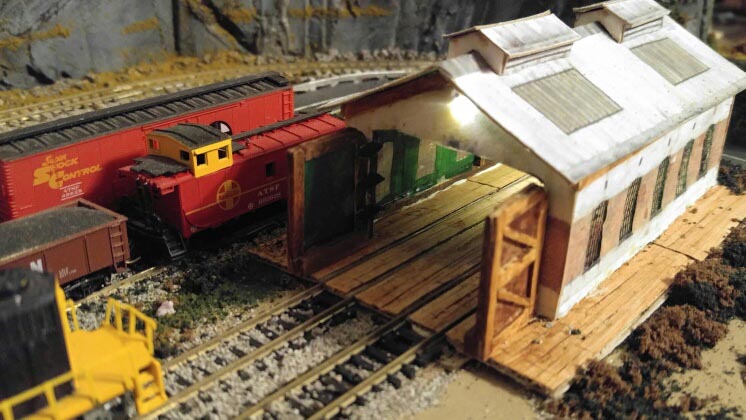
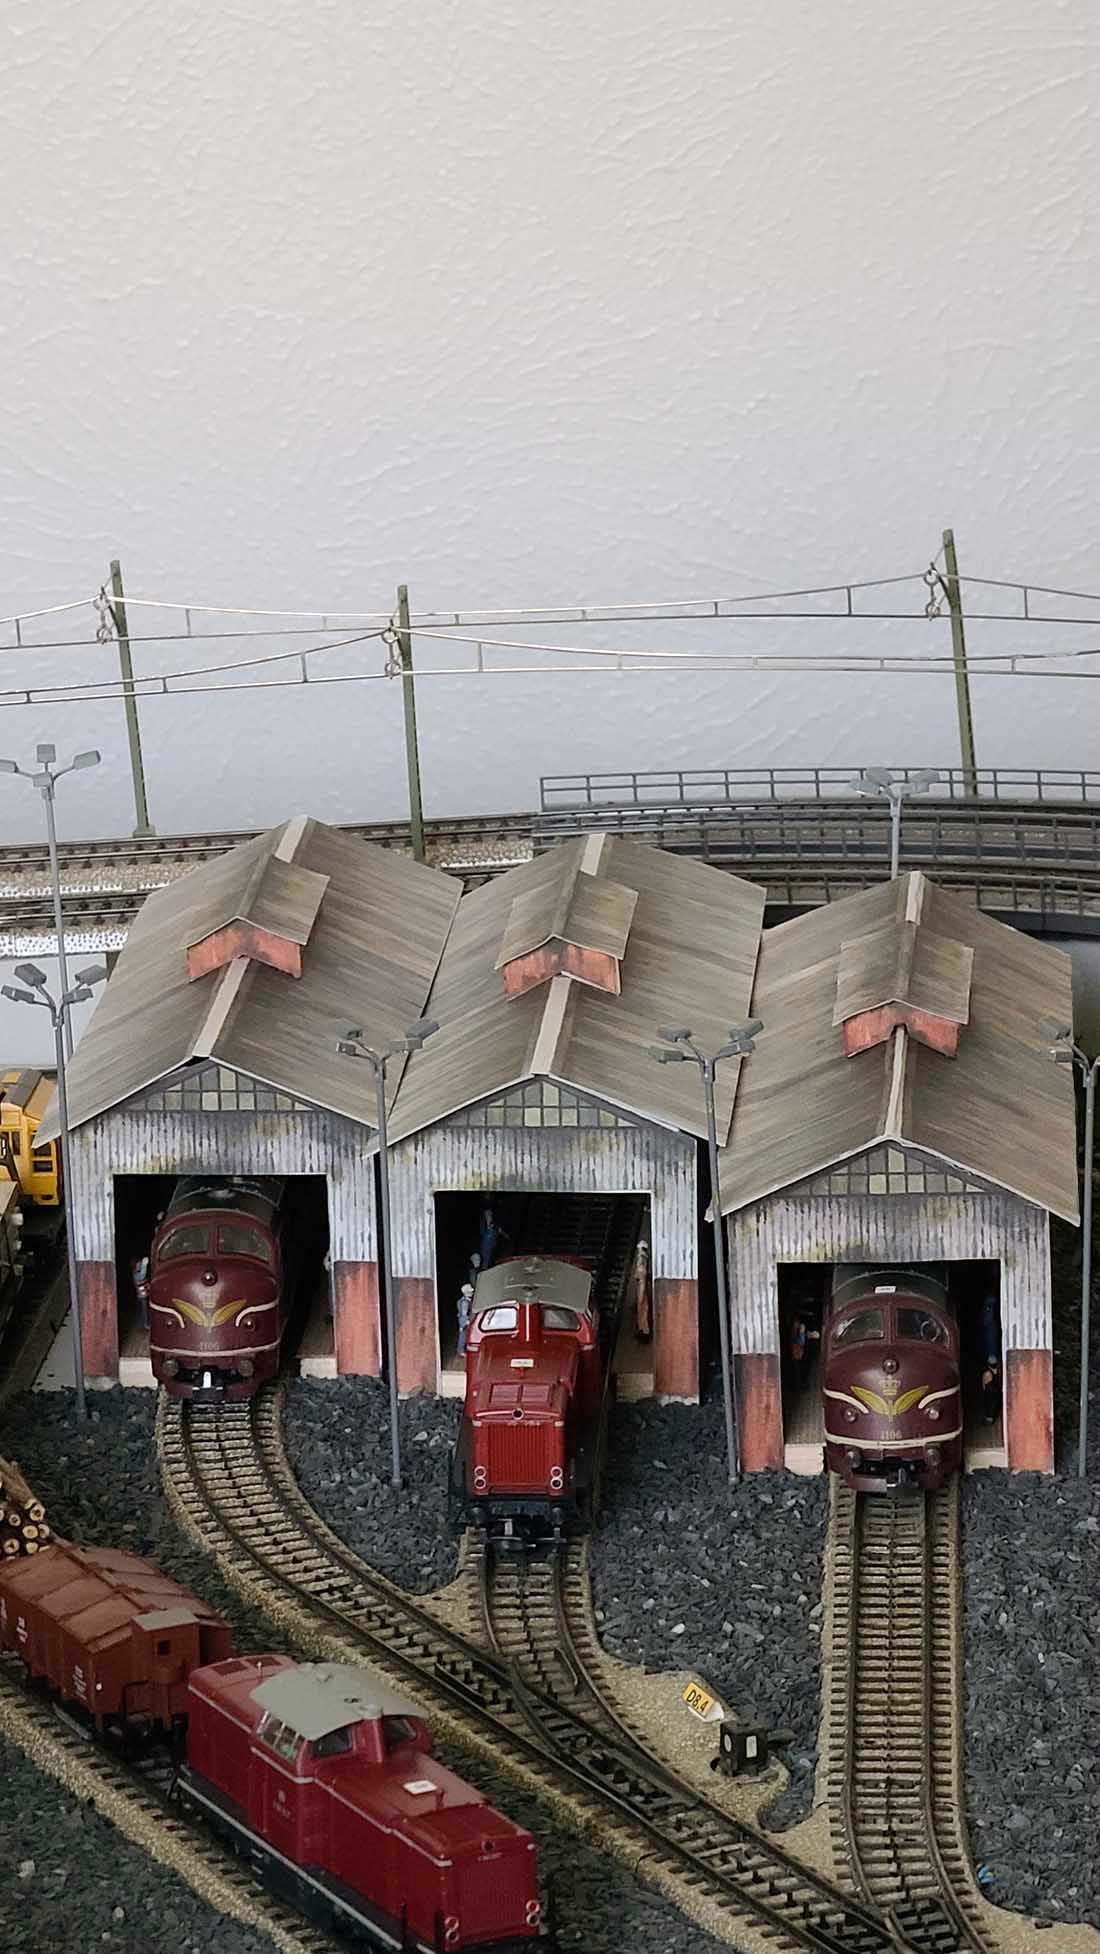
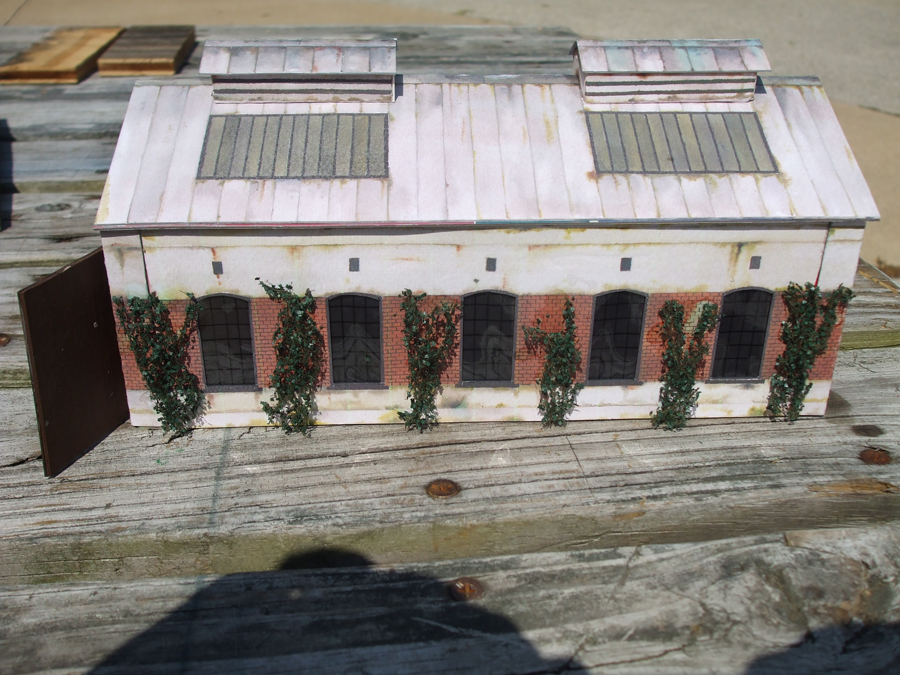
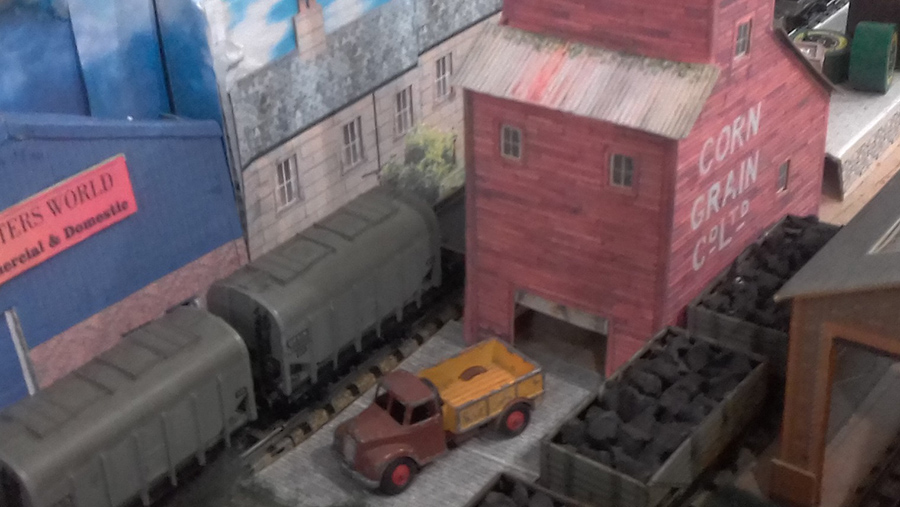
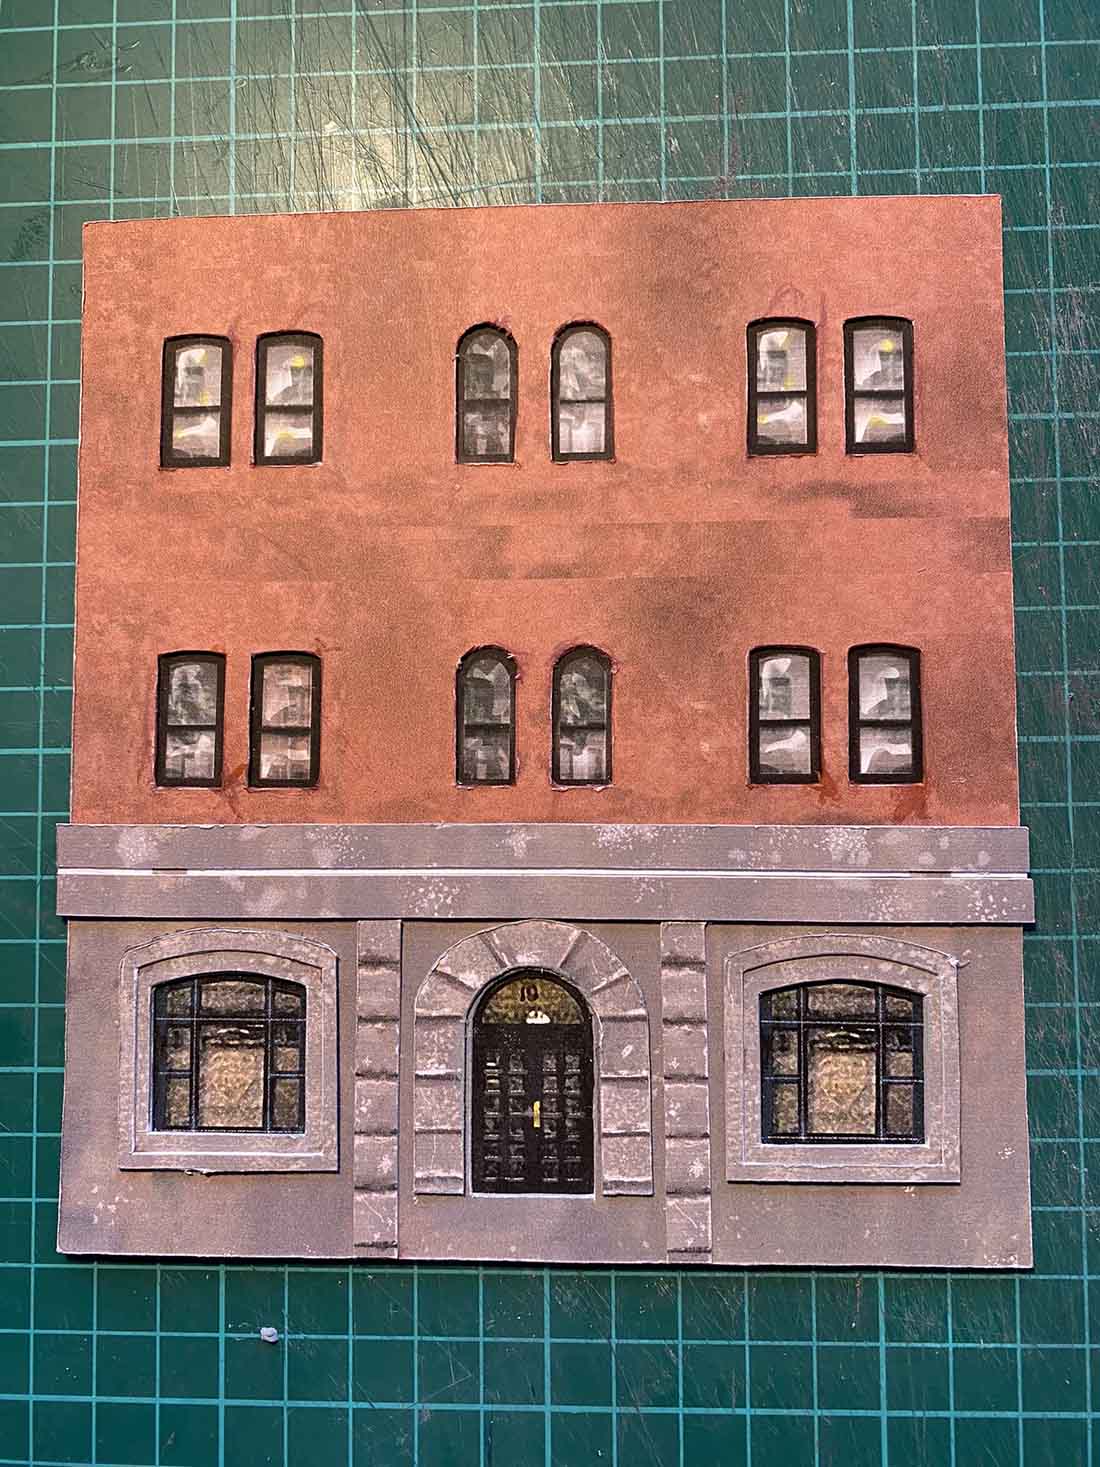
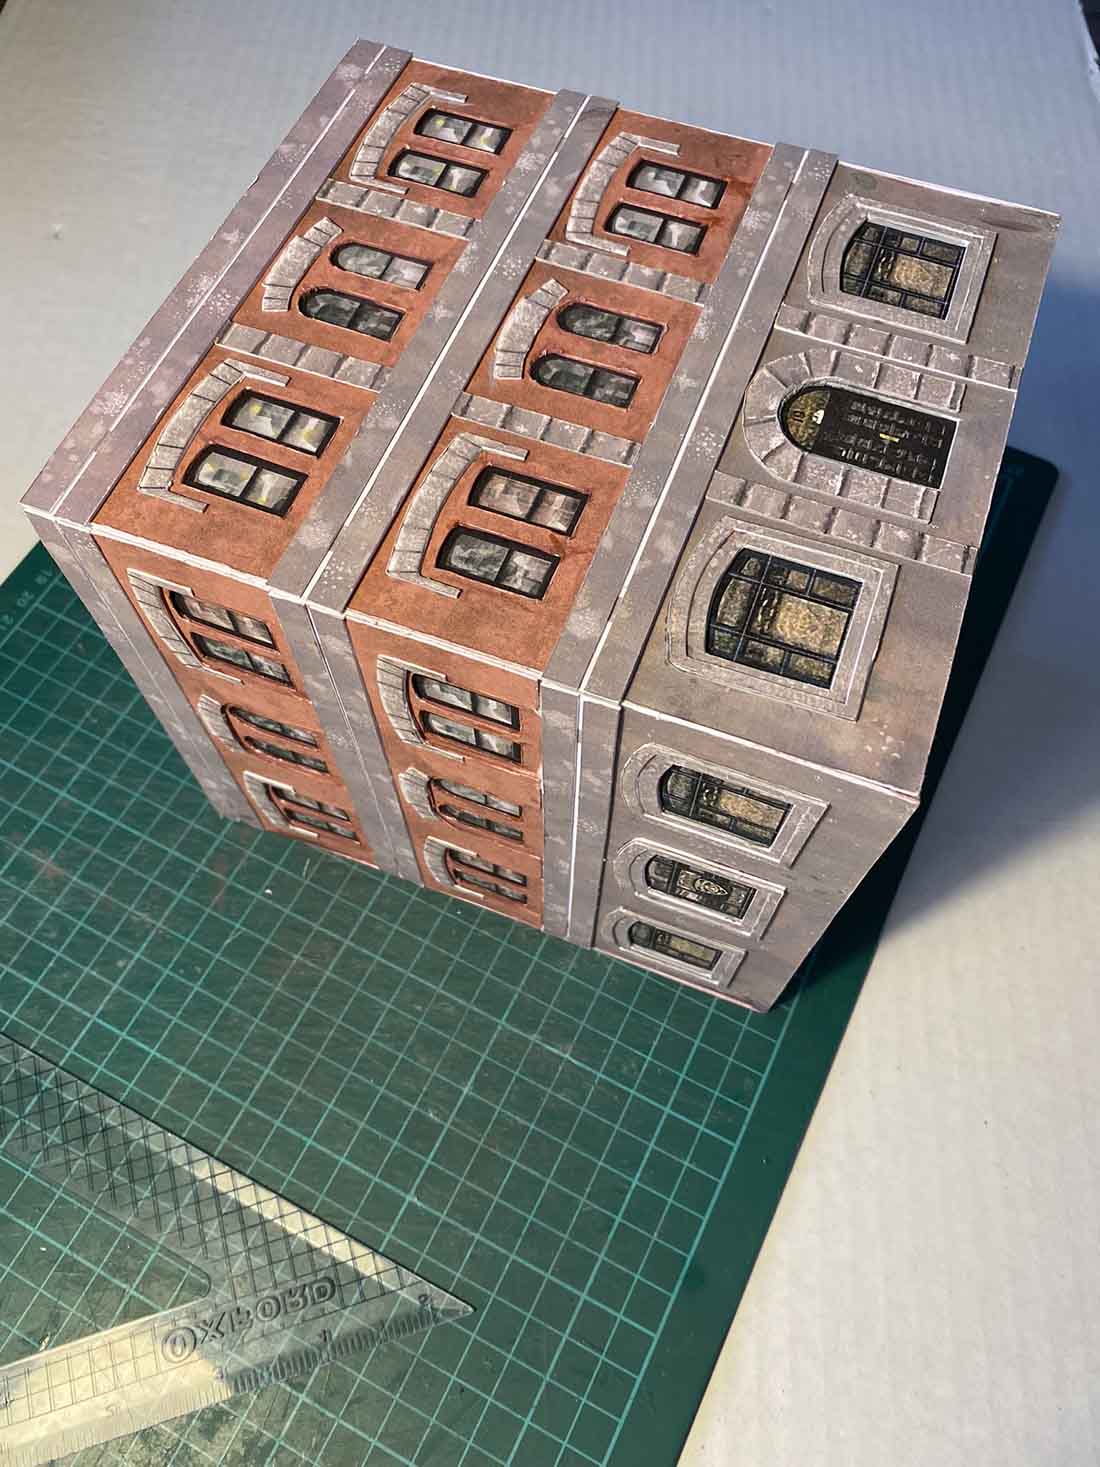
And here’s what the buildings look like when they are finished:
That’s all for today folks.
Please do keep ’em coming.
And if today is the day you get started on your layout, the Beginner’s Guide for just $9 is here.
You are saving a whopping $193 – but please remember, it’s only for the next few days.
Best
Al
PS Just so we’re clear, I know some of you already have the Beginner’s Guide and just buy it for the new buildings – and that’s absolutely fine.
PPS And I know some of you buy because it’s only $9, you save $193, and it’s a great way to make that all important start.
PPPS Even when someone sends in the smallest of dioramas with one of these buildings it puts a massive smile on my face. It’s a great way to make a start into this hobby.
PPPPS HO scale train layouts here if that’s your thing.