Paul’s been in touch with a great ‘how to’ on model train restaining walls.
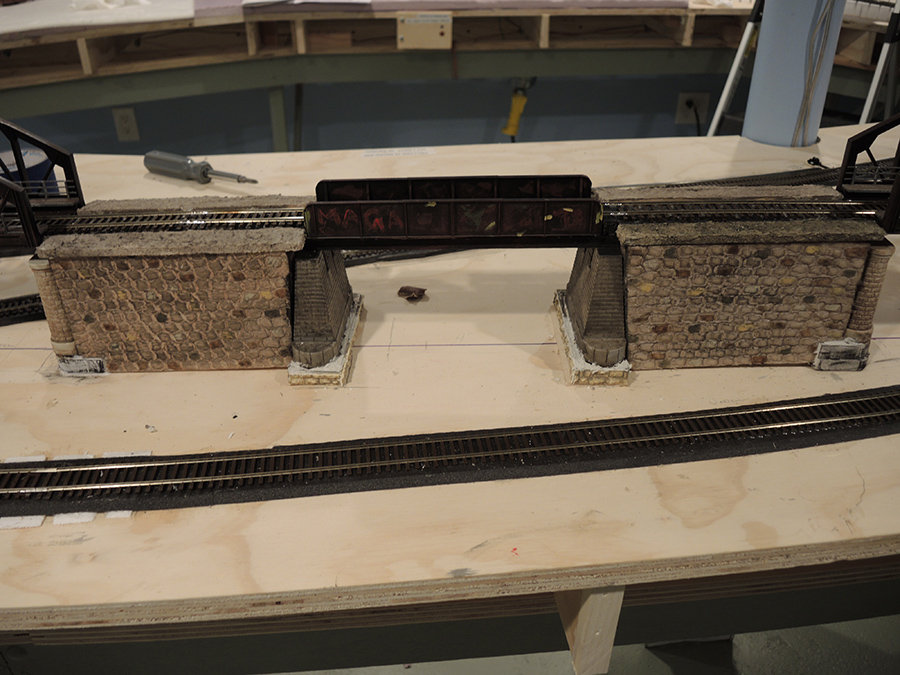
Hi Alastair, I thought I would share how I made some stone walls.
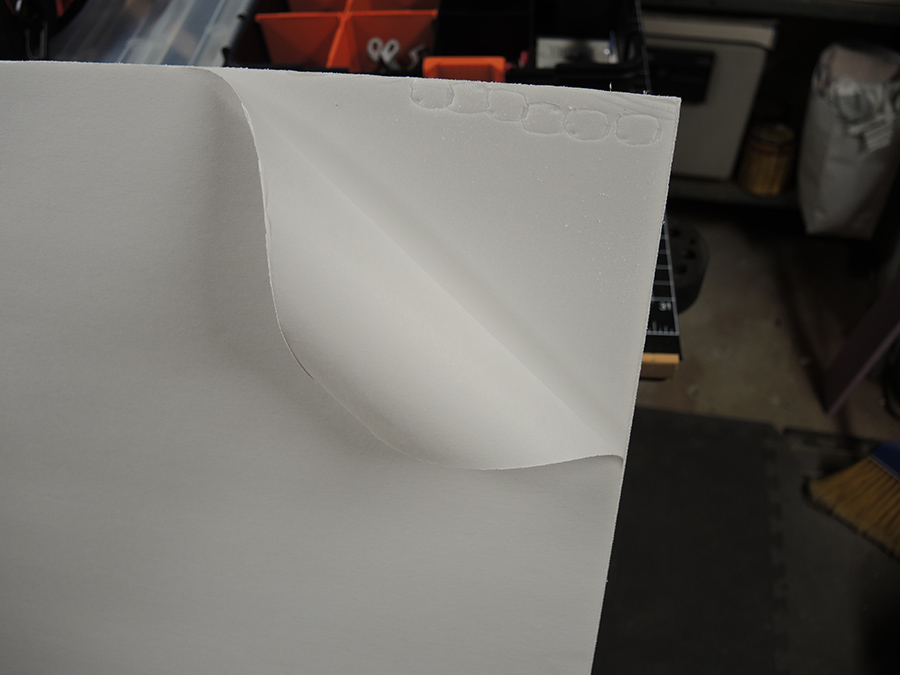
First thing is to get some white foam board at the dollar store.
Next peel off the paper cover on both sides. This can be facilitated by wetting the paper. You can use the board as a single layer or glue two pieces together with PVA glue as I did.
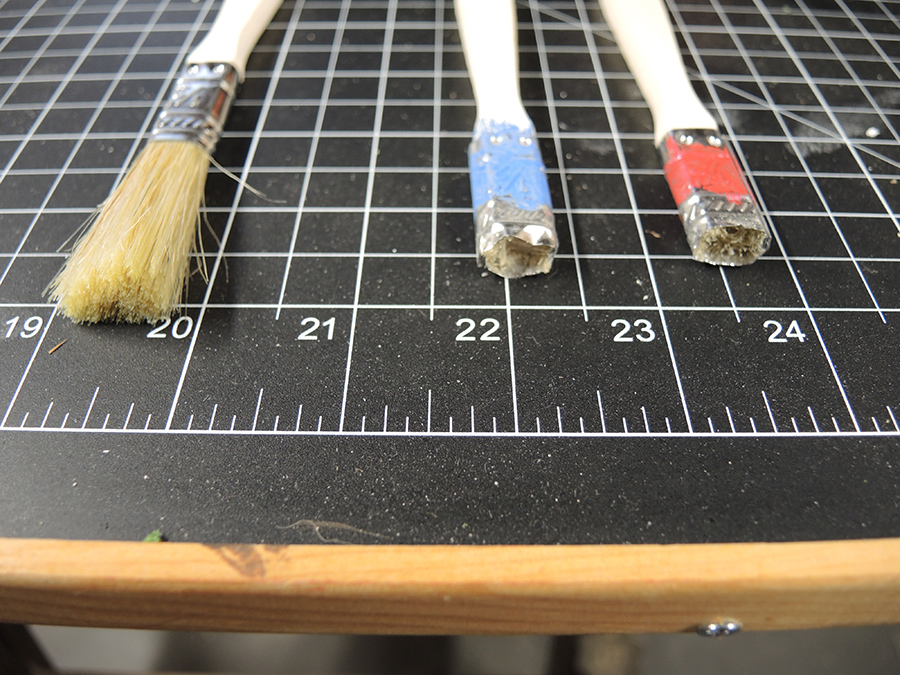
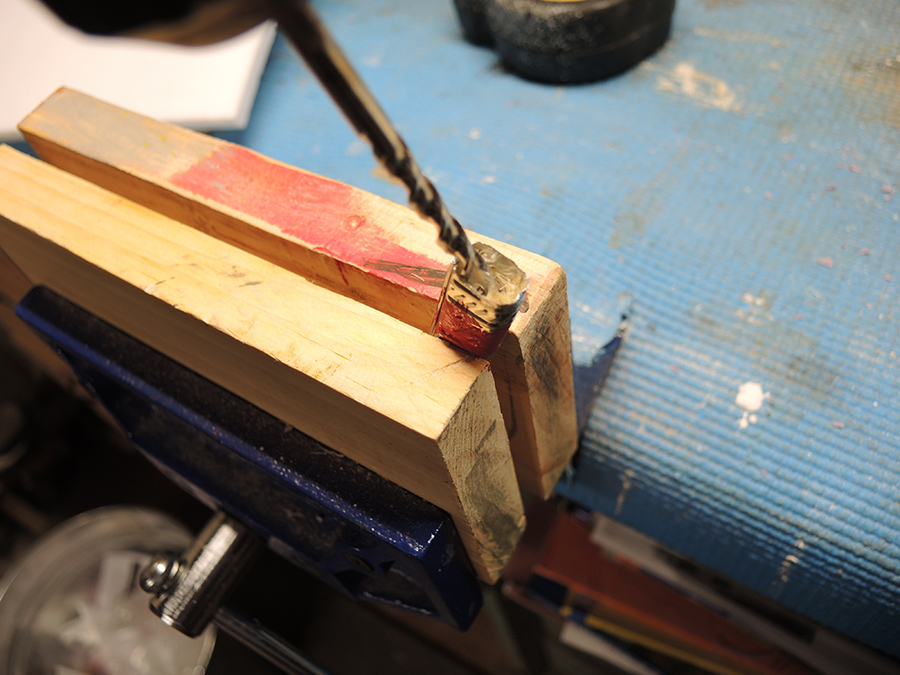
Next get some cheap ½” brushes and cut off the bristles right down to the metal binding. Using a drill remove the bristles down below the metal at least 1/8”.
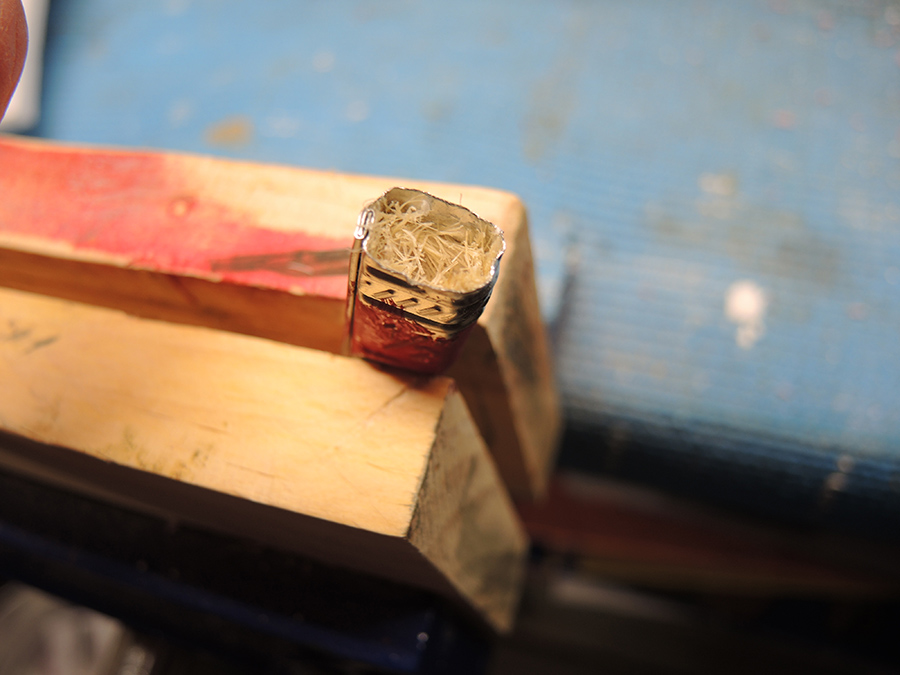
This leaves the metal binding exposed which will make the stone impressions in the foam board.
You can make few different brushes and bend the metal into different profiles. Mark the tools you now made with different markings so the you will get different shape stones.
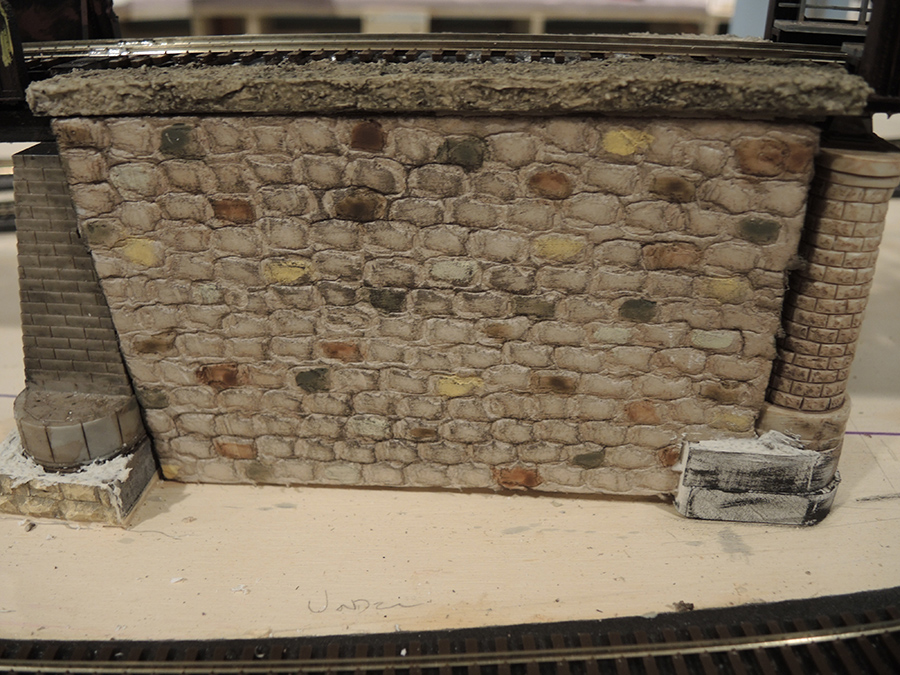
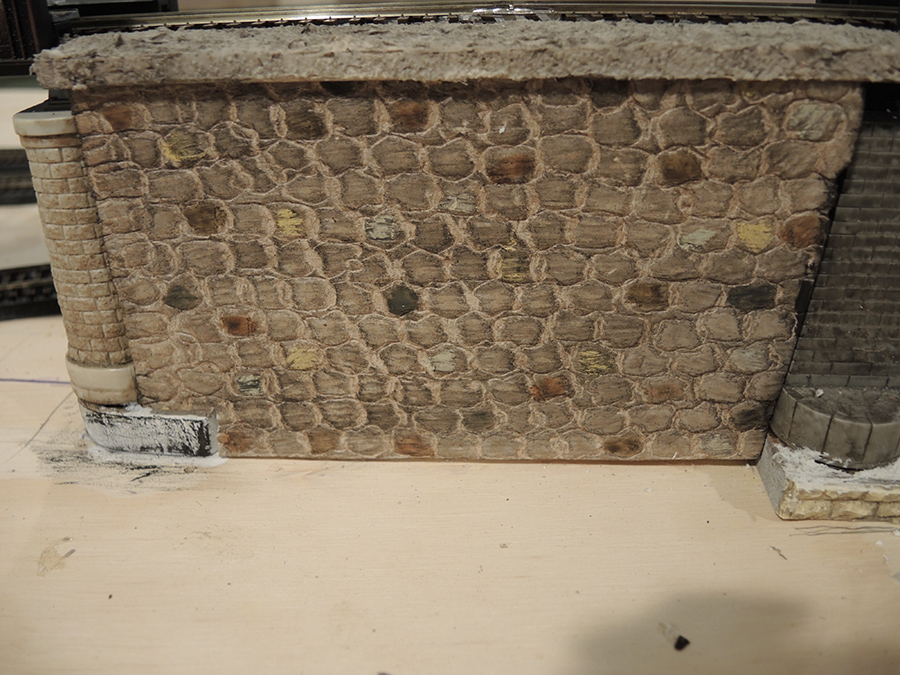
After you make all your impressions in the foam to form your wall you have to paint on the colors that you want. Make notations of the steps you use and the colors so that you get uniform walls.
My walls were colored with the following procedure:
Two layers of Burnt Umber wash allowing drying between coats.
Add the different color stones as you like.
A coating of dry brushed black using a fan brush.
Lastly a single coating of a black wash to emphasize the grout lines between the stones.
“Hi Al,
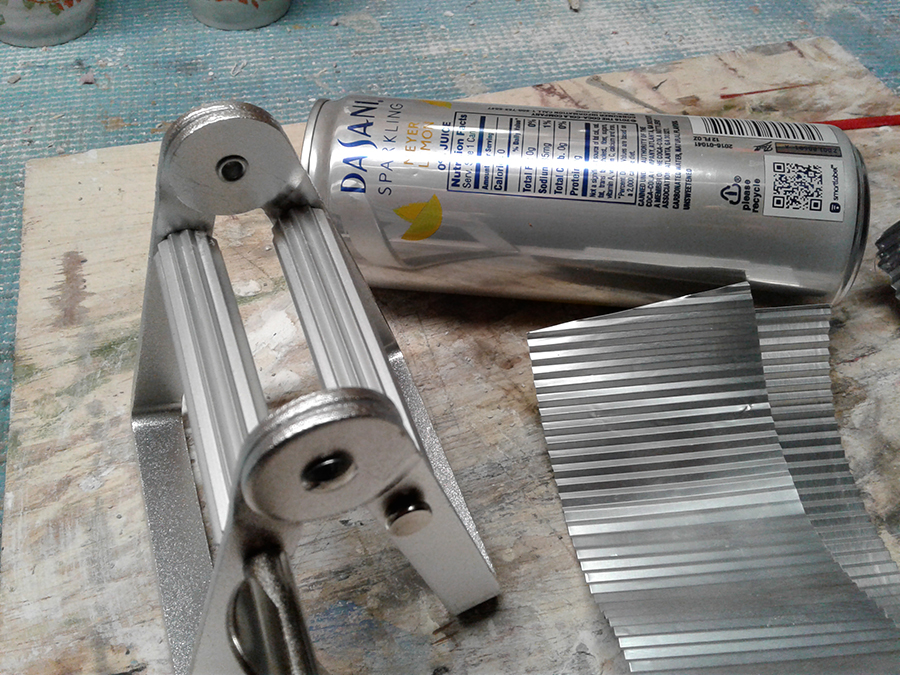
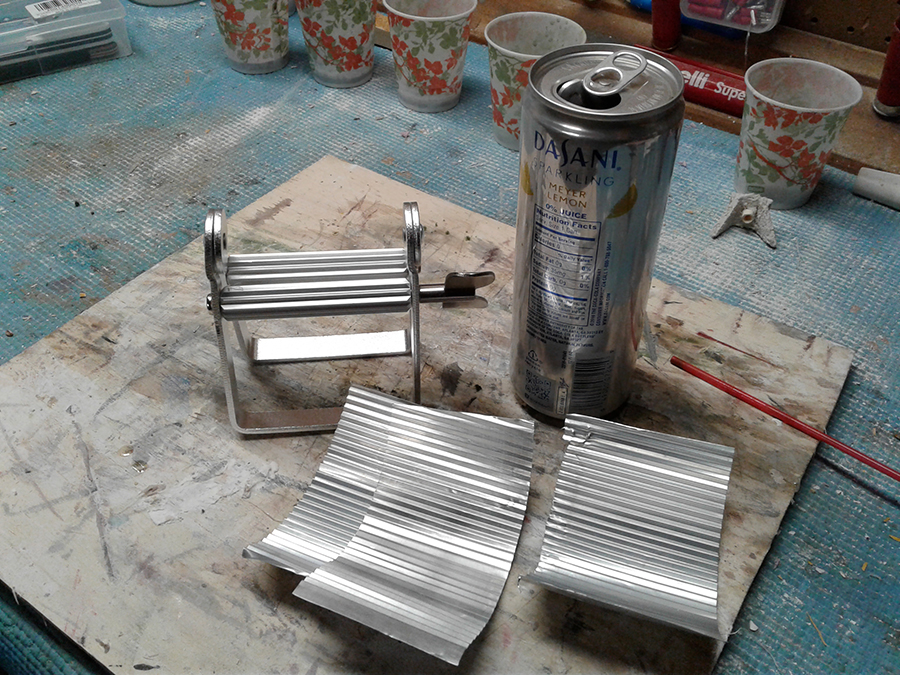
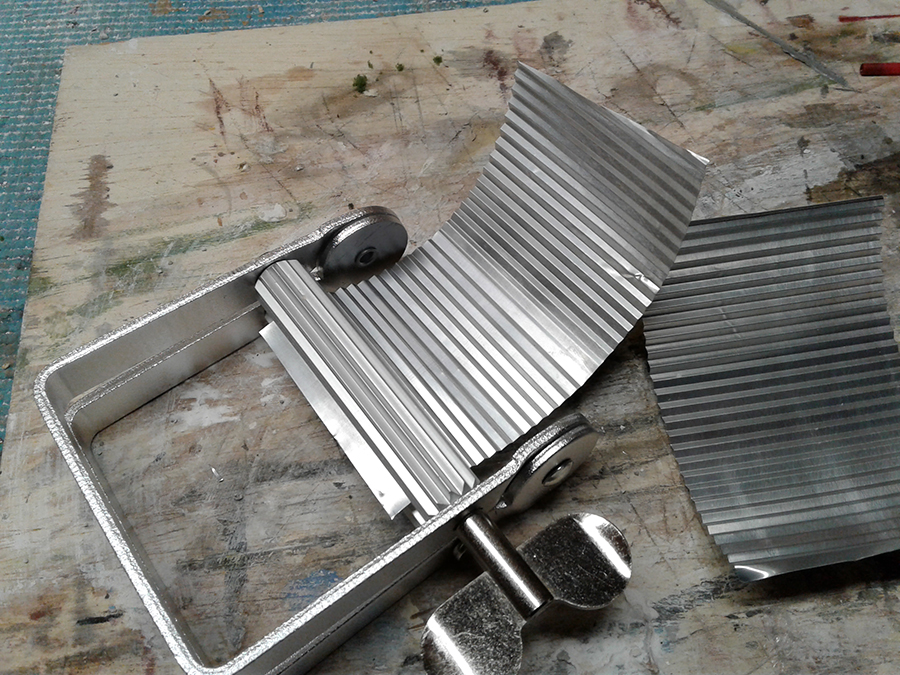
I thought I would send you some photos of how to easily and quickly make tin or corrugated roofing. I used a artist’s paint tube squeezer that I got on Amazon for less that $6. You can salvage the metal stock from aluminum drink cans as I show in the photo.
Now on to another Paul
Paul”
A big thanks to paul for his ‘how to’ on model trains retaining walls, and to the other Paul too.
Henry’s been in touch with something that can be a bit tricky, model train signals.
“Hi Al
I just want to share this with you, as some of our other readers might have had similar problems with signalling.
On my layout there is a passenger station with two platforms, that needs to be signalled for operating sessions as the engineers needs to obey the signals.
I encountered a bit of a brain teaser when it came to the simple arrangement of 3 signals at each leg of a turnout or switch.
On the opposite side of my layout, the arrangement is quite easy, as there is a single platform, so a simple double pole switch does the trick.
Throw it to the left and it turn the east side home signal green and the west side home signal red, and vice versa when thrown to the right.
At the next station which is more complex, I wanted to use a similar switch arrangement, which also helps with interlocking, that we do not get to opposing green signals.
I then realized when the Home signal controlling entry into the station, on either platform 1 or 2 is green, I need both the starter signals on platforms 1 and 2 to be red at the same time.
To keep cost down, I opted to use only one single pole switch double throw switch to select between platform 1 and 2 to turn the starter signal green.
Another single pole double throw switch controls the home signal. If I simply wire the signals from the switches, I end up getting a green and red signal at whatever platform I select the starter to be green at, as there is a feedback from the home signal switch to both red starter signals.
Then it dawned on me, why not use the diode matrix system I am using for my turnout control for the model train signals too?
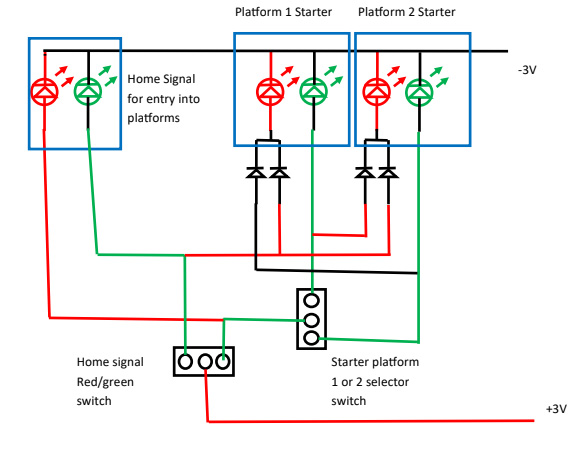
I quickly drew a table with the 6 signal lights, and the switch positions, and saw that I would need 4 diodes to control the signals.
I then wired the diodes into the signal wiring, and hey presto, all is working well.
(I still have to install the signals on the layout, but now the wiring is sorted.
I include a pic with the wiring diagram. Hope this can be of help to someone.
Regards
Henry in Pietermaritzburg, Kwa-Zulu Natal, South Africa”
Spent many frustrating hours trying to carefully strip the ends of the very thin wires on LEDs and Grain of Wheat Bulbs.
I even resorted to not stripping them but just soldering them hoping the heat would burn off the plastic. Not ideal but it mostly worked.
Today I have found a solution!!!!
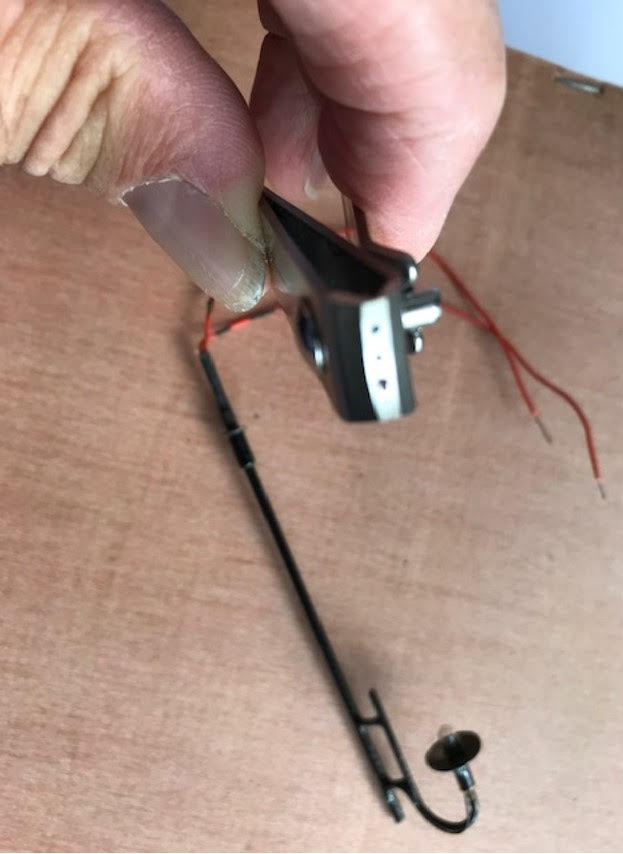
I got an old pair of nail clippers, the cheap nasty sort from Christmas crackers, and squeezed them on 3 different gauges of spring steel wire.
This created notches in the clippers which are just perfect for stripping theses fine wires.
Hope this might help any one else struggling with the same problem.
Best regards,
John”
“Hi Al,
I thought you might be interested in this video. I’ve gotten a good response with it on my channel I demonstrate how to add very cost effective signals to any layout.
The first few scenes are just me having a play with my new DCC controlled coaches/passenger cars. It is fun to be able to operate the lighting remotely.
I have heard from many that these easy to understand videos have started them to add signals and railway crossings to their layouts. It is fun, not hard and very rewarding building automated signals. There are many suppliers that will provide kits, but they are expensive. This method is not.
cheers,
Rob”
“Hi Al
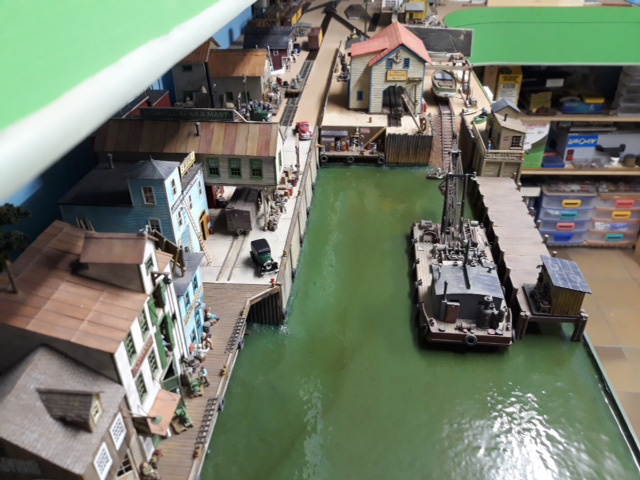
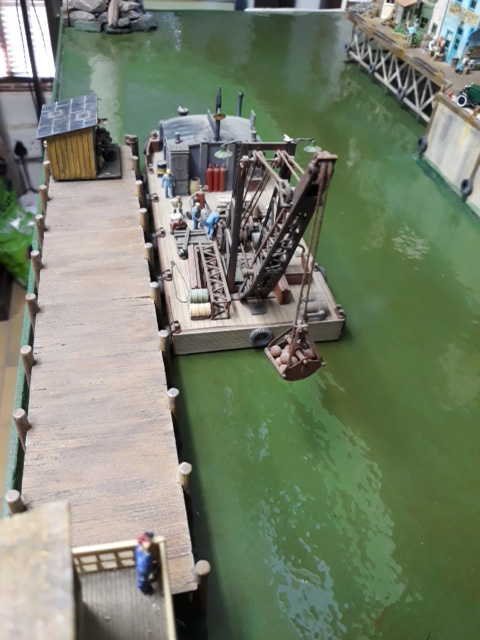
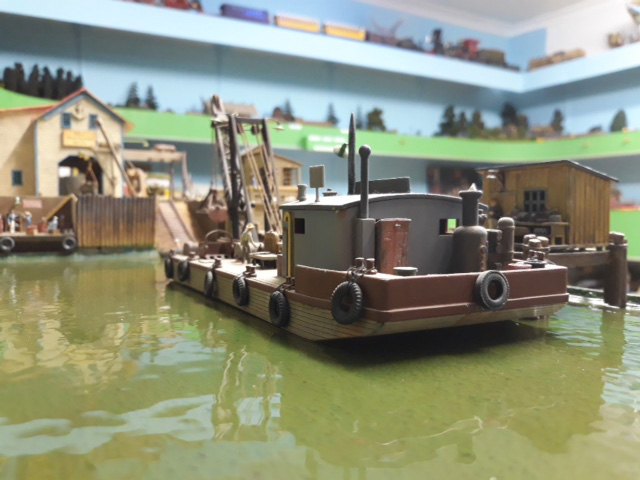
Someone asked if the water on my harbor was superimposed.
Definitely not (I would not know how to do it anyway)
Here are a few photos of the water in the harbor.
Many thanks
Brian – the HOn3 guy – Knysna RSA”
A big thanks to Henry for his tip on model trains signals.
What a clever lot you all are. Some great tips today – and a big thanks to Rob, John, and Brian too.
Please do keep ’em coming, and if you’d like to make a start on your own masterpiece, the Beginner’s Guide is here.
Barry has sent in a fab figure of 8, step by step for any model railroad.
Some of you will remember Barry from years ago.
Unfortunately the pics don’t enlarge but I still really enjoyed Barry’s pics and narrative:
“Alastair,
This is a Lionel “O” scale layout that I started a couple of days ago.
It’s a simple figure “8” with no sidings.
I’m doing the landscaping with 2″ pink high density foam house insulation.
There will be no buildings but (2) lakes and I will add schrubs and grass. I’m trying to keep it very low profile for easy protective storage.
I put fold away metal legs on it for easy set-up. I’ll be done in a few days and I will send you final pics of it then.
Regards,
Barry”
Making rock formations for my figure of 8 model railroad, step by step
“1) Purchase a foam cutting “hot knife”. I think I bought mine from Home Depot for less than $20.00.
2) I use mine on the highest setting which is #6 on temp. dial.
3) Just let the hot blade do the cutting with twisting and reciprocating motions and occasionally changing the angle of the blade to achieve an unevenly cut edge that I think looks like real rock formations.
4) You can use 3/4, 1, 1-1/2, and 2″ foam. This shown with 2″ foam and that’s probably the thickest my knife can cut through. (enclosed is a picture of the hot knife That I use)
5) Caulk all the joints with painter’s caulk and let dry. Then paint the entire surface of the layout with a tan acrylic paint. (from Walmart or a crafts store—they are much cheaper than from a model train hobby shop)
6) Then using a darker shade of brown drybrush highlights on the rock formations to create depth and perspective.
7) Then paint the lakebed with an olive green color paint leaving some tan color around the outside edges to simulate sand in the shallow water. Then I use a flat black spray paint with just a few short bursts to give the illusion of deeper areas.
8) On this layout I only used a 2-part epoxy fake water from the crafts Walmart as I wanted the lakes/ponds to look like stagnant water instead of my normal ripples on the water created by the wind.
9) Last before the water is dry(approx. 24 hrs. add schrubs, fallen dead trees in the water and normal trees to the entire layout with white glue as desired.
I’ve enclosed (2) early stage pics showing the pink foam and the white caulk, (1) pic of the hot knife. And the rest of the pics are final results.
I also did not use foam grass on this layout to keep it more user friendly for the young operator.
Hope this help your readers to understand better and want to try it.