Model trains Carson City -Steve’s

Model train Carson City – what? Well that’s the great thing about this hobby. You can pick any theme you like.

And you can base it loosely on that theme, or copy every detail.

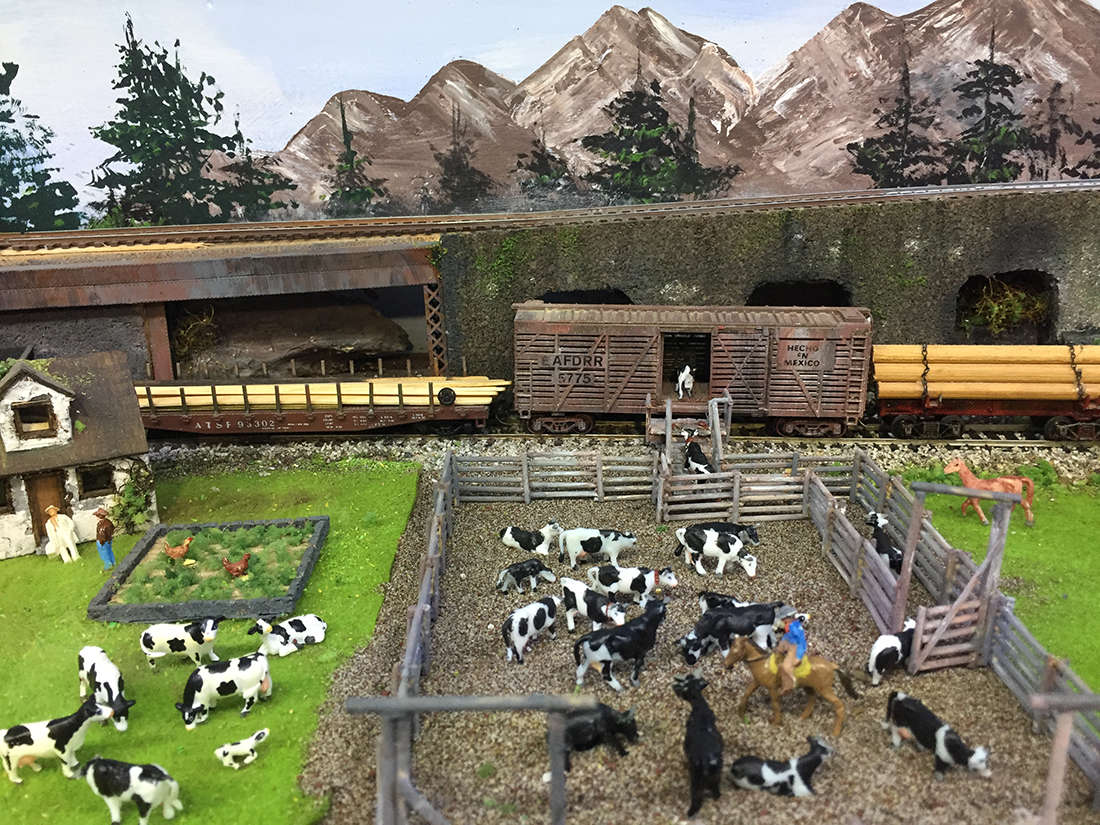
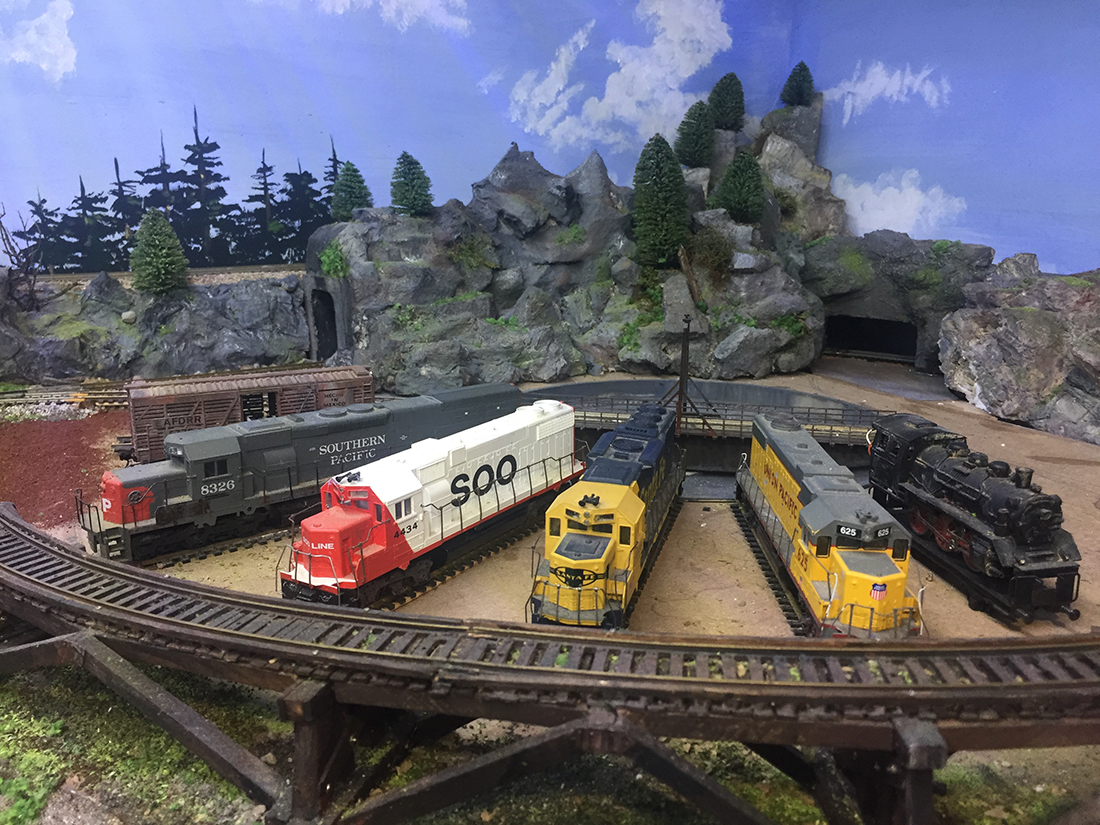
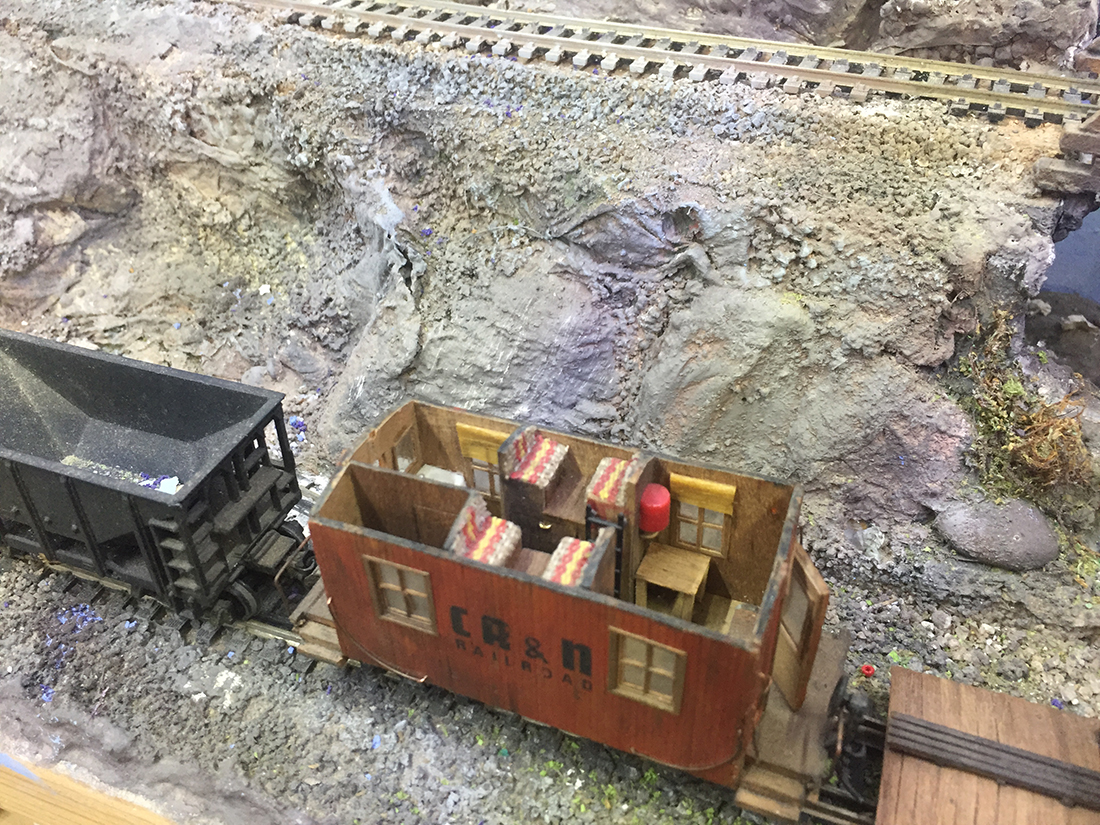
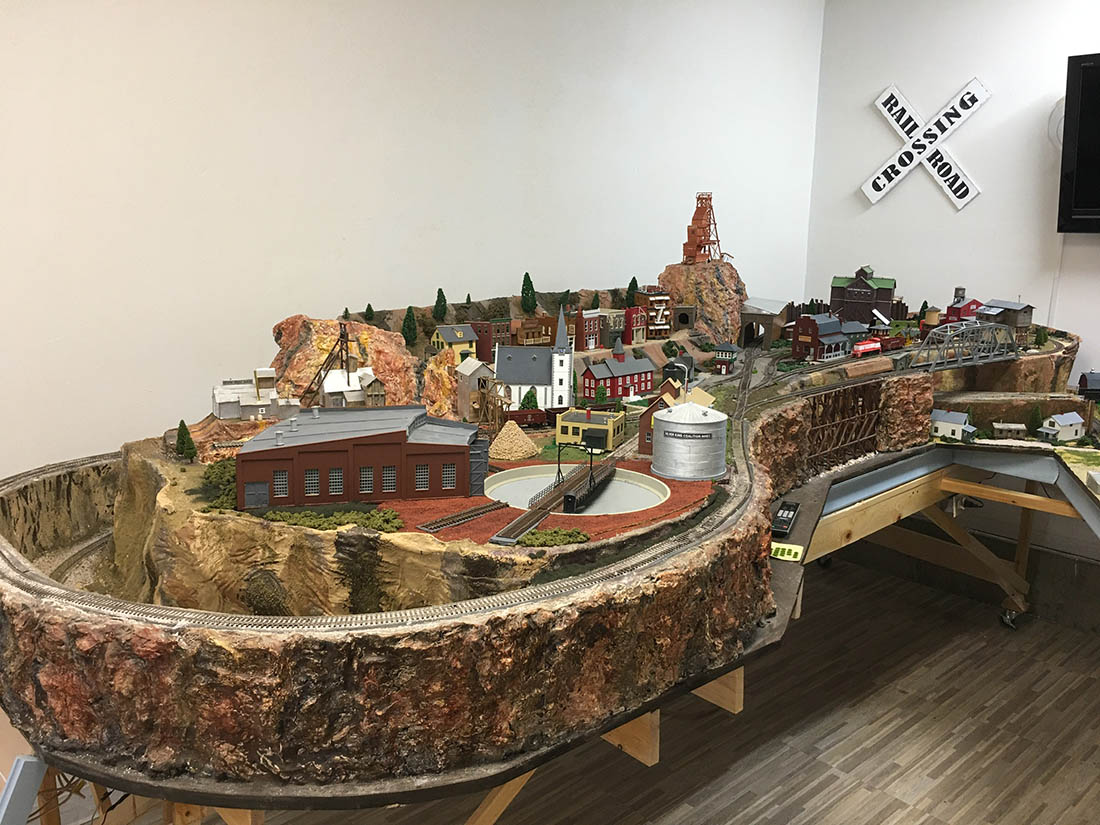
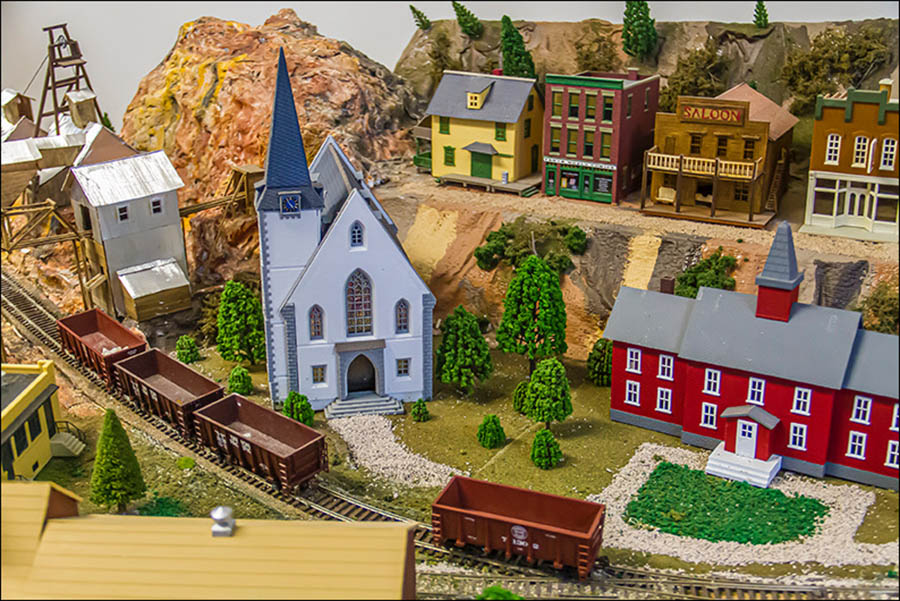
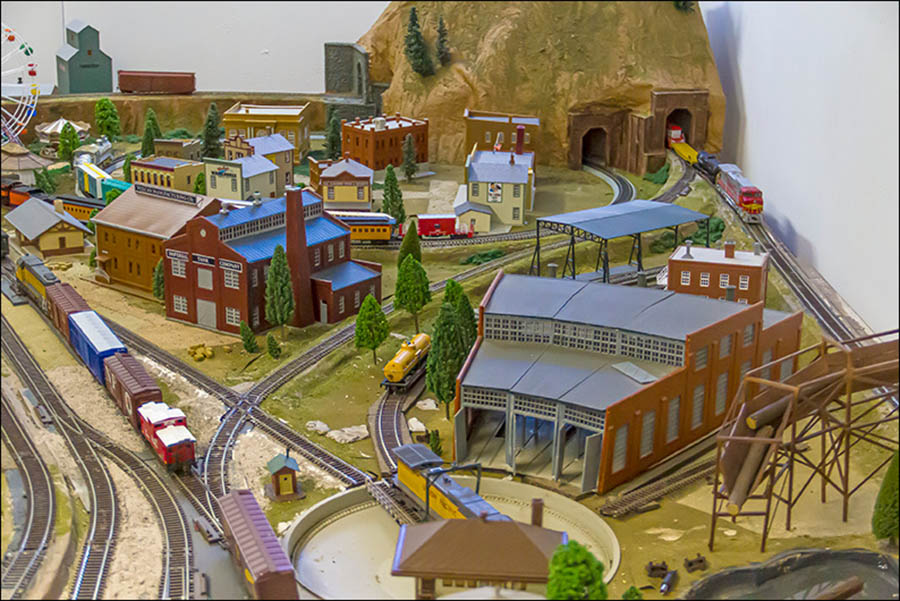
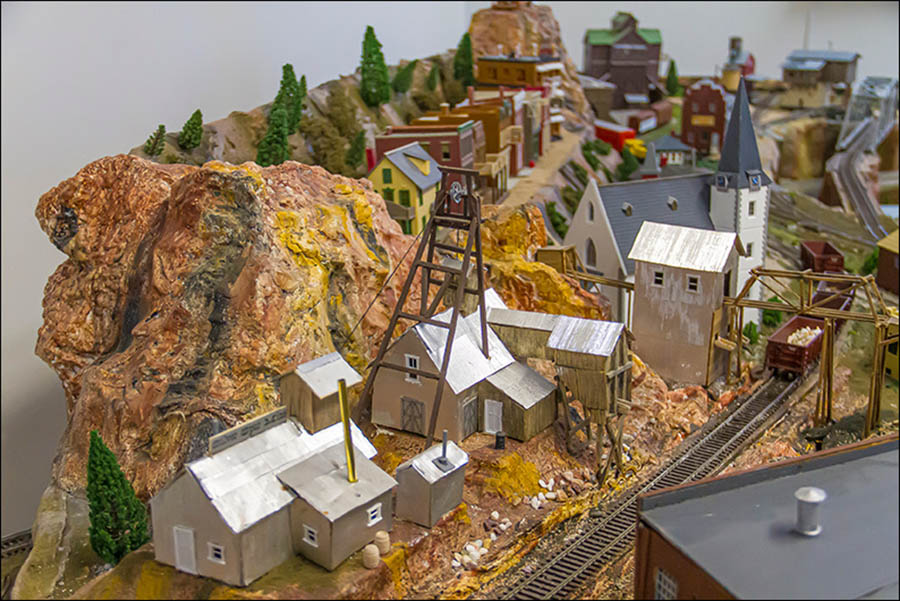
And that’s exactly what Steve has done:

“Hi Al.

Thanks for all your posts and suggestions. It has helped tremendously as I knew very little about modeling and have a long was to go still.

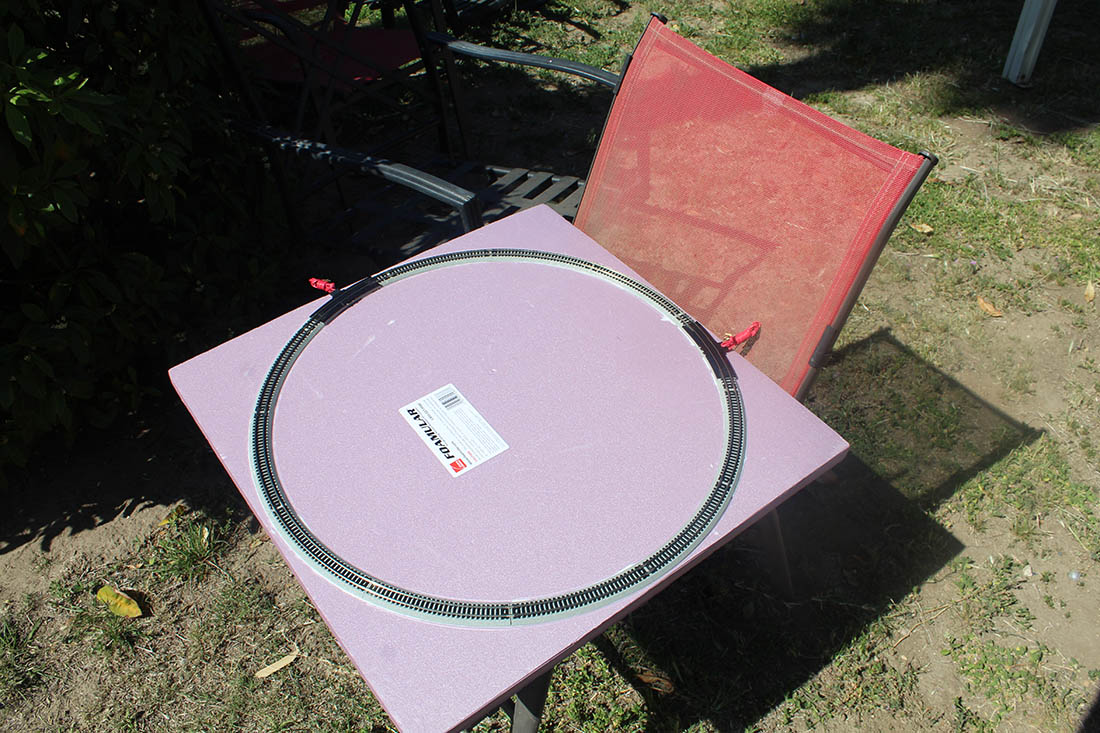
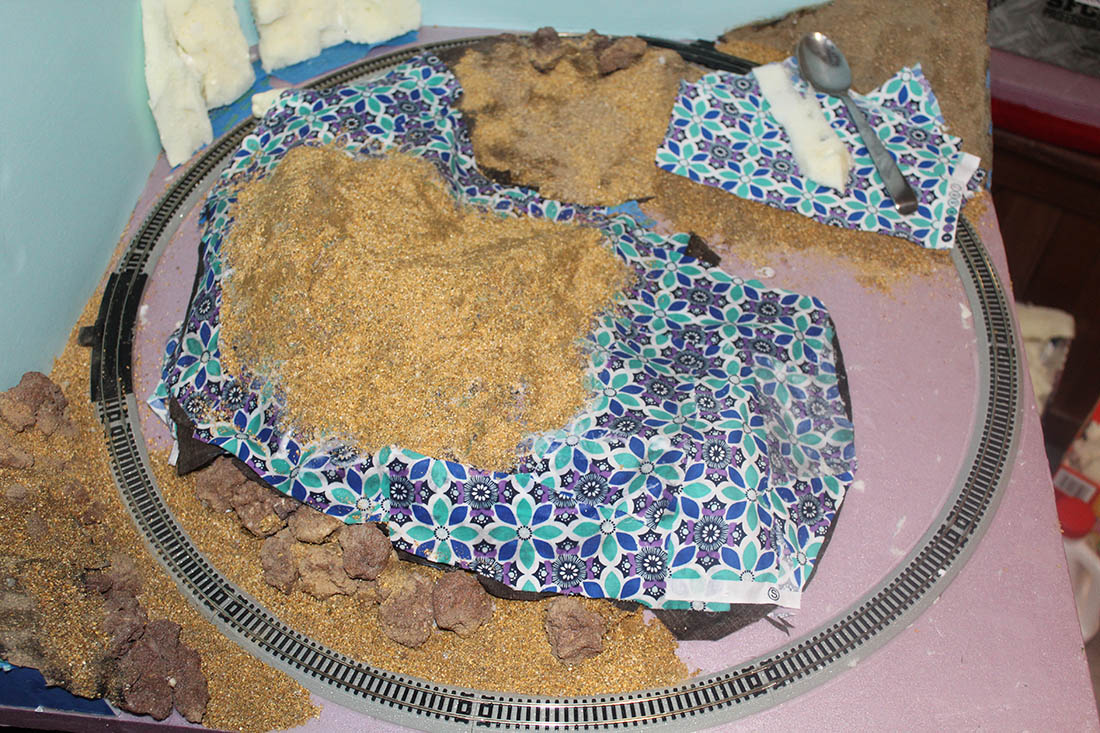
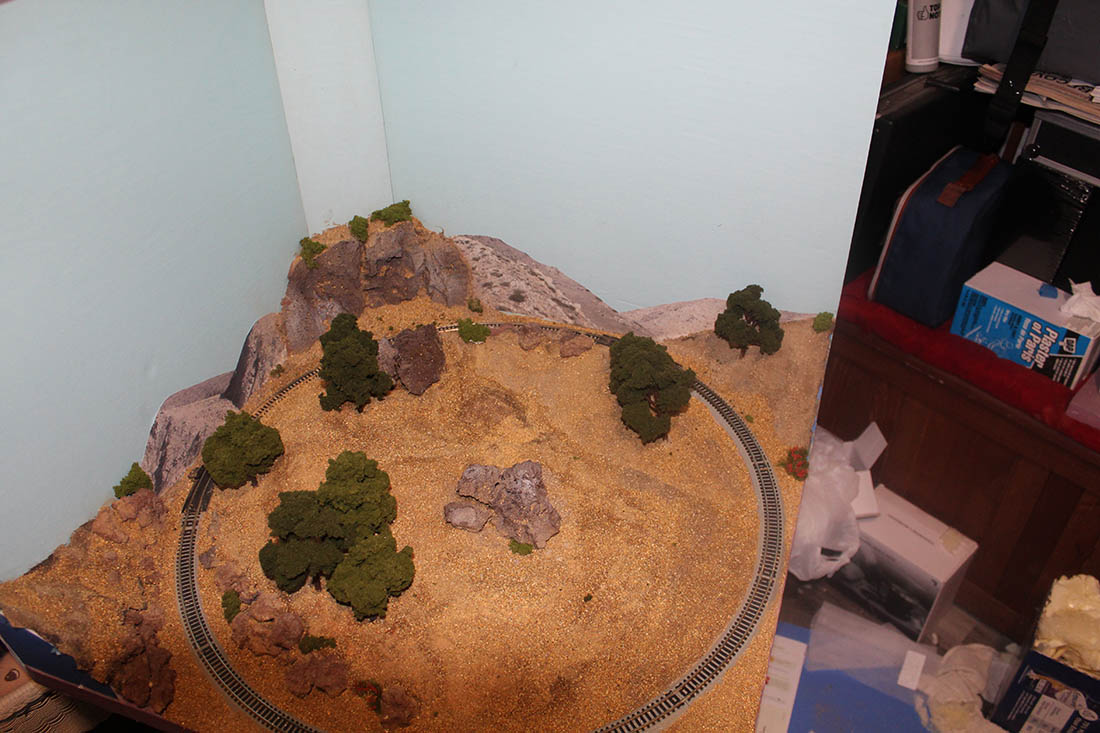
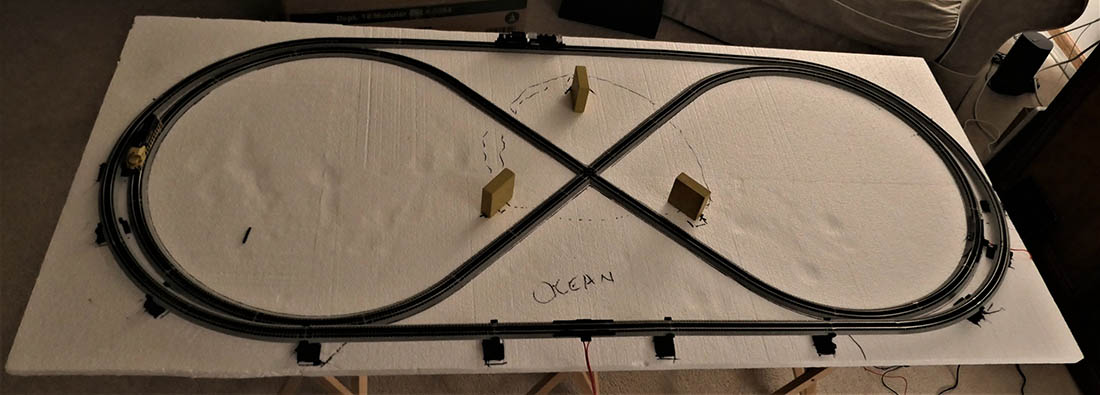
I started this train project just over three years ago knowing my only grandson was on his way. He’s now an excellent “three year old railroader”.

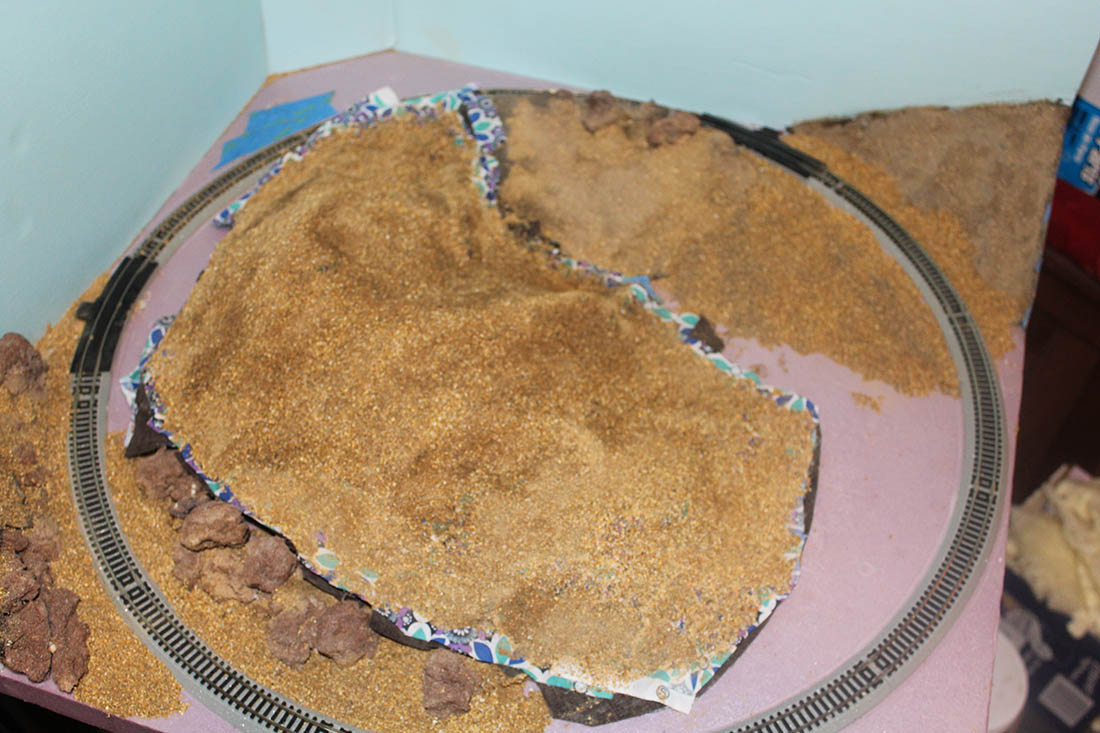
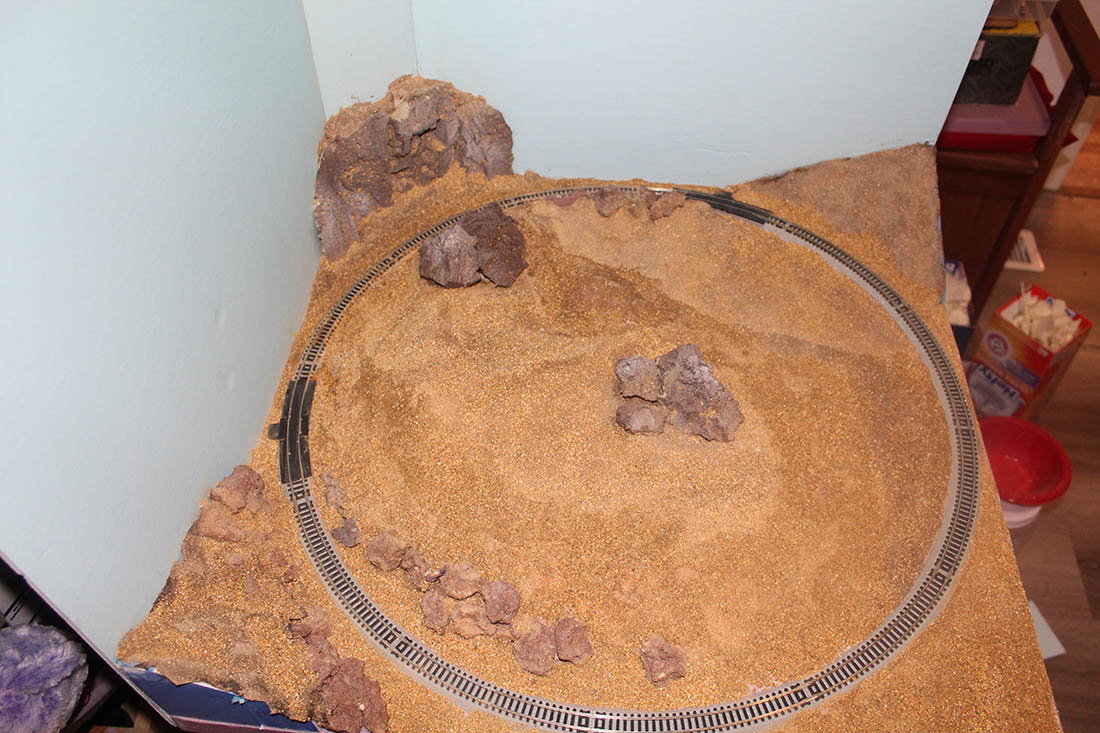
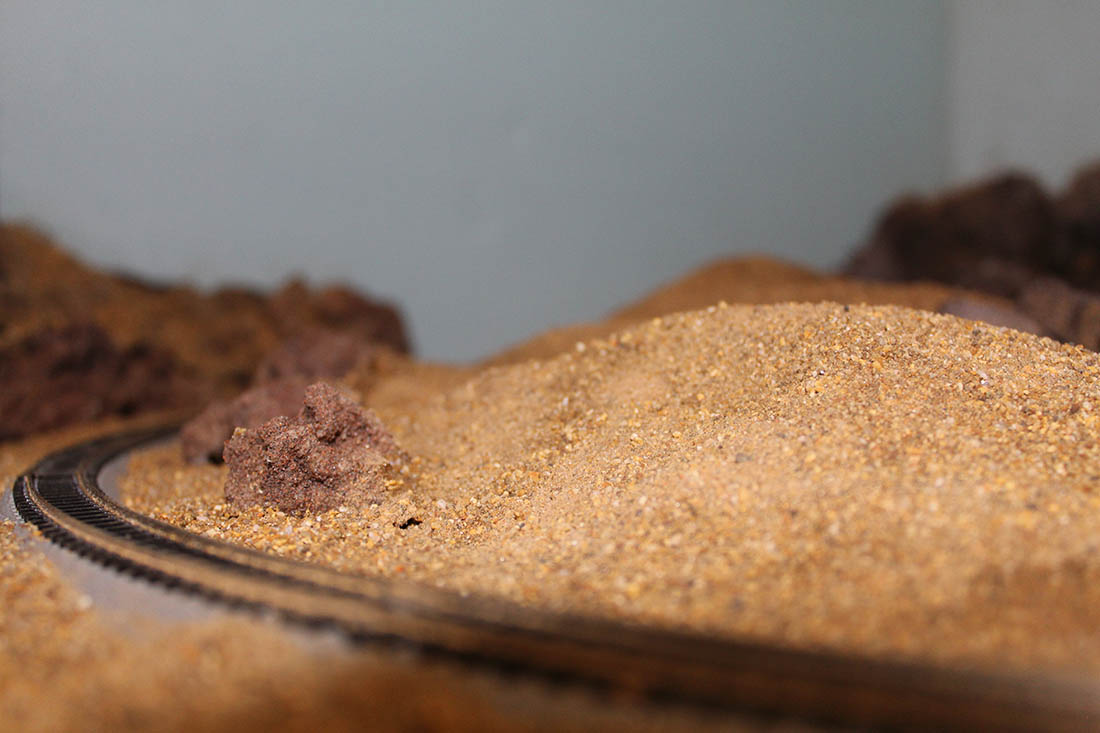
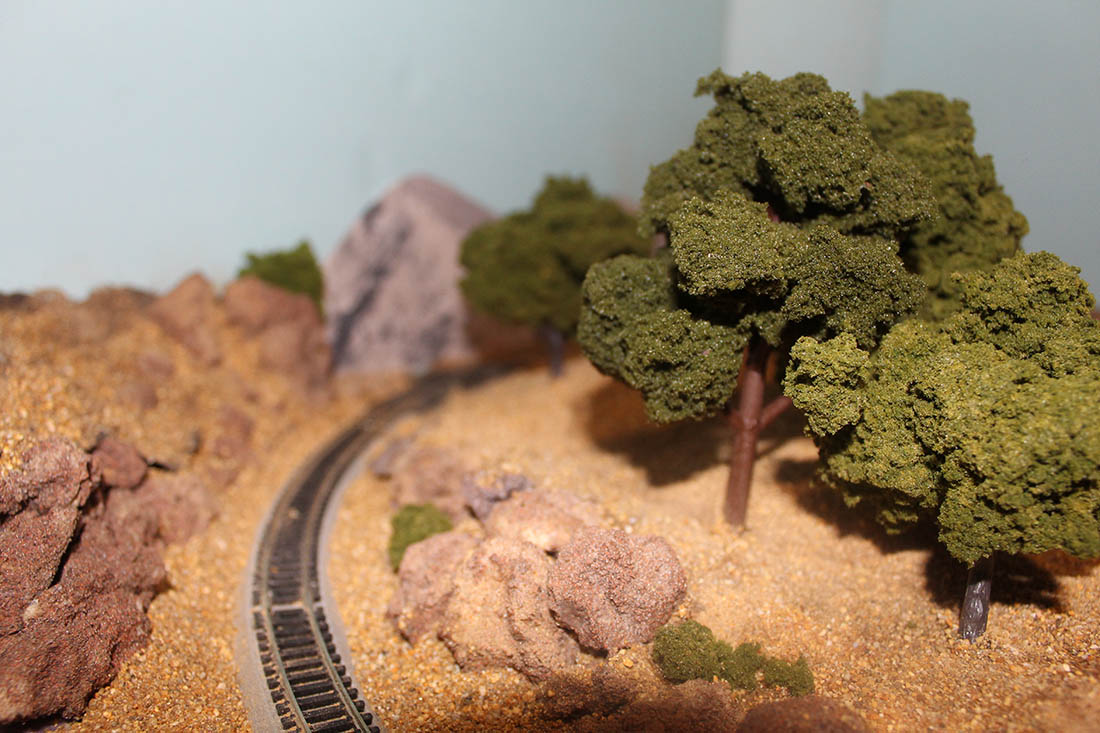
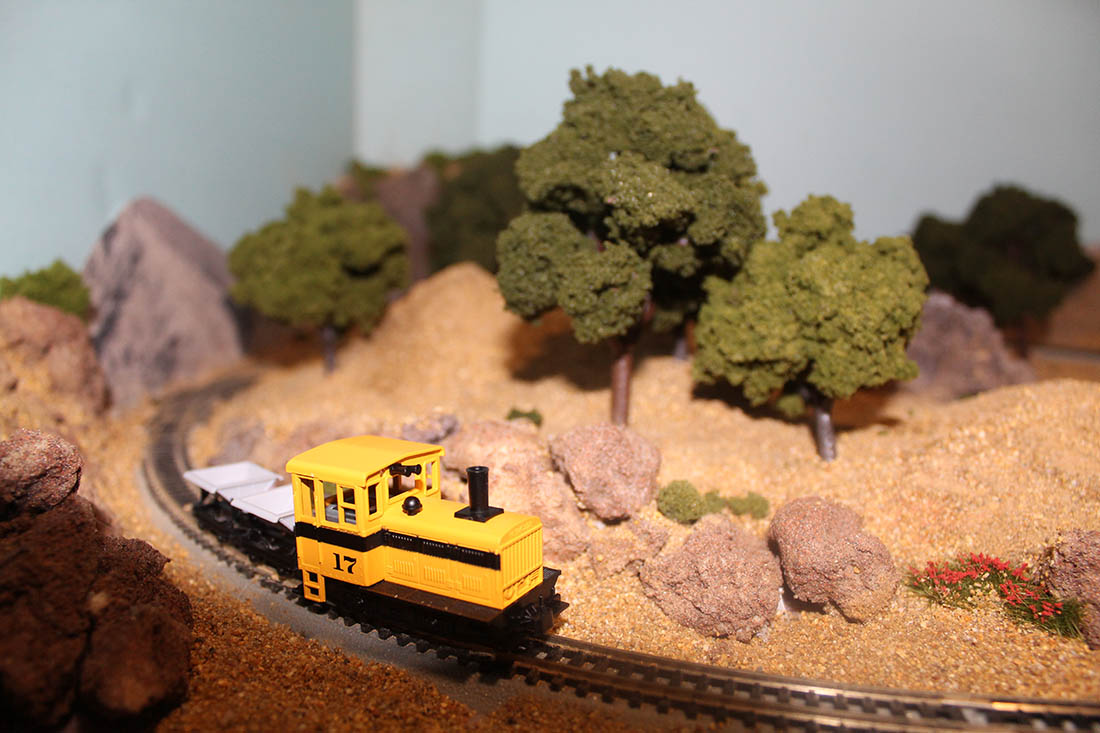
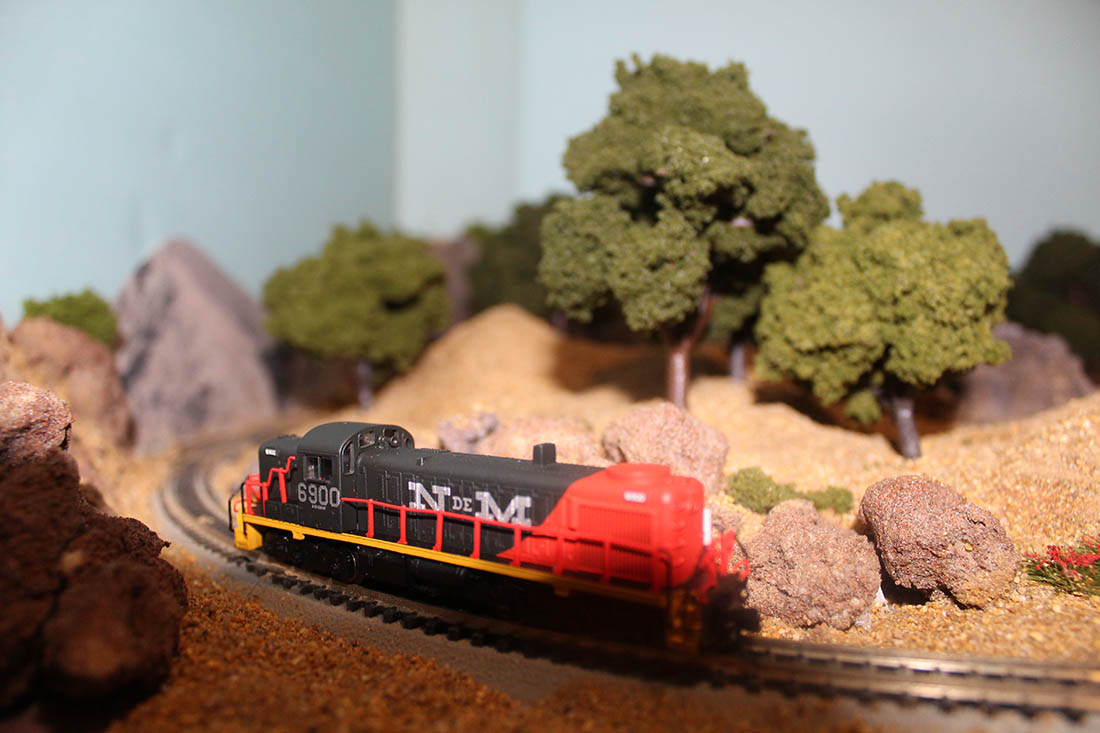
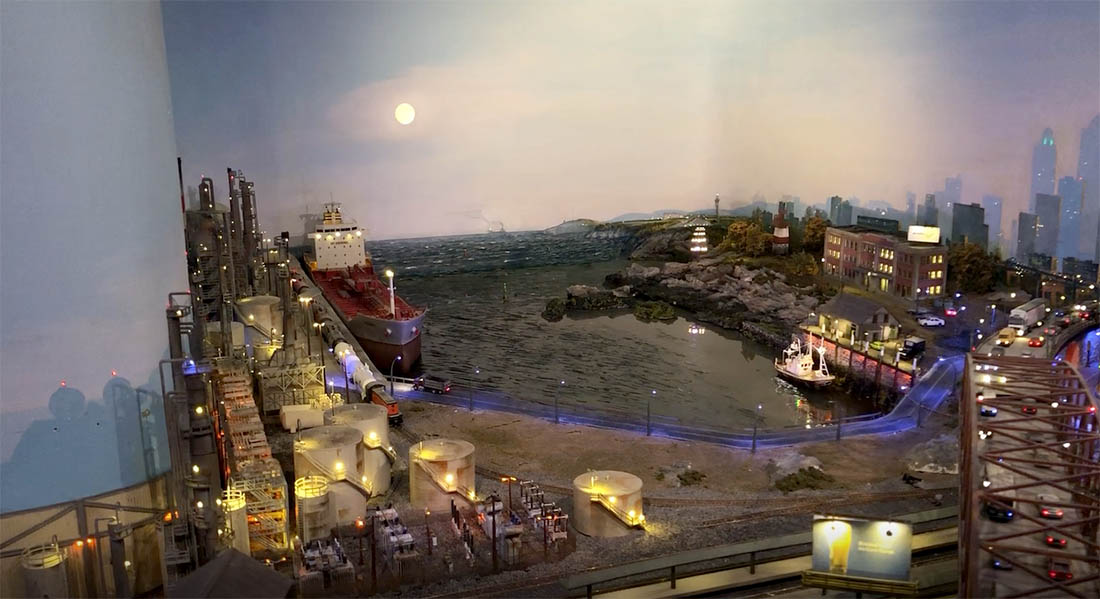
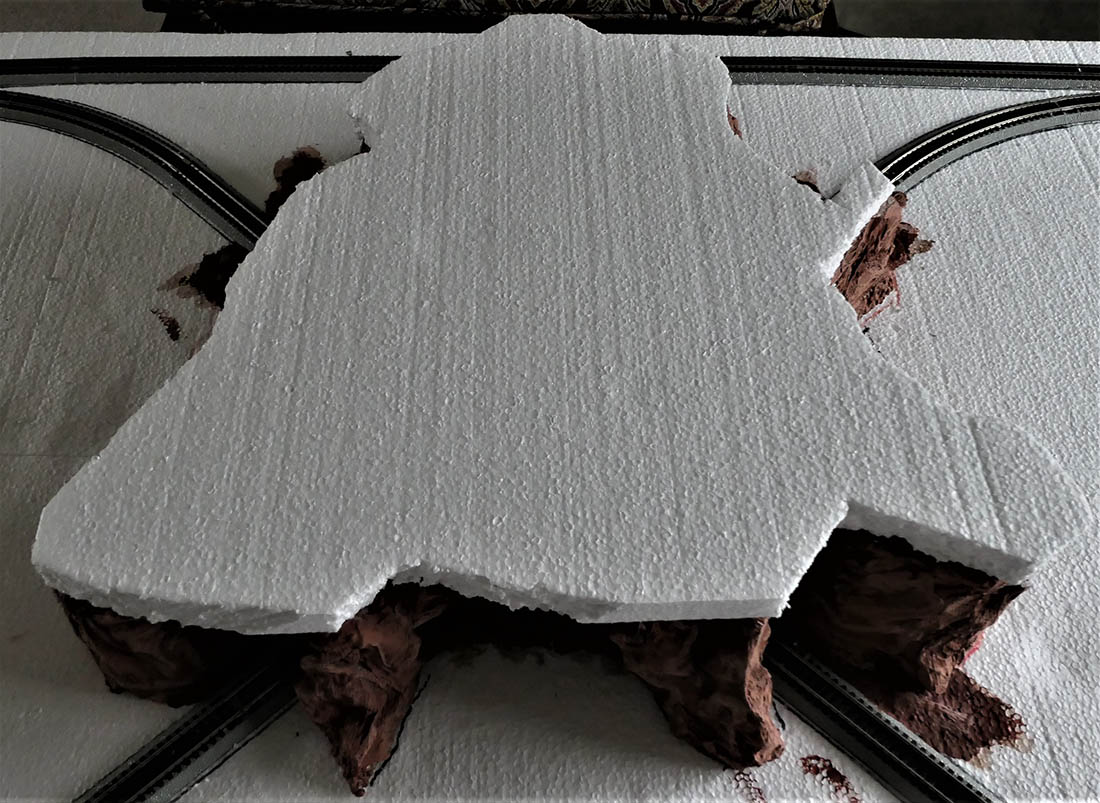
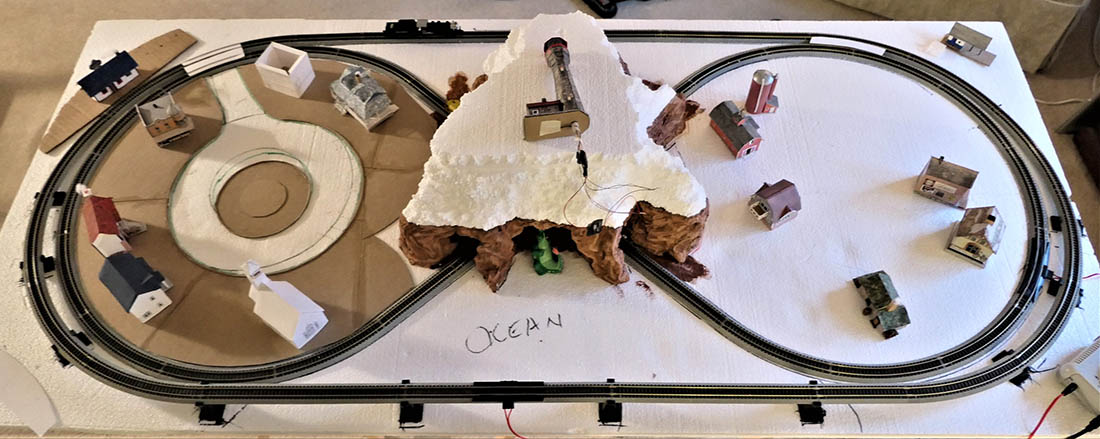
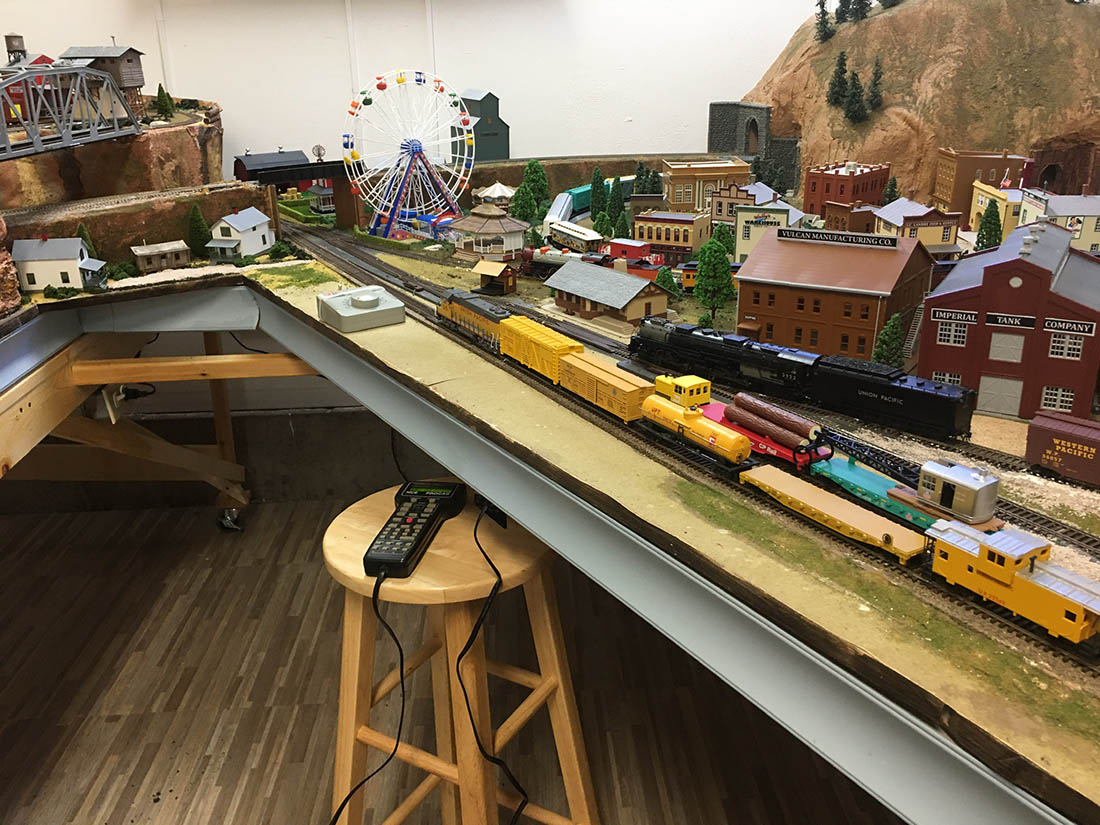
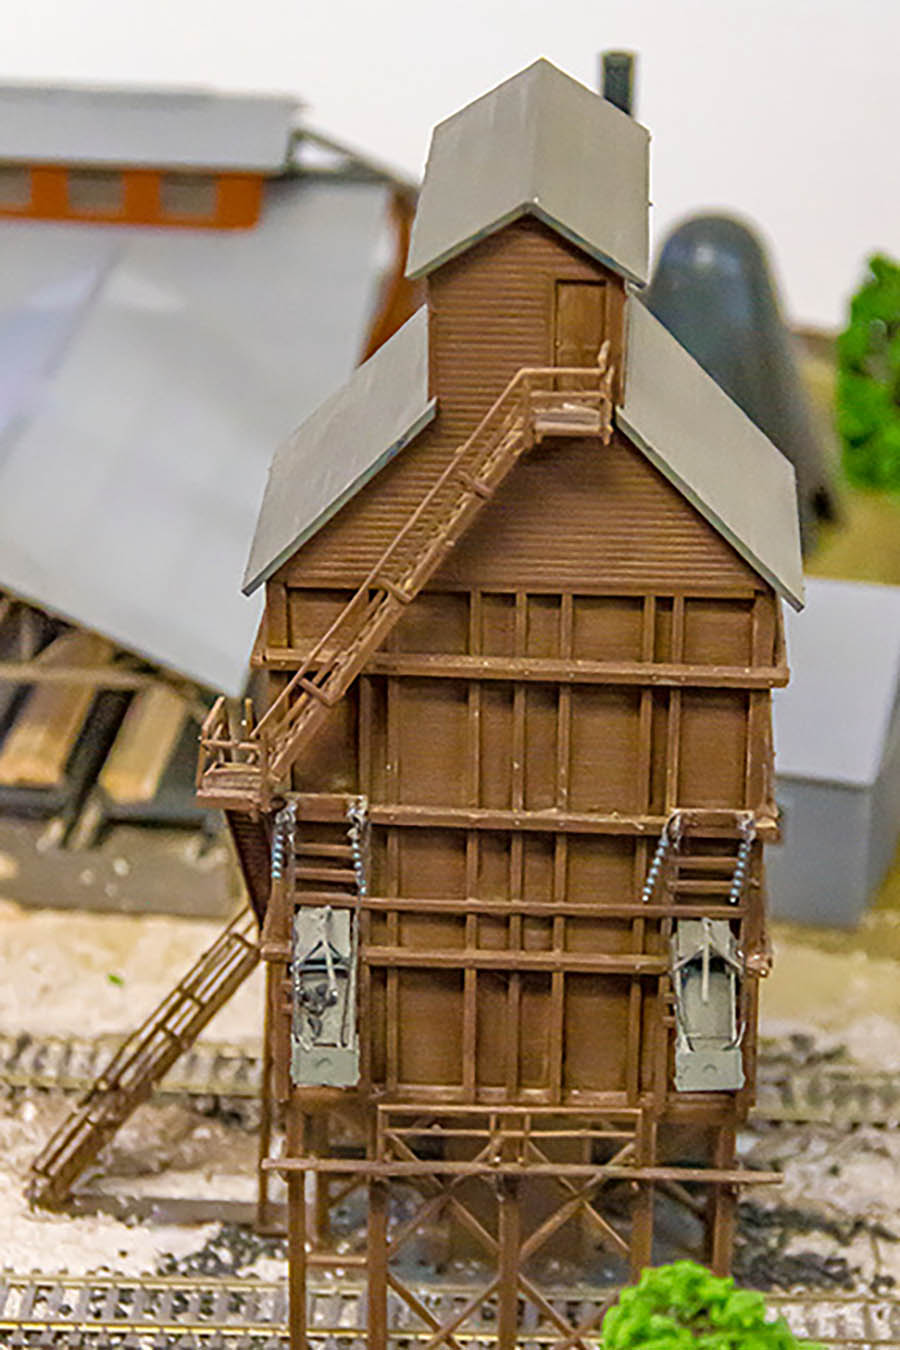
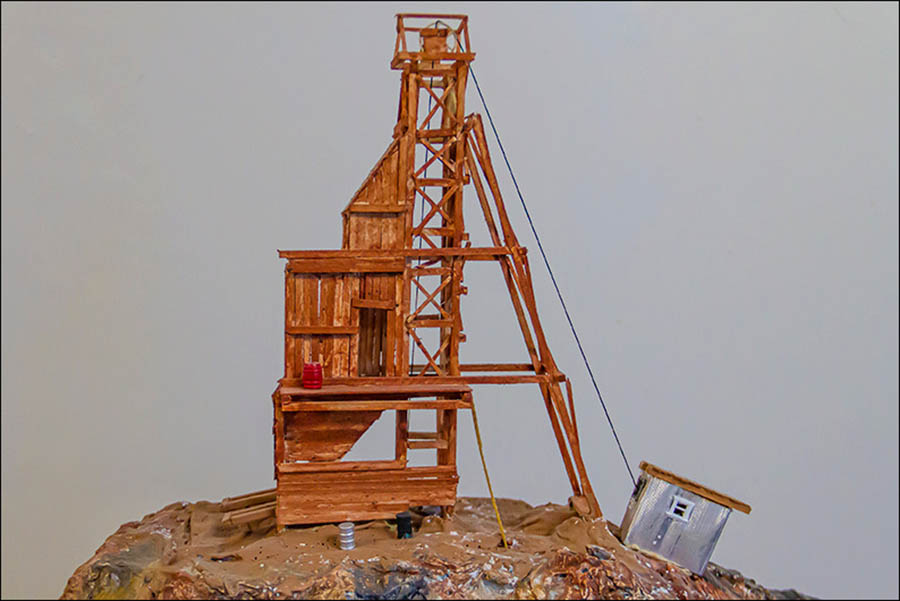
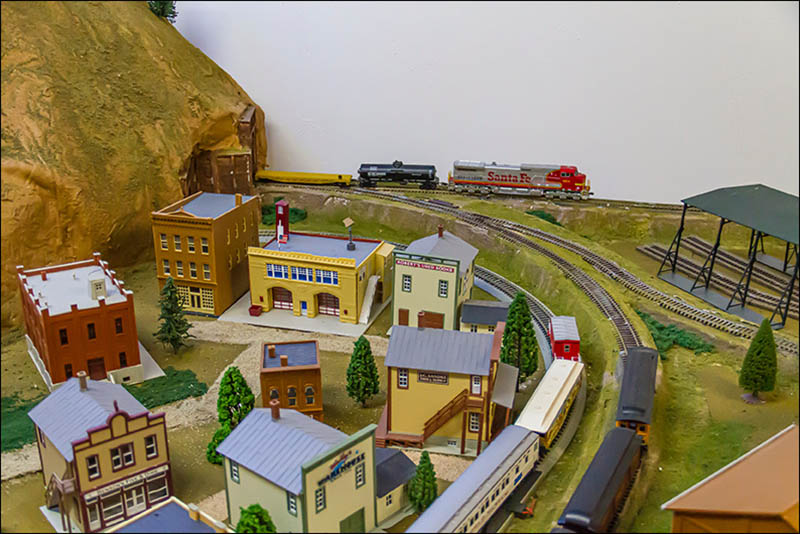
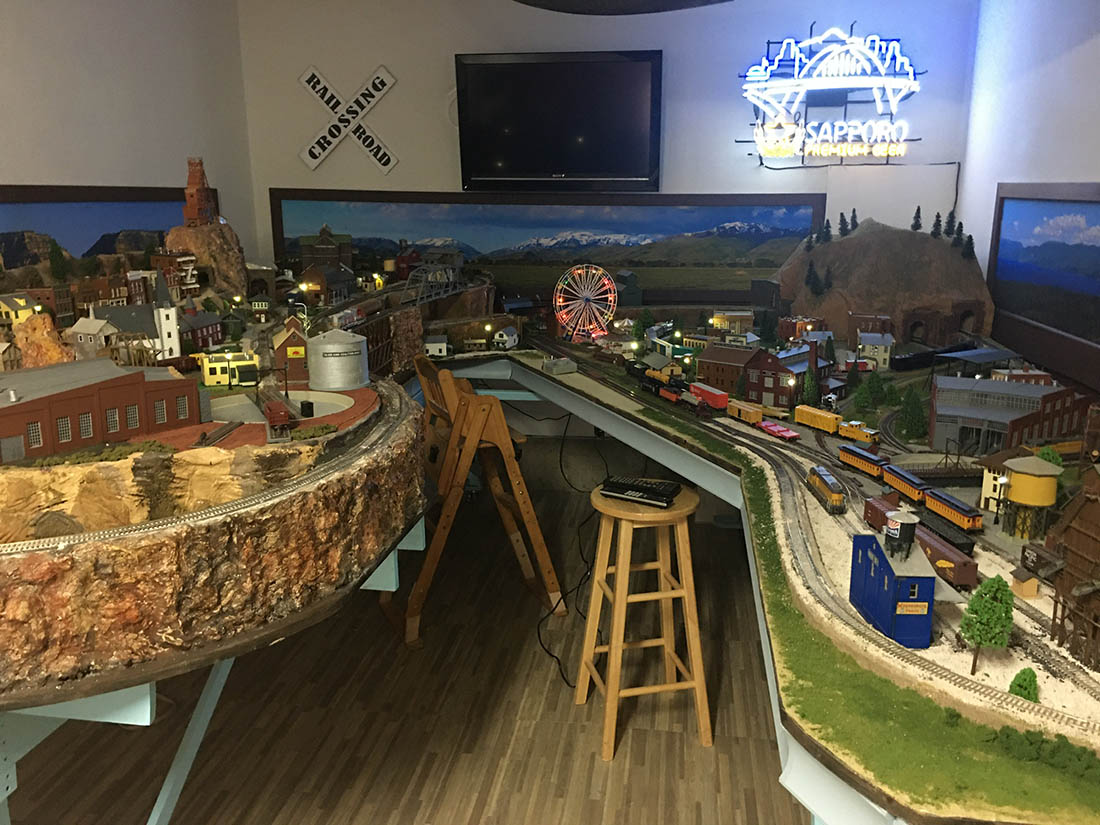
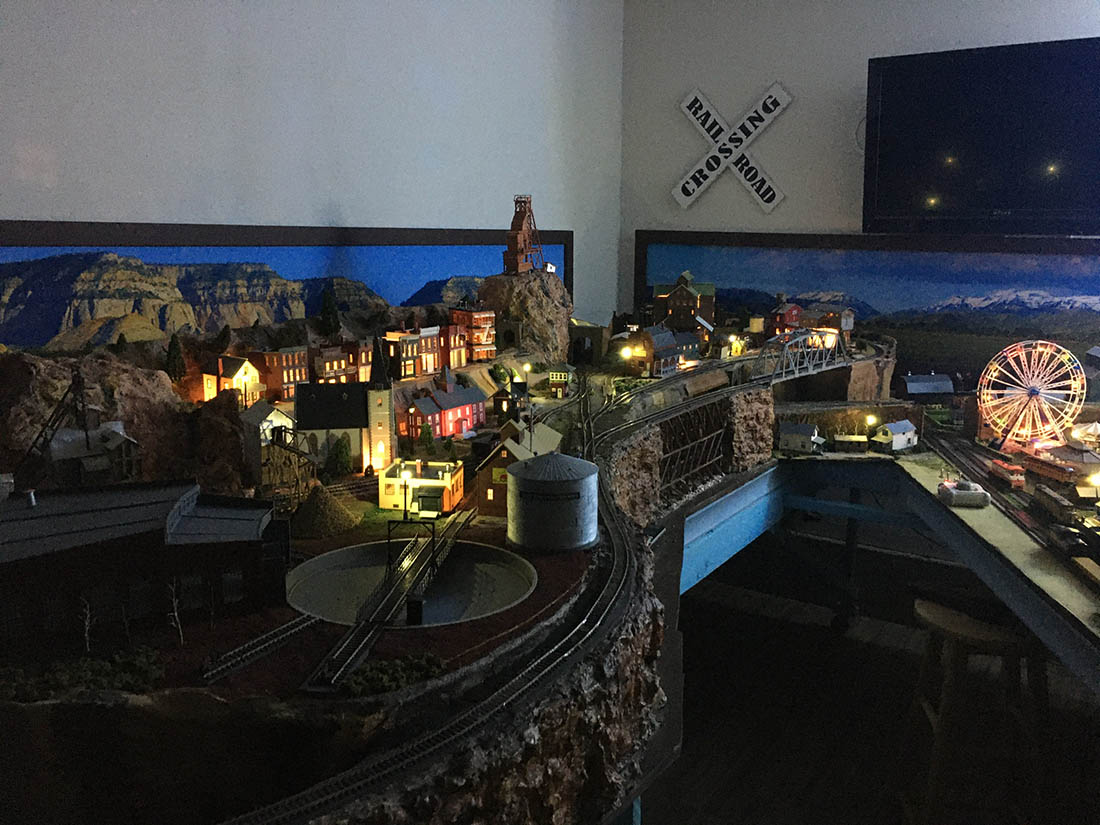
It’s loosely modeled after Nevada’s Carson City-Virginia City trains during the booming 1800’s Comstock area.

I grew up in that area in the 1960’s. A tourist train still runs between the two communities.

Steve”

Model trains Carson City HO scale

Model trains Carson City HO scale

Model trains Carson City

Model trains Carson City

Model trains Carson City width=


Model trains Carson City

Model trains Carson City

model railroad

model railroad

Model trains Carson City

“Alastair,

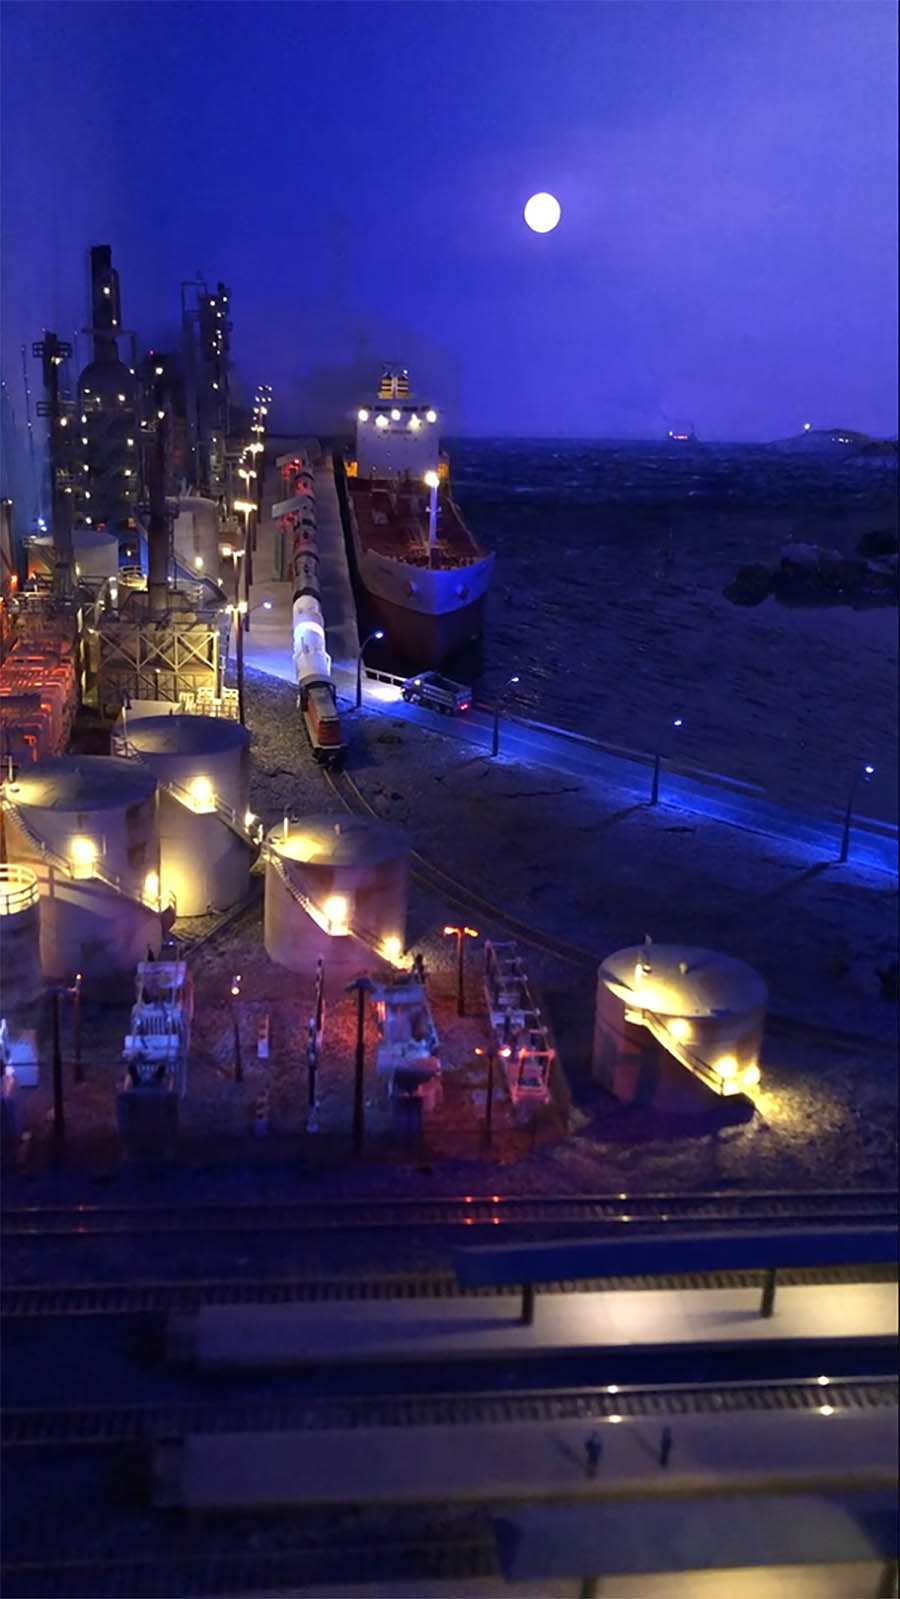
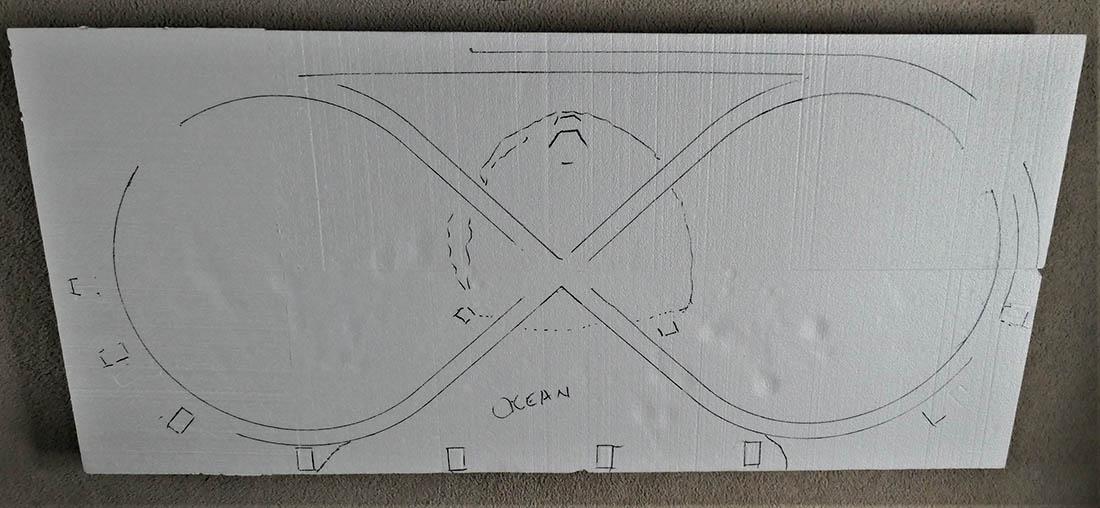
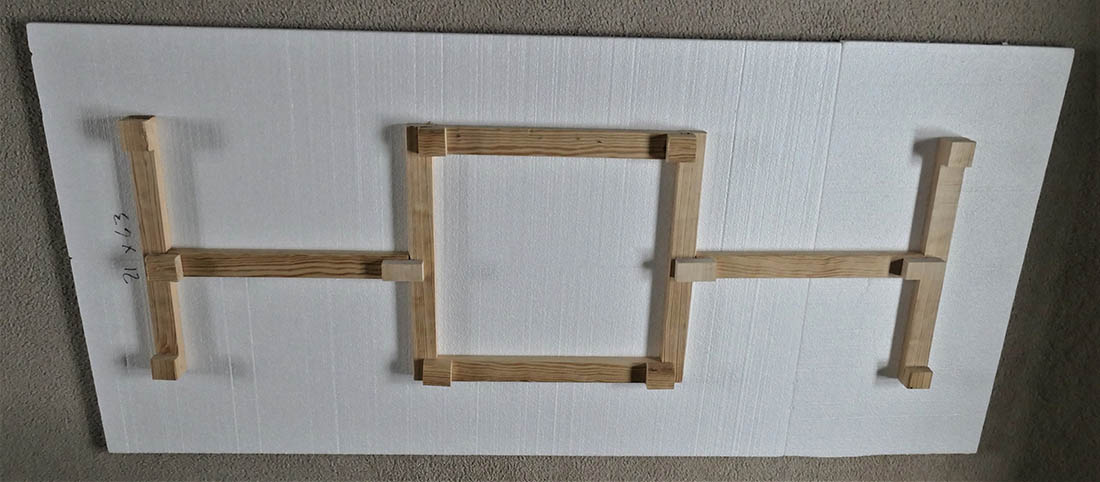
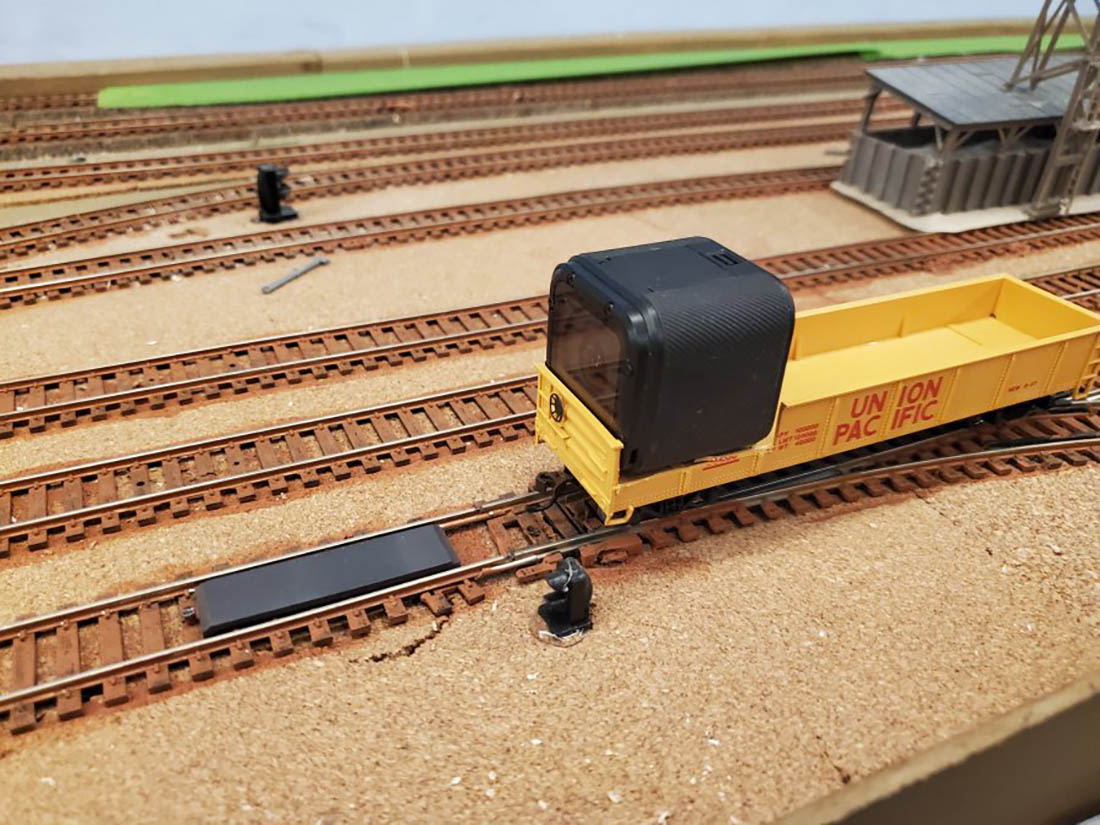
Thanks for all you do for the model railroad community. When I decided to try my hand at doing a video of my layout, I bought a GoPro Hero. I cut the sides of a low gondola to fit the camera and it worked well, first picture.

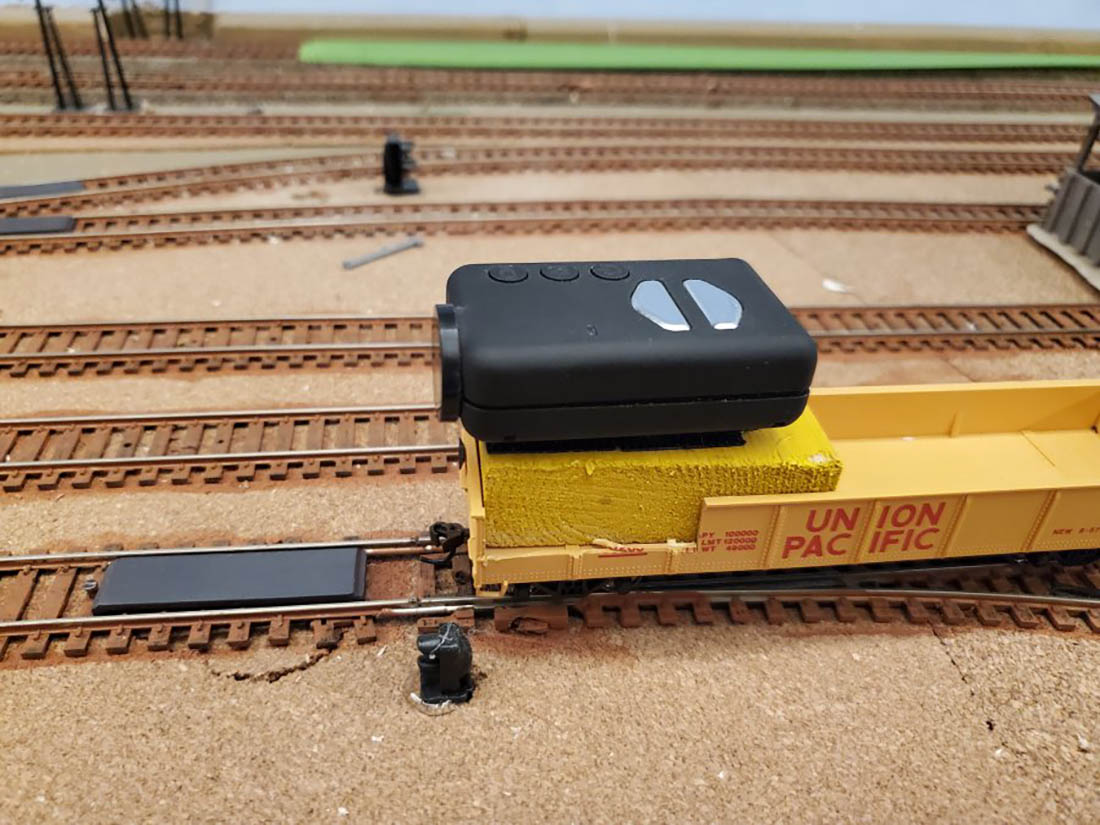
I then bought a Mobius camera that had a flat bottom and no means of mounting on a tripod, so I cut a piece of wood to fit the gondola. I painted the wood and put Velcro on the wood and on the flat bottom of the camera, second picture.

As soon as I finish painting my background, I will make a video using both cameras to see how they compare.

Bob, Newport News, Virginia”

A big thanks to Steve – course, I’m biased, but there are no better retirement projects, and remember, they can be on any theme you like. If that turns out to be Model trains Carson City, they that’s absolutely fine.

And thanks to Bob too, I’m looking forward to seeing that first cab ride video.

That’s all for today.

Please keep ’em coming.

And don’t forget the Beginner’s Guide is here if you want to stop dreaming and start doing.

Remember, it’s the start that stops most people.

Best

Al

PS More HO scale train layouts here if that’s your thing.


Need buildings for your layout? Have a look at the Silly Discount bundle.

N scale EZ track layout

John’s been in touch with his N scale EZ track layout:

“Right now my life is in transition.

Like many, I’m forced me to reassess my priorities.

In the reassessment, I purchased a new home in Nevada where I am building my minimum gauge outdoor railroad.

I am still working in Southern California 400 miles from my Nevada home. That commute is a killer!

To keep myself occupied, I decided to build my last Southern California layout.

The layout had to be small as my relocation and retirement are about three months away.

At first I was going to build a copy of a layout I built for my son some 25 years ago. That ship was scuttled by a multitude of misfortunes. In my frustrations I remembered a saying I learned some 40 years ago “Blessed are they that go in circles for one day they shall be called wheels.”

Quickly I grabbed my Bible to see if this could be found in the Beatitudes. No Luck.

After much research I found these words of wisdom came from Rodney Roundbottom.

Rodney was well named, he was born early in the 12th century on an morning in March, March 14th. As a bit of a Dionysian Epicure, Rodney was nearly as large at the equator as he was at the the poles.

For his size, Rodney fought well and became one of the lesser known knights of the round table, Sir Compherance of Pye.

It was shortly after joining the Knights that he uttered what proved to be a fate filled phrase “Blessed are they that go in circles…”. It seems that a couple of his better known compatriots took stock of his words (rumor has it they took a fence or two as well).

It was concluded that his observation was a slight against them and their endless discussions. They had Sir Compherance thrown in a punitentury, pilloried, and removed from the lists.

In honor of Rodney Roundbottom, my new layout is “Pizza Pye”

N scale EZ track layout circular layout

N scale EZ track layout adding landscape

N scale EZ track layout adding landscape

As one looks at my little layout one should notice that when it came to track, I took the EZ way out.

This track design was called a “Pizza” by the late Carl Arndt. It is a true micro-layout by his definition in that it fits in a four square foot space. The term “pizza” refers to the fact it is round like a pie and looks like it could fit in a pizza box.

N scale EZ track layout adding cliffs to model railroad

N scale EZ track layout model railroad sand

N scale EZ track layout model railroad rocks and trees

One may wonder why there are not any structures on this layout.

The reason will be obvious in a moment.

I wanted to be able to run both N Scale and HOn30/HOe/HO 009 trains on it.

Trees and rocks are indeterminate scale, buildings would give the game away.

Trees and rocks are arranged to hide the train as it makes its circuit around its fishbowl.

These scenic elements make the layout look bigger, They create an illusion by fooling the eye.

There is still more to do but it is serviceable for the present.

N scale EZ track layout on30

on30 circular model railroad

on30 model railroad

Some reasons to build small layouts like this Pizza or an Inglenook…

1. To try a different scale than the one you may be used to.
2. To learn new techniques, try different ideas.
3. To Get Started and have fun.

John”


Now on to Ernesto.

There’s bit of a language barrier, but nothing google translate can’t handle:

“Hello Al,

I would like to collaborate on your page with some photos of my model, I have been a ferromodelista since I was 10 years old.

I am currently 75 living in Mexico City

Ernesto”

model railroad crash

model railroad garage

moel railroad campsite

model train farmyard

model train farmyard

A huge thanks to Ernesto – I do enjoy seeing layout from all around the world.

And thanks to John too, for sharing his N scale EZ track, he has hit the nail on the head with his ‘Pizza Pye’ track plan. What a fab way to start!

That’s all for today folks.

Please do keep ’em coming.

And if today is the day you get started on your layout, the Beginner’s Guide is here.

Best

Al

PS More HO scale train layouts here if that’s your thing.


Need buildings for your layout? Have a look at the Silly Discount bundle.

N scale harbor scene

Fred’s been back in touch with his stunning N scale harbor scene.

You’ll remember his stunning layout as soon as you see it.

He hasn’t sent in a narrative, but if you want to get up to speed, his last post is here.


N scale harbor

N scale harbor

N scale harbor

A big thank to Fred for sharing his N scale harbor pics. I can’t wait to see more!

Now on to Robert, who has sent in a good piece on something I’m always going on about: making a start.

“I have been working on a humble N gauge layout that serves two purposes.

It puts a train around our little Christmas tree, and the rest of the year there’s a mountain in the center with a lighthouse on top for the grandkids to amuse themselves with when they visit.

The whole thing sits atop my stereo cabinet. The layout had to be compact and lightweight.

N gauge

1. I started with Styrofoam insulation sheets. I used low-temperature hot melt along the edges to fuse the sheets. The finished foam base is about 2.5 by 5 feet. I outlined where the tracks would fall and sketched the position of the mountain. The inside track is a figure eight, and the outside is an oval with a trestle in front.

N gauge

2. I braced the Styrofoam with furring strips and added squares of furring strips as standoffs to provide space for wiring.

N gauge

3. Next, I laid the track down, proved it with the trains, made adjustments, then glued it down using Loctite Power Grab construction adhesive. The three blocks in the center serve to hold the Christmas tree legs. They also serve to define the outside shape of the mountain.

4. I outlined the shape of the walls of the mountain on cardstock, then broke up chunks of Styrofoam and used them like building blocks, gluing them with hotmelt on top of the cardstock outline. Notice the shoe I made from cardstock to hold the foot of the tree. I did this for two of the three legs.

5. Here you can see a partially completed wall. I numbered each of the wall outlines so I would not confuse where each one went. I then sculpted the wall with a razor blade and covered it with tissue and diluted white glue to make it appear more like rock.

6. After outlining the locations of the walls, I used diluted white glue and toilet paper to add texture to the tunnel floor.

7. Here is a shot of the painted cave floor with the mountain walls glued in place.

8. Next, I cut foam for the tops of the entrances and a center piece for the top of the tunnels or cave. The entrance tops will be glued in place while the center piece is a friction fit.

9. I used tissue to trace the outline of the mountain walls and then cut a sheet of foam to match the tracing.

10. The piece that fits inside the mountain is then glued to the piece that serves as a base for the top of the mountain.

11. Turn the piece over and it fits snugly into the mountain base.

12. I built up the mountain top and prepared it for the lighthouse. The village to the left is Sunnydale, and the village on the right is Forest Falls. Pete’s dragon Elliott is sitting in his cave, anxiously awaiting his apples and a cocktail by the beach. Sunnydale, a happy little cul-de-sac, will have a gondola ride to the top of the mountain.

Much more to do…

Robert”

A big thanks to Robert and Fred.

Today’s post really does show both sides of a model railroad.

It’s hard to think that at some point, Fred’s layout looked something like Robert’s.

Nothing happens without making that start.

And if today’s the day you start yours, the Beginner’s Guide is here.

Best

Al

PS Latest ebay cheat sheet is here.