Bruce has been in touch with his N scale L shaped layout:
“It was in 1971 while living in Toronto Canada that I bought my first N Gauge train set.
It was a small boxed set by Aurora, Postage Stamp Trains, which cost me $25.
It consisted of a small 0-6-0 steam engine, 4 freight cars, and some rails. I was hooked on the detail and size, and this started me on collecting N Gauge.
Over the next couple of years I bought through the mail from the USA several Rapido, Atlas, and other makes.
I then moved to England for a couple of years, and bought a Hornby Minitrix Britannia for £10.
I then moved to Cape Town for several years, and found a small hobby shop close by, and continued my collection, mainly Atlas items.
After that I moved back to England for a while, and then in 1981 moved permanently to the USA, where I have lived at the same address for almost 40 years.
I bought a country house that did not have a decent garage, so I built a large 2-car garage with an upstairs, and two rooms at the back.
One room, my future Train Room is 16 ft by 12 ft, and next to it is the Tack Room (for saddles and bridles) for use by my wife for her horses.
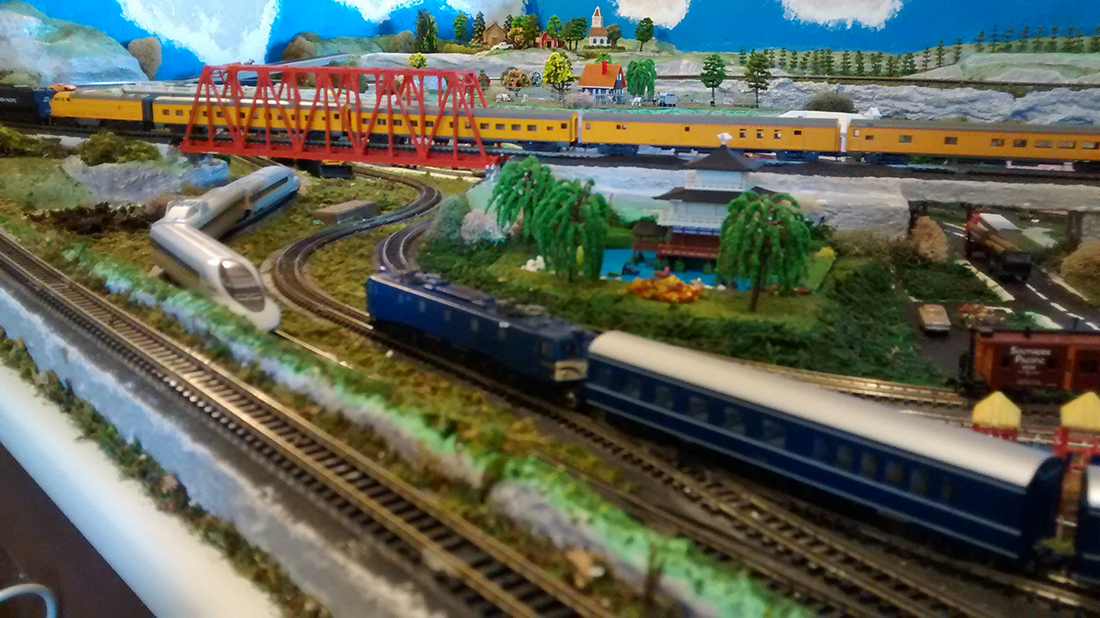
However, it was not until 2013 that I started building my layout, as my main interest was collecting different trains. I did not specialize, as I bought anything that I liked the look of – steam, diesel, electric trains from USA, England, Germany, France, Japan. Most of my purchasing was done on ebay between 2000 and 2010.
I “finished” my layout in 2018, since I did a little bit each year, as there is no heating or A/C in my train room, so I worked just a couple hours at a time over a couple of months each year.
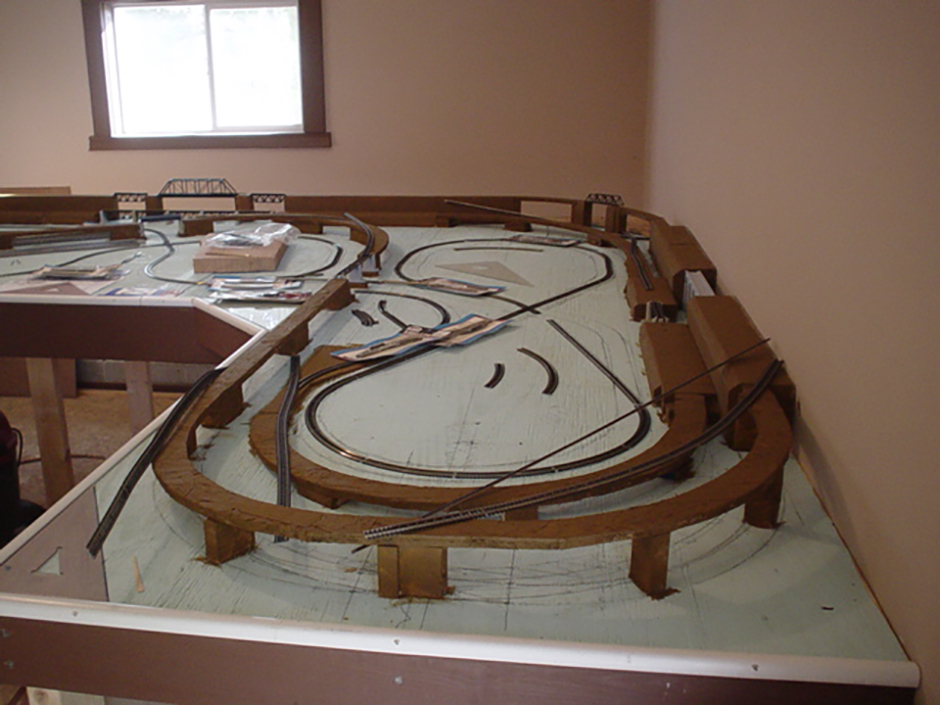
Attached are some progress photos – I apologize for the bad quality.
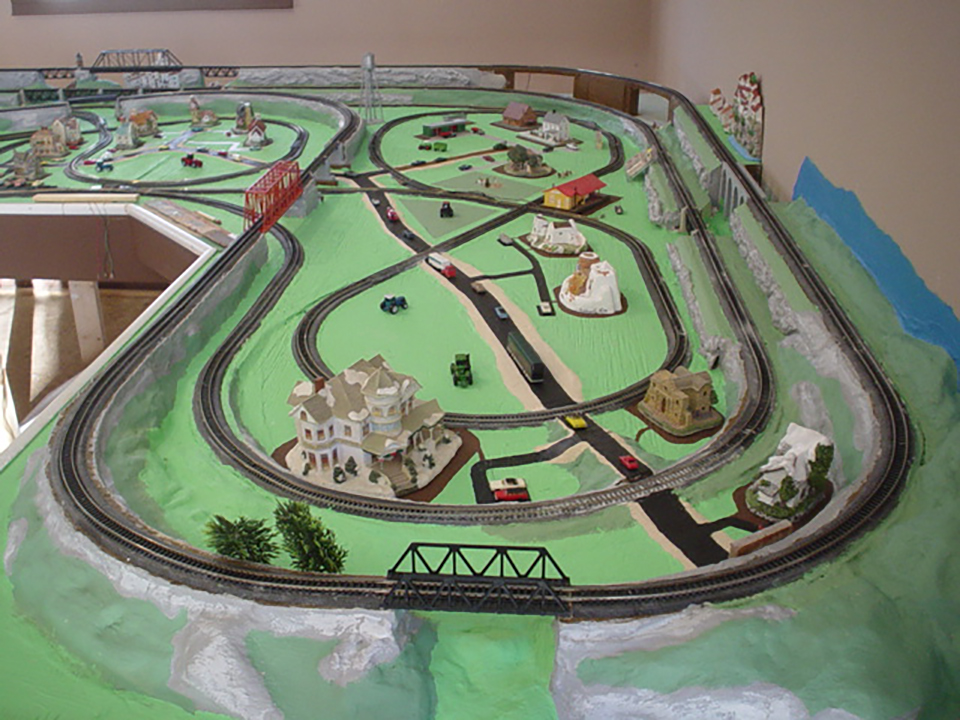
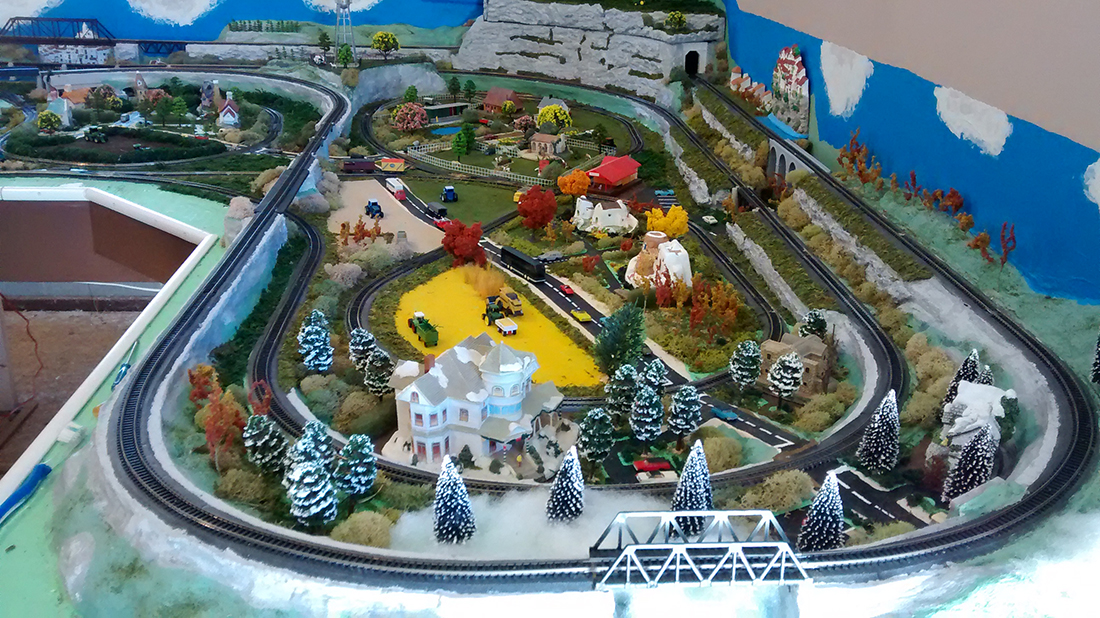
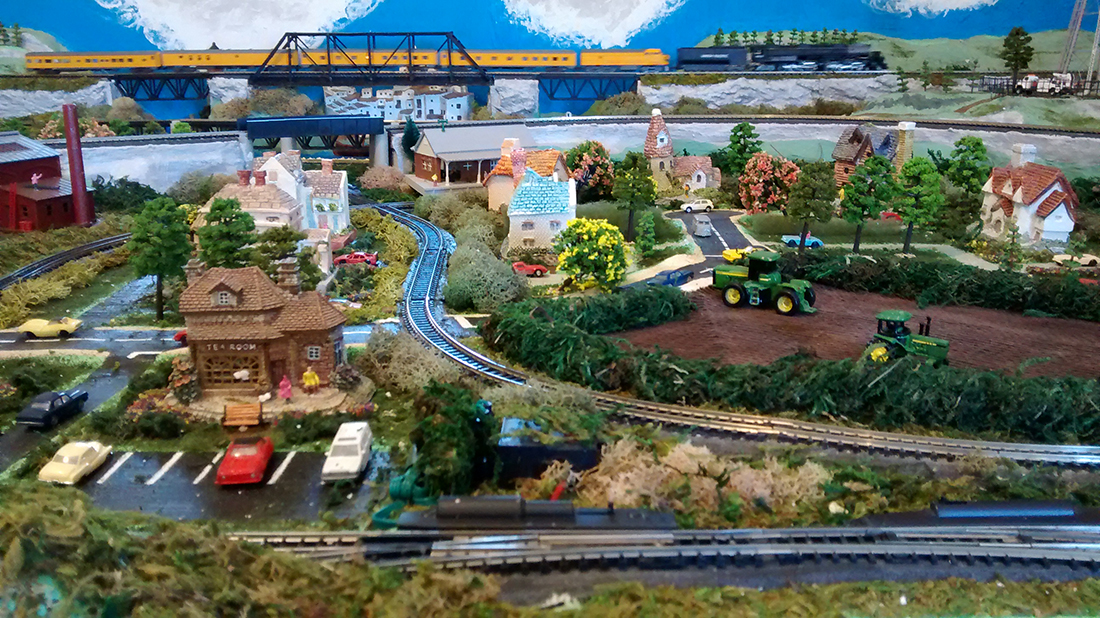
The layout is “L” shaped, with 4 train tracks, and 4 DC controllers.
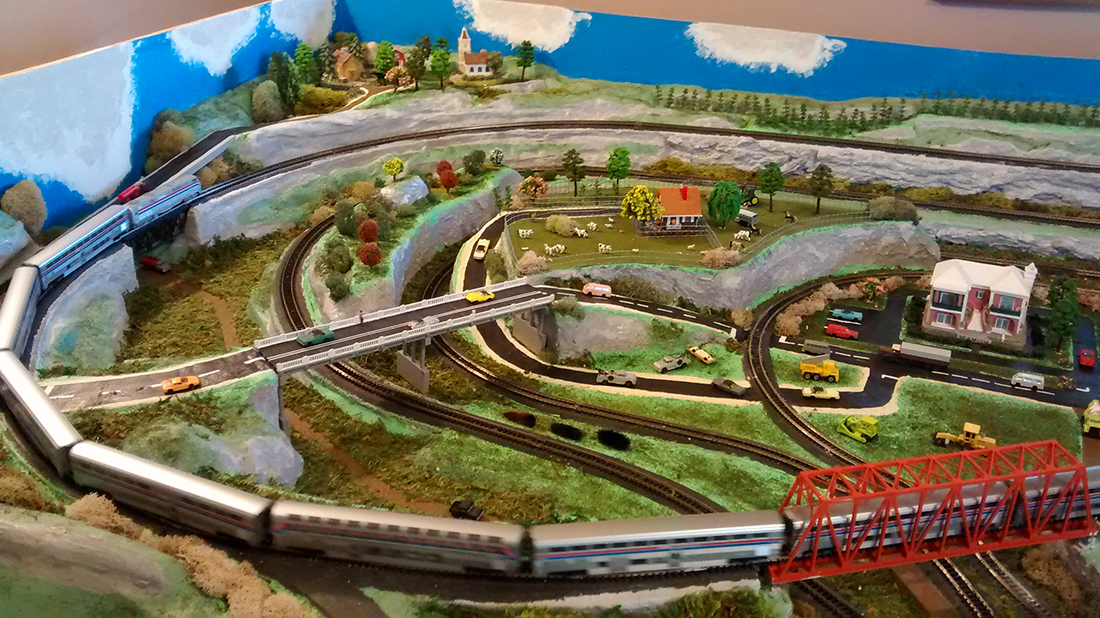
There are 2 outside long distance tracks for my longer trains, and 2 figure-8 shorter tracks on the inside. Nothing too fancy, as I want to see my trains run.
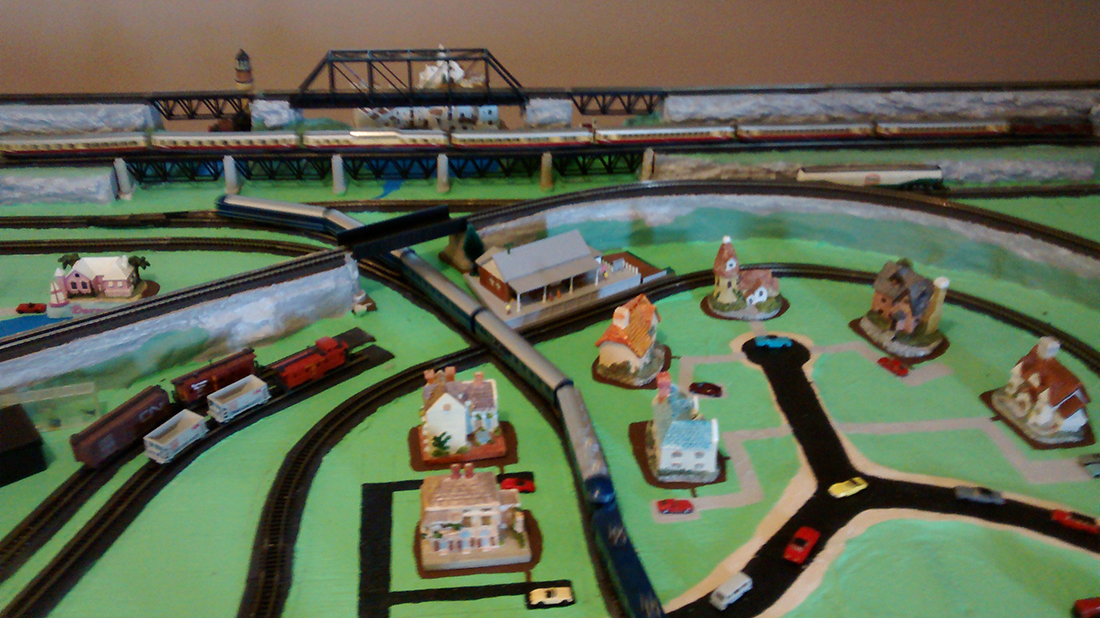
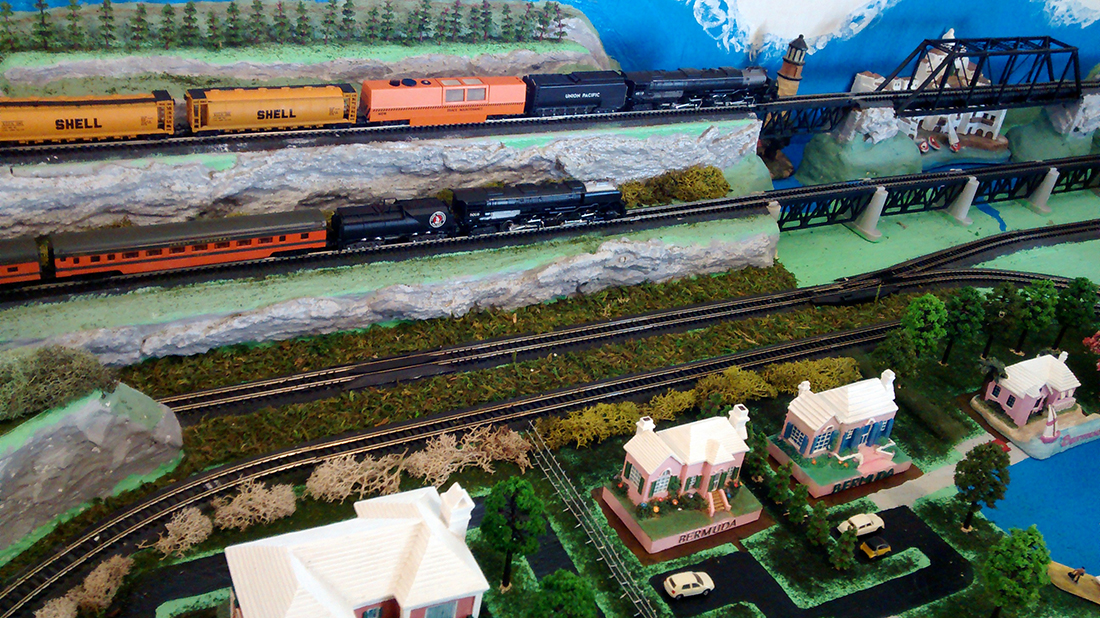
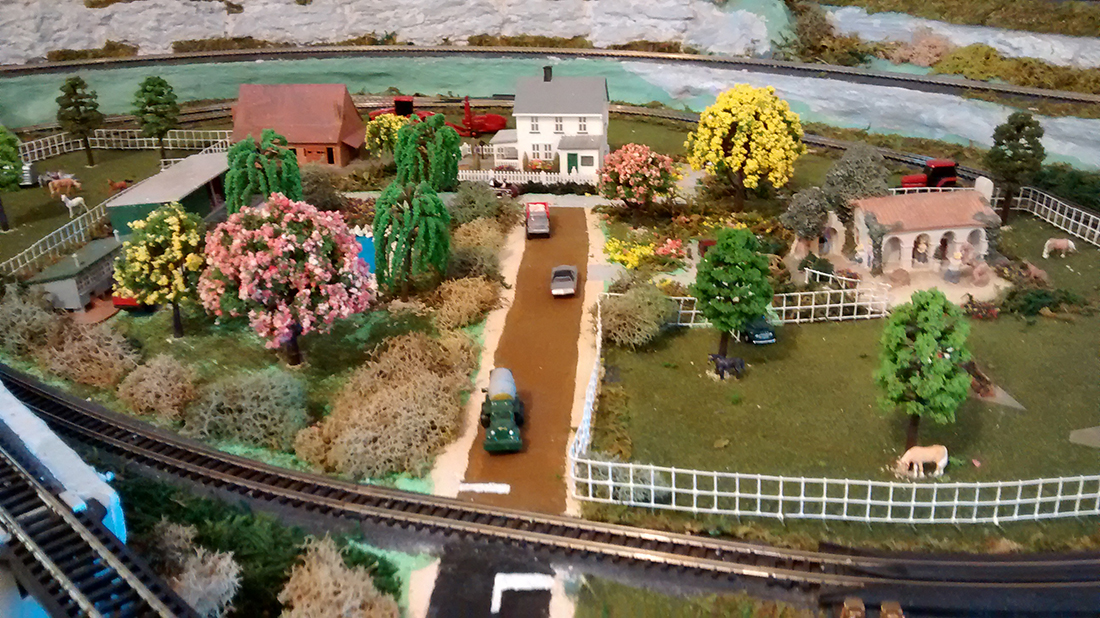
The houses I used are a real mix – some might not be truly N Scale. I got Spanish Villas bought in Cadaques Spain, Bermuda Cottages, English Cottages, American Farm houses, and a Lighthouse I bought at a Dollar General.
Bruce”
A huge thanks to Bruce for sharing his N scale L shaped layout.
Whenever I see a farm on a layout, for some reason, I’m always reminded of Pete’s HO farm.
That’s all for today folks.
Please do keep ’em coming.
And if today is the day you start your layout and joining in on the fun, the Beginner’s Guide is here.
Remember, it’s the start that stops most people… don’t let that be you.
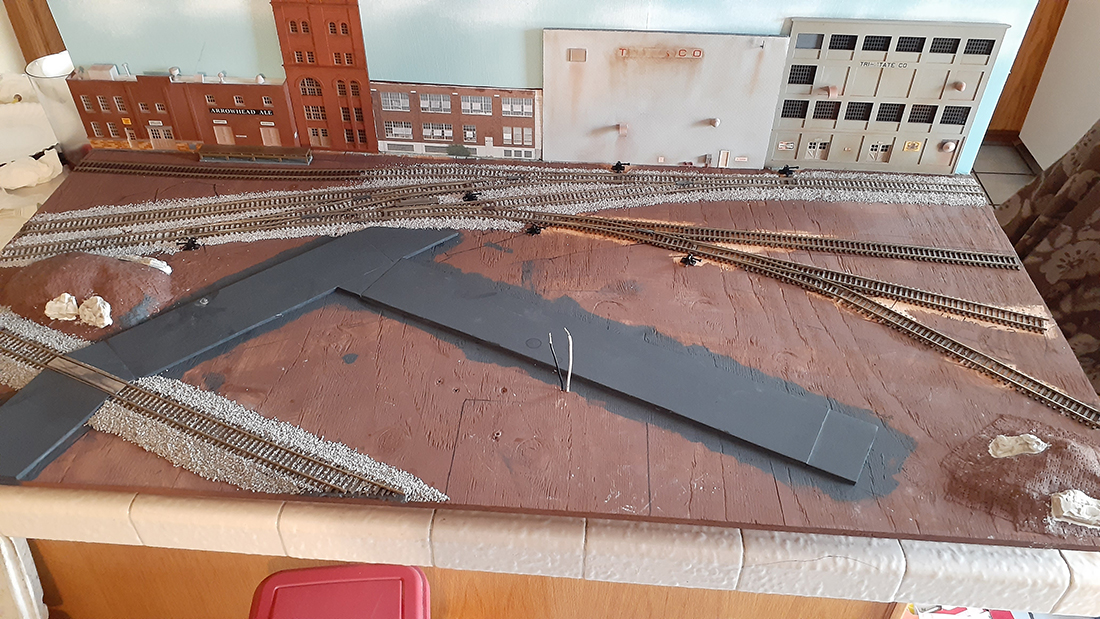
Hi, little update after a year off I am back at it a little at a time.
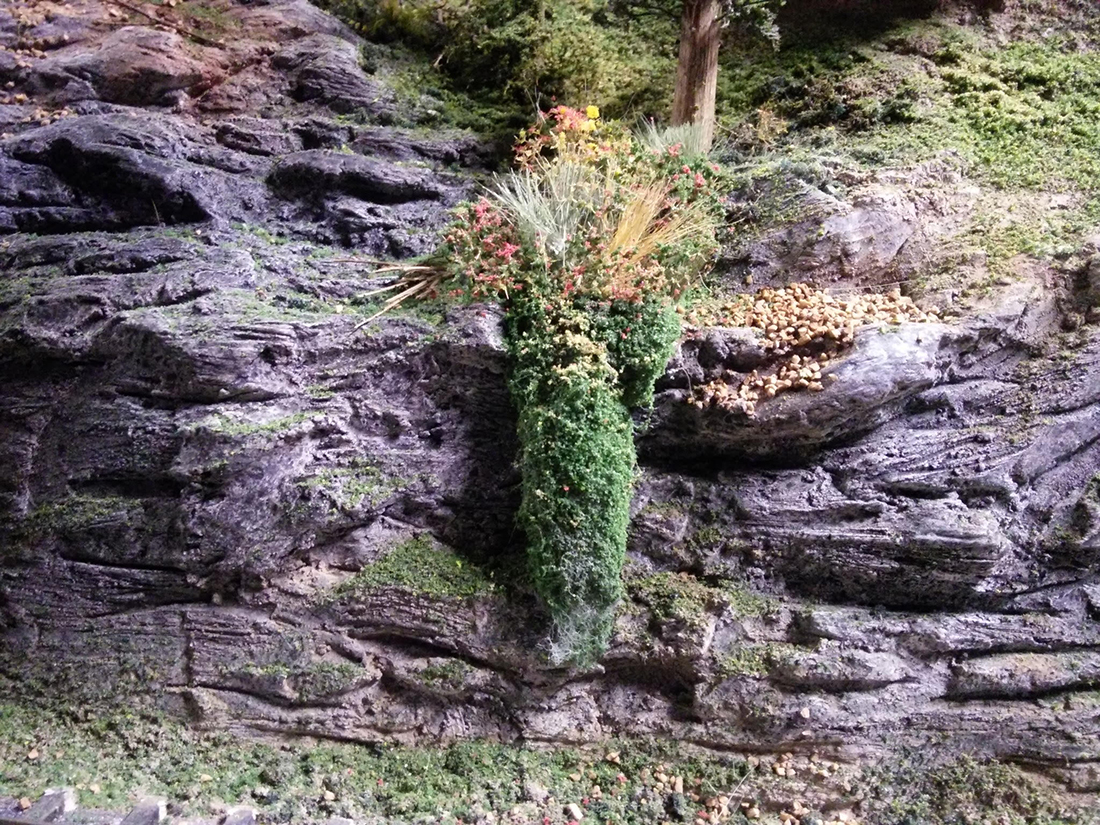
I have started with the track ballast and the land scape. Last winter I had a mouse get into the garage and the little bugger did some damage to some shrubs. So I had to make more, no big deal because I need a lot more.
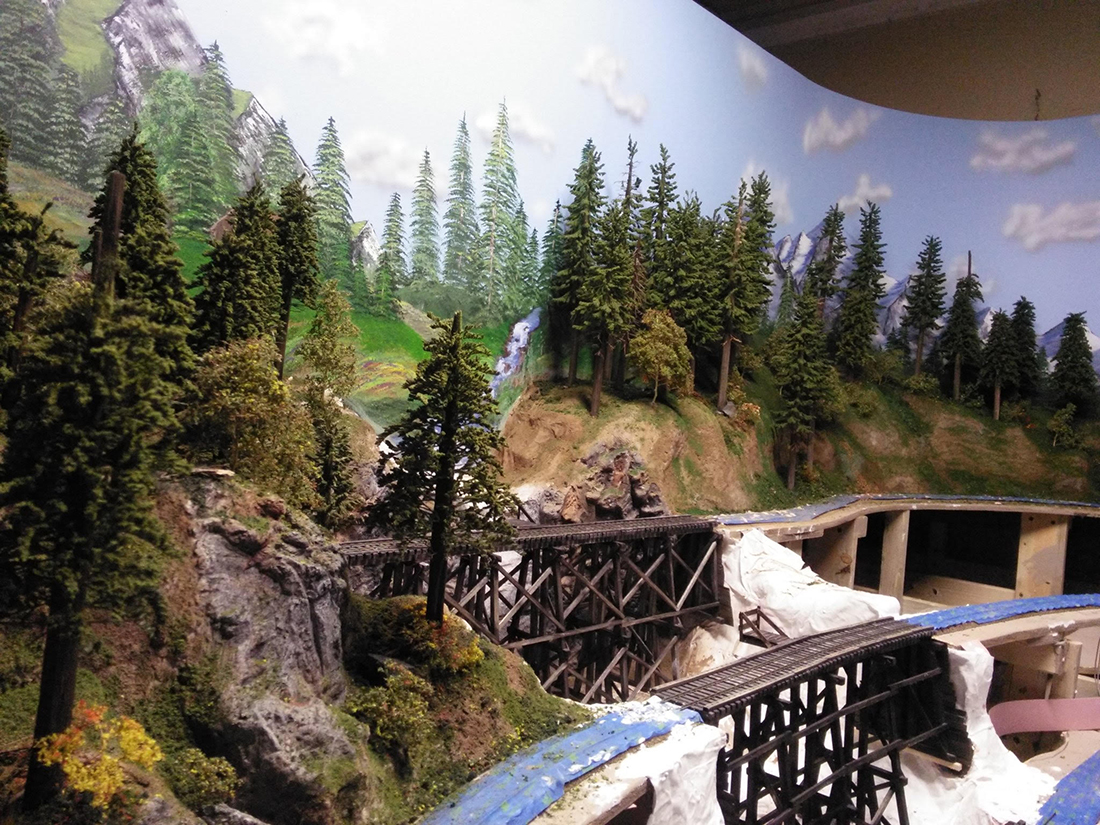
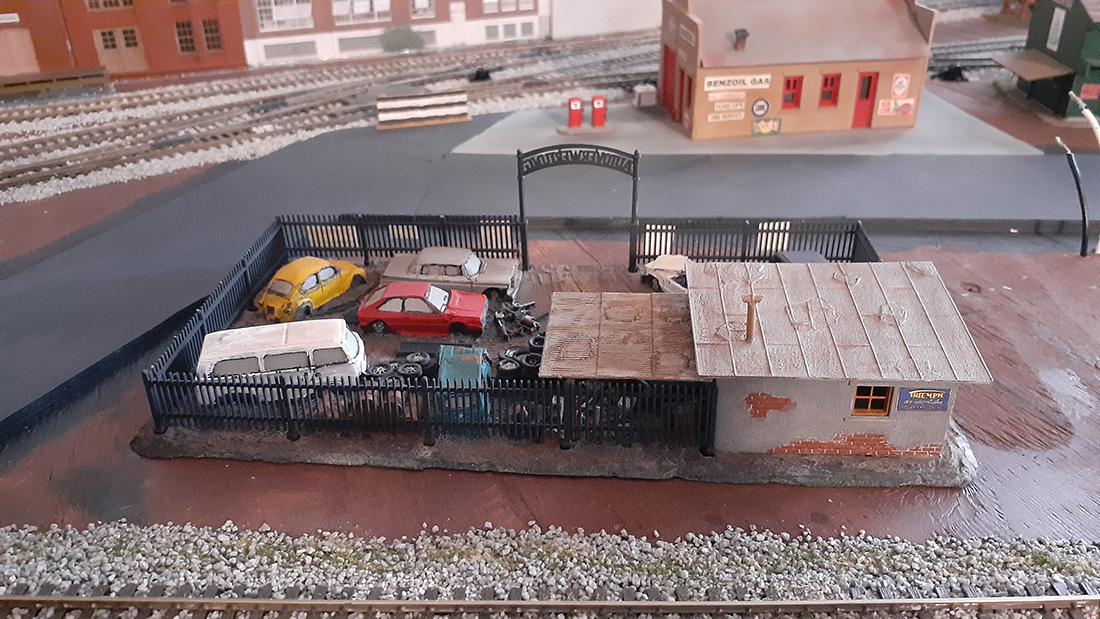
The pictures I sent show some of the landscape installed, my next project is installing the waterfalls and the streams. I then can install the trestles. Still working on adding more hard scape from the back forward.
Getting slower as I get older, I will send updates as I progress.
The scale I am modeling is on30 narrow gauge, all track was hand layer with over 25000 spikes installed.
When I make more trees I will take step by step pictures on how to.
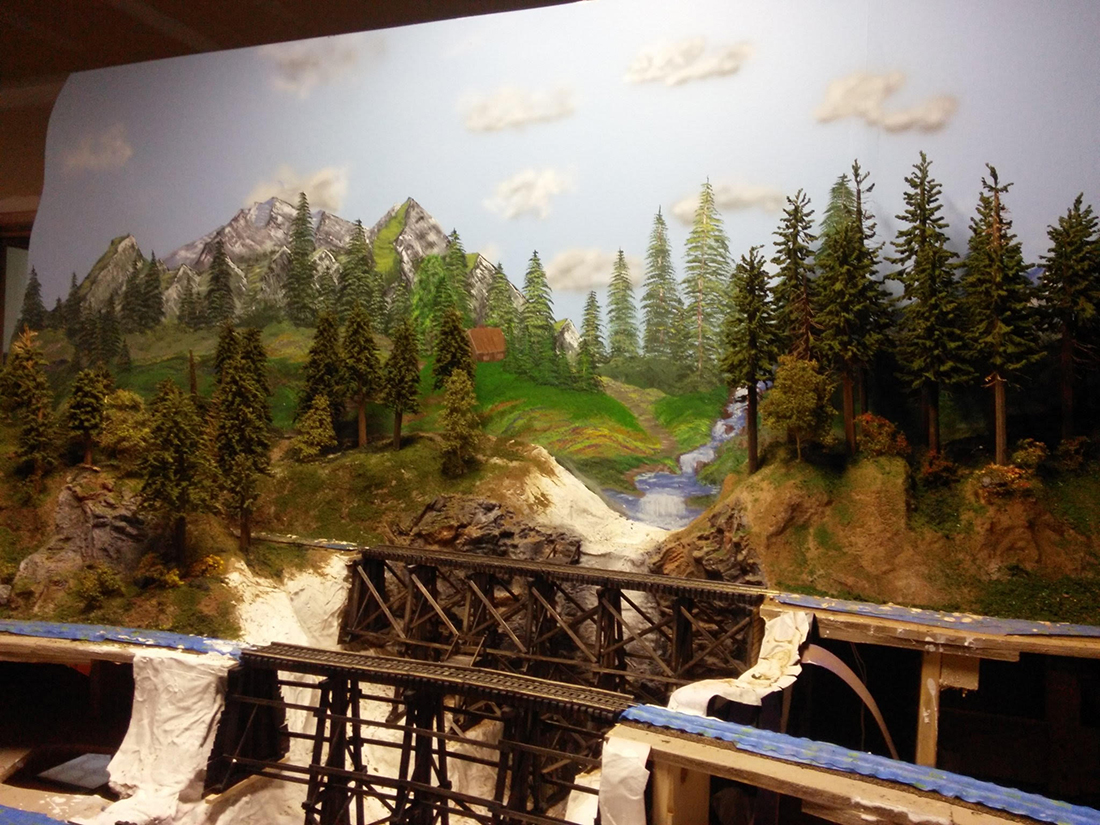
As the the backdrop painting it was why I took a senior bob Ross painting class at the local craft store, that was a experience because I was the only male among 15 or more lady’s.
After a few practice paintings I started the backdrop, it took about three week’s to complete.
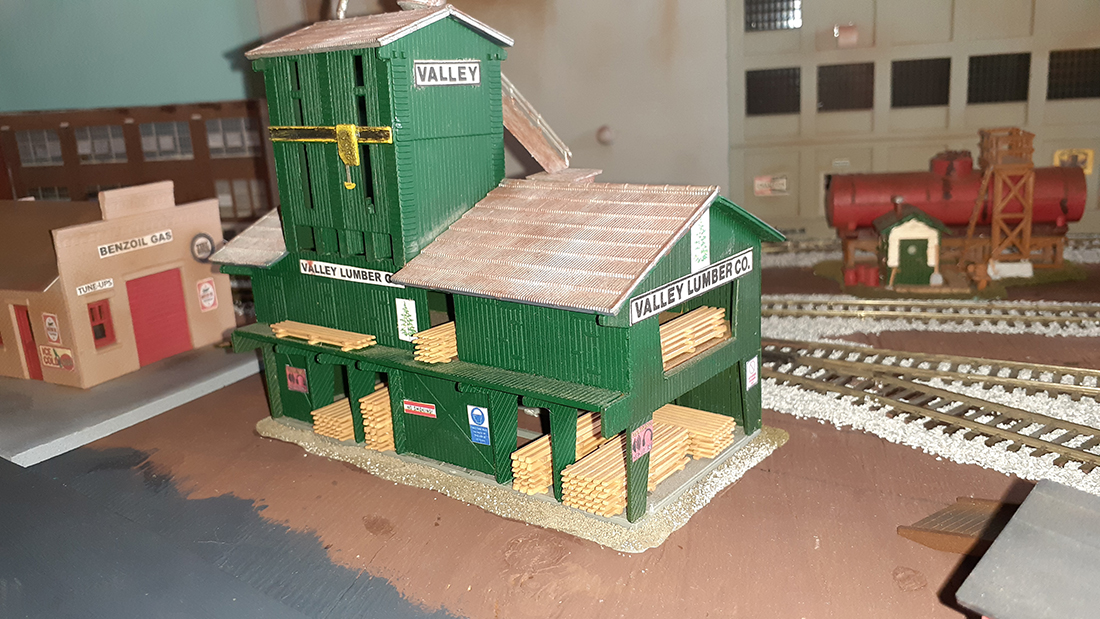
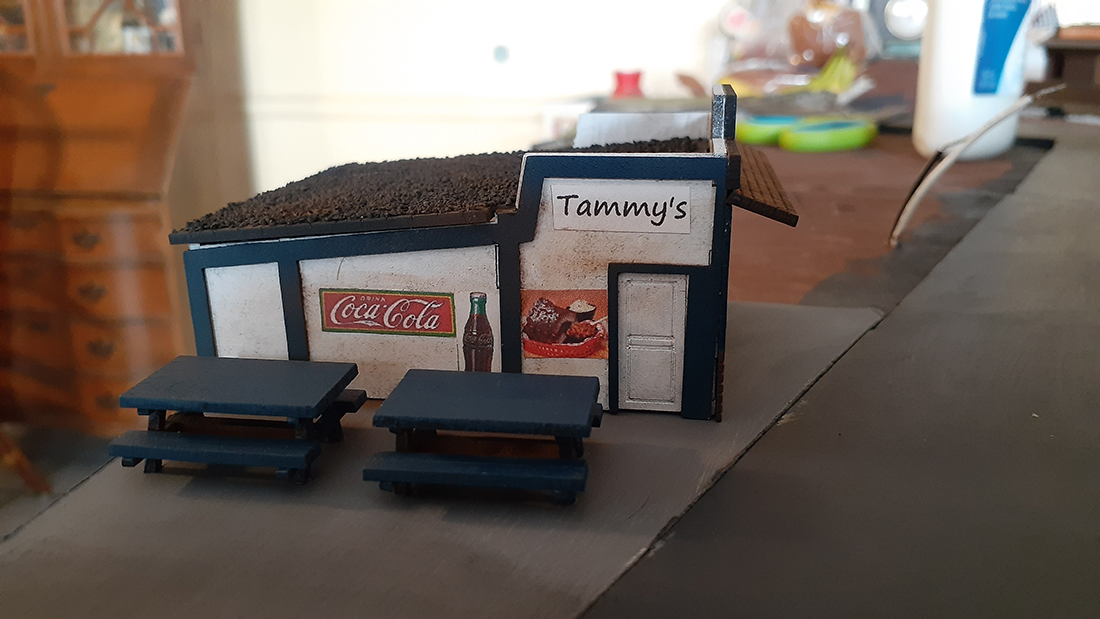
Like I said all buildings, trestles, bridges, water tanks etc, were all scratch built. Lumber was all cut on my table saw to the correct dimensions for my scale.
Some information I got from the university y Washington and some from the library of congress.
Again thanks for your great sit and the work you do for the model railroad community.
Thanks
Jeff”
Now on to Ben, who has made that all important start:
“Hi Al! I have slowly, and I mean slowly, been working on my small layout. Work and my kids take up most of my time.
I finally placed the last building and will start landscaping soon. Thanks for sharing!
Ben”
A big thanks to Jeff for sharing his on30 narrow gauge- what a layout that’s going to be.
And well done to Ben. The ‘start’ is what stops most people, which is a great shame. Once you get going it’s a lot of fun.
Now on to a quick bit of housekeeping. Some of you are mailing me saying you’re not getting my mails anymore. Sometimes this does happen.
If you want to make sure you stay on the list, please whitelist my email address. Just google how to do it (every mail provider is different), and then you won’t drop off the list.
David has been in touch with his HO scale train layout 6×4:
“Hi Al,
Thanks for all your blogs.
I started to build my layout about 6 years ago when I retired. It really just evolved, starting on the dining room table, then grew legs. Of course, starting as a novice I made many mistakes as we all do.
It’s a HO scale train layout 6×4 approx and was constructed using Peco code 100 set -track mainly to be able to shunt etc, using #2 curves as the smallest radii.
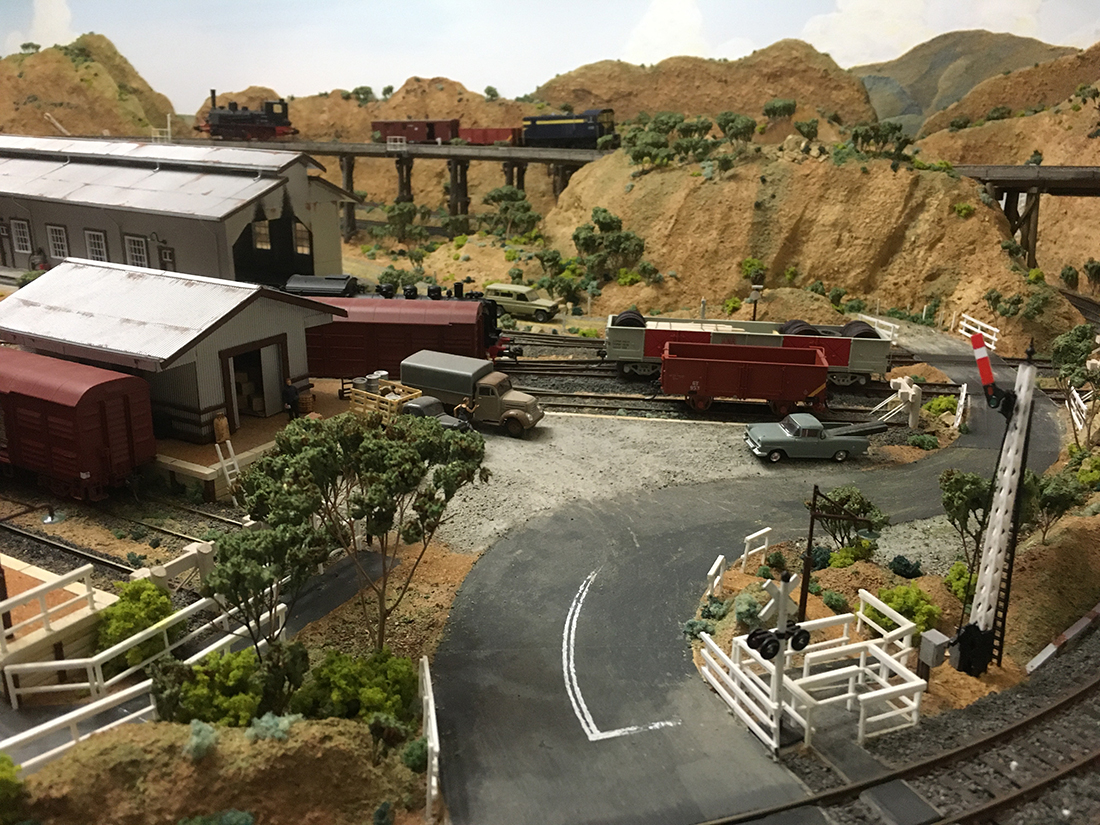
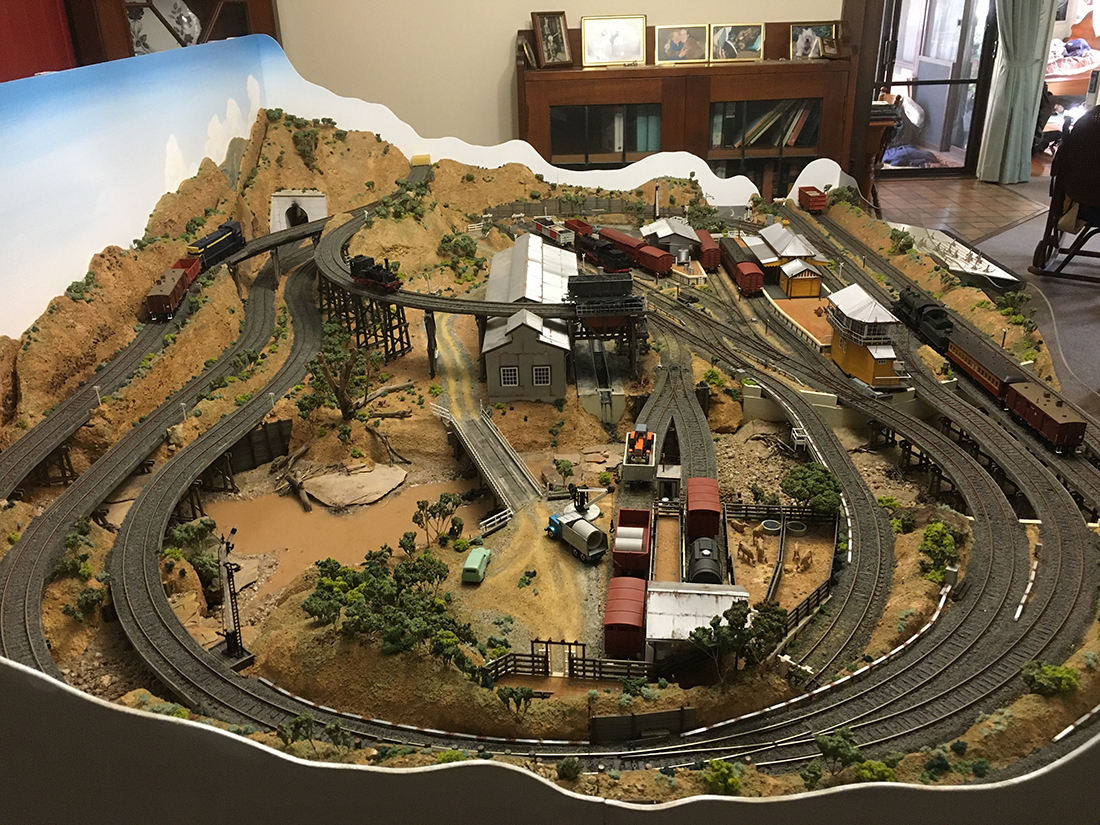
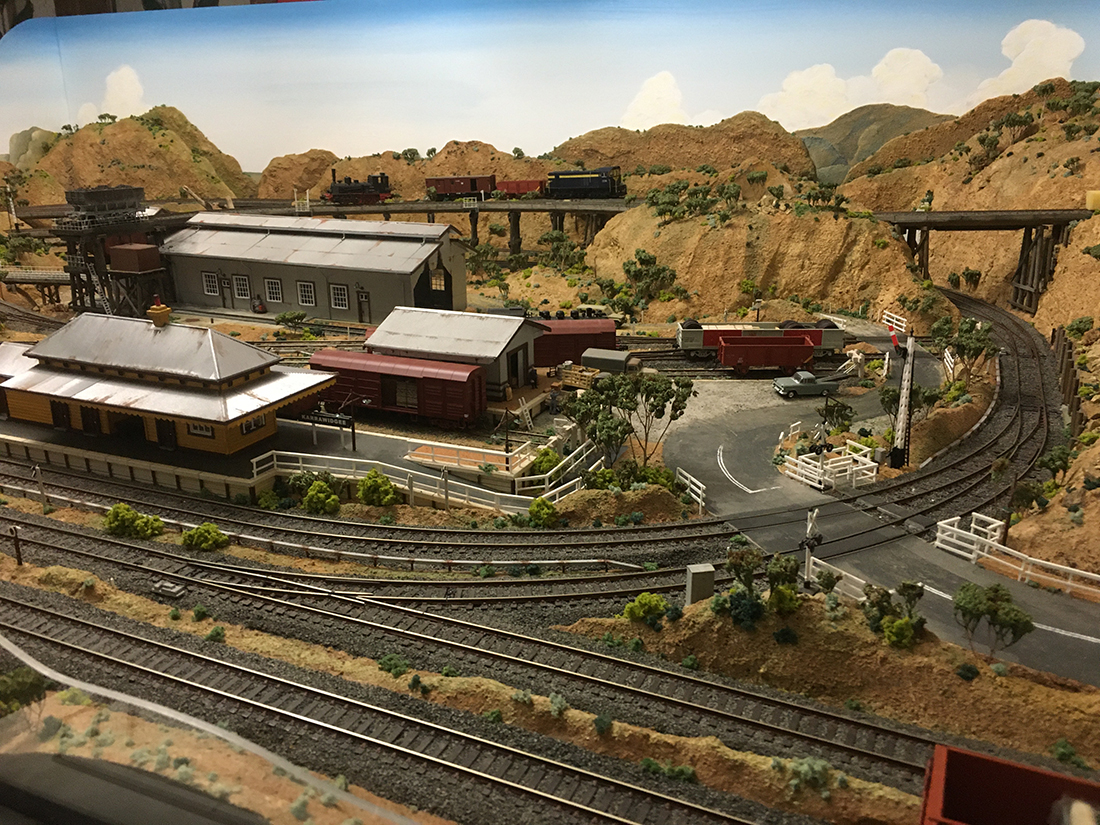
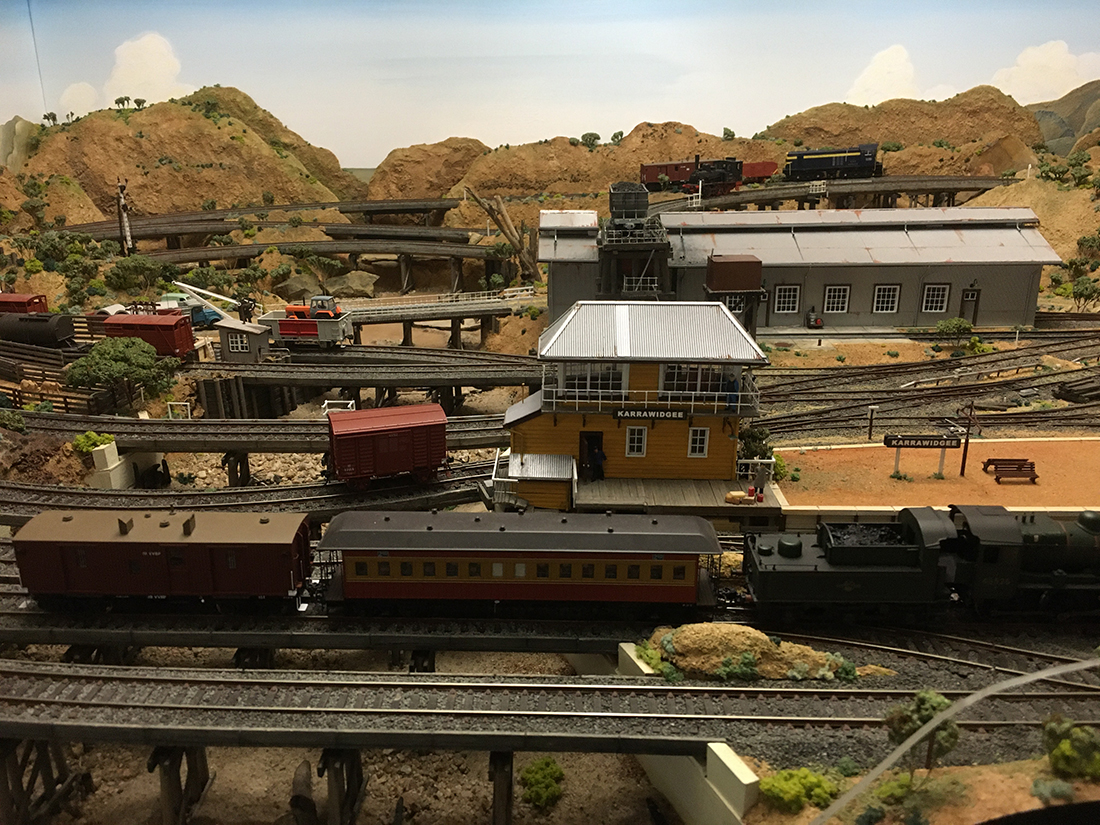
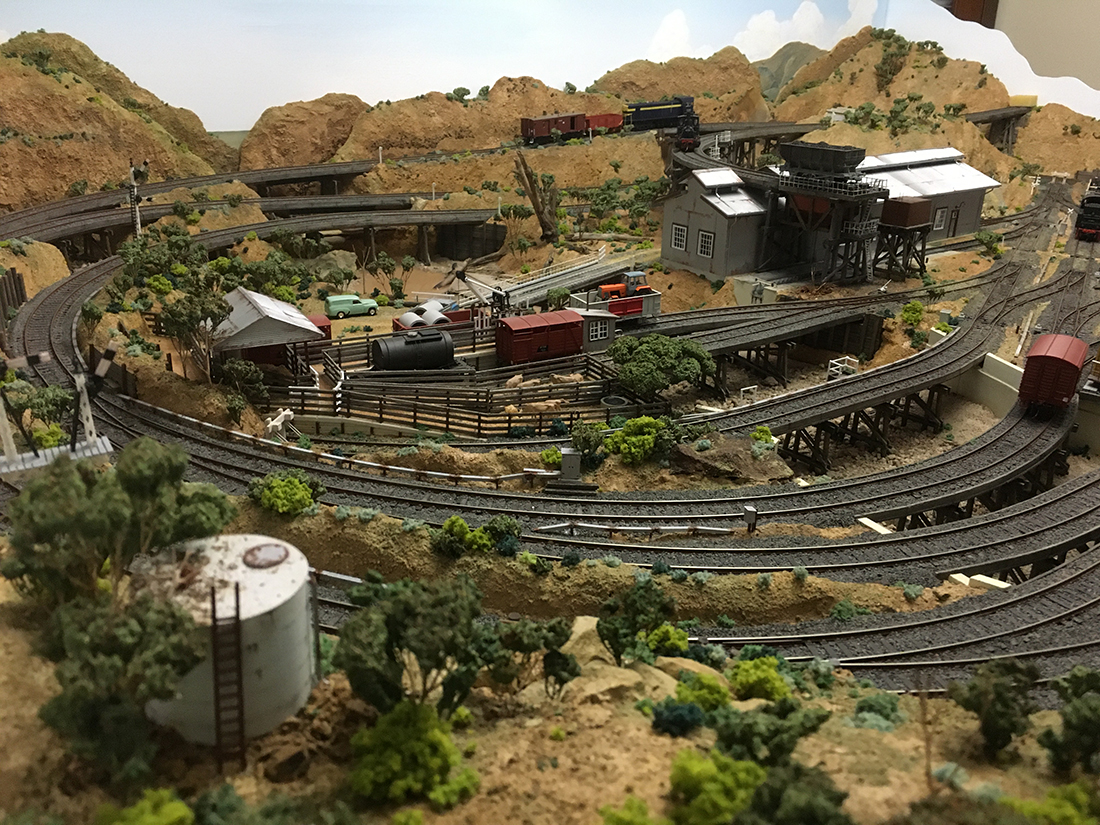
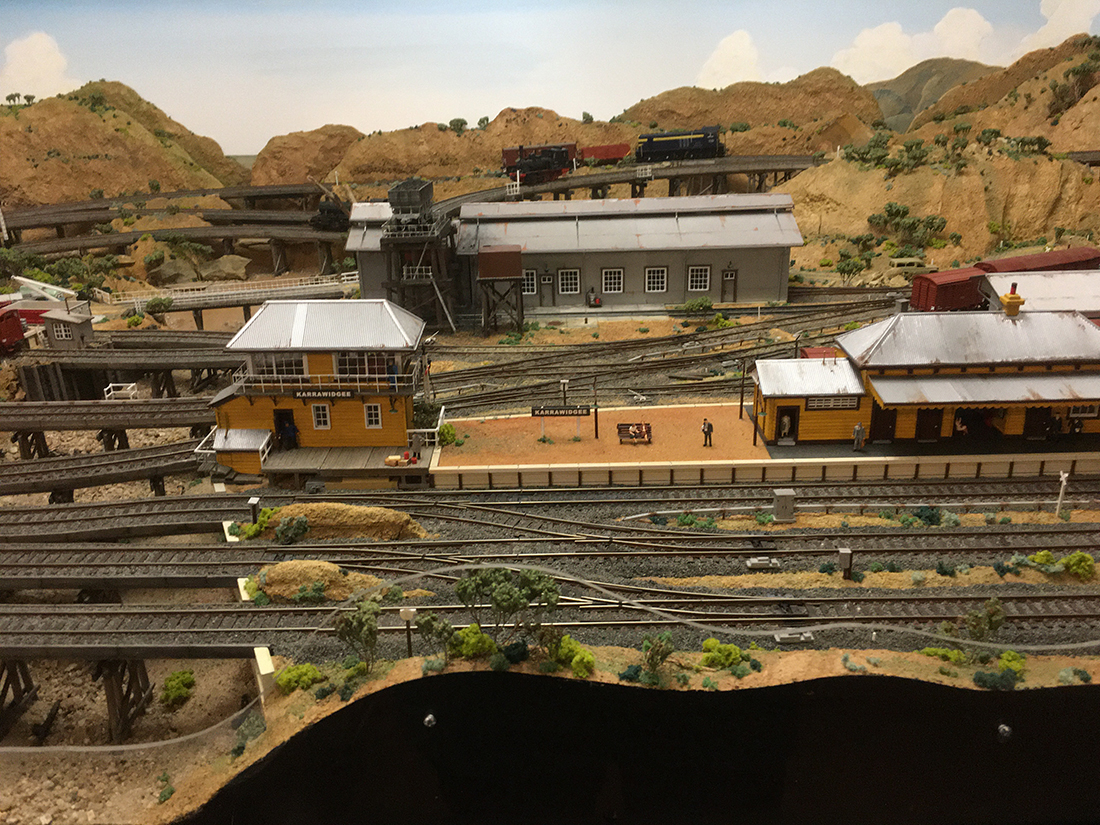
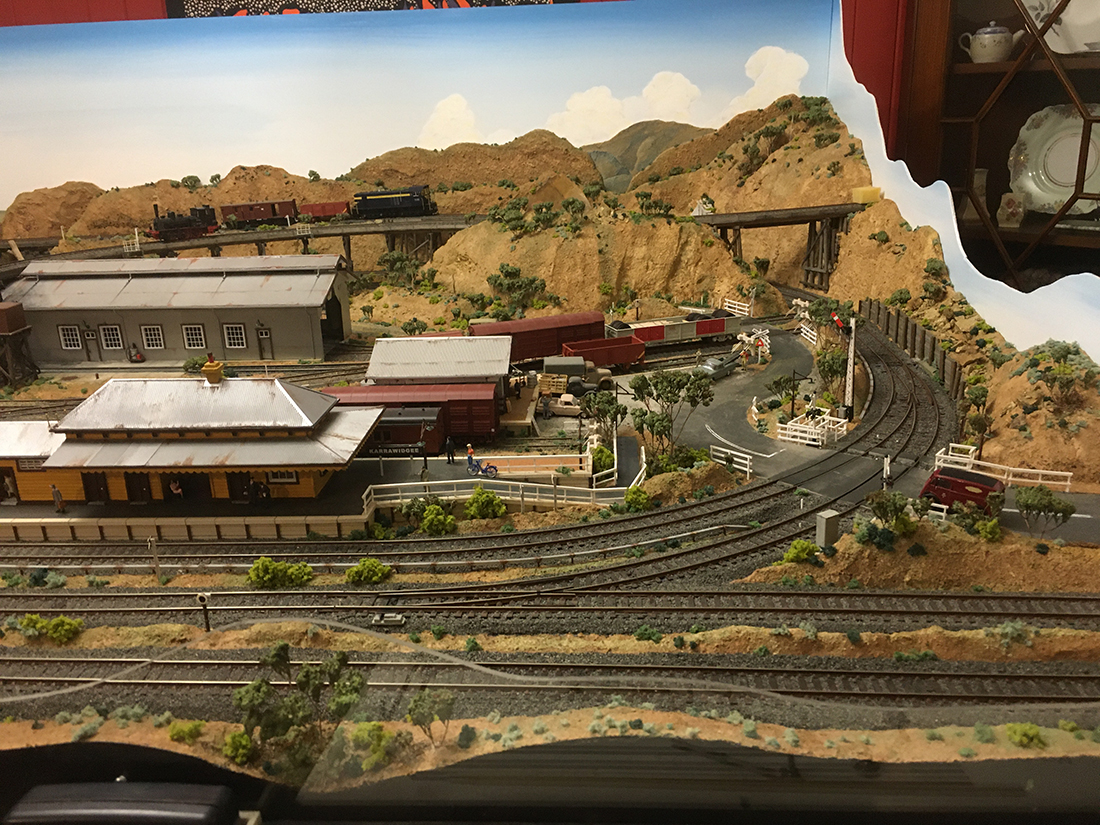
“Karrawidgee” (a fictitious town} is based on the Mallee type of vegetation found in the Western part of Victoria in Australia and is fairly accurate re Victorian Government Railway infrastructure.
It is all scratchbuilt including the vegetation which is Cedum plants and vitamised foam rubber. The vegetation was planted individually recently as we endure COVID19 lock-down and must admit was over it by the time I finished.
I started the layout with the river taking a lot of space and found I had to make many bridges to fit track in. All trestles are a different height and grade and constructed from the Vic Railway drawings to scale.
As a boy we lived near a railway branch line and the goods yard was my playground, so I guess it’s a bit nostalgic.
I have tried to make it as realistic as possible. Layout #2 will be in the NE of Victoria with new challenges in vegetation with many timber trestle bridges.
Hope my HO scale train layout 6×4 is of some interest.
“Hi Al, (From a longtime follower and great admirer)!
My love for trains started about 60 years ago and some of the trains on my layout today are some of my originals as well as my wife’s.
That HO train hobby stopped when I got my drivers’ license and was rekindled when our first daughter was about five years old. That lasted for about another 10 or 12 years when my wife packed everything up and neatly put them in the attic.
When the third generation was coming for Christmas about five years ago my oldest daughter called and said “Dad why don’t you put up the trains for the kids!” Luckily the trains were still in good shape and I had about six weekends to build a 4 x 8 layout. When the kids showed up for Christmas, it became immediately obvious that it was all worthwhile.
After the holidays I realized it was time to build a much larger layout. And I will admit it was not only for the kids!
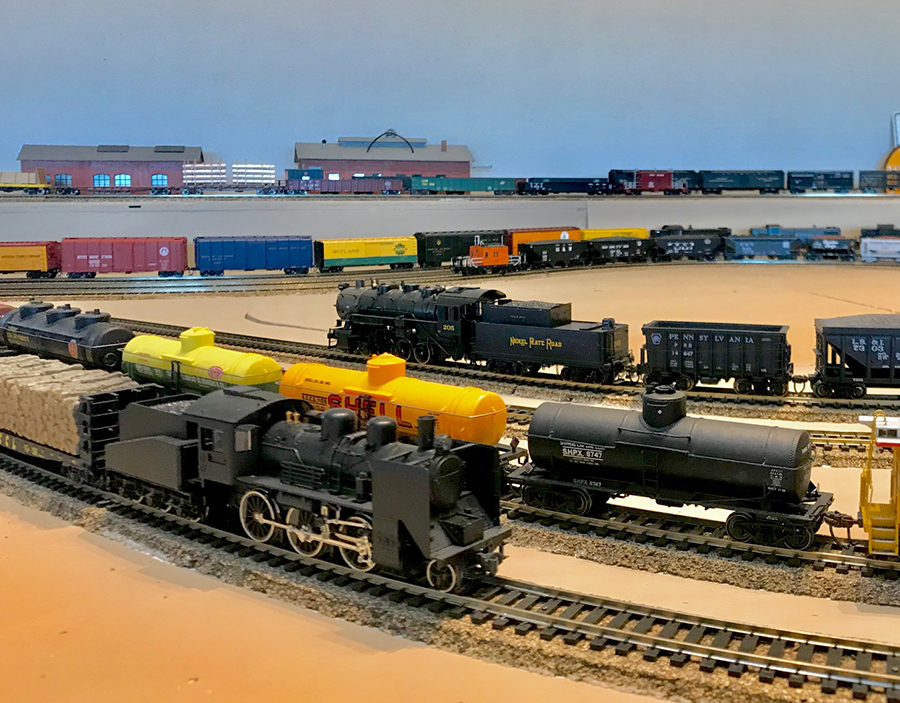
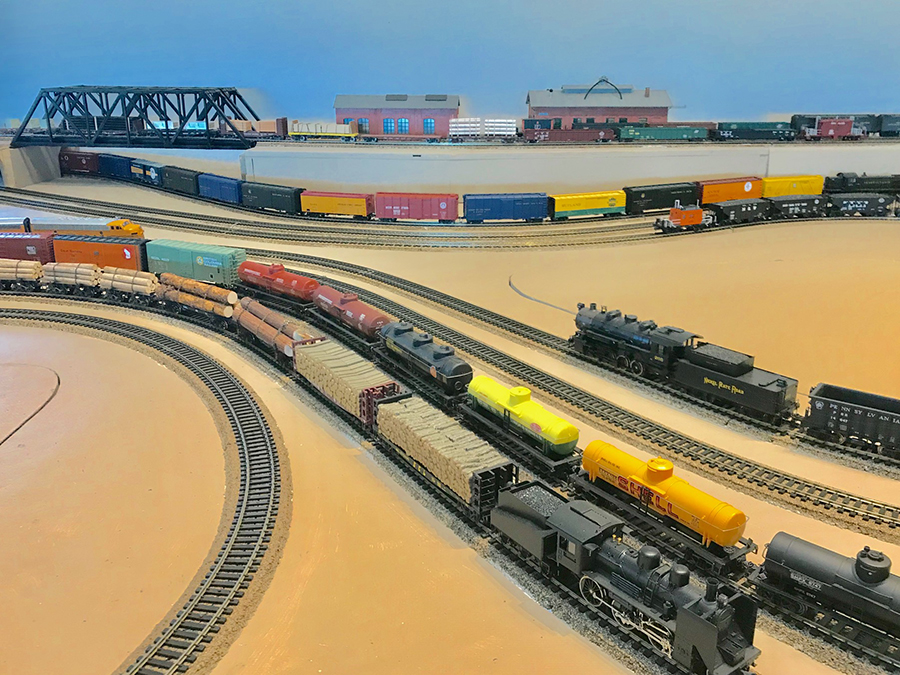
My HO layout is called the Wismer Valley Line. The following objectives informed my plans:
1) Replicate to the extent possible, very long American freight trains, pulled by multiple locomotives, up long grades.
2) Focus on the specific shape of the plan and get as many trains as possible running concurrently.
3) Incorporate the vintage trains into the plans. FYI – The major Railroads on the layout are from areas of the country where my three daughters have lived as adults.
Maybe as important as anything, make my own rules. e.g. It’s OK to have the Pennsylvania RR running alongside the Union Pacific, at least in my barn!
The first thing I did was get your beginners guide!! This is a tremendous resource even if you have previously built train layouts.
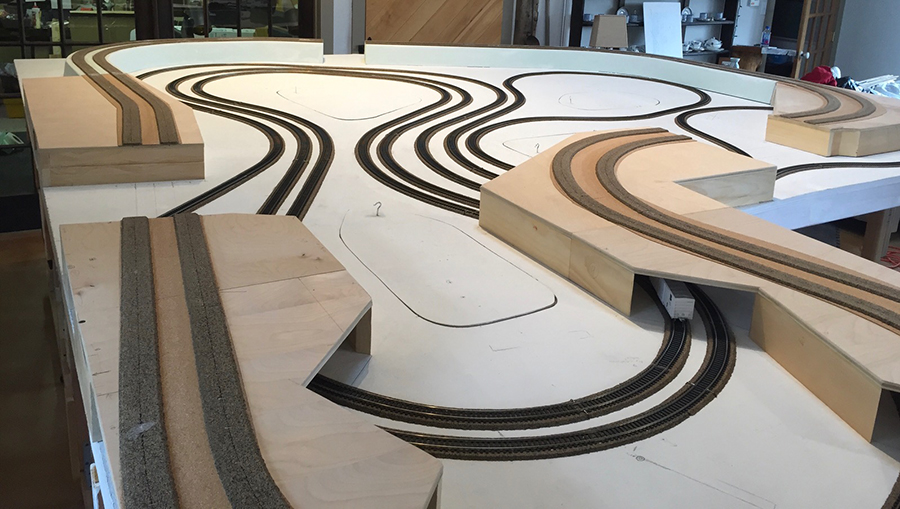
Secondly, was to find someone local willing to give me ad hoc advice. This advice began with the key suggestion to avoid grades (especially curved ones) if I wanted to pull long freight trains and avoid derailments. I opted for a bi-level layout. Overall size is approximately 17 feet long and 11 feet wide at the widest point. The shape was dictated by the interior of the space including doors on either end.
The longest freight train, on the upper level outside track is pulling about 60 cars, using four locomotives (NO dummies!) in tandem (over 30 feet in total length). The rolling stock are from the late 1950s the early 1980s and the past five years (which included additional vintage railcar purchases on EBay).
I rebuilt about 100 of the vintage cars installing (Kadee) couplers and well machined wheels, along with new trucks when necessary. The wheels are critically important for long trains in order to minimize drag.
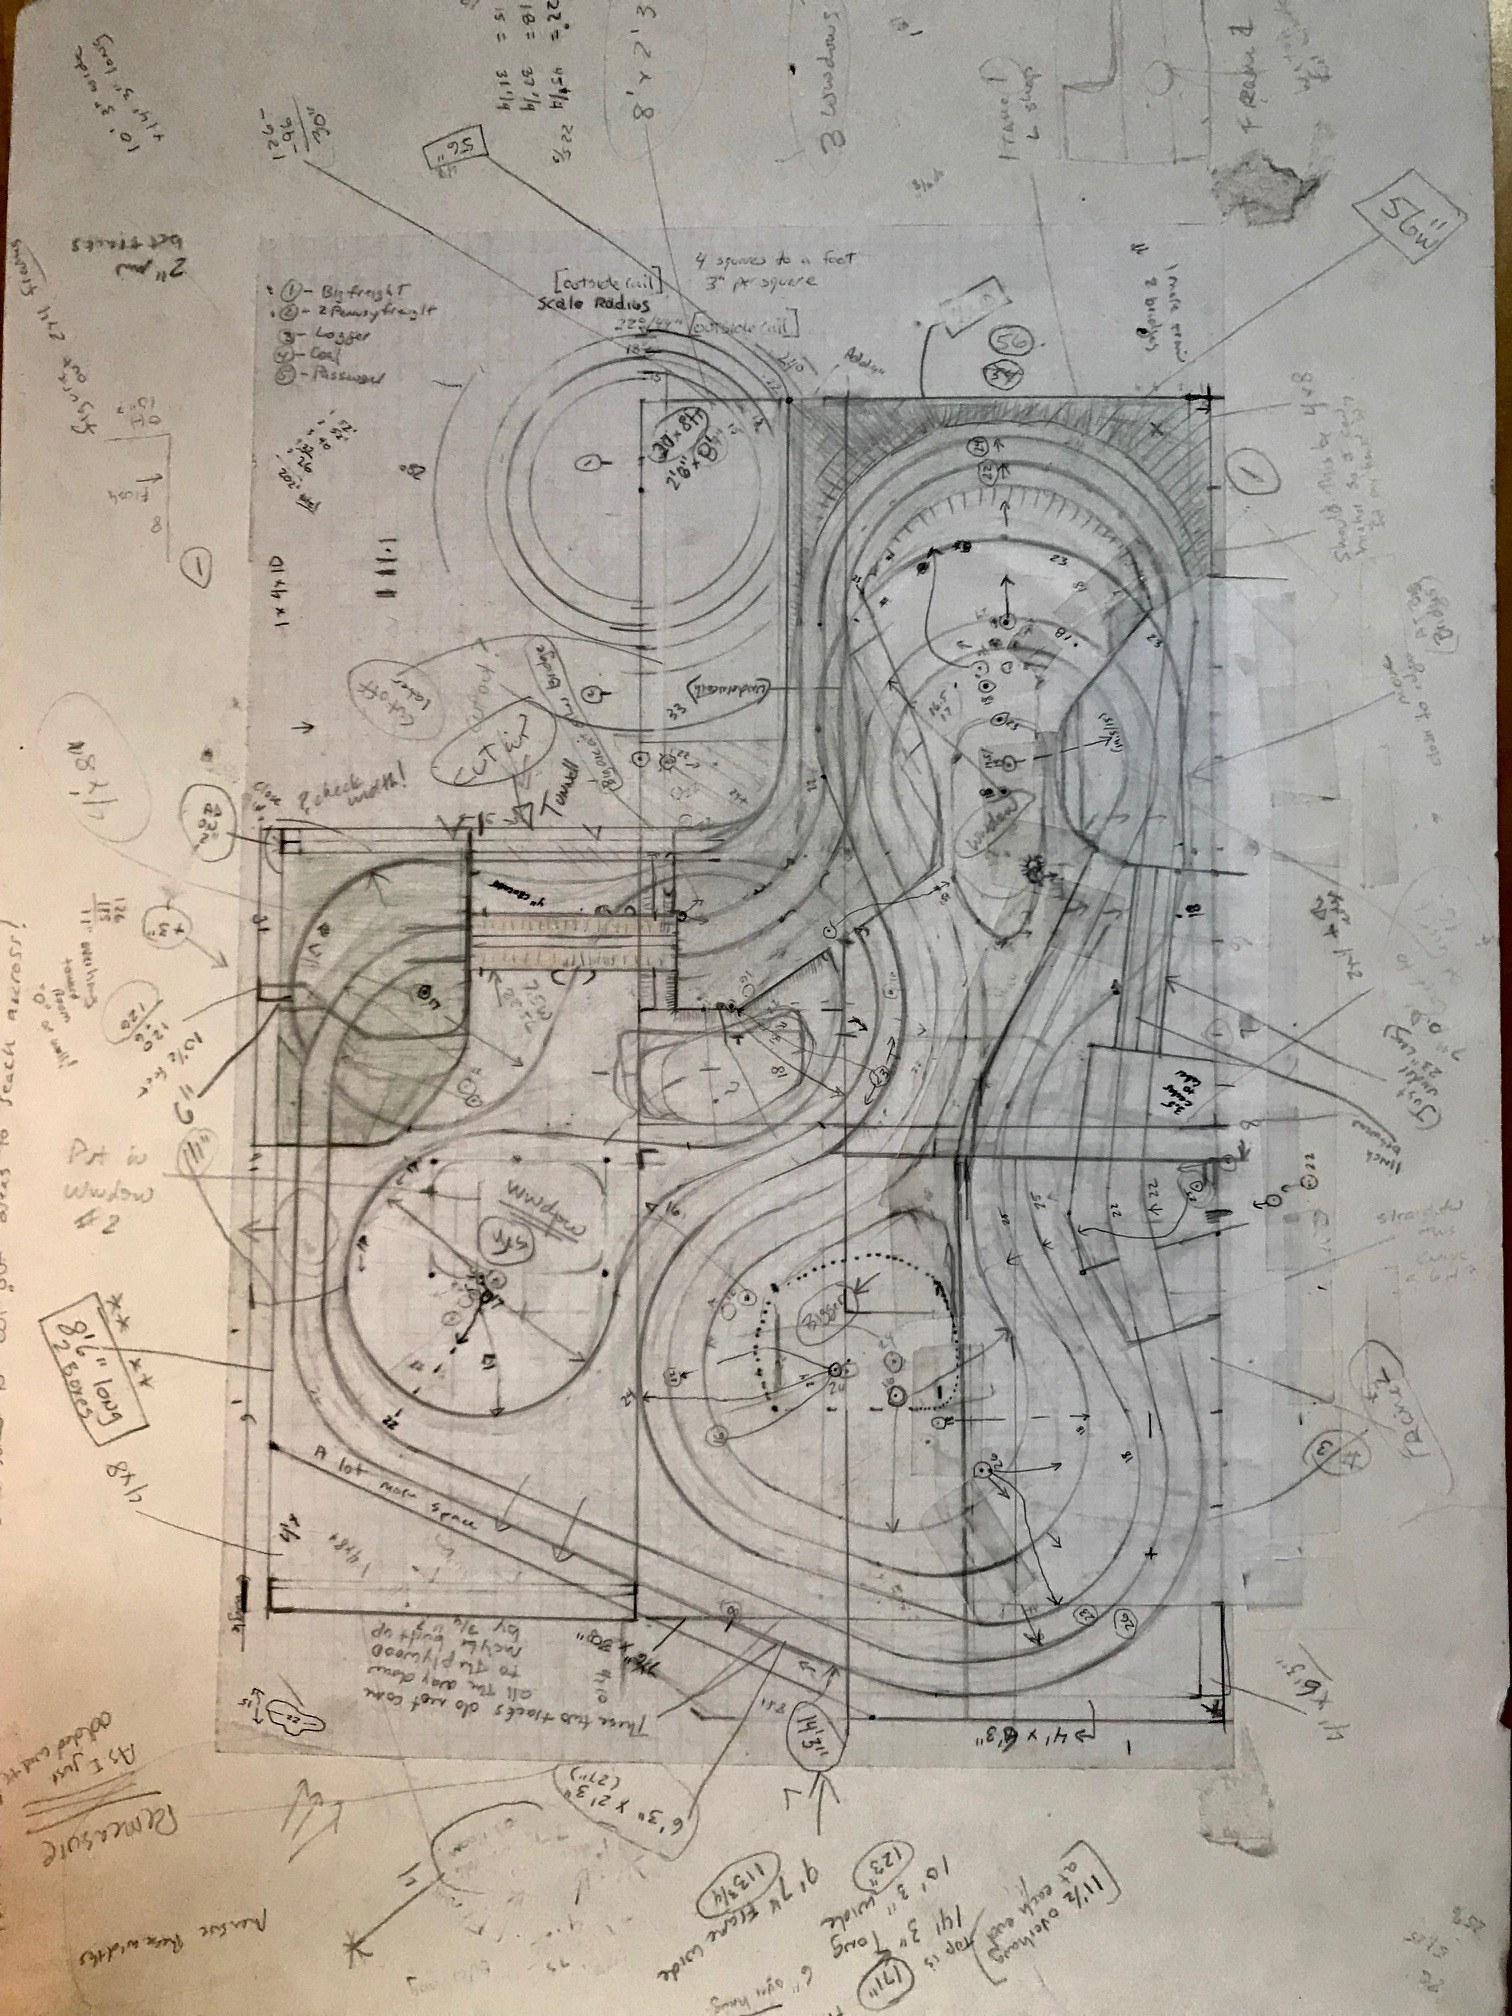
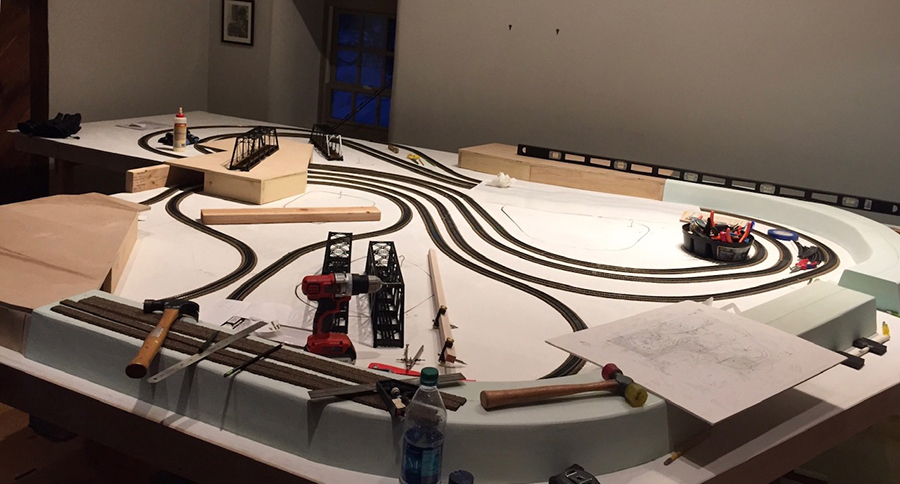
In planning the layout, as can be seen from the plans, I spent a lot of time working on the maximum radius that could be attained by each track. I am surprised to see that more of your readers have not mentioned this issue as longer locos simply can’t make it around tighter curves. Maybe it was just the unconventional layout combined with this many trains that created the issue. My original plans turned out to be invaluable as I used them constantly to measure and adjust the radius of each curve.
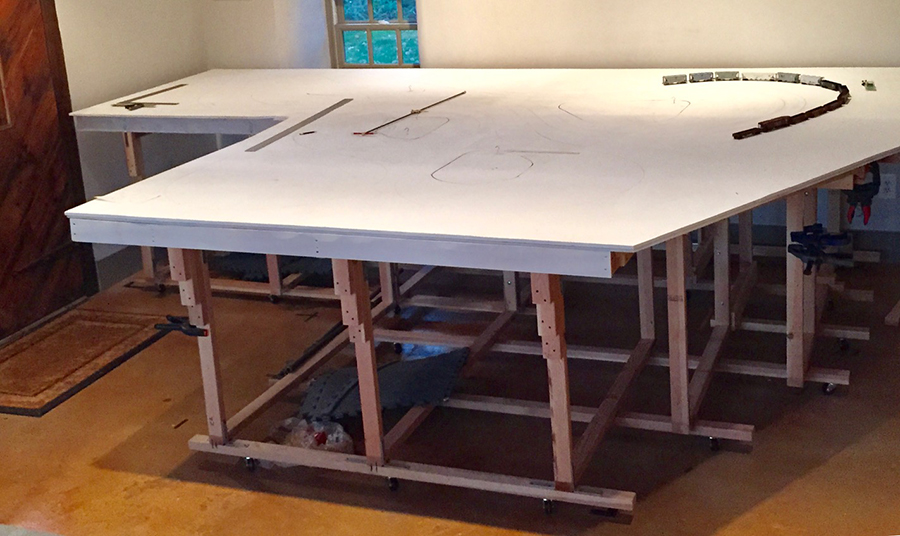
The deck is, bottom to top, plywood, Homesote, cork and then the tracks. All seams taped and spackled. Total weight exceeds 600 pounds.
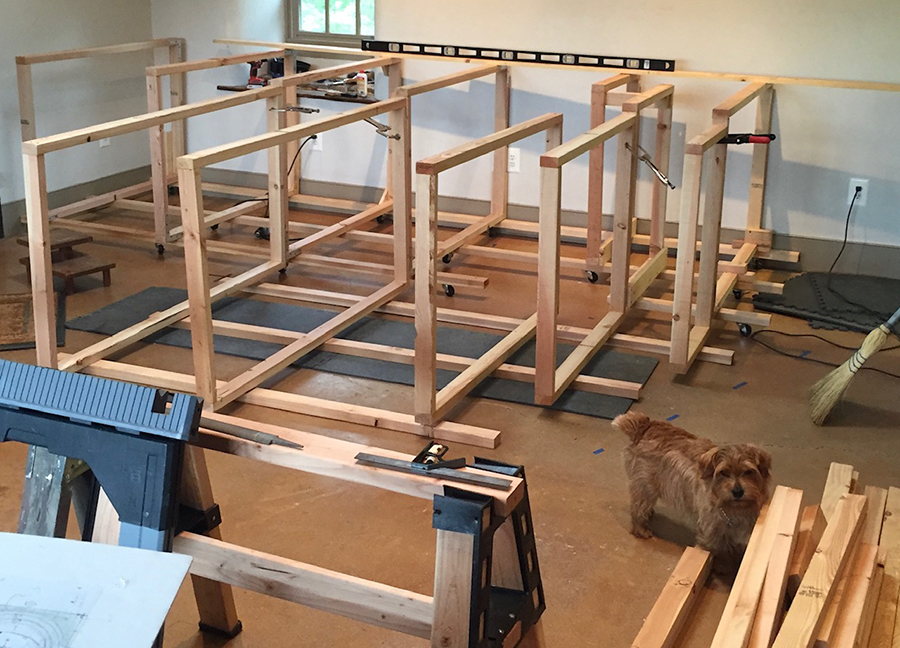
My biggest engineering challenge was the concrete floor in the old outbuilding on our farm. It is neither flat nor level! The solution was to overbuild and use 24 heavy-duty casters so the entire layout can be pulled out from the wall to allow for total access. There are also 4 cutout/lift-out windows (which eventually will be disguised by scenery), where I go underneath and come up out of the hole, enabling me to reach every square inch of the layout.
I spent significant time making sure everything was as level as possible, despite the uneven concrete floor. When working on it, it is pulled out from the wall about 3 feet. When running it, it’s back in the corner. With all those casters, once I get them going in the same direction, it’s not too bad to move; and they have the added benefit of finding their own version of level.
The deck is 43 inches off the ground. If I did it over again it would be a couple inches higher to allow for easier access.
I’ve included a few photos of the plan, and build out as well as a video of the six trains moving at the same time, and a short video of how I test the track.
Original plans and beginning construction:
Construction continues:
Up and running:
This is how I test my train tracks:
Trains running:
Final notes: With all of the wiring required for the six separate train lines I wanted to make sure that the tracks were really laid down properly, before I commenced with the wiring. As you can see from the short video, I push one railcar and see if it makes it all the way around the track (approx. 40’) with no problems. I also listen carefully. Sound will tell you if there is something loose or out of alignment. Better to discover this, BEFORE you do the wiring!
Al, thanks again for this wonderful service you provide for all of us. So much of what you show is the perfect combination of sheer genius crossed with amazing creativity. Inspiring!
Jonathan
P.S. Now it’s time for the ballast, hills, sage brush, and maybe a few sidings, if I can fit them in etc. Perhaps I did this a bit out of order, but I really just love rebuilding old running stock and operating the trains!! You might ask, why not DCC? Well it is quite simple, all of my locos are DC and I don’t particularly care for new technology. Much of what I make these days is with hand tools (not electric). I have rushed for most of my life and find that making things by hand slows me down just enough to think about what I am doing…… before I do it! If that sounds like a rationalization, sobeit.”
A huge thanks to Jonathan – I love how he tests his track. So simple! What a joy to see all that rolling stock running.
It’s great to see more HO scale train layouts too. I think David’s HO scale train layout 6×4 is fab.