HO scale water dock

Brian’s been back in touch, he’s been working on his HO scale water dock.

You may remember him from his stunning waterfront scene, his last post is here.

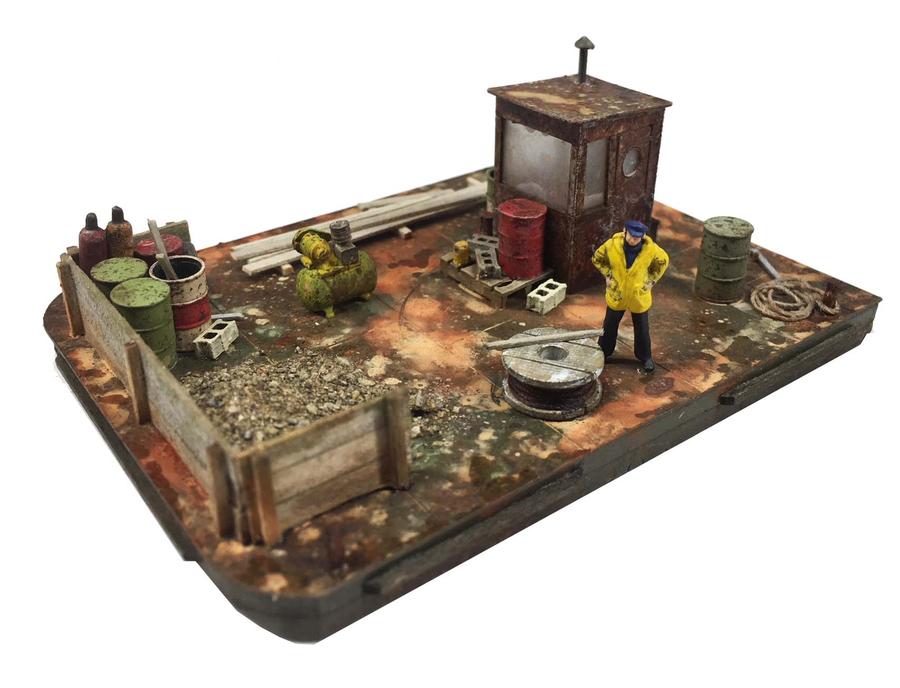
“Hi Al, I have just completed a utility barge for my waterfront harbour.

I saw this photo on a website of a kit that is available and decided that I need one and should scratch build it for my HO scale water dock.

Below is a photo from the website (Fos Scale Models) which I used for for inspiration.

barge for water dock

I cut the top layer (card stock to represent a metal top) to size and scored the metal plates. I sprayed it with grey primer. I had the wheelhouse in one of my many bits boxes that I could use.

making barge

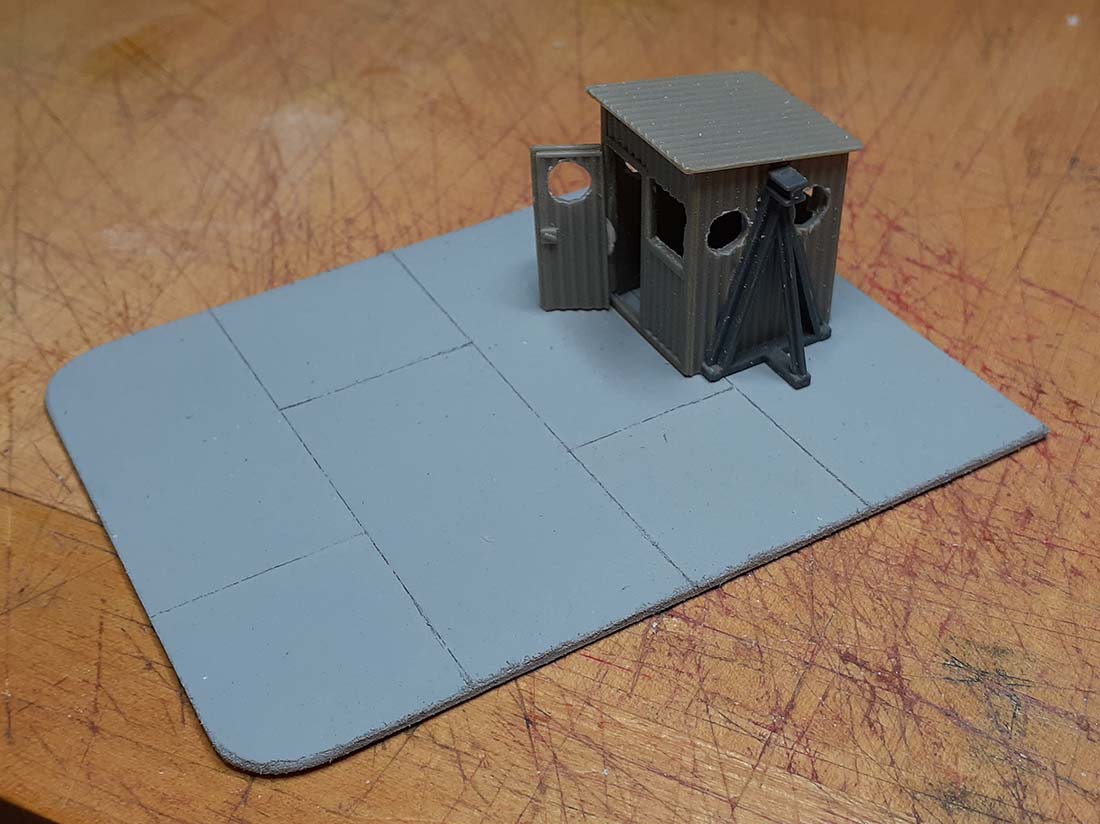
Added some detail to it and placed it in position to see if it would look okay. I was not quite happy with the look and decided to remove the metal supports on both sides of the wheelhouse.

making barge

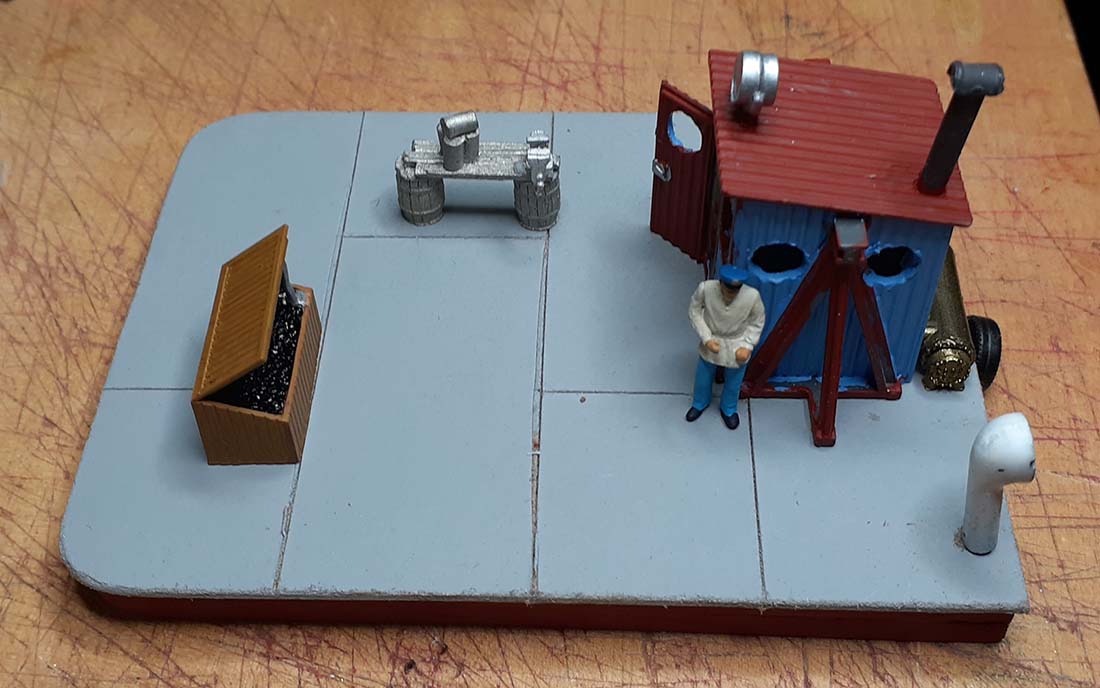
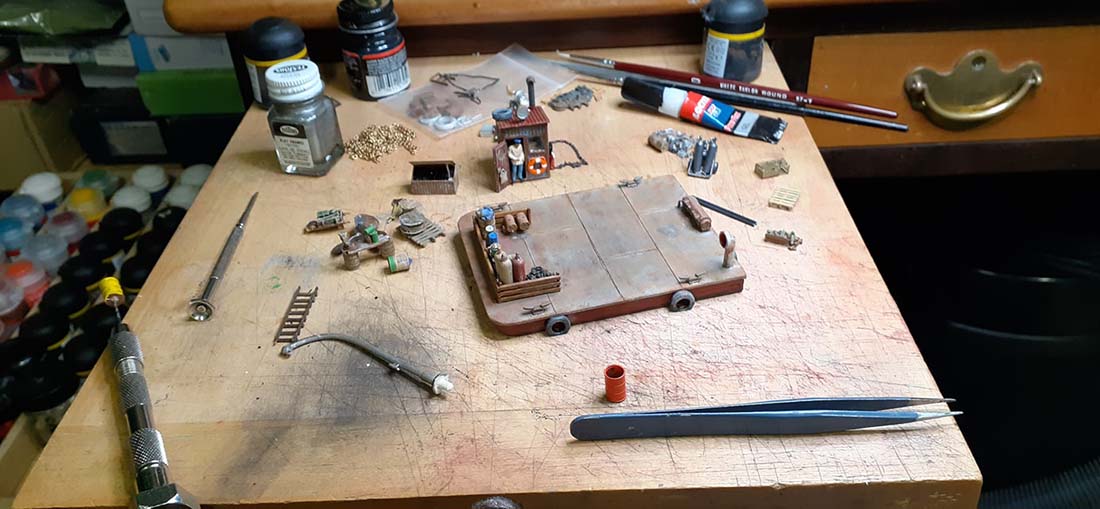
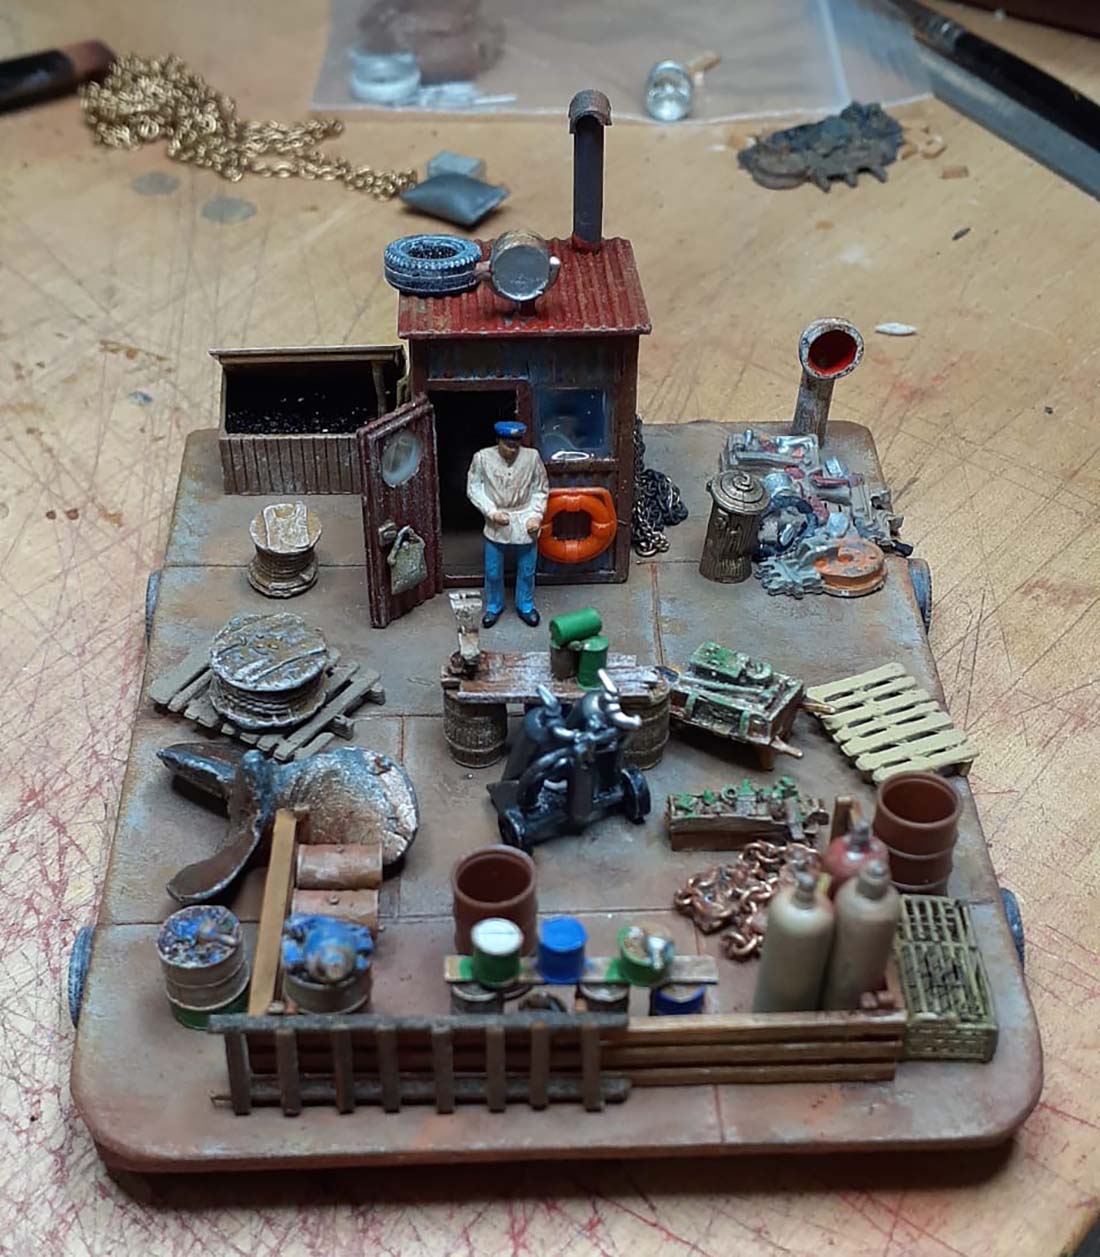
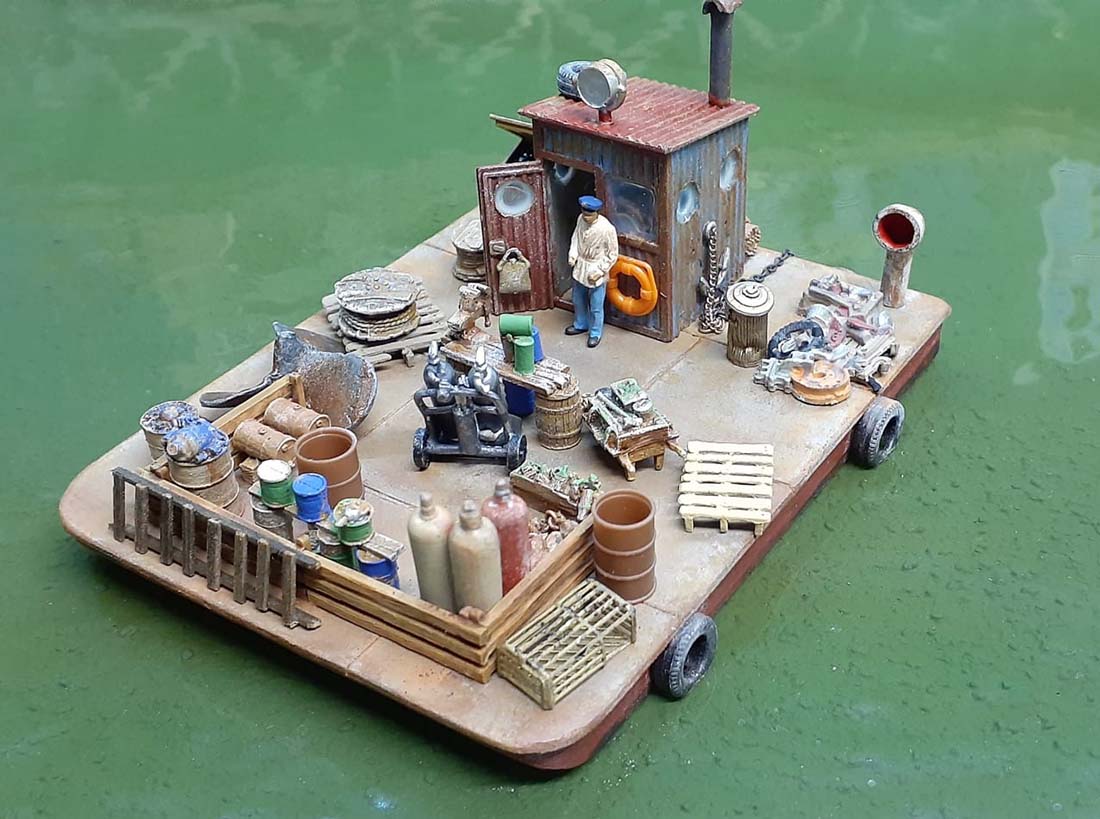
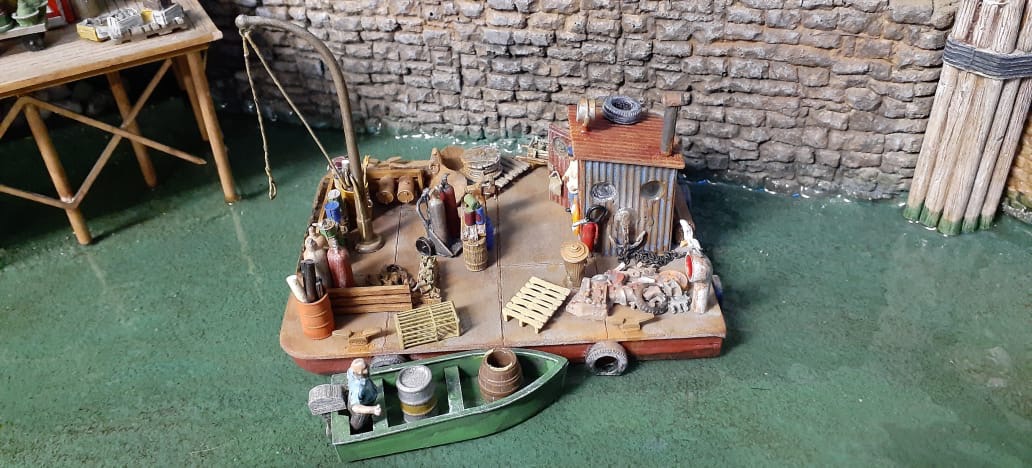
The “hull” was cut a fraction smaller than the top deck. I laminated two pieces of 0.125 inch Masonite (hardboard) to make the hull and then tapered the front of it down to the waterline. Here it is on my worktop figuring out where to place all the details – also from my many bits boxes.

making kit

kit bashing

I am always on the lookout for scale vehicle tires to use especially in my harbours. When glued onto the sides as buffers, i slice them level with the hull in order for it to sit flat on the water.

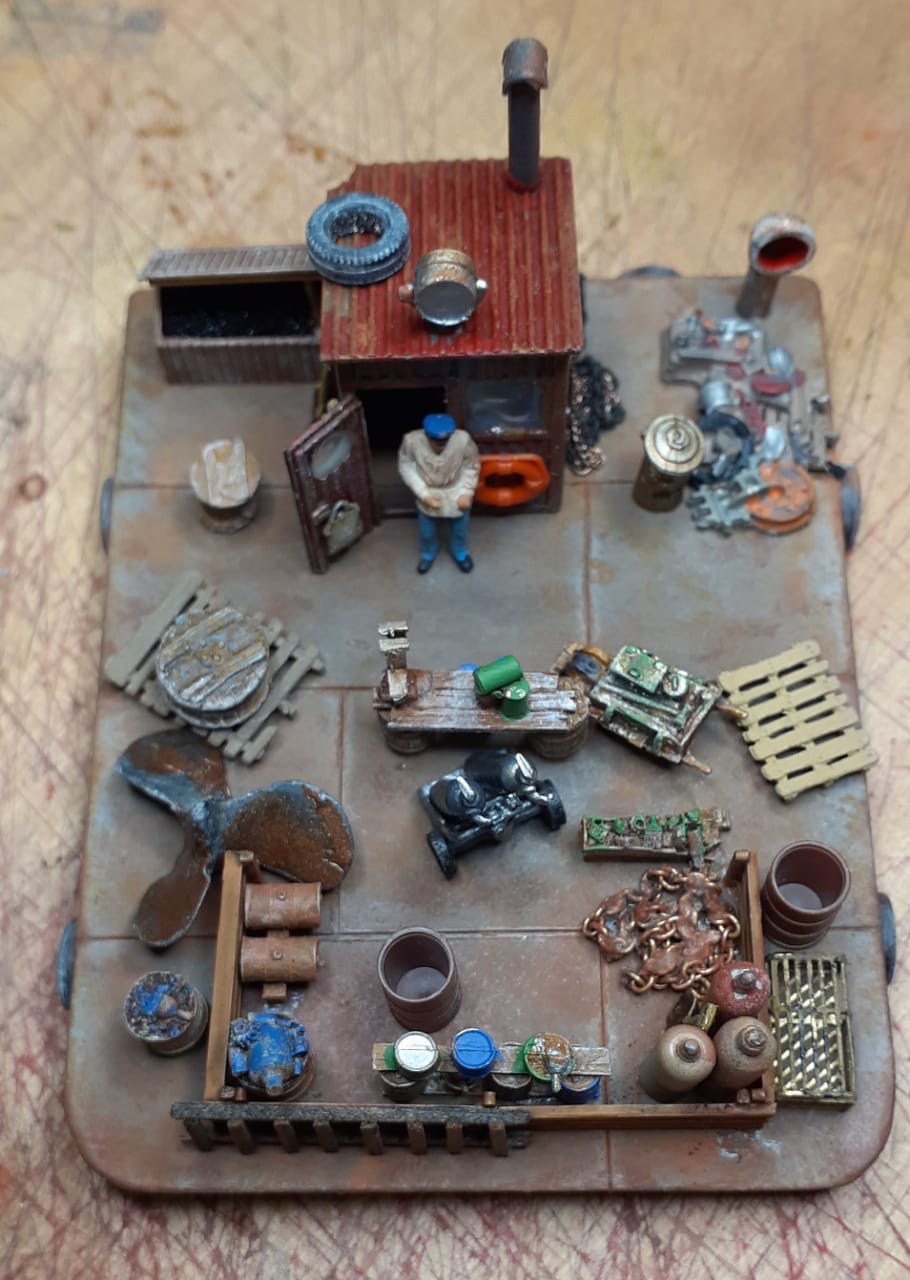
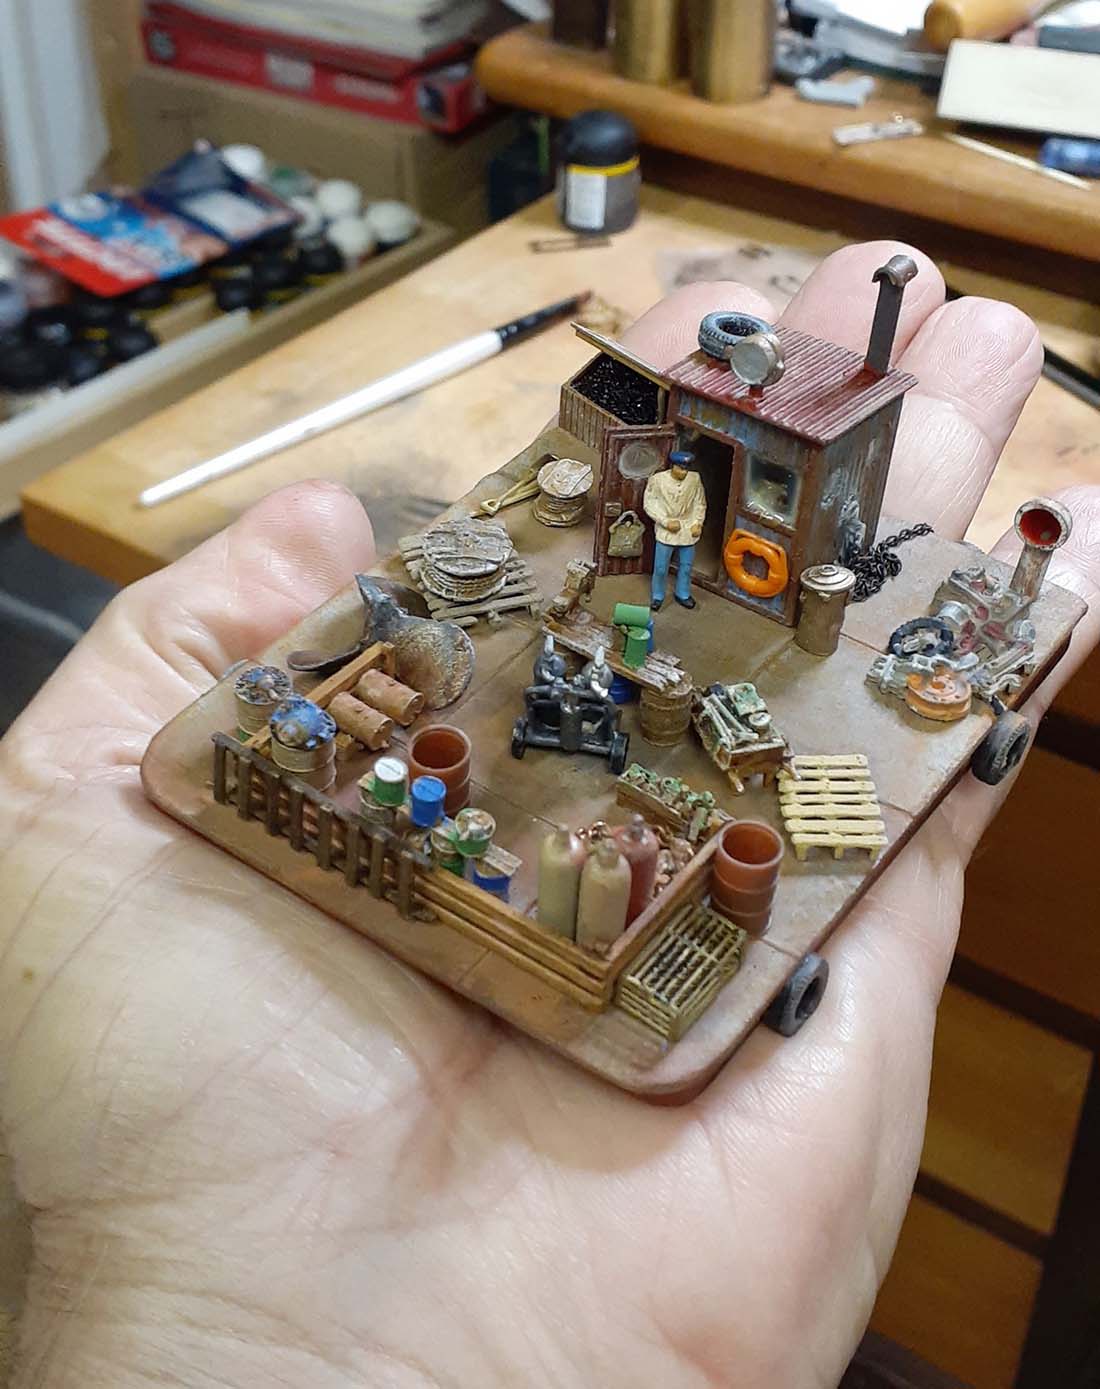
After temporary placement of the details, I gave it the once (many times) over to make sure that it looked workable before gluing it all in place. Here it is on my hand to show the small size – 3.75 X 2.75 X 0.375 inches.

HO scale water dock


Again, a different view to check placement of the details.
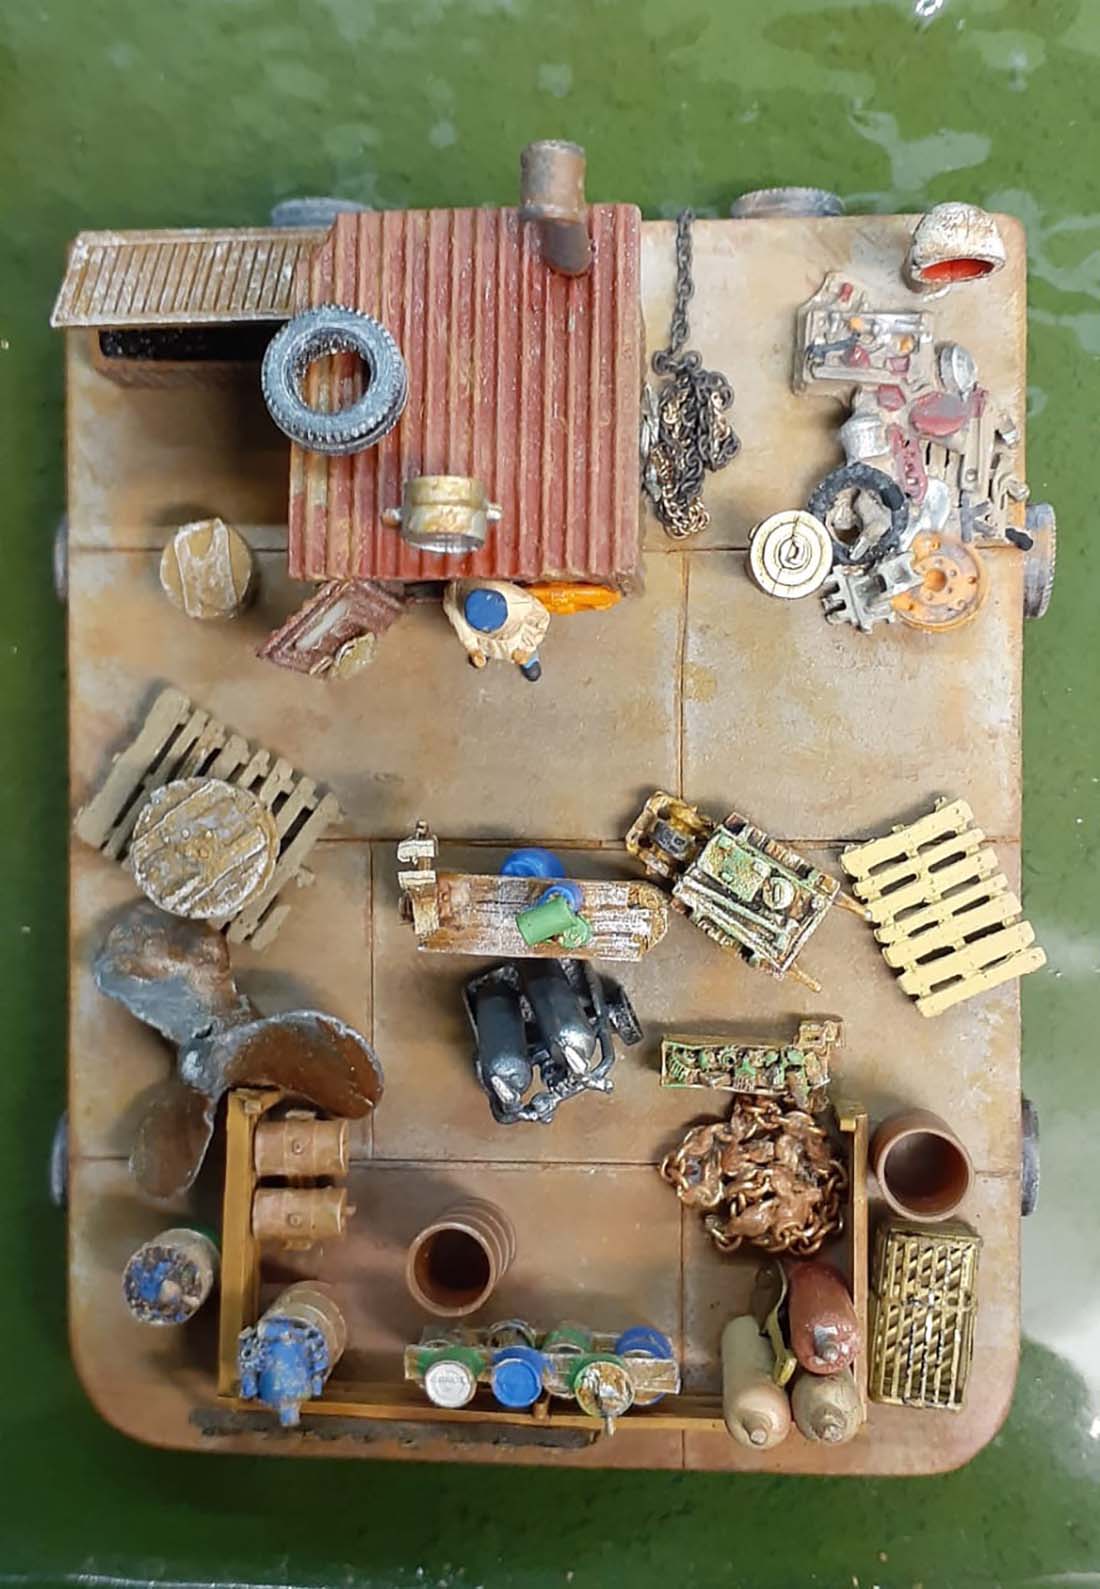
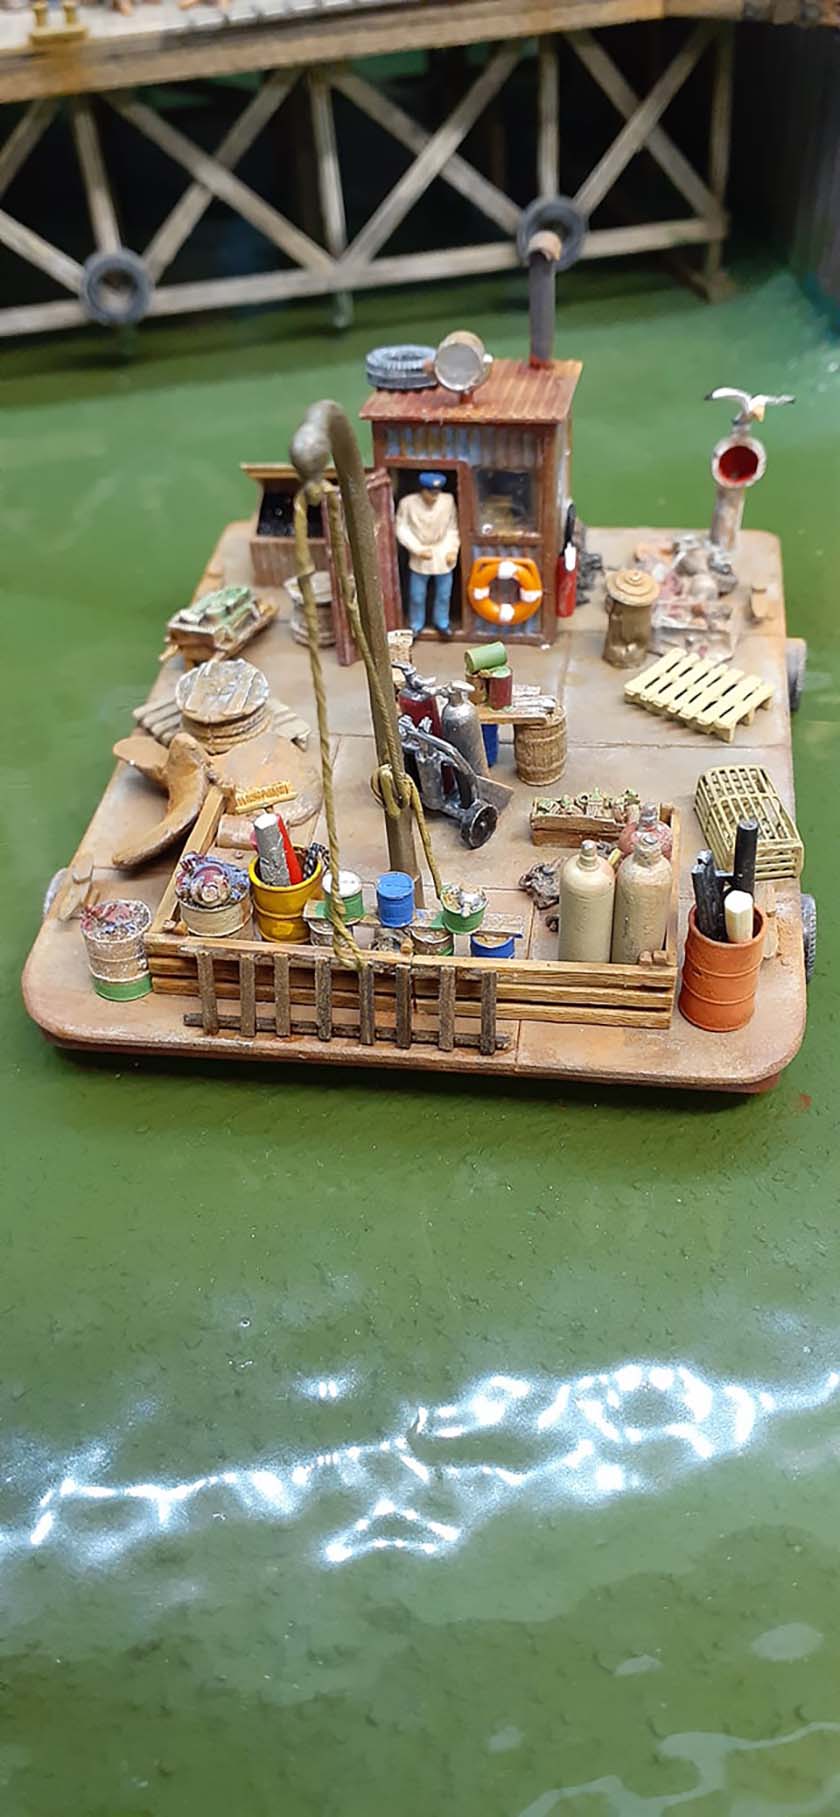
HO scale water dock

Same again.

HO scale water dock

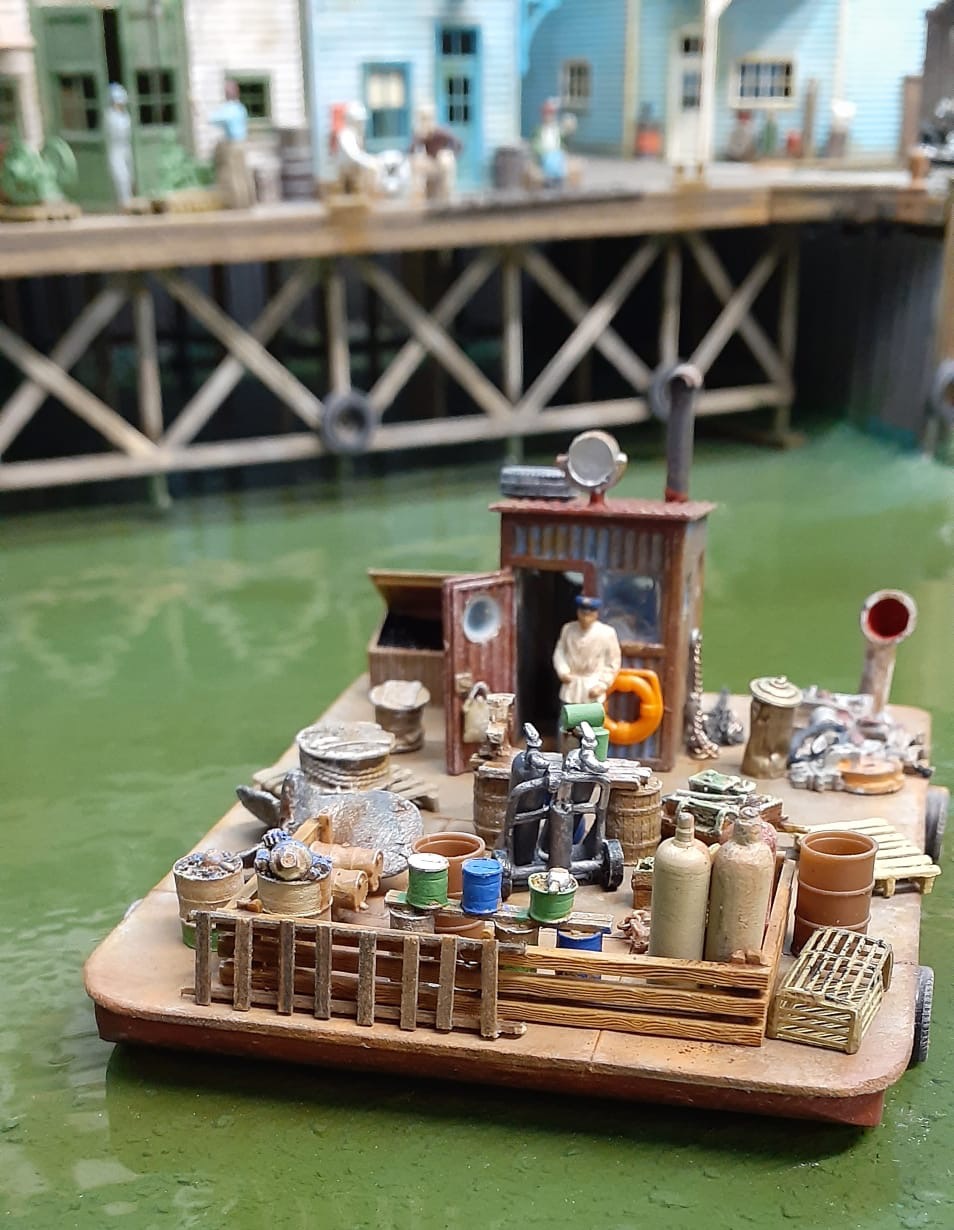
While waiting for the window glue to dry I placed it in the harbour as a test. After looking closely at it in place I realized that it needed more weathering. It was not dirty enough to be a working barge in the harbour.

It pays to take a break, sit back and view your model. I did this and realized that I left off the kleets which are used to tie it up to the keyside or other boats.

HO scale water dock

HO scale water dock

HO scale water dock

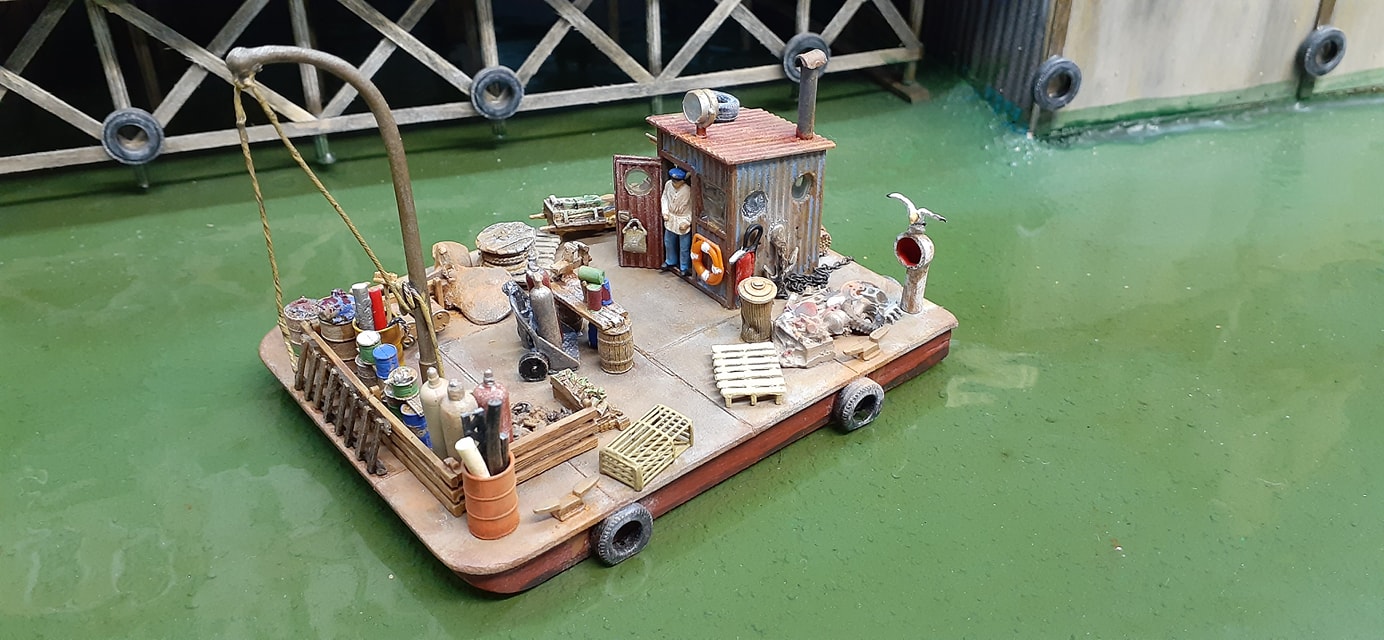
Did not take long for the seagull to find somewhere to perch in the hope of finding a tiny morsel.

HO scale barge

HO scale water dock

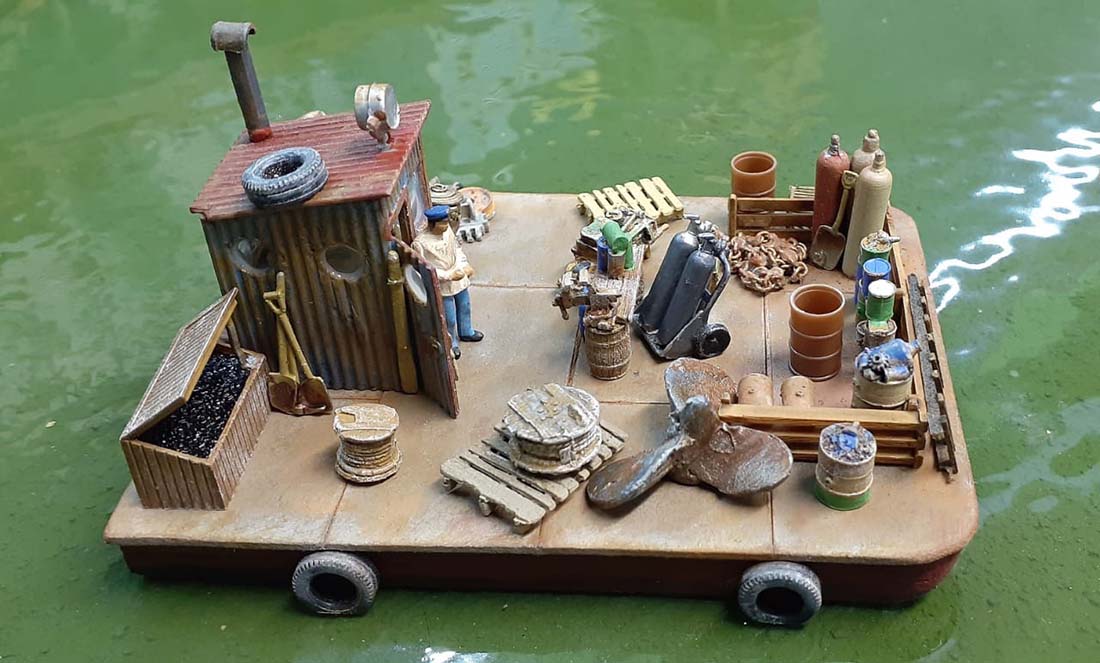
Final weathering and all details glued in place and in the harbour to begin working.

HO scale water dock

Thanks for all that you do for this hobby and keep up the good work.

Brian

The HOn3 guy – Knysna RSA

All the best Al, and thanks as always for your blog.

Brian”

Now on to another Brian, who has also featured on the site before:

“Hi Al

Further to my previous Poirot video I thought I would make a fun video featuring my Changing of the Guard scene on the OO loft layout with Airfix Guards and Band.

It includes footage from the actual Changing of the Guard at Windsor Castle, my son is the Bandmaster of the Irish Guards. Here’s the story to back up the video:

“I have several ‘hobbies’ that keep me busy in retirement – railway and military modelling, walking football (to keep fit), and playing trumpet in a concert band. My enjoyment of playing music has ‘rubbed off’ on my elder son who took up a career as a musician in the British Army and is now the Bandmaster of the Band of the Irish Guards of the Queen’s Household Division.

On both my N and OO gauge layouts I have tried to include scenes where various members of the family are involved, so modelling the Changing of the Guard at Windsor Castle, a regular activity for the Queen’s Guards and Bands was a challenge that had to be undertaken.

The Airfix 1:76 Guards Band and Colour Party were the only models in OO gauge that I was aware of, but being produced way back in the 60’s meant that I would have to find them on a popular auction website.

Fortunately, I did, but at a considerably higher price that the two shillings I would have paid for them when I was buying them as a boy all those years ago!!

With all the research needed to paint them from my son, I commenced the painstaking task of painting both the band and the colour party. There was one very important piece of surgery that had to be carried out – converting a side drummer to my son, the Bandmaster who marches in the band towards the back (you’ll see him in the video) with his conducting baton tucked up his sleeve. Many hours later, about 40, both Guards and Band were fully painted, and were passed inspection by the Bandmaster!

The Windsor Castle, named Wenham Castle (my Grandmother’s maiden name) on my layout is a 1:72 kit from Miniart which after a lot of filling and painting came out reasonably well.

The march into Wenham Castle is via Station Approach passing the public entrance to West Hoe railway station and the police have the ‘crowd’ and ‘traffic’ fully under control, except of course for the passing goods trains that like to make their presence heard!!!

I hope you enjoy the video. My apologies to those who were hoping to see more train action, but I think many will agree that without scenery and interesting things going on in any layout, just trains, I hesitate to say, could get a bit boring? Each to his own though eh?

All the best to railway modellers everywhere.

Brian
Wokingham, UK.”


I am getting more and more submissions from folk who are combining their hobbies – and why not? A good back story always makes a layout.

What’s more, I’m getting more and more folk sending me stuff of their other hobbies, which I do really enjoy seeing too. I haven’t ever posted any, but I think I will soon. I do enjoy seeing what everyone gets up to in their spare time.

A big thanks to Poitrot Brian, and an even bigger thanks to Hall of Fame member Brian for sharing his HO scale water dock.

Really enjoyed today’s posts, hope you did too.

That’s all for today folks.

Please do keep ’em coming.

And don’t forget, the Beginner’s Guide is here if you want to get going on your own layout.

Best

Al

PS Don’t forget the latest ebay cheat sheet is here. Still updated daily.


Infrared detectors for model trains

John has been in touch with how to put together the infrared detectors for model trains.

“Hi Al,

It’s been awhile, been busy working on some real railroads since many of the folks who normally do the work are locked down and can’t travel, but I’ve been reading the posts every day.

Your website and the products you offer are great for any level of model railroading.

Now to my latest project. I’ve been trying to get some way to detect trains as they pass, and drop signals to red when they go by.

There are some good detectors out there, but I wanted to see what I could figure out on my own.

I’ve been fooling around with the little sensors used in manufacturing mostly made to send a signal for something, like light being on, or to turn on lights when dark, or objects passing by on an assembly line.

How about people sensors? Both types had some utility, but the turn on the lights did just that, but not when I wanted to run trains.

The people sensors… well… sensed people, not HO trains, and when I adjusted the sensitivity they detected everything but trains.

Back to research, and success!

I found little IR detectors on eBay for less than $2.00 each. A lot less than that from China (just ordered 20 more for a total of $10.33!) but it takes a few months mail, and customs, and red tape to get here from there.

They are called Arduino PIC AVR IR Infrared Obstacle Avoidance Sensor Module Object Detector.

infrared detectors for model trains

Size is about 16 mm by 50mm with a plug attached. They run on 3.3 to 5 volts DC, and will detect anything directly in front of the sensor diodes.

Out of the package, they will detect from a little as 8 mm and, with playing with the potentiometer, out to about 40 mm.

They react fast, and in a few tests actually picked up the space between the cars. Not good. So I decided I would modify the detector, but quickly determined that connecting everything with jumpers and alligator clips was tedious and confusing.

So I made a little test board. It has a place to connect my power supply, a common cathode type “D” 2 color signal, and a relay to get the trigger from the detector and change the signal. I use a relay, also from eBay, 1 Channel Relay Module 5V Optocoupler LED for Arduino Pic ARM AVR note that it has the same plug as the detectors. This is a single pole – double throw relay that would work with the same voltage as the little detectors.

Since I’m planning on having a dozen or so of these detector/relay/signal sets, I also bought some 3 conductor connector sets that plug into the board and relay.

The circuit design is:

infrared detectors for model trains

I found that the relay below is just what I needed to make a tester, but decided for the layout I’d get a bunch on one board, they come up to 16 relays on a board but I ordered a few with 8 relays.

infrared detectors for model trains

1 Channel Relay Module 5V Optocoupler LED for Arduino Pic ARM AVR

infrared detectors for model trains

As I got into the detectors, I realized that not only the range was a problem, but putting them in some kind of structure so they could “see” a train going by would also be difficult.

infrared detectors for model trains


Here is my little test board with a detector not detecting anything.

I wondered if I could remove the IR LED and Detector LED, and if they needed to have a specific wire lead length. I decided to try to un-solder the IR-LED and Detector LED and extend them on longer wires, this allows for them to be hidden in most anything on the railroad, like in cars waiting at a grade crossing, or in a little signal box next to a switch.

Some care needs to be taken as the little IR Led and Detector are unsoldered, wires extended, and shrink tubing applied. Be careful not the lose the polarity. I added about a foot of wire, and 6” to each LED, like below.

model train detector

Since they face each other now, their mode switched and they send a detect signal until the space between them is blocked, out of the box and mounted side-by-side, they look for reflected IR so they are normally not detecting.

So, how to detect the trains without blinking as the detector “sees” the spaces between the cars? Decided to shoot the beam on an angle like below:

model train detector

My signals, most from China, are LED common cathode, so the schematic shown above is how to wire them with that configuration. If common anode, reverse the + common to the relay and connect the negative to the LED’s. What I found is that when the IR and Detector are facing each other, the range is reallly increased. I easily detected a card blocking the beam from more than 6”

model train detector

When my test railcar even gets close, the detector hits it and the detector will report “track occupied” to the relay, which turns the signal red. I’m planning on also having a parallel LED on my control board to also see where my trains are, and what tracks are occupied.

Next project is rebuilding a roundhouse turn-table! Everyone be safe, and happy modeling!

John from Baltimore.”

Lastly for today, Cassio has sent this video in.

He’s never a man of many words – or any come to think of it – but I enjoy his videos:

A big thanks to John for sharing his infrared detectors for model trains ‘how to’. Thanks to Cassio also.

(John’s post reminded me of Mark’s: Model train block dectectors.)

That’s all for today folks.

Please do keep ’em coming.

And if you’d like to make that start on your layout, the Beginner’s Guide is here.

Best

Al

PS Don’t forget the latest ebay cheat sheet is here. Still updated daily.

PPS More HO scale train layouts here if that’s your thing.


N scale military layout

Phil’s been in touch with his N scale military layout:

“Hi Alastair

I have been following your posts for ages but this is my first response.

It was Andy’s WW2 railway that inspired me to post.

Just before I retired my wife gave me the Bachmann Ambulance Train set which recreated the ambulance trains of the First World War.

Like many I had an N gauge layout when I was a kid but nothing in-between. This gift allowed me to combine three of my interests railways, WW1 and with DCC the opportunity to use computer control.

Over the last 5 years I have created three layouts that have successively used 1/3 of the room, 2/3 of the room and finally the whole room.

The last version was my covid lockdown project and so far has not got much beyond baseboard construction track laying and testing.

Since I retired I am now on my third iteration of a railway based in southern England sometime in 1917/18.

The first half of the video is the second incarnation of the railway and the second of the third version very much work in progress.

Phil”

N scale military layout

N scale military layout

N scale military layout

N scale military layout

N scale military layout

N scale military layout

When it comes to militaty layouts, William’s Railroad to military base springs to mind.


And now on to Bob, who has been kind enough to answer your questions on his fab layout (which you can see here).

“Al… I just wanted to acknowledge all the folks who took the time to comment on my layout. I really appreciate their comments, suggestions and questions. For those who expressed an interest, I will send another post shortly describing the design, construction and operation of the layout. I also hope to include a video.

Thanks to Dan, Tony and William for their comments regarding the Durango & Silverton Narrow Gauge Railroad and the Cumbres & Toltec Scenic Railroad. My father was an avid fly fisherman and he took me trout fishing to Lemon Reservoir just north of Durango, Colorado, or to Red River, New Mexico at least once every summer. So, I had the privilege of riding both trains many times. The scenery is magnificent.

Dan also mentioned the resemblance of my layout to the Thomas Kincade Christmas tree sculpture. I had not thought about it until Dan’s comment, but it may have been a subconscious influence on my design since I do know the piece well. Thanks to Mal for sharing the information about Totnes Castle. I plan to put a 1:160 scale model of the castle atop my next N scale layout.

Will, your brother’s plan to build a terraced N scale layout with each level representing a different season of the year is inspired. I wish I had thought of it. I would love to see it when it is finished. He should post photographs on Al’s blog.

And, Frank, I am so glad your wife would approve of my layout. That is surely the most meaningful comment of all.

Al…thanks again,

Bob”

A big thanks to Bob and Phil for sharing his N scale military layout.

It’s still wonderful to see such variety in my inbox each morning.

Please do keep ’em coming.

And don’t forget the Beginner’s Guide is here if you want to make that very first step with your very own layout.

Best

Al

PS Latest ebay cheat sheet is here.