Kaustav’s been back in touch – this time he shows us how to make trees for model train layouts:
“Hi Al,
Every time I took a closer look at my scenes, one thing always bothered me – how unrealistic my trees look!
All the trees that are currently installed in Wrightsville Port are off the shelf products – I spent different amount of money when I bought them, but overall they never live up to the standard of the rest of the scenes.
When I look at off the shelf ‘fine scale’ or ‘craftsman’ trees, I always find the price to be prohibitive.
While searching for ways to make better looking scale trees I experimented quite a bit and found this one way that doesn’t burn your pocket and when done right, can give you some incredible trees for the foreground of your model. I thought it’s worth sharing the method here. Believe it or not, these trees are meant for N Scale! Though they will do pretty good for HO too.
Here are the broad steps:
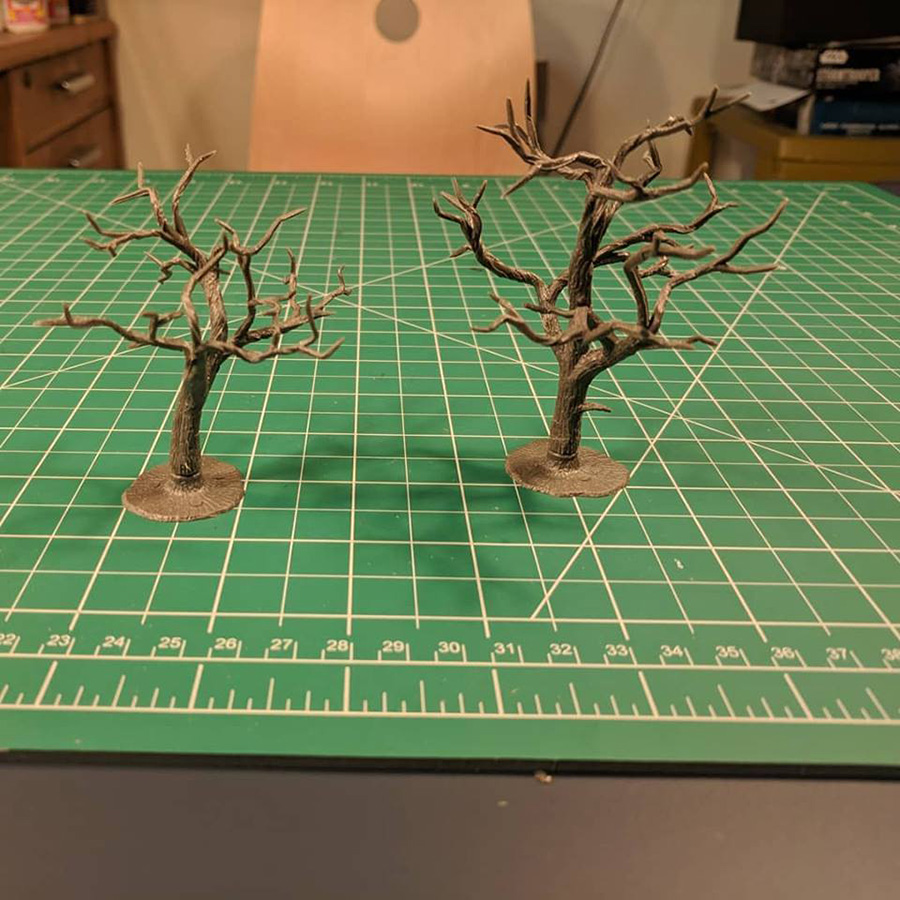
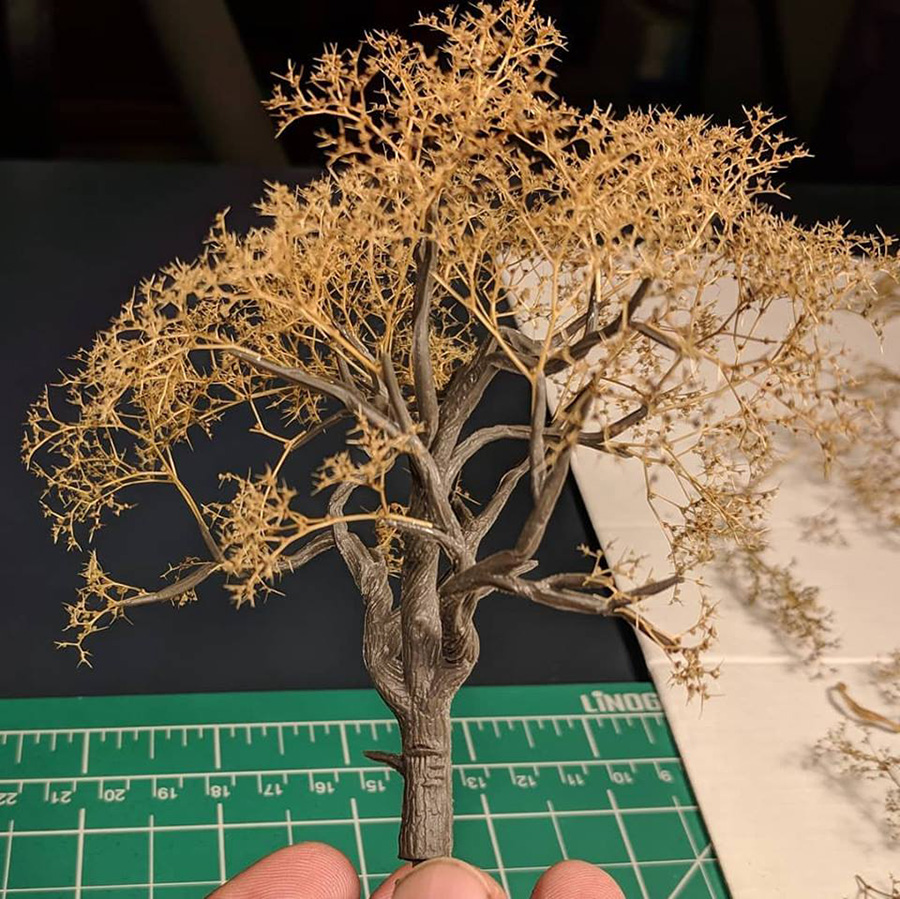
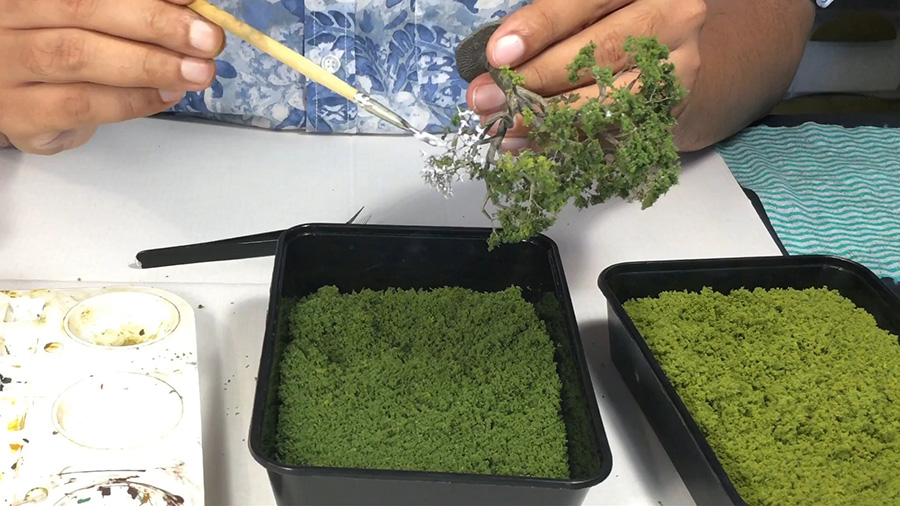
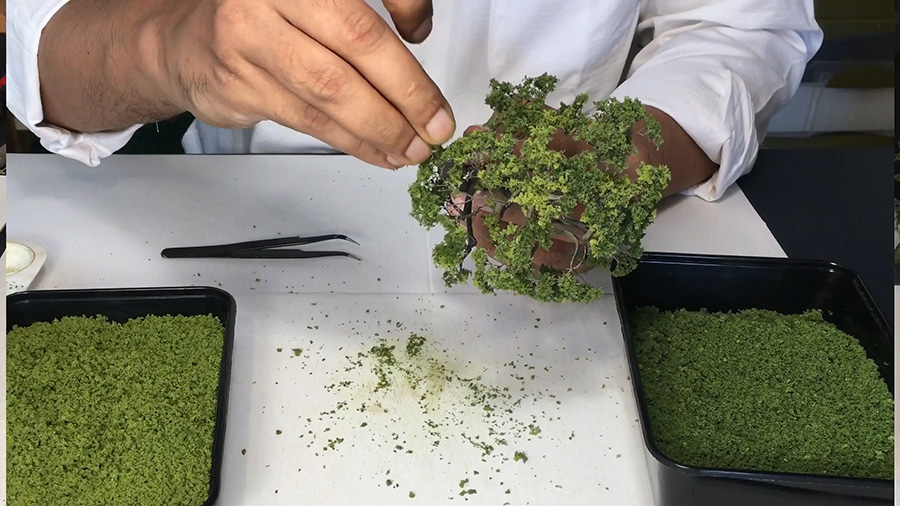
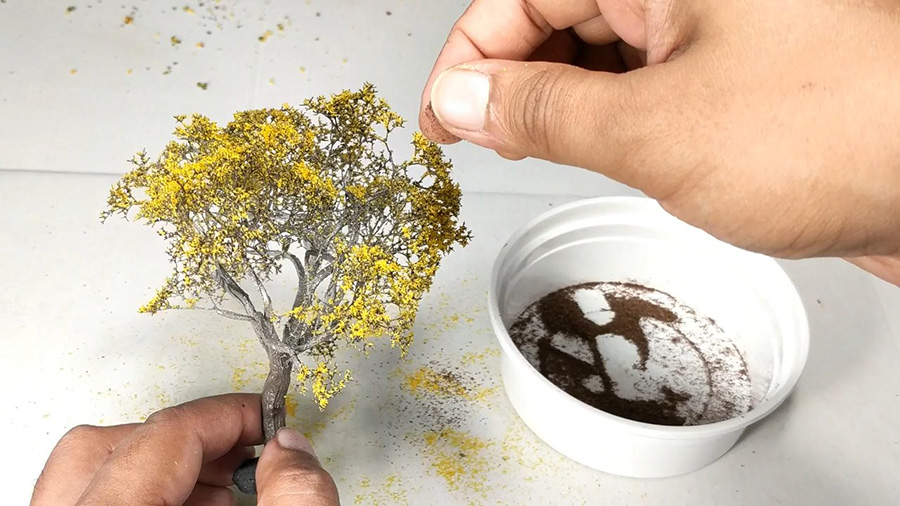
1. Take commonly available plastic armatures and bend them to suit the shape of the tree (I used Sycamore, Beech, Hickory etc.)
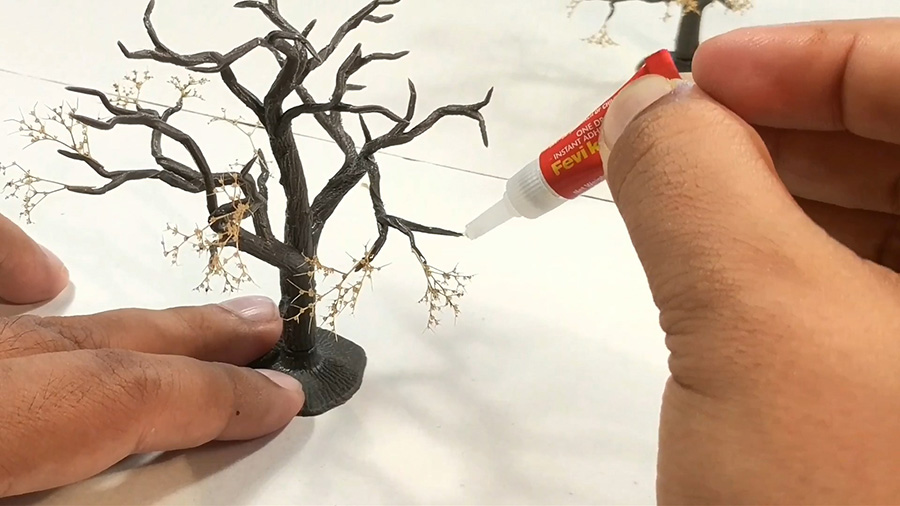
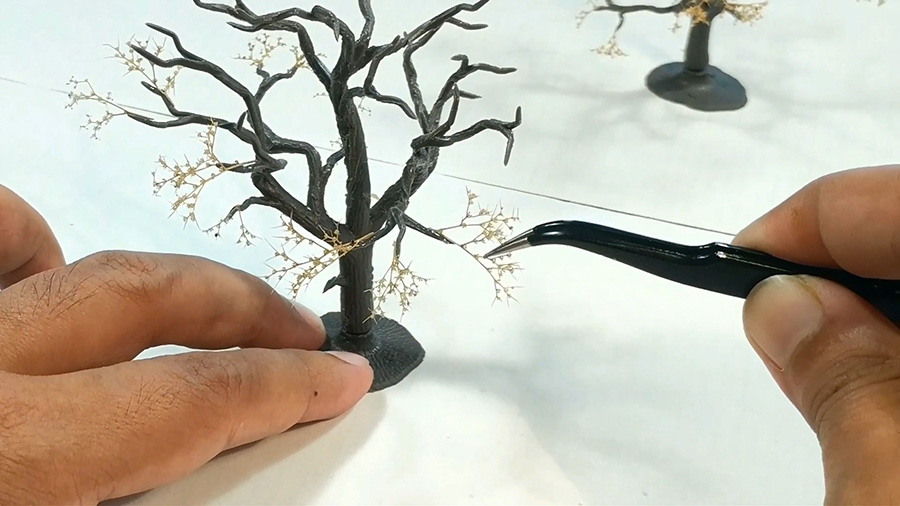
2. Attach small seafoam twigs to the branches using super glue.
3. You get the basic structure.
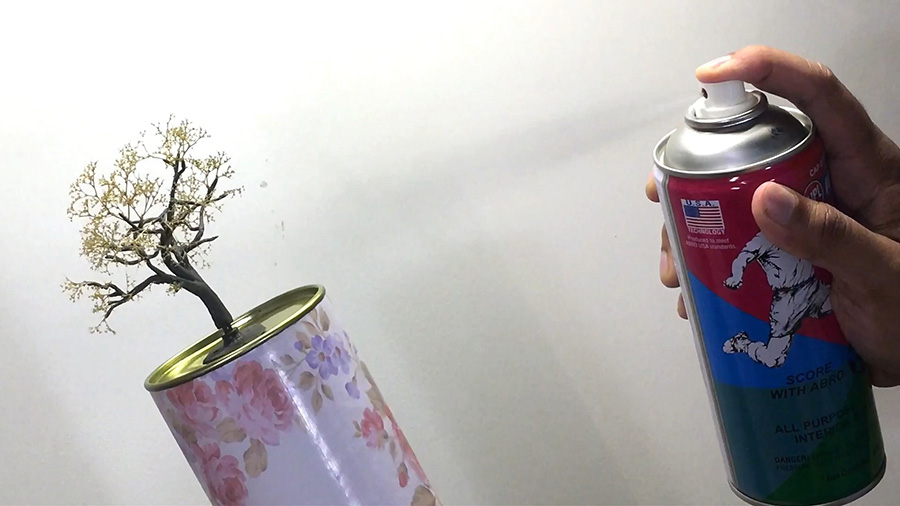
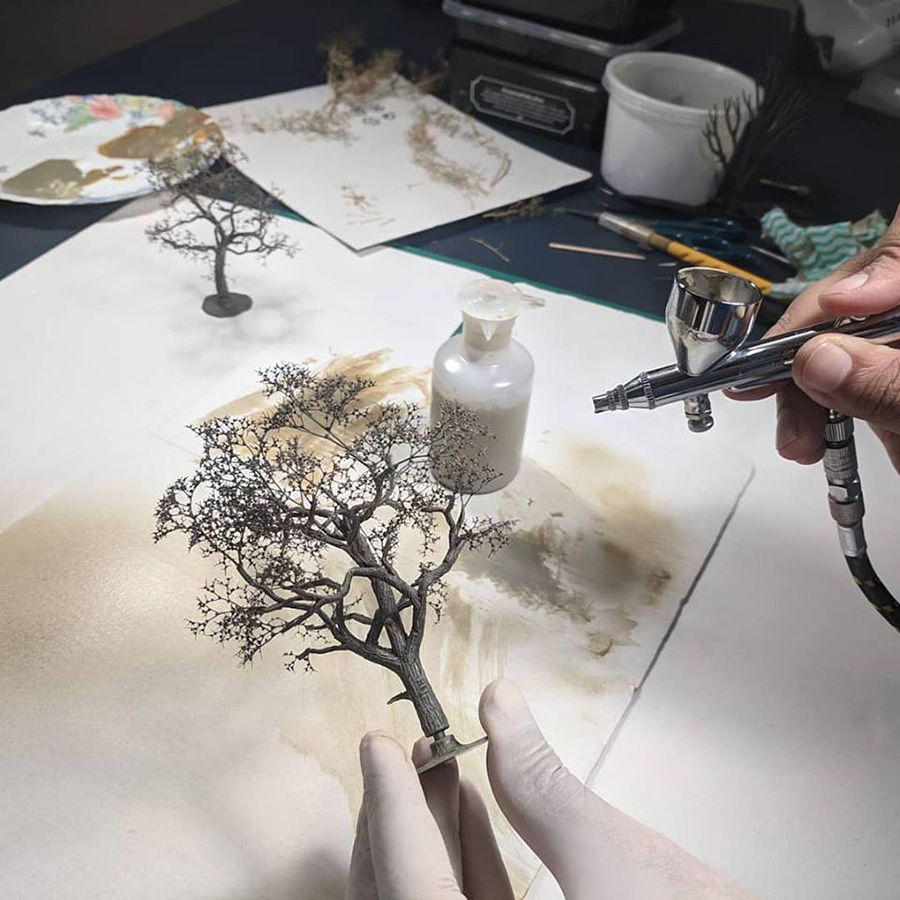
4. Paint them using spray paint and airbrush.
5. You get the bare tree in the colour you need.
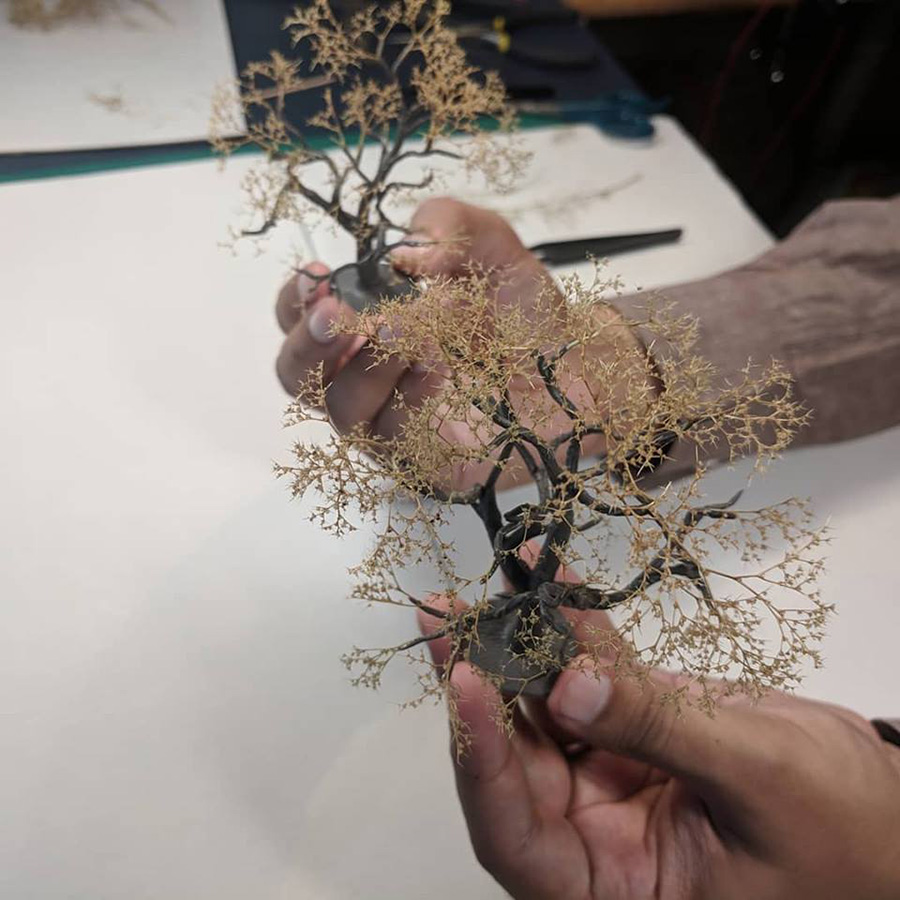
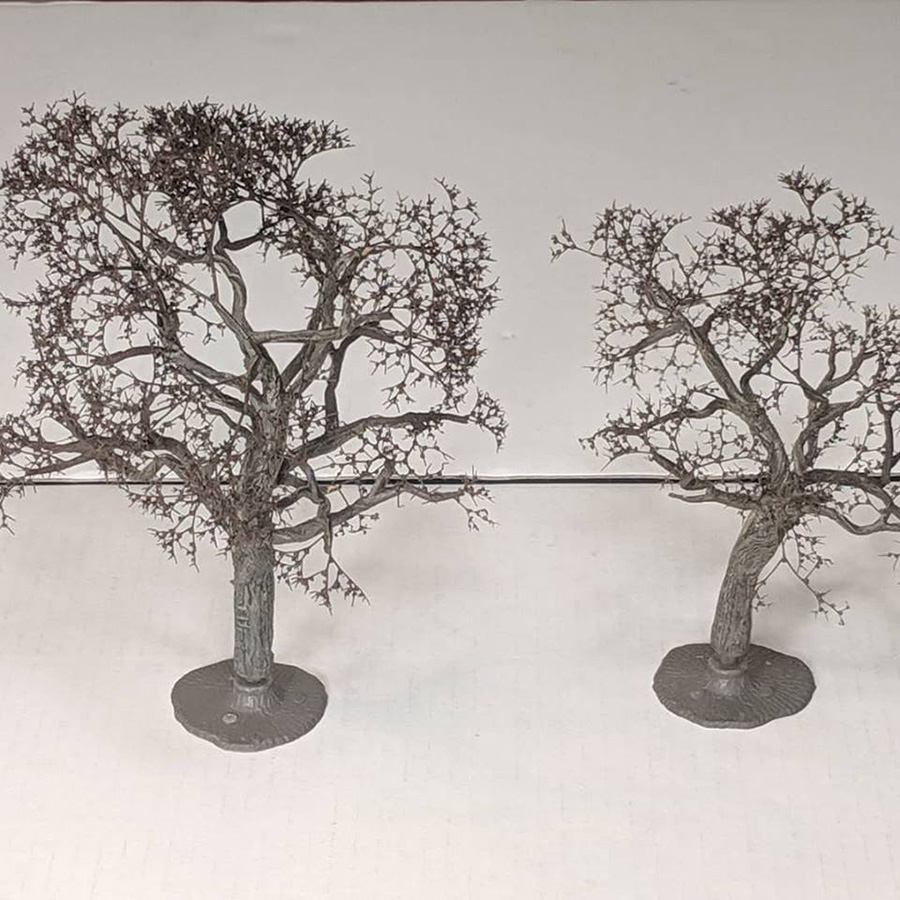
6. You add suitable foliage and leaves.
7. You get some awesome trees!
I have documented the process in detailed, but quick to watch videos – you can find the process to make autumn trees in this video:
A big thanks to Kaustav for his pics and narrative on how to make trees for model train layouts. He’s pretty much kit bashing trees, which is something I never would have thought of in a million years. But that’s what I love about the blog – you lot make it what it is.
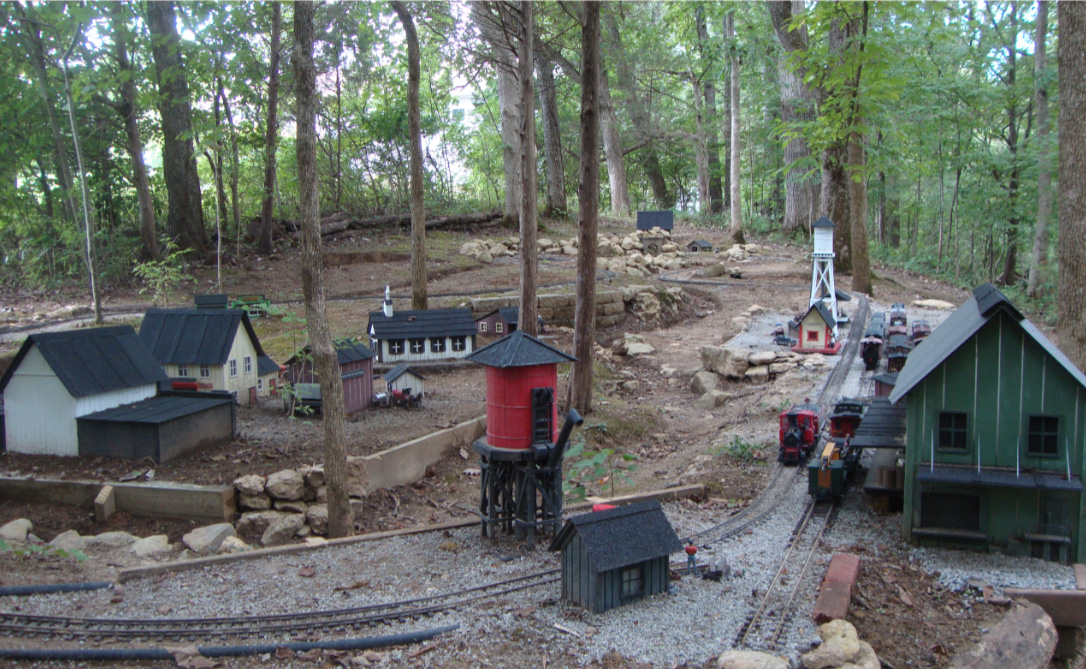
And by the way, if you missed Kaustav’s stunning layout, it’s here.
Cary’s been in touch with his G scale model train update:
“Hello Al and All,
I’m seven years into my G Scale model train garden layout and was finally able to finish laying track and start scenery work this summer.
I picked a nice, shady location for my layout but it also comes with a lot of maintenance. After clearing the site this Spring of leaves and branches, I realized I had some drainage
issues and had more digging to do. Drainage and keeping my ballast in place will be trial and error forsome time to come.
I then proceeded to set the 1/24 scale buildings I made over the last 6 years during the winter months so this summer was a real milestone I have been looking forward to for a long time.
This summer was my first chance to run my trains a lot. Most of my layout is on a 3.5% grade so I had some reservations as to how my locomotives would actually perform. I’m using a 10 amp power supply with only one attachment point for about 120 feet of track. Voltage drop is not a problem but pulling those hills and wheel slip is a problem for two of my four engines. I’ve built my accessories for the Steam Era, but my diesel runs the best. Sealed trucks, heavier, longer and two motors seem to make for more reliable outdoor operation. My little LGB steam 0-4-0 runs well, heavy, powerful and NO idler wheels. As with all other aspects of this project, the plan keeps changing, so I'll need to give some serious thought
to my next locomotive purchase.
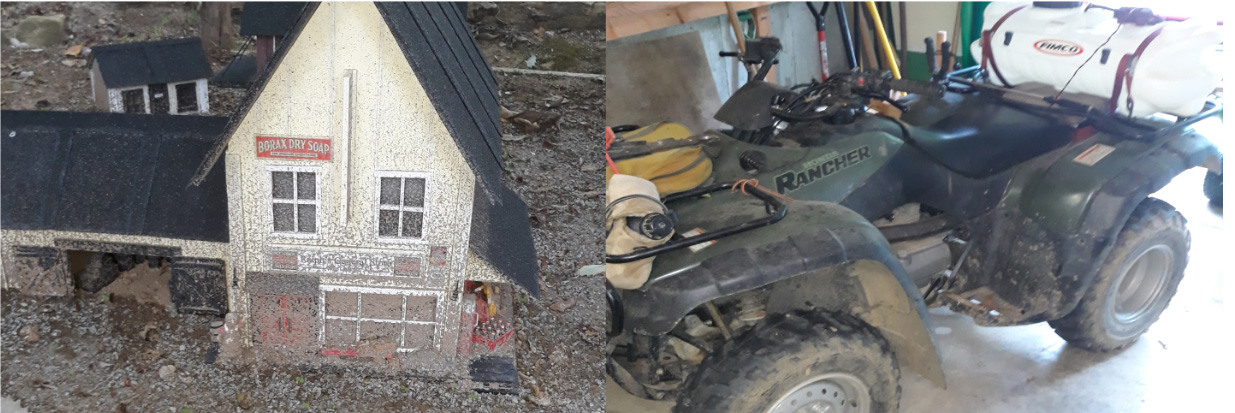
I don’t understand how dirt and small rocks manage to climb the walls of my buildings. I’m using a tank sprayer on my ATV to clean buildings and water plants.
Early in this project I realized that hauling my trains in and out of the house would add greatly to the prep time so while my layout is open for the summer I leave the rolling stock on the storage tracks and put my locomotives in a weather proof tool box. In the Winter I bring in the trains, power supply and smaller accessories. I intend to leave the buildings out year round, we'll see how that works out.
I need plants that grow in the shade and that the deer won't eat. Animals, weather, tree branches, drainage…. why again did I want an outdoor train layout ???? Hey I'm a big kid playing in the dirt with my train set and having a blast!
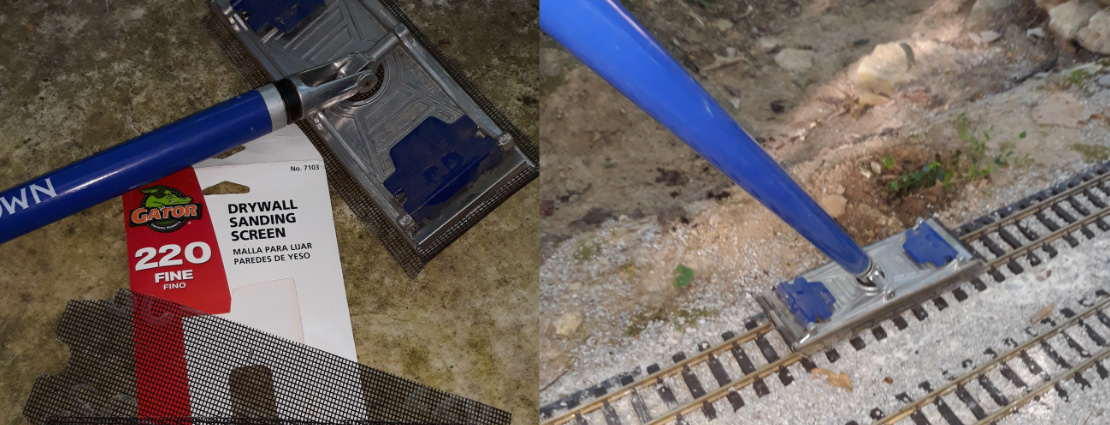
I’m cleaning the track with a pole sander and 220 grit drywall sanding screens. Even after sitting outside all winter, just a couple of swipes and the track is shiny and ready to run. But this needs to be done every time I run trains so some sort or track cleaning car is on the list for this Winter’s projects.
All in all this has turned into a great hobby that I believe will hold my interest for some time to come.
Running trains is not a simple flip of the switch, it takes about 30 minutes of preparation but I love working back in the woods. Now I’m shifting to the gardening part and look forward to seeing my layout fill in with plants over the next few years. Next summer I’ll be adding roads, vehicle bridges, crossings, a few more buildings and water towers, I like water towers!
I hope you’ll check out the video, I had great fun putting it together. Thanks to Al for the work he puts into his blog, seeing other’s projects and sharing my own adds a very enjoyable dimension to this hobby.
That’s all for today – except for one quick question from Danny:
“Alastair,
Enjoying your guide book, l have a question, maybe some members could help with.
My old track from the 70’s is code 100, and I just acquired a lot of code 83 from a Friend. I must have lost some of my Code 100, so I asked my hobby shop about combining them,and they said no problem.
I asked about joiners that could adapt with 100 and 83, but the guy at the hobby shop said they don’t make them anymore, but there was no problem with using both together.
Does any one have experience with this,I am having some problems with combining them. Thanks for any advice.
Danny”
Please do post a comment below if you can help Danny, or let Cary know what you’re thinking.
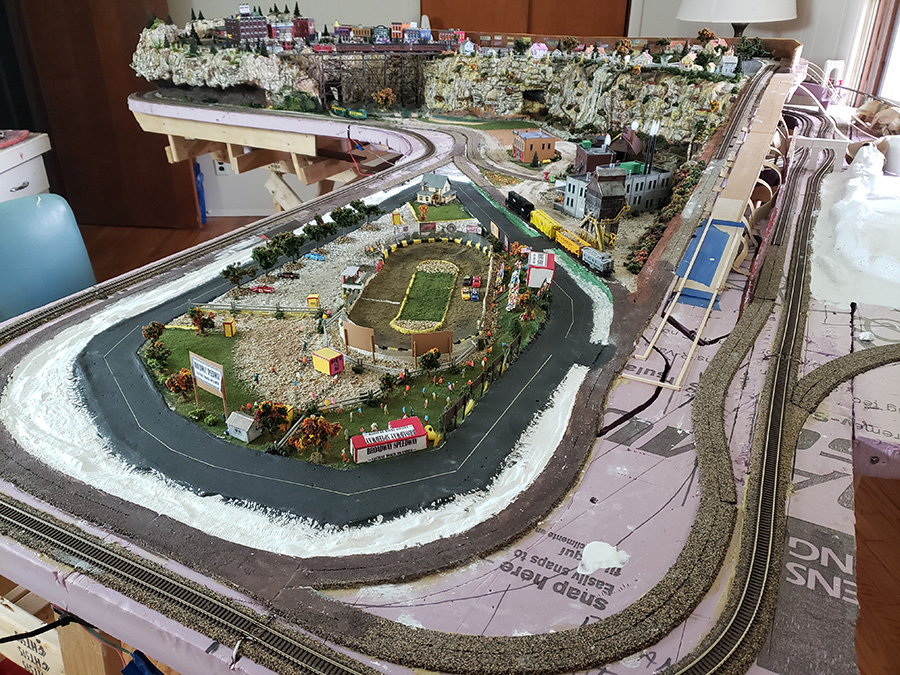
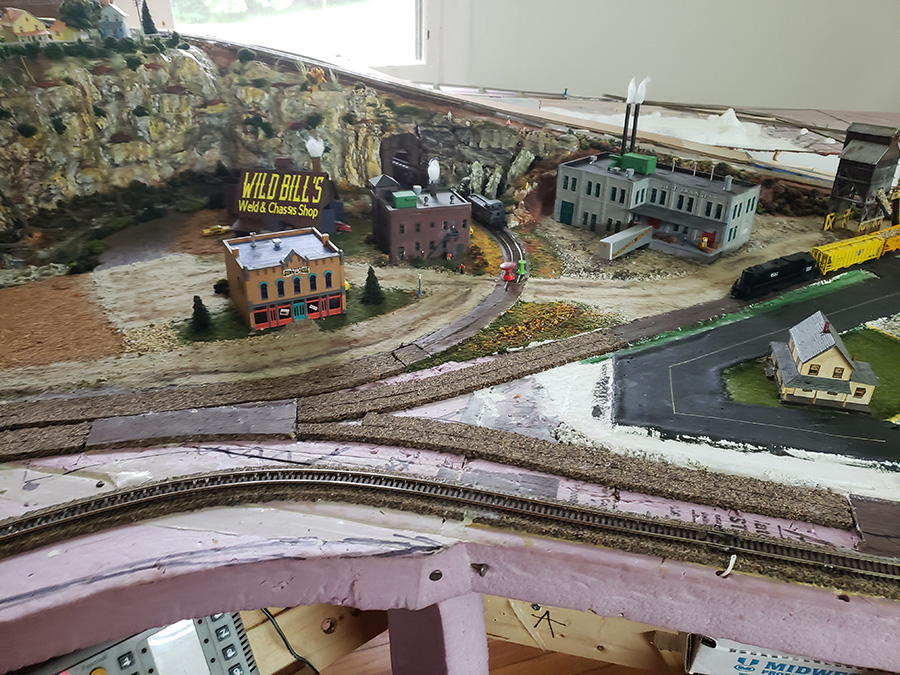
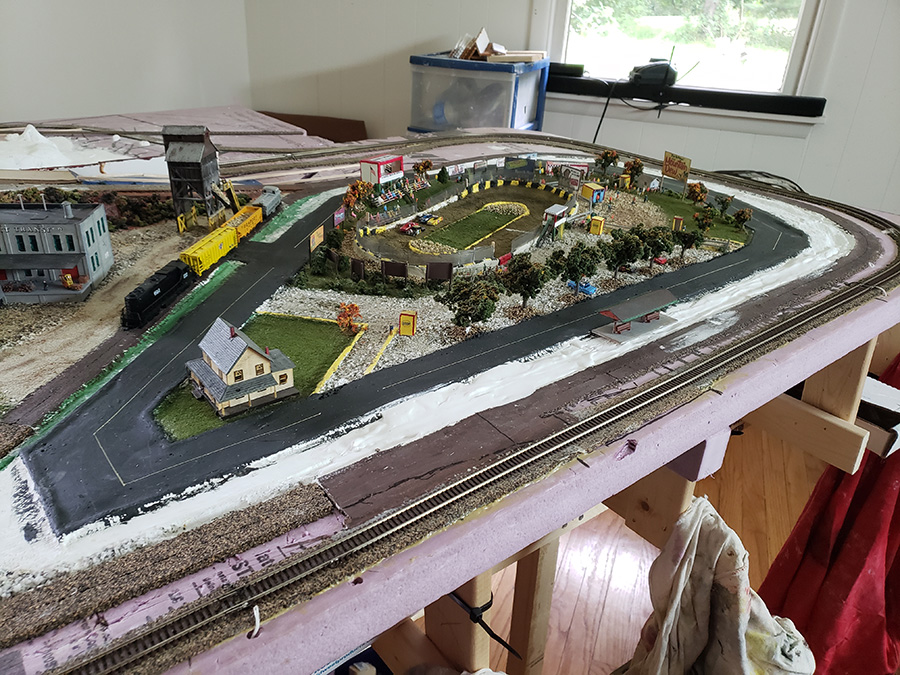
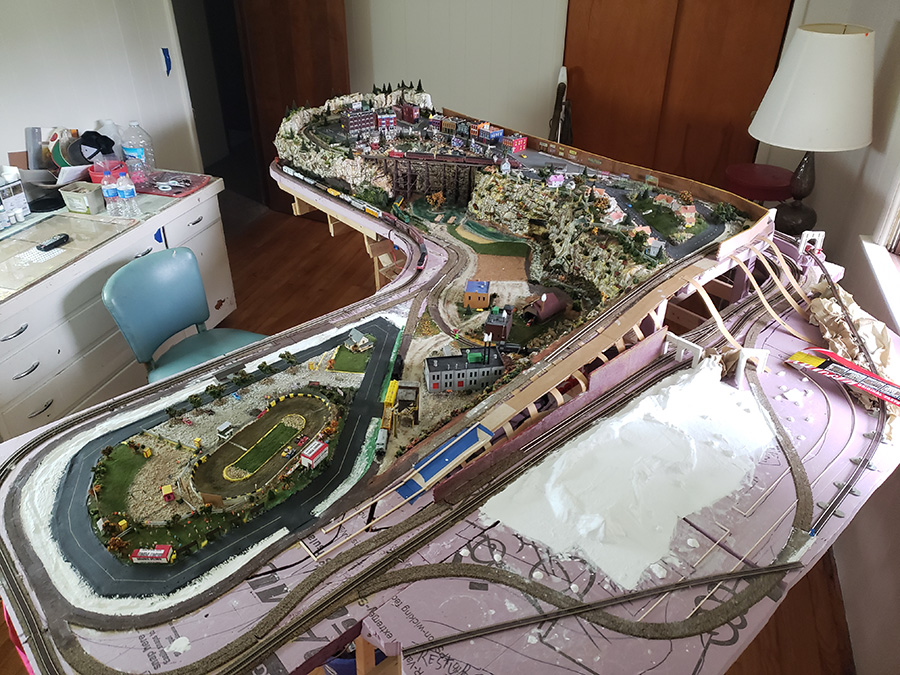
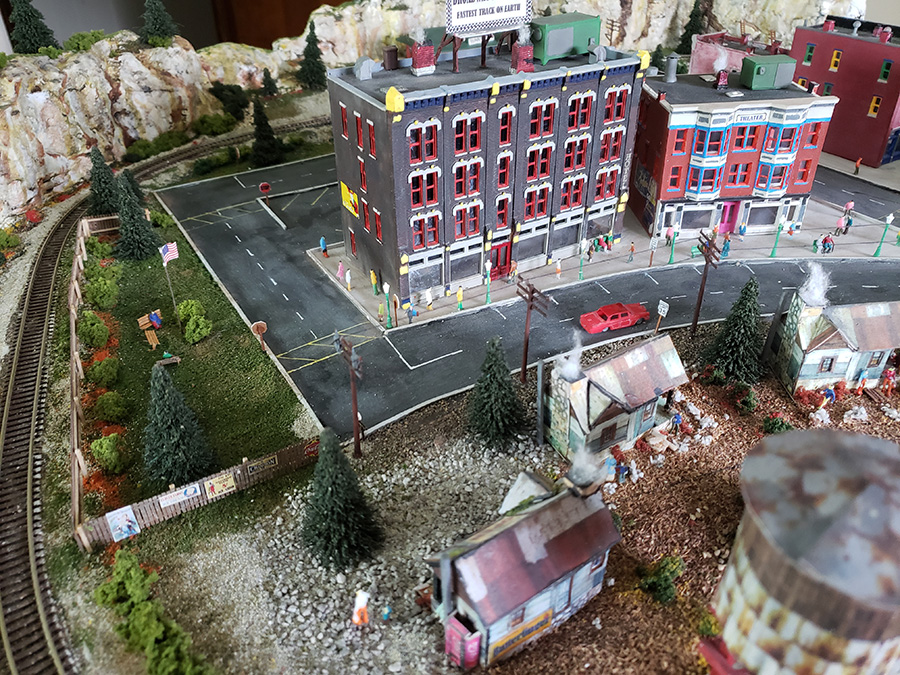
Bill’s been back in touch with an update – this time he’s added some printable house models N scale.
He’s also added a race track too. I do love how so many of you base your layouts on fond memories.
“Hi al.
It’s been about a year since you heard from me about my n gauge layout. If you’ll remember it’s called Gerskyville. Its come a long way of just would and styrofoam.
Theres shots of unfinished areas yet.
Along the long backside will be two arched bridges on each end leading to a 3 foot by 4 foot yard.
I’m not good at story telling so that’s up to you. All the layout was built, painted and assembled by myself , I purchased no already finished buildings, just printable house models N scale from the “printable buildings range.
The race track on the layout is built after a track in indiana that my whole family raced at, up untill they closed down. Broadway speedway, the fastest track on earth.
How you all enjoy.
Thanks
Bill G”
I do love it when I see some of the print-out scenery on a layout. Bill’s done a fab job with his houses.
And if you want to see just how much Bill’s layout has come along, his last post is here.
“Hi Al, just posted this video, asking for any ideas, advice on what I could put on the new platform I put on the layout, shown in my last video.
As you see from the video most building’s are far too wide for this standard Hornby width platform.
I have also put to gather a consist with 2 class 37`s, not the easiest to do for timing when both have a different decoder and sound file …but came out not too bad…
Also a small tribute to one of my old business partners who passed away recently , he just loved watching model railway videos.