Brian has been back in touch with his HO scale harbor structures:
“Hi Al, more construction done on the lower level of my HOn3 layout.
This became a personal problem as I originally thought that I would just start the harbor area and carry on with the rest of the lower level. Ha ha!!!
The rest of the lower level now has to wait. I still enjoy running log trains every now and then on the almost complete upper level logging area of Cascade Creek.
I got so involved with it that I just carried on as it is one of the most enjoyable parts of the hobby that I have had to date. I love detailing to this level with all the buildings (most of them recovered from my previous layout) that go with it.
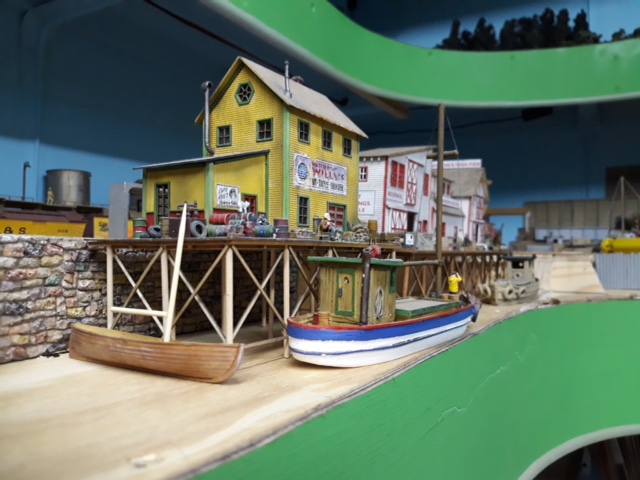
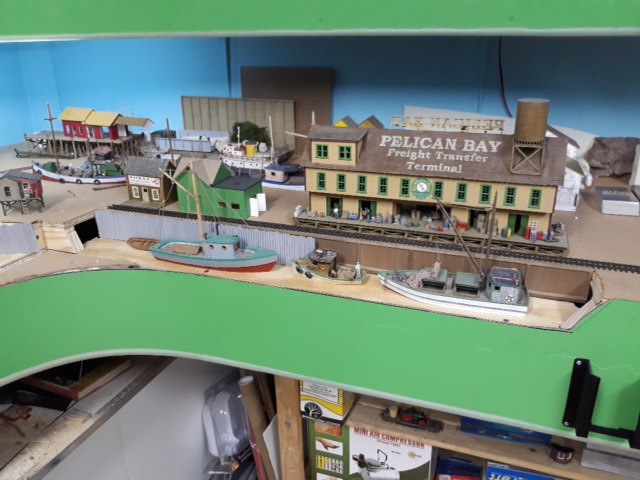
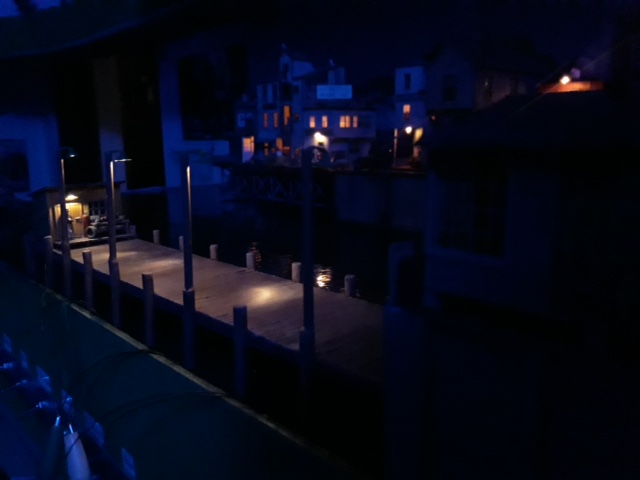
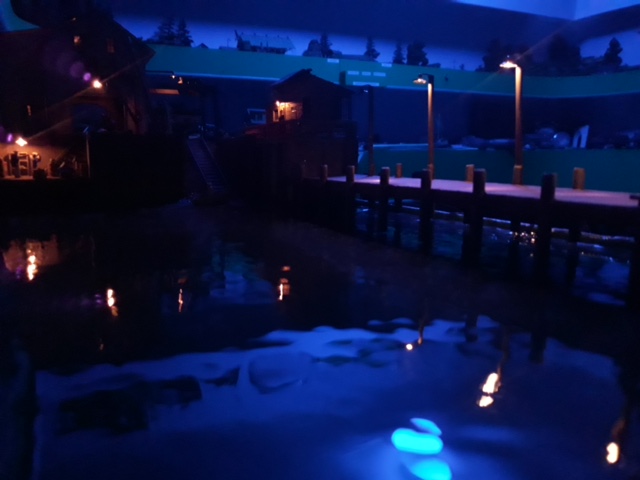
First two photos are of the waterfront expansion under construction on the lower level of my layout past the harbor.
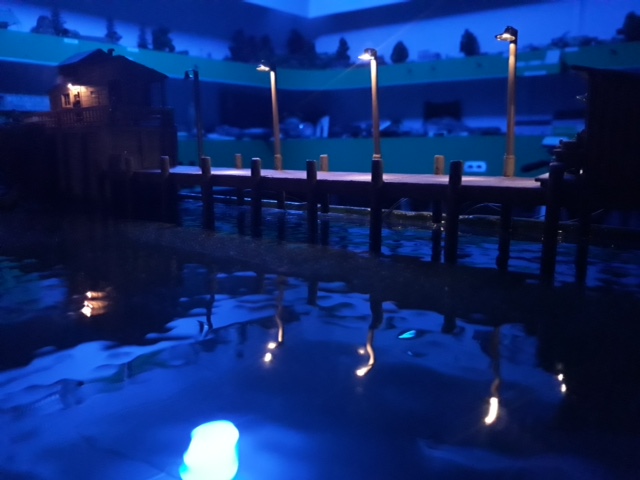
The next three photos are of the night life at my still under construction harbor. Never had a problem with the Woodland Scenics realistic water as can be seen in the photos. Others on this site have complained about the product. Just follow the instructions as explained on the product. I have used it many times and will continue using it.
When I have completed the waterfront expansion, the harbor and the waterfront with all the detail that goes with an area like this will be done. (Is a layout ever finished – NO)
This whole area will be super detailed as it is the first section of the layout that one sees when entering the train room. The shadows on the wall are there because the valance lights above are switched off at the time of taking these photos.
Once this is completed I will do a write up of the whole harbor/waterfront construction with how it was done.
That’s all for now.
Brian – HOn3 guy RSA🇿🇦”
A huge thanks to Brian. He’s a Hall of Fame member if you’d like to see more of his posts.
Now on to Graeme.
He’s got in touch with a question I know we’ve all thought about:
“Hi Al,
My big question is which is the best DCC controller?
That’s a hard question to answer as all of our needs are different.
So, the discussion could be what is it about the DCC controller I like and what is about it that I really don’t like.
These controllers are very expensive and a significant investment in our layouts. And, I am sure that there are many like me who do not want to make the wrong choice.
For example, I noticed from one of Dave’s video’s that he uses the ESU ECoS – Now, Dave is a very savvy modeller and he would have specific reasons for his choice.
BTW, I really enjoy the posts and especially the videos – I have learned everything I know about the hobby from them. When I get my layout to some semblance of order, I post a few photos.
Kindest regards, from Graeme in Bendigo, Victoria, Australia”
Please do scroll to the bottom and post your comments – I’d love to hear them.
A big thanks to Graeme and to Brian for sharing his ho scale harbor structures.
That’s all for today folks.
Please do keep ’em coming.
And if today is the day you get started on your layout, the Beginner’s Guide is here.
Best
Al
PS Latest ebay cheat sheet is here.
PPS More HO scale train layouts here if that’s your thing.