How to make a model train dirt road

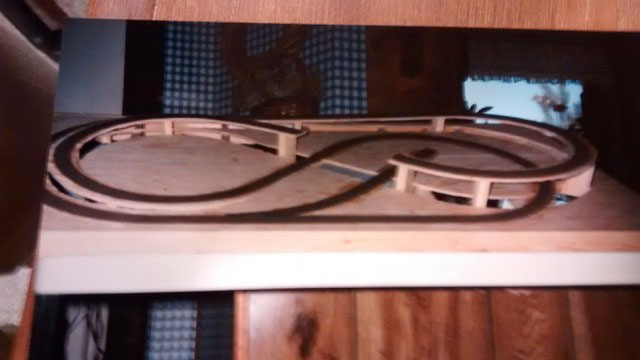
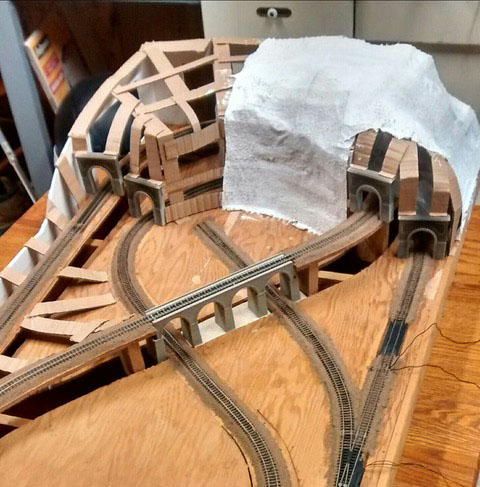
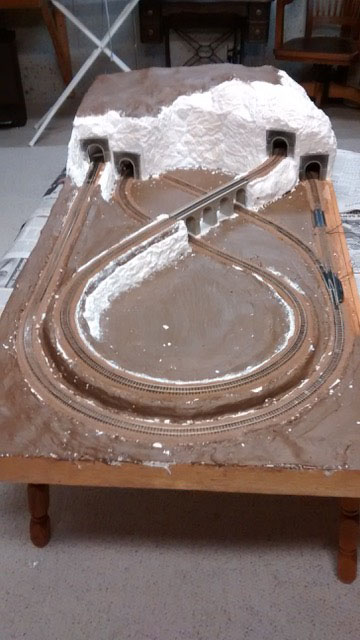
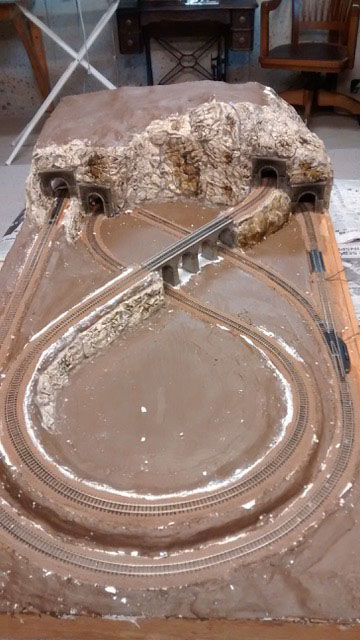
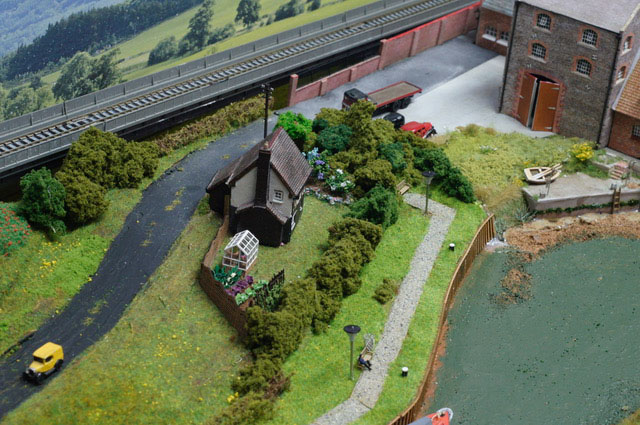
Rob’s been in touch again. This time he shows us how to make a model train dirt road.

(his last post is here).

“Hi Al,

It seems I have been perfecting single track roads through the rough.

In my latest effort, I have created this simple tutorial. There are a couple of things necessary to build a road as I’ve built in the video that I don’t go into in this short tutorial.

One is collecting the dirt, drying it, sterilizing it and sifting it to various grain sizes. Perhaps in the future, I will do a video on that, It is a subject to tackle some other day.

In this video, I use dirt out of my garden in an area where it has not been subjected to amendments like softeners or fertilizers, etc.

The other thing I do not get into is the special tool I have developed to initially layout the dual grooves that form it. This tool is homemade of course and it has N scale tracks at one end and OO tracks at the other.

To determine how wide one needs to make the tool drags, just take a scale vehicle and measure it. In fact, I would recommend you take 4 or 5 to measure since they are not all the same.

You could drill the ends of the small block I have mounted them on if you have the patience. When I originally realized I needed this tool, I was in a hurry but I have used it for years now and it works just fine.

One important thing about car or truck tracks is that though they may wind around and around, they always stay exactly the same distance apart. That is why I realized I needed the tool. It is simple but works as you see in the video like a dream.

The way you use it is to drag it along where you want the track to be. It works really well in foam board as I used here.

I glued 4 mm thick foam board along where the path was to be, created the ruts, taped them to protect them with Tamaya 1/4 inch tape then put the grass down over the tape.

When I pulled up the tape, it left the tracks without any grass so I could finish them separately.

The tool also works in wet drywall compound or wet plaster for a muddy track effect. It is harder to control in wet plaster however and you may ruin your tool. No worries though it that happens, just make a new one.

Thank you for all you do for the modeling community around the world. Though I don’t always comment, I do read every one.

Rob”

How to make a model train dirt road

How to make a model train dirt road

How to make a model train dirt road


Latest ebay cheat sheet here. Had a look yet?

A huge thanks Hall of Fame member, Rob, for showing us how to make a model train dirt road.

A wonderful ‘how to’ – the end result really does look fantastic.

In fact, this post goes very well with Bob’s grass ‘how to’.

That’s all for today folks.

Please do keep ’em coming.

And if today is the day you get started on your layout, the Beginner’s Guide is here.

Best

Al

PS Latest ebay cheat sheet is here.

PPS More HO scale train layouts here if that’s your thing.


Portable model train tables

There are quite a few portable model train tables on the blog.

But none are as inventive as Ewart’s.

“Evening, Al

I have been receiving your posts for the past 18 months or so, while I have been pondering how to give my grandson a model railway that can be stored in a small space, but expanded to a full 8x4ft layout.

I have been collecting some locos for him, and so far about 20 wagons of Hornby OO. He is nine years old and the equipment is new, but only DC.

I have purchased a full set of the track pieces, and the railway works ok on the floor, but it’s a bit of a nuisance for his parents having it there.

So, what to do? I researched portable model train tables and decided to build a railway that could be folded into its own layout requiring less than 10min to uncrate, and less than 5min to re-crate.

I purchased an 8x4ft sheet of 17mm structural ply and cut it in half to make two 4x4ft sheets. I turned the good side up for the lower sheet, and turned it facing down for the top sheet.

In each corner of the bottom sheet, I drilled a shallow depression to take a 25mm 1ft long dowel and secured all four of them with very solid 32mm x 6mm screws.

The second sheet I drilled the shallow depressions again, and lowered the sheet onto those I had just secured, and again tightened very securely with 32mm x6mm screws. The result is a firm open box of two 4x4ft 17mm sheets held together with 25mm dowels in the corners.

I next purchased an 8x4ft 12mm non-structural ply sheet and cut four planks that would fully enclose the box, and screwed each of them into place with eight 32mm screws and washers, four screws for top each side, and four along the bottom.

The result was a 4x4ft fully-enclosed crate, one foot deep. A little heavy, but solid, and deep enough so that if my grandson gets really absorbed and builds some mountains, the depth of the crate will allow the mountains to be a permanent fixture inside the crate.

So far so good.

I unscrewed everything and put the two 17mm plates back exactly as they were when new. I purchased three 6mm bolts and cut off the thread and the nut from each, and cleaned them up on the bench grinder, to make three 60mm long steel dowels.

I also purchased a 6mm dowel drill-bit and made three holes each in the facing end-grain of both 4x4ft plates, just deep enough to take the steel dowels. I inserted the dowels and banged the two sheets together with a rubber mallet, using a piece of waste timber to ensure the plates were not damaged.

The ends had come together really well, but I needed to ensure that the plates would not move under use, so I hack-sawed the screw-plates from both sides of a very solid cupboard hinge, and screwed each of them across the join, one on my side, and one on the other side. The rejoined plate was now as tight as a drum.

I intended to make a starter layout on the two pieces, to give plenty of places for my grandson to add track in different ways each time he has to restart his layout. You can see from the attached pictures that the layout is long, and has two tracks for a fiddle yard. I wanted three, but I couldn’t make it work.

I also had to remove the fishplates from all track that stopped at the centre joint and I coddled up some wire joiners to secure the power supply to all rails. After quite a bit of testing I decided the railway was ready for tacking, and I finished that this afternoon.

The railway works well, with trains being able to run round the outside track, and move into the inside track and back.

Once my grandson left for home I rebuilt the crate, ready for his return.

It takes less than three minutes to unscrew the crate, and about ten minutes to take all the non-fixed track off the board, and to re-build the crate.

Ewart”

portable model train tables

countersunk crew

middle join for portable model train tables

join for portable model train tables


portable train table track laid

woring for model train

wiring join model train table

portable model train tables sidings

trains running

dowling for table

countersunk screw for table

folding portable model train table

model train benchwork

portable model train table folded

train table folded

train table folded sides off

train table folded

I have added quite a few new starter tracks. By that I mean lots more turnouts so that my grandson can add track to go through a town, or an industrial area.

I did solve the problem where I wanted three tracks for the fiddleyard. I have been testing the layout all afternoon and it looks pretty good.

portable model train table trains running

Regards

Ewart”

A big thanks to Ewart for sharing his portable model train table.

And now Bill’s been back in touch – his last post is here.

There’s this one two: HO scale modular layout plans.

“Hello Al,

I’ve had more time to work on my switching layout than I thought I would and things are coming together. The past few weekends I’ve focused on wiring the layout. I have it set to run on DC. All feeders are in place and I used 22 gauge wire for those and 18 gauge wire for the runs to the panel.

I’m using suitcase connectors for the first time and really like how simple those are. I’ve had almost no problems with them – I found one bad connection today as I was test running all the track after I finished the basic control panel install. I’m using micro switches for the blocks and a rotary switch for the engine yard and parts of the repair shop area.

In my work wiring I did come across a great use for painters tape. I used some to temporarily hold wires in place under the layout. The tape works so well I am going to forgo putting in hooks to contain my wiring. The tape holds great but is easy to remove if I need to do something different.

I also had the opportunity to weather my turntable before I put it into place on the table. For those that remember my very first post showing me in about 1974 I used a Heljan turntable on my layout. While the one I’m using is much much newer it’s the same type of turntable from Heljan.

Won’t be long before I start to get ballast in place. As always I’m still having fun!

Best

Bill in Virginia”

wiring for train table

powersupply for turntable

model train turntable wiring

model train turntable

Dave’s right have a look at the Latest ebay cheat sheet here. Still updated every day.

That’s it for today. Really enjoying all the updates at the moment – I hope you are too.

Please do keep ’em coming.

And don’t forget the Beginner’s Guide is here if you want to do more than just daydream about your layout. Why not make a start?

Best

Al


HO scale oil storage tanks

Don’s been in touch with pics of his HO scale oil storage tanks.

I love the way he has used household items for his layout:

“The oil storage tanks are an old kit. The large tanks are 4 inch PVC couplings, $2.

The curved wall is two laminated 0.10 x 3/8 strips. I clipped them together in the shape I wanted and when dried they kept the shape.

The pump house is an old Plasticville engine house kit bashed. The piping is made from plastic hangers. The ultimate recycling, the pier is made from our dogs poop bag cores.

The dock serves both Coal and Oil shipping without modelling either. They are off the table, much cheaper that way.

The coal walls are molding strip from Home Depo, $2. The coal is real from Ebay.

The lights are two 100 light Christmas tree lights. The main deck was painted sky blue. After this photo I repainted it gray. The blue was too intense.

Since I had many parallel yard tracks I made Pigtails to simplify wiring.

I hope this gives your readers some ideas.

Don”

HO scale oil storage tanks

HO scale oil refinery

HO scale oil pipes

HO scale oil storage tanks pipes

HO scale shunting yard

HO scale coal dump

HO scale wiring

HO scale bench work roof

HO scale oil storage tanks


Ho scale layout bench

HO scale oil storage tanks night time

A big thanks to Don for sharing his HO scale oil storage scene.

It reminded me of Gus’s: Storage tank HO scale.

And Marks:

HO scale storage tanks.

Next on to Ray – not with an update… but because I managed not to include the video on his post, so here it is.

Sorry Ray!


Latest ebay cheat sheet is here – have a look and see how much you can save.

Now on to Bob. He’s a man of few words – but there is a common theme here:

“Here’s some photos of mine, still have lots of work to do. I got back into the hobby after 30 year hiatus.

Keep the videos and photos and info coming. I’ve been enjoying it all since last April.

Bob”

HO layout

HO model railroad

HO scale model train

HO scale in the making

I know what Bob means – so many of you are folk who have had a fair few years off while life gets in the way. But then again, I think it’s one of the things that makes this hobby – it’s wonderful when you reach the time in life when you have the time.

A big thanks to Ray, Bob and Don.

It’s wonderful to see you creations come to life – hope you enjoy seeing them as much as I do.

That’s all for today folks – do leave a comment below if you’d like to get involved.

Please do keep ’em coming.

And don’t forget the Beginner’s Guide if you’re looking for inspiration and motivation. Come and join in.

Best

Al