Model train vacuum

Dave has been in touch with his model train vacuum tip:

“Hi Alastair

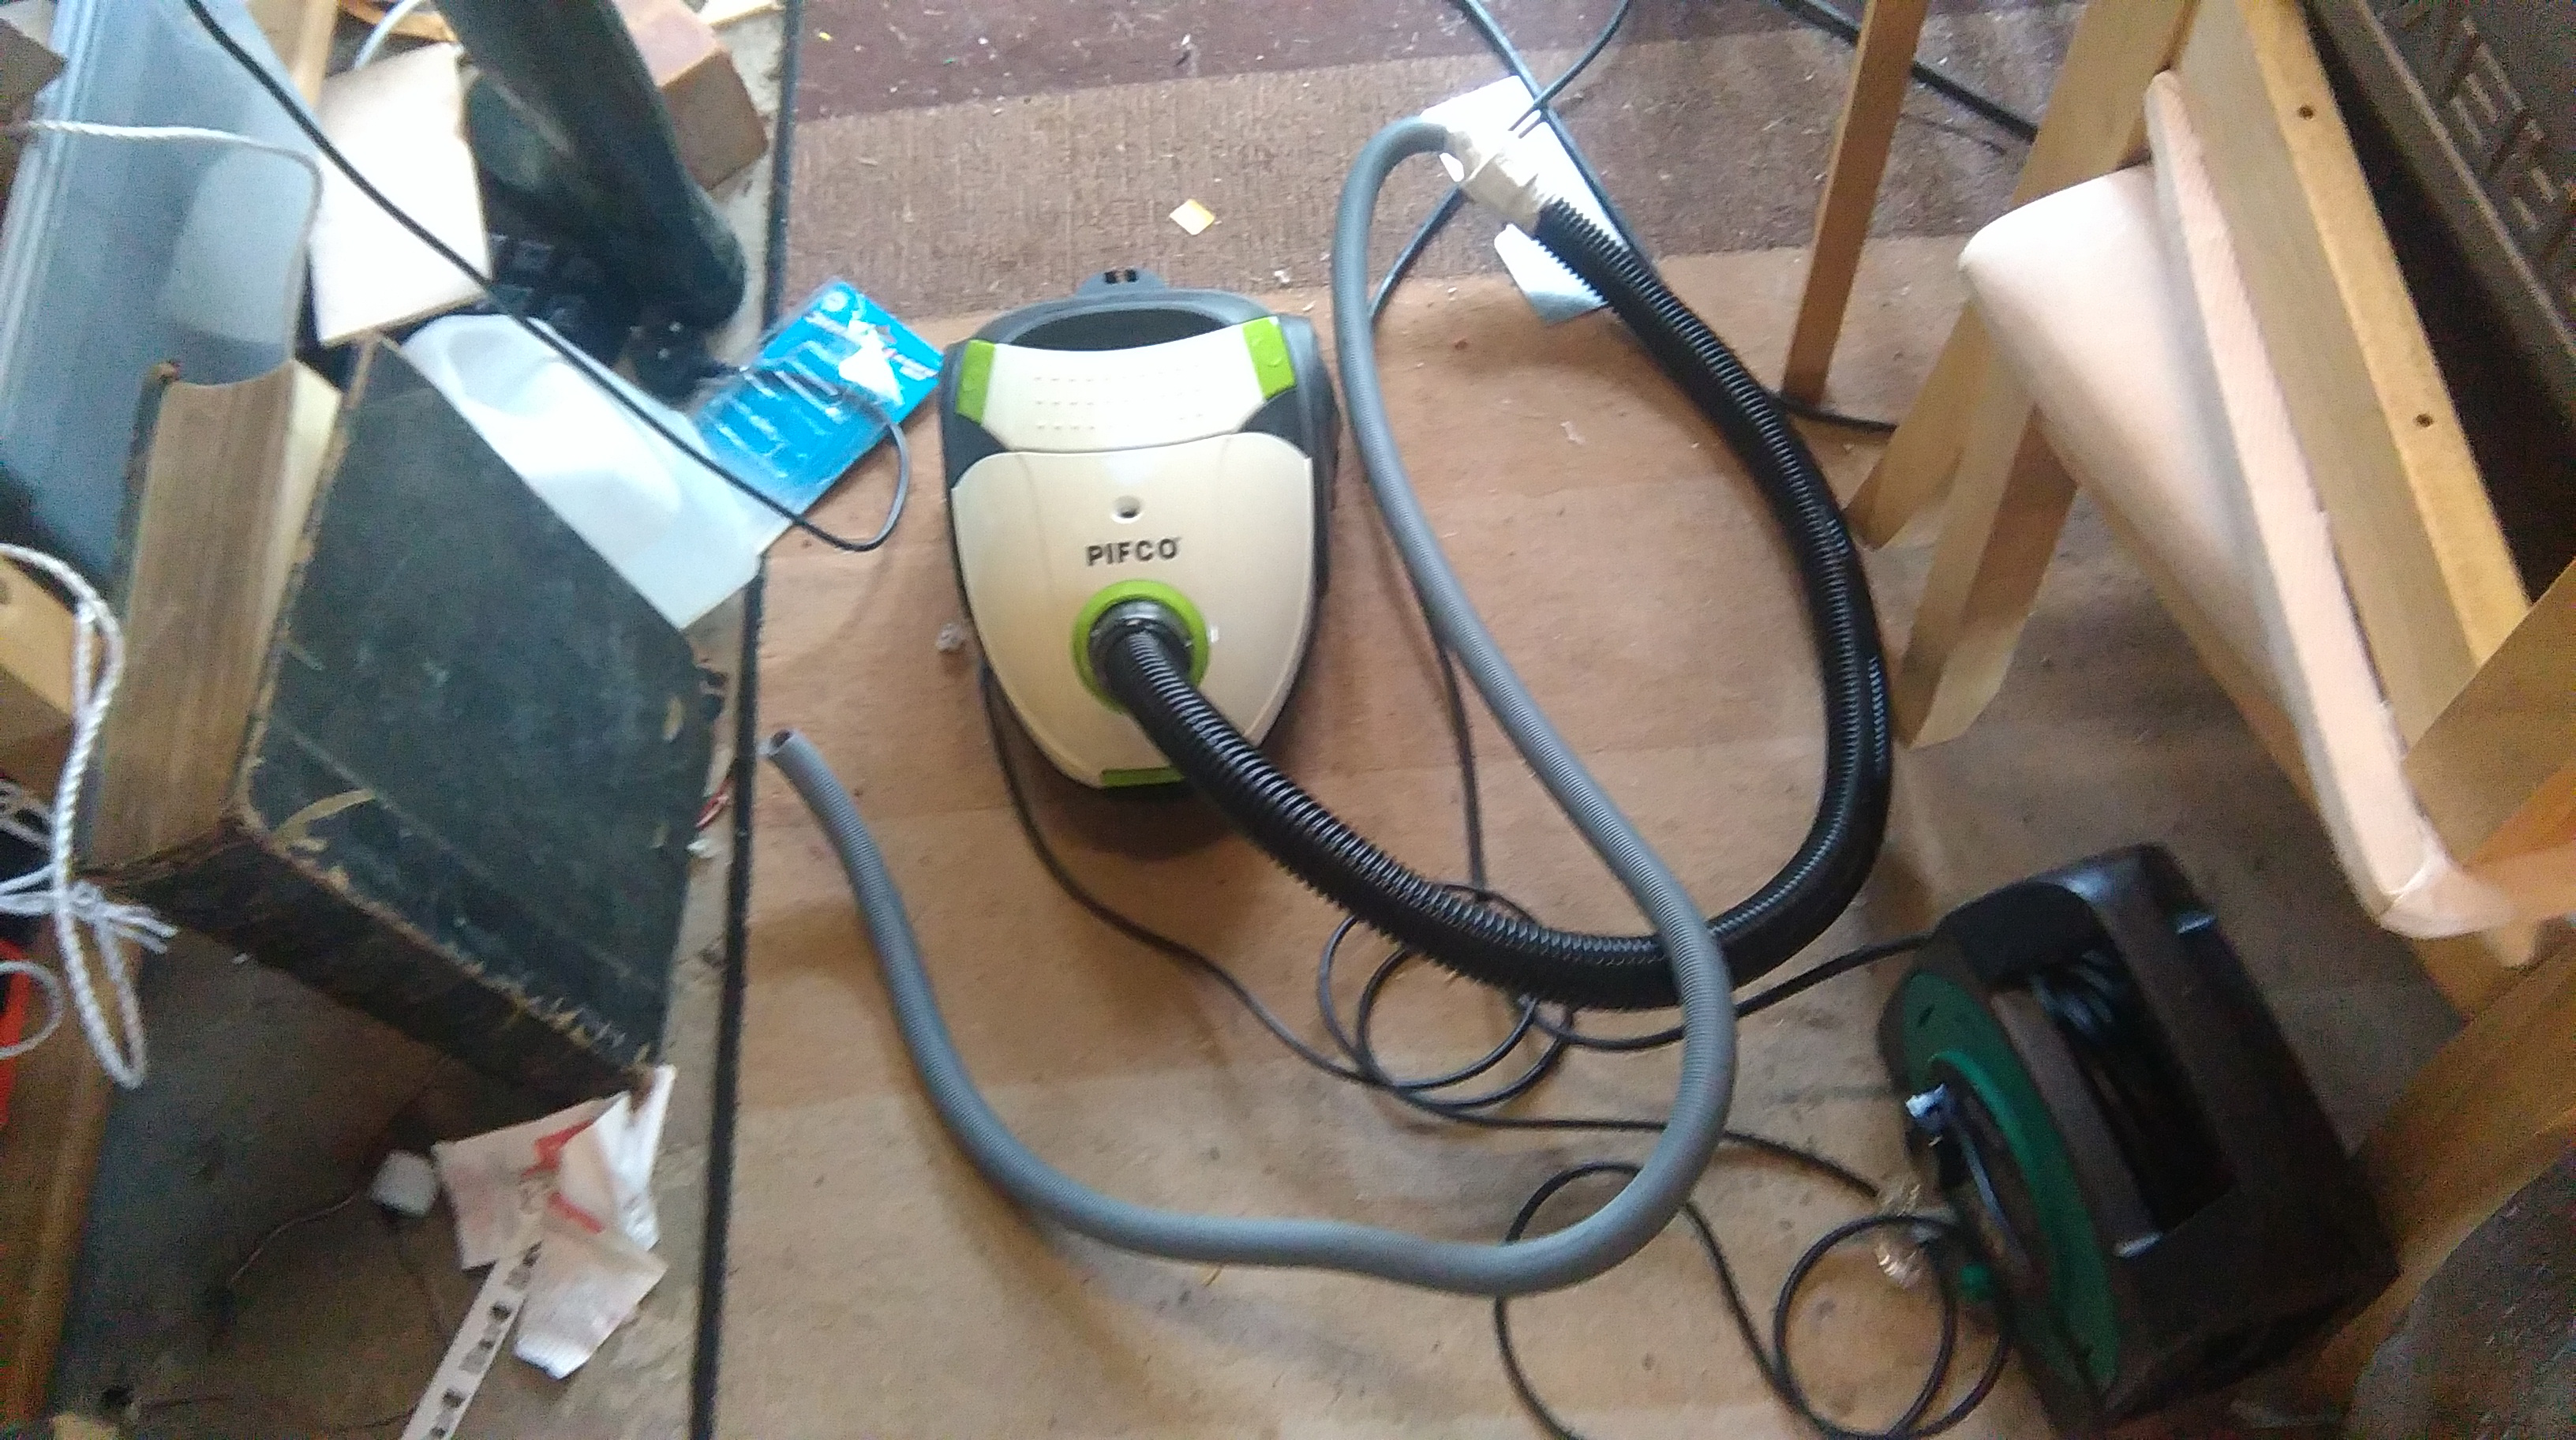
Just thought I would share a little trick I found while trying to clean up the layout after some major track modifications.

I find it rather hard to get a vacuum into the small spaces on my layout, especially as I model in n gauge.

So cobbled together an extension using the old outflow hose off of a disused washing machine. This allows me to have the machine on the floor while having a small pipe to get into the nooks and crannies around the trackwork.

And inadvertently suck up something important, its simple a matter of taking the bag out and finding said piece.

Hope this is helpful for other modellers and thanks for all the great hints and tips in your informative newsletter.

Regards

Dave”

Model train vacuum

Model train vacuum

Now on to Chuck:

“Hi Alastair,

I have never written you but have been receiving your emails for several years now and have really enjoyed them. And I have your books you created and have downloaded them and are in my collection of ideas box.

I got my first train back in Christmas 1961 when I was 8 years old. I have had it all these years with dreams of one day building a complete layout. I have all the original train cars from that set and have acquired many more since then.

I have always loved trains from the first day I met my grandfather at age 7. My grandfather was a conductor on the railroad and did the run between Montreal, Canada and New York City and Boston. We lived in Essex Junction, Vermont and yes it was known as “The Junction” – the rail station was located there.

The town has 5 main roads that all come together there known affectionately as the 5 corners. No traffic light back then, but when my grandfather was coming through town my dad would take us down to the station to see him come through. I have his original conductors watch and a photo of him in his conductor’s uniform (yes, black and white). Anyway enough nostalgia and the reason for my writing.

It struck me the other day, after viewing some tips from one of your posts on how different people have been creating their own models and repairing or changing out things, that your viewers might be a good source for what I have been in need of for a lot of years.

As a kid I ran my trains a lot and when my first son came along we would run them in the basement of my home, but as time would have it the motor eventually gave out. At the time I was working at IBM and had an acquaintance at work that was involved with trains and I had given him the armature to see if he could find someone to repair it. The long story short however is that we both left IBM completely forgetting about the armature so I no longer have it. I have been looking for a replacement motor, either parts or something that would fit within the motor housing and engine.

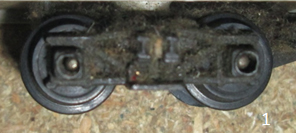
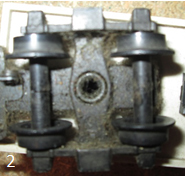
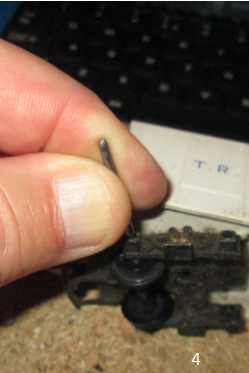
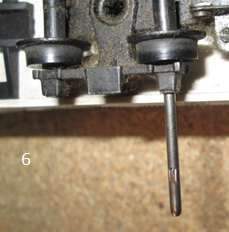
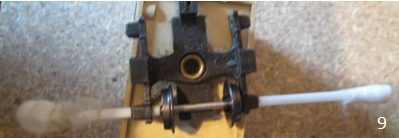
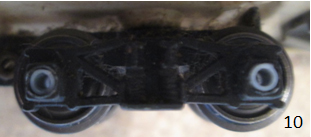
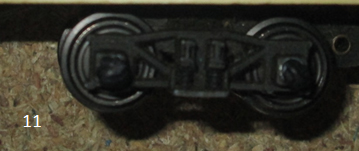
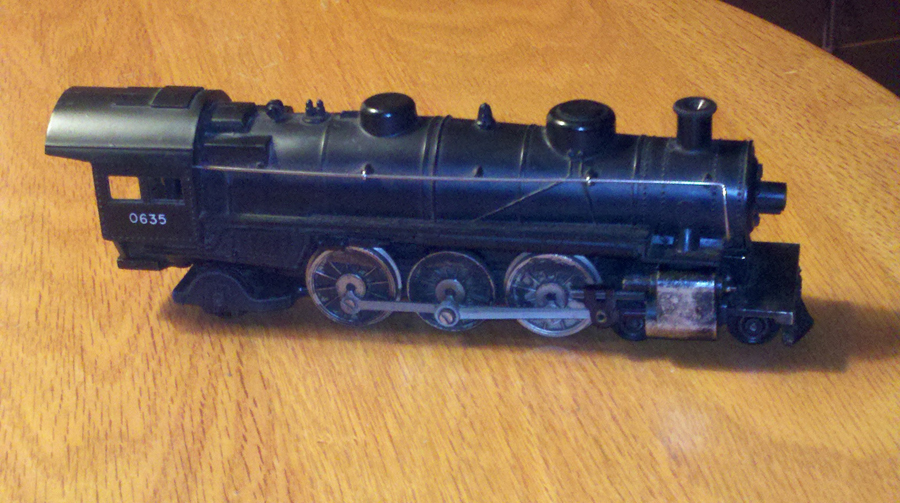
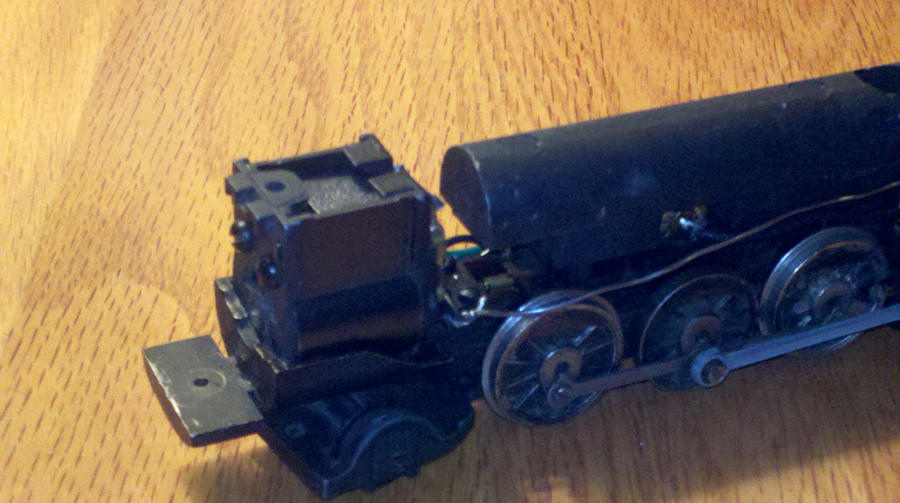
The engine was made by the Lionel Corporation. I have attached some photos of the engine along with the motor box with some dimensions. If this is something you would consider sharing with your viewers that would be good, but if it is not something you would normally do, that is fine too. I someday hope to get a new layout going before my 9 year old grandson gets too big to have an interest. He has loved trains too from an early age.

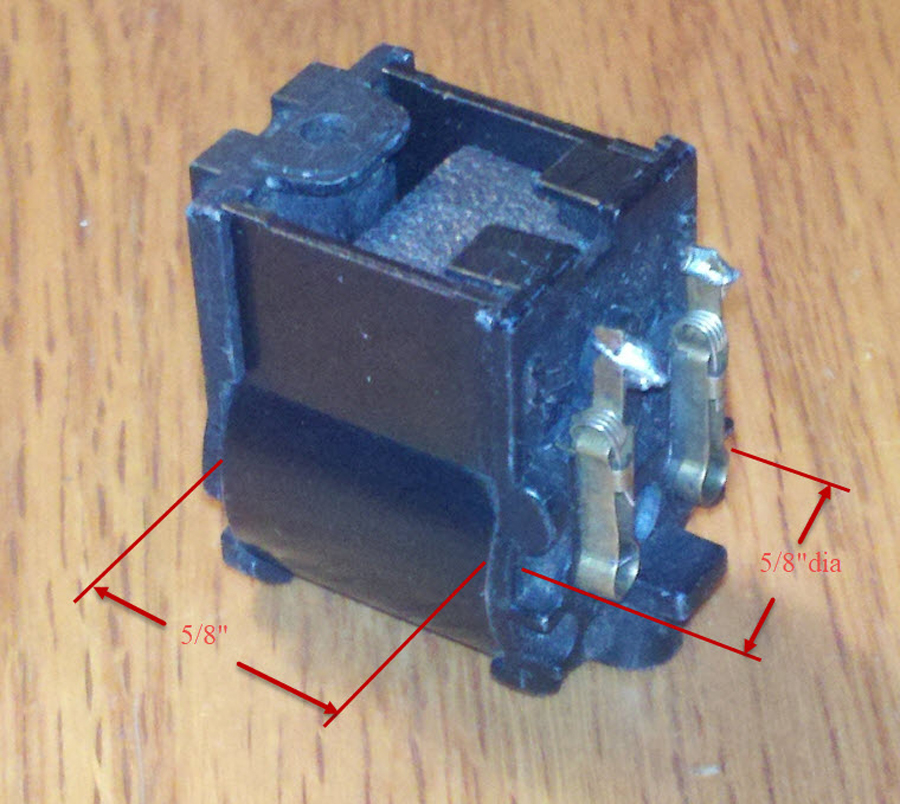
The motor housing inside dimensions are 5/8” round and 5/8” long. It was a three lobe armature with brushes and commutator at the front of the motor. The total shaft length was 1 – 5/8” – I still have the original gear that goes on the end. Since I don’t have the original shaft I am not sure of the exact diameter of it, but judging from the holes in the motor casing and the gear, it was somewhere around a 1/16” in diameter.

Anyway, thanks Alastair for your emails and keeping my dream alive. When I get the upstairs playroom cleaned out from all my kids things left behind by them, I hope to get building little by little and I will share photos as I get started.

Thanks,

Chuck”

vintage model train

vintage model train

model railroad locomotive

model railroad locomotive

model train motor housing

“Hi Al, just got my Deltic back with the EM2 speaker fitted, sounds fantastic, I have added a clip with a real Deltic to compare the sound, which to me is near as possible to get, also shown that I am now starting to remove some track ready for changes, hope to have completed before Xmas

you have to excuse the sound on the low track side clips as I was using the go pro camera, and its not very good on sound reproduction.

All The Best

Regards

Dave”


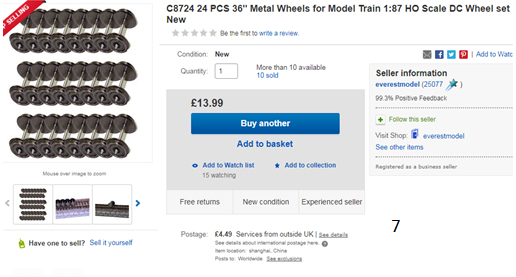
The very lates ebay cheat sheet is here.

A big thanks to Dave for his model train vacuum tip, and to Chuck (I did wonder about posting – but maybe someone can help?).

That’s all for today folks.

Please do keep ’em coming.

And if today is the day you get started on your layout, the Beginner’s Guide is here.

Best

Al

PS Latest ebay cheat sheet is here.

PPS More HO scale train layouts here if that’s your thing.


How to make model bridges for HO train layout

John’s been in touch again with how to make model bridges for HO train layout.

His first post is on the bottom half of this one if you want to get up to speed.

“Al,

Thanks for running the first part of my “bridge module.”

Seeing one’s work is an encouragement to do more.

I made time to put in another few days on the next 2 bridges, and finished painting/weathering the rest of the module’s rock cliffs and concrete features of the bridge piers.

I also put the ever-present rust on the first bridge.

I thought some folks might be interested in how the bridges are being constructed, so I have left the thin plywood “dummy track” pieces in the photos, and show how sections are temporarily wired in place.

As I set the heights of the various tracks, I ran into problems with where the bridge tower legs would land (can’t be in the water!) I had to design bridge sections long enough to get across the river.

Fitting all of them together required the plywood tracks to hold each in place until they are glued together and painted silver.

By the way, many USA railroad bridges on the east coast are black, but many out west are silver, and I think they show rust and weathering better than black.

I had the concrete piers and walls kind of gray, but when I checked my photos, I see that most concrete around railroads is a lot darker than new concrete, and the rust from rails and wheels add some reddish-iron-oxide into the mix.

I’m looking forward to doing the scenery, trees and bushes, dirt and all the vines that are always climbing up the bridge supports around here.

I also sent in the general track plan for the layout, general because I’ll be building the mountains first, and the tracks may have to be modified to fit the terrain.

My staging tracks will be housed under the mountains to the left of the drawing, accessed from another door into the room.

I’m hoping to have a mini-camera system to see what’s going on under there.

I’m also painting the backdrop in my mind (I’m sure it looks better there than what will be on the module, but one can wish!)

Regards,

John”

How to make model bridges for ho train layout

How to make model bridges for HO train layout:

How to make model bridges for ho train layout

How to make model bridges for ho train layout

HO scale model railroad

A huge thanks to John for sharing his ‘How to make model bridges for HO train layout’ post – you all know how I like an update.

Can’t wait to see the next one.

That’s all for today folks.

Please do keep ’em coming.

And if today is the day you get started on your layout, the Beginner’s Guide is here.

Best

Al

PS Latest ebay cheat sheet is here.

PPS More HO scale train layouts here if that’s your thing.


Model train wheels

Steve’s been in touch with a helpful post on how to change model train wheels:

“Hi Al

I have started collecting old Tri-Ang “Transcontinental” locos and stock, mainly from nostalgia and to display on shelves, but I would like to see them running on my proposed layout now and again.

Given the relative crudeness of these models, plus my railway is supposed to be in Northern England, some might say “why?”, but I like them, it’s my railway, so I’ll do what I want!

The wheels fitted to these older models don’t like newer track and pointwork – and vice-versa.

I was surprised to find that some of the old locos ran OK through my Peco points and didn’t “bump” along the chairs on the Peco Streamline track, but nearly all of the old coaches and wagons with open axleboxes ran terribly.

With the help of e-Bay and some cotton buds, I have rewheeled quite a few items of stock so that they run OK on my Peco track and points.

1. The original Tri-Ang open axle boxes. The axles can be pushed right through, allowing the wheels to be removed. This is MUCH easier to do from one side than the other – see photo 3 to see why!

model train wheels

2. The axles are split which gives a variable “back-to-back” (the distance between the backs of the two wheels) This, together with the very deep flanges and the very wide “tyres”, means that these wheels will usually ride very roughly or even derail on more modern track such as Peco Streamline or even the more modern Hornby track.

model train axle

3. The Tri-Ang axle. Note that at the right-hand end there is a small ridge which bites into the plastic of the wheel on that side.

When removing wheels, you need to push the axle out from the OTHER end. You can tell which end is which by holding both wheels, turning one of them and seeing which one makes the axle rotate with it.

4. Using a suitable metal rod (I am using one of the Tri-Ang axles here – with the ridged end away from the axle box) GENTLY tap the axle through using a small hammer and a lot of care.

Older vehicles use metal boxes, newer ones use plastic but still have the split wheel/open axlebox arrangement. Plastic is not as tough as metal, so extra care is needed.

model train axle

5. If the axle is not too badly gunged-up with oil and dirt etc you should be able to finish removing it by pushing through by hand using an old jeweller’s screwdriver or similar and/or pulling with pliers on the axle.

In extreme cases I have had to break the old wheels or saw through the axles using a razor saw (careful!). Generally however, they come out OK without having to use such major surgery.

model train axle

6. Here you can see the Tri-Ang axle almost completely removed. You should be able to see the ridged end of the axle towards the bottom of the picture.

As I said before, this is the direction in which the axle should be removed – if you drove it through in the opposite direction, the ridged bit would just cut into the plastic around it and make it much harder or even impossible to remove.

model train wheels

7. These are the new wheels I used. Most of my newer Hornby stock has been fitted with Bachmann coach or wagon wheels. It’s a good idea to stick to one wheel standard for best running, but I could not find Bachmann ones nearer to the smaller diameter wheels required for HO models.

So e-Bay to the rescue. £13.99 plus very reasonable (and fast) postage from China gives sufficient model train wheels for 9 bogie vehicles so the cost per vehicle is a couple of pounds.


Model train wheels:

8. The coarse-scale Tri-Ang bogie frames are over-sized for the length of the new axles, so you need some kind of bearing to take up the slack as well as allowing the wheels to rotate freely but without slopping about. You could use Peco brass bearings, but these would need careful fitting and some means of packing them out to make them fit on the new axle ends.

Enter the cotton bud.

9. Take two cotton buds and trim off one end of each to remove the cottony bit from that end. You will see that the stem of the cotton bud is hollow and the diameter is either a force fit or just a tiny bit larger than the holes in the axle box.

If necessary, open up the hole a little until the stem of the cotton buds can be pushed through the holes opposite one another while still being a tight fit. A round needle file would be a good choice – I found that a suitable size of jeweller’s screwdriver did the job but don’t tell any real engineers!

This allows you to ease the cotton buds in and out so you can first trap and then centralise the new wheelset. This one has been trapped but needs to be centralised towards the left by twiddling the left cotton bud out a bit and the right one in a bit.

cotton bud model train wheels

10. Once you have finally adjusted the buds on either side so the wheels rotate freely (and they are more or less centrally positioned between the side frames), trim them off with a sharp blade. You should be able to re-use the same stem a few times until it is too short to handle.

model train wheels

11. You could just paint the new bearings black and leave the axle boxes open, if they don’t bother you. I filled the open ends with tiny blobs of “Protastic”, which is like black Blu-Tack, making sure to avoid the ends of the axles . I guess you could use ordinary Blu-Tack or any other suitable gunge/filler and then paint it black!

Using a non-setting substance allows for future maintenance and easy bearing replacement if required.

model train wheels

Regards

Steve”

Big thanks to Steve for sharing his way of changing model train wheels.

I know so many of you are attached to your old stock – so hopefully Steve’s how-to will help a fair few of you out.

That’s all for today, folks. Please do keep ’em coming.

And why let everyone else have the fun? The Beginner’s Guide is here.

Best

Al

PS Latest ebay cheat sheet is here